
New old project-1946 Austin gasser


nice, probably wont make it in with a car this year in the roadster show. the main goal is puyallups goodguys event for the custom. roadster show next year. what kind of clutch are you trying to run? a hydraulic clutch would probably work better than trying to get a mechanical one all stuffed in there.

Thread Starter
|
Second Generation Moderator
Feb 2010 ROTM winner
Jan 2013 ROTM winner
Feb 2010 ROTM winner
Jan 2013 ROTM winner
Joined: Aug 2008
Posts: 9,097
From: Portland, Or
ROTM Winner's Club
The problem isn't just under the car, it's pedal room! I've got so little foot room I'm not sure I can put another pedal beside the brake pedal.
Thread Starter
|
Second Generation Moderator
Feb 2010 ROTM winner
Jan 2013 ROTM winner
Feb 2010 ROTM winner
Jan 2013 ROTM winner
Joined: Aug 2008
Posts: 9,097
From: Portland, Or
ROTM Winner's Club
Got the ice chest for the Austin neutralized and stripped of rust. After some sanding I primed and painted it bright red. Next is a good clear coat and then reassemble it. Having a local pinstriper do some copper striping on it to match the Austin's trim. The wrinkle finish is not quite as "wrinkly" as the original wrinkle finish.

Last edited by 1971BB427; Oct 17, 2012 at 04:30 PM.
Thread Starter
|
Second Generation Moderator
Feb 2010 ROTM winner
Jan 2013 ROTM winner
Feb 2010 ROTM winner
Jan 2013 ROTM winner
Joined: Aug 2008
Posts: 9,097
From: Portland, Or
ROTM Winner's Club
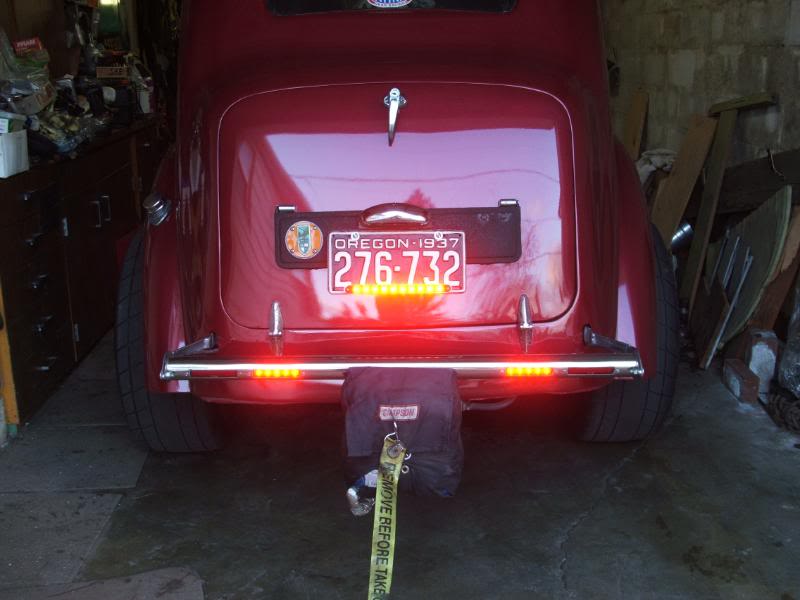
My "15 minute" project today was to remove my '32 Ford rear bumper/tailight assembly, and chute bracket, and fit the new tailights I got from Vintage Impressions. Took me several hours to get my 15 minutes done, but I like the cleaner look. I'm going to later build two more nerf bars like I have up front, and put them in the rear holes. Not sure I'll put the chute back, as I don't really need it to stop the little Austin.
These lights are much brighter than what I had also. I hooked them all up as tailights, but just hooked outside two for turnsignals, and inside two as brake lights.
Before:
After:
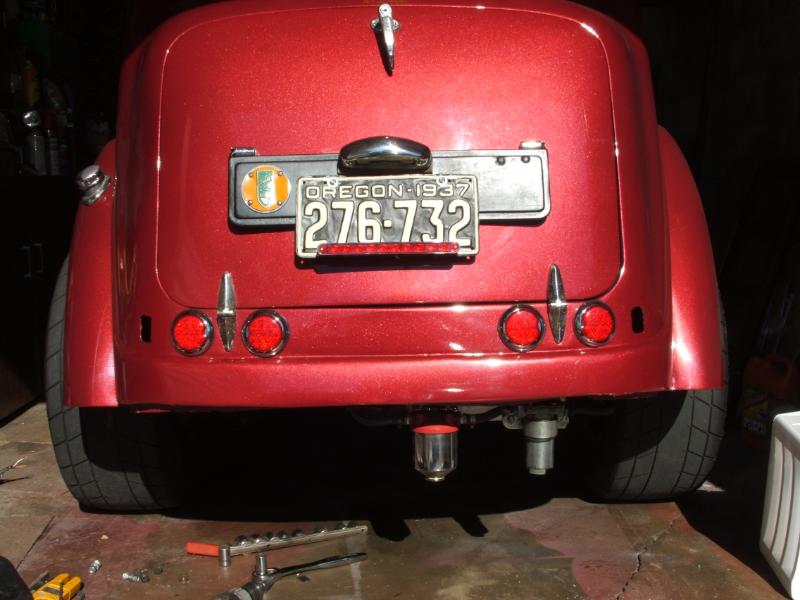
These lights are much brighter than what I had also. I hooked them all up as tailights, but just hooked outside two for turnsignals, and inside two as brake lights.
Before:
After:
Thread Starter
|
Second Generation Moderator
Feb 2010 ROTM winner
Jan 2013 ROTM winner
Feb 2010 ROTM winner
Jan 2013 ROTM winner
Joined: Aug 2008
Posts: 9,097
From: Portland, Or
ROTM Winner's Club
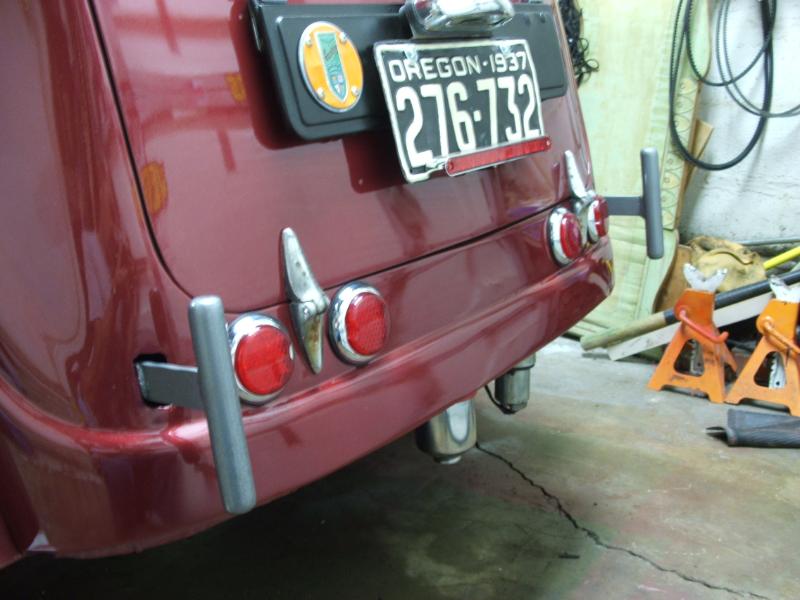
Thanks! They're a really nice light, with heavy cast chrome rings, and LED lamps. I'll have to see if the chute fits in somewhere, but the place it looks best is where my license plate is, and that's a hinged frame, so it can't cleanly be relocated. Just drilling the holes for these lights was scarey enough. I masked the body and drilled through the tape, then removed the tape and used my touchup paint to paint the raw holes to prevent rust.

Thread Starter
|
Second Generation Moderator
Feb 2010 ROTM winner
Jan 2013 ROTM winner
Feb 2010 ROTM winner
Jan 2013 ROTM winner
Joined: Aug 2008
Posts: 9,097
From: Portland, Or
ROTM Winner's Club
Gonna take some figuring to see if the chute can be frame mounted by fabbing up a plate and bracket that bolts to the frame, but situates the chute between the lights and low enough for the trunk to open.
Thread Starter
|
Second Generation Moderator
Feb 2010 ROTM winner
Jan 2013 ROTM winner
Feb 2010 ROTM winner
Jan 2013 ROTM winner
Joined: Aug 2008
Posts: 9,097
From: Portland, Or
ROTM Winner's Club
Got my 15 minutes in again today! Turned into 4 hours by the time I was done!
I pulled the bumper brackets and marked them up for cutting. Then I made up two extensions, and two push bars to fit the rear. I decided I wanted something a little different from the nerf bars up front, as I tried several bends and the small nerf bars didn't fit the look in back. I cut two 6" pieces of 1" OD schedule 40 pipe and then dropped bolts in each end to act as fillers. Welded the bolts in, and then tack welded the pipes to my brackets. Took several test fits to make sure they were aligned in every way, and then the last time I tweaked them to get them straight up before welding. After some grinding and a shot of Hammerite to match the front bars I got them all bolted up. I like the way they came out. They should give some small protection to the new taillights also.
While the paint was drying, I got the cooler parts out and reassembled the Falstaff cooler. It kept me from wanting to handle the painted pushbars before they were dry!