
New old project-1946 Austin gasser


Thread Starter
|
Second Generation Moderator
Feb 2010 ROTM winner
Jan 2013 ROTM winner
Feb 2010 ROTM winner
Jan 2013 ROTM winner
Joined: Aug 2008
Posts: 9,097
From: Portland, Or
ROTM Winner's Club
With the new project section, I decided to go over and post the build of my Chevy powered Austin gasser as a project thread. It will take a few days to get it all here, but I'll detail the project from last August when it was a stock vehicle to today. Then update it as I go forward from now.
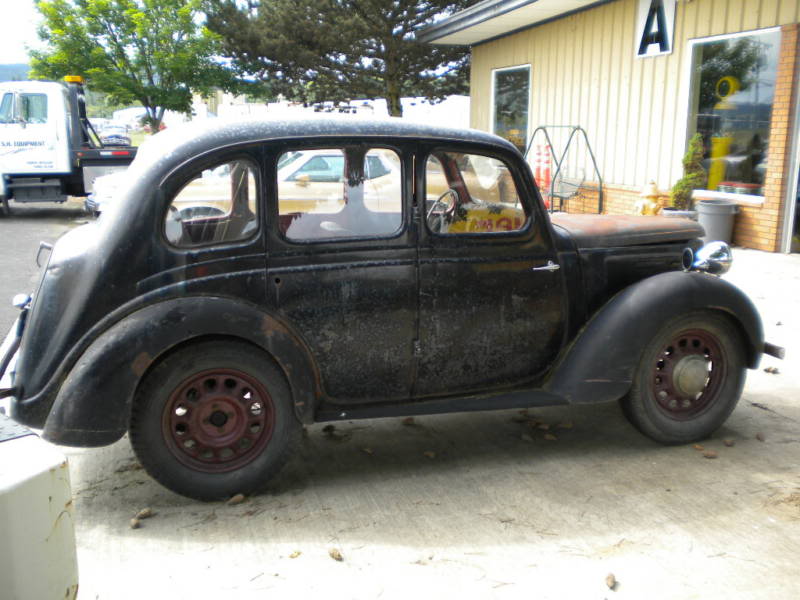
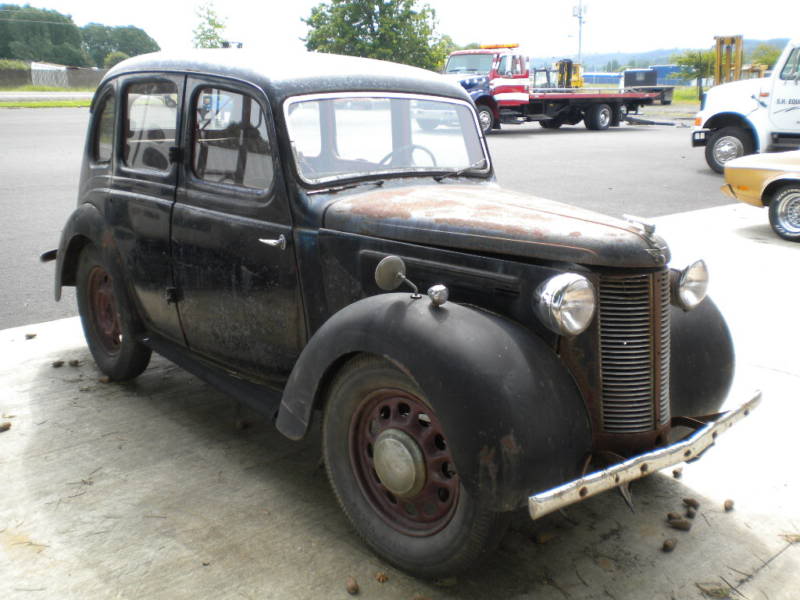
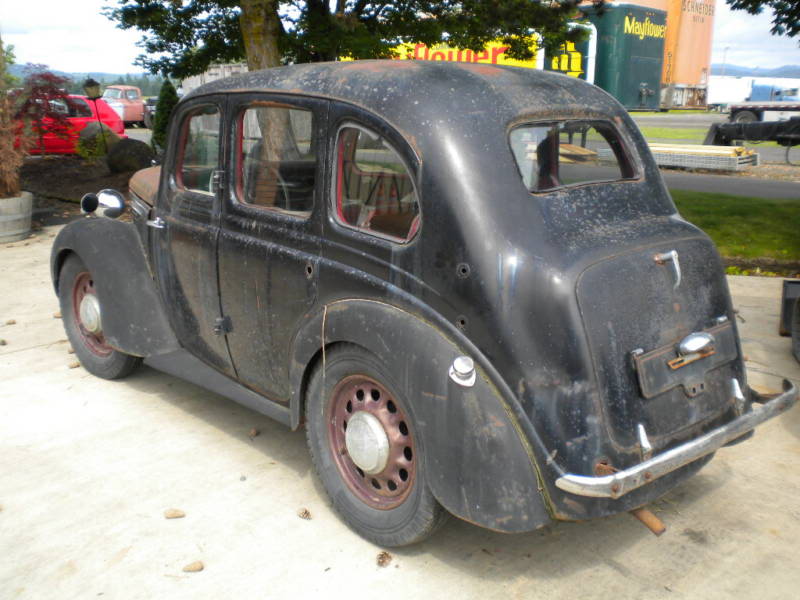
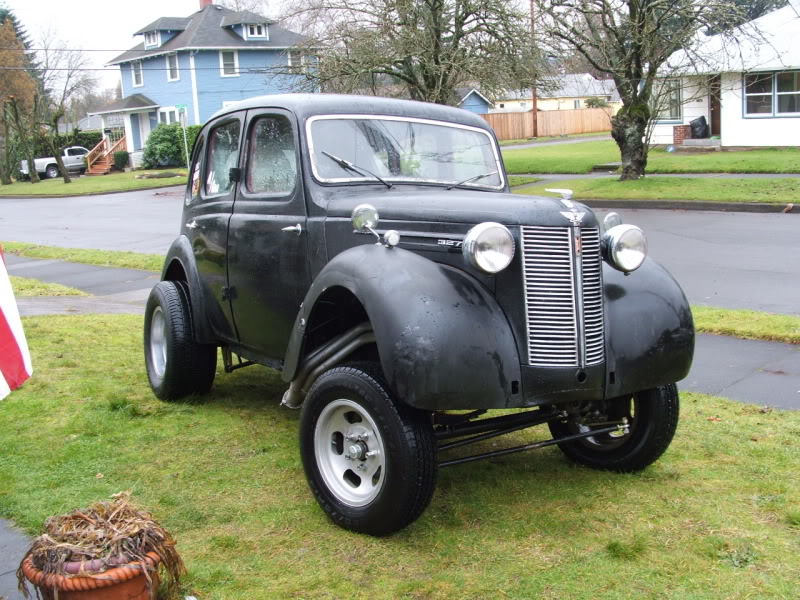
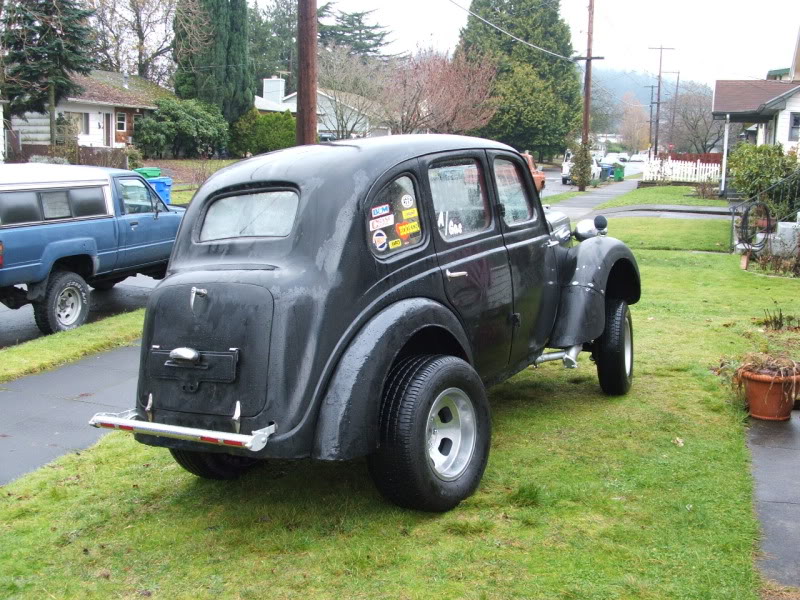
Here's a picture of the '46 Austin last August, when I purchased it from a local equipment supply store:
Home now:
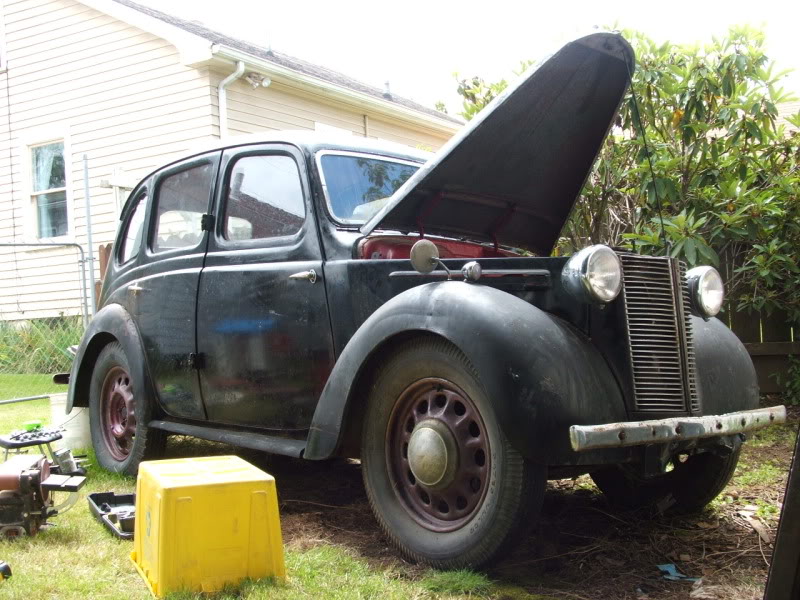
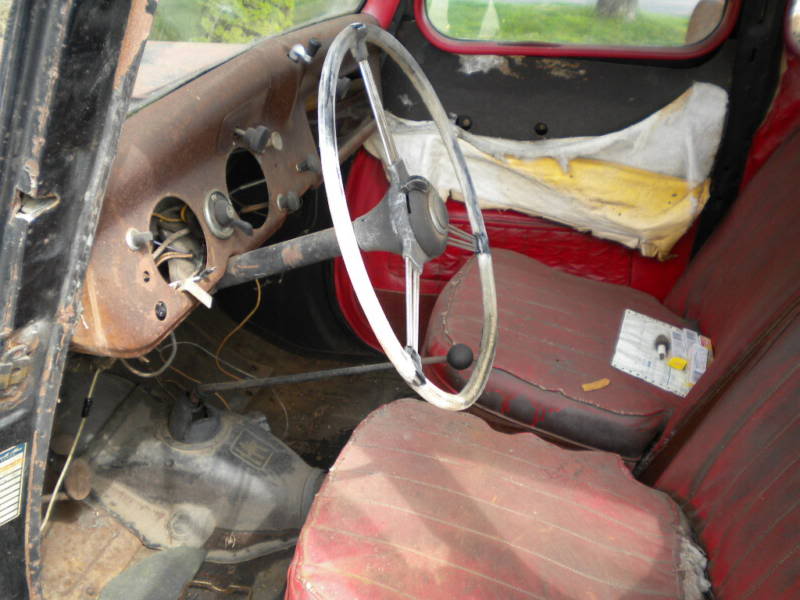
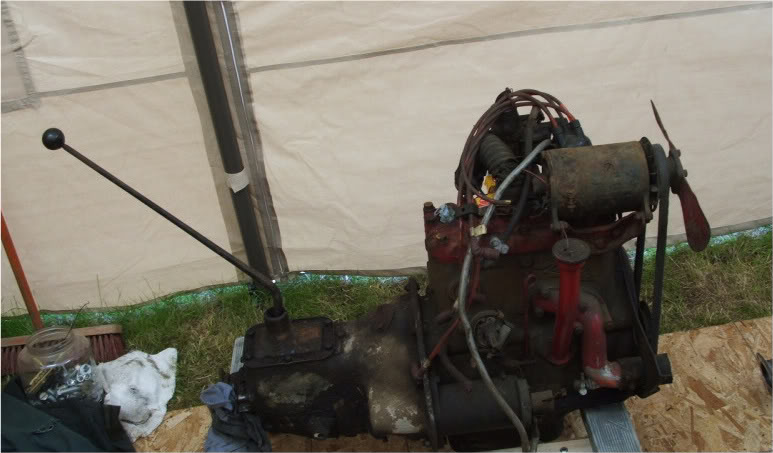
It was a complete stock car, and only missing the gauges. Original flathead 4 cyl. and 4 spd. toploader trans:

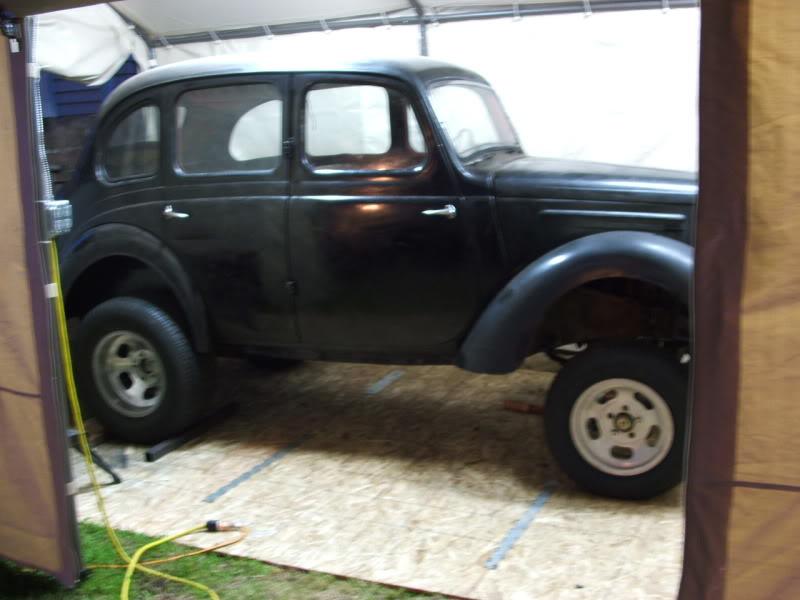
My first order of business after making a game plan, was to remove the front sheetmetal, and start mocking up for the new Speedway gasser axle I had on order:
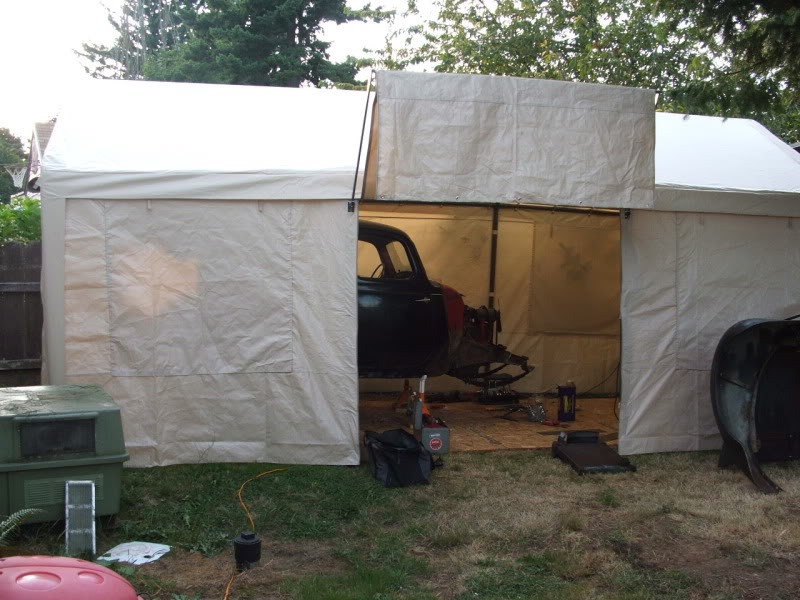
My 1971 Camaro occupies the garage, so the Austin was relegated to the backyard. With winter coming it wasn't gonna happen without a cover, so a $200 Costco tent was purchased and a base of gravel was laid inside, then 3/4 sheet wood laid down for a floor.
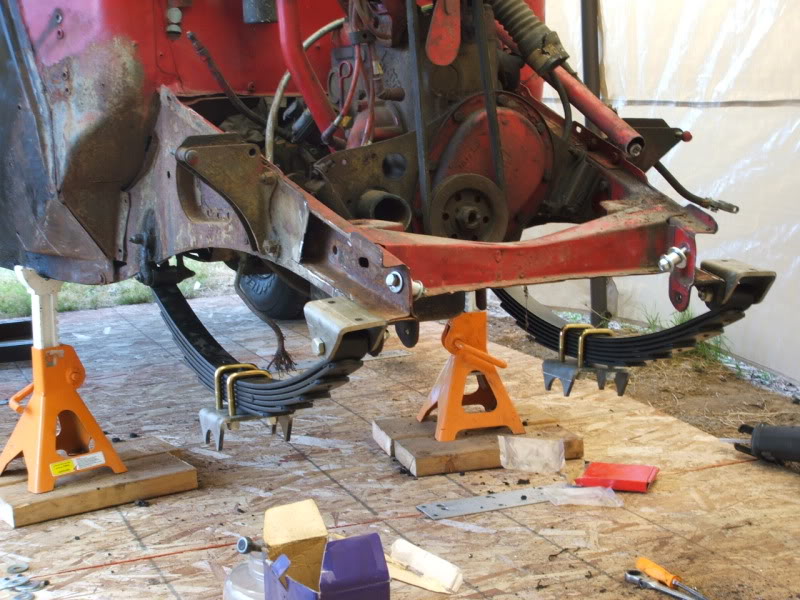
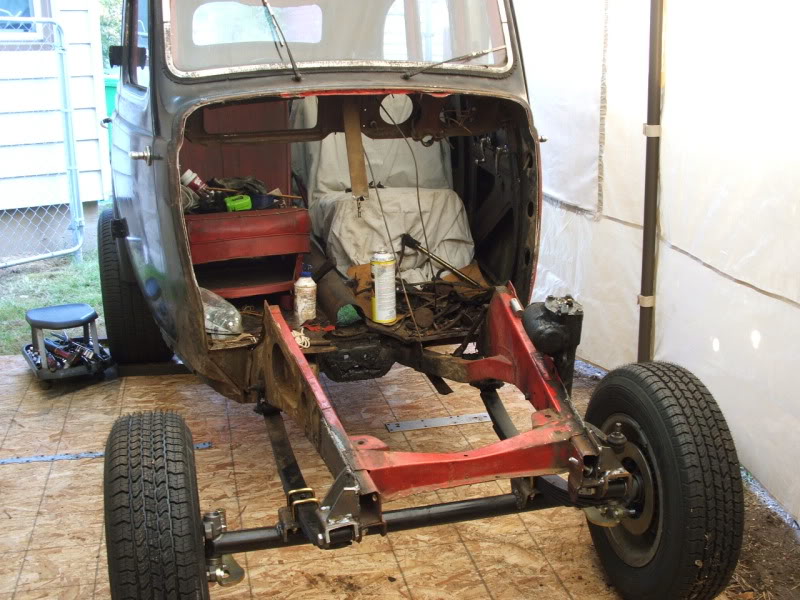
Still had the stock engine under it, but got the basic front axle in, and new rear axle sitting under the stock springs. This turned out to be more temporary than I first thought, as I couldn't get the stance and height right, so it came out again later:
Pulled the old 4 banger and cut the firewall out in preparation for the 327 Chevy engine from a '67 Chevelle SS:
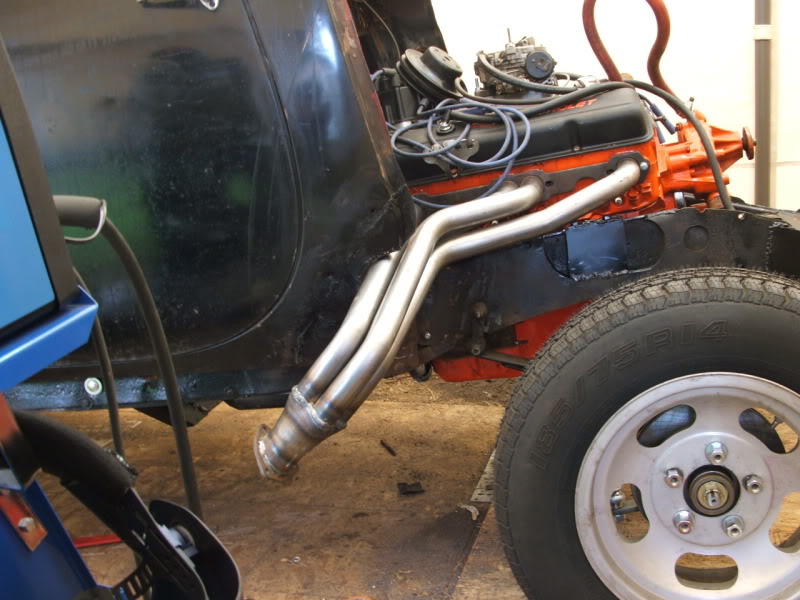
It became immediately clear that the stock frame rails needed more than just boxing and more crossmembers. The headers planned for the build prooved the engine couldn't go low enough without dissecting the frame:

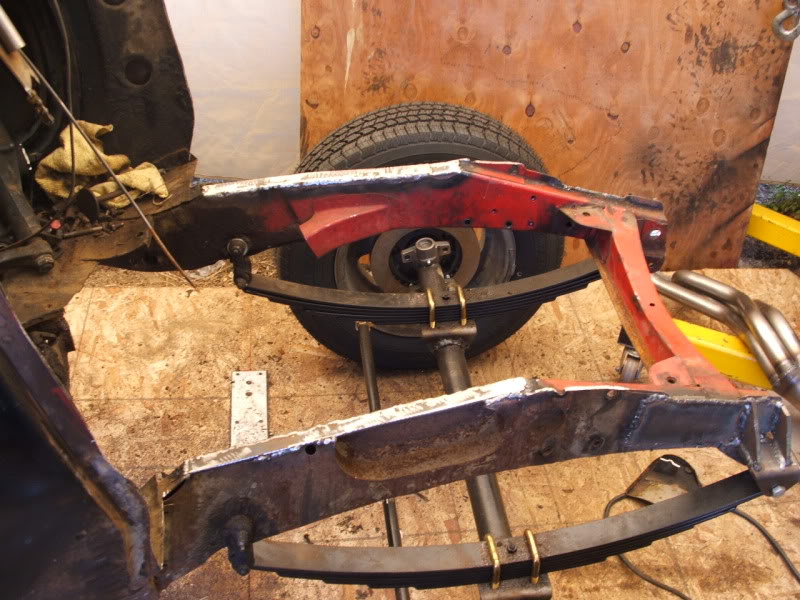
So after attaching the headers to the engine and dropping it into the frame, I measured the drop needed and cut the top half the frame away. Then used steel to fill it back in and reinforce it:
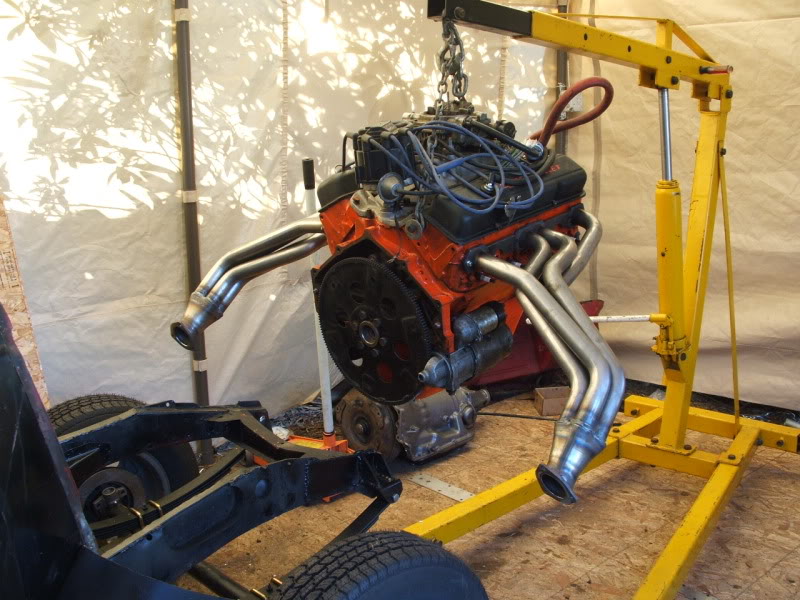
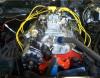
The donor engine; a 327 bored .040", balanced, blueprinted, and a little cam added. Got it from a neighbor for a fraction of what he had in it! Ready for test fit and tacking up the frame mounts:

Another snafu. The engine and headers blocked the spot I had planned for the Mazda steering box, so it got tossed in favor of a Corvair steering box. Then the drag link, and all the steering linkage was on the wrong side of the axle, so it all had to swap to the front, and line up with the new steering location inside the rails in front of the axle:
Engine sitting in place, new trans bolted up, and the crossmember built for the TH350 with manual shift kit:
Here's a picture of the '46 Austin last August, when I purchased it from a local equipment supply store:
Home now:
It was a complete stock car, and only missing the gauges. Original flathead 4 cyl. and 4 spd. toploader trans:
My first order of business after making a game plan, was to remove the front sheetmetal, and start mocking up for the new Speedway gasser axle I had on order:
My 1971 Camaro occupies the garage, so the Austin was relegated to the backyard. With winter coming it wasn't gonna happen without a cover, so a $200 Costco tent was purchased and a base of gravel was laid inside, then 3/4 sheet wood laid down for a floor.
Still had the stock engine under it, but got the basic front axle in, and new rear axle sitting under the stock springs. This turned out to be more temporary than I first thought, as I couldn't get the stance and height right, so it came out again later:
Pulled the old 4 banger and cut the firewall out in preparation for the 327 Chevy engine from a '67 Chevelle SS:
It became immediately clear that the stock frame rails needed more than just boxing and more crossmembers. The headers planned for the build prooved the engine couldn't go low enough without dissecting the frame:
So after attaching the headers to the engine and dropping it into the frame, I measured the drop needed and cut the top half the frame away. Then used steel to fill it back in and reinforce it:
The donor engine; a 327 bored .040", balanced, blueprinted, and a little cam added. Got it from a neighbor for a fraction of what he had in it! Ready for test fit and tacking up the frame mounts:
Another snafu. The engine and headers blocked the spot I had planned for the Mazda steering box, so it got tossed in favor of a Corvair steering box. Then the drag link, and all the steering linkage was on the wrong side of the axle, so it all had to swap to the front, and line up with the new steering location inside the rails in front of the axle:
Engine sitting in place, new trans bolted up, and the crossmember built for the TH350 with manual shift kit:
Thread Starter
|
Second Generation Moderator
Feb 2010 ROTM winner
Jan 2013 ROTM winner
Feb 2010 ROTM winner
Jan 2013 ROTM winner
Joined: Aug 2008
Posts: 9,097
From: Portland, Or
ROTM Winner's Club
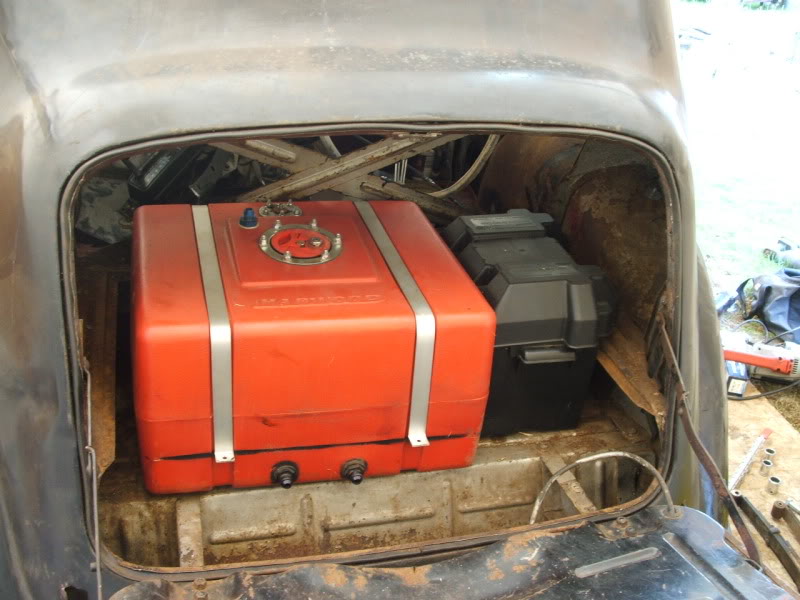
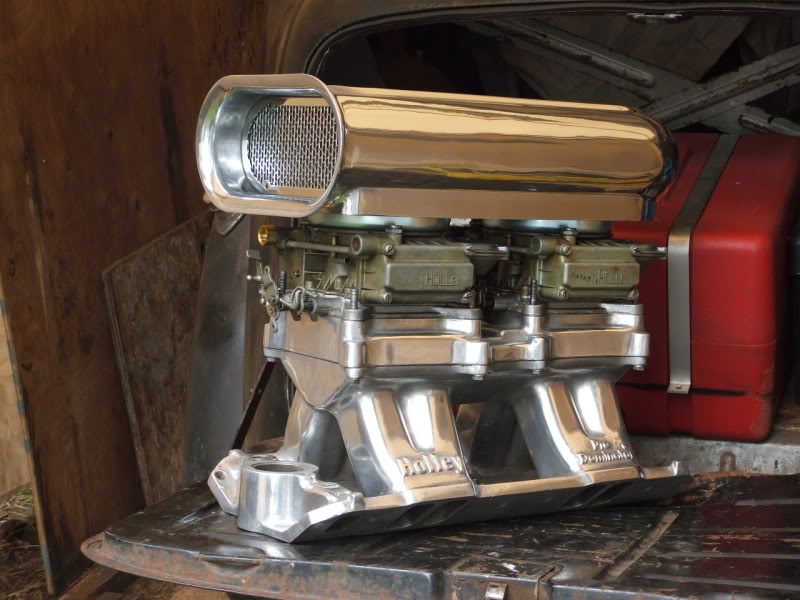
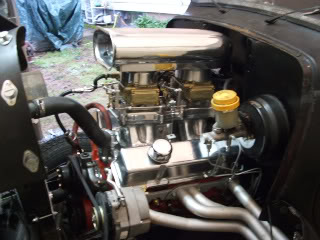
Found some more new and old parts. A fuel cell and battery box for the trunk, test fitting. And a cool Holley Pro Dominator intake and dual 450's for the little 327:
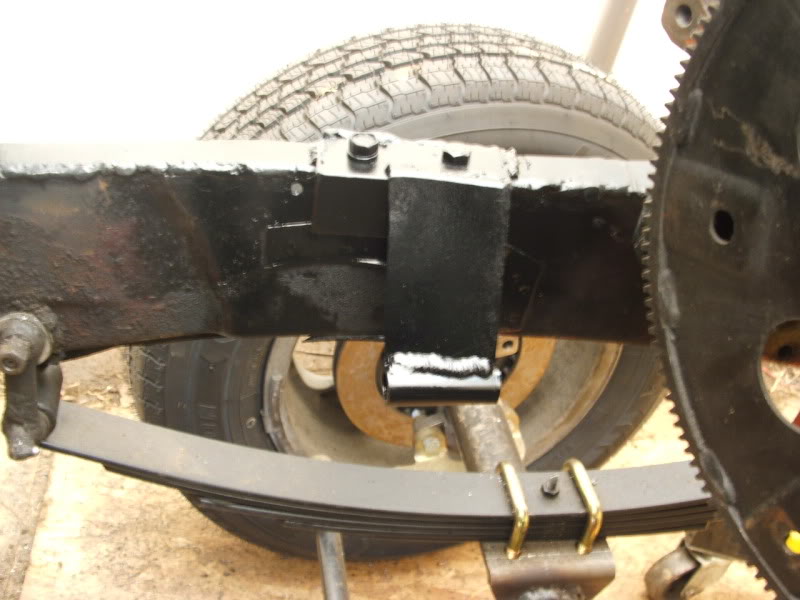
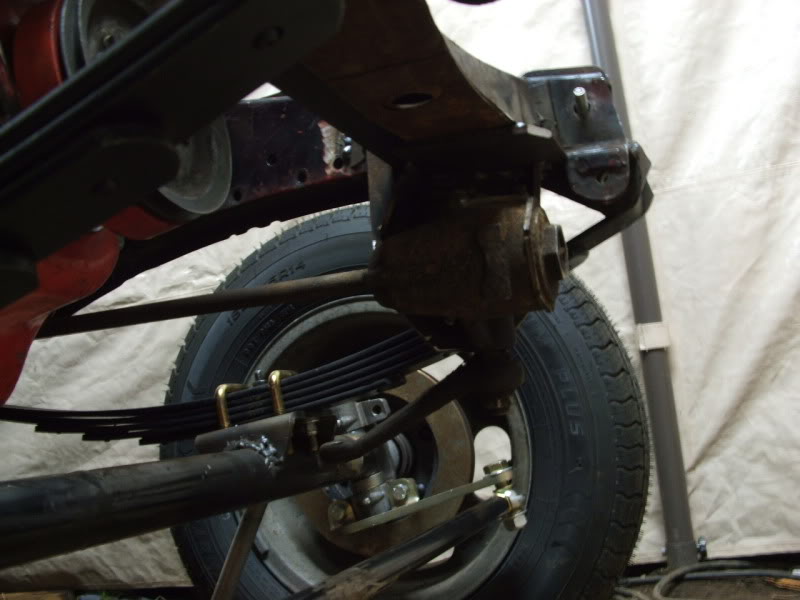
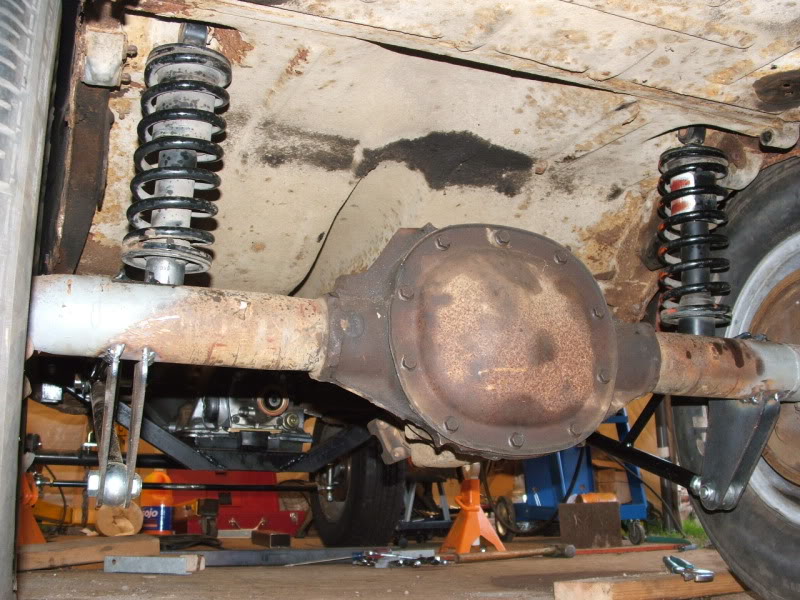
Back to the rear again. These will solve the issues of rearend height, along with some Jaguar coilover shocks:
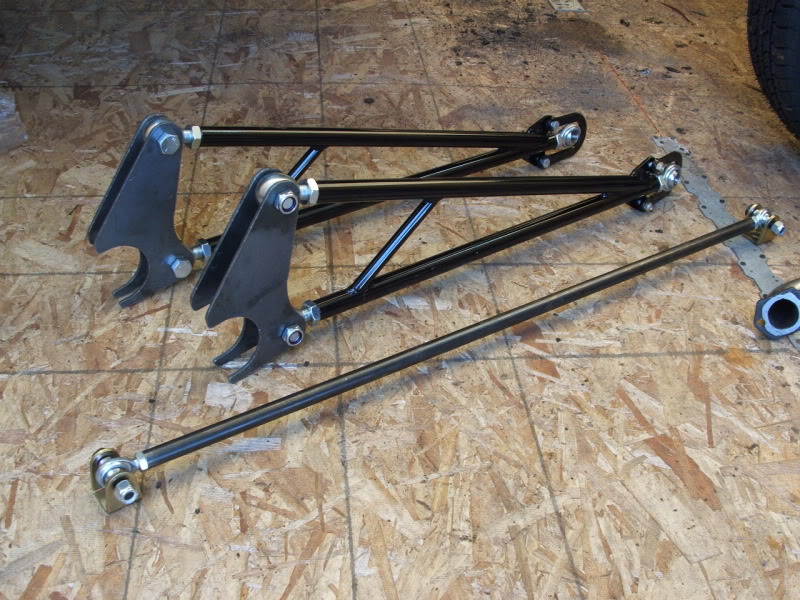
The ladder bars and coilovers were tack welded in along with a newly fabricated crossmember and the narrowed 10 bolt, with Dutchman axles:
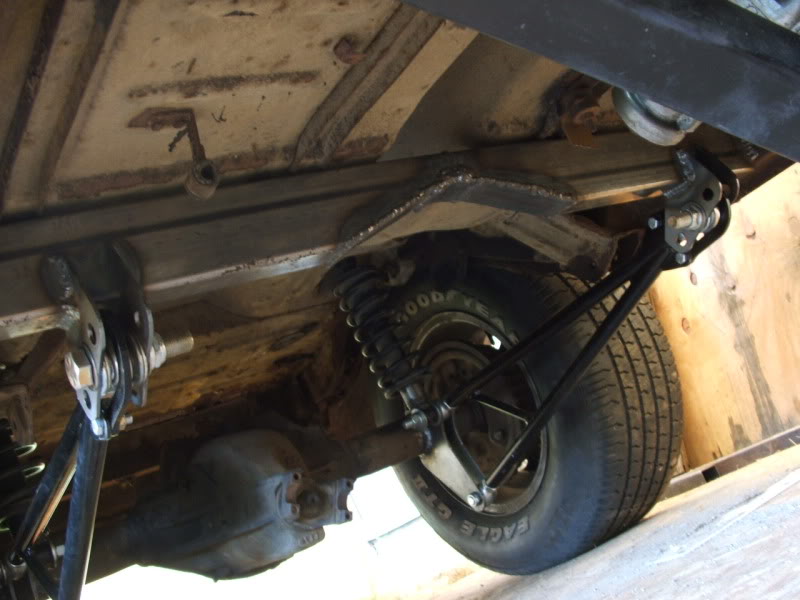
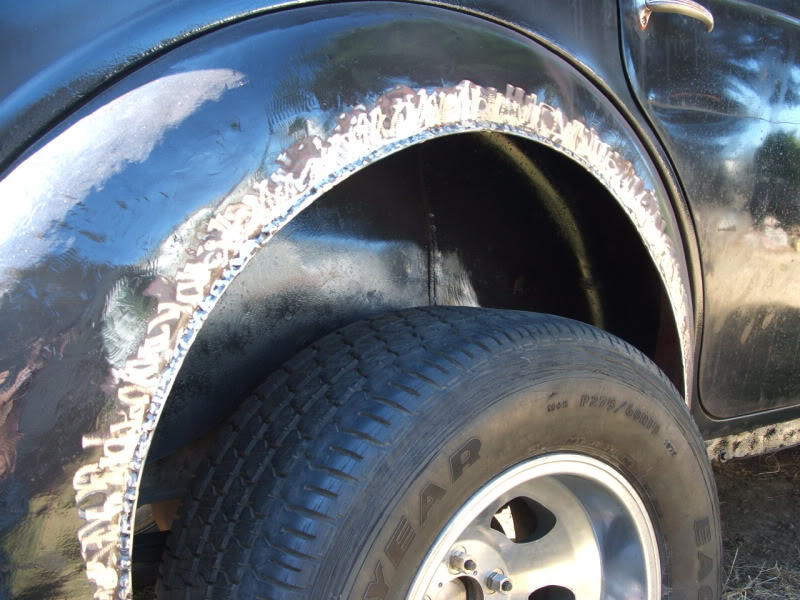
Rear fenders were removed and marked out for the bigger tires. Then the opening cut and a new 3/16" rod bent to weld to the edge for strength and to finish it off. The wheels and tires were just for mockup, as larger MT Sportsmans were planned for the rear, but they were close enough:

More to come later!
Back to the rear again. These will solve the issues of rearend height, along with some Jaguar coilover shocks:
The ladder bars and coilovers were tack welded in along with a newly fabricated crossmember and the narrowed 10 bolt, with Dutchman axles:
Rear fenders were removed and marked out for the bigger tires. Then the opening cut and a new 3/16" rod bent to weld to the edge for strength and to finish it off. The wheels and tires were just for mockup, as larger MT Sportsmans were planned for the rear, but they were close enough:
More to come later!


Thread Starter
|
Second Generation Moderator
Feb 2010 ROTM winner
Jan 2013 ROTM winner
Feb 2010 ROTM winner
Jan 2013 ROTM winner
Joined: Aug 2008
Posts: 9,097
From: Portland, Or
ROTM Winner's Club
Thanks guys! I probably wouldn't have, but since they started this section I figured I'd document what's been done on the Austin, and then go back and do the same for the 1971 Camaro and the 1969 Suburban too.
Never really did a project thread for the Camaro, it just happened here over time.
Never really did a project thread for the Camaro, it just happened here over time.
Thread Starter
|
Second Generation Moderator
Feb 2010 ROTM winner
Jan 2013 ROTM winner
Feb 2010 ROTM winner
Jan 2013 ROTM winner
Joined: Aug 2008
Posts: 9,097
From: Portland, Or
ROTM Winner's Club
With the engine and trans in place I headed back to the metal yard for a few pieces of leftover scrap 16ga. to build the firewall. Didn't have a torch or plasma cutter at the time, so I knew I'd either have to do it the hard way with my sawzall, or take it somewhere.
I used some old cardboard to mock up a firewall, and then taped it all in place behind the engine. Once it fit well I removed it and took the two largest pieces to a fab shop with a plasma cutter. For $20 he cut them to my patterns and away I went. I cut and bent the offsets on my little HF metal brake, then cut the center separately to fit inbetween.
Took a lot of tack welds and fitting to get it close, but I wanted it to be a close fit around the engine. Once it was tacked in place the engine came back out for final welding:
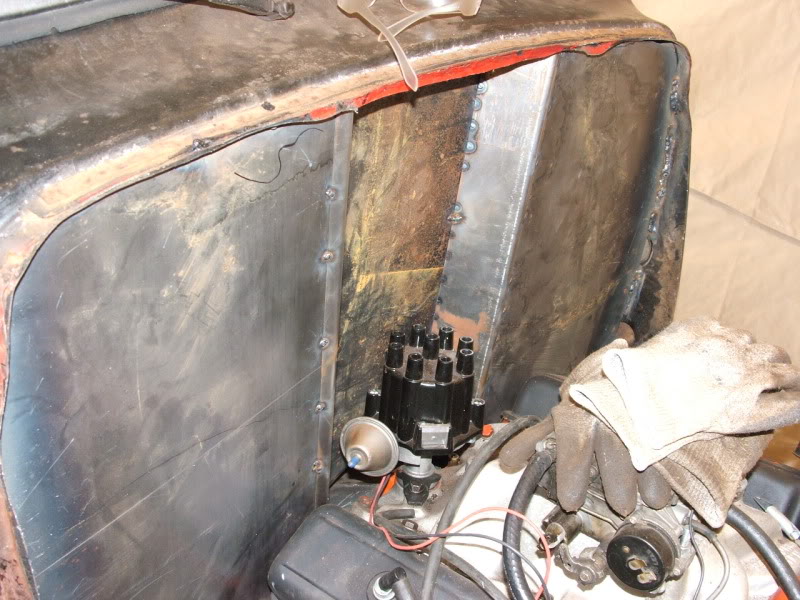

You can also see the chain gear for the crank open windshield, which I wasn't sure I could save. I moved the firewall back 11" and the chain is in a guide tube to keep the grease away from everything. I was lucky and it tacked back to the new location and worked perfectly still!
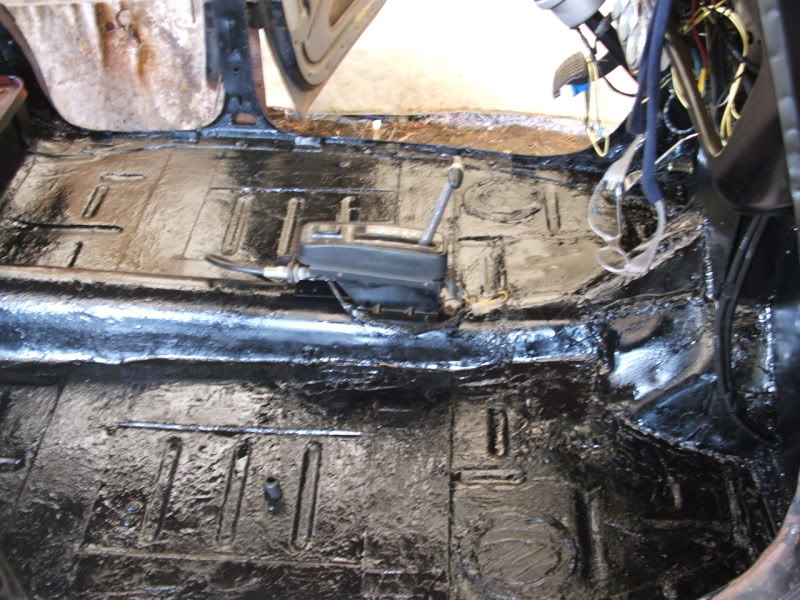
After the firewall was done I started back on the trans hump. With the engine low in the frame rails the hump was small, and that's what I really wanted,because floor space is at a premium in this tiny 12' long car!
I did a lot of small pieces of 16ga. for the trans hump because it was so thick, and tough to get a decent looking bend. So fitting it all in like a jigsaw puzzle made it easier to get it close to the tunnel.
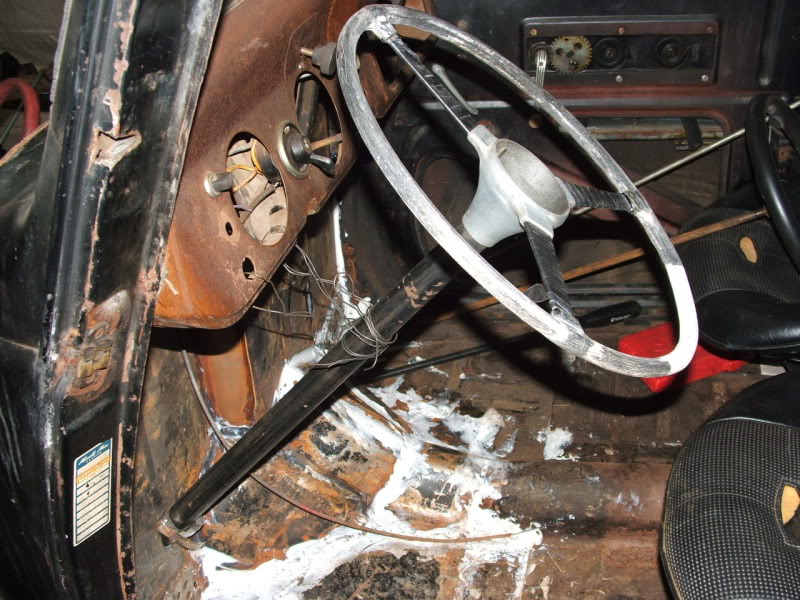
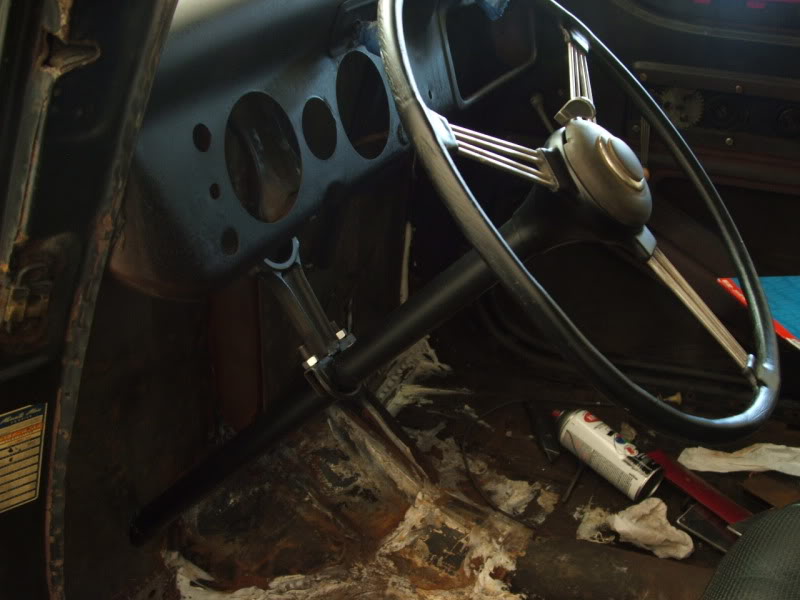
As you can see in the picture above the steering column was just wired in place to mock up the hole for it to pass through. Lots of time spent with a old seat sitting in the car and me in it to figure out where to locate the column, and how much drop it would need from the dashboard. Once I had it located and I was sure I was going to try to use the stock column and that cool banjo wheel, then I had to come up with a column drop to get it back towards my nearly backseat seating position.
I went to the guys at work in our motor shop and asked if they had any motors that were scrap and robbed a connecting rod out of one of them to fab a column drop. I cut the piston end off and welded a small muffler clamp in place and the length was perfect. Spanned the old column support area with flat plate and then drilled holes in it to match the rod end, and just used the stock rod bolts through the plate to hold it in place. Works great, and it was free vs. a $50 support! The wheel was pretty ugly, so I took it off and removed the sun cracked sections and replaced it with epoxy putty, then sanded it and repainted it black again:
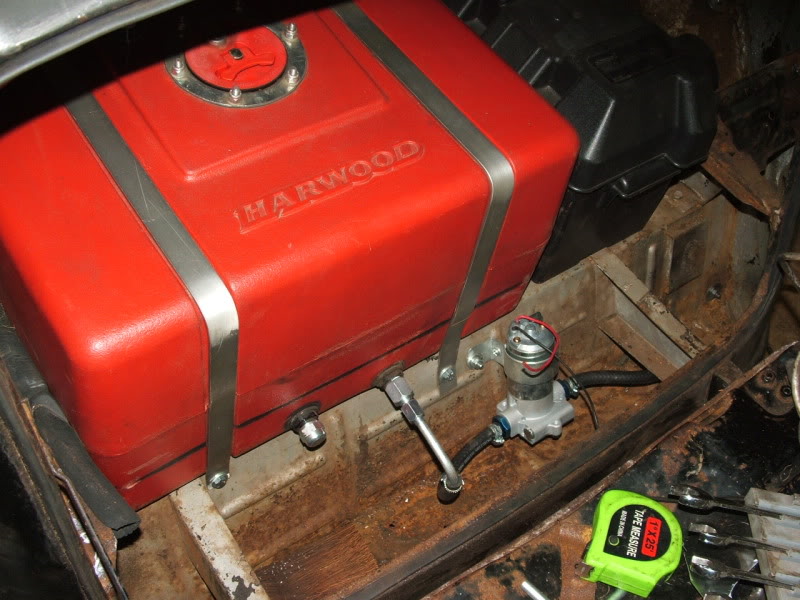
Next I went back to the trunk and rebent the stock straps for the fuel cell to work with my car and cut and drilled them to hold it down. Drilled and modified the battery box too, then slipped some edge guard on the metal in the sides of the trunk after cutting it back to make the cell and box fit beside each other. Fitted my 115gph fuel pump in the trunk drop too. Of course like everything else, it all has to come back out later to clean and paint in there.
Not much room left in the trunk! I can get two camp chairs for cruises, and that's all:
I used some old cardboard to mock up a firewall, and then taped it all in place behind the engine. Once it fit well I removed it and took the two largest pieces to a fab shop with a plasma cutter. For $20 he cut them to my patterns and away I went. I cut and bent the offsets on my little HF metal brake, then cut the center separately to fit inbetween.
Took a lot of tack welds and fitting to get it close, but I wanted it to be a close fit around the engine. Once it was tacked in place the engine came back out for final welding:
You can also see the chain gear for the crank open windshield, which I wasn't sure I could save. I moved the firewall back 11" and the chain is in a guide tube to keep the grease away from everything. I was lucky and it tacked back to the new location and worked perfectly still!
After the firewall was done I started back on the trans hump. With the engine low in the frame rails the hump was small, and that's what I really wanted,because floor space is at a premium in this tiny 12' long car!
I did a lot of small pieces of 16ga. for the trans hump because it was so thick, and tough to get a decent looking bend. So fitting it all in like a jigsaw puzzle made it easier to get it close to the tunnel.
As you can see in the picture above the steering column was just wired in place to mock up the hole for it to pass through. Lots of time spent with a old seat sitting in the car and me in it to figure out where to locate the column, and how much drop it would need from the dashboard. Once I had it located and I was sure I was going to try to use the stock column and that cool banjo wheel, then I had to come up with a column drop to get it back towards my nearly backseat seating position.
I went to the guys at work in our motor shop and asked if they had any motors that were scrap and robbed a connecting rod out of one of them to fab a column drop. I cut the piston end off and welded a small muffler clamp in place and the length was perfect. Spanned the old column support area with flat plate and then drilled holes in it to match the rod end, and just used the stock rod bolts through the plate to hold it in place. Works great, and it was free vs. a $50 support! The wheel was pretty ugly, so I took it off and removed the sun cracked sections and replaced it with epoxy putty, then sanded it and repainted it black again:
Next I went back to the trunk and rebent the stock straps for the fuel cell to work with my car and cut and drilled them to hold it down. Drilled and modified the battery box too, then slipped some edge guard on the metal in the sides of the trunk after cutting it back to make the cell and box fit beside each other. Fitted my 115gph fuel pump in the trunk drop too. Of course like everything else, it all has to come back out later to clean and paint in there.
Not much room left in the trunk! I can get two camp chairs for cruises, and that's all:
Last edited by 1971BB427; May 16, 2011 at 08:51 AM.
Thread Starter
|
Second Generation Moderator
Feb 2010 ROTM winner
Jan 2013 ROTM winner
Feb 2010 ROTM winner
Jan 2013 ROTM winner
Joined: Aug 2008
Posts: 9,097
From: Portland, Or
ROTM Winner's Club
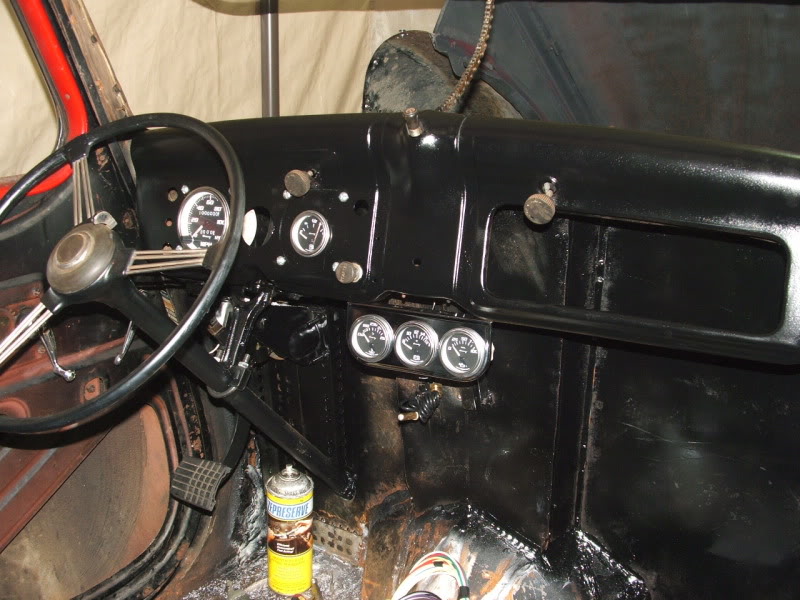
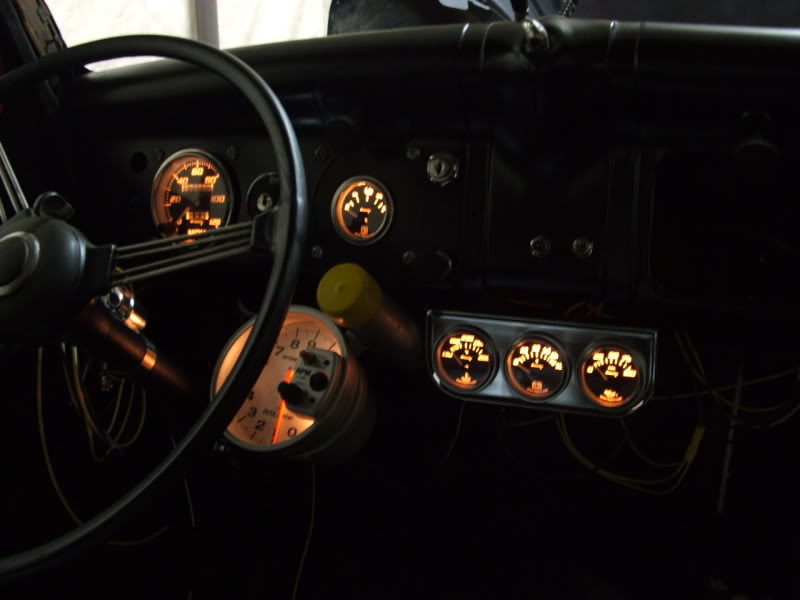
With the firewall and floors done I started on the dash. All new Equus gauges, but keeping with the old gasser look I wanted to just put fuel and speedo in the dash, and volts, oil, and temp in a panel below. Painted up the dash and made reducer plates for speedo and fuel gauges, then mounted it all in place. The two ***** in the dash are the left and right manual wipers! Pretty low tech. The dash never had a glove box door, as that was an option, but I eventually fixed that later:
Back outside again, I drilled and bolted all the sheetmetal together and made a tilt frontend. Added a fab plate at the front lower edge and then some pivot holes to the frame. Then just bolted it on and double nutted the pivot bolts to keep them from coming off, and not bind the hinge point too:

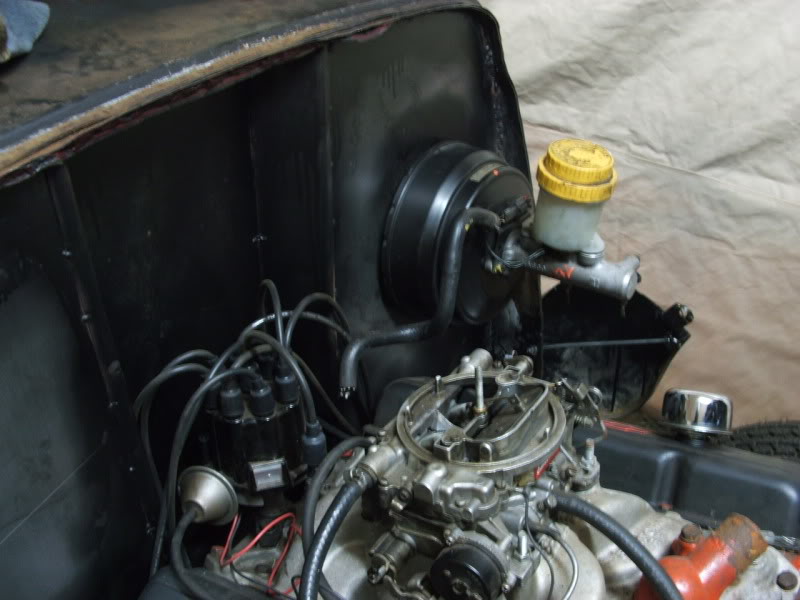
Headed to U Pull It next and walked miles of wrecked cars looking for a donor master cylinder/brake pedal assembly. After giving up I was headed out when I walked past a '92 Subaru Legacy and there it was! The coolest master/brake assembly I ever saw on a stock car. Nice and compact, with a pedal assembly that looked like it was made for hotrods. Took only a small offset bent in a plate to mount the factory bracket to the dash, and 5 holes in the firewall to sandwich the master to the booster. Some strut was required to strengthen the firewall and prevent flex, but it works great:
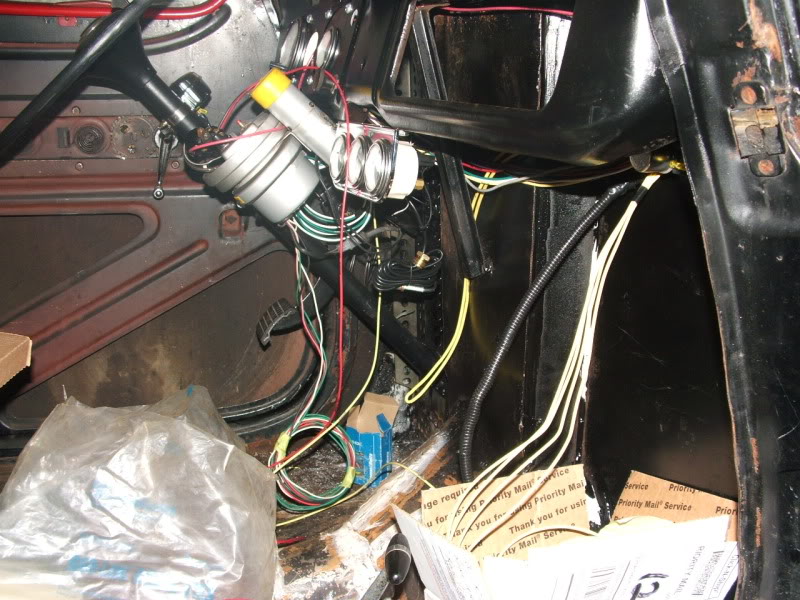
With the pedal and master in place I got my wiring harness from NW Autowire. A 12 ckt. hotrod harness and fuse block that is really easy to use, with all wires labeled, and only $99 complete with flashers and relays for fuel pump and fan. I mounted it behind the old glovebox location since the dash is so shallow now, and began wiring the gauges:
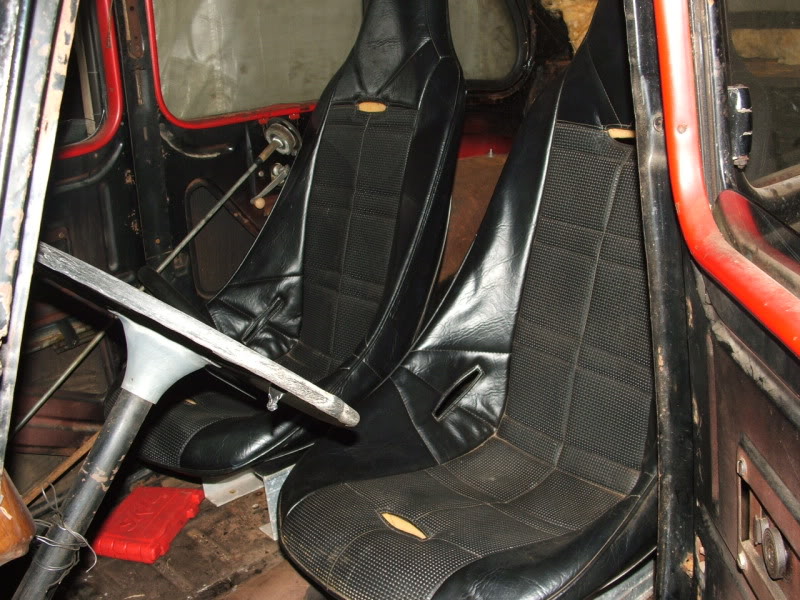
Picked up a couple old racing buckets at the local swap meet for $60 a pair. Seemed to just barely fit side by side, with enough room for a floor shifter between them. Tight quarters inside! Only 40" door to door inside! Yikes this is close! Regular buckets would never have fit!:
Lots of wires to dress down, but the gauges work! Still need more wiring to things like turn signals, fuel pump, a few dash indicators, and of course a stereo. (somewhere):
Time for some more cleanup and paint! Removed all the junk from the floors and cleaned them up. Painted gloss black enamel and ready for mocking up seats. Picked up a used Jaguar floor shifter and cable when I got my used Jaguar coil over shocks. $70 for two shocks and the shifter. Cheaper than the alternative of nearly $500 for the same new!:
Got the new dipstick tube from Spectre, and mounted. Stock tube wouldn't clear the tight firewall. Set up the engine to start with the Edelbrock Performer intake and carb. Didn't want to fight anything new until I had it running. Work out the bugs one at a time:

Back under the car. Man I seem to jump around on this thing! Got the trans lines (2nd gen Camaro) and the cooler installed. Begin assembly of the disc brake conversion to late 2nd gen rotors and calipers. Pretty easy, just an adapter bracket and then bolt it all on the straight axle spindles. Used Mustang spindles with adapter bearings to fit the GM hubs.

Welded up an exhaust sytem from a friend's '68 Firebird. It was new when he decided he didn't like the sound, so it came off. Free parts, and it almost dropped in place like it was made for the Austin. Just flipped it upside down and cut it short to fit. The turn ups after the muffler to go over the axle became the turndowns! I love free parts!
Got a free driveline with the rebuilt TH350 I bought off a guy's race car. $200 for the trans, with driveline. Cut it down to fit and welded it back together. If it vibrates I'll have it balanced, but we'll see if it's OK. Saved the stock weight locations to avoid balance issues. It worked out, and no vibrations.:
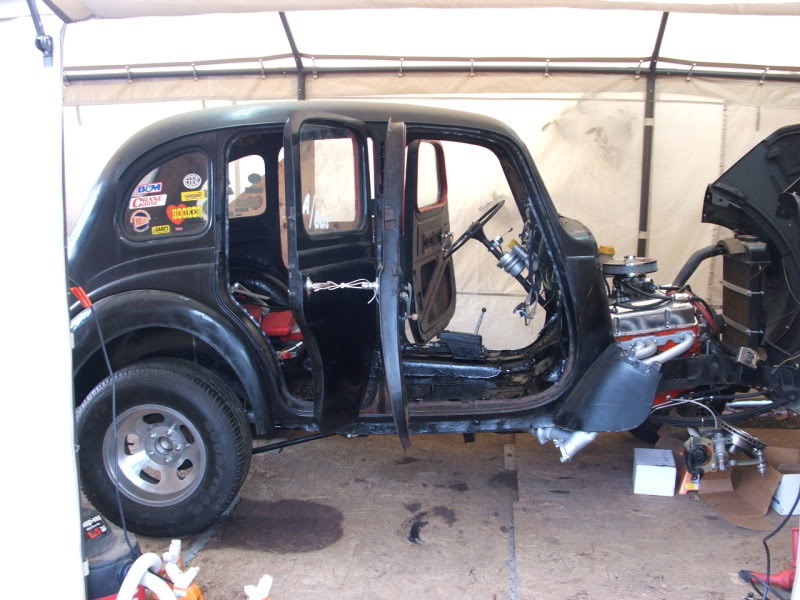
The suicide doors really help when working inside. Just tie them to the back doors and they don't keep hitting you in the rear while you're working!:
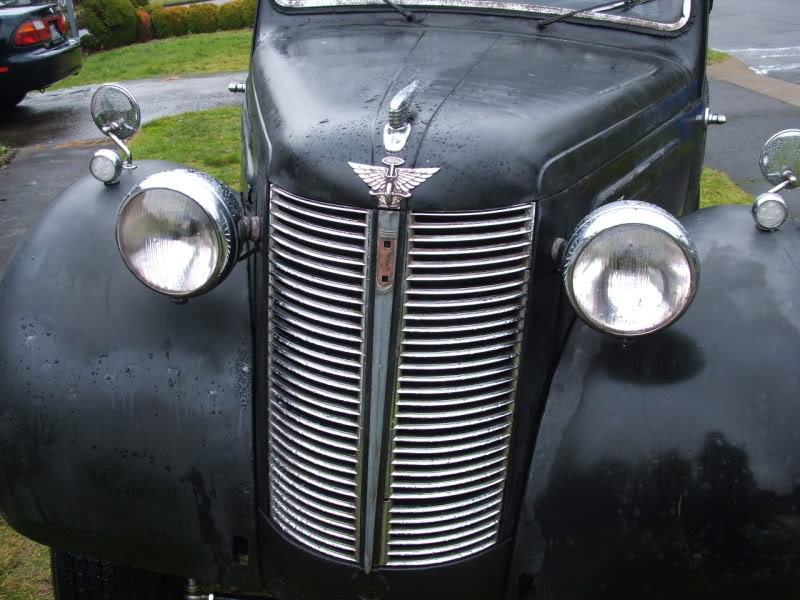
Did some clean up on the frontend parts to get rid of all the green/brown mold or whatever it was. The grille and emblems came out pretty decent. Modified the headlight sockets with sockets rivetted into the reflectors from a modern halogen lamp car. Used LED lamps reworked to fit into the little turn signal lamps. Free headlight sockets, and $9 ea. for the LED lamps!:
First test drive 4 months after purchasing the stock Austin. Lots to do, but it's a runner at this point! Wet out, and squirrelly as all get out, even with 2.73 rear gears! Now it comes apart for engine upgrades, gear change, interior, bodywork, etc., etc.....:
Rear bumper is a aftermarket '32 Ford hotrod item with LED lights, and is polished stainless.
More to come, but I could drive it now once it had plates on it!
Back outside again, I drilled and bolted all the sheetmetal together and made a tilt frontend. Added a fab plate at the front lower edge and then some pivot holes to the frame. Then just bolted it on and double nutted the pivot bolts to keep them from coming off, and not bind the hinge point too:
Headed to U Pull It next and walked miles of wrecked cars looking for a donor master cylinder/brake pedal assembly. After giving up I was headed out when I walked past a '92 Subaru Legacy and there it was! The coolest master/brake assembly I ever saw on a stock car. Nice and compact, with a pedal assembly that looked like it was made for hotrods. Took only a small offset bent in a plate to mount the factory bracket to the dash, and 5 holes in the firewall to sandwich the master to the booster. Some strut was required to strengthen the firewall and prevent flex, but it works great:
With the pedal and master in place I got my wiring harness from NW Autowire. A 12 ckt. hotrod harness and fuse block that is really easy to use, with all wires labeled, and only $99 complete with flashers and relays for fuel pump and fan. I mounted it behind the old glovebox location since the dash is so shallow now, and began wiring the gauges:
Picked up a couple old racing buckets at the local swap meet for $60 a pair. Seemed to just barely fit side by side, with enough room for a floor shifter between them. Tight quarters inside! Only 40" door to door inside! Yikes this is close! Regular buckets would never have fit!:
Lots of wires to dress down, but the gauges work! Still need more wiring to things like turn signals, fuel pump, a few dash indicators, and of course a stereo. (somewhere):
Time for some more cleanup and paint! Removed all the junk from the floors and cleaned them up. Painted gloss black enamel and ready for mocking up seats. Picked up a used Jaguar floor shifter and cable when I got my used Jaguar coil over shocks. $70 for two shocks and the shifter. Cheaper than the alternative of nearly $500 for the same new!:
Got the new dipstick tube from Spectre, and mounted. Stock tube wouldn't clear the tight firewall. Set up the engine to start with the Edelbrock Performer intake and carb. Didn't want to fight anything new until I had it running. Work out the bugs one at a time:
Back under the car. Man I seem to jump around on this thing! Got the trans lines (2nd gen Camaro) and the cooler installed. Begin assembly of the disc brake conversion to late 2nd gen rotors and calipers. Pretty easy, just an adapter bracket and then bolt it all on the straight axle spindles. Used Mustang spindles with adapter bearings to fit the GM hubs.
Welded up an exhaust sytem from a friend's '68 Firebird. It was new when he decided he didn't like the sound, so it came off. Free parts, and it almost dropped in place like it was made for the Austin. Just flipped it upside down and cut it short to fit. The turn ups after the muffler to go over the axle became the turndowns! I love free parts!
Got a free driveline with the rebuilt TH350 I bought off a guy's race car. $200 for the trans, with driveline. Cut it down to fit and welded it back together. If it vibrates I'll have it balanced, but we'll see if it's OK. Saved the stock weight locations to avoid balance issues. It worked out, and no vibrations.:
The suicide doors really help when working inside. Just tie them to the back doors and they don't keep hitting you in the rear while you're working!:
Did some clean up on the frontend parts to get rid of all the green/brown mold or whatever it was. The grille and emblems came out pretty decent. Modified the headlight sockets with sockets rivetted into the reflectors from a modern halogen lamp car. Used LED lamps reworked to fit into the little turn signal lamps. Free headlight sockets, and $9 ea. for the LED lamps!:
First test drive 4 months after purchasing the stock Austin. Lots to do, but it's a runner at this point! Wet out, and squirrelly as all get out, even with 2.73 rear gears! Now it comes apart for engine upgrades, gear change, interior, bodywork, etc., etc.....:
Rear bumper is a aftermarket '32 Ford hotrod item with LED lights, and is polished stainless.
More to come, but I could drive it now once it had plates on it!
Last edited by 1971BB427; May 16, 2011 at 07:38 PM.

Thread Starter
|
Second Generation Moderator
Feb 2010 ROTM winner
Jan 2013 ROTM winner
Feb 2010 ROTM winner
Jan 2013 ROTM winner
Joined: Aug 2008
Posts: 9,097
From: Portland, Or
ROTM Winner's Club
Besides, remember I'm retired and just play all day anyhow!

Last edited by 1971BB427; May 16, 2011 at 07:40 PM.
Thread Starter
|
Second Generation Moderator
Feb 2010 ROTM winner
Jan 2013 ROTM winner
Feb 2010 ROTM winner
Jan 2013 ROTM winner
Joined: Aug 2008
Posts: 9,097
From: Portland, Or
ROTM Winner's Club
With the car running and driving, the next step was to change that intake, and carbs. The polished Holley Pro Dominator and dual 450 Holleys looks cool, but needed some work to get it running well. Had to change accelerator pumps and cams on them, and also change the timing on the engine. I'll probably go with larger squirters soon too:
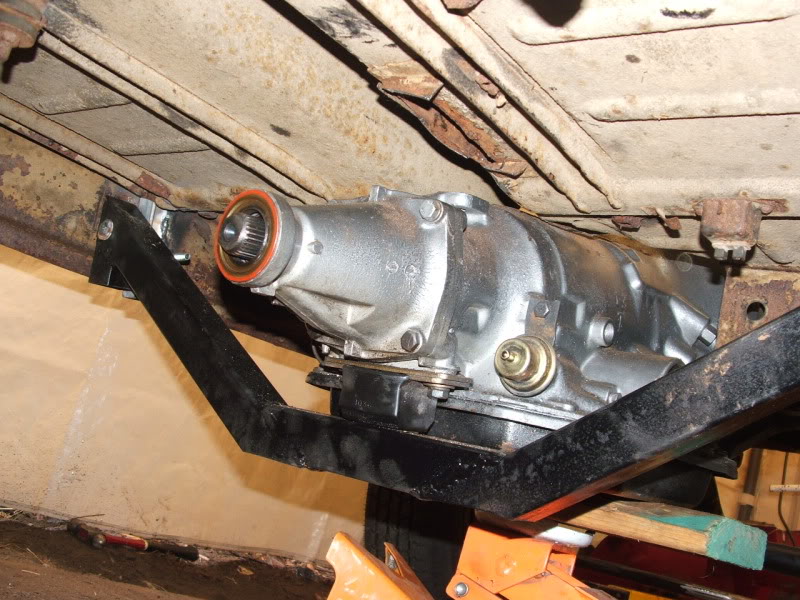
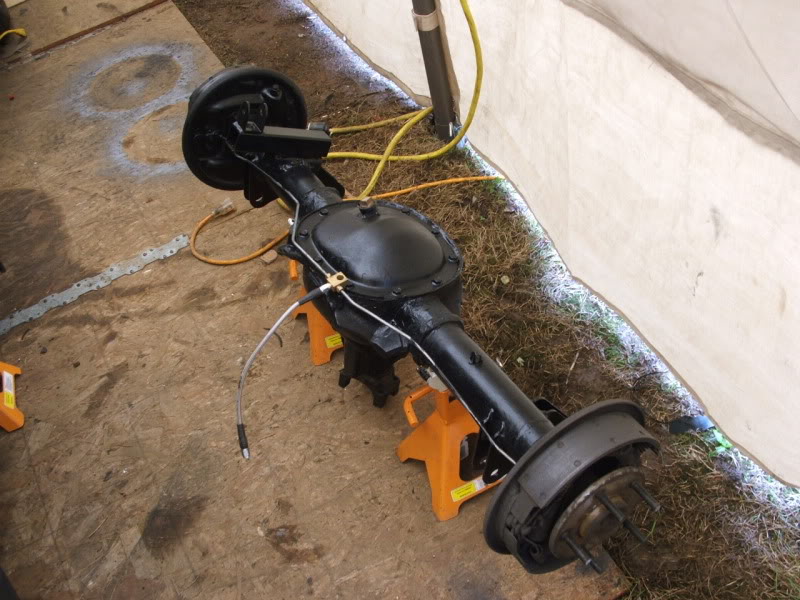
The rear gears were too tall, and I always planned to change them. Got the narrowed 10 bolt from a friend, but didn't look close enough at it to realise what it was. What a Frankenstein! Some sort of oddball 10 bolt that GM built for use in full sized GM's up north in Canada. It has huge axle shafts, but the ring gear is a large size, but with a small bolt pattern. Finding a correct 3 series carrier proved impossible, but the 3.73 gears were easy to find. The fix was a ring gear spacer to make the 3.73 gears work, and it's a major improvement in launch!
Here's the rearend out again for gears, right after it came back. It's got the finned drums and I like the look of them:
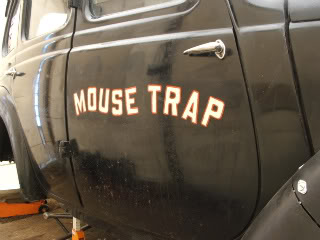
In keeping with the gasser look I lettered a name on the doors and then spent hours carefully sanding it down to get the weathered look of an old race car:
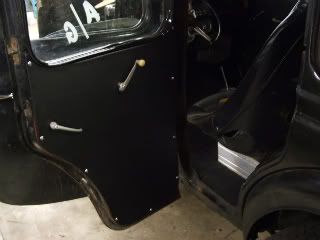
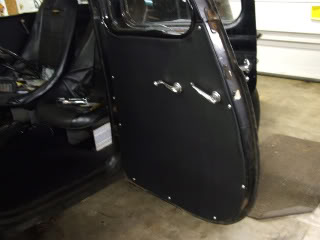
Interior finish was next. Buckets came back out and I moved the car to my neighbor's garage. More room and warmer to do the interior. Made cardboard patterns of all the doors and cut out masonite board. Then after sanding the edges smooth I spray glued the black naugahyde material over and put the panels on with chrome trim screws:
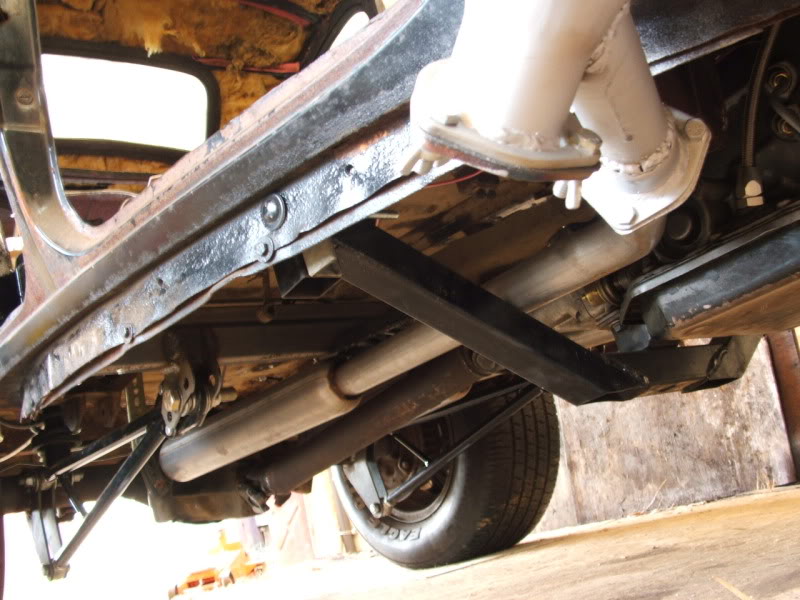
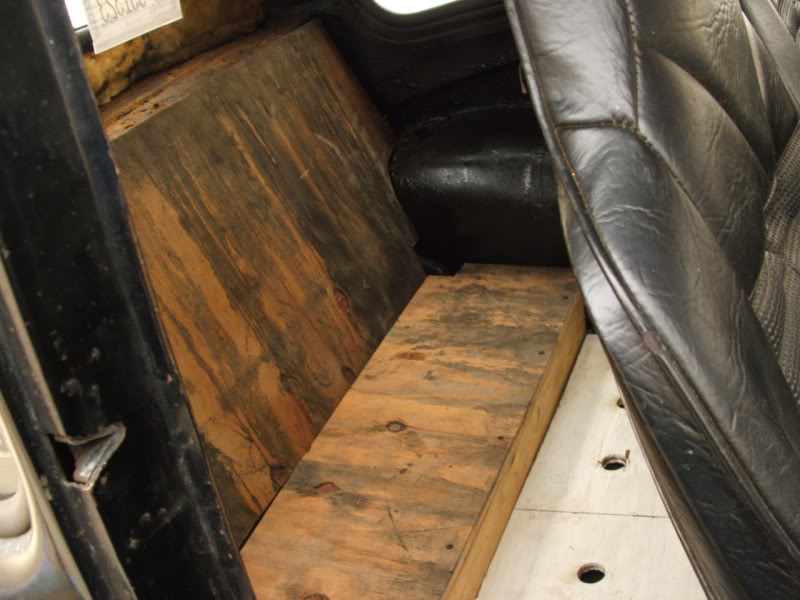
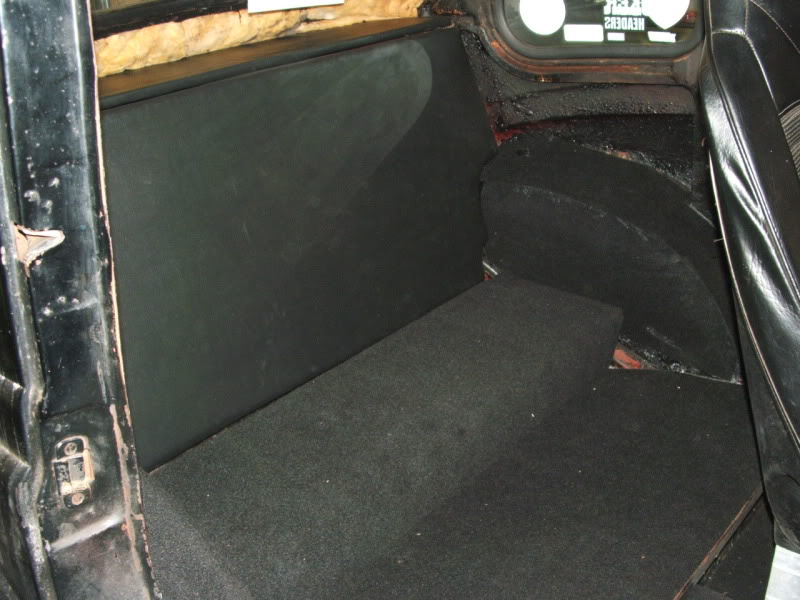
No backseat, so in the back I cut plywood panels to fill in and cover the added crossmember for the coilover shock mounts. There are a total of 4 new crossmembers added to the chassis, but the shock crossmember had to be located above the floor in the rear to get ride height where I wanted it. A plywood panels was also cut for the seat bottom area and the back got naugahyde, while the bottom got carpet:
Got a Dynamat replica from Home Depot at a big savings over the real thing. $32 for enough to do the whole floor and the divider panels area too!
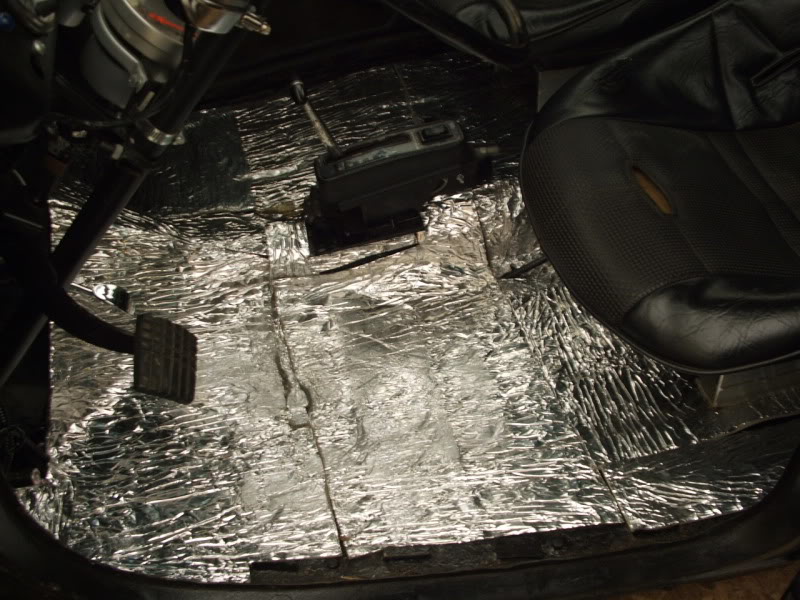
Had to cut the mat around my battery disconnect, which is just in front of the pass. seat:

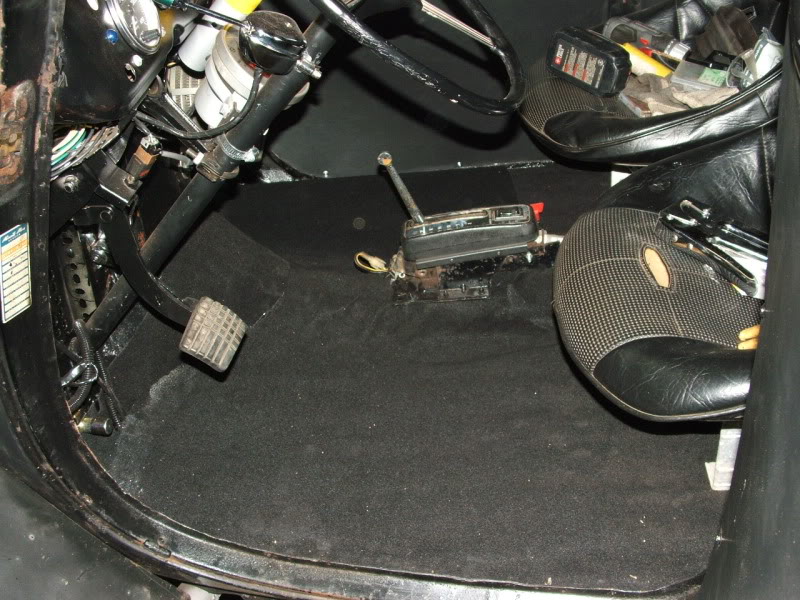
Floors got some inexpensive carpet for now, but I'm going to have edged carpets with a more finished look made to fit later:
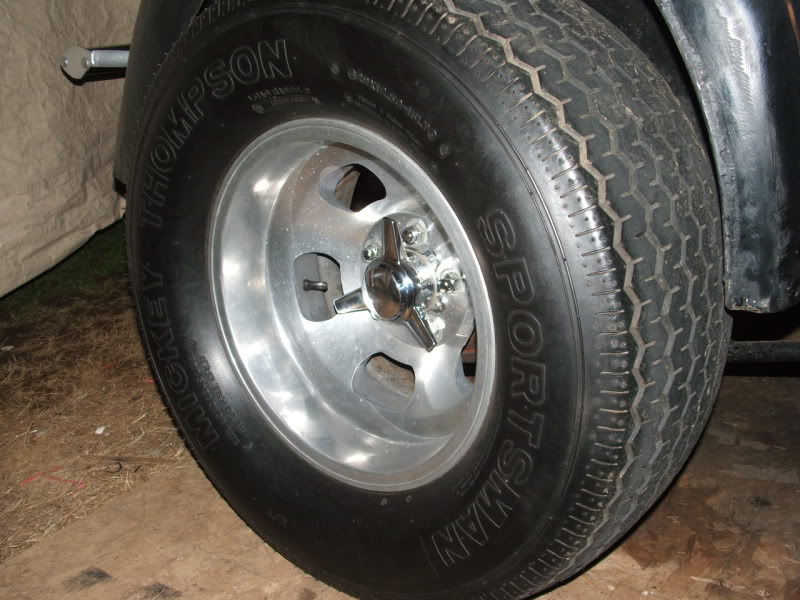
Finally got the MY Sportsmans mounted up. I've got new front tires and wheels coming also. The 5"x14" slots are going away, to be replaced with 3.5"x15" slots and skinnies:
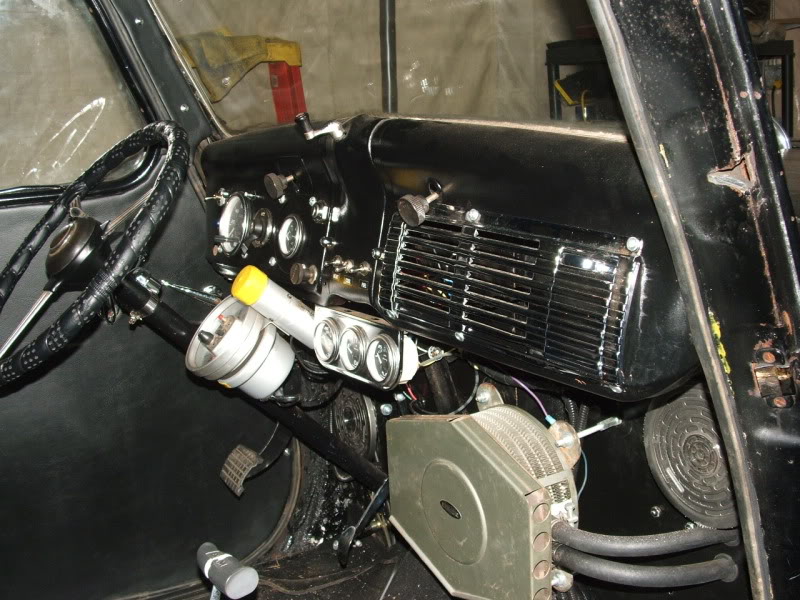
Also found a early Chev truck chrome dash insert to cover up the open hole. It was $20 at the swap meet, and added some bling to the dash. Also got a heater from a Toyota Land Cruiser rear seat to warm the Austin on cold days. It will get painted black to blend in better:
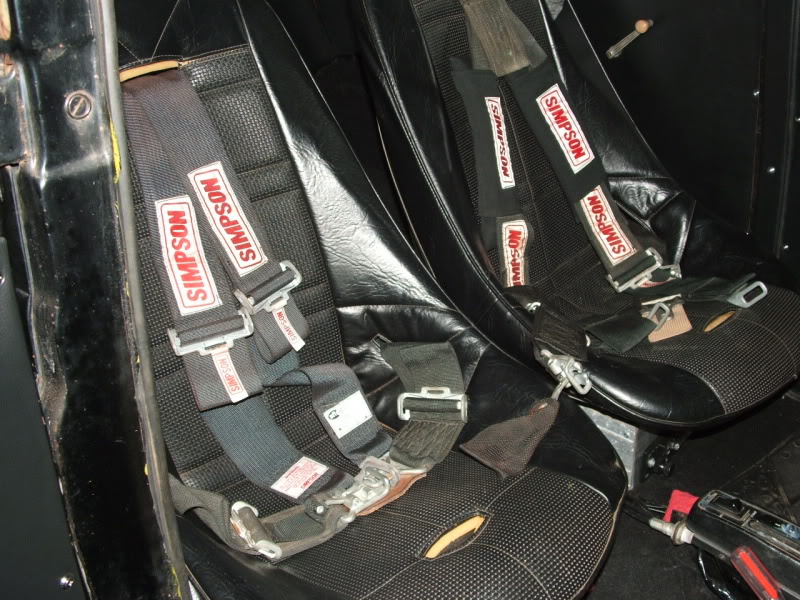
Picked up a couple sets of Simpson harnesses too. I just feel unsafe not having 4 point harnesses after using them in the Camaro for the last 30+ years!:
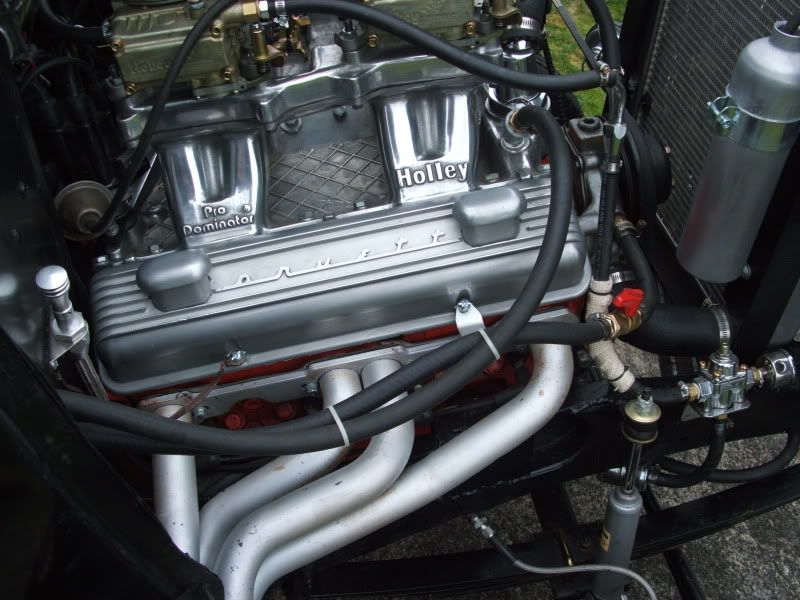
Got some old Corvette valve covers at the swap, converted to breathers and they're very cool on the 327:

A little video of the Austin running. It's performing really well now!:

The rear gears were too tall, and I always planned to change them. Got the narrowed 10 bolt from a friend, but didn't look close enough at it to realise what it was. What a Frankenstein! Some sort of oddball 10 bolt that GM built for use in full sized GM's up north in Canada. It has huge axle shafts, but the ring gear is a large size, but with a small bolt pattern. Finding a correct 3 series carrier proved impossible, but the 3.73 gears were easy to find. The fix was a ring gear spacer to make the 3.73 gears work, and it's a major improvement in launch!
Here's the rearend out again for gears, right after it came back. It's got the finned drums and I like the look of them:
In keeping with the gasser look I lettered a name on the doors and then spent hours carefully sanding it down to get the weathered look of an old race car:
Interior finish was next. Buckets came back out and I moved the car to my neighbor's garage. More room and warmer to do the interior. Made cardboard patterns of all the doors and cut out masonite board. Then after sanding the edges smooth I spray glued the black naugahyde material over and put the panels on with chrome trim screws:
No backseat, so in the back I cut plywood panels to fill in and cover the added crossmember for the coilover shock mounts. There are a total of 4 new crossmembers added to the chassis, but the shock crossmember had to be located above the floor in the rear to get ride height where I wanted it. A plywood panels was also cut for the seat bottom area and the back got naugahyde, while the bottom got carpet:
Got a Dynamat replica from Home Depot at a big savings over the real thing. $32 for enough to do the whole floor and the divider panels area too!
Had to cut the mat around my battery disconnect, which is just in front of the pass. seat:
Floors got some inexpensive carpet for now, but I'm going to have edged carpets with a more finished look made to fit later:
Finally got the MY Sportsmans mounted up. I've got new front tires and wheels coming also. The 5"x14" slots are going away, to be replaced with 3.5"x15" slots and skinnies:
Also found a early Chev truck chrome dash insert to cover up the open hole. It was $20 at the swap meet, and added some bling to the dash. Also got a heater from a Toyota Land Cruiser rear seat to warm the Austin on cold days. It will get painted black to blend in better:
Picked up a couple sets of Simpson harnesses too. I just feel unsafe not having 4 point harnesses after using them in the Camaro for the last 30+ years!:
Got some old Corvette valve covers at the swap, converted to breathers and they're very cool on the 327:
A little video of the Austin running. It's performing really well now!: