
79 Camaro Project

Thread Starter
|
3rd Gear Member
Joined: Sep 2009
Posts: 1,062
From: Morris, IL
The cylinders did have a ridge in them at the top, I had to go to Autozone and rent a reamer, after a break and another go at it, I got the hang of it and it went really quick for the rest of them. A thousand questions from my 4 year old probably didn't help the first go around... lol.
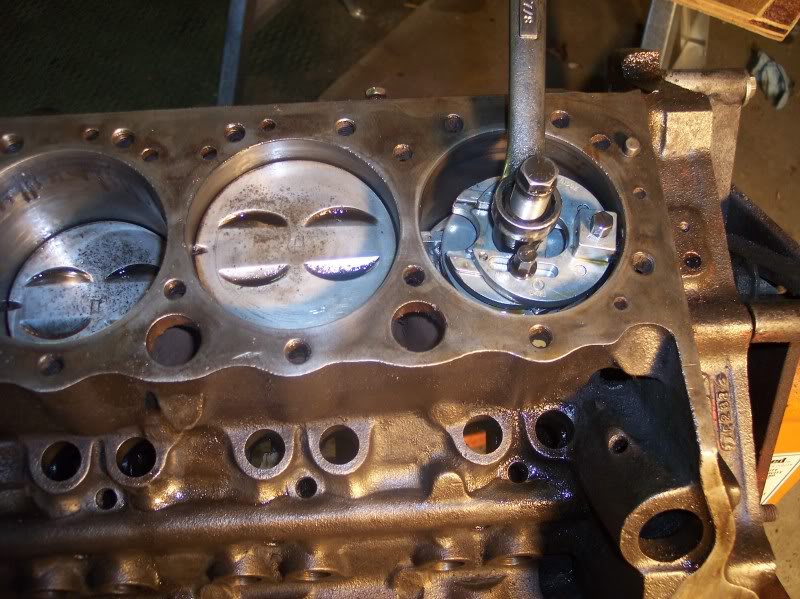
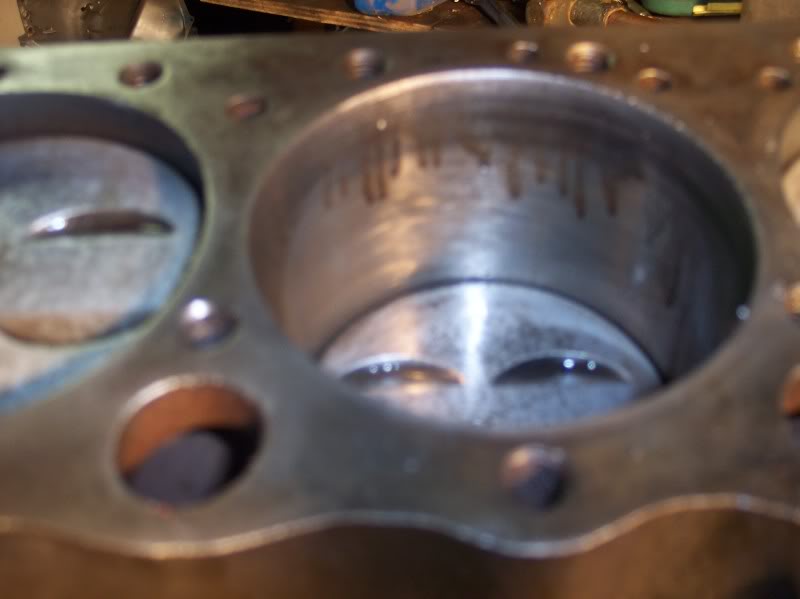
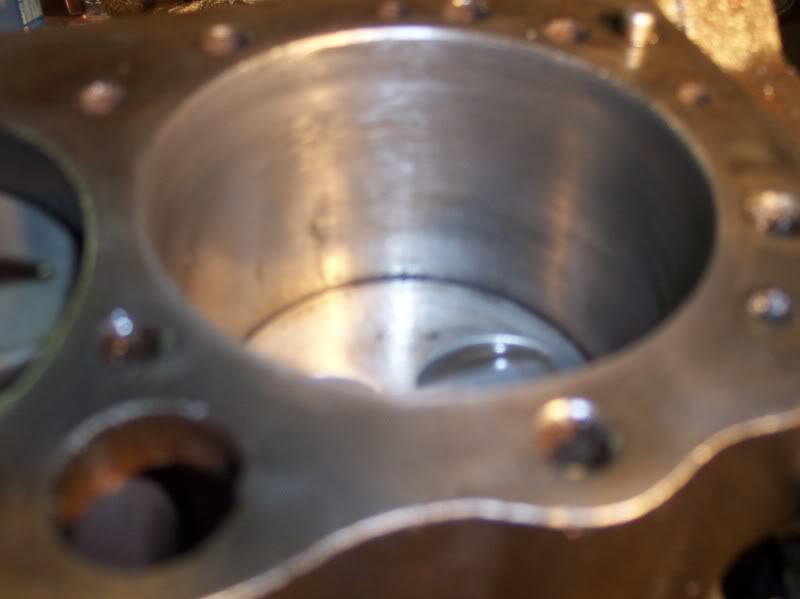
I've got to finish cleaning the block, at this point it needs a good pressure washing I think to clear up the inside.

I took and chucked and open quick connect in the end of my air hose and let it rip through all of my water jackets and stuff, and got ALOT of rust and junk out of there. I wasn't planning on pulling the freeze plugs, but with all the crud that came out of there, I think I should, it would allow me to blast it from different angles in the water jackets I think. Unless I can get it all out otherwise.

Even the rings looked good to me, given the quick glance I gave them, I need to spend some time really cleaning everything up though. With the ridge on the top of the bore, I don't know how they could have gotten the old pistons out, unless it is possible to take them out the bottom??? Not sure about that, then again, they could have beat them out for all I know and used the tool to put them back in. Or they are original, what do I know? lol.
I've got to finish cleaning the block, at this point it needs a good pressure washing I think to clear up the inside.
I took and chucked and open quick connect in the end of my air hose and let it rip through all of my water jackets and stuff, and got ALOT of rust and junk out of there. I wasn't planning on pulling the freeze plugs, but with all the crud that came out of there, I think I should, it would allow me to blast it from different angles in the water jackets I think. Unless I can get it all out otherwise.
Even the rings looked good to me, given the quick glance I gave them, I need to spend some time really cleaning everything up though. With the ridge on the top of the bore, I don't know how they could have gotten the old pistons out, unless it is possible to take them out the bottom??? Not sure about that, then again, they could have beat them out for all I know and used the tool to put them back in. Or they are original, what do I know? lol.
Thread Starter
|
3rd Gear Member
Joined: Sep 2009
Posts: 1,062
From: Morris, IL
The cam bearings are definitely not new though I don't think. I haven't gone after them to clean them up, but when I removed the cam, it looked like a small-ish one, and it definitely wasn't new, so they probably just left that bit of the engine alone.


I'm going to probably take a break for the rest of the night, hopefully tomorrow sometime I can get out there and decifer what size bearings are in everything. I need to do some reading on how to tell if the rods are still true, how to mic the crank and check the radius or whatever. I'll need to check the bore size, I assume that it is stock, but who knows. I'd like to try to determine if it needs an overbore too. Got some learning to do. I don't really want to go ***** out drag race here, but I'd like to take this oportunity to get a good grasp of building an engine the right way.
I'm going to probably take a break for the rest of the night, hopefully tomorrow sometime I can get out there and decifer what size bearings are in everything. I need to do some reading on how to tell if the rods are still true, how to mic the crank and check the radius or whatever. I'll need to check the bore size, I assume that it is stock, but who knows. I'd like to try to determine if it needs an overbore too. Got some learning to do. I don't really want to go ***** out drag race here, but I'd like to take this oportunity to get a good grasp of building an engine the right way.

Overdrive Member
Joined: Nov 2009
Posts: 4,848
From: off the grid
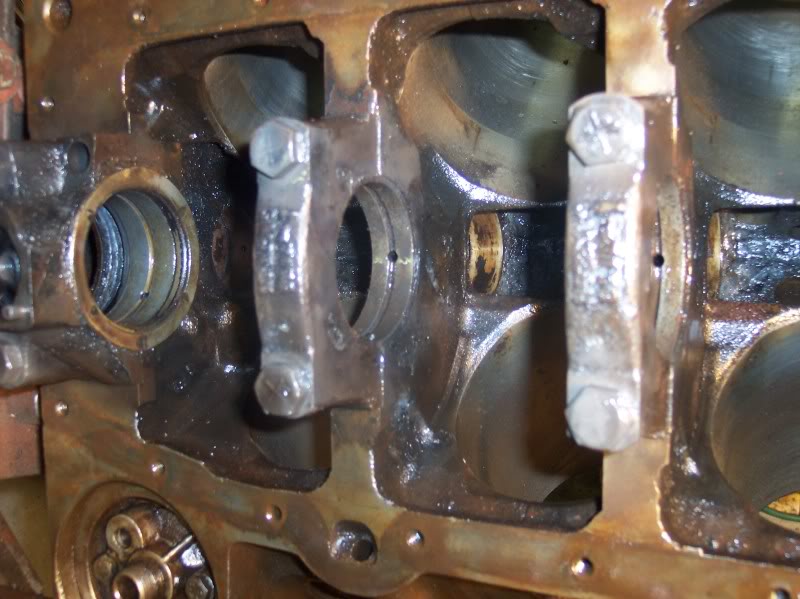
Hmm. A lot to take in here. No way should there be thread sealant on the main bolts. Thats a no no. I was thinking about what your FIL was saying about making the side of rods. I have seen this near the bolt. Forgot!
Anyhow, I think your lookin at a stock motor. I can't explain the sealant though. Maybe someone had the crank turned. You can pull the crank and reinstall without ever touching the pistons.
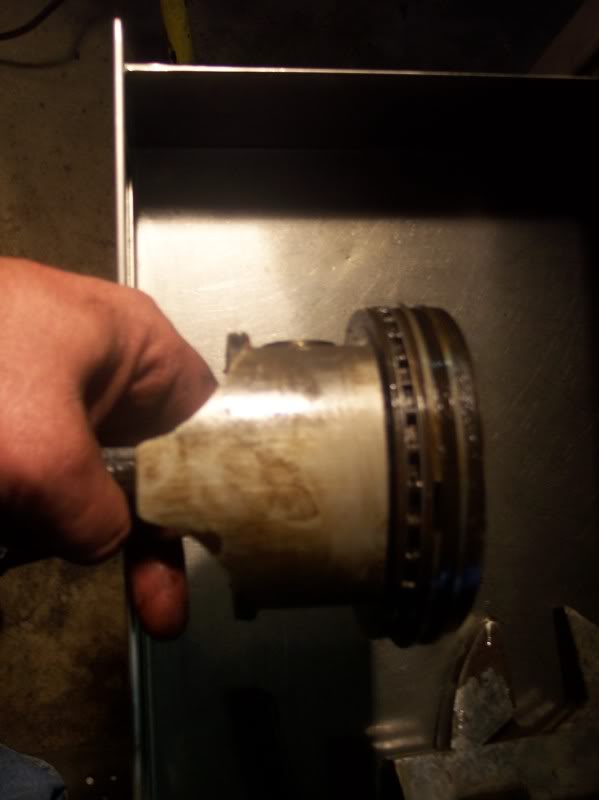
You rings will almost always look new. Rings don't really wear down they relax and lose tension, there ability to push toward the walls. The piston skirts will tell a bigger story. Look at the thrust side. This will be the sides 90* from the pins. The side that pushes toward the outside during ignition is the worst.
Around here the machine shop will hot tank your block and rplace cam bearings for about 50 bucks.
I can't say for certain, but my experience tells me those stamps are to identify the the different cavity #s. I would imagine there were many, many cavities for pistons. Needing 8 per vehicle is a lot when you think about it. We're launching a seat pivot at work. Four per car. 2.5 million pieces per year. We only have (2) three cavity dies. Thats for one specific car. Now back in the 60s and 70s when there were anything from Novas to motor homes came with a 327, it blows my mind really how many had to be produced at one time.
Oh yeah, thats pretty clean inside. Good score. I would LOVE a high winding motor for my car.
Anyhow, I think your lookin at a stock motor. I can't explain the sealant though. Maybe someone had the crank turned. You can pull the crank and reinstall without ever touching the pistons.
You rings will almost always look new. Rings don't really wear down they relax and lose tension, there ability to push toward the walls. The piston skirts will tell a bigger story. Look at the thrust side. This will be the sides 90* from the pins. The side that pushes toward the outside during ignition is the worst.
Around here the machine shop will hot tank your block and rplace cam bearings for about 50 bucks.
I can't say for certain, but my experience tells me those stamps are to identify the the different cavity #s. I would imagine there were many, many cavities for pistons. Needing 8 per vehicle is a lot when you think about it. We're launching a seat pivot at work. Four per car. 2.5 million pieces per year. We only have (2) three cavity dies. Thats for one specific car. Now back in the 60s and 70s when there were anything from Novas to motor homes came with a 327, it blows my mind really how many had to be produced at one time.
Oh yeah, thats pretty clean inside. Good score. I would LOVE a high winding motor for my car.
Thread Starter
|
3rd Gear Member
Joined: Sep 2009
Posts: 1,062
From: Morris, IL
Just went out and hit my crank with the die grinder, cleaned all of the gunk off of it, it looks almost brand new now. That aught to help I'm sure.
I don't have a shop around me that hot tanks the engine. I wish that there were. The one in town pressure washes engines... I'll do that. As for the cam bearings though, not sure how I feel about that being a DIY option. I've read about it, but it sure looks like it has to be right. I'll dig up my book and re-read it.
I've also got to be giving my heads some thought. They are the old fuelies, and there aren't any hardened seats in them. Especially with this motor and trans combo, this is only going to be a weekend warrior. I don't think I am going to get any work done to them. Maybe a lap job valve job at home here. If I were going to want to get a ton of miles out of it then I'd see the reasoning, but even then, I'd just get some vortecs or something instead. I do need to pull them completely apart and finish cleaning up all the water jackets and stuff in them too.
I am feeling pretty good about what I've got here so far, nothing to really turn me off of going ahead and using it. It's here, I've got it, just need bearings, rings and gaskets and it is good to go. Well, and a cam, lifters, pushrods, and an SBC oil pump driveshaft and a dizzy. Oil pan. And dipstick... plugs, wires, hoses, belts.
As far as bolts go, reuse, or buy new? I'm thinking reuse for this one. Depends on price though.
Thread Starter
|
3rd Gear Member
Joined: Sep 2009
Posts: 1,062
From: Morris, IL
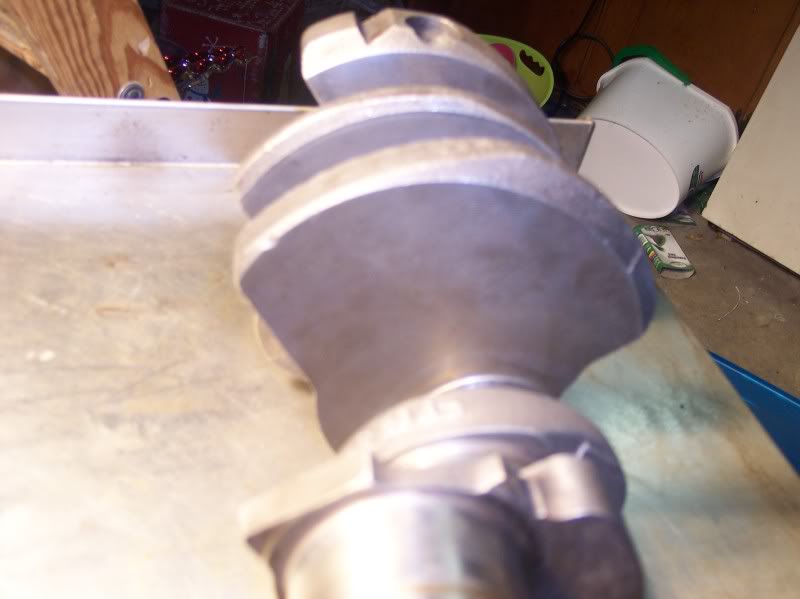
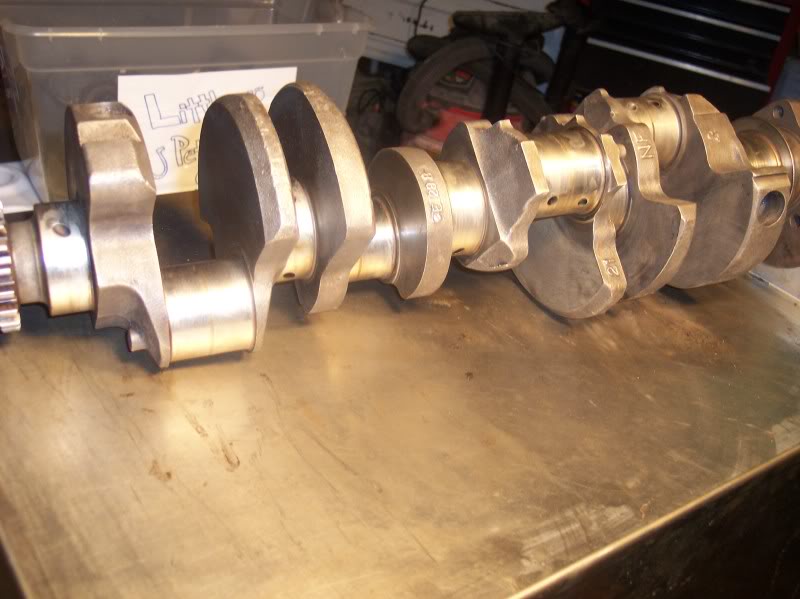
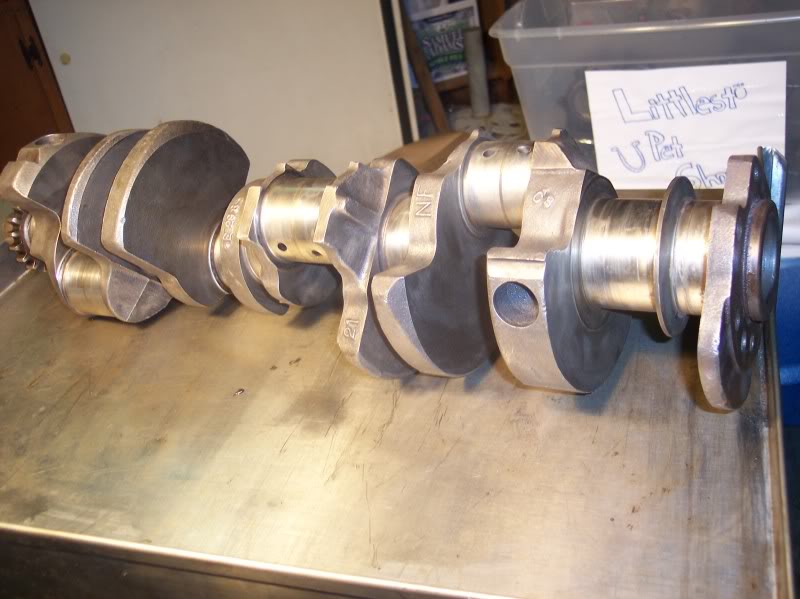
Here are some pics of the crank cleaned up. I may go a step beyond this, but I'm not really sure yet. Where do you stop?
And my next project is going to be these I think. Is it possible to remove the rings and reuse them if they are any good? Or is it just not worth it?


Tomorrow is our Easter with the kids and everything, and next weekend is with our family, so I'll have to try to come up with some way to hit these things during the week.
What is the best way to clean pistons and rods, I'm thinking that I would like to not have to pull them apart. Soak them in something maybe and a wire brush? Probably brass on the pistons?
And my next project is going to be these I think. Is it possible to remove the rings and reuse them if they are any good? Or is it just not worth it?
Tomorrow is our Easter with the kids and everything, and next weekend is with our family, so I'll have to try to come up with some way to hit these things during the week.
What is the best way to clean pistons and rods, I'm thinking that I would like to not have to pull them apart. Soak them in something maybe and a wire brush? Probably brass on the pistons?

Second Generation Moderator
Feb 2010 ROTM winner
Jan 2013 ROTM winner
Feb 2010 ROTM winner
Jan 2013 ROTM winner
Joined: Aug 2008
Posts: 9,097
From: Portland, Or
ROTM Winner's Club
I never take them out the top unless it was a re-ring with no bearings, and I've never been in that scenario. I always pull the crank and take them out thye bottom. Mainly because I want the engine completely apart, hot tanked, and magnafluxed before I start anything else. That way I don't spend any time or money on anything until I know the bore size, what the crank condition is, and what it might need to be turned to. Or if anything is cracked in the block too!
My Camaro had a cracked block when I rebuilt the engine back in 1999, and had I spent any time on labor or materials it would have gone for nothing once I found the block was bad.
Don't reuse the rings for sure! They're not worth reusing and wont cost much to replace. Also when cleaning the pistons I just clean them in a solvent tank, then use a piece of one of the old rings to clean inside the grooves.
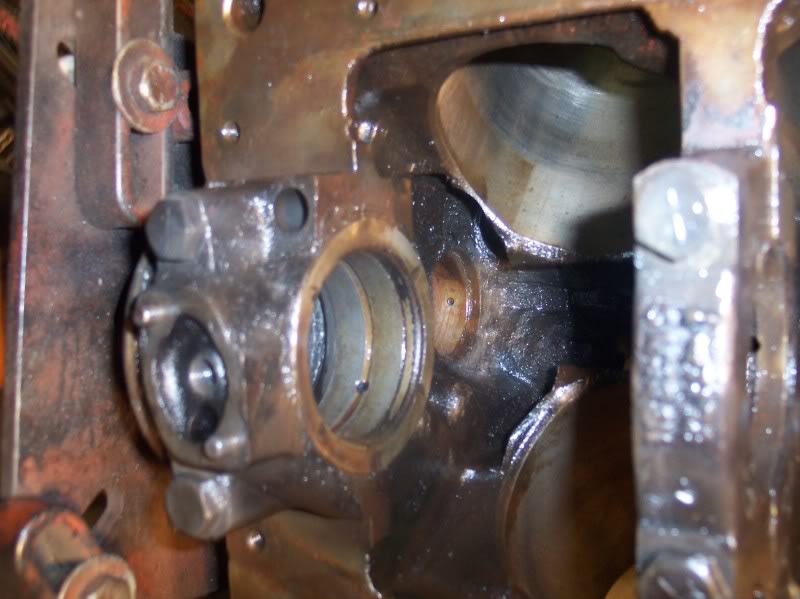
Have you pulled the bearings yet to see what size they are on the backside? There's a few spots on the crank throws that look questionable to me; might just be the light or dirt, but odd looking.
My Camaro had a cracked block when I rebuilt the engine back in 1999, and had I spent any time on labor or materials it would have gone for nothing once I found the block was bad.
Don't reuse the rings for sure! They're not worth reusing and wont cost much to replace. Also when cleaning the pistons I just clean them in a solvent tank, then use a piece of one of the old rings to clean inside the grooves.
Have you pulled the bearings yet to see what size they are on the backside? There's a few spots on the crank throws that look questionable to me; might just be the light or dirt, but odd looking.
Last edited by 1971BB427; Apr 16, 2011 at 11:49 PM.
Overdrive Member
Joined: Nov 2009
Posts: 4,848
From: off the grid
The valve seats might be a problem. I'm not old enough to have ever pumped leaded fuel so I can't say they'll live long without it. The journals look kind of dull, did you wire wheel them too?
For your block. You can lock you kids in the house and the go about using muratic acid to clean the snot out of that block. Were gloves and don't breath it. Do it outside. I just used it at work last week to clean zinc off some machine components. That was on Friday. Monday morning everything in the close area had surface rust on it. I'm talking 15' radius. Fill the water passages up with that and they'll be clean for sure.
For your block. You can lock you kids in the house and the go about using muratic acid to clean the snot out of that block. Were gloves and don't breath it. Do it outside. I just used it at work last week to clean zinc off some machine components. That was on Friday. Monday morning everything in the close area had surface rust on it. I'm talking 15' radius. Fill the water passages up with that and they'll be clean for sure.
Thread Starter
|
3rd Gear Member
Joined: Sep 2009
Posts: 1,062
From: Morris, IL
As for the crank throws, when I pulled it apart, everything looked like all the pictures of perfect that I've ever seen. I really feel good about everything there, but I need to read about checking things with a mic, etc. It very possibly could be bone stock, and it is likely that it is.
Keeping in mind here, that I really don't mean for this to be a final engine, I don't really want it to cost me a fortune. I don't mind tinkering with it to a point, putting time into it to practice some things and do a bit of learning, like chamfering the oil passages. If it is going to be a monetary drain, I'll do just that with it, and save up for a bigger engine. I do have a line on a 350 with a brand new crank, rods, and pistions, new rings and bearings, all the machine work done, essentially ready to go. It has been sitting though, so it would probably require getting pulled back apart and relubed up at the minimum. With that new engine he also has a set of Vortec heads, fresh from the machine shop, cut for larger springs, new valves, springs etc. I can get all that for $900. Seems like a very good starting point to me, but I need to save for it.
Originally Posted by 77nomad
The valve seats might be a problem. I'm not old enough to have ever pumped leaded fuel so I can't say they'll live long without it. The journals look kind of dull, did you wire wheel them too?
For your block. You can lock you kids in the house and the go about using muratic acid to clean the snot out of that block. Were gloves and don't breath it. Do it outside. I just used it at work last week to clean zinc off some machine components. That was on Friday. Monday morning everything in the close area had surface rust on it. I'm talking 15' radius. Fill the water passages up with that and they'll be clean for sure.
For your block. You can lock you kids in the house and the go about using muratic acid to clean the snot out of that block. Were gloves and don't breath it. Do it outside. I just used it at work last week to clean zinc off some machine components. That was on Friday. Monday morning everything in the close area had surface rust on it. I'm talking 15' radius. Fill the water passages up with that and they'll be clean for sure.
I didn't go after the crank throws with the wire wheel, I may have bumped them occasionally though I am sure. I know that they are supposed to have a nice pattern to them. But I did clean the crank up with paint thinner once I was done wheeling on it. I think that dulled it up for sure.
Overdrive Member
Joined: Nov 2009
Posts: 4,848
From: off the grid
I wouldn't scream at you. LOL I said I didn't know how long they would last because I really have no idea about that stuff. I know you duplicate your posts for Nasty, it can be tough over there. Some guys have multiple magazine cars. Dollars are common thing like french fries to them.
So here's what I'd do in your shoes. By a bearing set and ring set. Maybe rod bolts if you wanna spin it high. 45 bucks is cheap insurance here. Your cam bearings are probably toast but as you said no one in town to replace them, so leave them. The 100+ for the tool isn't worth it for you. Oil pressure may suffer, it may not. Get a reasonable cam and run what ever head was on there to begin with. Toss in a cheap set of "Z28" springs and ballpark the installed height with a set of calipers. Spring height is a big deal to me and its cheap to set. Put it all back together with a Performer RPM (because it likes more RPM) and a 650 carb. I'm sure this could be done for less than 500 bucks if you have a carb already.
So here's what I'd do in your shoes. By a bearing set and ring set. Maybe rod bolts if you wanna spin it high. 45 bucks is cheap insurance here. Your cam bearings are probably toast but as you said no one in town to replace them, so leave them. The 100+ for the tool isn't worth it for you. Oil pressure may suffer, it may not. Get a reasonable cam and run what ever head was on there to begin with. Toss in a cheap set of "Z28" springs and ballpark the installed height with a set of calipers. Spring height is a big deal to me and its cheap to set. Put it all back together with a Performer RPM (because it likes more RPM) and a 650 carb. I'm sure this could be done for less than 500 bucks if you have a carb already.
Second Generation Moderator
Feb 2010 ROTM winner
Jan 2013 ROTM winner
Feb 2010 ROTM winner
Jan 2013 ROTM winner
Joined: Aug 2008
Posts: 9,097
From: Portland, Or
ROTM Winner's Club
Steve, crank throws sould not have any "pattern" on them. Every crank I ever had turned and polished came back with a mirror finish on the throws and mains. As for the valve seats, I asked the machine shop when I had my last set done if I should go to hardened seats and they told me I'd probably go 30-40,000 miles with stock seats, where hardened will do twice that with ease. For my situation of about 2,000 a year I figured I'd be dead before they need new seats.
No reason to pull the pistons off the connecting rods if all is OK.
No reason to pull the pistons off the connecting rods if all is OK.

