
'63 Falcon project


Thread Starter
|
Second Generation Moderator
Feb 2010 ROTM winner
Jan 2013 ROTM winner
Feb 2010 ROTM winner
Jan 2013 ROTM winner
Joined: Aug 2008
Posts: 9,097
From: Portland, Or
ROTM Winner's Club
Got a reprieve from the move today, so decided to just make up a few loose ends. Connected the hose lines at tank and fuel pump. Made up the front brake lines, and installed my pressure switch for brake lights. Installed my $1 swap meet gas door on the back of the car. Started chopping up the exhaust system to make it fit, but didn't get any welding done. Gave the newly dyed rear seat a couple coats of sealer. Man did the dye work great, and the seat looks like it was black since it was new! Not as shiny as the spray dye that didn't work; more natural.
Thread Starter
|
Second Generation Moderator
Feb 2010 ROTM winner
Jan 2013 ROTM winner
Feb 2010 ROTM winner
Jan 2013 ROTM winner
Joined: Aug 2008
Posts: 9,097
From: Portland, Or
ROTM Winner's Club
Yippee! Got our daughter moved today! She had lots of help, so we finished at noon today!
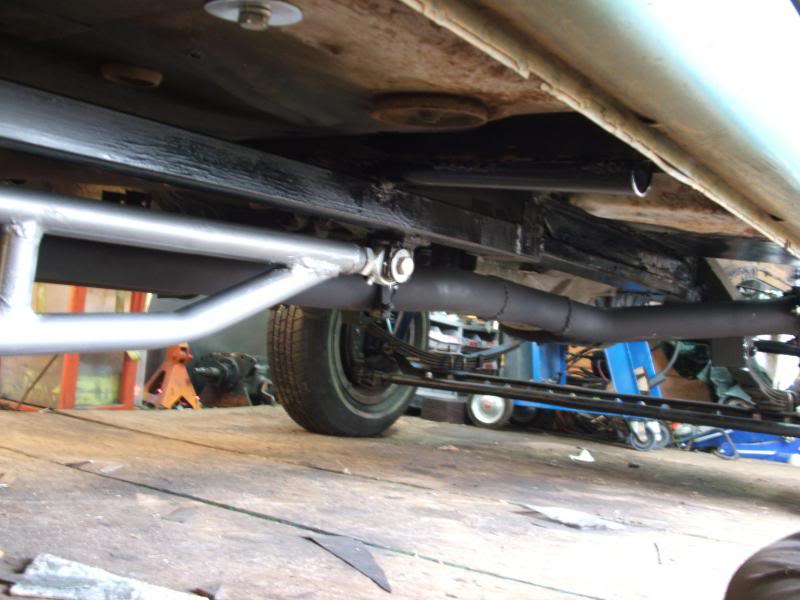
I ran home and started building up the 2.5" exhaust sytem for the Falcon. Only got one side tacked together, as my argon ran out. I think they shorted me, as it's only been a couple weeks, and I haven't welded that much. Stuck until Wed. now before I can do more than just tack the other side without gas.
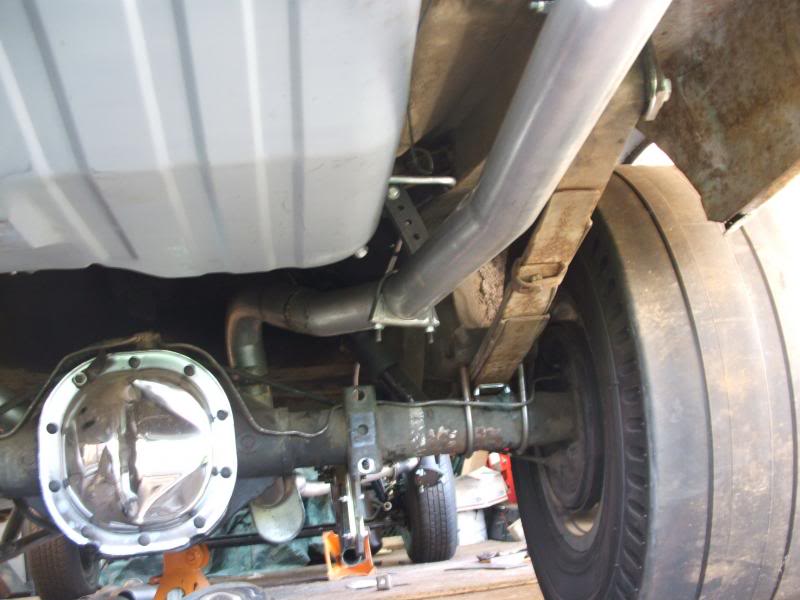
Holesawed the hole in the side of the collector with my bit for 2" EMT tubing, and the 2.5" exhaust fit in there like a glove! The Chevelle exhaust kit is turning out to be a good choice. I tossed the 180 degree bend that went over the rear axle out, and recut other pieces to make it work and fit better.
I used a couple old 3" collectors out of the 3.5" collector side to make the headers removeable from the exhaust system. That way I can uncap without removing the exhaust, and also remove headers by taking the inside collector loose.
I ran home and started building up the 2.5" exhaust sytem for the Falcon. Only got one side tacked together, as my argon ran out. I think they shorted me, as it's only been a couple weeks, and I haven't welded that much. Stuck until Wed. now before I can do more than just tack the other side without gas.


Holesawed the hole in the side of the collector with my bit for 2" EMT tubing, and the 2.5" exhaust fit in there like a glove! The Chevelle exhaust kit is turning out to be a good choice. I tossed the 180 degree bend that went over the rear axle out, and recut other pieces to make it work and fit better.
I used a couple old 3" collectors out of the 3.5" collector side to make the headers removeable from the exhaust system. That way I can uncap without removing the exhaust, and also remove headers by taking the inside collector loose.
Last edited by 1971BB427; May 25, 2013 at 10:00 PM.
Thread Starter
|
Second Generation Moderator
Feb 2010 ROTM winner
Jan 2013 ROTM winner
Feb 2010 ROTM winner
Jan 2013 ROTM winner
Joined: Aug 2008
Posts: 9,097
From: Portland, Or
ROTM Winner's Club
After helping my daughter with more settling in chores after her move, I went home and did a few things on the Falcon. Sanded the entire dash, and after careful masking of all the chrome, I gave it 4-5 coats of satin black.
It's ready now to install the reworked gauge cluster, new wiring harness, and electronics. Need to pick up a couple indicator lamps, as I still need turnsignal indicators before wiring the gauge cluster.
It's ready now to install the reworked gauge cluster, new wiring harness, and electronics. Need to pick up a couple indicator lamps, as I still need turnsignal indicators before wiring the gauge cluster.
Thread Starter
|
Second Generation Moderator
Feb 2010 ROTM winner
Jan 2013 ROTM winner
Feb 2010 ROTM winner
Jan 2013 ROTM winner
Joined: Aug 2008
Posts: 9,097
From: Portland, Or
ROTM Winner's Club
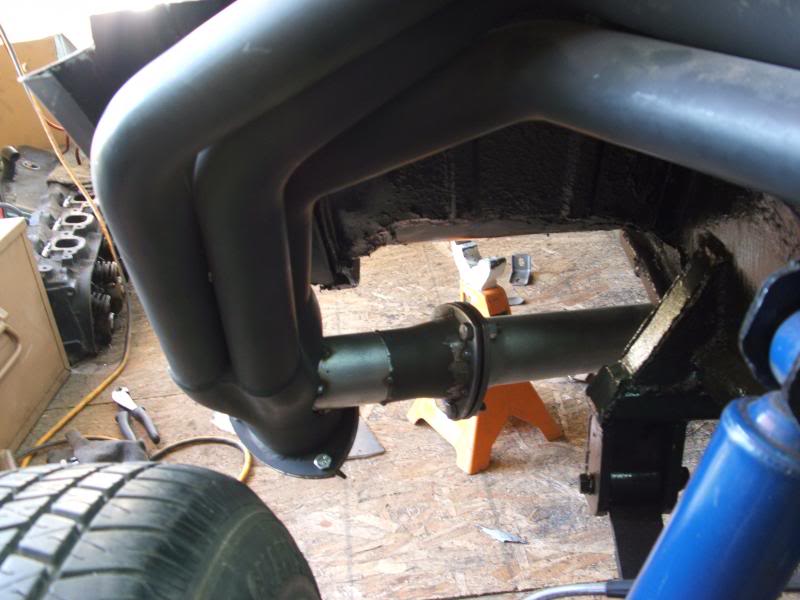
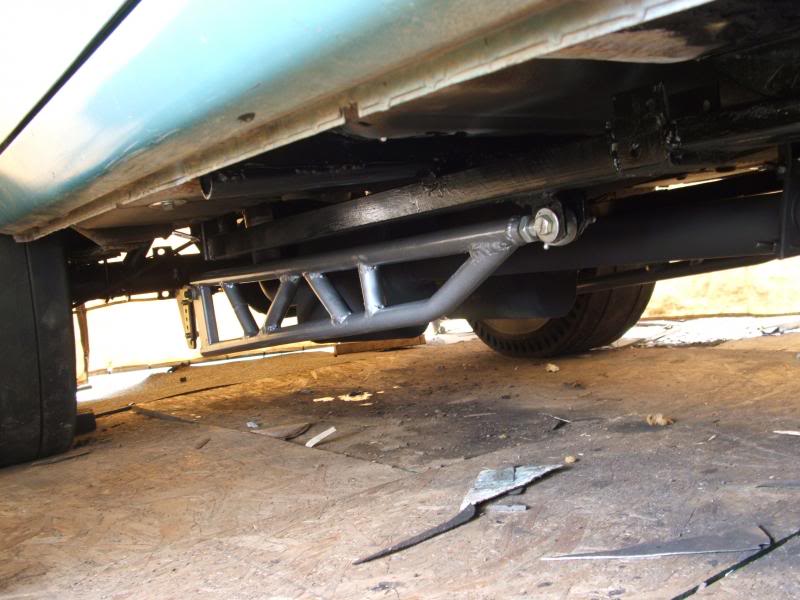
I got the driver's side completed today, and welded everything up solid. Tomorrow I'll shoot it all VHT black to help hide it, and then shoot the ladder bars Hammerite gray for contrast.
Thread Starter
|
Second Generation Moderator
Feb 2010 ROTM winner
Jan 2013 ROTM winner
Feb 2010 ROTM winner
Jan 2013 ROTM winner
Joined: Aug 2008
Posts: 9,097
From: Portland, Or
ROTM Winner's Club
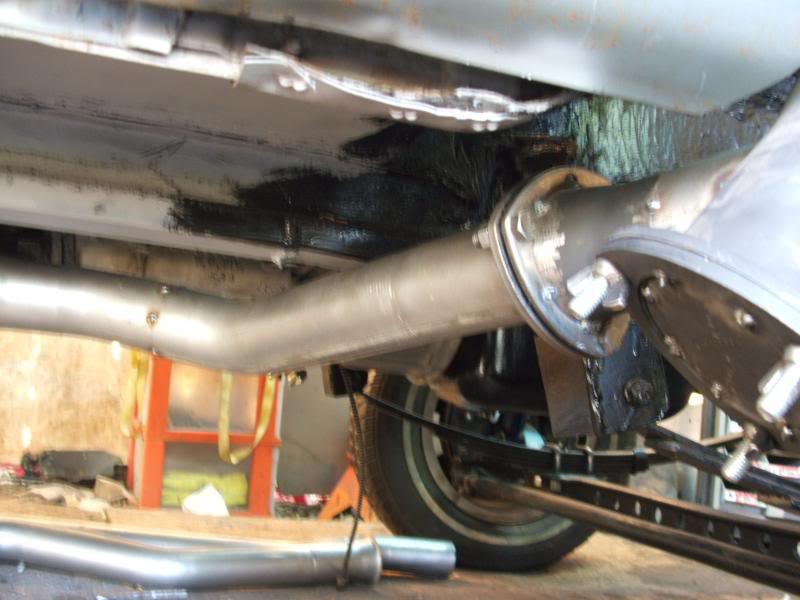
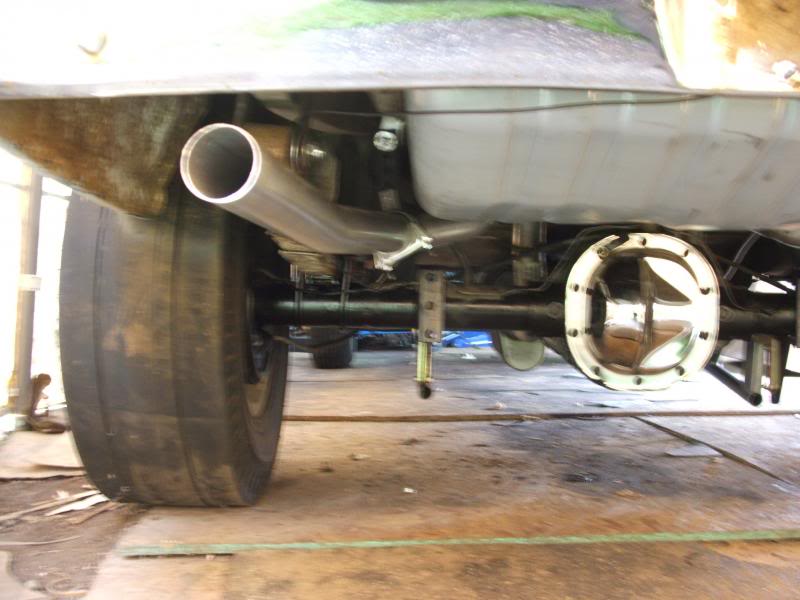
Got the exhaust painted and hung back up with gaskets, and the headers back on. Got the ladder bars off, painted and re-hung. Made up the rear brake connection. The Explorer brake line bolted right up to the Falcon old setup! Did some chassis painting in areas that I could get to while the exhaust was down. The rest will get done over the summer, or this fall.
Put my circuit tracer on the wiring to the back, and got all those identified, and marked when I start wiring! Also got my clutch adjuster built, and all that bolted up. Got to push the clutch in today for the first time! Fairly stout, but not as heavy feeling as I thought it might be.

Put my circuit tracer on the wiring to the back, and got all those identified, and marked when I start wiring! Also got my clutch adjuster built, and all that bolted up. Got to push the clutch in today for the first time! Fairly stout, but not as heavy feeling as I thought it might be.


Thread Starter
|
Second Generation Moderator
Feb 2010 ROTM winner
Jan 2013 ROTM winner
Feb 2010 ROTM winner
Jan 2013 ROTM winner
Joined: Aug 2008
Posts: 9,097
From: Portland, Or
ROTM Winner's Club
Thanks! Hope to start wiring today. Been putting it off, but can't wait any longer. It's a neccessary PIA.