
'63 Falcon project


Thread Starter
|
Second Generation Moderator
Feb 2010 ROTM winner
Jan 2013 ROTM winner
Feb 2010 ROTM winner
Jan 2013 ROTM winner
Joined: Aug 2008
Posts: 9,097
From: Portland, Or
ROTM Winner's Club
Sounds like it might hold up for Friday evening! The weekend looks crummy! Sure was great today!
Thread Starter
|
Second Generation Moderator
Feb 2010 ROTM winner
Jan 2013 ROTM winner
Feb 2010 ROTM winner
Jan 2013 ROTM winner
Joined: Aug 2008
Posts: 9,097
From: Portland, Or
ROTM Winner's Club
I banged out the yard work quickly, considering the back grass was getting pretty long! Then I ran out to my buddy's place to get the steering arm, and he had welded the tabs on backwards. So we cut them off again and welded them back on. His big old Miller 210 really penetrates this thick metal!
Got home and made up the spacers to locate the arm around the kingpin area, and the UPS guy showed up with my last DD to spline union! So I bolted up the steering arm, and cut my drag link to length, and welded the other bung on. Then I made up the last section of DD shaft and put the joint on it. The steering is finished!
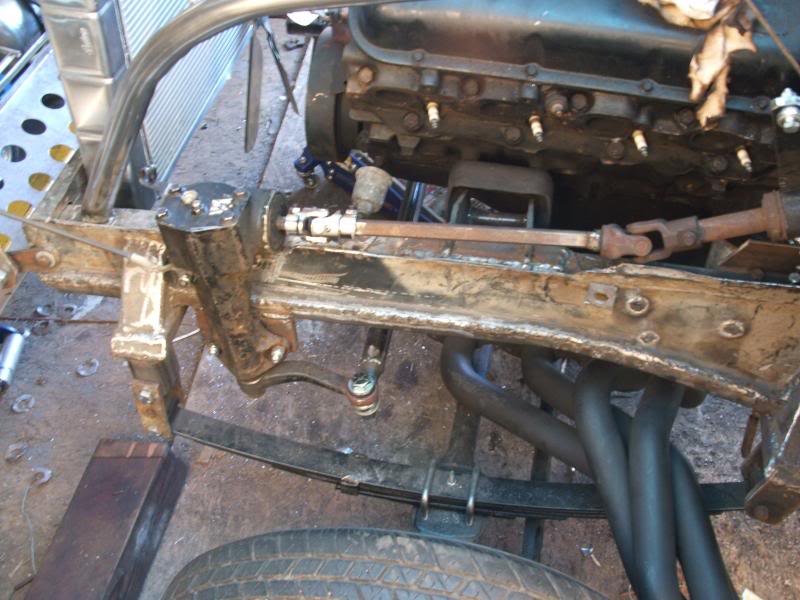
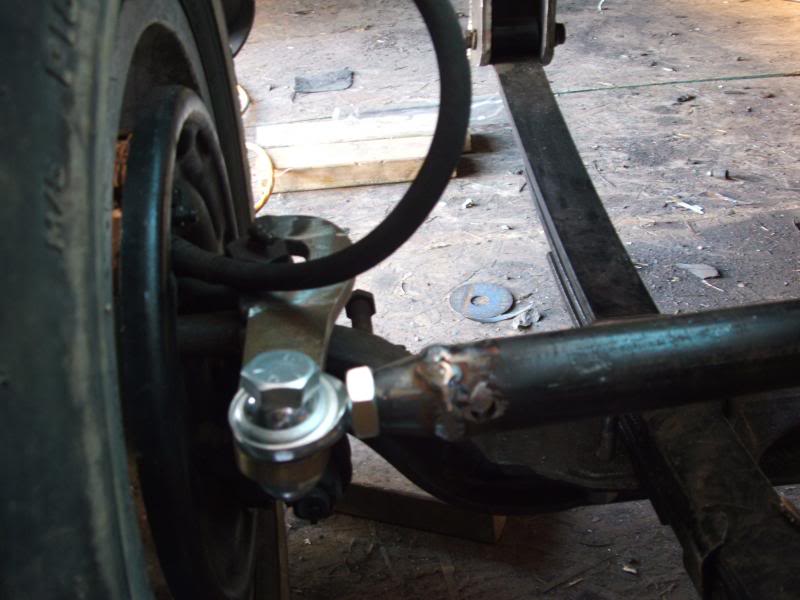
Plenty of clearance on the front of the pan, and the .120 wall tube is massive looking! Shouldn't have any flex at all in this 40" long drag link! It's darn near dead level too, so no bump steer problems!

Thread Starter
|
Second Generation Moderator
Feb 2010 ROTM winner
Jan 2013 ROTM winner
Feb 2010 ROTM winner
Jan 2013 ROTM winner
Joined: Aug 2008
Posts: 9,097
From: Portland, Or
ROTM Winner's Club
Changed things up today, and decided to go inside to interior. The backseat has been in the way, so I pulled it out and did some reworking. Pulled all the staples and hog rings, and got the sawzall out. I cut 4" off the top molded plastic frame, and 1" off each end. Then I cut all the excess foam off both areas and pulled the material back over and cut the excess off. Couldn't get enough off the top to get rid of the shoulder harness opening, but I'll have someone make me a couple tooled leather Chevy bowties, and put one over the hole, and the other over the same spot on the driver's side.
Changed things up today, and decided to go inside to interior. The backseat has been in the way, so I pulled it out and did some reworking. Pulled all the staples and hog rings, and got the sawzall out. I cut 4" off the top molded plastic frame, and 1" off each end. Then I cut all the excess foam off both areas and pulled the material back over and cut the excess off. Couldn't get enough off the top to get rid of the shoulder harness opening, but I'll have someone make me a couple tooled leather Chevy bowties, and put one over the hole, and the other over the same spot on the driver's side.

I'll also build a divider to the trunk area, so when I have them folded down for a cooler, it will close off the trunk from view.

I built 4 2" spacer blocks as risers for the back mounting points on the seats to get them more vertical. Just cut them at an angle so they bolt to the frames, but extend back a little to match up with the old seat holes. Then bolted in the front buckets too.
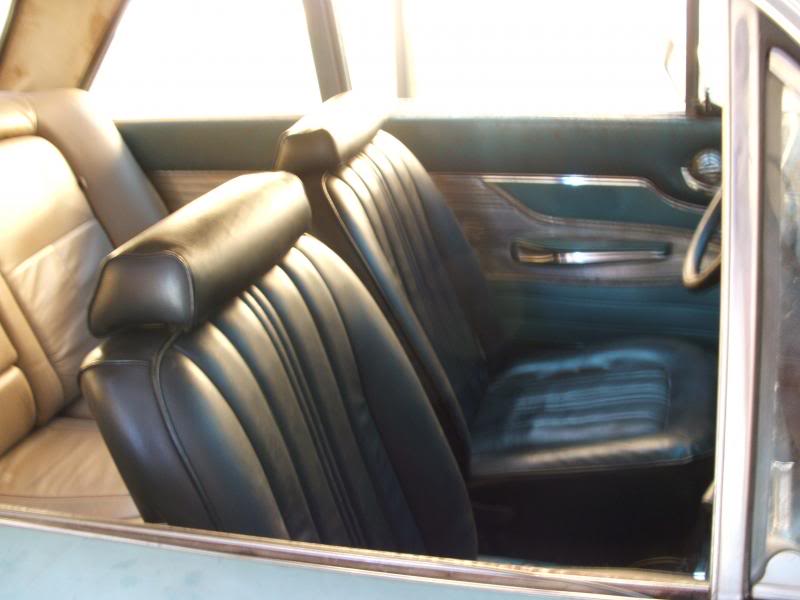
Of course it all will come out again to finish the interior, but need to do this stuff at least twice for mockup.
Thread Starter
|
Second Generation Moderator
Feb 2010 ROTM winner
Jan 2013 ROTM winner
Feb 2010 ROTM winner
Jan 2013 ROTM winner
Joined: Aug 2008
Posts: 9,097
From: Portland, Or
ROTM Winner's Club
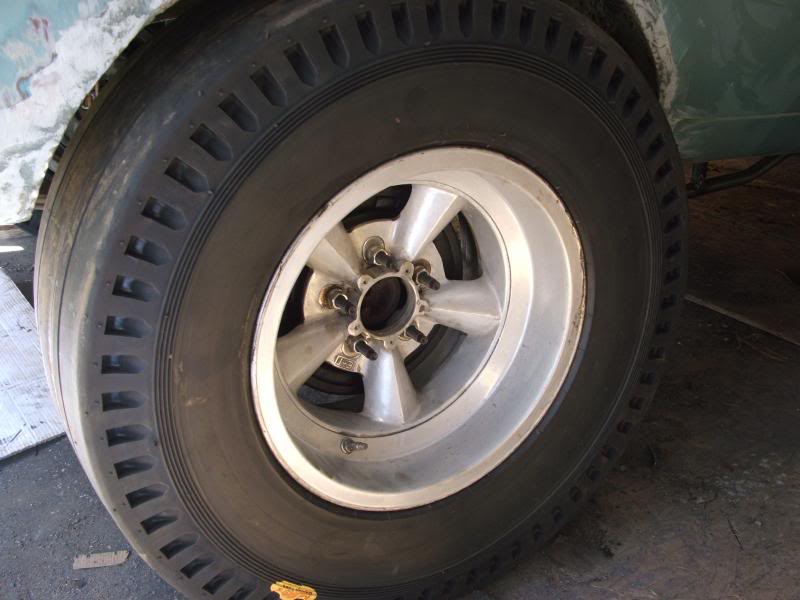
After getting back from the Henry J, I decided I'd assemble the front brakes, and install the 3" Milodon wheel studs all around. I got new drums, cylinders, and brakes with the axle, but no spring kits. Of course the springs were pretty rusty, and one broke on disassembly, so I had to go get a new hardware kit. The old studs were stuck so bad my 12 ton press groaned trying to press them out, and they flew out when they finally came loose!
I ended up spending so long putting it all together, cleaning, and parts runs, that I only got the front done. Hopefully the rear will go way faster/better tomorrow! Have to pull both axles to press the studs out and new in. Then I'll see how the rear brakes look, and if I need to replace them too.
The 3"x1/2" studs look relly good with the open end lugnuts though!
Thread Starter
|
Second Generation Moderator
Feb 2010 ROTM winner
Jan 2013 ROTM winner
Feb 2010 ROTM winner
Jan 2013 ROTM winner
Joined: Aug 2008
Posts: 9,097
From: Portland, Or
ROTM Winner's Club
Took the axles out today and pressed in the new 3" studs. Then I reassembled it all and sealed the cover, as I wont need in there again. I traced a center cap on some flat aluminum and drilled the 5 mounting holes in the pattern. I'll cut them out with a jigsaw and then finish them with a file to make blank flat plates for the rear mags. The aftermarket ones are stupid priced at about $20 ea., so I'd rather make my own and save the money.
After that I decided to drop the rear bumper and see if I could straighten the damage to the passenger side. I pressed it with my hydraulic press, but couldn't get into the areas I needed to. Decided to just put it on the ground and with two small sledgehammers and my homemade anvil I beat it into submission. It's still not perfect, but a lot better than it looked before! Quit early to get cleaned up for the cruise tonight.
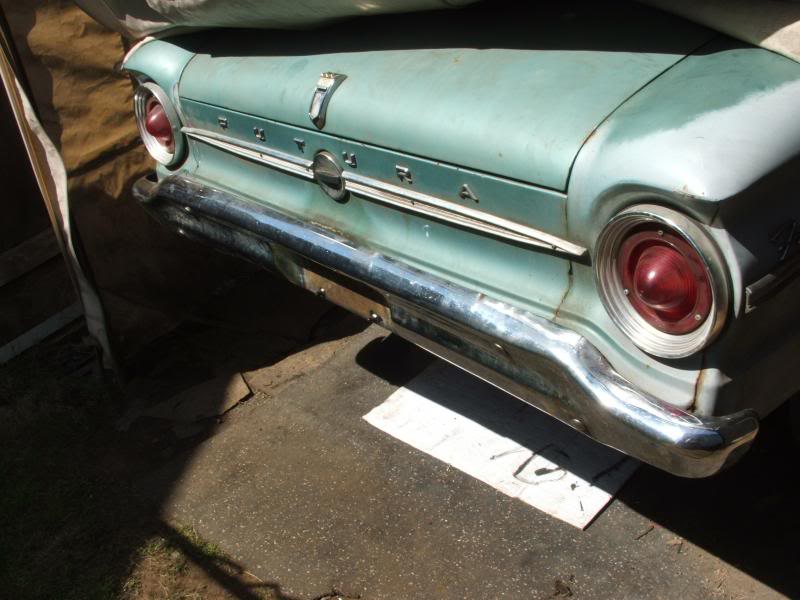

After that I decided to drop the rear bumper and see if I could straighten the damage to the passenger side. I pressed it with my hydraulic press, but couldn't get into the areas I needed to. Decided to just put it on the ground and with two small sledgehammers and my homemade anvil I beat it into submission. It's still not perfect, but a lot better than it looked before! Quit early to get cleaned up for the cruise tonight.

Thread Starter
|
Second Generation Moderator
Feb 2010 ROTM winner
Jan 2013 ROTM winner
Feb 2010 ROTM winner
Jan 2013 ROTM winner
Joined: Aug 2008
Posts: 9,097
From: Portland, Or
ROTM Winner's Club
Emptied out the trunk today, and started wire brushing the metal. Got it all cleaned out and vacuumed in a few hours, and then gave it a coat of black Rustoleum thorughout. Then I hammered and cut out a rusty dent on the driver's side trunk drop, and cut in a small repair panel I bent up for it.
About ready to haul the engine and trans back out and finish up the engine bay, and engine upgrades.
About ready to haul the engine and trans back out and finish up the engine bay, and engine upgrades.


 but I still miss the friggin Camaro.
Thread Starter
|
Second Generation Moderator
Feb 2010 ROTM winner
Jan 2013 ROTM winner
Feb 2010 ROTM winner
Jan 2013 ROTM winner
Joined: Aug 2008
Posts: 9,097
From: Portland, Or
ROTM Winner's Club
Your Camaro is already very nice!
