
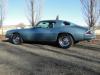
'63 Falcon project


Thread Starter
|
Second Generation Moderator
Feb 2010 ROTM winner
Jan 2013 ROTM winner
Feb 2010 ROTM winner
Jan 2013 ROTM winner
Joined: Aug 2008
Posts: 9,097
From: Portland, Or
ROTM Winner's Club
Thanks Slick!

Thread Starter
|
Second Generation Moderator
Feb 2010 ROTM winner
Jan 2013 ROTM winner
Feb 2010 ROTM winner
Jan 2013 ROTM winner
Joined: Aug 2008
Posts: 9,097
From: Portland, Or
ROTM Winner's Club
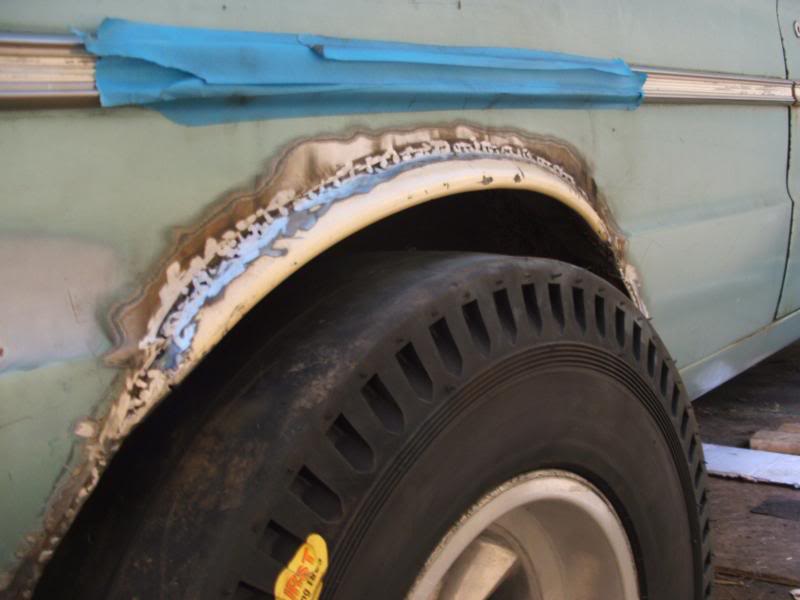
As easy as the front fender cut was, the rear openings were torture! I pcked up the Hurst slicks today, and had them mounted up. Then I started laying out the opening to make my cuts. I probably laid it out 6-7 times, and still didn't feel comfortable with what I had.
I tried laying it out with the tire sitting next to the opening. Then tried a homemade compass with a felt pen attached to the end. Then I tried freehanding it with the tire as a guide. Finally laid the tire on a piece of cardboard and measure half the diameter plus a few inches to get 18". Marked the 18" from the edge of the cardboard, and set one edge of the tire on the mark. Drew around the tire, then added 1" either side for clearance, and drew in a curve that met the 18" mark. I cut out the pattern and used it to trace on each side, but had to scotchbrite the multiple other lines off so I wasn't confused on which to cut!
After marking it all out I held the tire up to it, and realised that 3" above was too much once I added air to my air shocks in back, and it might rise! So I went back to just 1" all around the tire and cut a new pattern. This was driving me nuts at this point, so I just jumped in and cut the passenger side, as it looked the best. After cutting it I took it to the driver's side and flipped it over and penciled around the edge. Then I laid the cardboard over the mark and used it to mark the final cut.
After all the measuring, marking, worrying, I still had to trim the driver's side a little more to match the passenger side better. But I did finally get them to match, and look good.
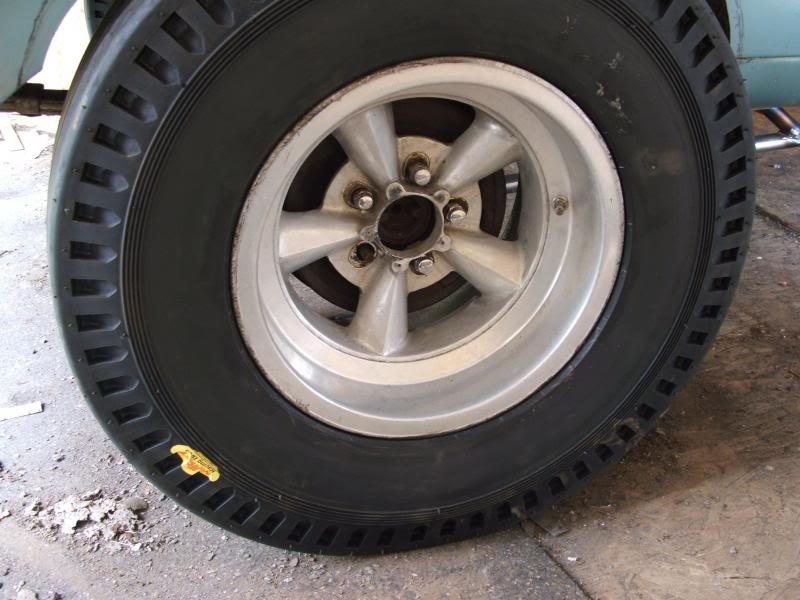
Here's the new Hurst slicks mounted up:
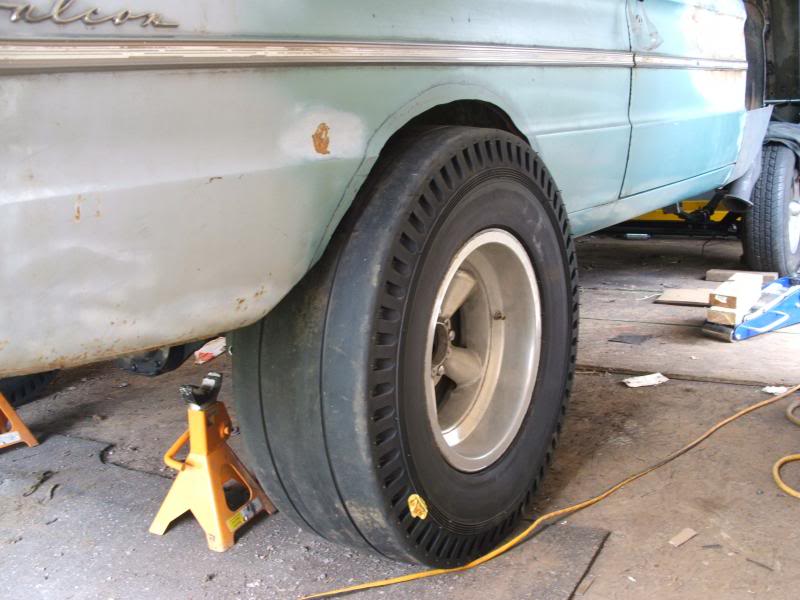
Here's the opening cut out and the new tires in place. You can see the pencil line where I was going to cut. Glad I stopped and cut it lower!:
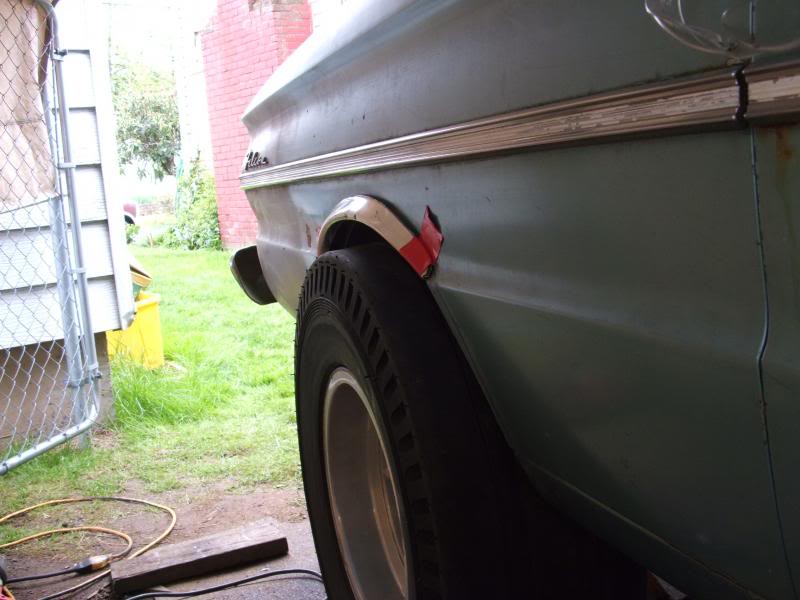
After some trimming and fitting, this is close to where the little Mercedes flares will sit on the opening when they're done:
I tried laying it out with the tire sitting next to the opening. Then tried a homemade compass with a felt pen attached to the end. Then I tried freehanding it with the tire as a guide. Finally laid the tire on a piece of cardboard and measure half the diameter plus a few inches to get 18". Marked the 18" from the edge of the cardboard, and set one edge of the tire on the mark. Drew around the tire, then added 1" either side for clearance, and drew in a curve that met the 18" mark. I cut out the pattern and used it to trace on each side, but had to scotchbrite the multiple other lines off so I wasn't confused on which to cut!
After marking it all out I held the tire up to it, and realised that 3" above was too much once I added air to my air shocks in back, and it might rise! So I went back to just 1" all around the tire and cut a new pattern. This was driving me nuts at this point, so I just jumped in and cut the passenger side, as it looked the best. After cutting it I took it to the driver's side and flipped it over and penciled around the edge. Then I laid the cardboard over the mark and used it to mark the final cut.
After all the measuring, marking, worrying, I still had to trim the driver's side a little more to match the passenger side better. But I did finally get them to match, and look good.
Here's the new Hurst slicks mounted up:

Here's the opening cut out and the new tires in place. You can see the pencil line where I was going to cut. Glad I stopped and cut it lower!:

After some trimming and fitting, this is close to where the little Mercedes flares will sit on the opening when they're done:


Thread Starter
|
Second Generation Moderator
Feb 2010 ROTM winner
Jan 2013 ROTM winner
Feb 2010 ROTM winner
Jan 2013 ROTM winner
Joined: Aug 2008
Posts: 9,097
From: Portland, Or
ROTM Winner's Club
Got a call from my buddy at the sheetmetal shop to tell me my lower valance was ready! Picked it up and got it fitted in place with zip screws. It will get welded in later, but I wanted to temporarily attach it to do the rest the frontend work.
After getting it attached I laid out a series of marks for cooling holes. I lined them up with the radiator to allow more air flow to reach the lower portion. Punched them with my knockout set, and as I was punching holes I noticed the punch die had intials from my grandfather on it! My dad gave me these punches when he retired, and I entered the electrical trade, but never realised he'd gotten them from his father in law. So I guess they both were giving me an assist today!
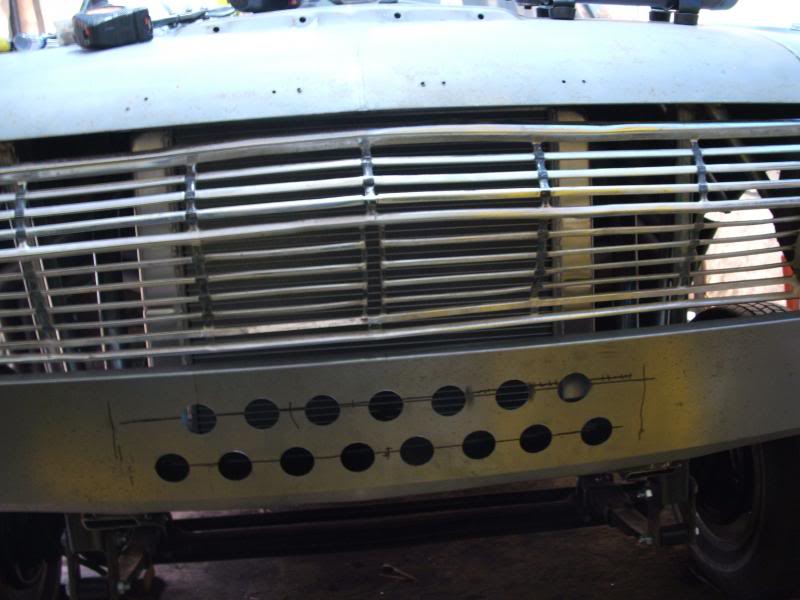
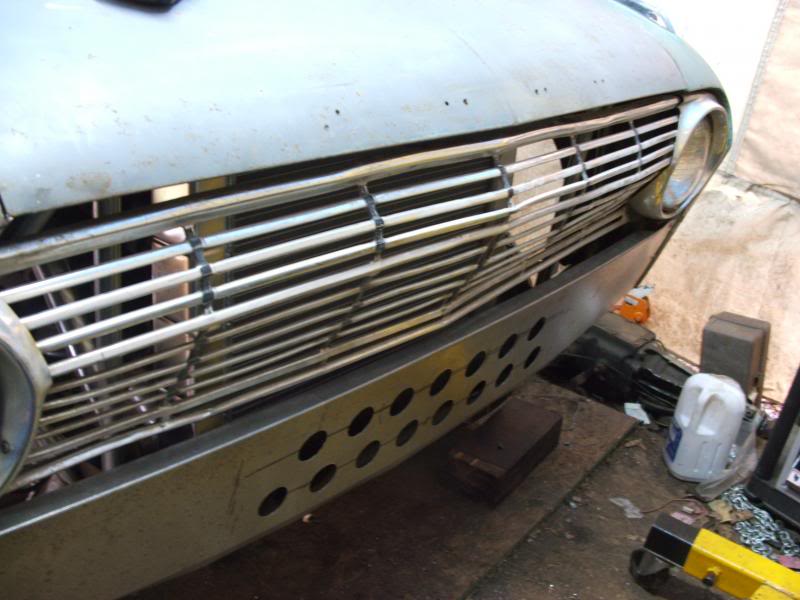
After getting the lower valance installed and the grille in, I fired up the angle grinder and used a parting wheel to remove a section of grille for the "Moon tank" that will be my radiator overflow. Then I made up mounting points and bolted the straps to the car, and reinstalled the tank.

The ends of the grille bars were a bit fragile, so I decided to make something to hold them all together. Cut up one of the leftover grille bars and after crimping the ends of each tube down a bit, the bar fit right over, and I crimped it at each horizontal bar with channel locks. That tightened everything right up, and cleaned up the ragged ends too!

Thread Starter
|
Second Generation Moderator
Feb 2010 ROTM winner
Jan 2013 ROTM winner
Feb 2010 ROTM winner
Jan 2013 ROTM winner
Joined: Aug 2008
Posts: 9,097
From: Portland, Or
ROTM Winner's Club
Spent a good portion of the day cutting, grinding, and fabricating the wheelwells. Cut up some 20ga strips 2" wide to patch inbetween the inner and outter wheelwells to span the opening, and welded the flares to the outside upper lip and the new filler piece.
Didn't like the shape of the rear edge on what was left of the old wheelwell opening, so I fabricated a filler panel behind the wheelwell to delete that following edge. Looks better with a nice round opening, and not that sweeping edge on the bottom.
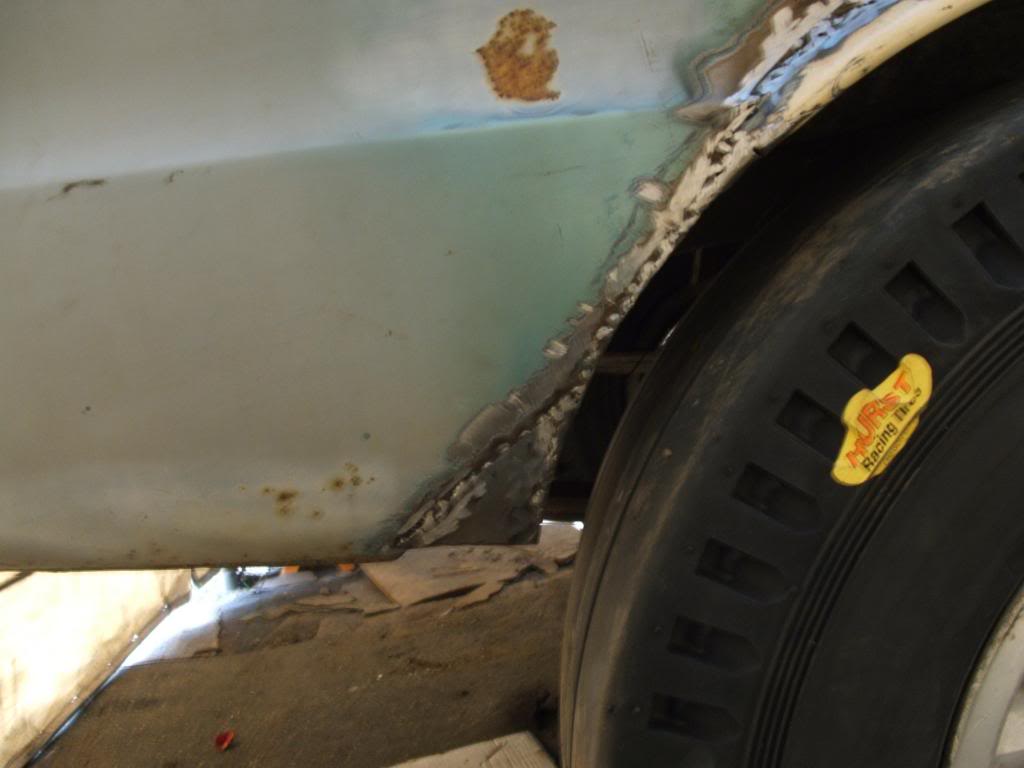
I love the fabricating, but sick and tired of the grinding and cutting. Those cutoff wheels take their toll on fingers, even with heavy gloves!