
1996 Camaro Z28 Project Thread


Thread Starter
|
May 2013 ROTM
Joined: May 2009
Posts: 1,671
From: Farmington Hills, MI
ROTM Winner's Club
Got some good stuff done today. The biggest thing was that I successfully replaced the driver's side window motor. I got SUPER lucky with that one. It had been replaced before, so I didn't have to drill out any rivets.
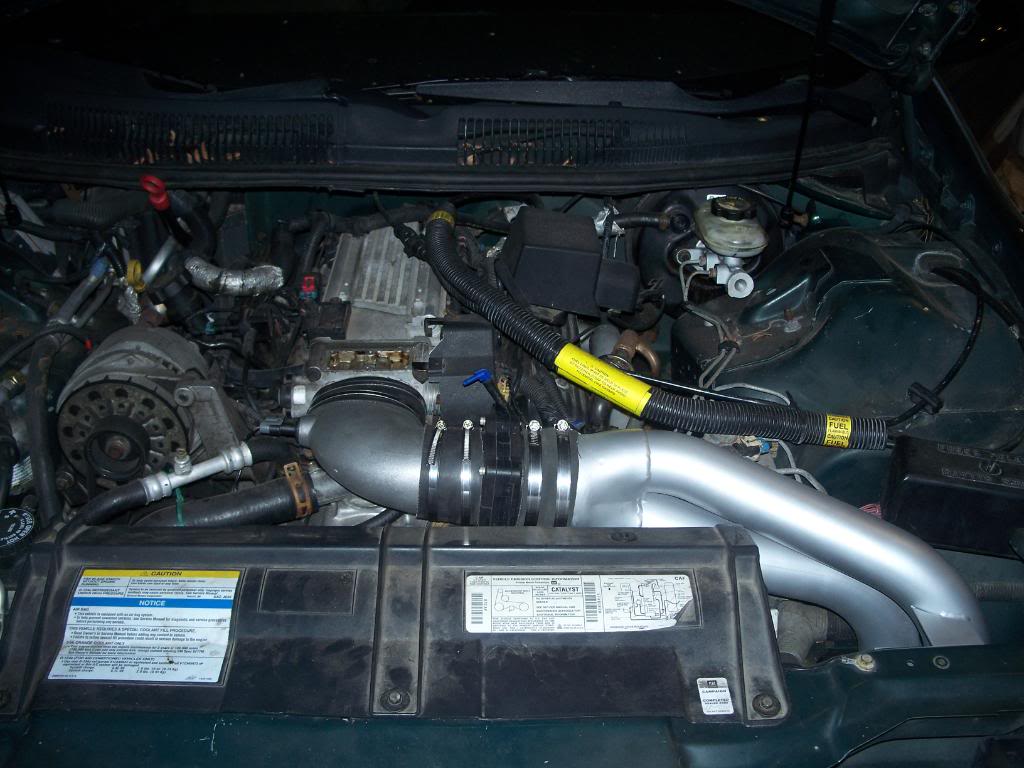
I got everything mocked up under the hood:

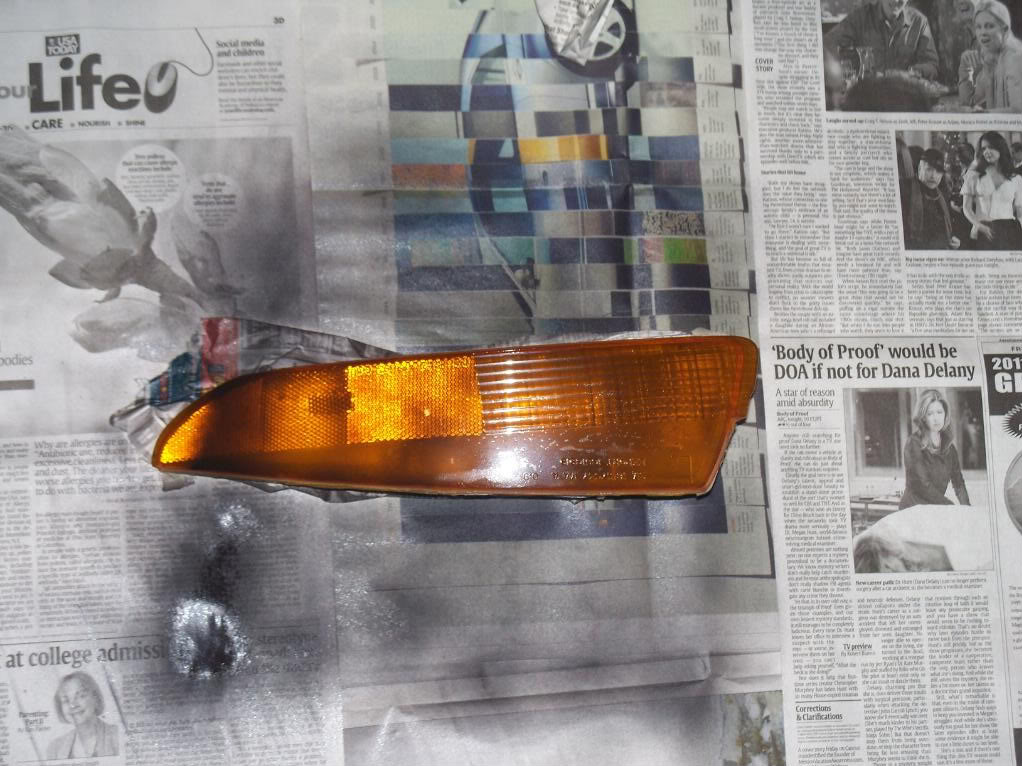
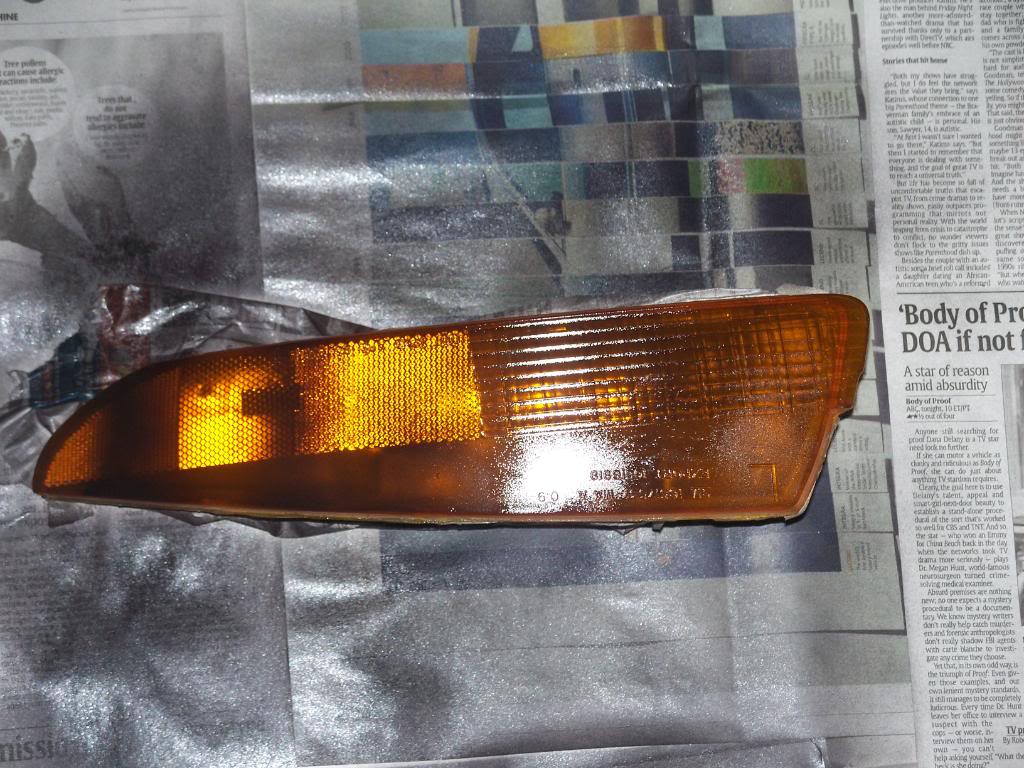
I also got to work tinting my turn signals.
At first:

then successive coats:
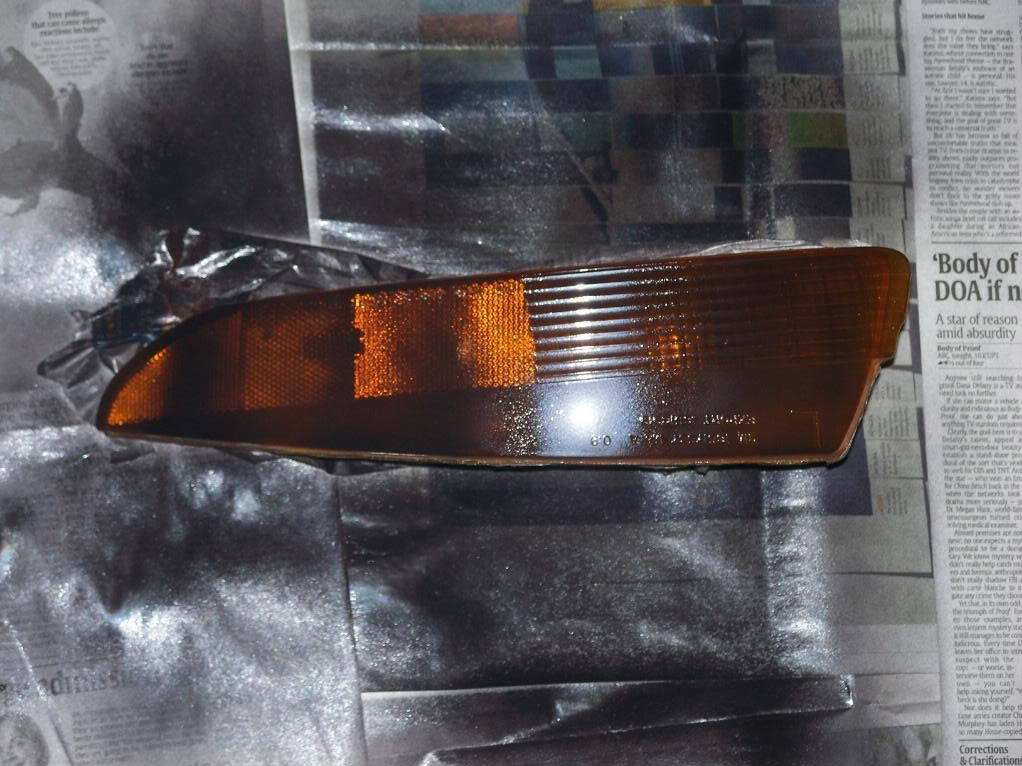
To show the contrast:
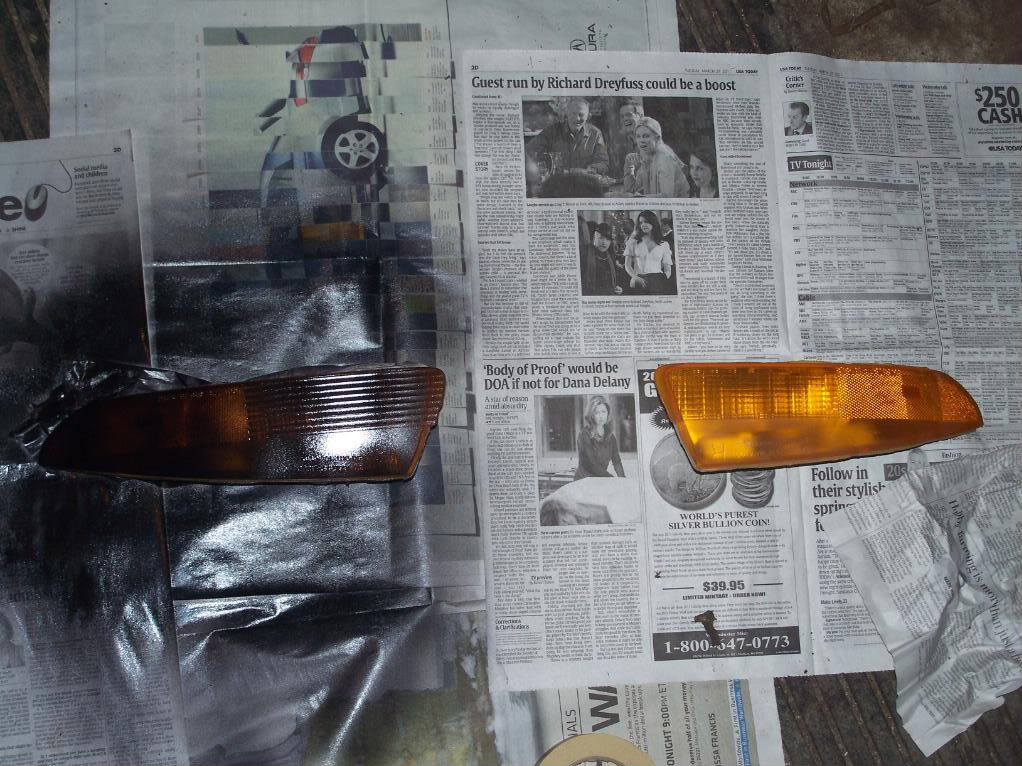
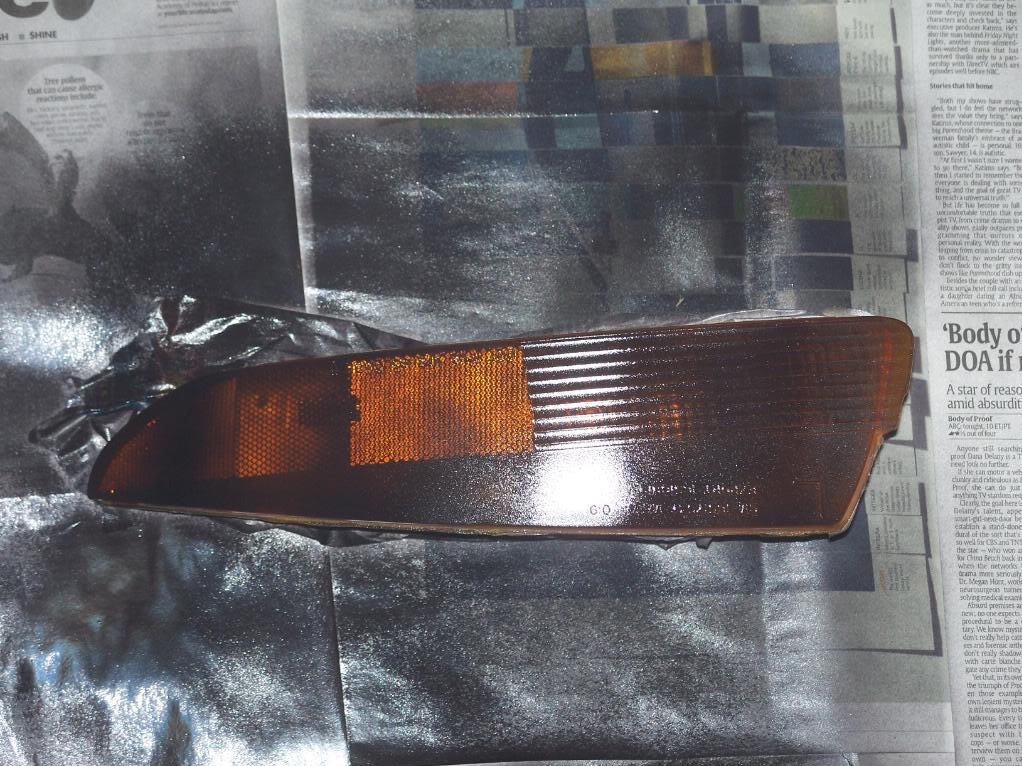
I've since applied two coats of clear coat. I'm not entirely pleased of how it looks so far. I feel like it should be smoother...
Anyway, tomorrow I will be doing the other one, then I'm going to get cranking on the suspension stuff. Which leads me to a question: is there a good way to remove the clothes hanger hooks in back? I always have a heck of a time getting the middle part out. Am I just doing it wrong, or is it a PITA no matter what?
I got everything mocked up under the hood:
I also got to work tinting my turn signals.
At first:
then successive coats:
To show the contrast:
I've since applied two coats of clear coat. I'm not entirely pleased of how it looks so far. I feel like it should be smoother...
Anyway, tomorrow I will be doing the other one, then I'm going to get cranking on the suspension stuff. Which leads me to a question: is there a good way to remove the clothes hanger hooks in back? I always have a heck of a time getting the middle part out. Am I just doing it wrong, or is it a PITA no matter what?
Thread Starter
|
May 2013 ROTM
Joined: May 2009
Posts: 1,671
From: Farmington Hills, MI
ROTM Winner's Club
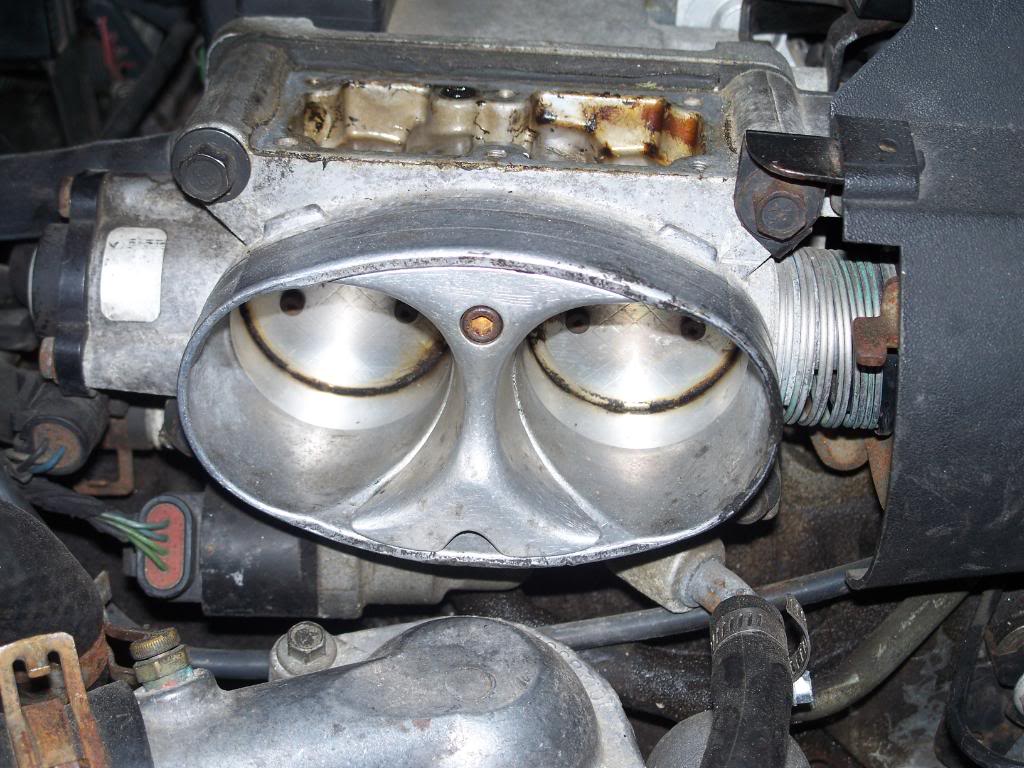
other than all the stupid niteshade stuff, I got a little bit done today. I finally got that nut in the mail, so I could install the throttle body airfoil:
I also installed the new intake elbow and CAI:
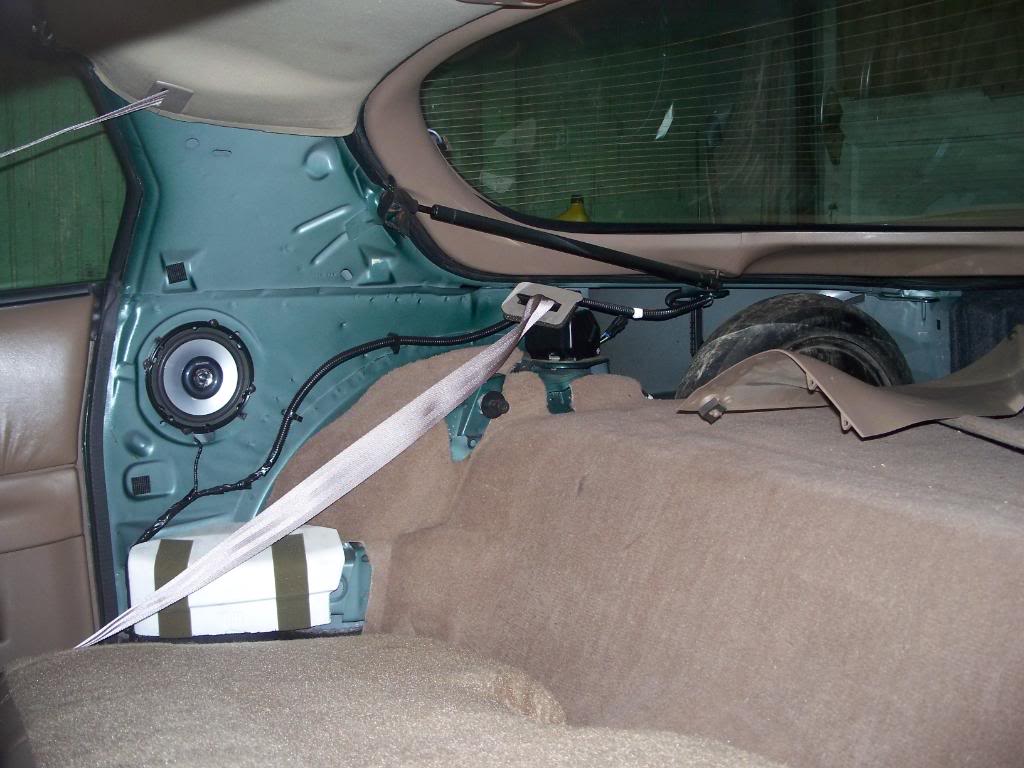
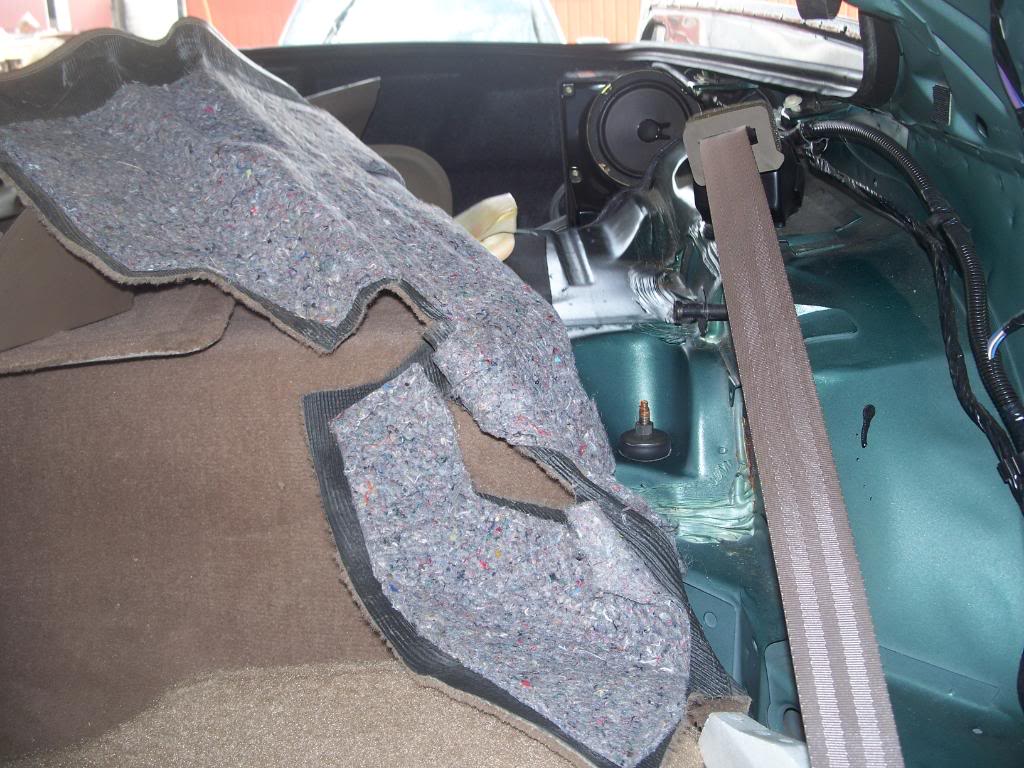
I also got the interior pretty much ripped apart enough to get at the top bolts for the rear shocks.
I also installed the new intake elbow and CAI:
I also got the interior pretty much ripped apart enough to get at the top bolts for the rear shocks.
Thread Starter
|
May 2013 ROTM
Joined: May 2009
Posts: 1,671
From: Farmington Hills, MI
ROTM Winner's Club
Got a lot done the last couple of days. First, I got the TB plate gasket in the mail, so I finally got it installed:

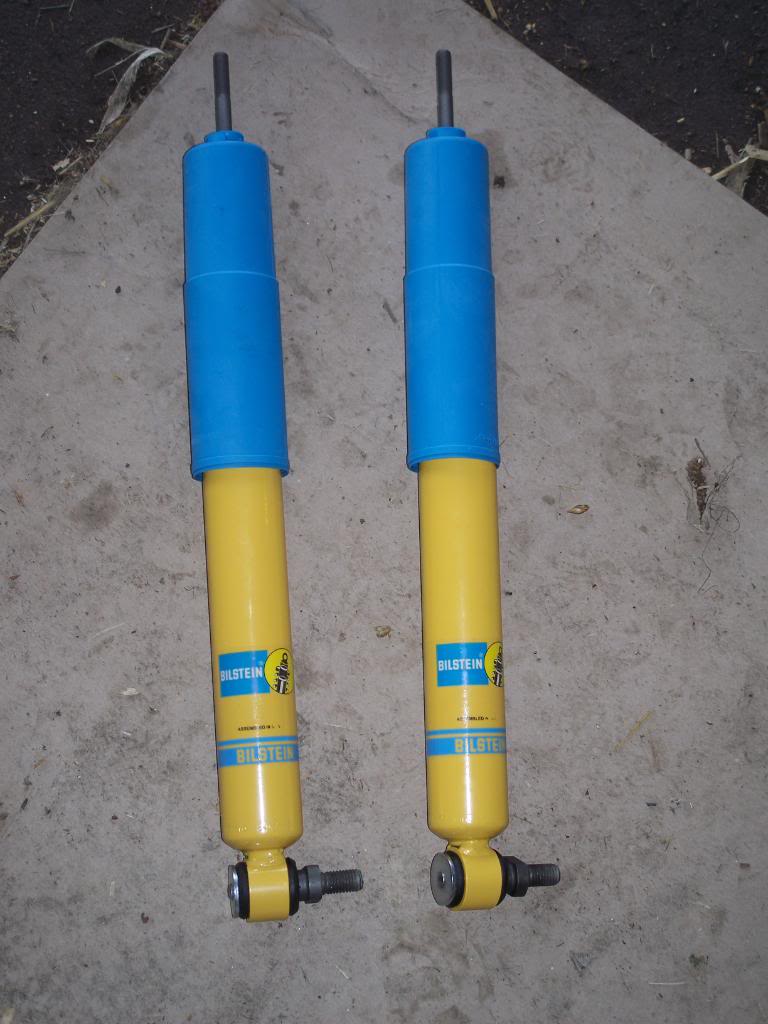
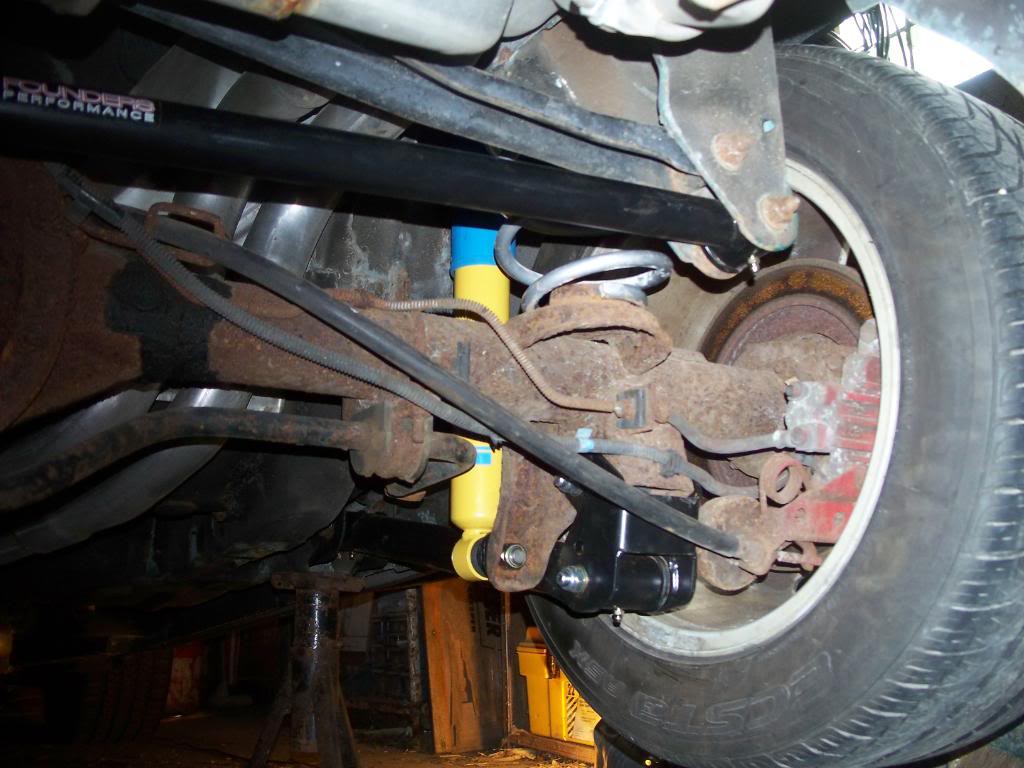
Then I got to serious work on the rear suspension. I got my SLP Bilsteins:
It was rather annoying that I had to tear the interior apart to get at the upper bolts, but I've done this before.
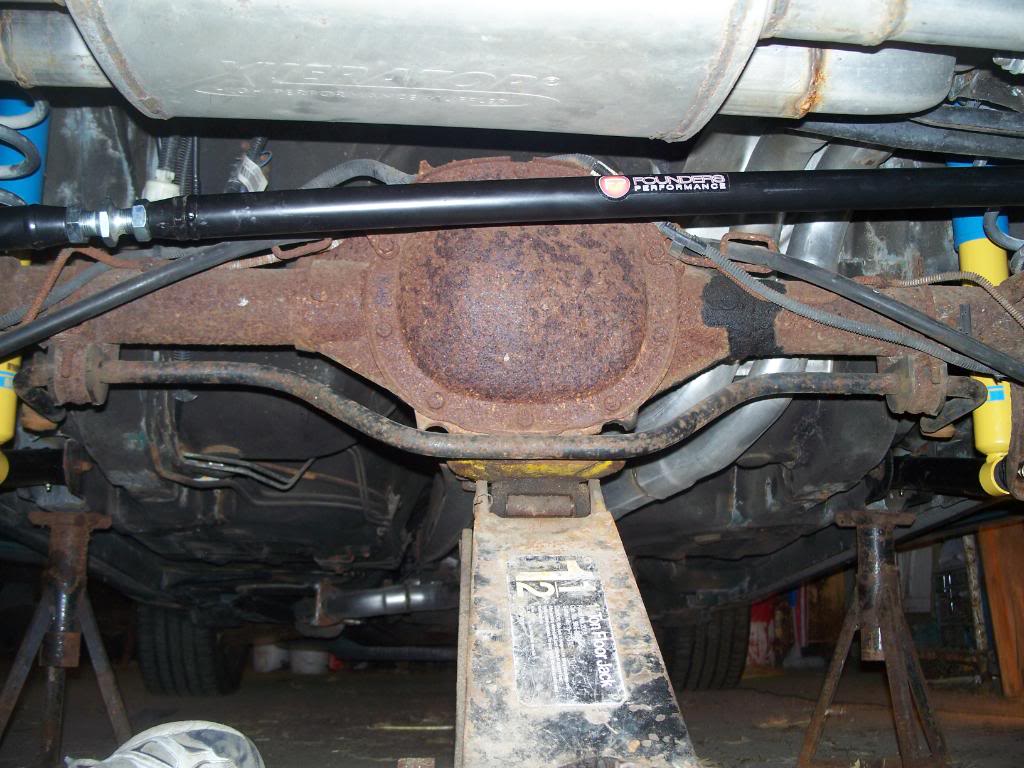
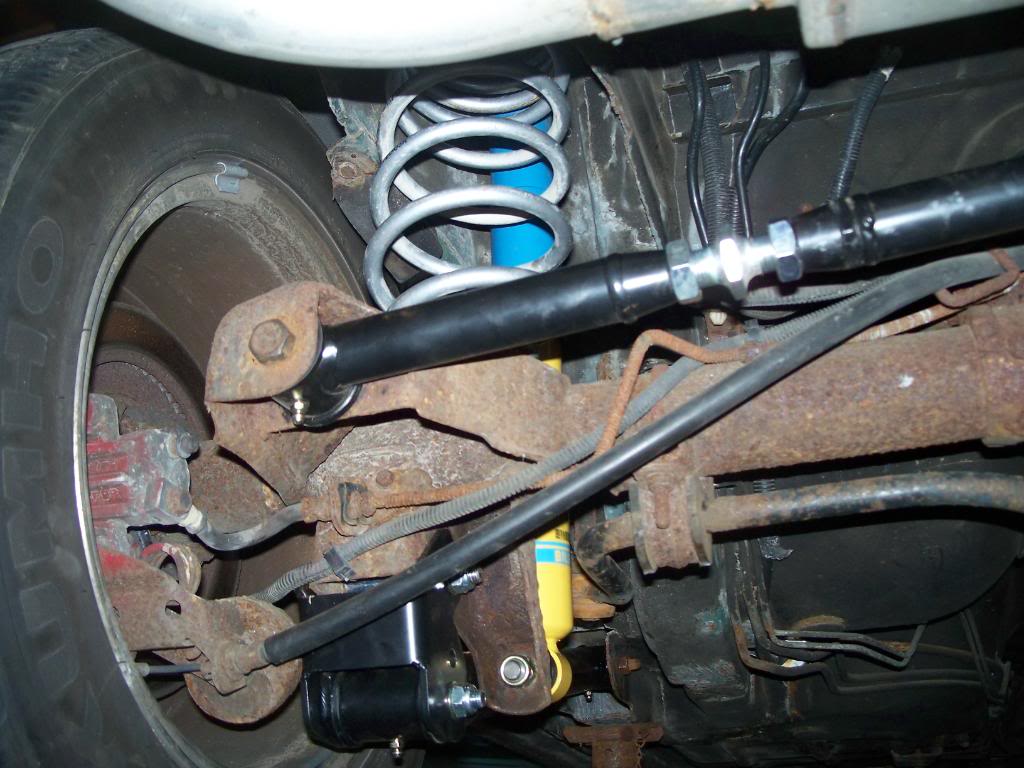
Fortunately my dad was out in the garage helping me this afternoon, so we got a lot done in not too much time. We installed the Bilsteins, Summit lowering springs, adjustable Panhard, LCAs, and relocation brackets:
I also finished up one of the turn signals. I'm much more pleased with how it turned out this time around:
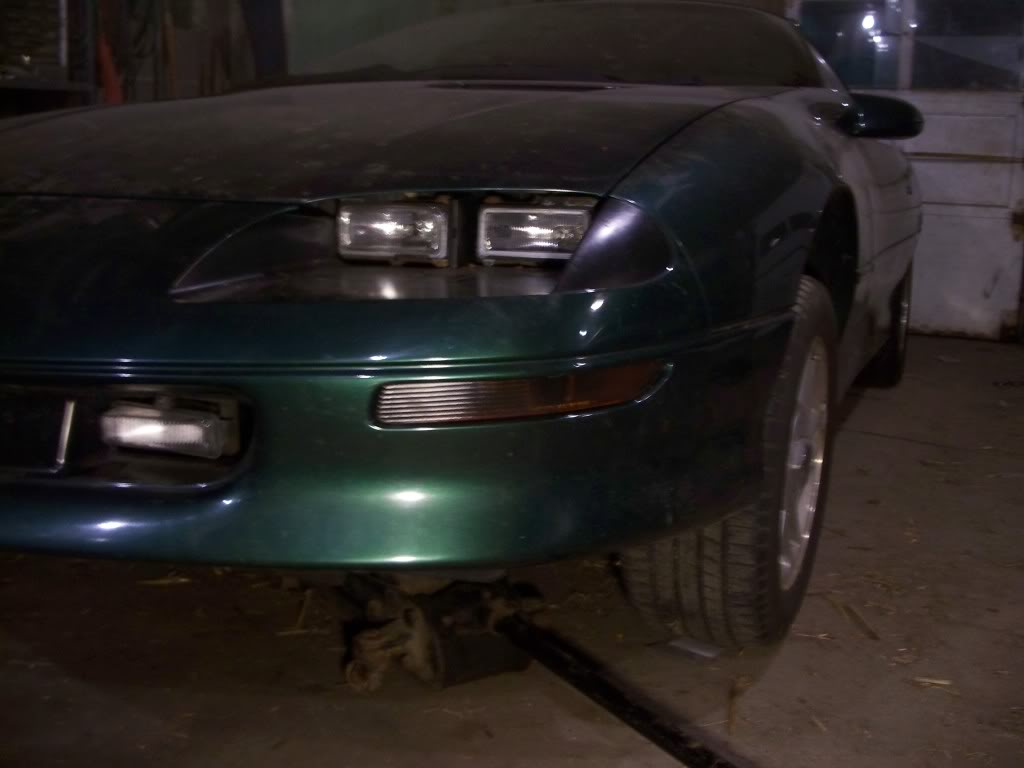
Kind of a crappy picture, but this is how it sits now, with stock front suspension and lowered in the back:

This week I need to finish the other turn signal (I applied the tint and clear today, I'll be in Chicago tomorrow so it will be finished on Tuesday or Wednesday). We will be taking the car to a local shop to install the front shocks and springs and give the car a 4-wheel alignment.
Then I got to serious work on the rear suspension. I got my SLP Bilsteins:
It was rather annoying that I had to tear the interior apart to get at the upper bolts, but I've done this before.
Fortunately my dad was out in the garage helping me this afternoon, so we got a lot done in not too much time. We installed the Bilsteins, Summit lowering springs, adjustable Panhard, LCAs, and relocation brackets:
I also finished up one of the turn signals. I'm much more pleased with how it turned out this time around:
Kind of a crappy picture, but this is how it sits now, with stock front suspension and lowered in the back:
This week I need to finish the other turn signal (I applied the tint and clear today, I'll be in Chicago tomorrow so it will be finished on Tuesday or Wednesday). We will be taking the car to a local shop to install the front shocks and springs and give the car a 4-wheel alignment.
Thread Starter
|
May 2013 ROTM
Joined: May 2009
Posts: 1,671
From: Farmington Hills, MI
ROTM Winner's Club
finished the other turn signal...turned out not as dark as the other one, but I'm hoping that you won't be able to tell the difference since they're on opposite sides of the car.
warning: dirty car is DIRTY

also dropped the car off to get the front Bilsteins and springs installed, and to get an alignment. Pretty much all I have to do yet is drill a hole in my intake elbow so I can put the opti vent hose into it.
warning: dirty car is DIRTY
also dropped the car off to get the front Bilsteins and springs installed, and to get an alignment. Pretty much all I have to do yet is drill a hole in my intake elbow so I can put the opti vent hose into it.

Thread Starter
|
May 2013 ROTM
Joined: May 2009
Posts: 1,671
From: Farmington Hills, MI
ROTM Winner's Club
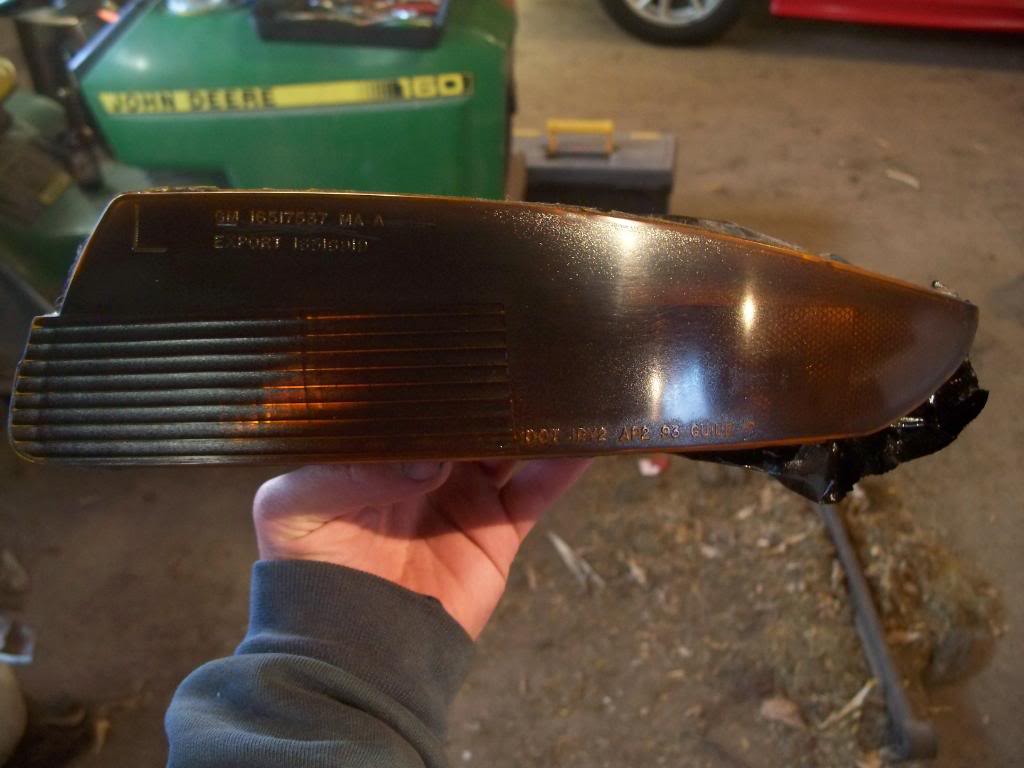
I cleaned them real well, sanded with 1000-grit, cleaned again, put four super-light coats of nightshade on, then followed up with 3 coats of clear, then wet-sanded with 1000-grit again. I then added Meguilar's polishing compound and Scratch-X. I think the lighter your coats of nightshade, the smoother it will look.
Thread Starter
|
May 2013 ROTM
Joined: May 2009
Posts: 1,671
From: Farmington Hills, MI
ROTM Winner's Club
everything's installed, and I made the 450-mile drive to Dearborn without significant issue...the only thing was that when I came to a stop, I heard sort of a squeaking noise...to my dismay, it was the mystery noise that I dealt with last summer. I thought it was my water pump, since it went out last summer and the noise went away after I replaced it. I'm really frustrated about it now. Also, my newly-lowered car scrapes the exhaust pipes on the speed bumps in my apartment complex. Awesome 

