
79 Camaro Project
#231
 04-28-2010 | 10:18 PM

Second Generation Moderator
Feb 2010 ROTM winner
Jan 2013 ROTM winner
Feb 2010 ROTM winner
Jan 2013 ROTM winner
Joined: Aug 2008
Posts: 9,097
From: Portland, Or
ROTM Winner's Club
I pulled the swivel pad off my floor jack and bolted a piece of 3/4" plywood to the center that was just large enough to allow the straps to situate on each side. Then just jacked the tank up into place and bolted the straps on.

#233
04-28-2010 | 10:50 PM
Thread Starter
|
3rd Gear Member
Joined: Sep 2009
Posts: 1,062
From: Morris, IL
If I have to pull that tank back out for any reason I'll be coming up with something that is for sure. It really should not have been that hard. The tank straps were also a bit bent up so it was hard getting them to where they needed to go. I am kicking around pulling one side off at a time before it is all said and done and putting a bit of rubber between the tank and the straps too. I haven't paid much attention to other peoples pics to see if they have them there or not, but I figure it can't hurt.
When I was looking for plans on building a home made tumbler, I found some ideas actually at some SHTF websites by guys who did reloading. I'll probably end up buying one sometime. I can see it being handy to have. I do have some guns, and if I could ever get myself out to shoot them I would eventually like to be able to reload the shells. At the moment I have no idea how, but I don't think that having a gun and not knowing how to reload makes much sense. Those SHTF people have some good points, they are usually just a bit off their rocker.
When I was looking for plans on building a home made tumbler, I found some ideas actually at some SHTF websites by guys who did reloading. I'll probably end up buying one sometime. I can see it being handy to have. I do have some guns, and if I could ever get myself out to shoot them I would eventually like to be able to reload the shells. At the moment I have no idea how, but I don't think that having a gun and not knowing how to reload makes much sense. Those SHTF people have some good points, they are usually just a bit off their rocker.
#234
04-28-2010 | 11:00 PM
Second Generation Moderator
Feb 2010 ROTM winner
Jan 2013 ROTM winner
Feb 2010 ROTM winner
Jan 2013 ROTM winner
Joined: Aug 2008
Posts: 9,097
From: Portland, Or
ROTM Winner's Club
Im unsure what SHTF is? I reload also, and it's a necessity if you shoot much nowadays. Ammo is way too spendy, especially for obsolete 1800's rifles.

#236
04-29-2010 | 10:00 PM
Thread Starter
|
3rd Gear Member
Joined: Sep 2009
Posts: 1,062
From: Morris, IL
Black is very nice, I would go black in a heartbeat, but my wife and I really want a darker silver color. We found a Ford color, Sterling grey metallic that we like, and thinking Satin Black stripes. I think it will be good like that.
#237
04-29-2010 | 10:09 PM
Thread Starter
|
3rd Gear Member
Joined: Sep 2009
Posts: 1,062
From: Morris, IL
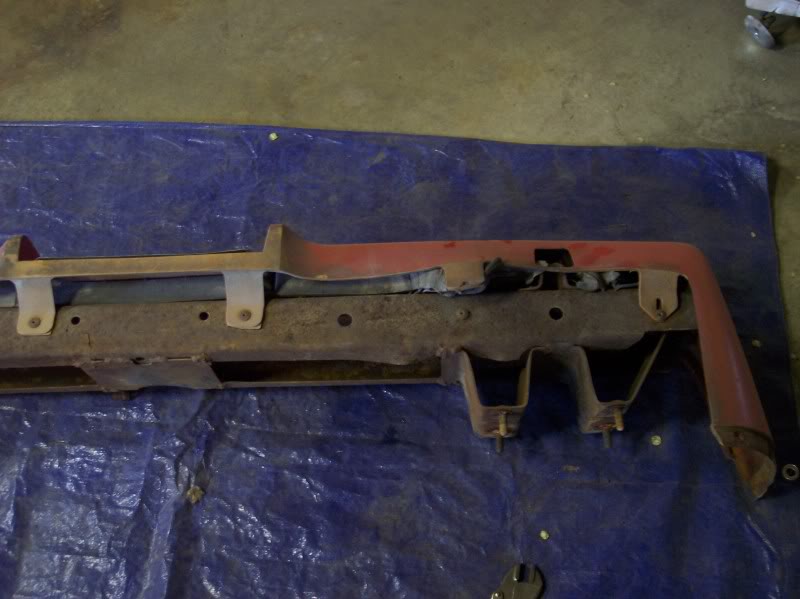
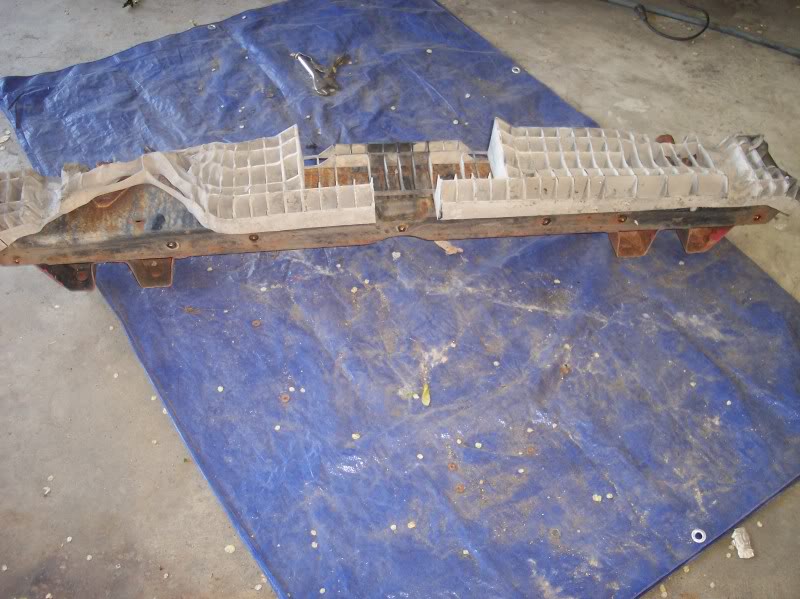
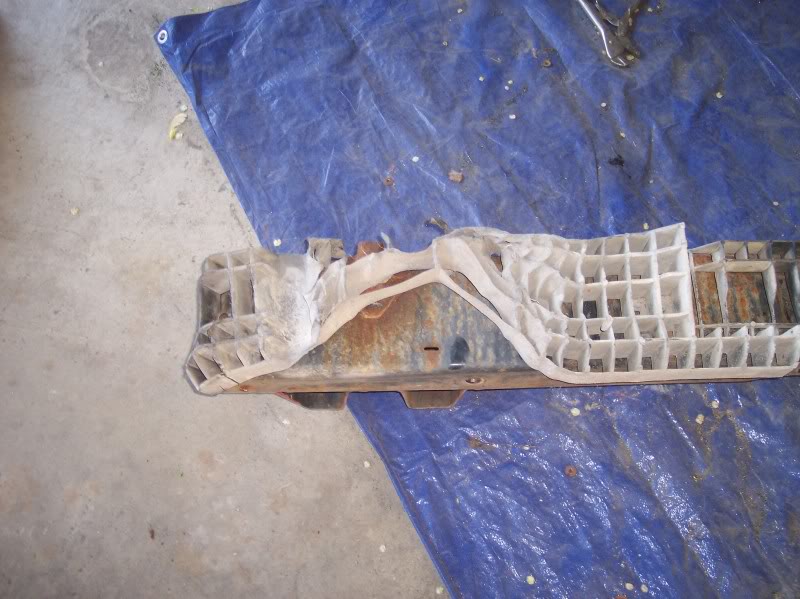
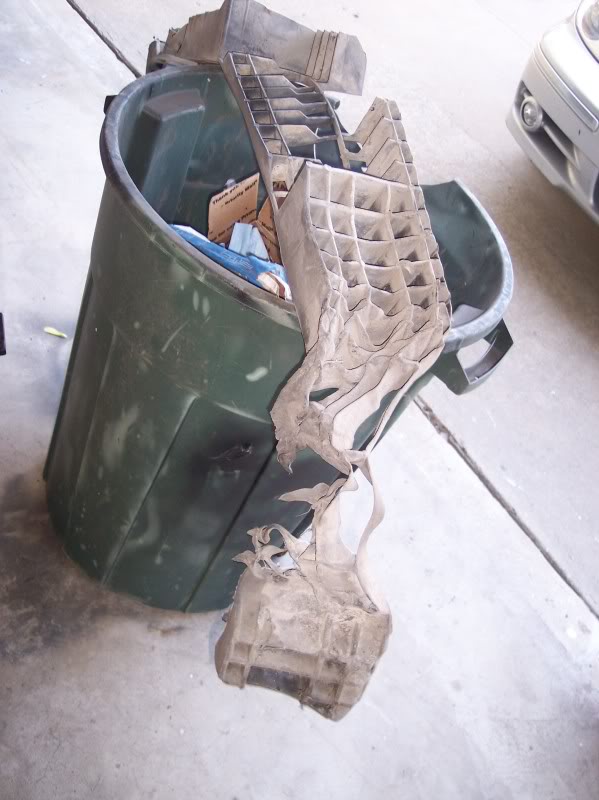
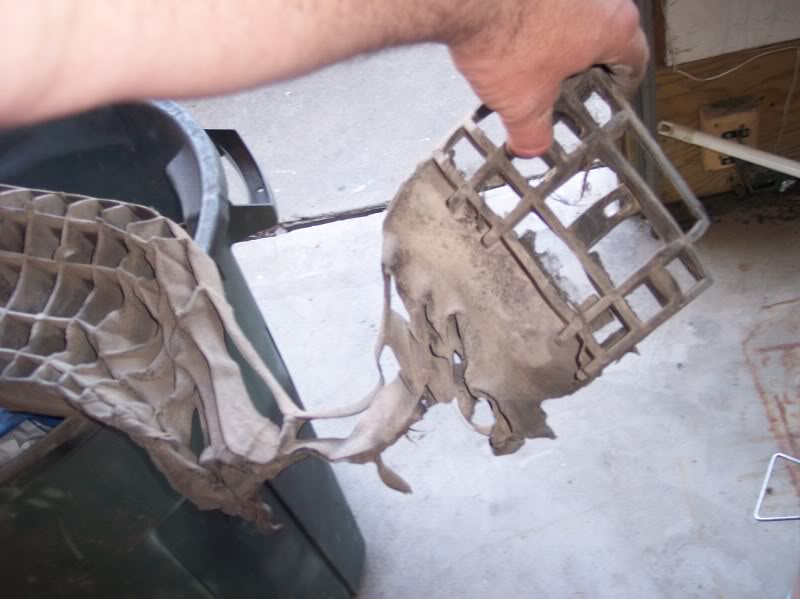
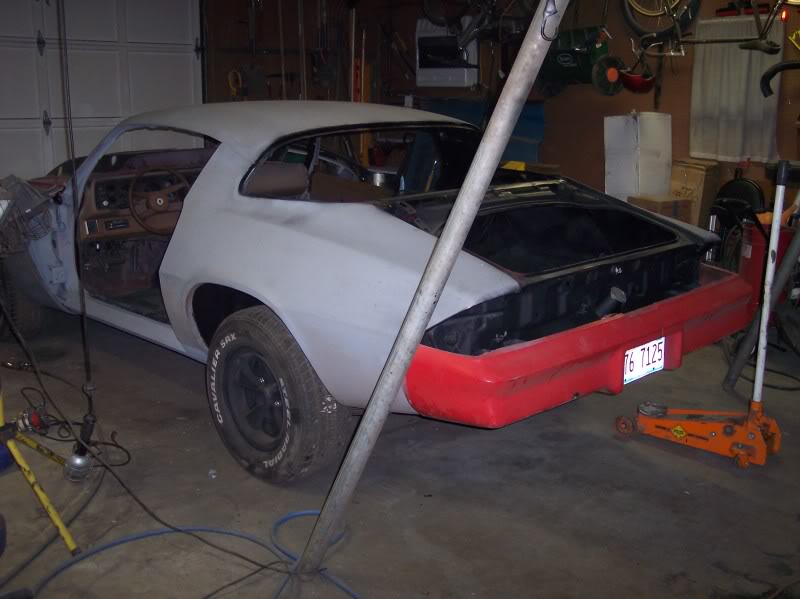
Figured I would tear into the rear bumper today and see just what could be done with it. When it was on the car it really did not look too bad, and I basically took it off and tossed it aside, and later shoved it up in the attic. So I never really looked at it. I did notice that the inner plastic was sticking out a bit at the bottom. So, I started by looking at it, and here is what it looked like, way worse than I thought. I figured MAYBE it could be "fixed" with some spray foam; not a chance.
Once I rewired my drill, the wire was breaking inside of the insulation, I drilled out all the rivets and here is the damage.
I may have a replacement though for $20, will find out tomorrow.
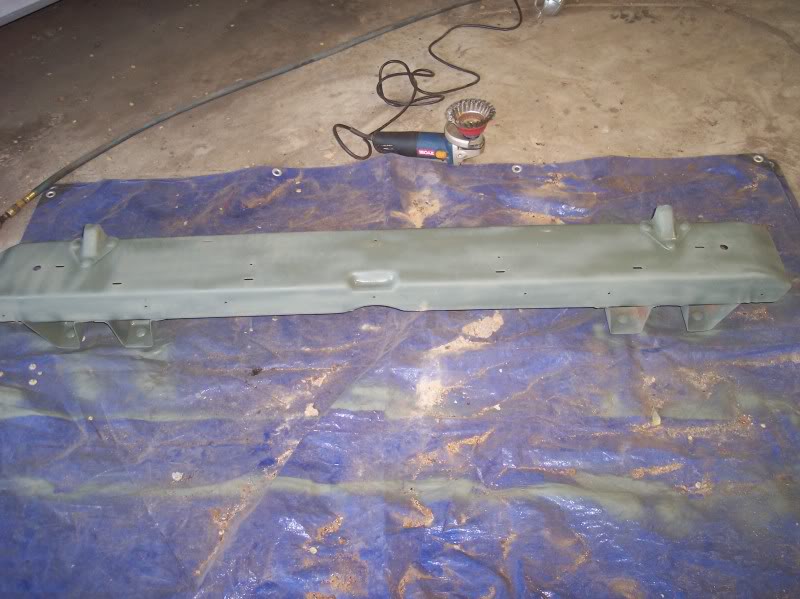
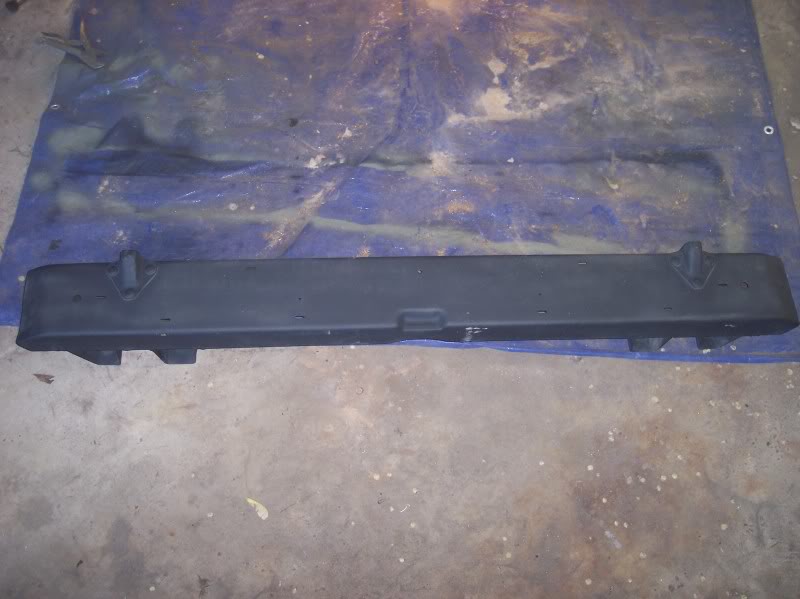
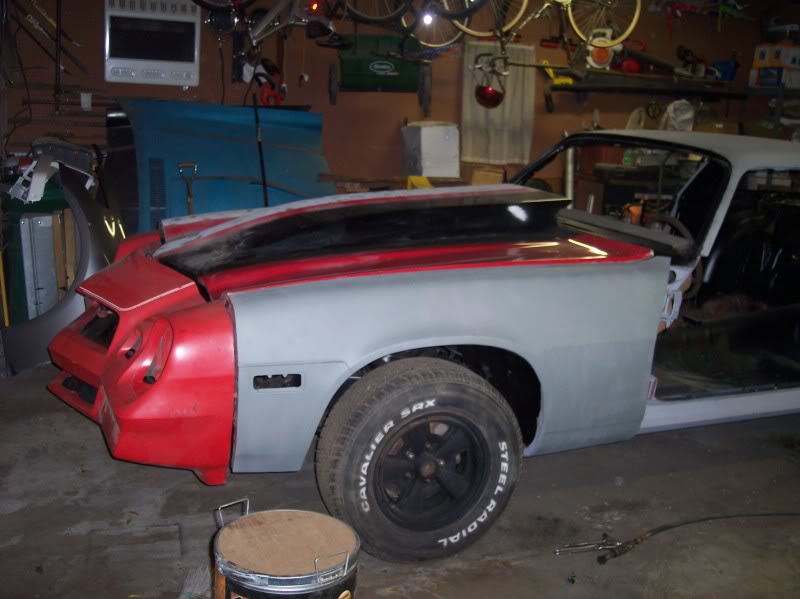
I took the wire wheel, because I am so done with sandblasting and cleaned the steel bumper up, etching primed it, and just blasted it with flat black.
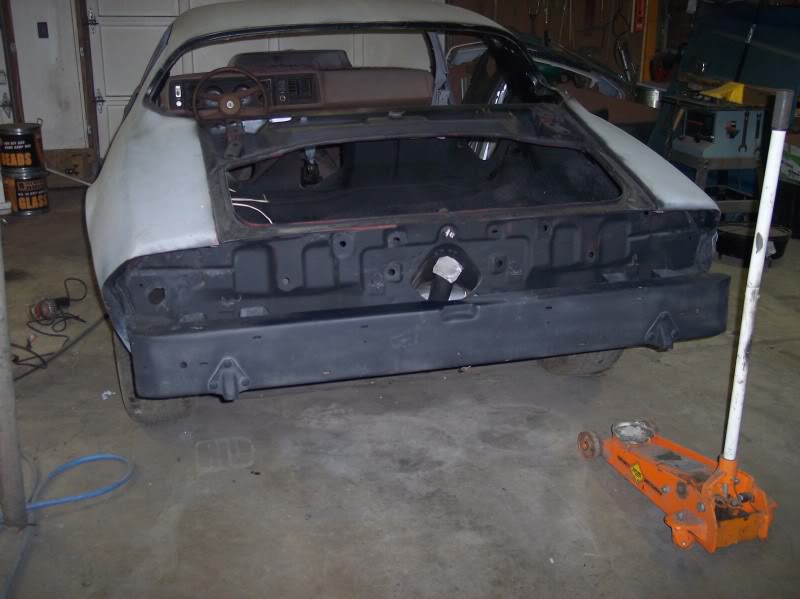
Here is the bumper just sitting on the car.
And here is the nose just sitting there.
Funny thing is, the car is just starting to look just like it did when I first bought it home. I am getting the feeling that it would appear like I am going noplace on this thing. Everything I have done is preventative maintenance and you can't see it. Its coming together though.
Once I rewired my drill, the wire was breaking inside of the insulation, I drilled out all the rivets and here is the damage.
I may have a replacement though for $20, will find out tomorrow.
I took the wire wheel, because I am so done with sandblasting and cleaned the steel bumper up, etching primed it, and just blasted it with flat black.
Here is the bumper just sitting on the car.
And here is the nose just sitting there.
Funny thing is, the car is just starting to look just like it did when I first bought it home. I am getting the feeling that it would appear like I am going noplace on this thing. Everything I have done is preventative maintenance and you can't see it. Its coming together though.
#238
05-04-2010 | 05:47 PM
Thread Starter
|
3rd Gear Member
Joined: Sep 2009
Posts: 1,062
From: Morris, IL
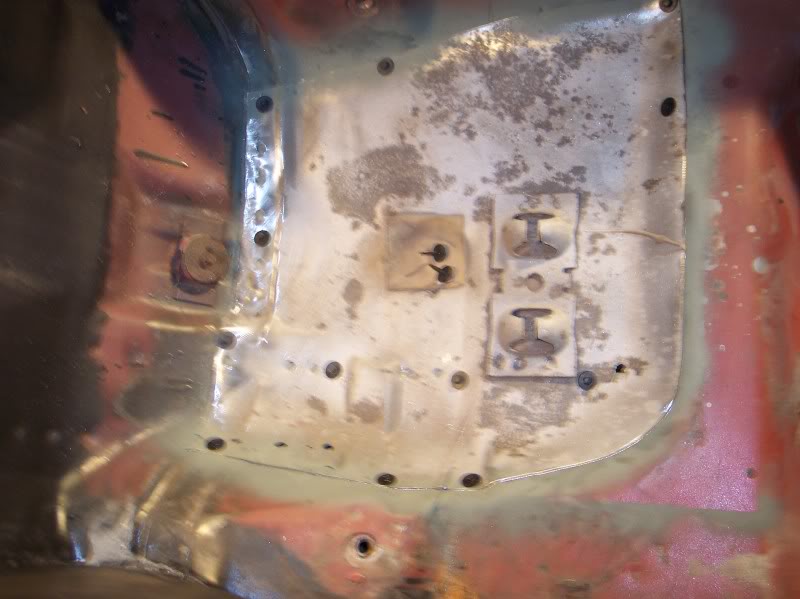
Been slowly working on some things lately. My father in law came over the other night and started to work on the floor panel. We actually spent more time working on the welder. It seems to weld fine, with everything turned all the way up for about 2 minutes, then it starts getting crappy. If you let it cool down it will work a bit. Then when it starts getting crappy, the wire gets stuck in the tip, and it spins around the feed inside and ends up breaking. We probably wasted 100' of wire redoing it constantly. Hopefully this one will get us through the floor panel repairs.
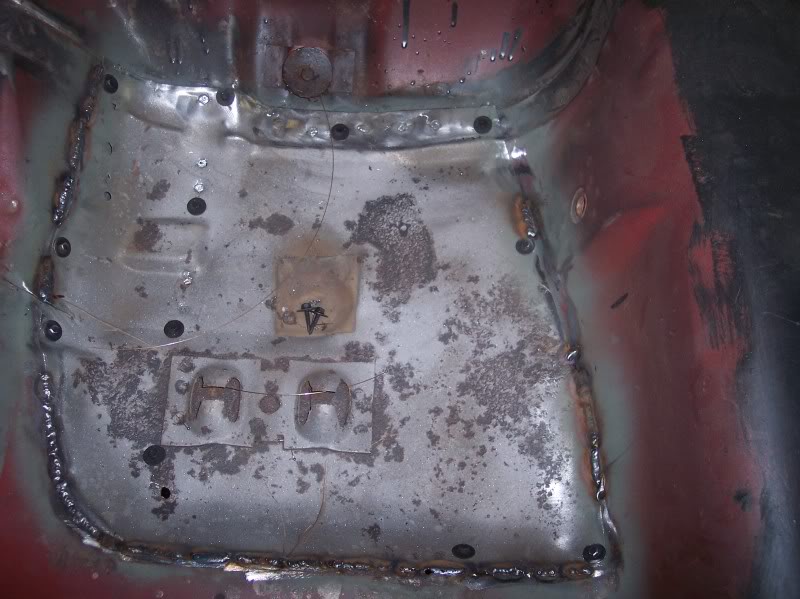
He started by cutting out the rot, and trimming the donor panel to fit. He primed any exposed metal that would not be able to be either seam caulked up, or POR15ed. He used these awesome self tapping screws to pull everything together, those suckers are tough.
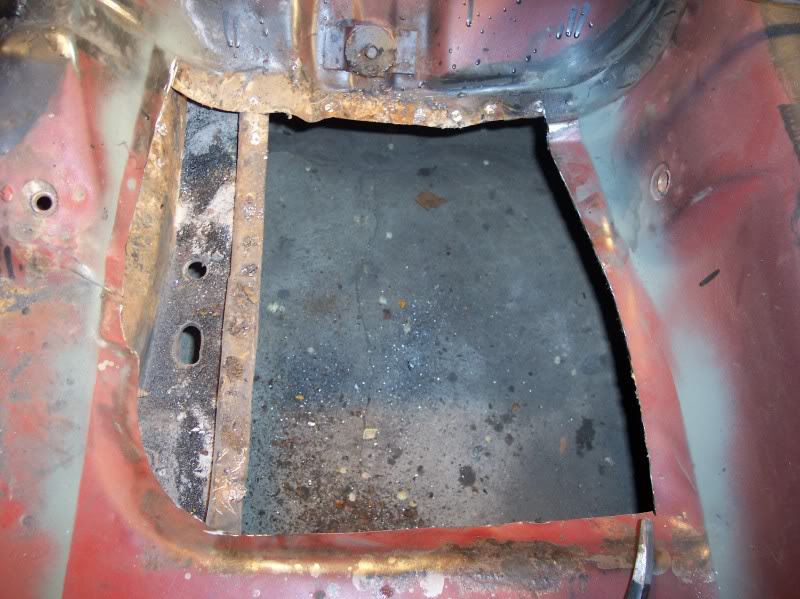
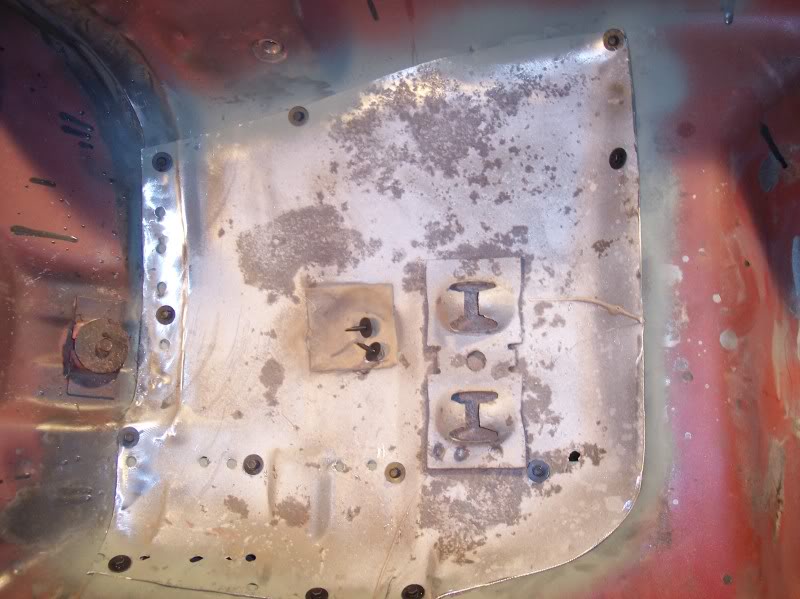
This is where he gave up for the night.
The welder was just too much hassle.
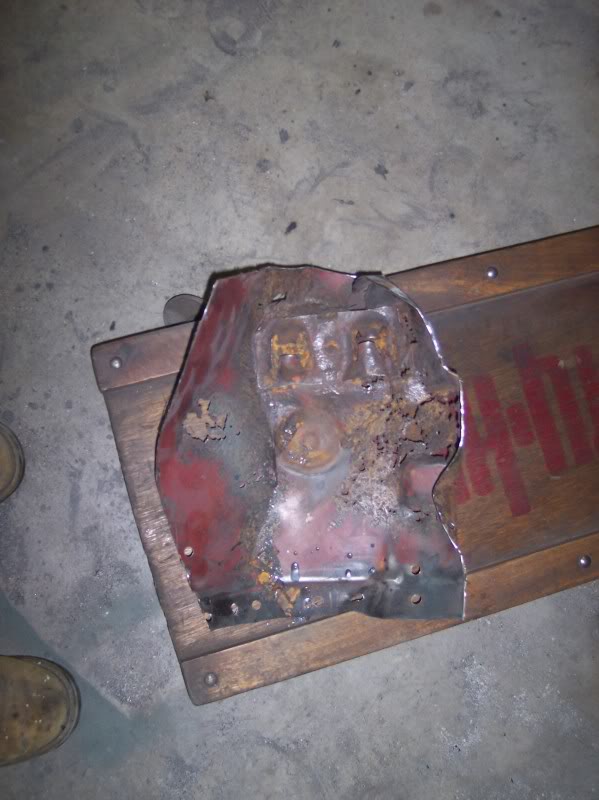
If anyone is interested in this fine bit of steel to quickly revert a solid spot in a car immediately to rust, you pay for the shipping and it is yours.
I also got some sway bars, both front and back out of a WS6 package on an 80 TA, I don't really need the front one because I already have one, but the back one I need. I went ahead and cleaned all the rust and everything off of them and primed and painted them up. Still need a couple bits to get the rear one in though, but at least I have it.
I don't think I am going to accomplish much for a couple days. I really need the floor to be done so I can finish POR15ing the interior and what I skipped under the car, then start going towards the poor mans version of dynamat, get the doors on, and call my stereo friend and start pulling some wires to prewire the car. Looks like I'll just hang out in the yard cooking out and grabbing a couple beers. I'll have to get more, I'm out of the good stuff, and Miller Lite just doesn't do it for me.
He started by cutting out the rot, and trimming the donor panel to fit. He primed any exposed metal that would not be able to be either seam caulked up, or POR15ed. He used these awesome self tapping screws to pull everything together, those suckers are tough.
This is where he gave up for the night.
The welder was just too much hassle.
If anyone is interested in this fine bit of steel to quickly revert a solid spot in a car immediately to rust, you pay for the shipping and it is yours.
I also got some sway bars, both front and back out of a WS6 package on an 80 TA, I don't really need the front one because I already have one, but the back one I need. I went ahead and cleaned all the rust and everything off of them and primed and painted them up. Still need a couple bits to get the rear one in though, but at least I have it.
I don't think I am going to accomplish much for a couple days. I really need the floor to be done so I can finish POR15ing the interior and what I skipped under the car, then start going towards the poor mans version of dynamat, get the doors on, and call my stereo friend and start pulling some wires to prewire the car. Looks like I'll just hang out in the yard cooking out and grabbing a couple beers. I'll have to get more, I'm out of the good stuff, and Miller Lite just doesn't do it for me.


