
New old project-1946 Austin gasser


Thread Starter
|
Second Generation Moderator
Feb 2010 ROTM winner
Jan 2013 ROTM winner
Feb 2010 ROTM winner
Jan 2013 ROTM winner
Joined: Aug 2008
Posts: 9,097
From: Portland, Or
ROTM Winner's Club
Thanks Dalton! The film came today, so hopefully I'll get started soon!
Gotta do a cam swap on a friend's 350 in his gasser tomorrow, then on to mine!
Gotta do a cam swap on a friend's 350 in his gasser tomorrow, then on to mine!

1st Gear Member
Joined: Oct 2012
Posts: 203
From: Kentucky
I bought the canopy at Costco for $189. As with most Costco items it may or may not still be available there, but I think Walmart also sells them, but not sure if they're the same. I plan to get some sheetmetal roofing soon, and make the top more permanent for the next build. It's never leaked, but I know it wont last forever.
I also bought some 3' auger anchors from Northern Tool for $30 to make sure the wind didn't lift the canopy off the ground. The anchors that come with it are tiny tent anchors, and wont hold anything.
I also bought some 3' auger anchors from Northern Tool for $30 to make sure the wind didn't lift the canopy off the ground. The anchors that come with it are tiny tent anchors, and wont hold anything.
Thread Starter
|
Second Generation Moderator
Feb 2010 ROTM winner
Jan 2013 ROTM winner
Feb 2010 ROTM winner
Jan 2013 ROTM winner
Joined: Aug 2008
Posts: 9,097
From: Portland, Or
ROTM Winner's Club
Glad I could help Wayne242!
Hit the local fall swap meet today and picked up a nice cast aluminum finned trans pan for the Austin's TH350 for $20. Also got aq full set of 15"x10" and 15"x8" ralley wheels with new Cooper tires, 295-50 and 235-60 for my other project '69 Suburban. Didn't really need them, but at $500 I sure couldn't pass them up!
Pretty sure I can sell my steel spokes and 235-70-15 tires for enough to break even, or close!
Thread Starter
|
Second Generation Moderator
Feb 2010 ROTM winner
Jan 2013 ROTM winner
Feb 2010 ROTM winner
Jan 2013 ROTM winner
Joined: Aug 2008
Posts: 9,097
From: Portland, Or
ROTM Winner's Club
Began the interior tear down today! Got everything stripped out, right down to the sound deadening mat. Went over to my friends at Fabric Depot, and picked up the thread and needles to do the carpet seams. Wife's out of town for a couple days, so I'll take over the living room this evening and cut the carpet from patterns I made on butcher paper. Then I can sew and glue the seams at the trans tunnel. Most of my floor will be flat carpet, except for the tunnel up front.

After a short break I got the small hump for the trans tunnel stitched in by hand. Then I got the Ultra Black RTV gasket sealer out and sealed the stitching from the back side. I locked each stitch, and used a nylon based thread that wont rot, so this should be ready to start installing tomorrow when the RTV is dried well.
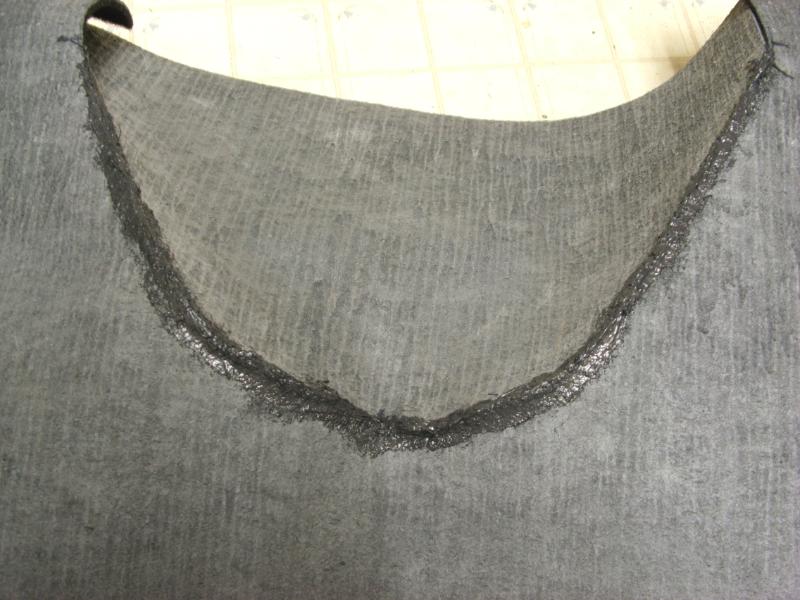
Turned it over and the seam is pretty much invisible from the top. Should be decent enough for a home grown carpet and gasser!
After a short break I got the small hump for the trans tunnel stitched in by hand. Then I got the Ultra Black RTV gasket sealer out and sealed the stitching from the back side. I locked each stitch, and used a nylon based thread that wont rot, so this should be ready to start installing tomorrow when the RTV is dried well.
Turned it over and the seam is pretty much invisible from the top. Should be decent enough for a home grown carpet and gasser!
Thread Starter
|
Second Generation Moderator
Feb 2010 ROTM winner
Jan 2013 ROTM winner
Feb 2010 ROTM winner
Jan 2013 ROTM winner
Joined: Aug 2008
Posts: 9,097
From: Portland, Or
ROTM Winner's Club
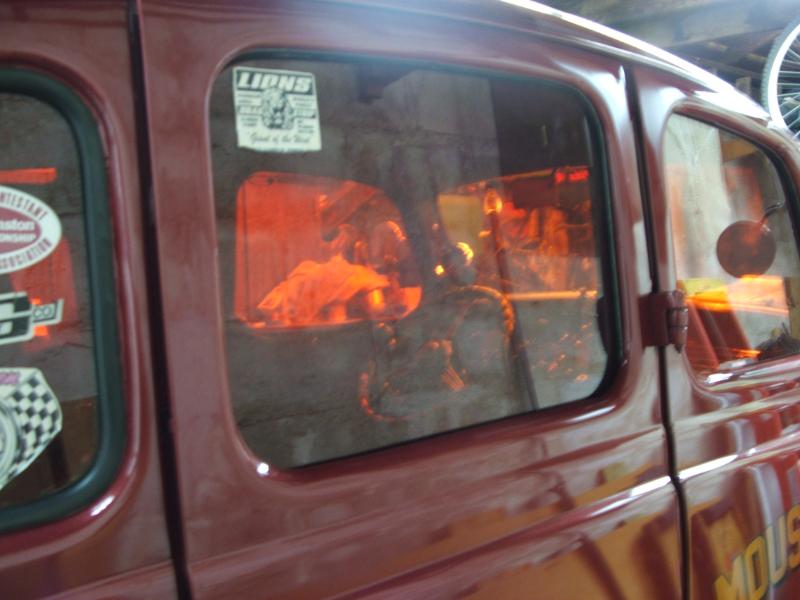
The window tint went pretty well. Only had to toss one piece, and that was because it ripped when trying to separate the film.
I rough cut the film to the length and height, then tape it to the outside of the window reversed, so when I pull the tint it's the correct orientation on the inside:
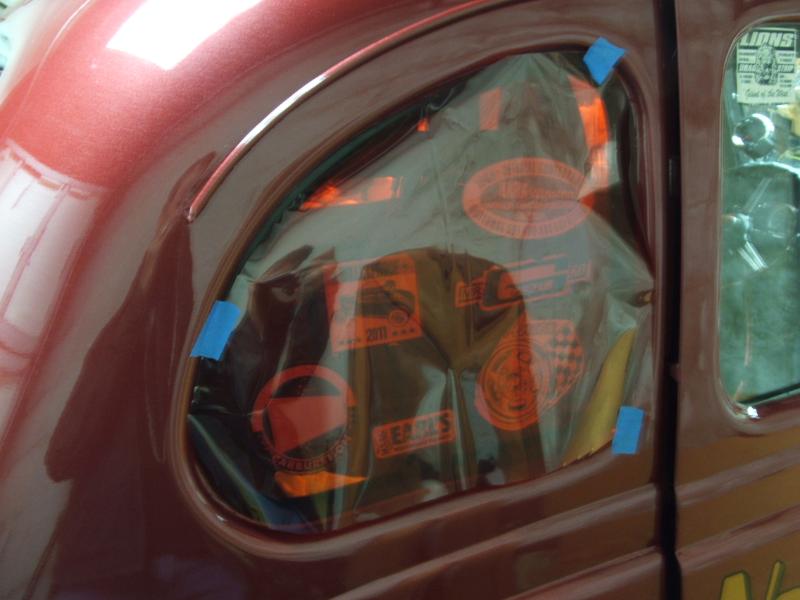
I mixed up some dishwashing soap in a spray bottle and sprayed the window glass after cleaning the glass thoroughly. Then I laid the tint on a flat surface and put masking tape on the edge of each side to help separate the protective film. As I pull them apart I spray the tint as I get 4"-5" apart. This keeps it from wrinkling, or dropping back against itself and sticking. Once I have it fully separated I lay it on the wetted glass and line up the bottom edge with the window fully up. I squeegee the soap and air bubbles to each side at the bottom, and out to the edges as I move up. Once I've got the bottom flat I use the squeegee to hold the side edge and a sharp razor blade to trim it close. After that I can roll the window down enough to expose the top edge, and continue cutting the sides with the blade all the way up. Once the bubbles are all worked out I can lay the razor along the top edge and trim it to the glass.
After it's set for 10 minutes or so I go back over each window with the squeegee to address any issues. If I see a bubble that wont work out I poke a hole with a sharp needle and work the air out. When the tint sits over night I'll go back and use some Novus plastic window cleaner to clean the inside. I never use regular window cleaner on the tint film, as it tends to make it dull over time and gets a cloudy look. Novus is designed specifically to clean plastic and helps keep it clear.
I use a long metal level to make straight cuts with the razor, as scissors wont get a straight line. Took me half an hour just to clean up all the clippings, and get them off my shoes!

Here's a picture of one side done:
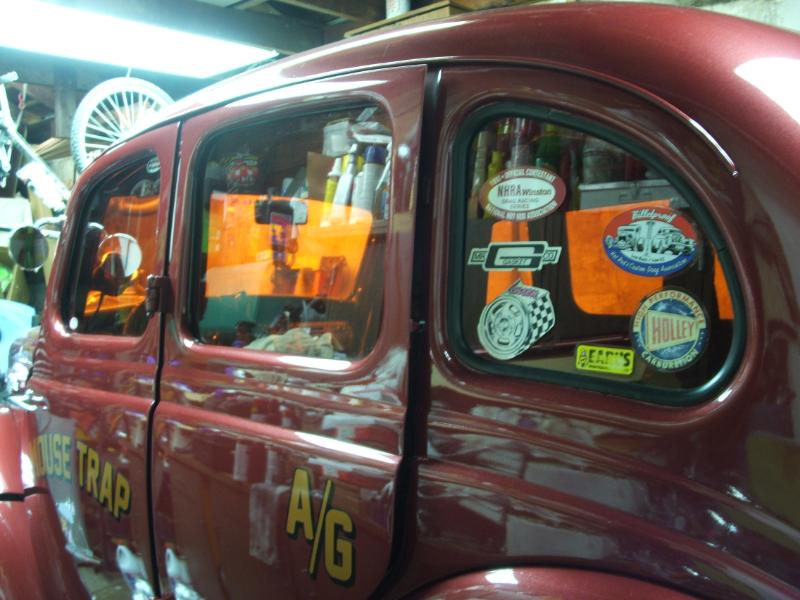
And the other side. Even looking through with both sides done it doesn't seem to get a lot darker than just one side alone.
Took me about 3 hrs. to do the 6 windows. I didn't do the rear window, as I wanted front and rear to stay clear glass.
I rough cut the film to the length and height, then tape it to the outside of the window reversed, so when I pull the tint it's the correct orientation on the inside:
I mixed up some dishwashing soap in a spray bottle and sprayed the window glass after cleaning the glass thoroughly. Then I laid the tint on a flat surface and put masking tape on the edge of each side to help separate the protective film. As I pull them apart I spray the tint as I get 4"-5" apart. This keeps it from wrinkling, or dropping back against itself and sticking. Once I have it fully separated I lay it on the wetted glass and line up the bottom edge with the window fully up. I squeegee the soap and air bubbles to each side at the bottom, and out to the edges as I move up. Once I've got the bottom flat I use the squeegee to hold the side edge and a sharp razor blade to trim it close. After that I can roll the window down enough to expose the top edge, and continue cutting the sides with the blade all the way up. Once the bubbles are all worked out I can lay the razor along the top edge and trim it to the glass.
After it's set for 10 minutes or so I go back over each window with the squeegee to address any issues. If I see a bubble that wont work out I poke a hole with a sharp needle and work the air out. When the tint sits over night I'll go back and use some Novus plastic window cleaner to clean the inside. I never use regular window cleaner on the tint film, as it tends to make it dull over time and gets a cloudy look. Novus is designed specifically to clean plastic and helps keep it clear.
I use a long metal level to make straight cuts with the razor, as scissors wont get a straight line. Took me half an hour just to clean up all the clippings, and get them off my shoes!
Here's a picture of one side done:
And the other side. Even looking through with both sides done it doesn't seem to get a lot darker than just one side alone.
Took me about 3 hrs. to do the 6 windows. I didn't do the rear window, as I wanted front and rear to stay clear glass.
Thread Starter
|
Second Generation Moderator
Feb 2010 ROTM winner
Jan 2013 ROTM winner
Feb 2010 ROTM winner
Jan 2013 ROTM winner
Joined: Aug 2008
Posts: 9,097
From: Portland, Or
ROTM Winner's Club
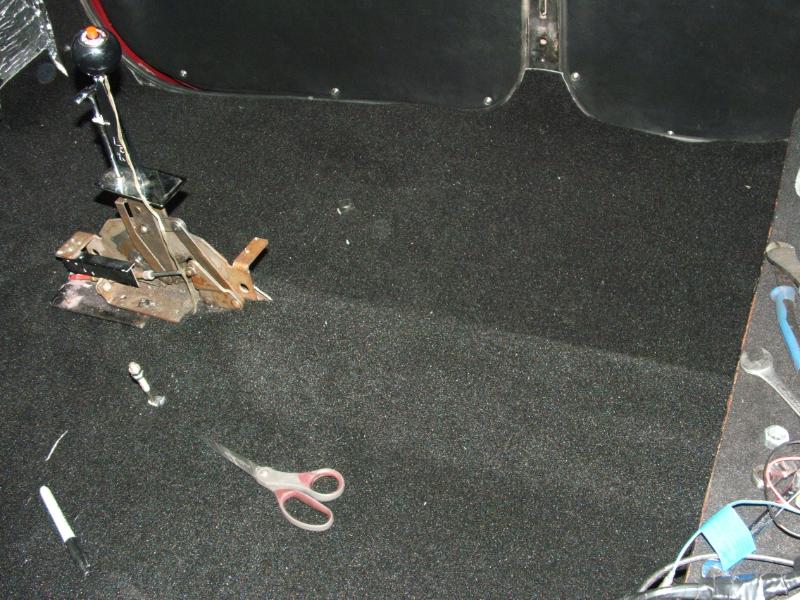
After the T'day dust settled and everyone headed home I slipped out to the garage and did some preliminary fitting on the carpet. Measured out the center and cut for the shifter with just a small slot to start, then dropped the carpet over and started locating it, while I cut the hole longer to allow movement both ways.
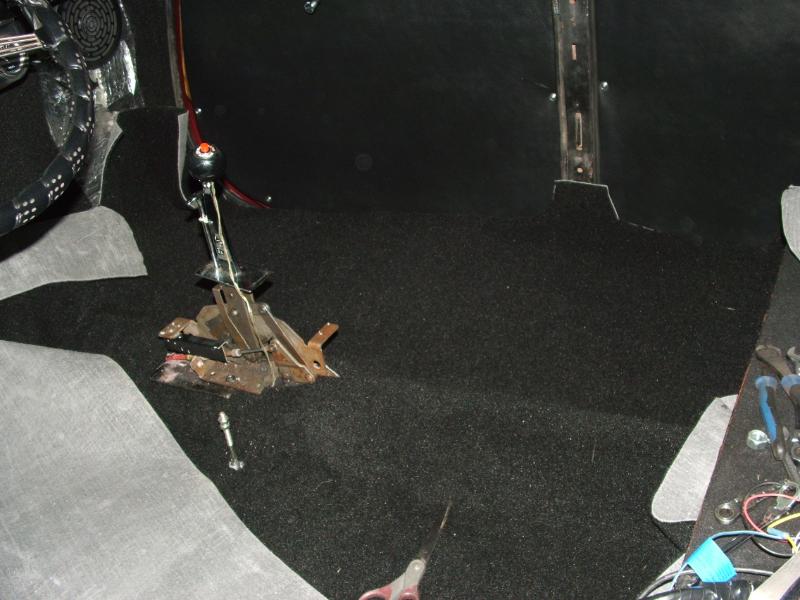
Once the hole was enlarged just enough to get the carpet close, I got it laying over the hump and tunnel, and took a sharpie to the door openings to mark them out.

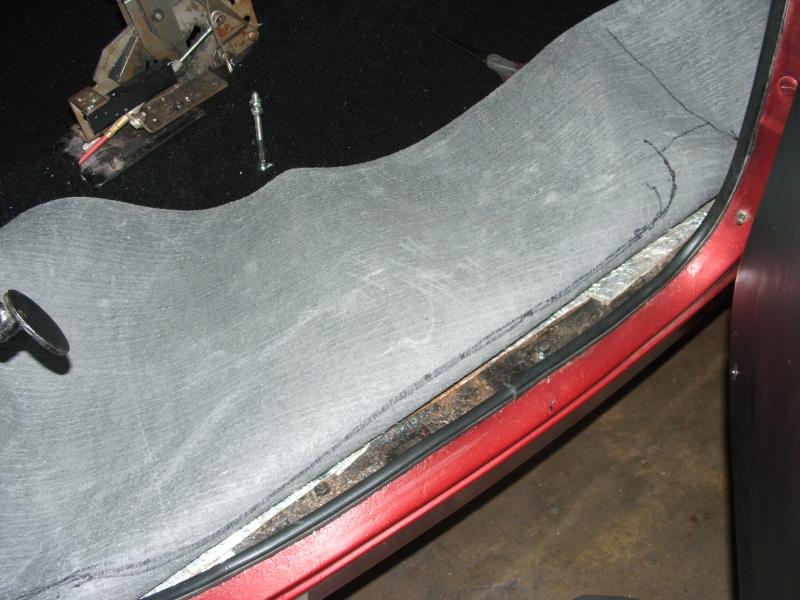
With the openings marked large, I cut the carpet and that allowed it to lay down better for a 2nd cut.
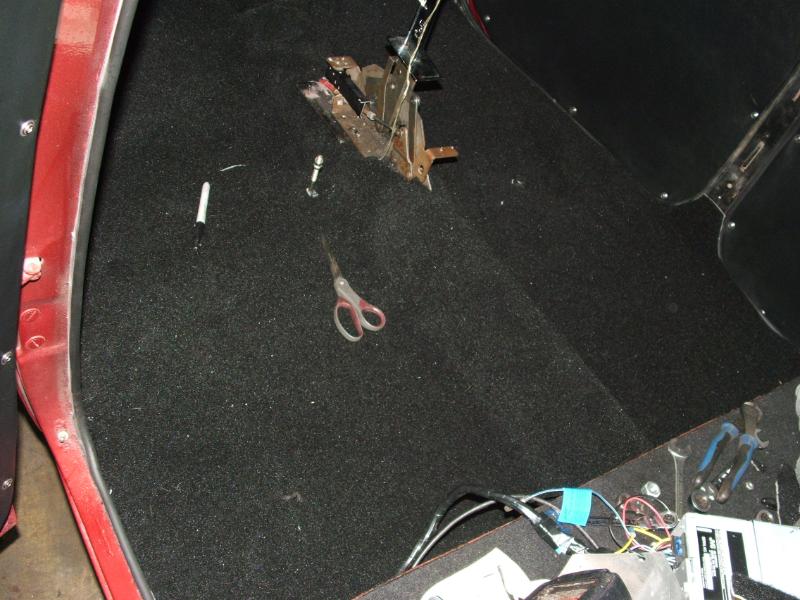
After the 2nd cut I pushed the carpet into all the corners and left it long where the door post covers go. I'll cover that carpet with the trim, so I want it long to allow for that. Next step is to fold it back on each side and glue the edges. After the edges are glued I can do one more trim and then begin installing the seat bases and seats.
Once the hole was enlarged just enough to get the carpet close, I got it laying over the hump and tunnel, and took a sharpie to the door openings to mark them out.
With the openings marked large, I cut the carpet and that allowed it to lay down better for a 2nd cut.
After the 2nd cut I pushed the carpet into all the corners and left it long where the door post covers go. I'll cover that carpet with the trim, so I want it long to allow for that. Next step is to fold it back on each side and glue the edges. After the edges are glued I can do one more trim and then begin installing the seat bases and seats.
Thread Starter
|
Second Generation Moderator
Feb 2010 ROTM winner
Jan 2013 ROTM winner
Feb 2010 ROTM winner
Jan 2013 ROTM winner
Joined: Aug 2008
Posts: 9,097
From: Portland, Or
ROTM Winner's Club
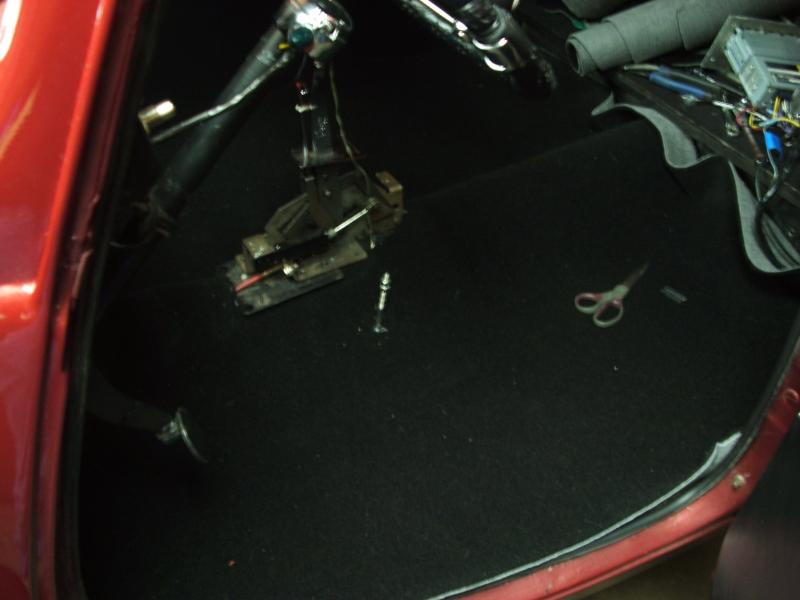
My 15 minutes stretched into all day today! Went out to Harbor Freight for the black Friday sale to pick up some cheap ramps for my quad, and a few other small items. When I returned around 10:30 I started back on the carpets and got them all glued down and the door trim replaced. Also got the inside window trim back on, and then cut the seat bases down 1" to lower them a bit. My head rubbed the headliner when I wore a baseball cap, so needed to gain a small amount.
Mounting the seats back in the car with just the 1" difference was unbelieveably hard! That little change made the seats low enough that the old rear seat pan blocked access to the rear bolts, and I had to reach in from the rear door and do the bolts by the brail method. It took forever, but I finally got them bolted in, and the harnesses sandwiched under the mounting bolts.
Six hours to finish the carpet and get the E brake,shifter boot, and seats back in! Got my 15 minutes covered for the next couple weeks, but I need to change out the OEM trans pan and install the new aluminum pan.
Thread Starter
|
Second Generation Moderator
Feb 2010 ROTM winner
Jan 2013 ROTM winner
Feb 2010 ROTM winner
Jan 2013 ROTM winner
Joined: Aug 2008
Posts: 9,097
From: Portland, Or
ROTM Winner's Club
Thanks Bill! It was time for something more than just wool felt on the floors, and sound mat everywhere else. I got the kick panel area covered in the same carpet, and covered some painted metal in the back with carpet too.
My trans pan gasket started leaking, so I guess the timing is right to change to the finned cast aluminum pan now.
My trans pan gasket started leaking, so I guess the timing is right to change to the finned cast aluminum pan now.
Thread Starter
|
Second Generation Moderator
Feb 2010 ROTM winner
Jan 2013 ROTM winner
Feb 2010 ROTM winner
Jan 2013 ROTM winner
Joined: Aug 2008
Posts: 9,097
From: Portland, Or
ROTM Winner's Club
Another two hour job that lasted nearly 5 hrs today, after multiple trips for hardware! I dropped the trans pan to install the Summit finned pan. Had some clean up to do on the pan, so I let the trans drain while I cleaned. I was at the local Autozone the other day and they had some biodegreable spray cleaner called "Super Clean" on sale 2 for $5. I gave it a try on the aluminum and was pleasantly surprised how clean it came out!
The Summit pan is extremely heavy, and the flange is about .5" thick, so the old bolts wouldn't work. After two trips to the hardware store, I finally got some 5/16" button head allens that worked, and also cleared the wider/thicker pan. Tried regular hex heads, but a socket wont clear the pan and tighten them down, thus a 2nd trip for the allen head bolts. Also had to use the small floor jack to hold it during all this test fitting, as I ran out of steam after 10 minutes of holding that heavy sucker and trying to line it up!
Got the pan on, and of course the extra thickness made my trans cable bracket lower, and required a minor adjustment to keep everything lined up. The pan holds two extra quarts of fluid, so after pouring all I took out back in, plus replacing what had been leaking, it seemed like I'd never get done pouring fluid!
A quick test run revealed a drip, which turned out to be the allen plug not tightened. Guess I figured if it was a used pan the plug would be tight. After tightening it up, all seems well and the pan looks great. Fortunately the drivetrain hangs down enough in my Austin that the pan is very visable, so it looks cool, and will help the trans run cooler too!

The Summit pan is extremely heavy, and the flange is about .5" thick, so the old bolts wouldn't work. After two trips to the hardware store, I finally got some 5/16" button head allens that worked, and also cleared the wider/thicker pan. Tried regular hex heads, but a socket wont clear the pan and tighten them down, thus a 2nd trip for the allen head bolts. Also had to use the small floor jack to hold it during all this test fitting, as I ran out of steam after 10 minutes of holding that heavy sucker and trying to line it up!
Got the pan on, and of course the extra thickness made my trans cable bracket lower, and required a minor adjustment to keep everything lined up. The pan holds two extra quarts of fluid, so after pouring all I took out back in, plus replacing what had been leaking, it seemed like I'd never get done pouring fluid!
A quick test run revealed a drip, which turned out to be the allen plug not tightened. Guess I figured if it was a used pan the plug would be tight.
After tightening it up, all seems well and the pan looks great. Fortunately the drivetrain hangs down enough in my Austin that the pan is very visable, so it looks cool, and will help the trans run cooler too!