
New old project-1946 Austin gasser


Thread Starter
|
Second Generation Moderator
Feb 2010 ROTM winner
Jan 2013 ROTM winner
Feb 2010 ROTM winner
Jan 2013 ROTM winner
Joined: Aug 2008
Posts: 9,097
From: Portland, Or
ROTM Winner's Club
Thanks! I got a light on it and it was pretty retarded timing. Only had about 28 degrees total, so bumped it up quite a bit and she revs much nicer now! Spent the afternoon taking it for a spin to my buddy's house, then cleaning up the work area.
Gonna take a few days off to figure out where I'm going with the paint and bodywork, then I'll jump into that next.
Gonna take a few days off to figure out where I'm going with the paint and bodywork, then I'll jump into that next.

Thread Starter
|
Second Generation Moderator
Feb 2010 ROTM winner
Jan 2013 ROTM winner
Feb 2010 ROTM winner
Jan 2013 ROTM winner
Joined: Aug 2008
Posts: 9,097
From: Portland, Or
ROTM Winner's Club
Kinda does, doesn't it. I put the same gear drive in my friend's 350 and after a few hundred miles it was a bit quieter. When we first started his engine I looked at him and said, "I'm not using my gear drive!"
But after I heard it mellow out I changed my mind.
But after I heard it mellow out I changed my mind.
Thread Starter
|
Second Generation Moderator
Feb 2010 ROTM winner
Jan 2013 ROTM winner
Feb 2010 ROTM winner
Jan 2013 ROTM winner
Joined: Aug 2008
Posts: 9,097
From: Portland, Or
ROTM Winner's Club
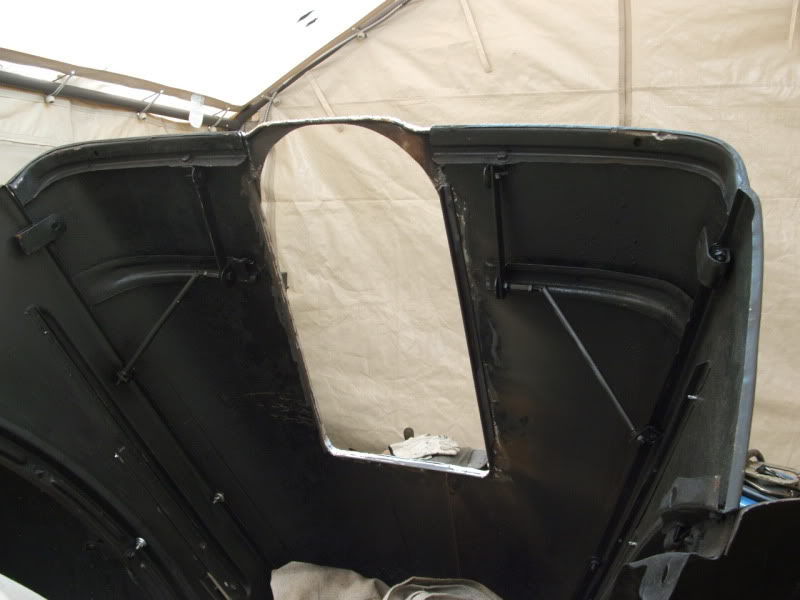
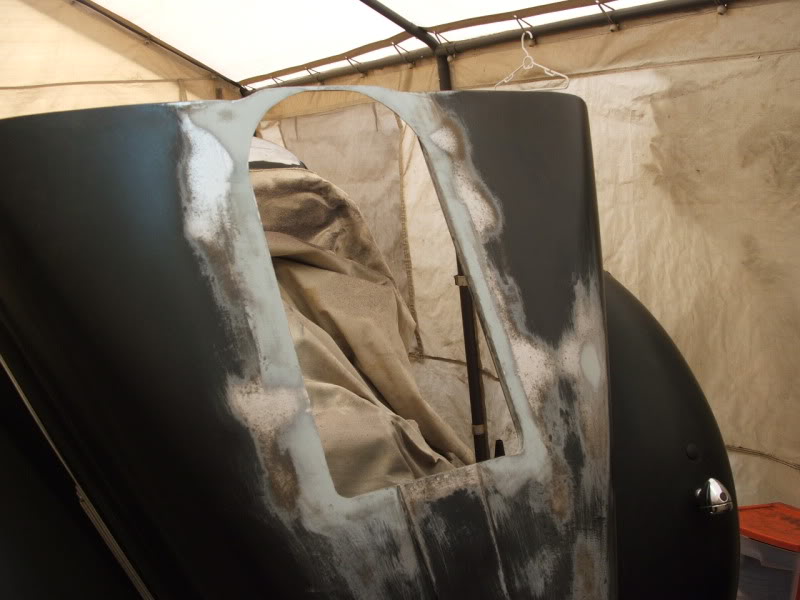
Now I start the body work! Today I got the welder out and reworked the hood opening. I wanted to clean it up some, and reinforce it. Also wanted the raw edge gone, as I've cut myself a time or two on it.
Started by making cardboard templates of the back edge to close in the square rear opening, and make it rounded like the scoop. Tack welded those in, then got some 1/2"x1/2"x .125 angle and bent up a edge piece to fit the opening. Drilled holes every few inches and clamped it to the hood, then plug welded the holes. After that I tack welded the edge of the opening all around, then ground the welds down.
Had to work the filler pieces in the rear corners with a hammer and dolly, as they warped a little while cutting them out with the tin snips, but they're good now. Just a thin coat of body filler, and it will be ready for paint!
Last edited by 1971BB427; Nov 9, 2011 at 06:06 PM.
Thread Starter
|
Second Generation Moderator
Feb 2010 ROTM winner
Jan 2013 ROTM winner
Feb 2010 ROTM winner
Jan 2013 ROTM winner
Joined: Aug 2008
Posts: 9,097
From: Portland, Or
ROTM Winner's Club
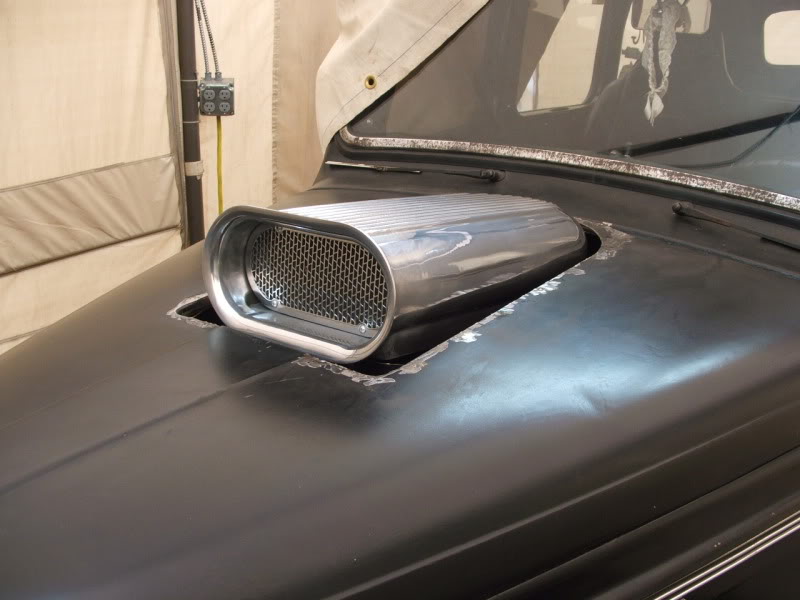
Yeah, without the scoop in the picture it looks like it's 2 ft. long and over a ft. wide! It's about as small as I can get and not rub the scoop opening as I lower the frontend!
Early on I actually scraped the edges of the scoop inlet with the rough opening being careless while opening the hood. I had to file and sand, then re-polish the scoop to get the dings out. That's another reason I wanted a nice rolled edge on the opening.
I also hate seeing scoop holes with stick on edge material around them. Just looks cheezy to my eye, and unfinished.
Thread Starter
|
Second Generation Moderator
Feb 2010 ROTM winner
Jan 2013 ROTM winner
Feb 2010 ROTM winner
Jan 2013 ROTM winner
Joined: Aug 2008
Posts: 9,097
From: Portland, Or
ROTM Winner's Club
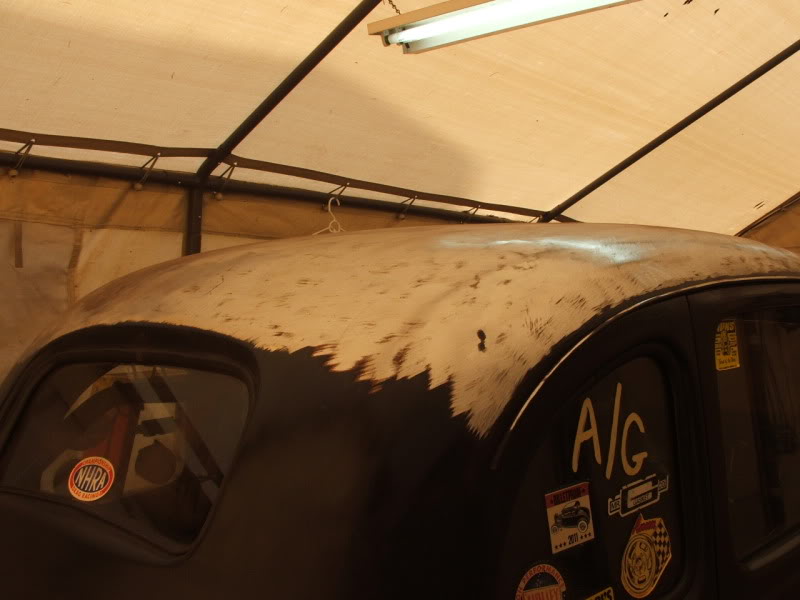
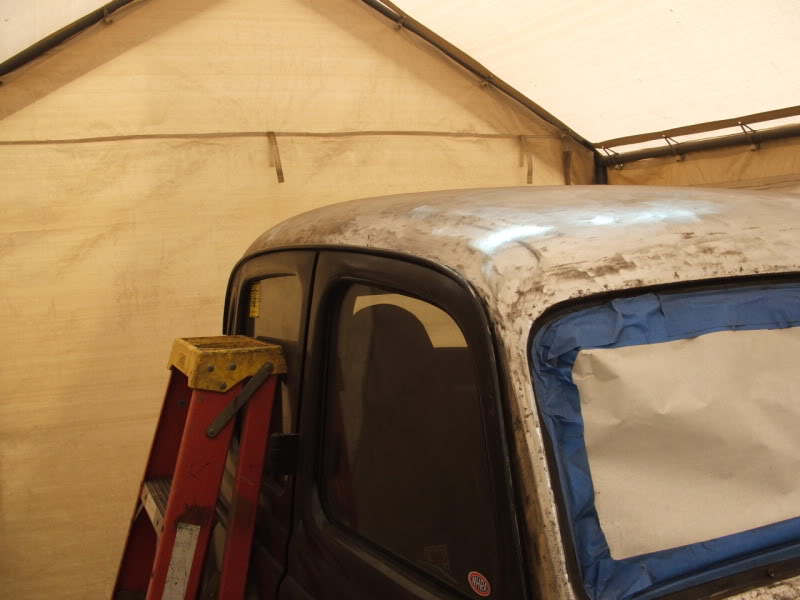
Got back on the project today. Started stripping paint and got the roof stripped. Man all that old paint makes a mess when it comes off! Dust everywhere!

Then I got back to the hood and laid a little filler around and did some sanding. I'm not fond of this bodywork and sanding.
Then I got back to the hood and laid a little filler around and did some sanding. I'm not fond of this bodywork and sanding.
Thread Starter
|
Second Generation Moderator
Feb 2010 ROTM winner
Jan 2013 ROTM winner
Feb 2010 ROTM winner
Jan 2013 ROTM winner
Joined: Aug 2008
Posts: 9,097
From: Portland, Or
ROTM Winner's Club
Moved to my smaller angle grinder today, and 4" flappers. Removed the crank open windshield and wipers, then worked all the small areas around windshield and posts. Really was slow going as the cowl area was coated in some sort of rubber base sealer. Not sure how they applied rubber with a sprayer, but it was about 1/16" thick and really gave me a lot of trouble grinding it off with the discs.
Also had to grind all the screw heads off for the welting that seals the hood to the cowl, as they were rusted in place. I'll have to find some sort of replacement material after it's painted to fit back into the channel and keep things from rubbing metal to metal.

Also had to grind all the screw heads off for the welting that seals the hood to the cowl, as they were rusted in place. I'll have to find some sort of replacement material after it's painted to fit back into the channel and keep things from rubbing metal to metal.