
'63 Falcon project


Thread Starter
|
Second Generation Moderator
Feb 2010 ROTM winner
Jan 2013 ROTM winner
Feb 2010 ROTM winner
Jan 2013 ROTM winner
Joined: Aug 2008
Posts: 9,097
From: Portland, Or
ROTM Winner's Club
Pulled the heads off the 454, and had a pleasant surprise. The engine is rebuilt, as my friend's son told him. Bored .040" over, and crank turned 10/10, so nothing to do but clean things up. I got a new Melling high volume oil pump, so I'll cut the tack off the oil pickuup and swap it to my new pump. Happy to see that it's a great engine, and a 464c.i. with the overbore. The heads appear to be older than the engine, and also rebuilt. They are 781 heads which are the last of the good oval port heads, with 113cc chambers, and 2.06/1.72 valves. All newly rebuilt, so I'll coat them with lubricant and bag them for storage. Never know when I might need a good pair of heads.
I will end up reusing the old oil pan instead of my $10 swap meet find chrome pan because the old pan holds two more qts. and has a long pickup tube. Easier and better, so no reason to swap for less oil volume.
I put a degree wheel on the engine and checked TDC because something was off on the timing marks. Put the engine on TDC with cam and crank lined up at 6 o'clock, and the timing mark and pointer were probably 2.5"-3" apart! When I put a stop on the block and ran #1 up to check TDC it turned out to be @1.375" off from the mark on the balancer. Not sure if the timing cover is wrong, or the balancer, but I'll get a degree tape and put it on the balancer to match true TDC.
Got everything cleaned up externally and painted, so ready to start assembly tomorrow.
Thread Starter
|
Second Generation Moderator
Feb 2010 ROTM winner
Jan 2013 ROTM winner
Feb 2010 ROTM winner
Jan 2013 ROTM winner
Joined: Aug 2008
Posts: 9,097
From: Portland, Or
ROTM Winner's Club
A setback yesterday. After getting things cleaned up, painted, and ready to assemble. Put the new cam and gear drive set in, and began installing the ARP stud kit for the heads. Got both heads on, and began torqing in 20 lb. increments to 80 ft. lbs. On the last bolt, of the last head, the stud pulled out! #16 bolt in the alignment dowell had stripped the threads in the block.
So now I have pulled the head back off and pulled the alignment dowell, and need to install a helicoil in that hole. It's a pass through hole into the water jacket, so I can stuff a rag in under the hole to catch metal drillings. Probably need to replace that one new head gasket too, as it was almost fully torqued, and not sure I should reuse it after the repair.
This sucks!


Thread Starter
|
Second Generation Moderator
Feb 2010 ROTM winner
Jan 2013 ROTM winner
Feb 2010 ROTM winner
Jan 2013 ROTM winner
Joined: Aug 2008
Posts: 9,097
From: Portland, Or
ROTM Winner's Club
I got completely away from engine work today, and decided to tear out the headliner. Been dreading it, as I knew the mice had moved into the headliner when it was in the barn for 20 yrs, but it needed to come out. I cut between each bow and kept the vacuum going to suck out the old fiberglass insulation they'd made into nests. My hose nozzle picked up something solid, so I pulled it out to dislodge it and found a petrified mouse skeleton stuck to the end!
After clearing it all out I cleaned and painted the bows, and all the trim. Then I started installing the new headliner, and got it almost done. Only part left is tucking the edge into the winshield and rear window rubber edge. Of course that's also the hardest part too.
After clearing it all out I cleaned and painted the bows, and all the trim. Then I started installing the new headliner, and got it almost done. Only part left is tucking the edge into the winshield and rear window rubber edge. Of course that's also the hardest part too.
Thread Starter
|
Second Generation Moderator
Feb 2010 ROTM winner
Jan 2013 ROTM winner
Feb 2010 ROTM winner
Jan 2013 ROTM winner
Joined: Aug 2008
Posts: 9,097
From: Portland, Or
ROTM Winner's Club
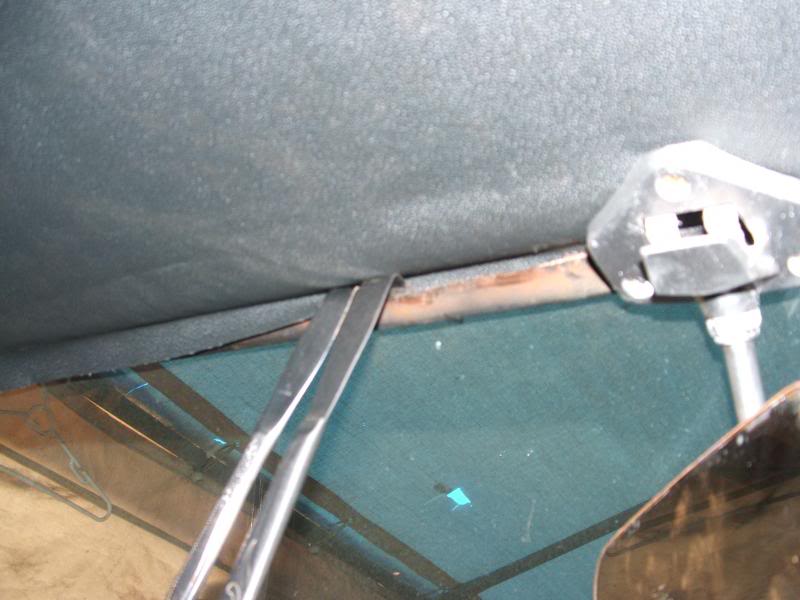
After a diappointing day Wed., today was a great ending to the week! Finished up painting trim for the windows, and finished up the headliner too! Had to build a couple specialty tools from Goodwill butter knives to make the headliner tuck into the edge rubber. I used these two knives to "leapfrog" along the edge working the headliner into place:
Then the big brown truck delivered my helicoil kit, so I drilled out the block and installed the helicoil. Stuffed the water jacket full of old rag first, and it caught all the chips I couldn't vacuum out. I used red loctite on the helicoil, and let it sit a couple hours before inserting the stud. Put a new head gasket on it, and dropped the head on.
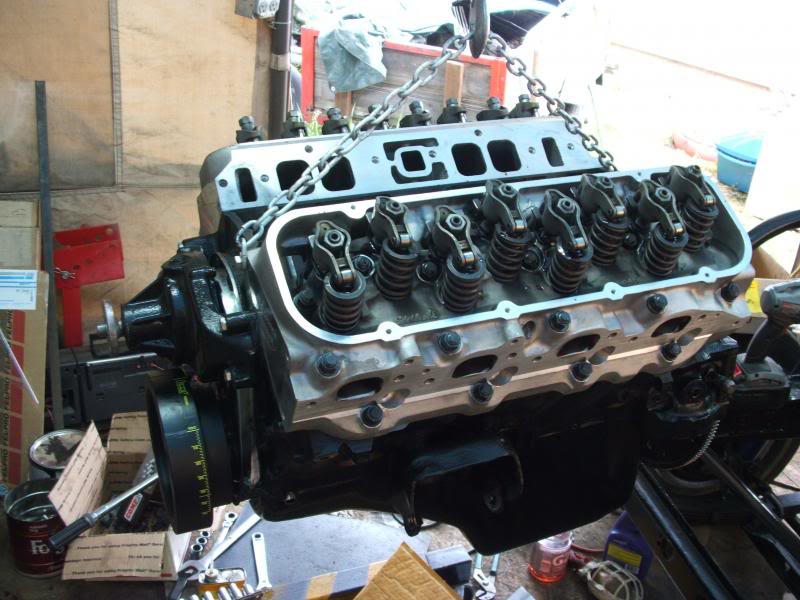
To say I was a little uncomfortable tightening the head studs would be an understatement! Especially that #16 stud!! But all went fine and torqued down with no issues anywhere. Got the water pump and balancer on also, plus lifters, pushrods, and rockers. So it's as assembled as I want it to drop in the car once I install flywheel, clutch/pressure plate, and bellhousing.

Then the big brown truck delivered my helicoil kit, so I drilled out the block and installed the helicoil. Stuffed the water jacket full of old rag first, and it caught all the chips I couldn't vacuum out. I used red loctite on the helicoil, and let it sit a couple hours before inserting the stud. Put a new head gasket on it, and dropped the head on.
To say I was a little uncomfortable tightening the head studs would be an understatement! Especially that #16 stud!! But all went fine and torqued down with no issues anywhere. Got the water pump and balancer on also, plus lifters, pushrods, and rockers. So it's as assembled as I want it to drop in the car once I install flywheel, clutch/pressure plate, and bellhousing.


Thread Starter
|
Second Generation Moderator
Feb 2010 ROTM winner
Jan 2013 ROTM winner
Feb 2010 ROTM winner
Jan 2013 ROTM winner
Joined: Aug 2008
Posts: 9,097
From: Portland, Or
ROTM Winner's Club
Thanks! Hoping for around 450-500hp out of the 464 when it's done! Nothing super radical, but very healthy.
Thread Starter
|
Second Generation Moderator
Feb 2010 ROTM winner
Jan 2013 ROTM winner
Feb 2010 ROTM winner
Jan 2013 ROTM winner
Joined: Aug 2008
Posts: 9,097
From: Portland, Or
ROTM Winner's Club
Had to chase parts today; one of my least favorite tasks! Getting fittings and fasteners to finish up the brake and fuel lines, plus a fuel pump. Only place that had a mechanical fuel pump for an early BBC was Oreillys, and then they gave me the wrong one. Had to make a 2nd trip back to find out their system lists the same pump for a BBC and a 66-88 Buick. Some kind of computer entry problem.
Got the clutch, pressure plate, flywheel and trans bolted to the engine. Decided to put gear oil in the super T10, and some ape tightened the fill plug so tight I stripped the square head off trying to get it out! Tried vise grips and pipe wrench, but no go. Finally ground the head round and welded a 5/8" nut on it, and used a 3' breaker bar to get it to loosen up.
Some people shouldn't own tools! At least it's ready to drop into the mounts tomorrow.