


'63 Falcon project

Thread Starter
|
Second Generation Moderator
Feb 2010 ROTM winner
Jan 2013 ROTM winner
Feb 2010 ROTM winner
Jan 2013 ROTM winner
Joined: Aug 2008
Posts: 9,097
From: Portland, Or
ROTM Winner's Club

Thanks! I think your Pontiac will be great once you're done. It's off to a good start!
Thread Starter
|
Second Generation Moderator
Feb 2010 ROTM winner
Jan 2013 ROTM winner
Feb 2010 ROTM winner
Jan 2013 ROTM winner
Joined: Aug 2008
Posts: 9,097
From: Portland, Or
ROTM Winner's Club
Did some more work on the front sheetmetal today. Getting the filler plates welded into the lower fenders I cut off, plus the lip welded on the upper portion of the mating fender area.
Also pulled the gas tank to see what it needed to clean it out. The wire connection broke off the sending unit, so it needed that, plus the tank has a lot of crud in it. I decided I'd get a new one as they are on Epay for $115 with sending unit, and not worth messing with since I needed a sending unit anyway. The replacements are 16 gal, so two gallons more than stock, and I can use the extea capacity with the 454!
Also pulled the gas tank to see what it needed to clean it out. The wire connection broke off the sending unit, so it needed that, plus the tank has a lot of crud in it. I decided I'd get a new one as they are on Epay for $115 with sending unit, and not worth messing with since I needed a sending unit anyway. The replacements are 16 gal, so two gallons more than stock, and I can use the extea capacity with the 454!
Thread Starter
|
Second Generation Moderator
Feb 2010 ROTM winner
Jan 2013 ROTM winner
Feb 2010 ROTM winner
Jan 2013 ROTM winner
Joined: Aug 2008
Posts: 9,097
From: Portland, Or
ROTM Winner's Club
Did a bit more "caressing" to the frontend today. I figured out that part of my interference issue was the splash apron that extends out the firewall width, so I unbolted it, and the fenders fell very close to position. I think the latch mechanism will do the rest once I figure that out.
I also began the brake plumbing and master. Got a rebuilt '68 Mustang master cylinder for $18, and it bolted right up, to give me a dual reservoir. Then I got all my lines and fittings to hook up the front speparately, and got everything bent up and loosely connected. Just need to bench bleed the master, and then tack on the front mounting brackets, and it's ready to stop!
Pulled the rear seat and with some 3/4" plywood, 2x4's, and sheetmetal, I got the base built for the backseat. Traced the seat shape on plywood to cut out. Then screwed a 2x4 to each side in front to get the plywood up to the tunnel height. Screwed the plywood to the floors, and screwed from below up into the 2x4 riser. Then took some scrap cable tray divider I had brought home from a job years ago, and made a curved cover for the front to close it all in. Made a pair of brackets to line up with the straps that lock the seat bottom in, and it fits like factory now! It will eventually get carpet over it all.
Just need to take it all out now, and then clean and paint the floors, then do the rollbar. I'll run sans any carpet or sound deadener for this year, and take it apart next winter to do the finish.
I also began the brake plumbing and master. Got a rebuilt '68 Mustang master cylinder for $18, and it bolted right up, to give me a dual reservoir. Then I got all my lines and fittings to hook up the front speparately, and got everything bent up and loosely connected. Just need to bench bleed the master, and then tack on the front mounting brackets, and it's ready to stop!
Pulled the rear seat and with some 3/4" plywood, 2x4's, and sheetmetal, I got the base built for the backseat. Traced the seat shape on plywood to cut out. Then screwed a 2x4 to each side in front to get the plywood up to the tunnel height. Screwed the plywood to the floors, and screwed from below up into the 2x4 riser. Then took some scrap cable tray divider I had brought home from a job years ago, and made a curved cover for the front to close it all in. Made a pair of brackets to line up with the straps that lock the seat bottom in, and it fits like factory now! It will eventually get carpet over it all.
Just need to take it all out now, and then clean and paint the floors, then do the rollbar. I'll run sans any carpet or sound deadener for this year, and take it apart next winter to do the finish.
Thread Starter
|
Second Generation Moderator
Feb 2010 ROTM winner
Jan 2013 ROTM winner
Feb 2010 ROTM winner
Jan 2013 ROTM winner
Joined: Aug 2008
Posts: 9,097
From: Portland, Or
ROTM Winner's Club
What a gorgeous day to work out in the canopy! Hit about 70 degrees, and half of my work was outside the canopy dying the backseat and some armrests. While the dye was drying I cleaned and painted the rear floor area. Gradually working my way forward to the firewall!
The rear package shelf was pretty bad, and like the floors, covered in gold carpet! So I made a template of the pieces and traced it on 1/4" plywood. After cutting it out I covered it in black naugahyde and slipped it in.
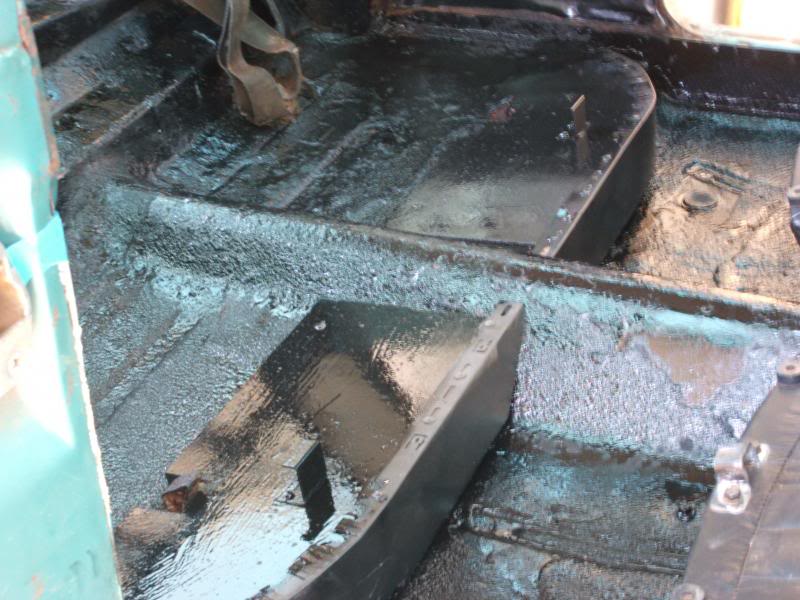
All the painting was with a brush, so good heavy coats to prevent future rust! These are the bases I built to fit the rear seat to the floor.
The stainless trim came off the armrests easy, so I could dye them without masking.

Backseat was tricky with all the sections, and had to dye things one way, then open it and dye another, and another, etc...

The backseat looks way better than the front until I pull them to get recovered.
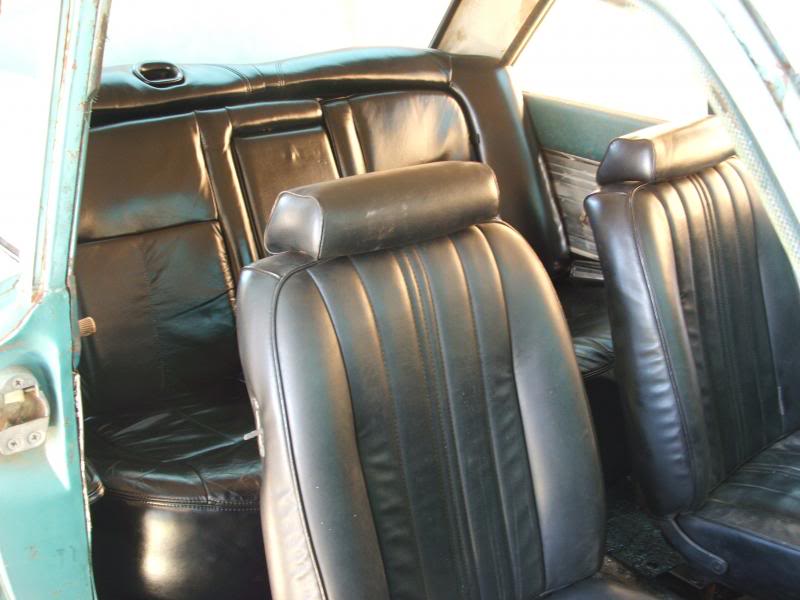
The rear package shelf was pretty bad, and like the floors, covered in gold carpet! So I made a template of the pieces and traced it on 1/4" plywood. After cutting it out I covered it in black naugahyde and slipped it in.
All the painting was with a brush, so good heavy coats to prevent future rust! These are the bases I built to fit the rear seat to the floor.

The stainless trim came off the armrests easy, so I could dye them without masking.

Backseat was tricky with all the sections, and had to dye things one way, then open it and dye another, and another, etc...

The backseat looks way better than the front until I pull them to get recovered.


In the Staging Lanes
Joined: Mar 2013
Posts: 47
I hope they look as good in the car as they do in the pictures. Excellent dye job. What kind of dye did you use? Spray can or rub on?
Thread Starter
|
Second Generation Moderator
Feb 2010 ROTM winner
Jan 2013 ROTM winner
Feb 2010 ROTM winner
Jan 2013 ROTM winner
Joined: Aug 2008
Posts: 9,097
From: Portland, Or
ROTM Winner's Club
It's Duplicolor spray dye. Since the backseat will rarely get used it should hold up fine. I've used it on front seats and it holds up, but the piping, and edges usually wear sooner.


Thread Starter
|
Second Generation Moderator
Feb 2010 ROTM winner
Jan 2013 ROTM winner
Feb 2010 ROTM winner
Jan 2013 ROTM winner
Joined: Aug 2008
Posts: 9,097
From: Portland, Or
ROTM Winner's Club
Thanks Scooch! I need to get some shocks mounted on the front soon. Before I get carried away painting, and have to grind off for shock mounts!
Thread Starter
|
Second Generation Moderator
Feb 2010 ROTM winner
Jan 2013 ROTM winner
Feb 2010 ROTM winner
Jan 2013 ROTM winner
Joined: Aug 2008
Posts: 9,097
From: Portland, Or
ROTM Winner's Club
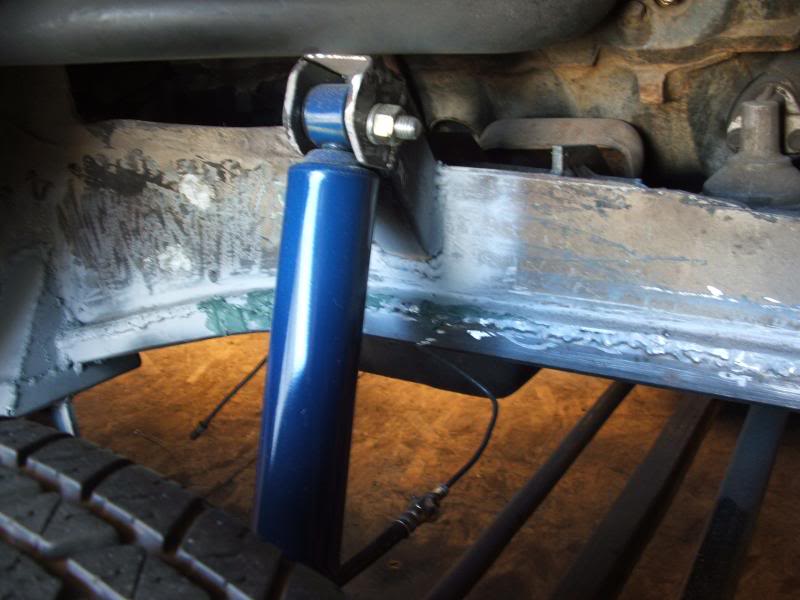
Got the new shocks, and built the shock mounts. Took half a day to do them, and probably a bit overkill, but they will show with the frontend open, so wanted them to look good and be strong.
Back on the Falcon after a weekend off having car fun! I started by hooking my Warn portable winch to the Suburban and snaking it out of the canopy. Just into the sideyard, as I had to push it back in with a neighbor, and once it gets to the front it's downhill from there.
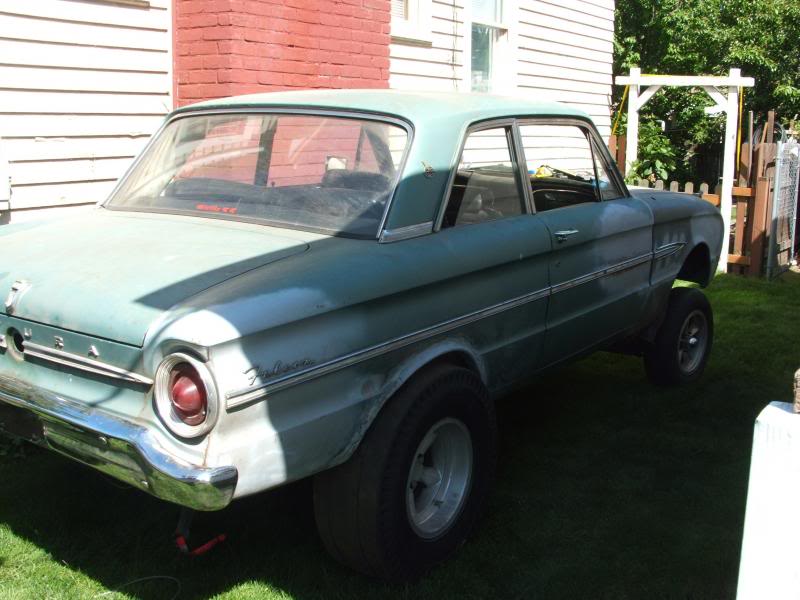
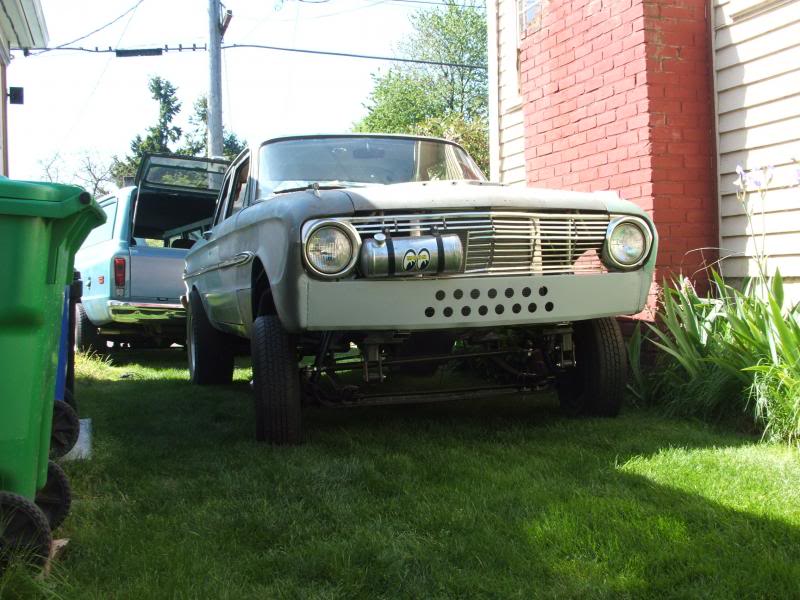
After getting the car out I gave the work area a good cleaning. It really needed it! The postman came about that time and dropped off the new gas tank! Perfect timing! I rolled the car back in the canopy and after putting some double sticky foam down on the trunk floor, I dropped the new tank in. It's definitely deeper, as it hangs down a couple inches more than the old tank.

With the tank in place I got my 3/8" line out and bent up the fuel line. Then I strapped it to the frame with straps and taped both ends closed for now. I put 3/8" rubber hose over the line everywhere it came in contact with any metal to protect the line. Did a 180 degree bend at the tank so the hose can be a straight piece to connect it.

Ran it along the inside of the new subframe connectors to protect it from any possible damage.
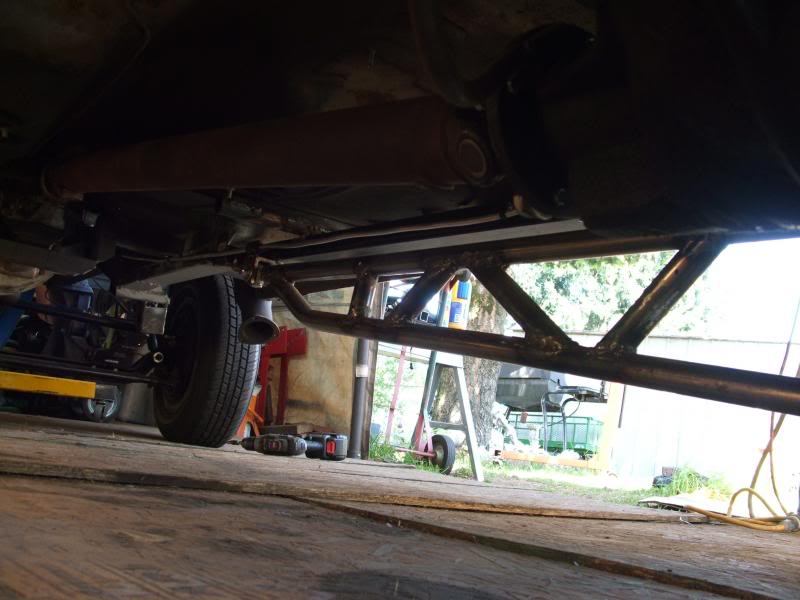
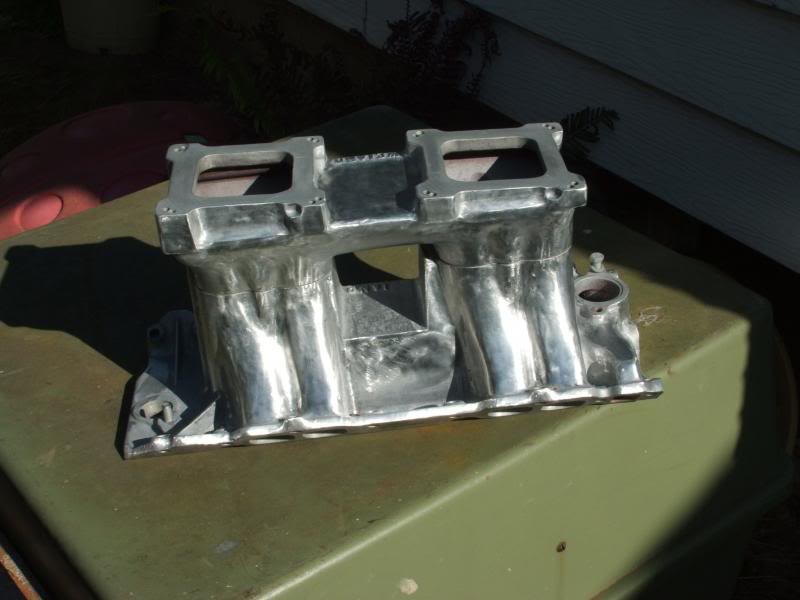
After finishing the fuel system I got out my sanding pads and die grinder and started smoothing the tunnel ram out. I'm going to give a try at polishing it myself, and see if I can get it acceptable. If I can't, I'll live with however close I get.
Back on the Falcon after a weekend off having car fun! I started by hooking my Warn portable winch to the Suburban and snaking it out of the canopy. Just into the sideyard, as I had to push it back in with a neighbor, and once it gets to the front it's downhill from there.


After getting the car out I gave the work area a good cleaning. It really needed it! The postman came about that time and dropped off the new gas tank! Perfect timing! I rolled the car back in the canopy and after putting some double sticky foam down on the trunk floor, I dropped the new tank in. It's definitely deeper, as it hangs down a couple inches more than the old tank.

With the tank in place I got my 3/8" line out and bent up the fuel line. Then I strapped it to the frame with straps and taped both ends closed for now. I put 3/8" rubber hose over the line everywhere it came in contact with any metal to protect the line. Did a 180 degree bend at the tank so the hose can be a straight piece to connect it.

Ran it along the inside of the new subframe connectors to protect it from any possible damage.

After finishing the fuel system I got out my sanding pads and die grinder and started smoothing the tunnel ram out. I'm going to give a try at polishing it myself, and see if I can get it acceptable. If I can't, I'll live with however close I get.
Thread Starter
|
Second Generation Moderator
Feb 2010 ROTM winner
Jan 2013 ROTM winner
Feb 2010 ROTM winner
Jan 2013 ROTM winner
Joined: Aug 2008
Posts: 9,097
From: Portland, Or
ROTM Winner's Club
Went down to the old workplace and the tool guy loaned me the fliptop Greenlee bender. Said, "Nobody ever checks it out anymore, so keep it as long as you like!" Guess we'll knock out a few rollbars and cages for the Falcon, and friends!

Stopped by Harbor Freight and bought one of those miniature sanding disc setups for the die grinder, with quick disconnect discs and polishing pads. Stripped all the cast finish off the tunnel ram and then gave it a light polish. Not super high polish, as I didn't want that level of shine, but didn't like the as cast finish either. Something inbetween.
And the upper shock mounts I built last week.

Stopped by Harbor Freight and bought one of those miniature sanding disc setups for the die grinder, with quick disconnect discs and polishing pads. Stripped all the cast finish off the tunnel ram and then gave it a light polish. Not super high polish, as I didn't want that level of shine, but didn't like the as cast finish either. Something inbetween.

And the upper shock mounts I built last week.


