
'63 Falcon project


Thread Starter
|
Second Generation Moderator
Feb 2010 ROTM winner
Jan 2013 ROTM winner
Feb 2010 ROTM winner
Jan 2013 ROTM winner
Joined: Aug 2008
Posts: 9,097
From: Portland, Or
ROTM Winner's Club
Track Thursday, and Expo today. We did great at both!
Thread Starter
|
Second Generation Moderator
Feb 2010 ROTM winner
Jan 2013 ROTM winner
Feb 2010 ROTM winner
Jan 2013 ROTM winner
Joined: Aug 2008
Posts: 9,097
From: Portland, Or
ROTM Winner's Club
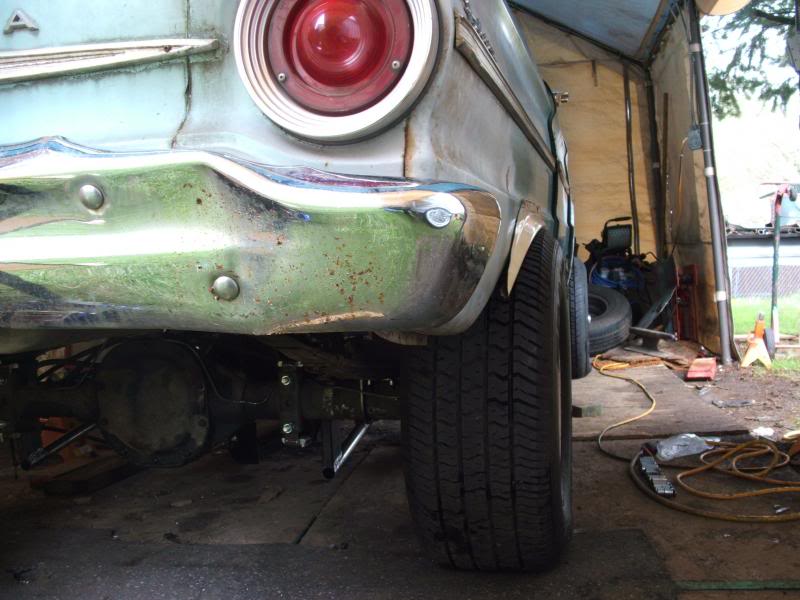
Got out the soap and water and washed up the tires and wheels today, then bolted them up. Set one old front fender on to get a look at how things sit.
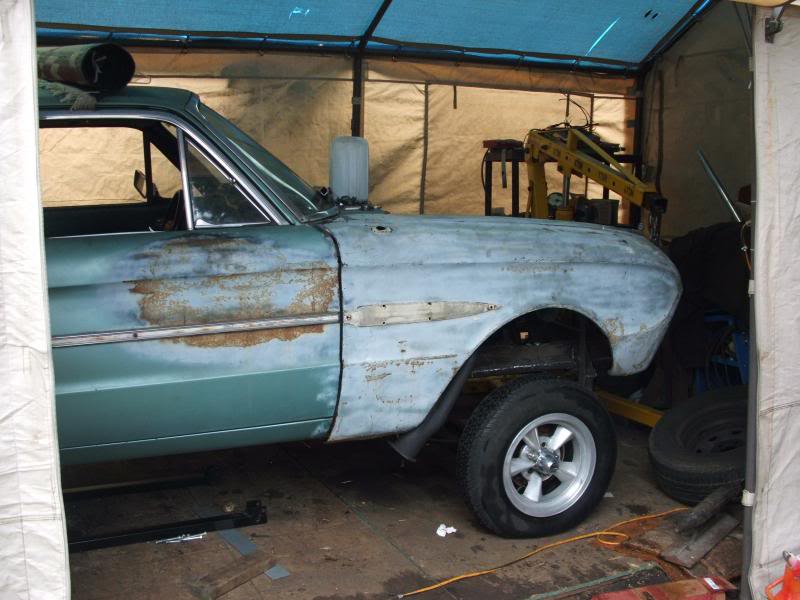
The rear wheelwells are sitting on the tire hard now, and I'm guessing it will drop down a couple inches once I radius. Glad I didn't start cutting before I put the tires on, as I think I would have gone too far front and rear edges! Now I think I'll wait until I have the Hurst slicks to cut, or I might screw things up! That pencil mark on the body is where I planned to cut, and it looks too big now.
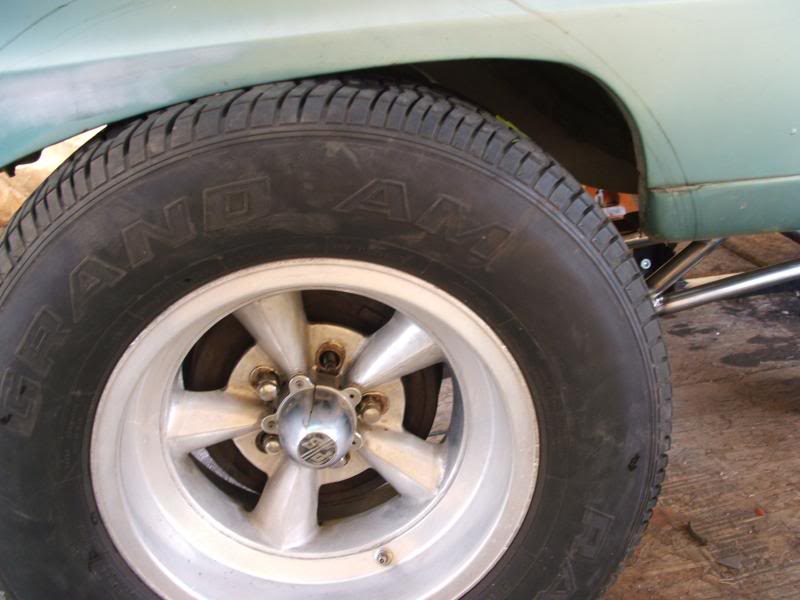
These tires measure 9.25" wide on the tread, and the Hurst are 10", so they will be slightly wider. I like where they're sitting, so I'm happy with the width.
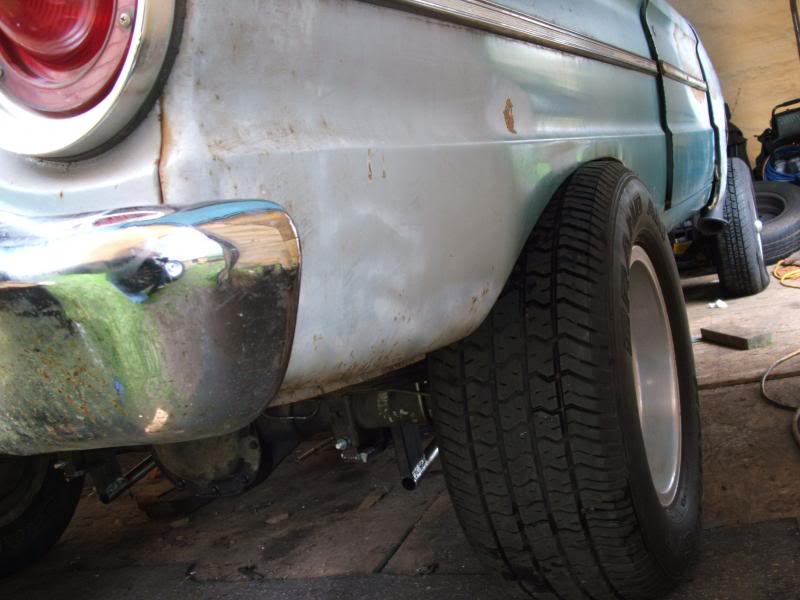
Had to sit a flare on and see what things might look like once the flares are welded to the radius wheelwell.

The rear wheelwells are sitting on the tire hard now, and I'm guessing it will drop down a couple inches once I radius. Glad I didn't start cutting before I put the tires on, as I think I would have gone too far front and rear edges! Now I think I'll wait until I have the Hurst slicks to cut, or I might screw things up! That pencil mark on the body is where I planned to cut, and it looks too big now.
These tires measure 9.25" wide on the tread, and the Hurst are 10", so they will be slightly wider. I like where they're sitting, so I'm happy with the width.
Had to sit a flare on and see what things might look like once the flares are welded to the radius wheelwell.
Thread Starter
|
Second Generation Moderator
Feb 2010 ROTM winner
Jan 2013 ROTM winner
Feb 2010 ROTM winner
Jan 2013 ROTM winner
Joined: Aug 2008
Posts: 9,097
From: Portland, Or
ROTM Winner's Club
Thanks Bill! Pretty happy with the wheels and the other neat stuff I found at the swap meet! Wait until you see my little Moon tank for the front grille!
Thread Starter
|
Second Generation Moderator
Feb 2010 ROTM winner
Jan 2013 ROTM winner
Feb 2010 ROTM winner
Jan 2013 ROTM winner
Joined: Aug 2008
Posts: 9,097
From: Portland, Or
ROTM Winner's Club
Took a backwards step today! Held the subframe connectors up to see how they fit and I put the ladder bar mounting points right in the way! Forgot the subframes from front to rear don't line up, so I had to cut the front mounts off. I was going to put the new rear mounts on anyway, so this made a little more work.
The subframe connectors were not correct for my Falcon either. They appear to be the same mounting points in the rear as my Falcon, but the length was short. Not a big deal there either, as I had to finish extending the framework I did under the front suspension anyway.
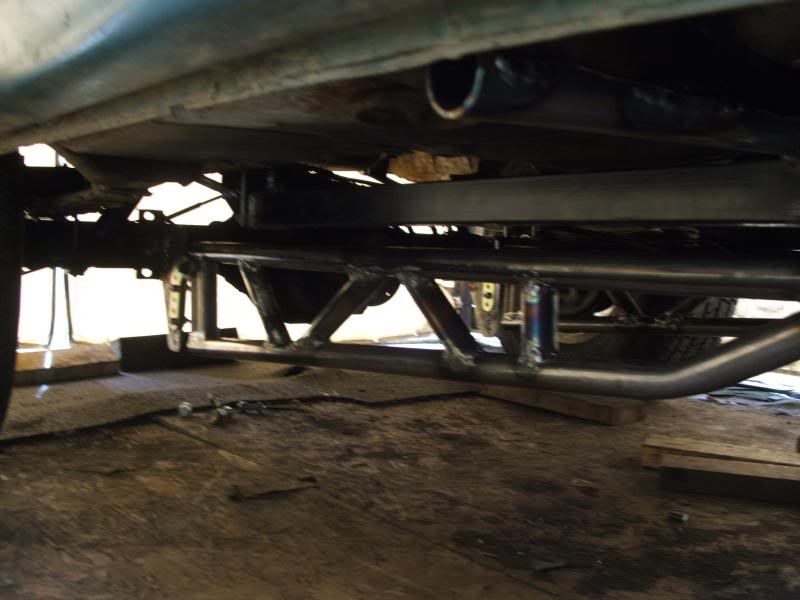
I removed the rear spring perch nut, and bolted the subframe up. Then I put a jack under them and got them into position, and measured for the box tubing. After cutting and fitting the box tubing inside the subframe connectors I tacked the ladder bar mounts up. Then I fabbed a new front mount and bolted the ladder bars up. With everything held in place with a couple jacks I tacked the mounts and frame extensions to the subframe connectors, and then pulled it all out and welded it together where I could get a better weld position.
After I got everything welded up I bolted and jacked it all into position and welded the whole thing in place. I went over the edges of the rear bolted connectors and welded them also, as I don't plan on ever removing them. Should be plenty strong with fronts, rears, and a center point all welded together now. After it was all welded up I bolted the ladder bars back on, and the modified frame rails are completed!
Still have to make up the lower plates for the ladder bars that will tie it to the brackets at two locations when I run it down the drag strip. The brackets that are on it now will get flipped upside down, and the plate will be at the top and another hole at the bottom for the 2nd mounting point.
Measured up the driveline at 50" u joint to u joint, and I'll take all the pieces I have to the driveling shop next week to have one fabbed up. I'd do it myself if it was just shortening, but it's going to be an odd one, so I better have them do it.

The subframe connectors were not correct for my Falcon either. They appear to be the same mounting points in the rear as my Falcon, but the length was short. Not a big deal there either, as I had to finish extending the framework I did under the front suspension anyway.
I removed the rear spring perch nut, and bolted the subframe up. Then I put a jack under them and got them into position, and measured for the box tubing. After cutting and fitting the box tubing inside the subframe connectors I tacked the ladder bar mounts up. Then I fabbed a new front mount and bolted the ladder bars up. With everything held in place with a couple jacks I tacked the mounts and frame extensions to the subframe connectors, and then pulled it all out and welded it together where I could get a better weld position.
After I got everything welded up I bolted and jacked it all into position and welded the whole thing in place. I went over the edges of the rear bolted connectors and welded them also, as I don't plan on ever removing them. Should be plenty strong with fronts, rears, and a center point all welded together now. After it was all welded up I bolted the ladder bars back on, and the modified frame rails are completed!
Still have to make up the lower plates for the ladder bars that will tie it to the brackets at two locations when I run it down the drag strip. The brackets that are on it now will get flipped upside down, and the plate will be at the top and another hole at the bottom for the 2nd mounting point.
Measured up the driveline at 50" u joint to u joint, and I'll take all the pieces I have to the driveling shop next week to have one fabbed up. I'd do it myself if it was just shortening, but it's going to be an odd one, so I better have them do it.
Last edited by 1971BB427; Apr 7, 2013 at 05:25 PM.
Thread Starter
|
Second Generation Moderator
Feb 2010 ROTM winner
Jan 2013 ROTM winner
Feb 2010 ROTM winner
Jan 2013 ROTM winner
Joined: Aug 2008
Posts: 9,097
From: Portland, Or
ROTM Winner's Club
Picked up a 4'x8' sheet of 20ga sheetmetal yesterday to build my firewall and tunnel. Only need half that, but they wanted $34 for 4'x4', and $48 for the whole sheet. I'll eventually use the rest for other projects.
I want the firewall welded in, but I want the trans tunnel built as a separate piece, and screwed or rivetted in so it can be removed if I need access to the trans for repairs.
I want the firewall welded in, but I want the trans tunnel built as a separate piece, and screwed or rivetted in so it can be removed if I need access to the trans for repairs.
Thread Starter
|
Second Generation Moderator
Feb 2010 ROTM winner
Jan 2013 ROTM winner
Feb 2010 ROTM winner
Jan 2013 ROTM winner
Joined: Aug 2008
Posts: 9,097
From: Portland, Or
ROTM Winner's Club
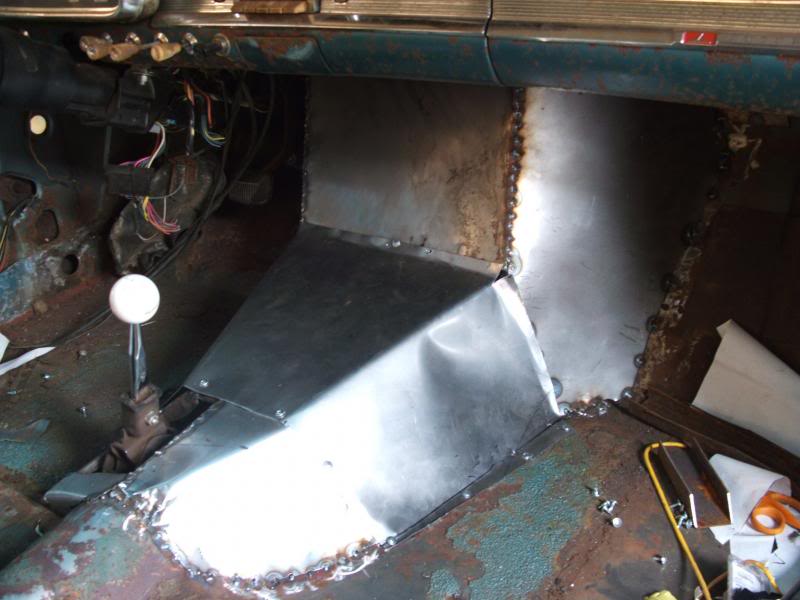
Lots of cutting and fab work today. 20ga sheetmetal is NOT very easy to cut with tin snips. I wish I'd gone with 22ga as it was a lot of work to get the snips through, and my wrist is pretty sore from all the cutting!
Got the tunnel and firewall built, and the front section welded in. Decided to build a framework around the shifter to screw a boot to, and welded the back area in also. Center is screwed in with self tapper screws and I will caulk everything once I'm sure I'm done and ready for sound deadener.
Also got the steering wheel pulled and I'll see if I can get something for the wheel and airbag on CL.
Thread Starter
|
Second Generation Moderator
Feb 2010 ROTM winner
Jan 2013 ROTM winner
Feb 2010 ROTM winner
Jan 2013 ROTM winner
Joined: Aug 2008
Posts: 9,097
From: Portland, Or
ROTM Winner's Club
Just did a little research on my driveline, as I thought maybe I might find a factory driveline that was close enough. The TH400 yoke is over 5" long, so it gives me some leeway on length. With the yoke pulled out 1" from bottomed, my center to center U joint length is 50". So after a little Google search I found out that 1st Gen Camaros and Firebirds used a 49.9" driveshaft! The Firebirds all came with 1350 HD joints like my yoke has. The factory Ranger driveline is a 1310 joint, so a standard Spicer 5-460x conversion joint will adapt the Ranger rear flange to the Camaro/Firebird driveshaft!
I called the local yard that specializes in old GM muscle cars and he has two drivelines there. One is a 1st gen Camaro, and one a 1st gen Firebird. $75 each! Looks like I might have gotten really lucky when I needed to set the engine back for more radiator clearance, and gotten it exactly where I needed it to use this stock driveshft!
I called the local yard that specializes in old GM muscle cars and he has two drivelines there. One is a 1st gen Camaro, and one a 1st gen Firebird. $75 each! Looks like I might have gotten really lucky when I needed to set the engine back for more radiator clearance, and gotten it exactly where I needed it to use this stock driveshft!