MKCoconuts Z28 Project

Thread Tools
 
Search this Thread
 
Old Aug 2, 2012 | 10:34 PM
  #71  
MKCoconuts's Avatar
Thread Starter
|
4th Gear Member
Joined: Oct 2011
Posts: 2,553
From: PA
Default

Name:  DSC01172.jpg
Views: 64
Size:  62.1 KB
Name:  DSC01171.jpg
Views: 66
Size:  54.1 KB
Just for you Scooch! Pictures with the center caps painted to match.
 
Old Aug 4, 2012 | 01:21 PM
  #72  
frankzlt1's Avatar
In the Staging Lanes
Joined: Jan 2010
Posts: 76
From: connecticut
Default

Just went through the whole threat very good hard work. The car came out great.
 
Old Aug 4, 2012 | 03:28 PM
  #73  
MKCoconuts's Avatar
Thread Starter
|
4th Gear Member
Joined: Oct 2011
Posts: 2,553
From: PA
Default

Originally Posted by frankzlt1
Just went through the whole threat very good hard work. The car came out great.
Thank you. It's still getting there and I won't stop till it's what I want...which means I'll probably never stop doing something to it! Haha. I wish I could do a full resto on it. Someday. Someday.
 
Old Aug 4, 2012 | 04:37 PM
  #74  
vanquishfist's Avatar
2nd Gear member
Joined: Jul 2010
Posts: 493
Default

I'd like to see a picture of the whole car with the new wheel paint when you get a chance.
 
Old Aug 4, 2012 | 05:10 PM
  #75  
MKCoconuts's Avatar
Thread Starter
|
4th Gear Member
Joined: Oct 2011
Posts: 2,553
From: PA
Default

^ Will do tomorrow if the suns shining. Could have done it today, but I worked all day and when I finally got, sky got cloudy.
 
Old Aug 8, 2012 | 11:23 PM
  #76  
MKCoconuts's Avatar
Thread Starter
|
4th Gear Member
Joined: Oct 2011
Posts: 2,553
From: PA
Default

Name:  DSC01175.jpg
Views: 52
Size:  54.5 KB
Name:  DSC01174.jpg
Views: 61
Size:  54.6 KB
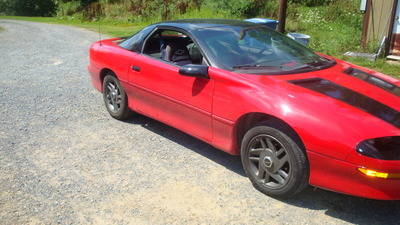
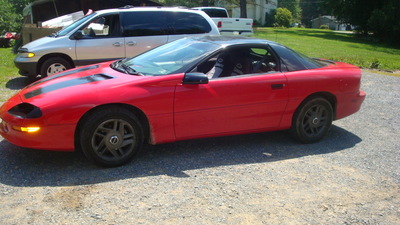
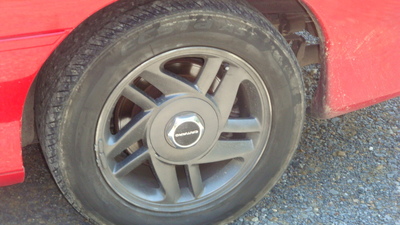
Here's photo's of the whole car with the painted rims. Sorry for the dirtyness. Haven't had time to clean it.
Name:  DSC01173.jpg
Views: 74
Size:  51.7 KB
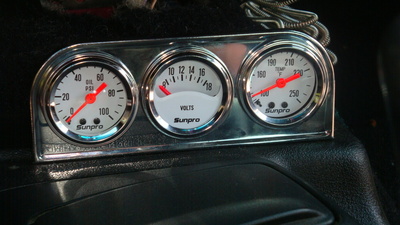
And my new gauges. Haven't gotten them hooked up yet. Still trying to find a good spot in the firewall to run the wires through. For now though, they're mounted, which is fine for me.
 
Old Aug 9, 2012 | 01:43 AM
  #77  
craby's Avatar
April 2011 ROTM
Joined: Mar 2009
Posts: 22,016
From: Tokeland, Washington
ROTM Winner's Club
Default

theres a good spot under the ecu, be right back. ok, back, look here http://shbox.com/fw/Firewall_wire_feed.html
 

Last edited by craby; Aug 9, 2012 at 01:46 AM.
Old Aug 9, 2012 | 10:47 AM
  #78  
MKCoconuts's Avatar
Thread Starter
|
4th Gear Member
Joined: Oct 2011
Posts: 2,553
From: PA
Default

That'll actually work perfect. Completely forgot about that spot. I all ready have my amp wire running through there so I know it's not too hard to get too. Thanks Craby. Not sure if I'll have enough line for the oil pressure sensor..so might have to pick more of that up.
 

Last edited by MKCoconuts; Aug 9, 2012 at 10:49 AM.
Old Aug 9, 2012 | 06:35 PM
  #79  
craby's Avatar
April 2011 ROTM
Joined: Mar 2009
Posts: 22,016
From: Tokeland, Washington
ROTM Winner's Club
Default

your going to hook in the oil pressure behind the intake right? that would save goin all the way over.
 
Old Aug 9, 2012 | 09:18 PM
  #80  
MKCoconuts's Avatar
Thread Starter
|
4th Gear Member
Joined: Oct 2011
Posts: 2,553
From: PA
Default

That's the plan. Just hoping the kit came with all the right fittings. I was hoping to find a spot or drill one in the center of the firewall or on trans tunnel to run the oil line up through since there's not much there. Not too big on having hot oil running into the cabin, which is why I'm gonna run the oil line through 1/4 in. hose as a safety precaution.


All times are GMT -5. The time now is 01:47 AM.