1996 Camaro Z28 Project Thread

Thread Tools
 
Search this Thread
 
Old Jul 10, 2012 | 08:31 PM
  #341  
WIspartan1026's Avatar
Thread Starter
|
May 2013 ROTM
Joined: May 2009
Posts: 1,671
From: Farmington Hills, MI
ROTM Winner's Club
Default

Ended up going with the intake elbow. It wasn't the same shade of silver as the CAI or the STB, so now it will match a bit better. Took one look at the alternator bracket, and was like, "Yeah...not happening." lol
 
Old Jul 10, 2012 | 10:03 PM
  #342  
craby's Avatar
April 2011 ROTM
Joined: Mar 2009
Posts: 22,016
From: Tokeland, Washington
ROTM Winner's Club
Default

yah good move, i wish i woulda had mine done when they did my intake.
 
Old Jul 11, 2012 | 04:00 PM
  #343  
WIspartan1026's Avatar
Thread Starter
|
May 2013 ROTM
Joined: May 2009
Posts: 1,671
From: Farmington Hills, MI
ROTM Winner's Club
Default

Parts back from powdercoat!

Name:  100_8433.jpg
Views: 49
Size:  198.8 KB
 
Old Jul 16, 2012 | 10:34 AM
  #344  
jrsmith4816's Avatar
Newbie
Joined: May 2012
Posts: 21
From: Southwest Michigan
Default

They look good. If you don't min dme asking, what did it cost to powder coat them? I did a valve cover job on my truck and I wish i had painted them
 
Old Jul 16, 2012 | 07:22 PM
  #345  
WIspartan1026's Avatar
Thread Starter
|
May 2013 ROTM
Joined: May 2009
Posts: 1,671
From: Farmington Hills, MI
ROTM Winner's Club
Default

well I bought a different type of disconnect tool and, lo and behold, it took a total of about 5 seconds to remove both fuel lines. smh...
 
Old Jul 16, 2012 | 08:17 PM
  #346  
WIspartan1026's Avatar
Thread Starter
|
May 2013 ROTM
Joined: May 2009
Posts: 1,671
From: Farmington Hills, MI
ROTM Winner's Club
Default

got the fuel rail all polished up. Here's a picture to give you an idea of before vs. after:
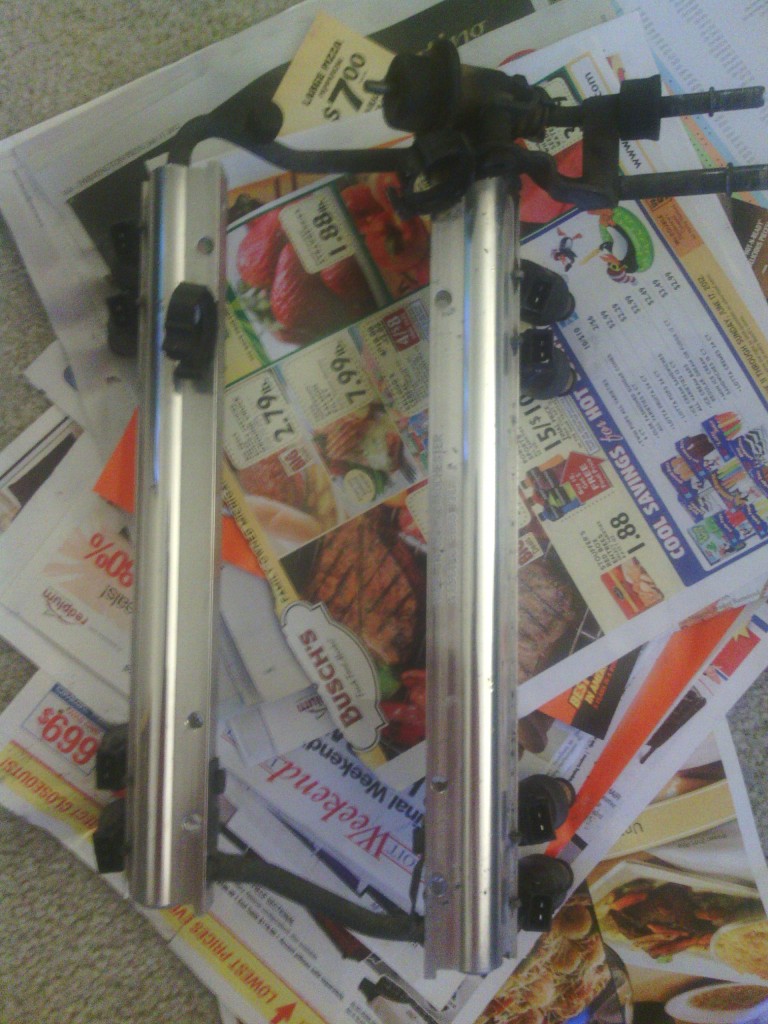
Name:  IMG_20120716_211251.jpg
Views: 69
Size:  184.1 KB

As it is now:

Name:  IMG_20120716_203327.jpg
Views: 65
Size:  193.8 KB

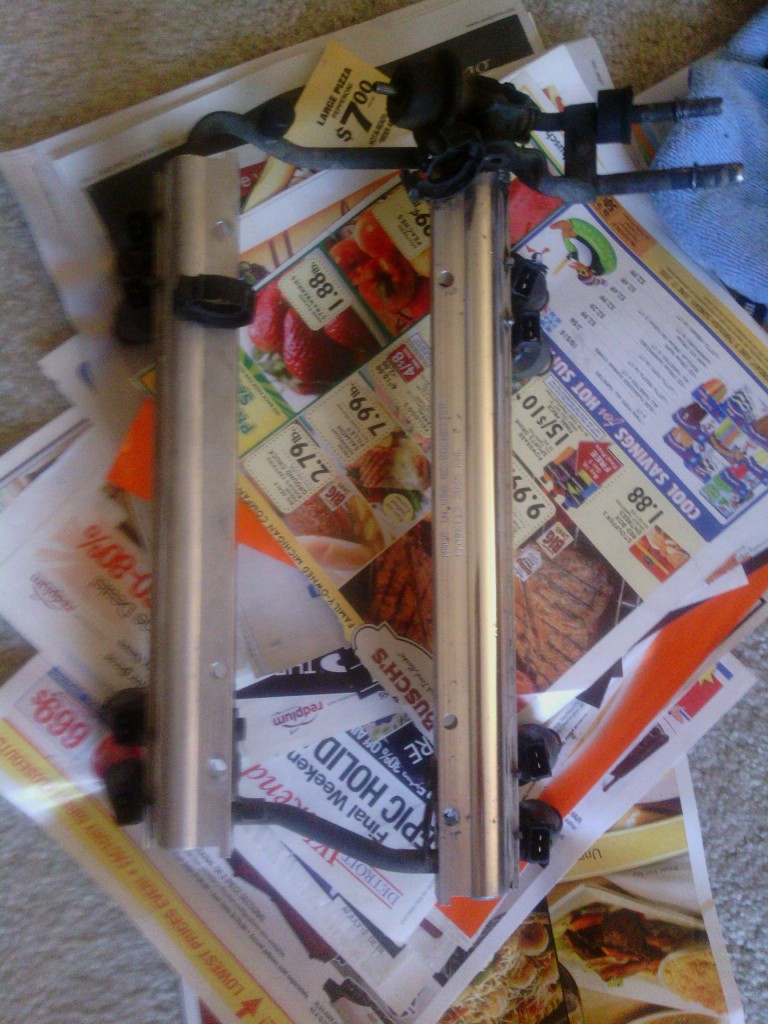
EDIT: wow, those pics suck. I'll get better ones tomorrow.
 

Last edited by WIspartan1026; Jul 16, 2012 at 08:19 PM.
Old Jul 17, 2012 | 07:10 AM
  #347  
WIspartan1026's Avatar
Thread Starter
|
May 2013 ROTM
Joined: May 2009
Posts: 1,671
From: Farmington Hills, MI
ROTM Winner's Club
Default

Originally Posted by jrsmith4816
They look good. If you don't min dme asking, what did it cost to powder coat them? I did a valve cover job on my truck and I wish i had painted them
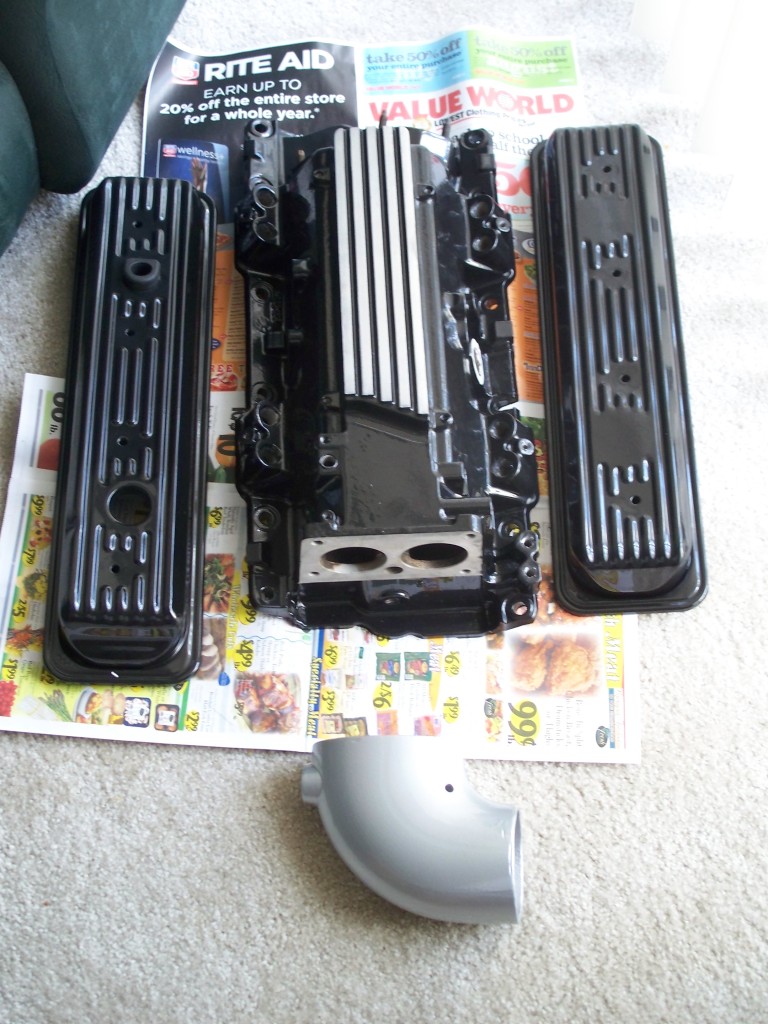
I got everything done for $120. The guy was doing a buy one get one free special. The intake mani was $90, then I got the elbow free with that. Valve covers for him are usually $30 apiece, but I got both of them done for that much because of the sale.
 
Old Jul 17, 2012 | 08:53 AM
  #348  
craby's Avatar
April 2011 ROTM
Joined: Mar 2009
Posts: 22,016
From: Tokeland, Washington
ROTM Winner's Club
Default

let us know how the valve covers handle it. was wondering if they were to flexible and paint would crack. like the looks. and yah i did my rack and took some pictures with same results. lol
 
Old Jul 17, 2012 | 10:22 AM
  #349  
WIspartan1026's Avatar
Thread Starter
|
May 2013 ROTM
Joined: May 2009
Posts: 1,671
From: Farmington Hills, MI
ROTM Winner's Club
Default

Originally Posted by craby
let us know how the valve covers handle it. was wondering if they were to flexible and paint would crack.
? not sure if I understand what you're saying here. The valve covers are already powdercoated, I just had them done black. Yeah they're black stock, but they look about 200% better than they did before.
 
Old Jul 17, 2012 | 12:20 PM
  #350  
craby's Avatar
April 2011 ROTM
Joined: Mar 2009
Posts: 22,016
From: Tokeland, Washington
ROTM Winner's Club
Default

mine were just painted,,, at least looks like plain factory engine paint. lol, ill have to look at em again, maybe change with the rusty ones on the netter.


All times are GMT -5. The time now is 02:37 PM.