
So here it goes, my project thread (2nd gen)


#343
 06-04-2011, 09:54 PM
I blasted most of the shell today. I have very little left before I can squirt primer. I pulled the dash last night and pretty much everything else. It really is a shell now. I had to stop for the day, the heat took too much out of me. Then I ran out of sand. I swept up a bunch of sand and filtered it through a screen for reuse tomorrow.
#344
06-06-2011, 02:15 AM
Let me start by saying, I have been in the sun so long this weekend that the sun now hides from me.
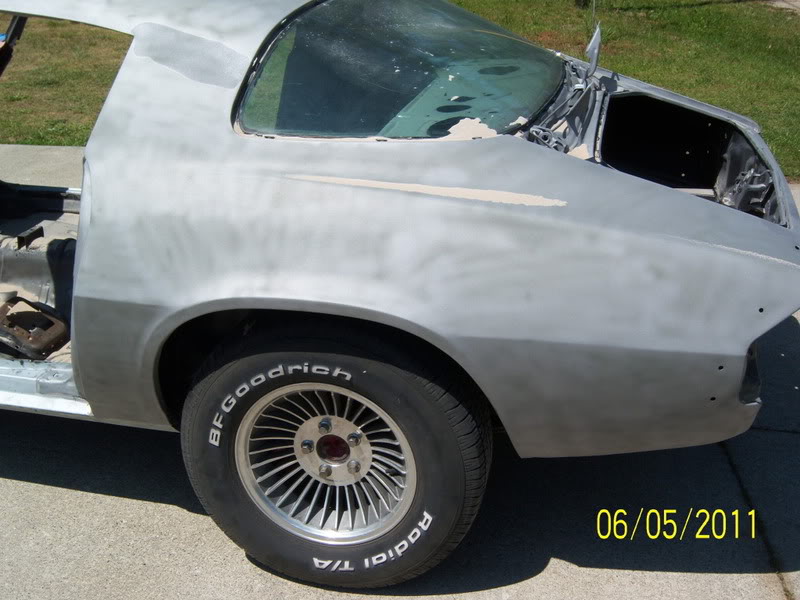
I blasted the day away yesterday and today. Then went at DAing with 80g to put a nice tooth for the epoxy to grab on to. Here's the way it went.
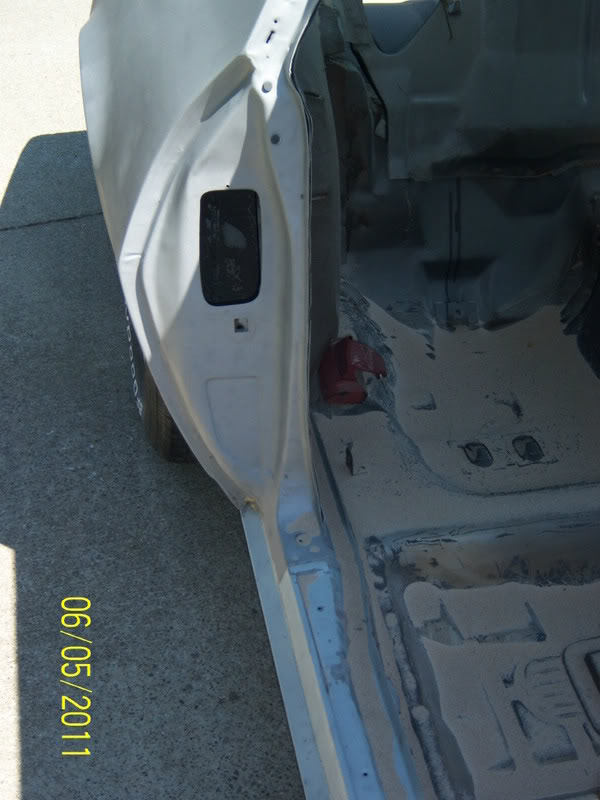
I'm glad i decided to do this as the whole passenger side 1/4 had rust completely covering the panel, except it was under acoat of paint. I could blast away the paint then have rust then blast the rust and have primer. Weird really. The whole panel was that way, rust under the paint.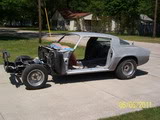
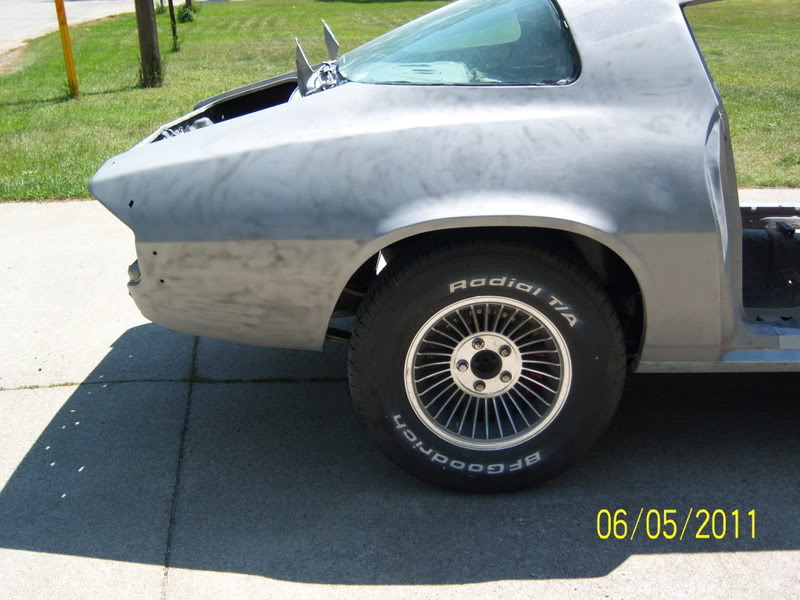
See these weird spot weld on the wheel lip? I don't see any signs of a replacement panel anywhere but these spot welds on the passenger side are goofy. Anyone ever see these? I haven't ever seen a car with the factory wheel wells in it besides this on.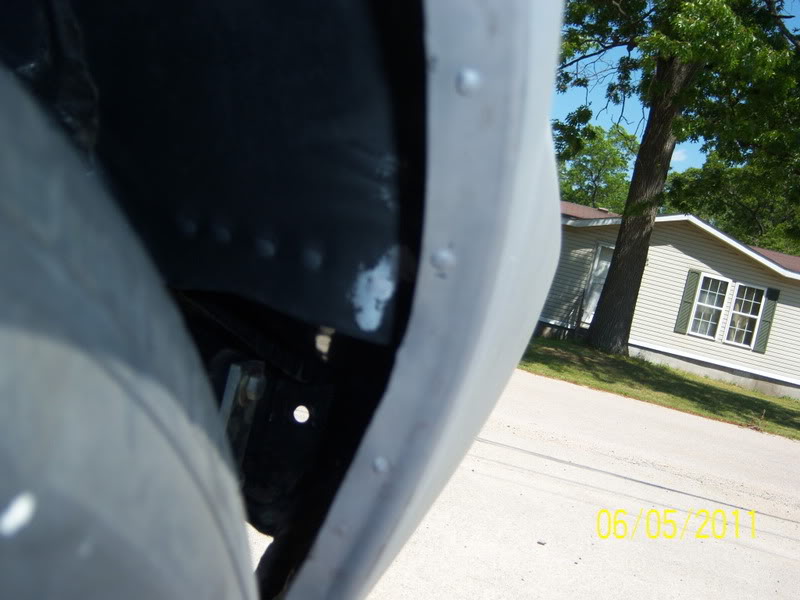
Now for the real deal. I shot epoxy tonight. There is plenty of dust in the paint but never mind that, most of it will be sanded off anyhow. I guarantee none will make it to the final finish. This is just the first of many coats of primer.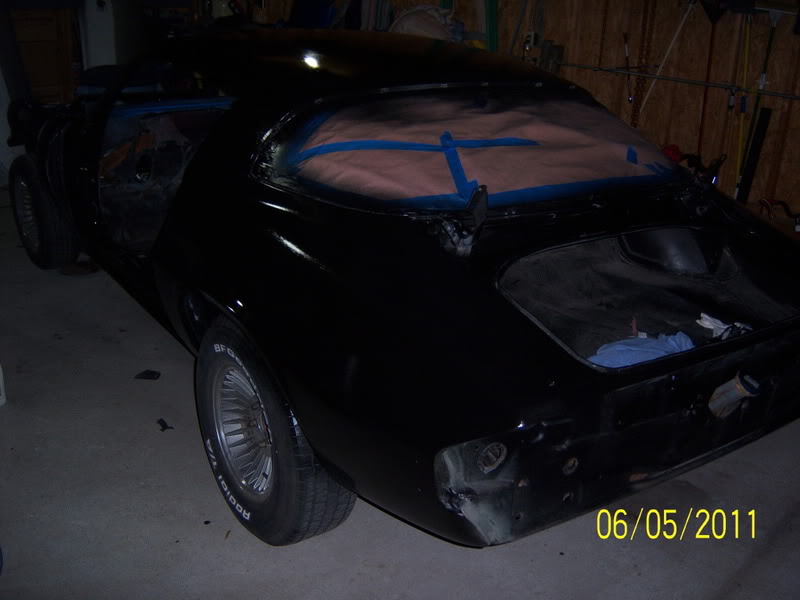

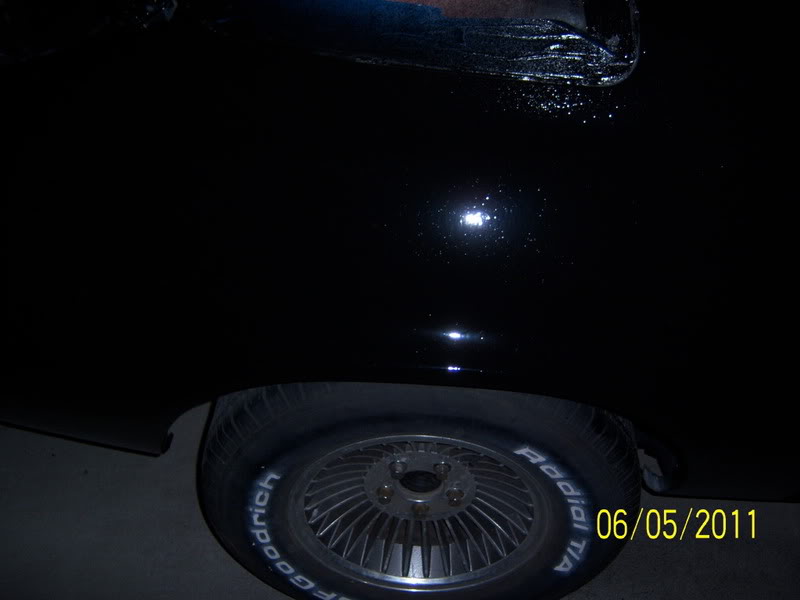

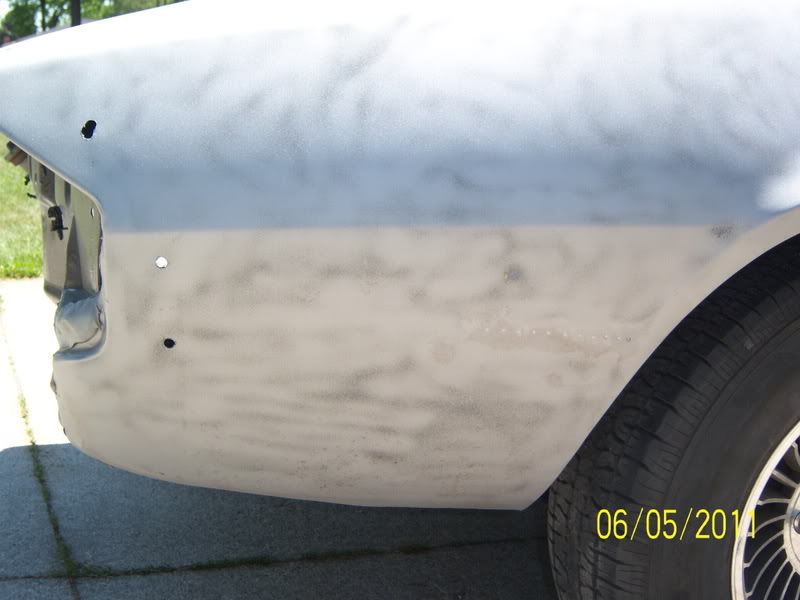
I am kind of diggin the black and the body only has a hand full of pin dents in it. I could do it I think. After putting gloss black on it I can't believe how straight it is. Body work will be a breeze, nothing is bigger that a quarter except for what looks like a crease that was fixed with a stud gun. I think a gallon of filler will be one gallon to much.
Until next time.
I blasted the day away yesterday and today. Then went at DAing with 80g to put a nice tooth for the epoxy to grab on to. Here's the way it went.
I'm glad i decided to do this as the whole passenger side 1/4 had rust completely covering the panel, except it was under acoat of paint. I could blast away the paint then have rust then blast the rust and have primer. Weird really. The whole panel was that way, rust under the paint.
See these weird spot weld on the wheel lip? I don't see any signs of a replacement panel anywhere but these spot welds on the passenger side are goofy. Anyone ever see these? I haven't ever seen a car with the factory wheel wells in it besides this on.
Now for the real deal. I shot epoxy tonight. There is plenty of dust in the paint but never mind that, most of it will be sanded off anyhow. I guarantee none will make it to the final finish. This is just the first of many coats of primer.
I am kind of diggin the black and the body only has a hand full of pin dents in it. I could do it I think. After putting gloss black on it I can't believe how straight it is. Body work will be a breeze, nothing is bigger that a quarter except for what looks like a crease that was fixed with a stud gun. I think a gallon of filler will be one gallon to much.
Until next time.
Last edited by 77nomad; 06-06-2011 at 02:21 AM.
#345
06-07-2011, 01:48 AM

Looks good man keep it up. gotta get my butt in gear and work on mine, been doing nothing but running around doing interviews, getting applications, and dropping off resumes.
#346
06-08-2011, 03:01 AM
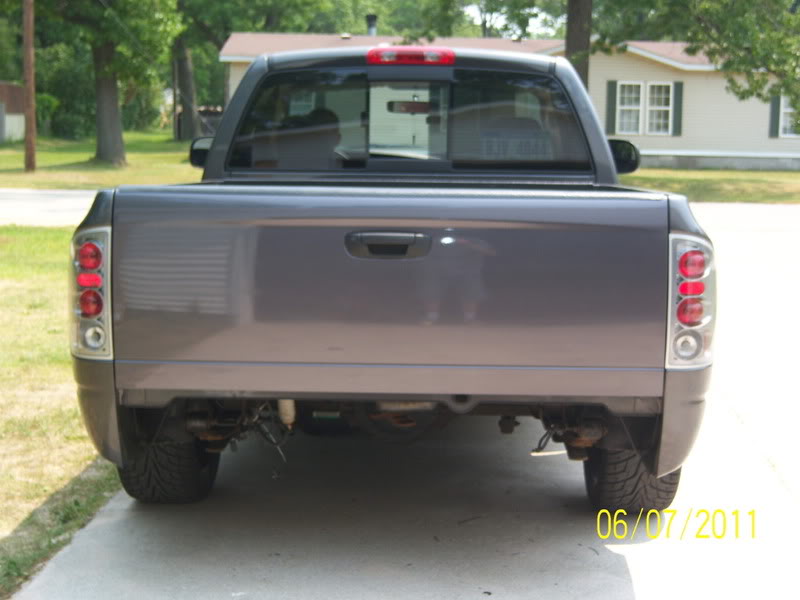
This was what I worked on all morning. My buddy (from the motor video) has an 04' Ram. He bought it new and over the years we've be slowly tricking it out. This morning we dropped the rear another two inches. Swapped the stock bumper for one he had painted body color. Also had to put on a new tailgate because back in our racing days he mounted a truck tool box to the tongue of the trailer. He cut it too tight one day and stabbed a big old hole in the gate. Funny! It is gettin a roll pan tomorrow. So far he tossed 22s in the back and 20s up front. I like it, were cruising Hot Rod Power Tour in it later this week so we have been ballz to the wall trying to get everything. Headlights with halos, new tail lights tomorrow, 2" drop spindles, 1" coils. The rear got a an axle flip and blocks. It has a total of 3" in front and 5" in back. Check it out.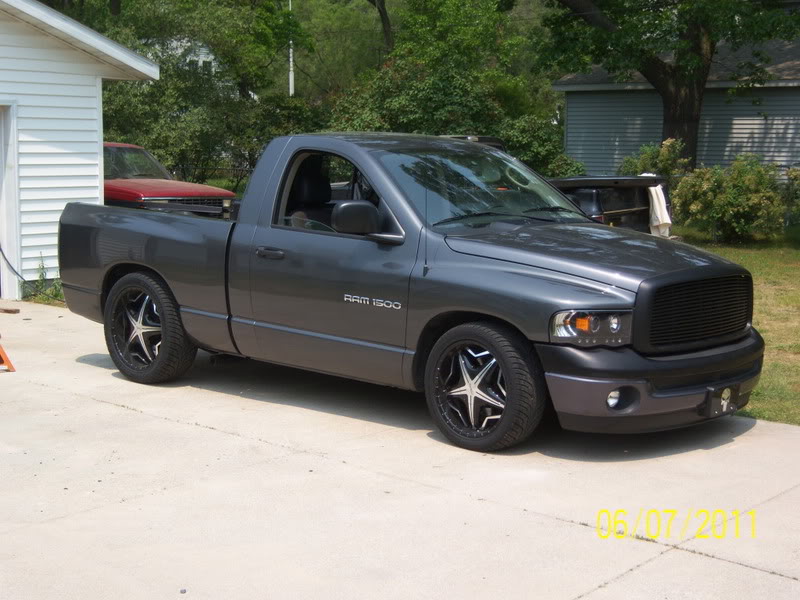
#347
06-08-2011, 03:04 AM
Tonight I got the subframe off and built a caster to roll it around on. I also planned out where to cut my firewall to smooth it. Started to block the prime but the humidity was awful. 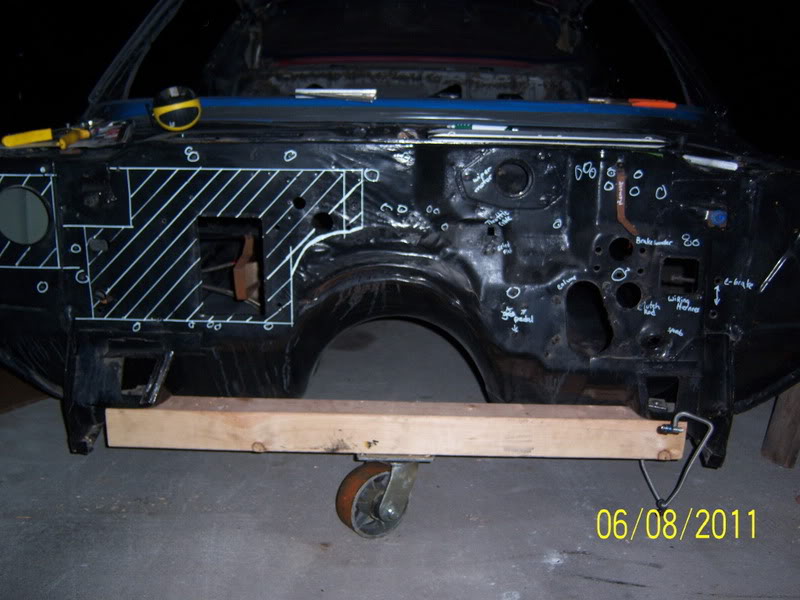

#349
06-08-2011, 02:03 PM

Join Date: Aug 2008
Location: Portland, Or
Posts: 9,097
Man I'm gonna have to get a bigger compuer screen! I'm spending more time scrolling back and forth than I ought to! 
Car looks great Damon, and you're really making progress now! Looks like you'll have more filler in finishing the firewall than you will in the whole body!
Car looks great Damon, and you're really making progress now! Looks like you'll have more filler in finishing the firewall than you will in the whole body!
#350
06-08-2011, 11:12 PM
I was thinking that same thing this morning, about the filler. Are my pics too big Vall? I shrink them to 600x 800, thats the size of a 15" monitor.
I got the hole cut for the panel this morning after installing a roll pan on the pick up. Power Tour is tomorrow. I'm gonna get a good nights sleep (I don't sleep well thats why my posts can literally be any time of day) and be ready to rock and roll.
I made the patch for the hole I cut tonight. All we have was some thick gauge stock so I'm giving Valls trick a go. I just laid the peice I cut out this morning on a sheet and traced it. The cut it out with a band saw. It still needs some massging but it will work fine. Now I have an a darn good reason to fire up the brand new 6 mo old welder and burn some steel.