Installing a LS1 in my 1977 Camaro
#81
 08-13-2011, 12:22 AM


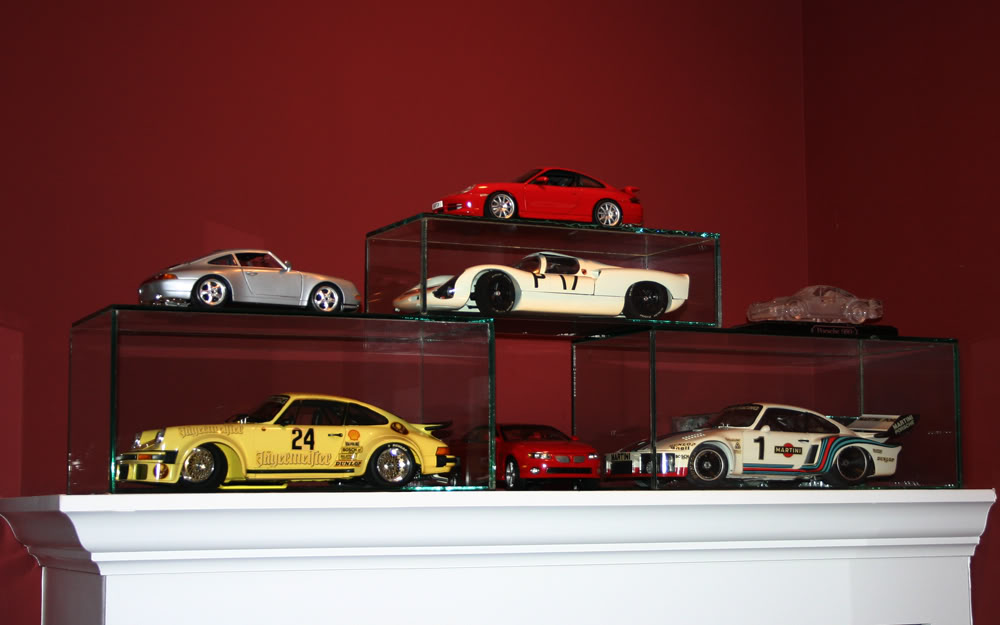
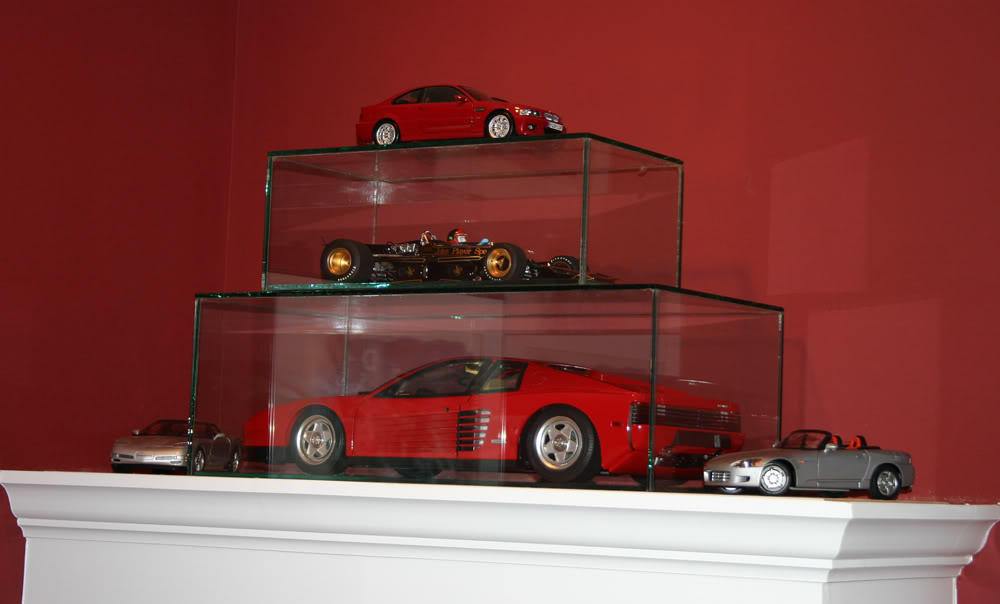
I would love to see how my car compared to one of those Porsches. The whole goal of my project was Porsche handling while remaining whisper quiet inside. If you live anywhere near Michigan, I do plan on driving to track days across the region.
You may be living on a fixed income but you must have retired from a descent career. Your garage is on par with my recently remodeled kitchen.
You may be living on a fixed income but you must have retired from a descent career. Your garage is on par with my recently remodeled kitchen.
#82
08-13-2011, 06:13 AM

I hate those big covers the Corvettes use! I'd rather see the engine and all it's wiring than those ugly things. I'm waiting for someone to come up with a plastic tube that's chromed outside to hide everything inside. You'd think with all the technology today they'd figure some way to clean it up and look good doing it.
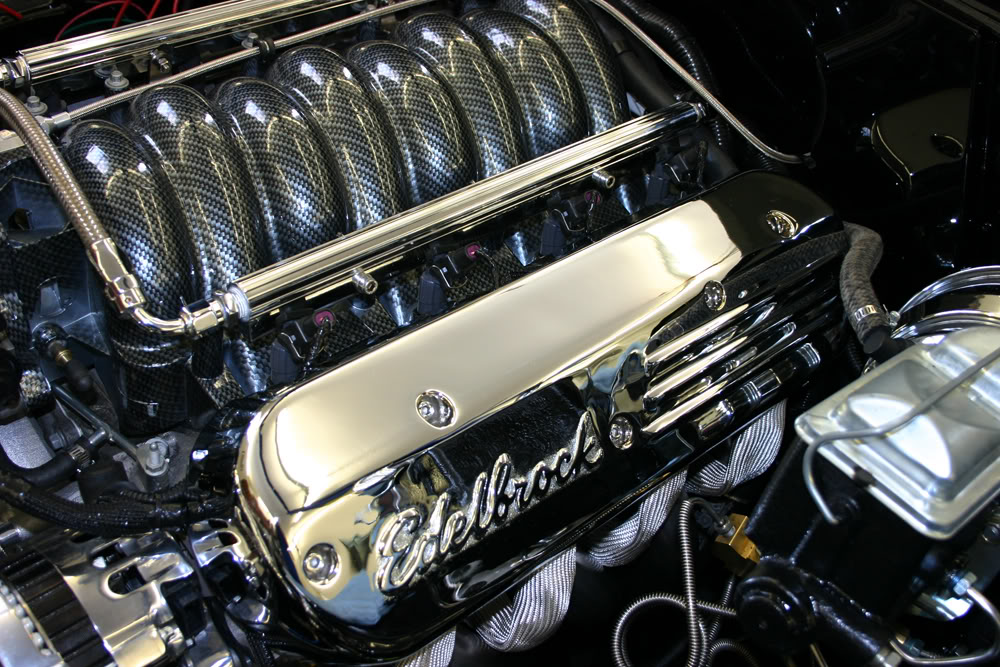
The Edelbrock valves covers are a great example of what they can do if they set their mind to it.
The Edelbrock valves covers are a great example of what they can do if they set their mind to it.
I was thinking the same thing about some type of tube. I may have to look into that. You would need a slit on the bottom large enough to fit the wiring through. These are small wires so the slit would not have to be very large.
#83
08-13-2011, 06:50 AM
I would love to see how my car compared to one of those Porsches. The whole goal of my project was Porsche handling while remaining whisper quiet inside. If you live anywhere near Michigan, I do plan on driving to track days across the region.
You may be living on a fixed income but you must have retired from a descent career. Your garage is on par with my recently remodeled kitchen.
You may be living on a fixed income but you must have retired from a descent career. Your garage is on par with my recently remodeled kitchen.
My wife and I met in college at Ball State University. We married after our freshman year. At that time Ball State had a mobile home park on campus for students. We bought a used 10' x 50' mobile home from one of the students who was graduating. Buying this mobile home would eventually lead me into my career of nearly 40 years in the mobile home industry.
To finance it, my mom took out a second mortgage on her house. While we were at my hometown bank in southern Indiana signing the papers, I told the bank employee that I might as well close out my account that I had had there since the fifth grade and my days as a paperboy. He brought over ninety-nine cents in change!! I am reasonably sure my wife did not marry me for my money!!!
I found those garage cabinets on Craigslist for $300 for both the overhead and base cabinets including the countertop. And they are of better quality than the ones in my kitchen. Lucky find there.
I live in NC now but I used to live near Elkhart, In. When I was active doing track days, we (my wife drove as well) ran all the mid-west tracks. In Michigan you have Grattan (one of my favorite tracks), Waterford Hills (one of my least favorites) and Gingerman. A few hours away you have Mid-Ohio (great track), Blackhawk Farms just south of Beloit, Road America in Wisconsin, and Putnam Park SW of Indianapolis. Lots of great choices. Plus there are some new tracks that have opened since I left the area. In my opinion, you live in one of the best areas in the country to do track events.
Once you get into doing track days, you will want to try new tracks. That's what prompted me to take my track car to Watkins Glen, Pocono, Summit Point, Road Atlanta, and Sebring.
A friend I had in Elkhart owned an RV company making motor homes and sold units as far away as California. We had two of his drivers each haul a trailer with our cars on them to LA on a delivery. We flew into LA and drove the cars north to Laguna Seca, did the event, drove the cars back to LA and had his drivers haul the cars back on their next delivery. Other than the flight to LA, it did not cost any more than driving to a track four hours away from northern Indiana. And the corkscrew at Laguna Seca is breathtaking!!!!!
#84
08-13-2011, 08:33 AM

Join Date: Aug 2008
Location: Portland, Or
Posts: 9,097
Your description of how you got started learning to work on cars fits well into how most guys get into hotrodding. Regardless of whether it's Porsche, Chevy. Ford, old rods, or muscle cars; many of us strated because we loved cars and didn't want to pay someone else to work on them.
I meet a lot of nice car people at various car events, and it's obvious who did what to their cars. Some guys wont let anyone do the slightest thing to their car, as they love every bit of personally taking charge of a build. Others are happy to just write a check for a completed car. Most are somewhere inbetween, and try to do whatever they can, but know their limitations and don't mind paying for some things to be done.
Thanks for sharing your car history with us. I enjoy hearing how people got into working on cars and reached whatever level they're at.
#85
08-13-2011, 10:01 PM
Your description of how you got started learning to work on cars fits well into how most guys get into hotrodding. Regardless of whether it's Porsche, Chevy. Ford, old rods, or muscle cars; many of us strated because we loved cars and didn't want to pay someone else to work on them.
I meet a lot of nice car people at various car events, and it's obvious who did what to their cars. Some guys wont let anyone do the slightest thing to their car, as they love every bit of personally taking charge of a build. Others are happy to just write a check for a completed car. Most are somewhere inbetween, and try to do whatever they can, but know their limitations and don't mind paying for some things to be done.
Thanks for sharing your car history with us. I enjoy hearing how people got into working on cars and reached whatever level they're at.
I meet a lot of nice car people at various car events, and it's obvious who did what to their cars. Some guys wont let anyone do the slightest thing to their car, as they love every bit of personally taking charge of a build. Others are happy to just write a check for a completed car. Most are somewhere inbetween, and try to do whatever they can, but know their limitations and don't mind paying for some things to be done.
Thanks for sharing your car history with us. I enjoy hearing how people got into working on cars and reached whatever level they're at.
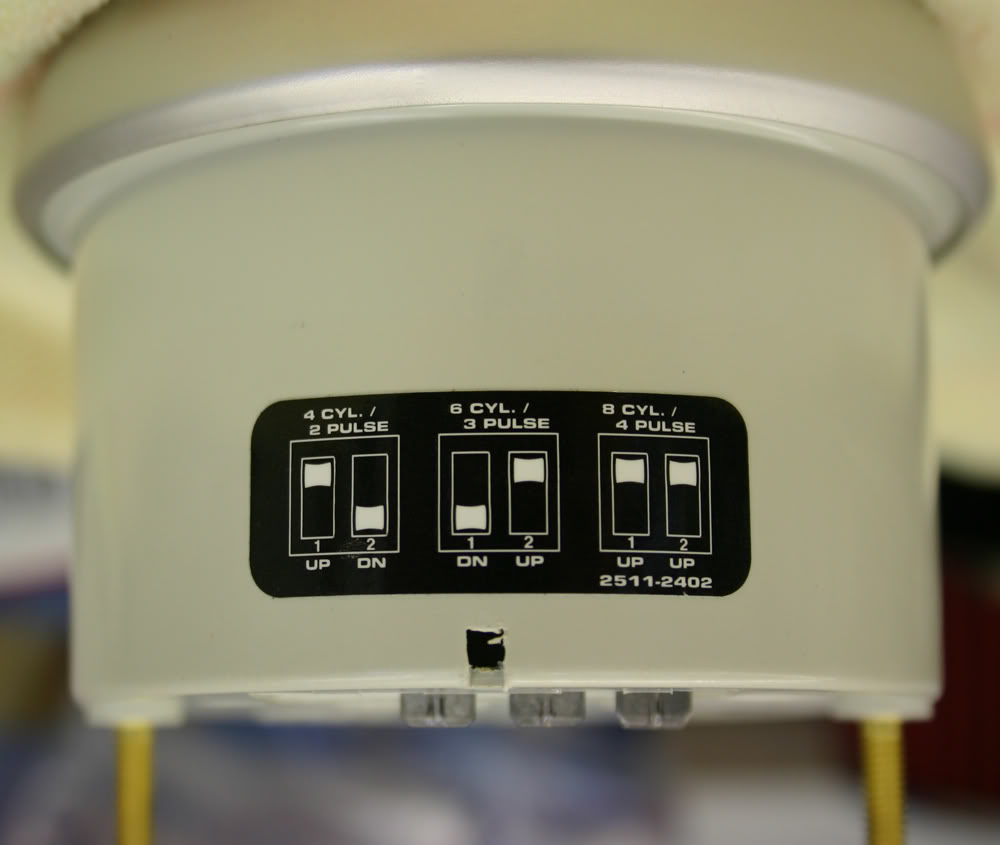
As I sorted through all of the remaining wires, I discovered the one for the tach has a 4 cylinder signal. The information for my tach showed that there are dip switches that would have to be changed to accept a 4 cylinder signal. This meant I had to remove the gauge panel. It is easier to remove if I lower the steering column. Had to crawl under the dash to get to the necessary two nuts. Always great fun!!
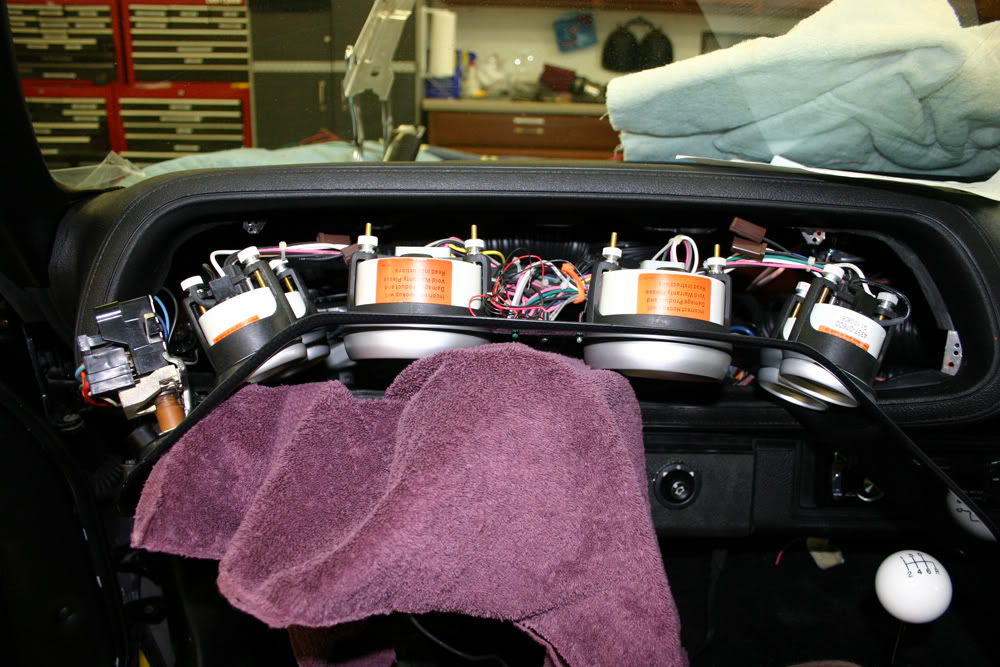
There is a plastic cover on the rear of the tach that covers the dip switches. The switches are very small so I had to use a small pick to move them.
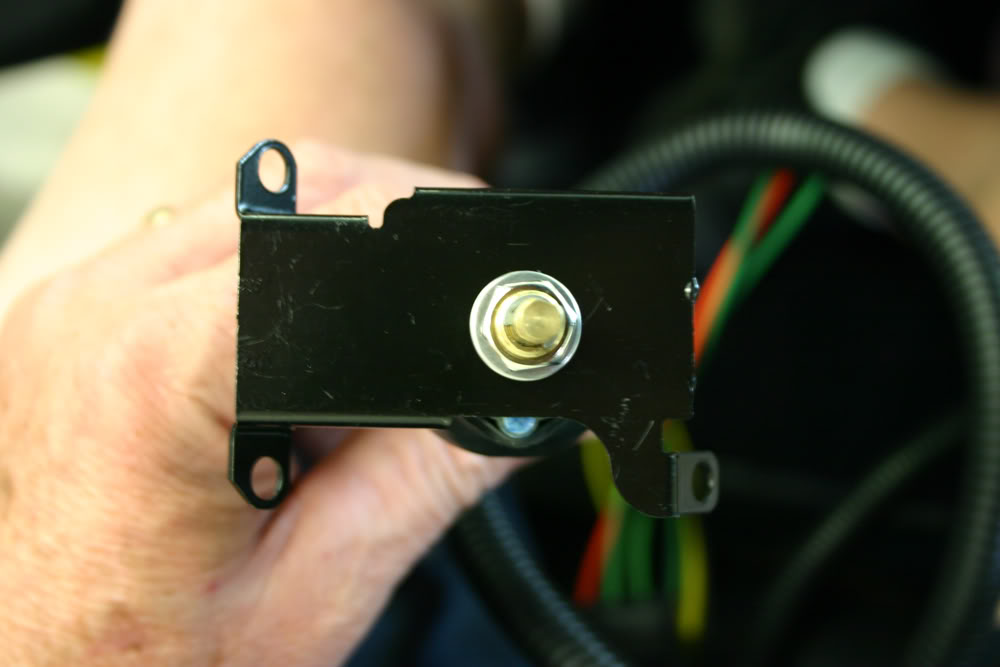
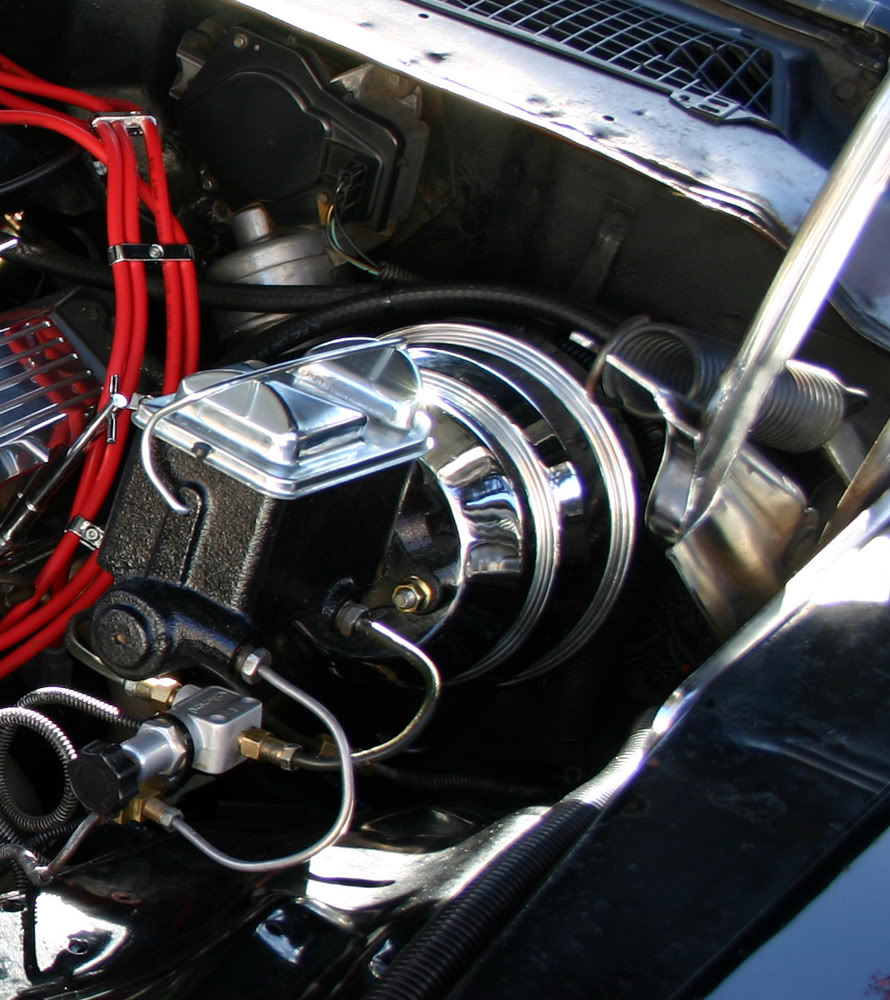
Prior to having my body man, Tim, smooth out my firewall, my son and my buddy talked me into buying Detroit Speed's Selecta Speed wiper motor. On the firewall the primary attraction is a much smaller unit. This kit gives you five intermittent and two full time speeds with a billet ****. I had removed the old wiper and Tim had installed the motor so he could design a cover for it.
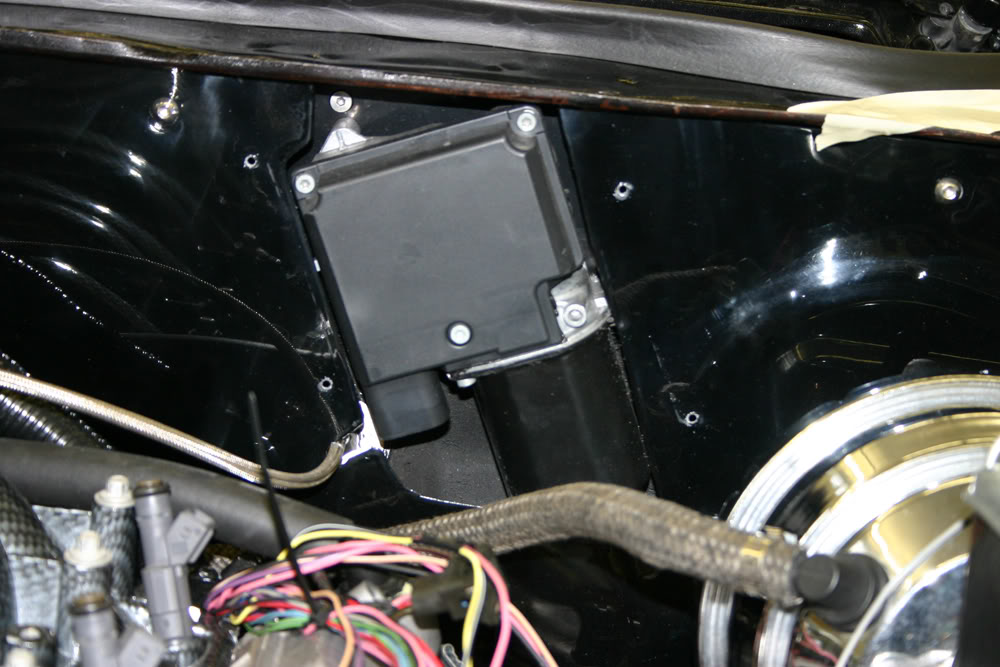
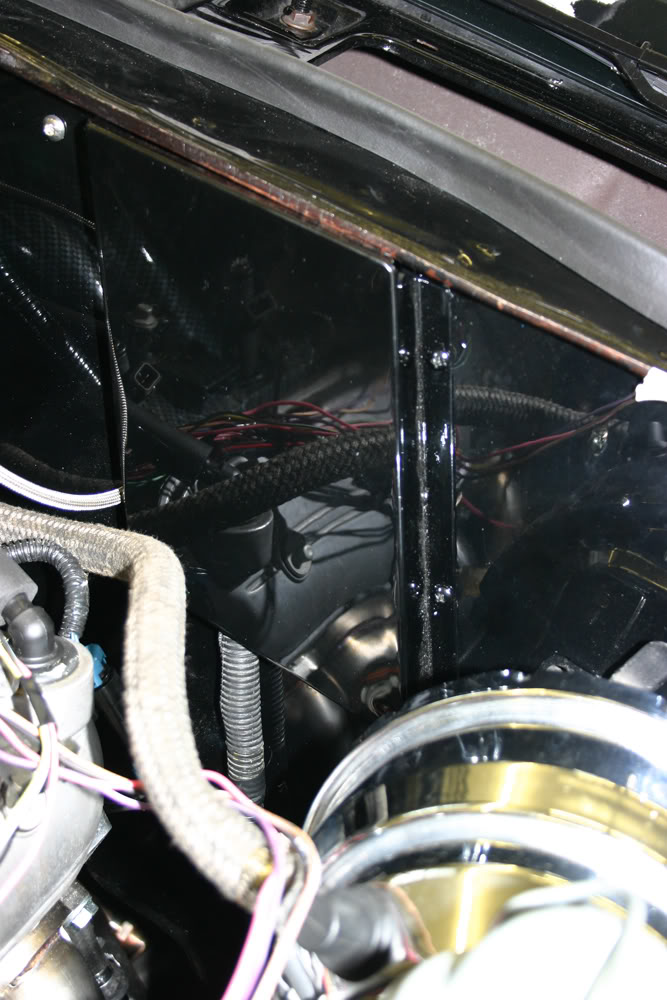

I was going to finish up the installation after I had the motor running. Since I had to remove the gauge panel, it only made sense to finish up the installation today.
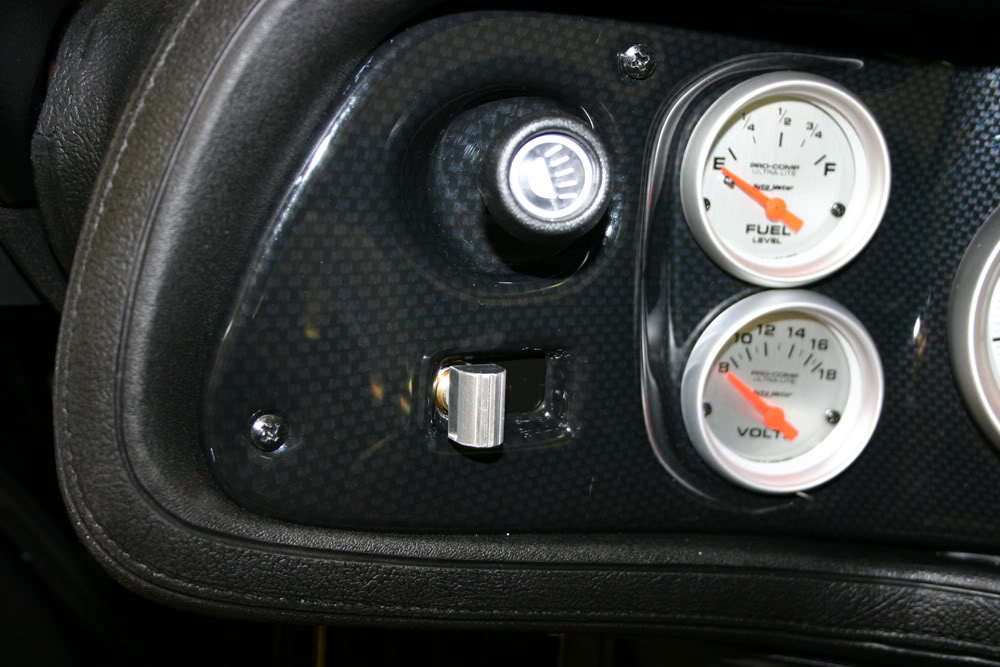
First you remove the old switch. DSE provides a mounting plate for the new switch that bolts into the existing mounting holes. The **** is held on with a set screw.
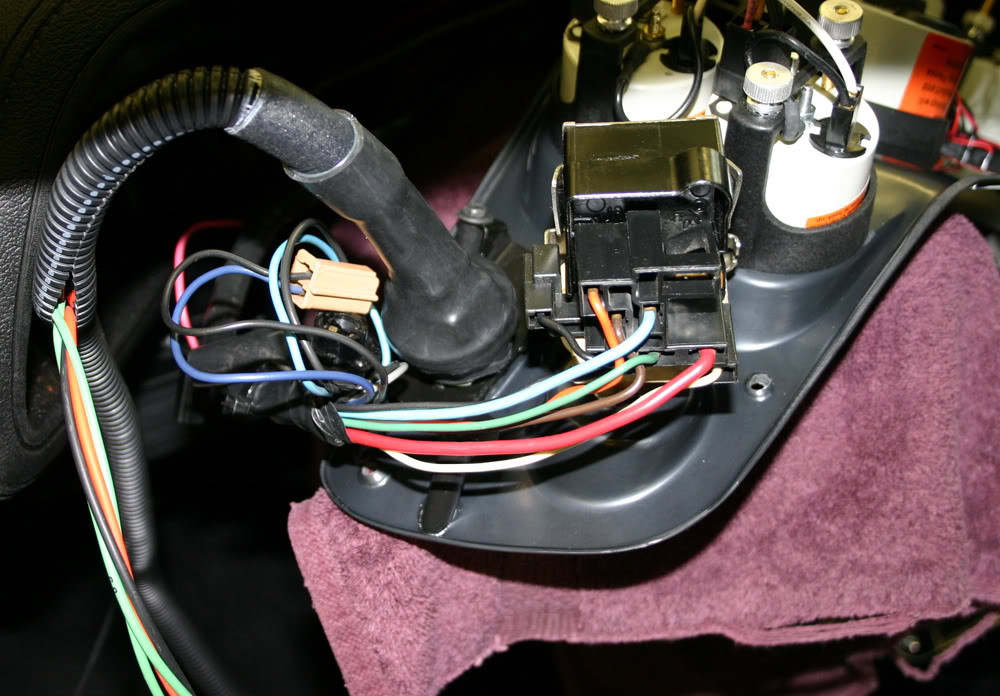
For the wiring, I had an existing hole that happened to be the right size and in the right location. After passing the wires through the hole, I had to insert the ends of the wires in the plug.
Under the dash, I only had to hook up a ground wire and a wire to 12V ignition. I had an opening on a recently added junction box that worked nicely. More lying on my back under the dash!!!
DSE's instructions ask you to check the motor for any clearance issues before hooking up the wiper arm. Since I have so many wires still not connected, I will have to wait on that until I am ready to hook up the battery.
About the time I got the dash back together, it was time for my buddy and I to ride our bikes to the local Harley dealer. They were having a charity benefit for our guys in service overseas where you donated canned goods, wipes, etc. We filled up our bags and did our part to help.
It was a good day.

#87
08-15-2011, 07:10 AM
I have made a simple car complex!!
#88
08-17-2011, 11:43 AM
Cool story. I learned how to identify most car parts while building model cars. I broke my ankle when I was 15, spent 3 months in the hospital and took over a year to walk again. I built models right there in my hospital bed, paint and all. My dad who is a car guy picked up on it and brought stacks of magazines. I was hooked.
#89
08-17-2011, 08:59 PM
Cool story. I learned how to identify most car parts while building model cars. I broke my ankle when I was 15, spent 3 months in the hospital and took over a year to walk again. I built models right there in my hospital bed, paint and all. My dad who is a car guy picked up on it and brought stacks of magazines. I was hooked.
Been working on wiring lately. Not a lot of sexy photos. However, I will try my best to get you all excited!!!
Stuff is everywhere in my garage as I am trying to get this project done.

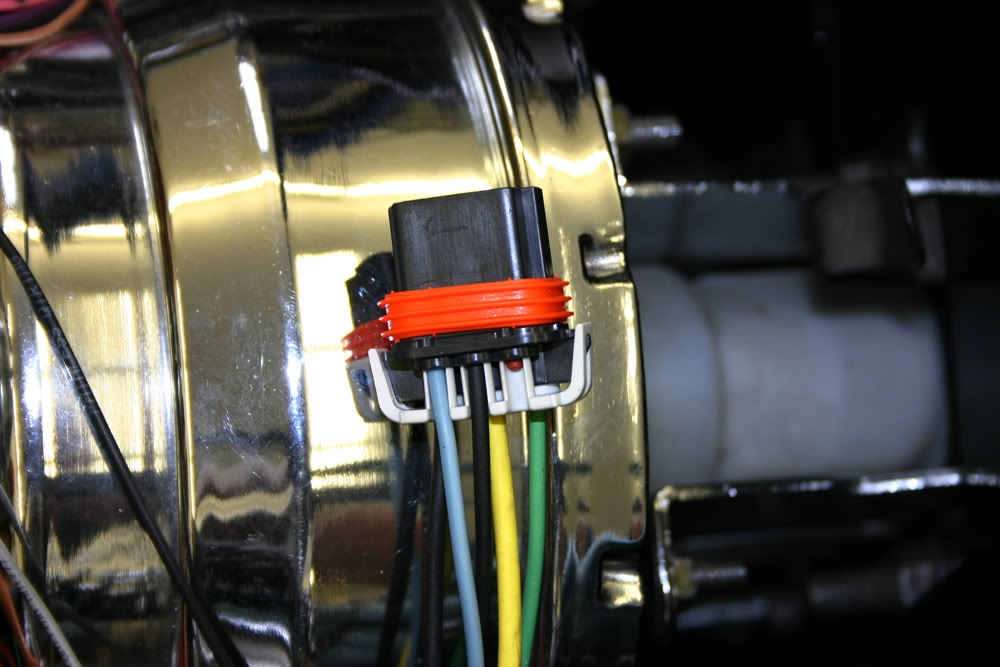
I got my parts back from the chromer. I had to drill a hole in my newly chromed cold air intake tube for the air temp sensor. I should have done this before, but until I had the harness laid out on the motor, I wasn't sure where it would need to be placed.

I had previously extended the MAF wiring so it would reach the front corner of the car. I didn't want to run it under the air intake tube as I would have had to install it with tie wraps. So I ran it back to the rear of the motor, along the firewall and then up to the left front corner. At the same time, I also wanted to clean up the wiring on the firewall. To do that, I basically ripped everything apart and re-routed everything under the brake booster rather than over the top of it. This was very time consuming as it was very difficult to get the wires into the convoluted tubing in that area. I had to put the car in the air and do part of it from the bottom. However, the end result was worth it. Here are before and after photos.

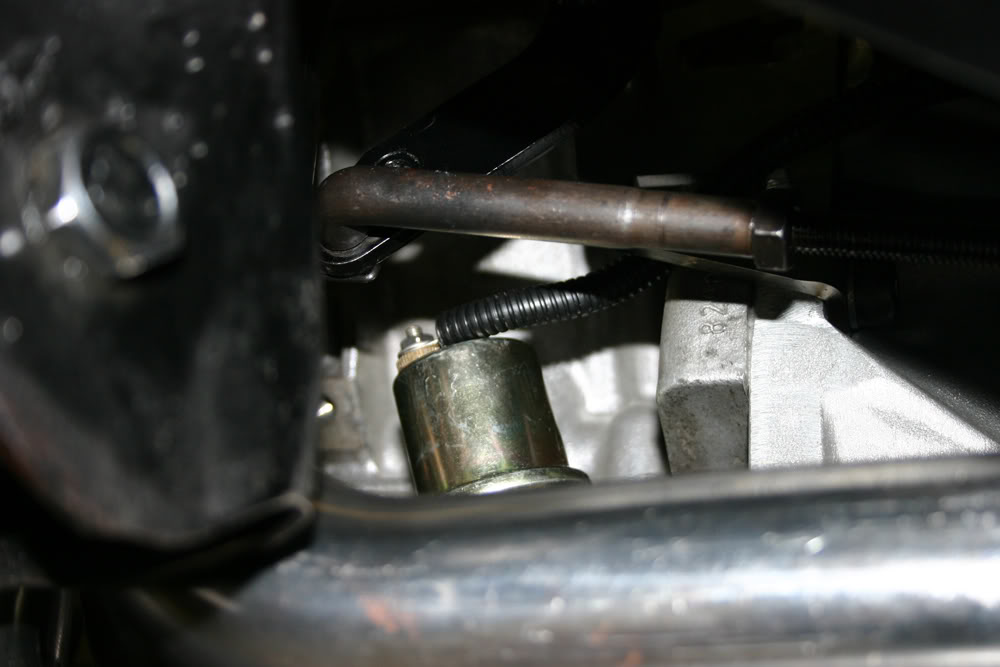
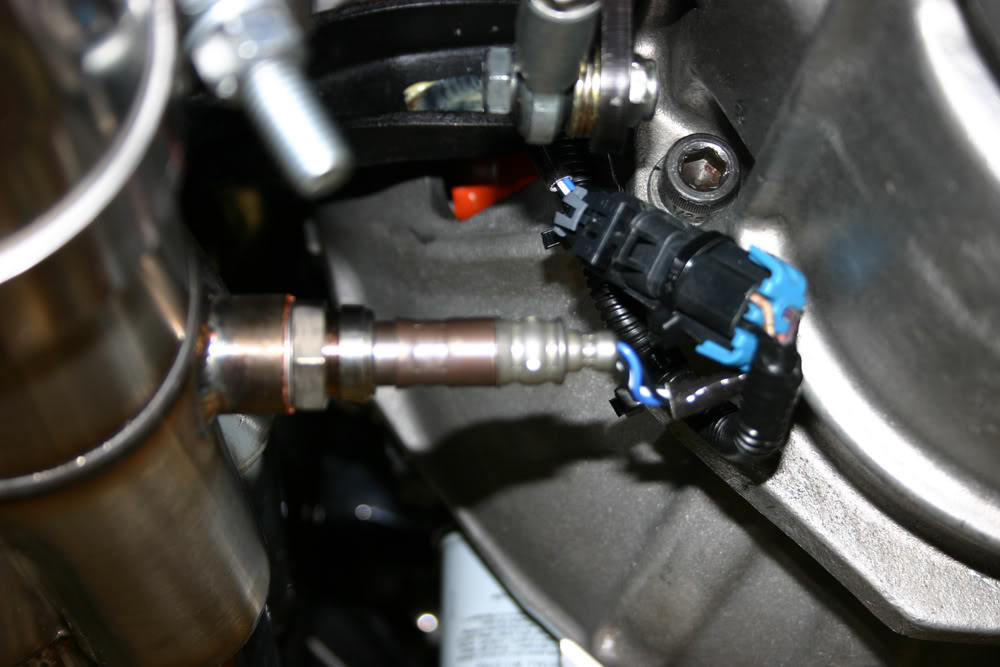
I also placed the wiring for the left o2 sensor and the oil pressure sender for my gauge in the tubing. I branched off the wire for the sender through the pivot ball adapter to the sender. Next I hooked up the o2 sensor and tie wrapped everything in place.

Now it is time to install the fuel rails, air intake tube and the coil covers.
#90
08-17-2011, 09:34 PM
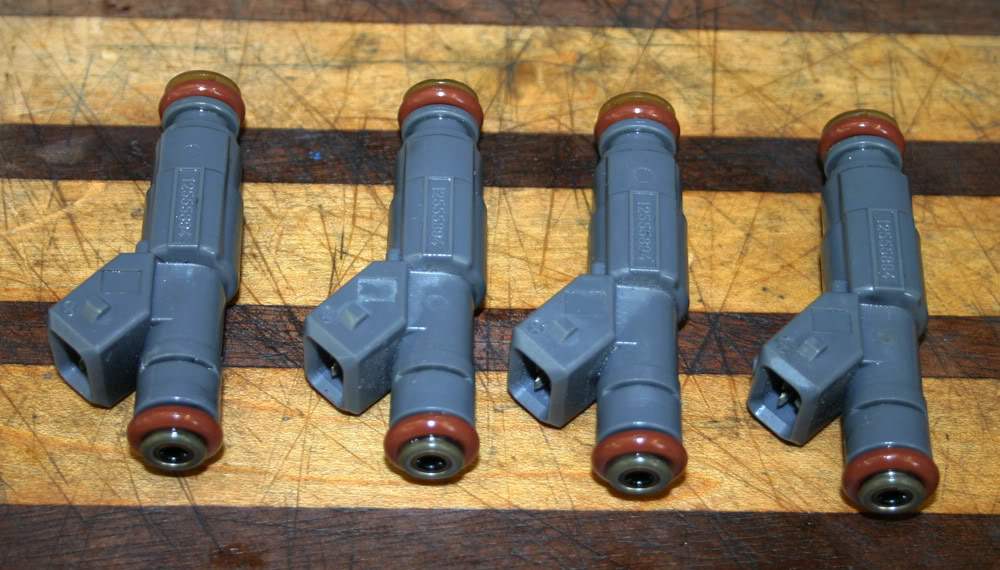
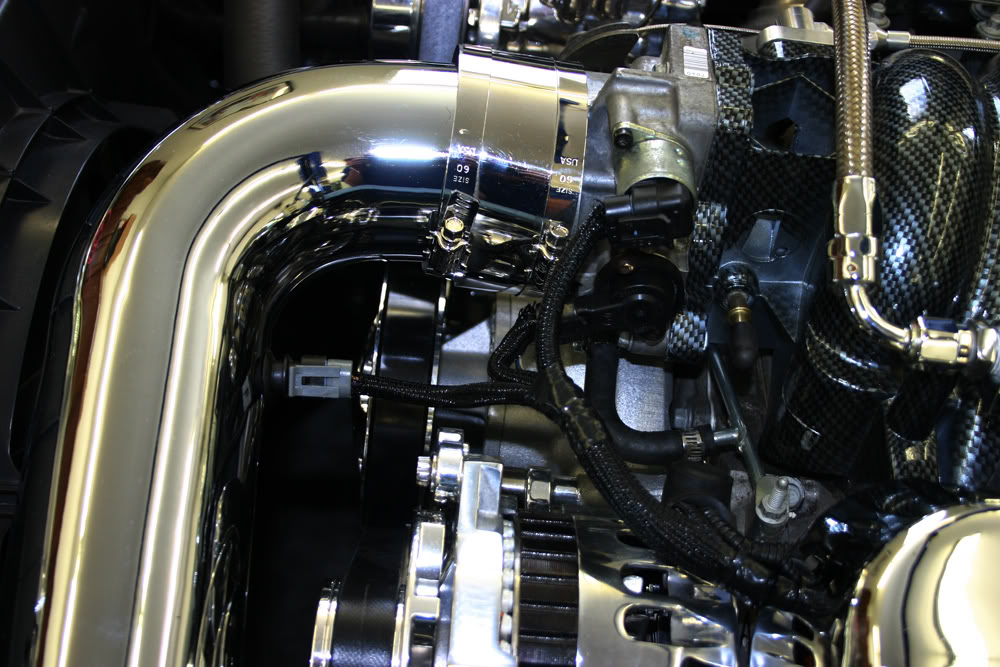
Time to install some of the chrome goodies. First up was to replace the O-rings on the injectors. Then it was simply a matter of pushing them into the fuel rails and then into the intake.
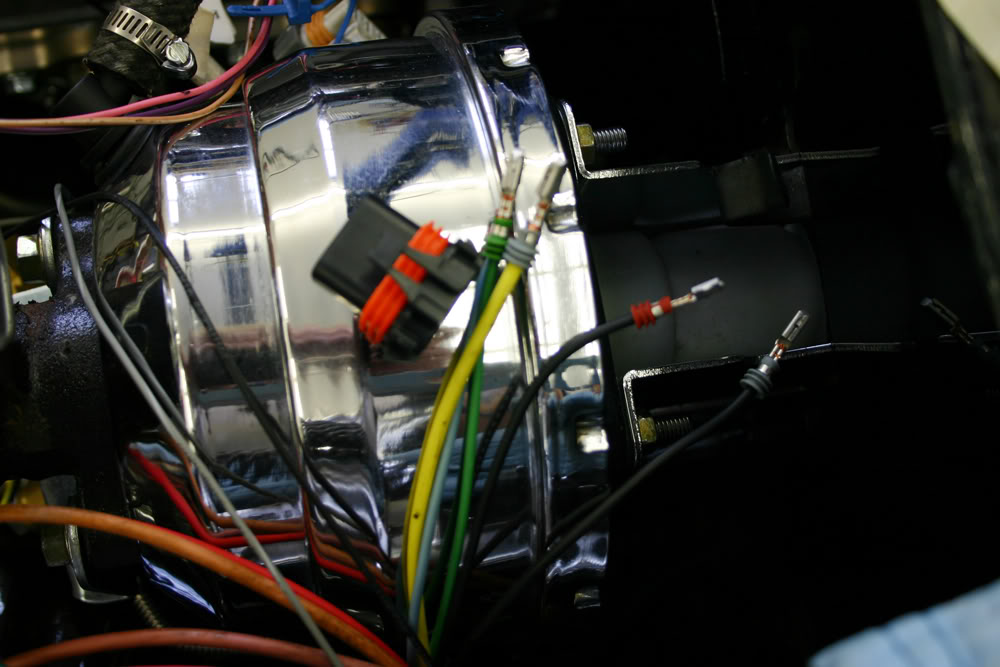
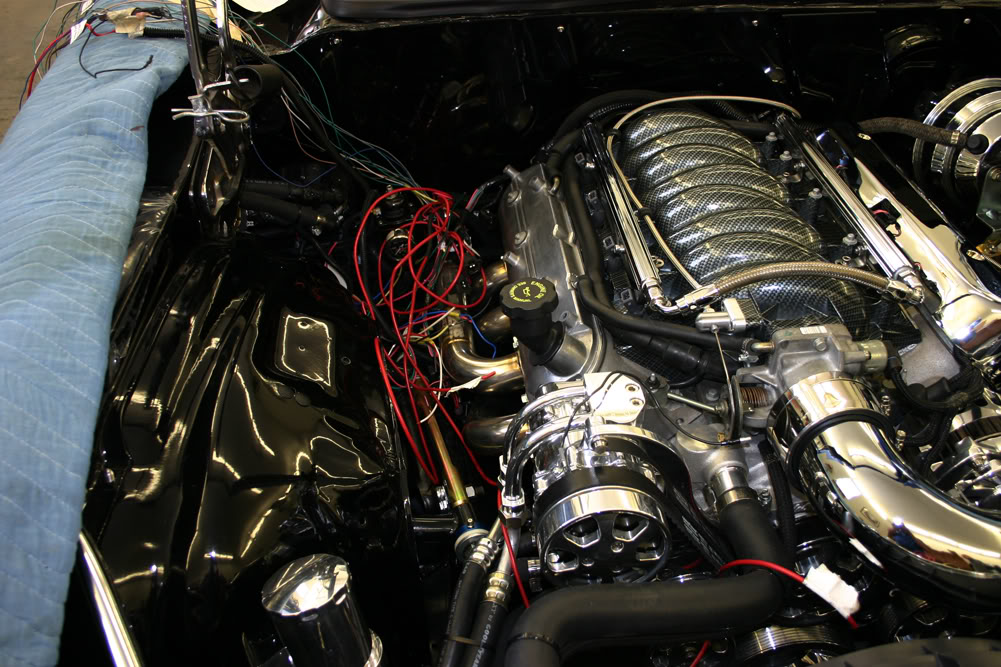
After I installed the plugs on the injectors, I wrapped all of the wiring on the left side. I used the braided mesh covering here for the wiring. I then test fitted the coil cover. I was pleasantly surprised to see that the coil cover covered most of the wiring. After removing the coil cover to make some final adjustments, I re-installed the coil cover. From the photos below you get an idea of what the finished motor will look like. In the fourth photo below, you can see some convoluted tubing running along the top of the inner fender. Once I am sure everything works, I will be loosening the inner fender and placing the tubing behind it under the outer fender.
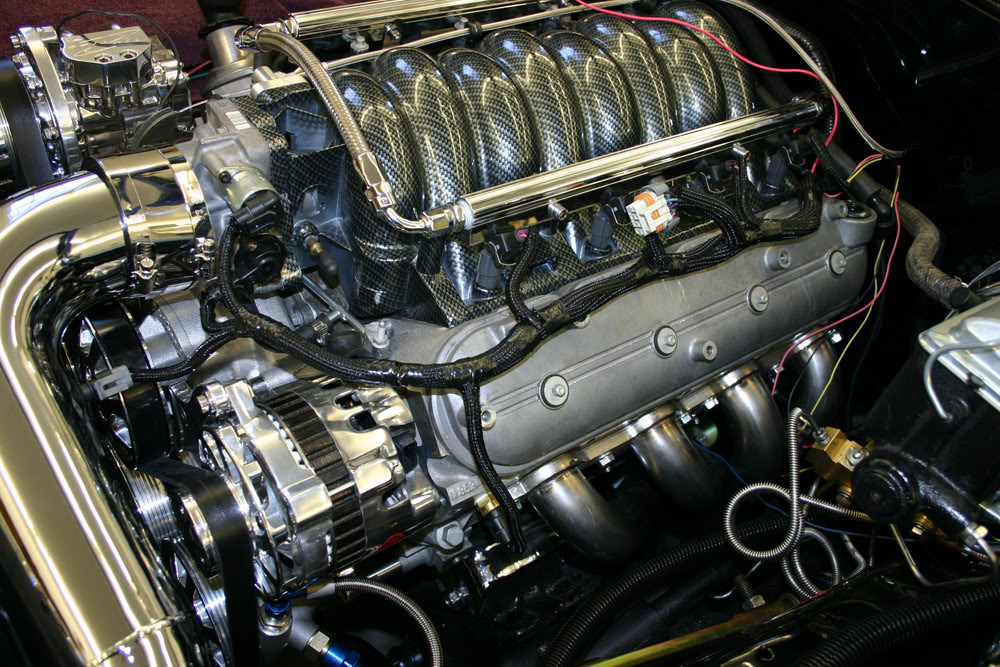
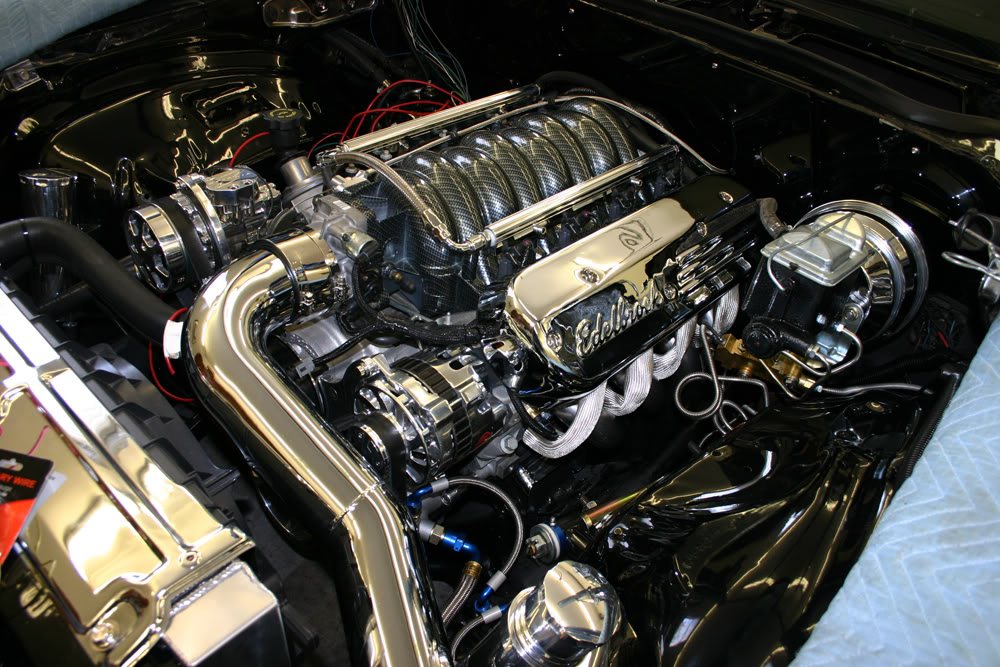
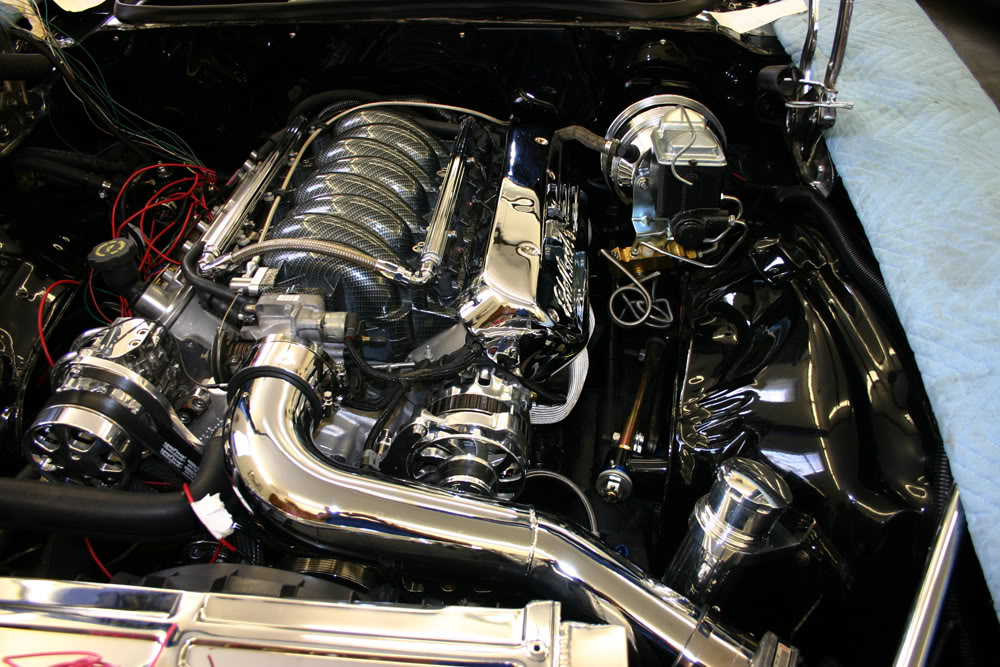
The photo below shows what is waiting for me tomorrow morning. At least there are less obstructions on this side. Still lots of wires to hook up.
www.jerryforthofer.wordpress.com
After I installed the plugs on the injectors, I wrapped all of the wiring on the left side. I used the braided mesh covering here for the wiring. I then test fitted the coil cover. I was pleasantly surprised to see that the coil cover covered most of the wiring. After removing the coil cover to make some final adjustments, I re-installed the coil cover. From the photos below you get an idea of what the finished motor will look like. In the fourth photo below, you can see some convoluted tubing running along the top of the inner fender. Once I am sure everything works, I will be loosening the inner fender and placing the tubing behind it under the outer fender.
The photo below shows what is waiting for me tomorrow morning. At least there are less obstructions on this side. Still lots of wires to hook up.
www.jerryforthofer.wordpress.com