
Installing a LS1 in my 1977 Camaro


Thread Starter
|
July 2011 ROTM
Joined: Dec 2009
Posts: 153
ROTM Winner's Club
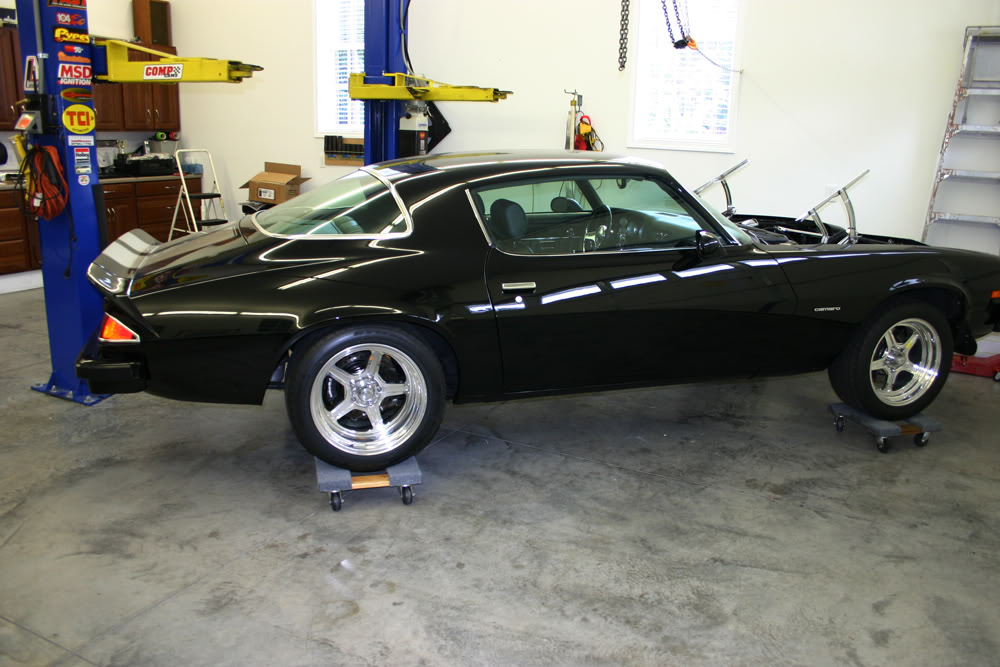
On the way back from showing my car at the Food Lion Autofair at Charlotte Motor Speedway, my engine started to make some strange noises. After pulling the valve covers and not seeing anything unusual, I put it up in the air and drained the oil only to find small shavings. Since the only way to pull the pan is to pull the motor, out it came. There were even more shavings in the pan. At this point I don't know exactly what is wrong, but a rebuild would be required.
Since I have said all along that if anything happened to this motor, a LS motor would be going in, it was time to act. I found a LS1 from a '99 Firebird with 32K miles. Since my father-in-law was in the hospital in northern Indiana, my wife and I headed there to visit with him. It so happened the motor was in Chicago, so we drove the truck. It is in the bed of the truck as I write this. We are still in Indiana, my father-in-law is doing better and, hopefully, we will be heading for NC soon.
Since my Richmond 6 speed is fresh, I am planning on using it. Keisler makes a bellhousing for this combination. One of the issues in using the Richmond is the ball for the Z-Bar that attaches to the motor. SD Parts makes an adapter. Next I have to find headers that will allow me to slip the Z-bar through them.
In looking to get the wiring harness modified, a place in Warsaw, In was recommended. It so happens that is my wife's hometown and I dropped off the harness there yesterday.
I do have some questions about the coolant hoses. I plan on using my Griffin radiator. Anyone have any ideas about which hoses will work?
Should be an interesting challenge getting everything to work and make it look good at the same time. Any suggestions are encouraged!!
We discovered the problem with my SB engine today. One of the lifters on cylinder 7 will not come out of the hole. It will move up and down some, but will not lift completely out of the hole. We can see wear on the lobe of the cam which explains the small shavings in the pan.
I have been disassembling the old motor and cleaning up the parts so I can sell them. The only things left to clean up are the heads at this point. I have someone interested in my short block so hopefully I can get it out of the garage soon and put the LS motor on the engine stand.
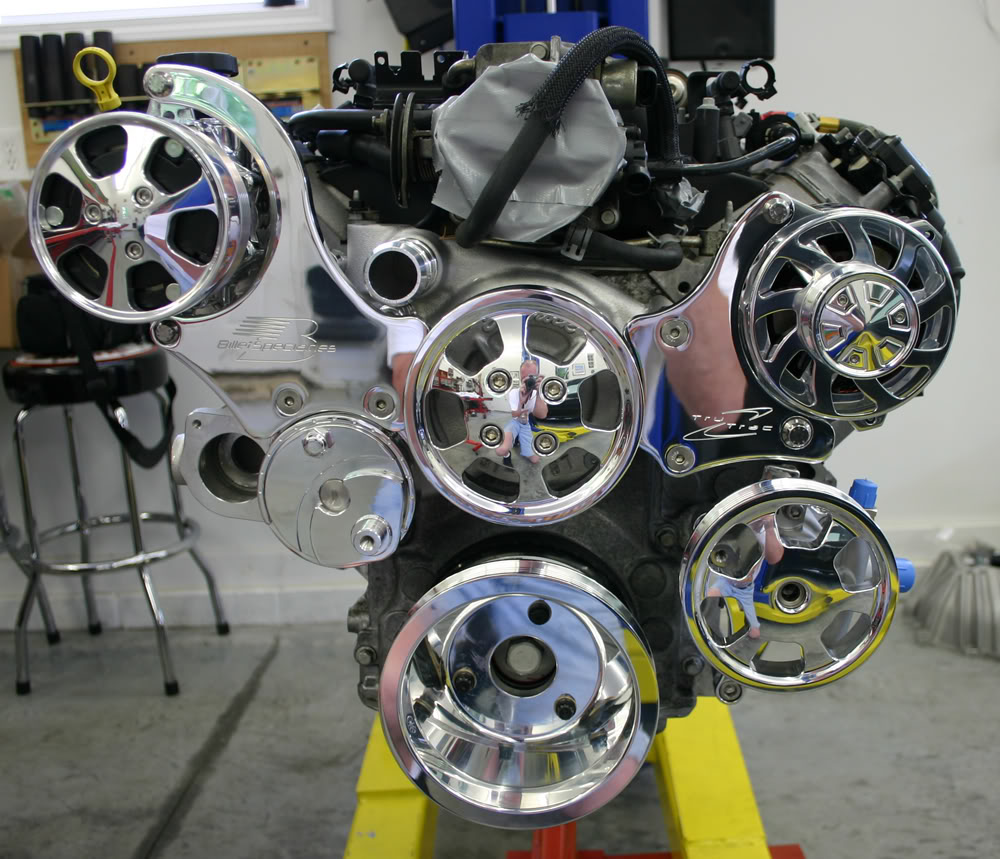
Since I really liked the look of the front runner kit on my old motor, I am planning on going that route on the LS motor as well. I also have some coil covers on the way to dress up the motor. I have a K&N air intake coming. I still have to remove some items from the car such as the CD box, the coil, and the rest of the fuel injection pieces.
The guy I bought the motor from had already installed a fuel line converting the LS fittings to a dash 6 fitting which is what I currently have on my fuel lines. The engine mount adapter plates are here. Once I have everything removed and the firewall/engine bay cleaned up, I can start the process of installing the motor and tranny. The adapter plates allow me to move the engine about 1 1/2" front to rear so hopefully I can find a sweet spot so my tranny will fit and I can use my old crossmember. If that works, I may not need a new driveshaft.
Lots of challenges to come but that is why we do this stuff!!!
Since I have said all along that if anything happened to this motor, a LS motor would be going in, it was time to act. I found a LS1 from a '99 Firebird with 32K miles. Since my father-in-law was in the hospital in northern Indiana, my wife and I headed there to visit with him. It so happened the motor was in Chicago, so we drove the truck. It is in the bed of the truck as I write this. We are still in Indiana, my father-in-law is doing better and, hopefully, we will be heading for NC soon.
Since my Richmond 6 speed is fresh, I am planning on using it. Keisler makes a bellhousing for this combination. One of the issues in using the Richmond is the ball for the Z-Bar that attaches to the motor. SD Parts makes an adapter. Next I have to find headers that will allow me to slip the Z-bar through them.
In looking to get the wiring harness modified, a place in Warsaw, In was recommended. It so happens that is my wife's hometown and I dropped off the harness there yesterday.
I do have some questions about the coolant hoses. I plan on using my Griffin radiator. Anyone have any ideas about which hoses will work?
Should be an interesting challenge getting everything to work and make it look good at the same time. Any suggestions are encouraged!!
We discovered the problem with my SB engine today. One of the lifters on cylinder 7 will not come out of the hole. It will move up and down some, but will not lift completely out of the hole. We can see wear on the lobe of the cam which explains the small shavings in the pan.
I have been disassembling the old motor and cleaning up the parts so I can sell them. The only things left to clean up are the heads at this point. I have someone interested in my short block so hopefully I can get it out of the garage soon and put the LS motor on the engine stand.
Since I really liked the look of the front runner kit on my old motor, I am planning on going that route on the LS motor as well. I also have some coil covers on the way to dress up the motor. I have a K&N air intake coming. I still have to remove some items from the car such as the CD box, the coil, and the rest of the fuel injection pieces.
The guy I bought the motor from had already installed a fuel line converting the LS fittings to a dash 6 fitting which is what I currently have on my fuel lines. The engine mount adapter plates are here. Once I have everything removed and the firewall/engine bay cleaned up, I can start the process of installing the motor and tranny. The adapter plates allow me to move the engine about 1 1/2" front to rear so hopefully I can find a sweet spot so my tranny will fit and I can use my old crossmember. If that works, I may not need a new driveshaft.
Lots of challenges to come but that is why we do this stuff!!!
Thread Starter
|
July 2011 ROTM
Joined: Dec 2009
Posts: 153
ROTM Winner's Club
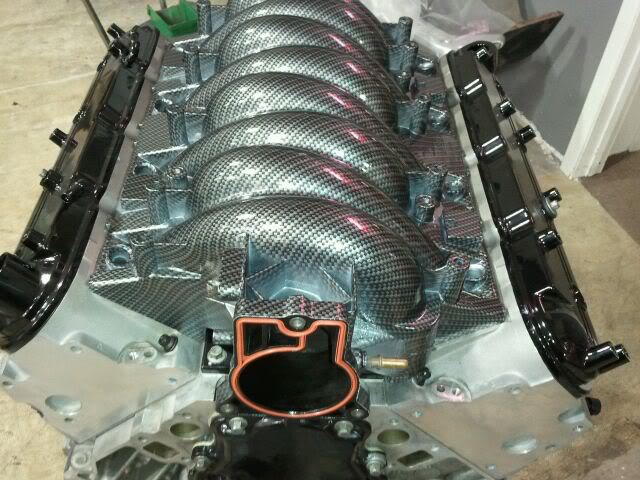
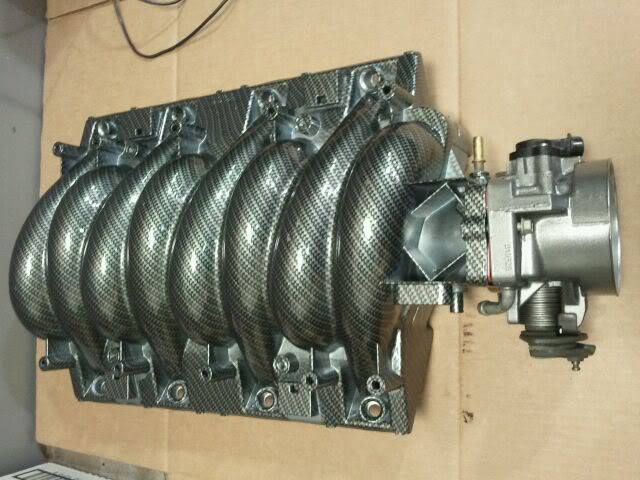
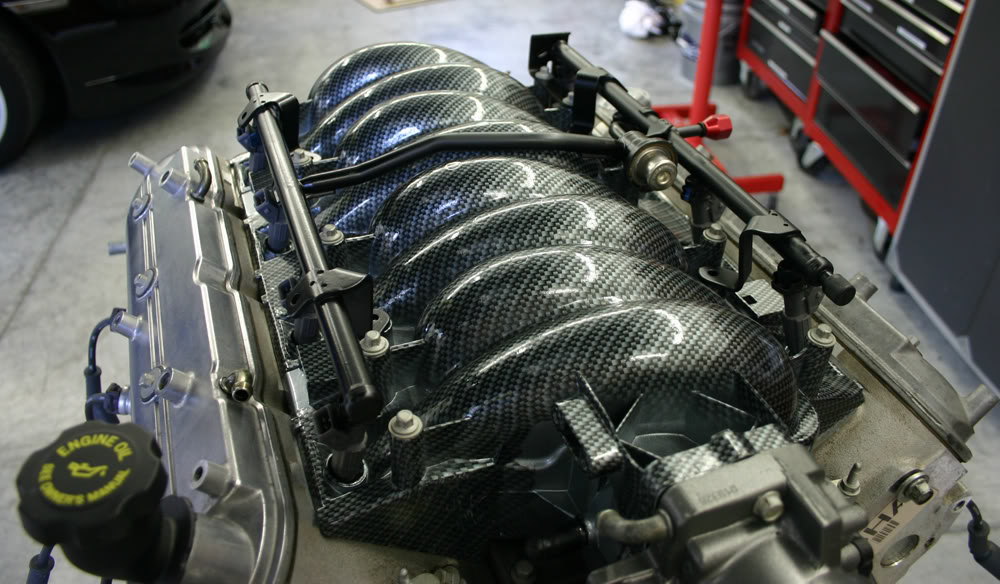
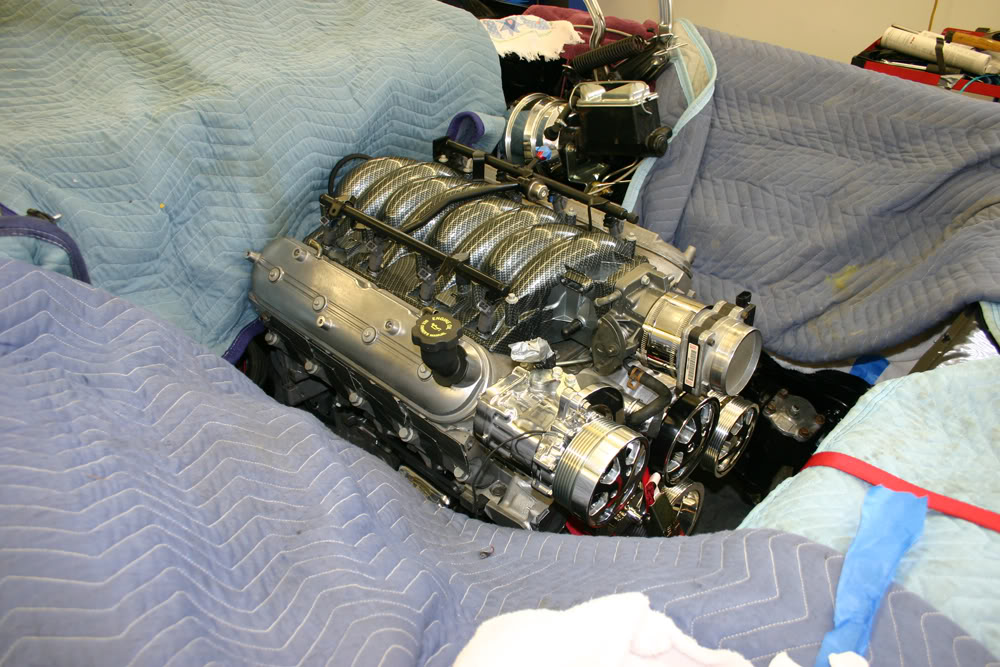
I am gathering the parts to make the switch and doing some reading on the LS motors. I found this LS6 intake and throttle body on Craigslist. I like the carbon fiber look and the LS6 intake and throttle body are supposed to flow better.
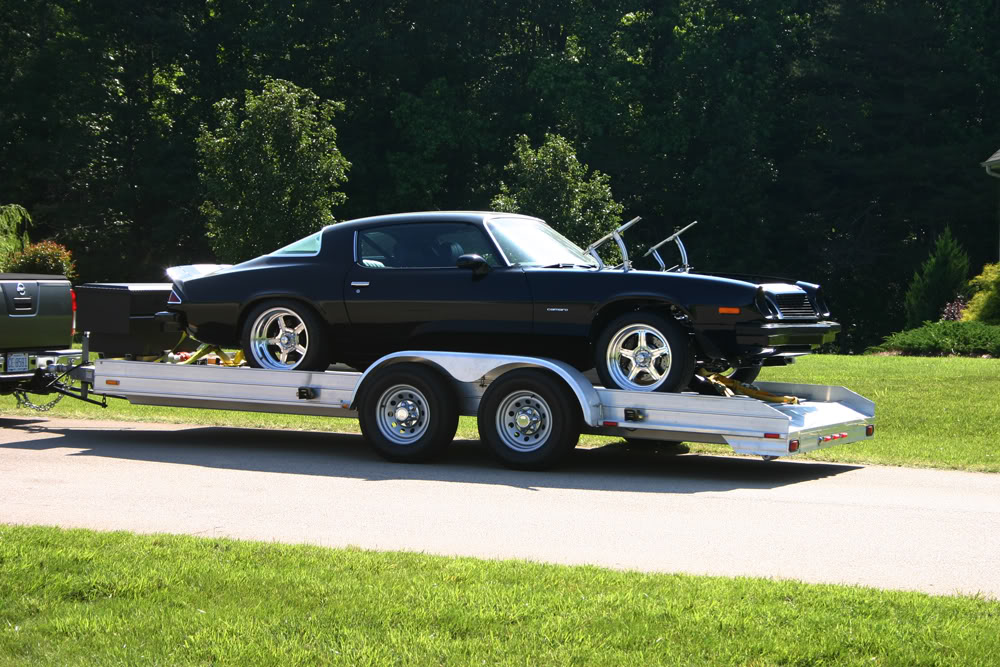
We hauled the car to the body shop a week or so ago to have the engine bay cleaned up. I am also having him smooth out the firewall. Should look much better.
I have been talking with Kooks headers about using my car as a guinea pig to design a header/exhaust system for LS swaps. Earlier this week, I talked with the sales manager who said he would get back with me. I had not heard back from him. Today my buddy and I were planning a bike ride. We are always looking for a destination, so I told him let's drive the 30 miles to Statesville and visit Kooks. The salesman (owns a '72 Camaro) took us on a tour of their two year old building. I was not very familiar with Kooks, but they have been in business since 1962 in Long Island, NY and only moved to Statesville two years ago. I was impressed with the quality of their stainless headers and it was an interesting tour.
Once we got back into the office, he hooked us up with the sales manager who drags a 2nd gen which does low 8's in the quarter at around 170!! He asked me why I thought there would be a market for this header and I asked him if he ever visited NastyZ28 or Pro-Touring.com. I told him if he went there and did a search about LS swaps, he would be surprised at how many threads there were. Plus, I told him, on Pro-Touring, he would see not only Camaros, but GTO's, Chevelles, Buicks, Olds, etc.
He then started asking me questions about my car and I showed him my blog. He liked what he saw there and said he need to talk with his boss. About ten minutes later he came back and offered me a sweet deal if I would get both the headers and the full stainless exhaust. I immediately said yes and we are scheduled to take the car there towards the end of June.
They have a digitizer so they will map the all the hard points on my car and feed that into the computer. Once they have done that, they can generate the entire system. Then they will actually make it to make sure the computer is accurate. Once they have all the dimensions nailed, they would make a jig for the production line. They said they would have my car for two or three weeks. Once they have everything done, the system will be available in their product line.
I am really pleased as I have a guaranteed system that will fit, plus it will look so good. I have been considering a hydraulic clutch, but he said he would prefer I do that after they are finished with my car as they want as many obstructions as posssible, which would include the Z-bar for the clutch. Doing it this way will insure that their system will work for a majority of situations.
I got the Billet Specialties front runner installed this week. I used some of the Kent-Moore tools from their LS tool kit to remove the harmonic balancer. Sure makes it easier when you have the correct tools. The bolt for the harmonic balancer must be torqued to 240 ft lb. I was concerned about tipping over the engine stand so I raised my lift, slid the engine stand under two of the arms and then lowered the arms over the engine stand legs. It worked.


I am waiting for some parts to install the LS6 manifold on the motor. The coolant lines must change and the correct ones are on the way. I also found at Speedway Motors the adapters I need for my oil pressure and water temp senders. These adapters will screw into the block in the factory locations and convert to 1/8NPT so my senders from my old motor will work.
I also replaced the rear main seal and am getting ready to install the rear cover and the oil pan. I found a thread showing how to use one of the tools in the Kent-Moore LS tool kit for aligning the covers with the oil pan.
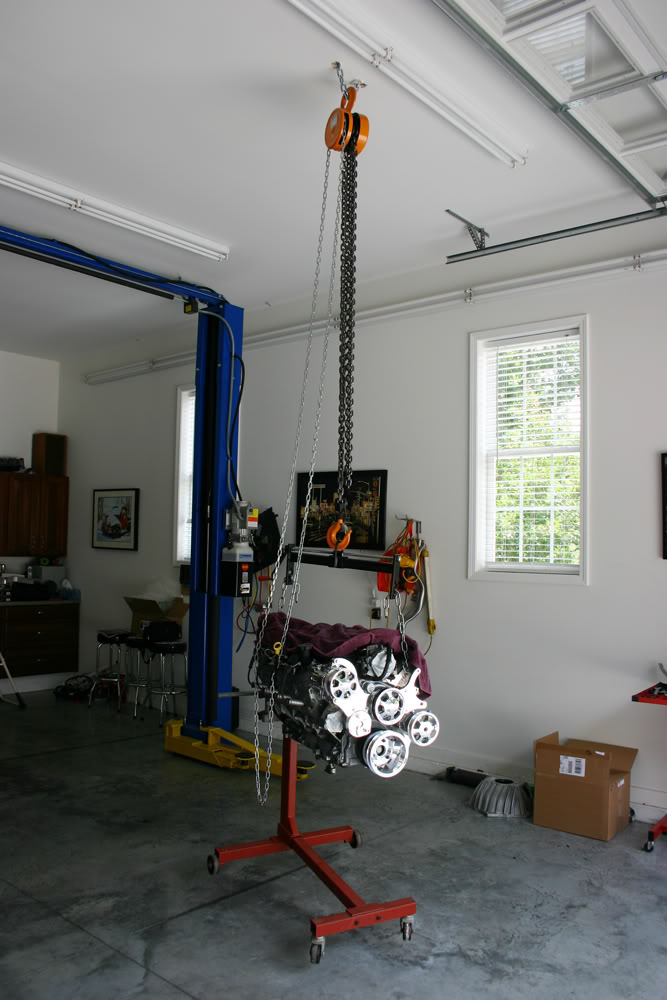
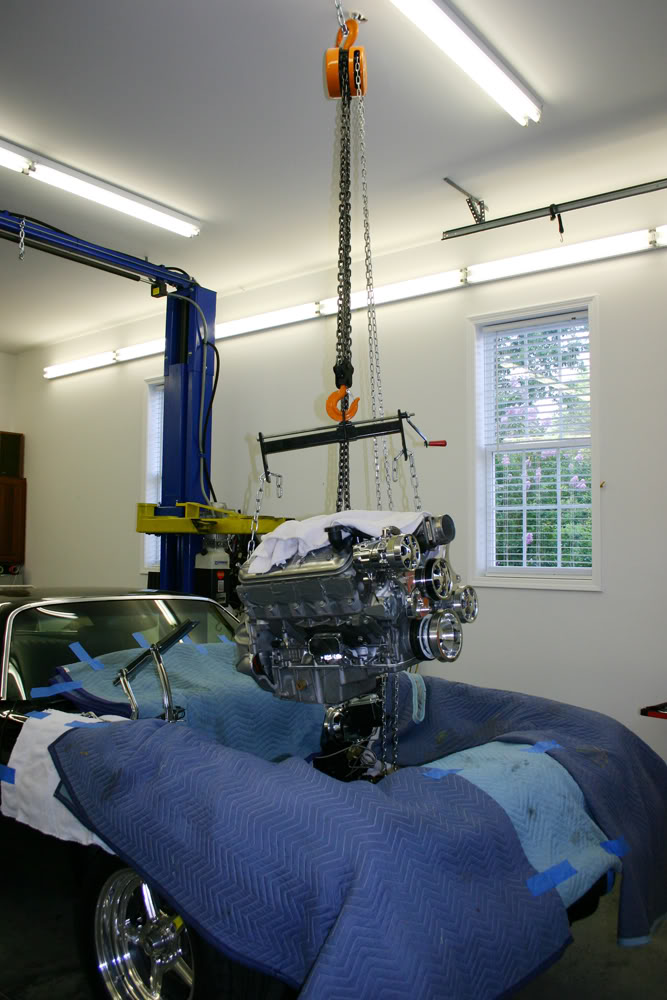
I also bought a 11' piece of 2" x 6" box steel section and a chain hoist. I am going to place it in my attic across five joists and then drop a chain through the ceiling so I can use a chain hoist to lift the engine among other things. The cherry picker I have was too short to reach the engine and we had to lift the engine out from the side. By having the chain hoist, I can lift the engine up, move the car under the engine and then lower it into place directly from above. My buddy seems to think this will work great. We will see.
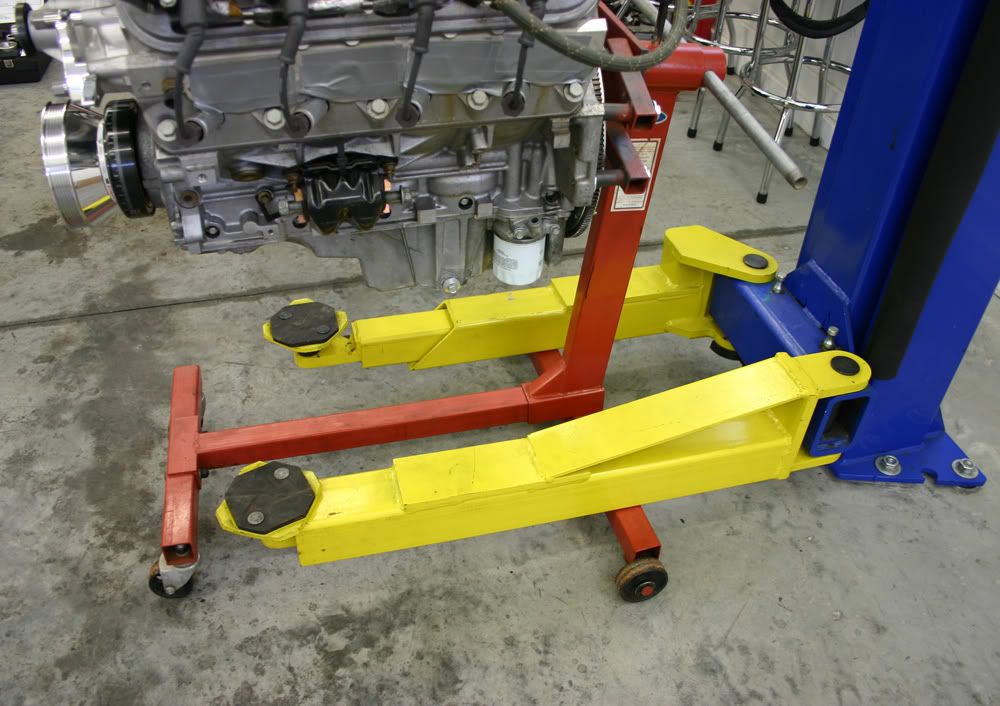
Got the 3 ton hoist installed in the ceiling of my garage on Saturday. Works like a charm. Here is a pic of it lifting my engine and the stand. This should make it easier to drop the motor into the engine bay.
We hauled the car to the body shop a week or so ago to have the engine bay cleaned up. I am also having him smooth out the firewall. Should look much better.
I have been talking with Kooks headers about using my car as a guinea pig to design a header/exhaust system for LS swaps. Earlier this week, I talked with the sales manager who said he would get back with me. I had not heard back from him. Today my buddy and I were planning a bike ride. We are always looking for a destination, so I told him let's drive the 30 miles to Statesville and visit Kooks. The salesman (owns a '72 Camaro) took us on a tour of their two year old building. I was not very familiar with Kooks, but they have been in business since 1962 in Long Island, NY and only moved to Statesville two years ago. I was impressed with the quality of their stainless headers and it was an interesting tour.
Once we got back into the office, he hooked us up with the sales manager who drags a 2nd gen which does low 8's in the quarter at around 170!! He asked me why I thought there would be a market for this header and I asked him if he ever visited NastyZ28 or Pro-Touring.com. I told him if he went there and did a search about LS swaps, he would be surprised at how many threads there were. Plus, I told him, on Pro-Touring, he would see not only Camaros, but GTO's, Chevelles, Buicks, Olds, etc.
He then started asking me questions about my car and I showed him my blog. He liked what he saw there and said he need to talk with his boss. About ten minutes later he came back and offered me a sweet deal if I would get both the headers and the full stainless exhaust. I immediately said yes and we are scheduled to take the car there towards the end of June.
They have a digitizer so they will map the all the hard points on my car and feed that into the computer. Once they have done that, they can generate the entire system. Then they will actually make it to make sure the computer is accurate. Once they have all the dimensions nailed, they would make a jig for the production line. They said they would have my car for two or three weeks. Once they have everything done, the system will be available in their product line.
I am really pleased as I have a guaranteed system that will fit, plus it will look so good. I have been considering a hydraulic clutch, but he said he would prefer I do that after they are finished with my car as they want as many obstructions as posssible, which would include the Z-bar for the clutch. Doing it this way will insure that their system will work for a majority of situations.
I got the Billet Specialties front runner installed this week. I used some of the Kent-Moore tools from their LS tool kit to remove the harmonic balancer. Sure makes it easier when you have the correct tools. The bolt for the harmonic balancer must be torqued to 240 ft lb. I was concerned about tipping over the engine stand so I raised my lift, slid the engine stand under two of the arms and then lowered the arms over the engine stand legs. It worked.
I am waiting for some parts to install the LS6 manifold on the motor. The coolant lines must change and the correct ones are on the way. I also found at Speedway Motors the adapters I need for my oil pressure and water temp senders. These adapters will screw into the block in the factory locations and convert to 1/8NPT so my senders from my old motor will work.
I also replaced the rear main seal and am getting ready to install the rear cover and the oil pan. I found a thread showing how to use one of the tools in the Kent-Moore LS tool kit for aligning the covers with the oil pan.
I also bought a 11' piece of 2" x 6" box steel section and a chain hoist. I am going to place it in my attic across five joists and then drop a chain through the ceiling so I can use a chain hoist to lift the engine among other things. The cherry picker I have was too short to reach the engine and we had to lift the engine out from the side. By having the chain hoist, I can lift the engine up, move the car under the engine and then lower it into place directly from above. My buddy seems to think this will work great. We will see.
Got the 3 ton hoist installed in the ceiling of my garage on Saturday. Works like a charm. Here is a pic of it lifting my engine and the stand. This should make it easier to drop the motor into the engine bay.
Last edited by jerhofer; Jun 8, 2011 at 09:26 PM.
Thread Starter
|
July 2011 ROTM
Joined: Dec 2009
Posts: 153
ROTM Winner's Club
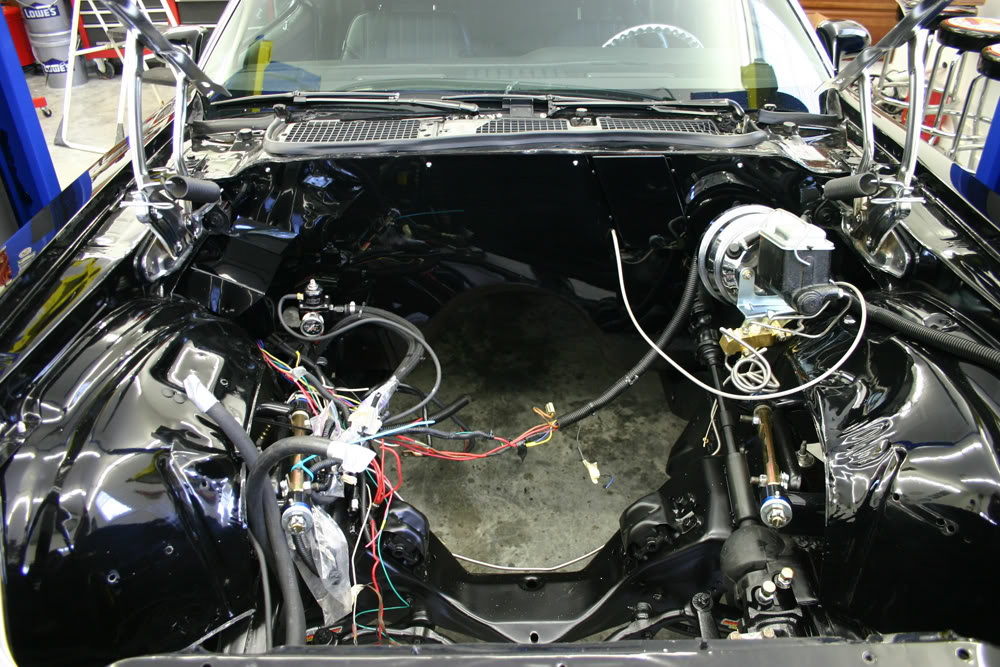
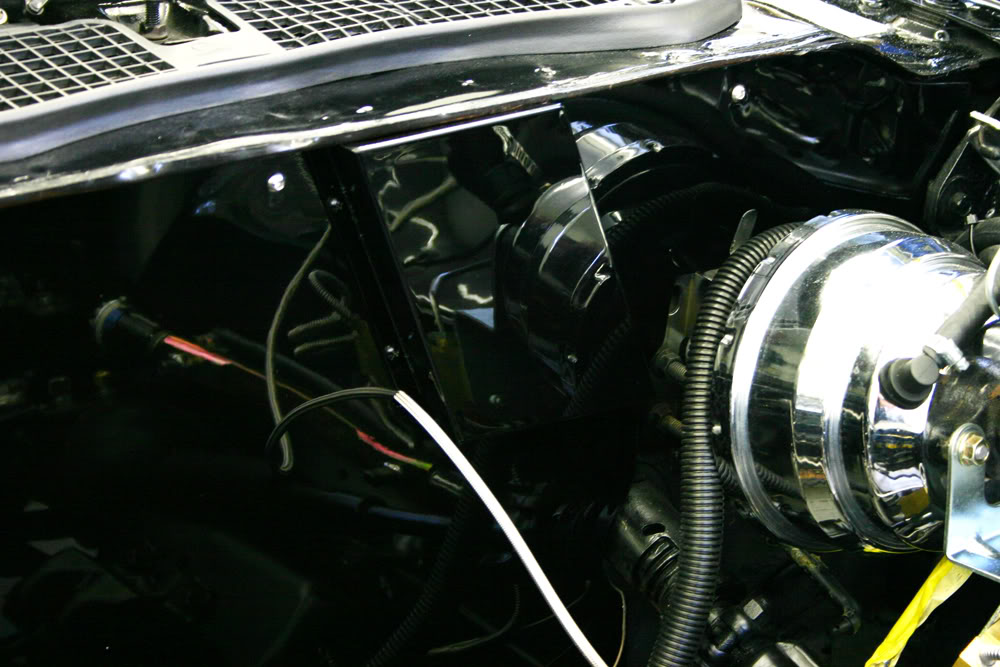
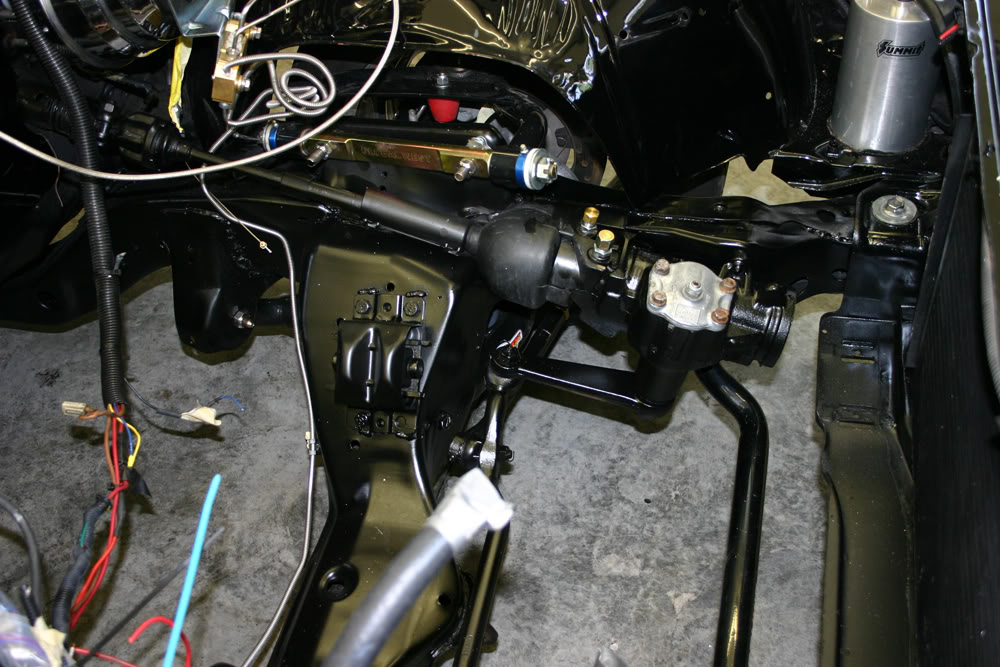
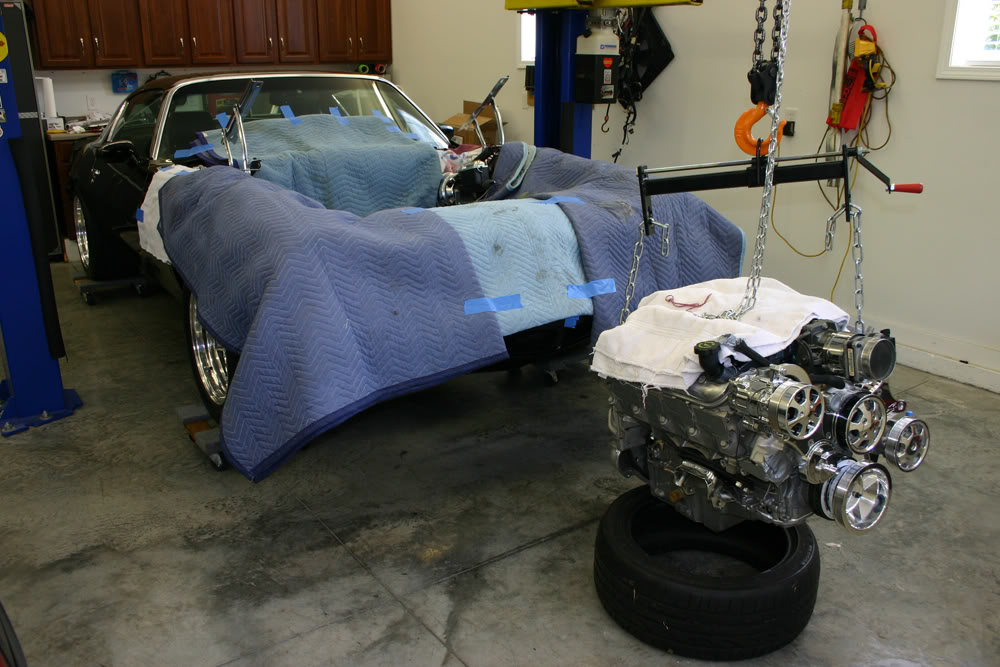
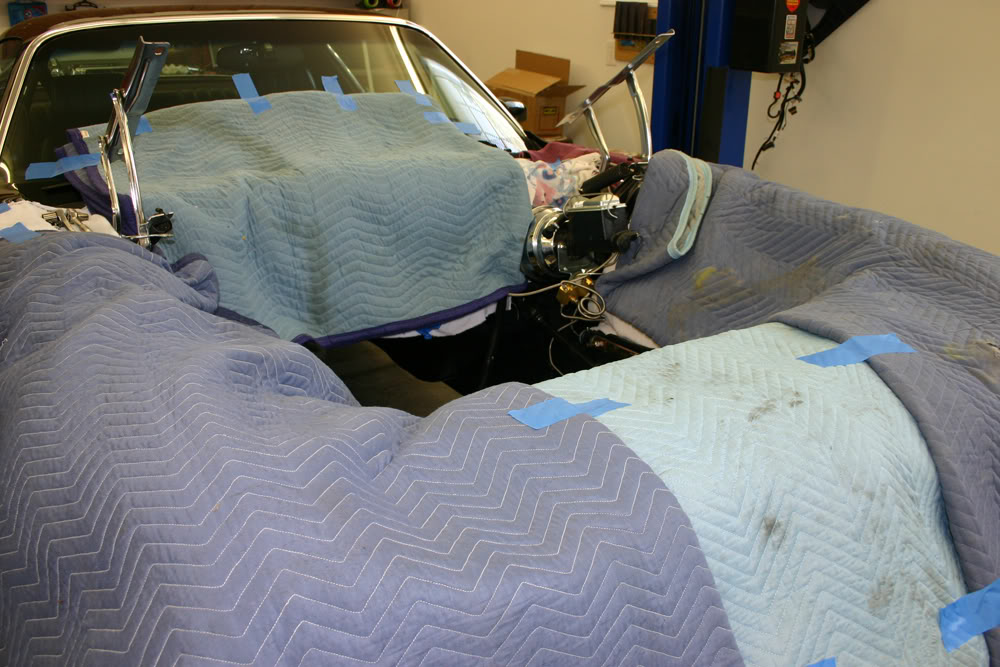
Got the car back from the body shop. He smoothed out my firewall with four separate, removable panels. There are two main panels on the firewall, a large one that goes to the wiper motor area and a smaller one behind the brake booster. There is also a cover for the wiper motor and a cover for the heater and AC hookups at the firewall. He also cleaned up the crossmember and the frame rails. The trick is going to be getting the motor installed without scratching anything!!! I have a number of moving blankets and am going to cut one of them up to make covers for the firewall and inner fender liners.
Next up is cleaning up the bottom of the car from the firewall back. I lined my walls and floor with plastic and plan on using engine degreaser and my pressure washer to clean it up. A dirty job!!!

I am glad this job is done!! Very messy cleaning up the bottom of the car. I spent Friday using engine degreaser and my pressure washer to get the bottom of the car at least respectable. As most of you know, when you do this type of cleaning, you are really only transferring the dirt. Part of it went onto the plastic and the rest went on me!! I don't have a mirror in my garage. If I had, I would not have gone out to get the mail as my face was pretty black. It took me nearly as long to clean up the mess as it did to clean the car.
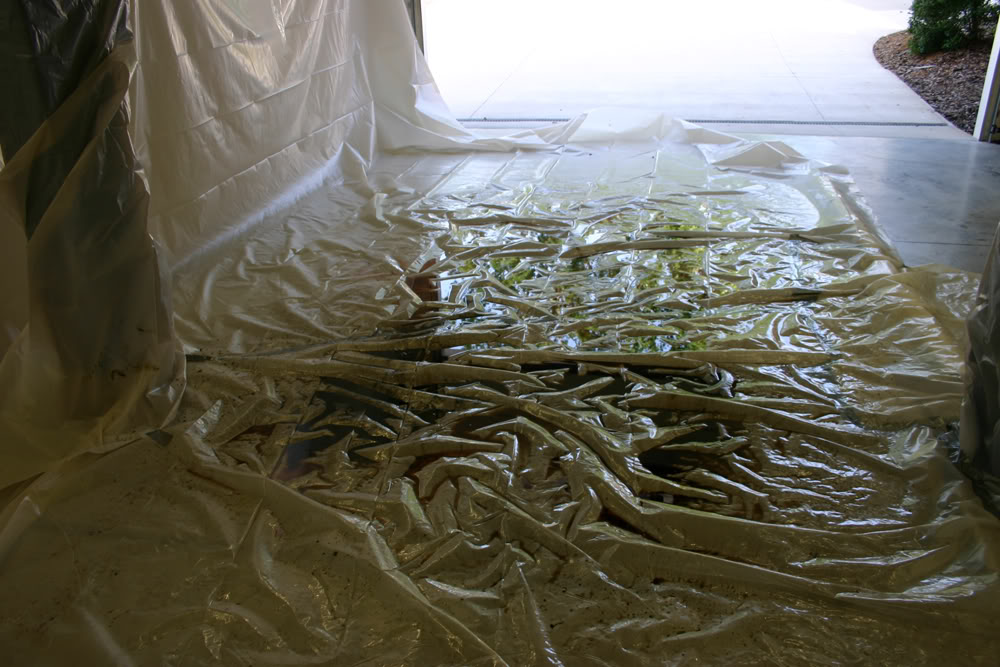
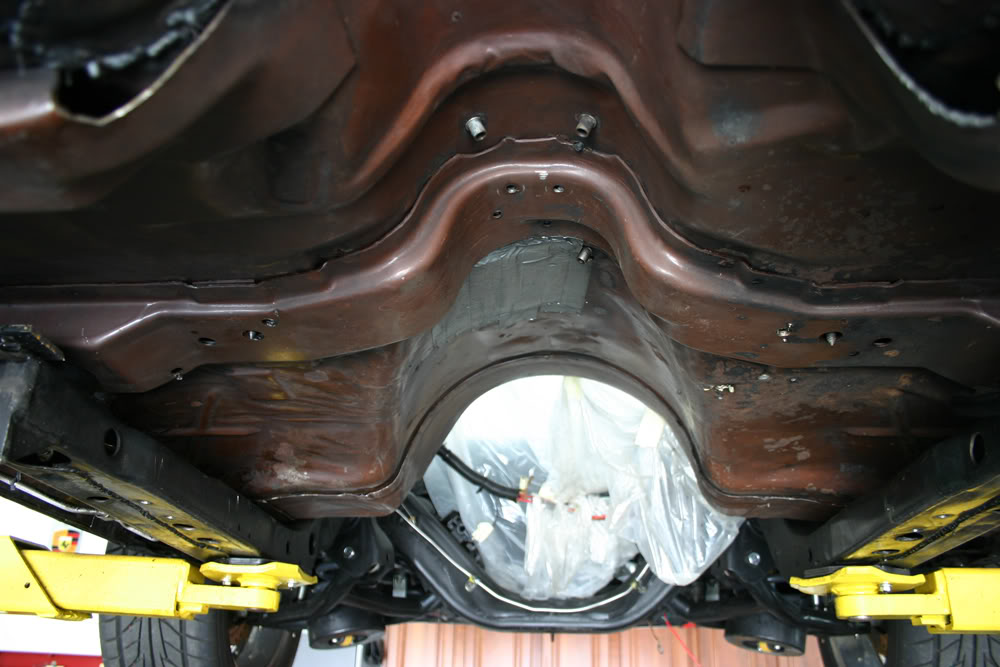
Today I masked everything off and used three rattle cans to at least make it all the same color. While it won't pass a white glove inspection, it sure looks better than when I began this project.
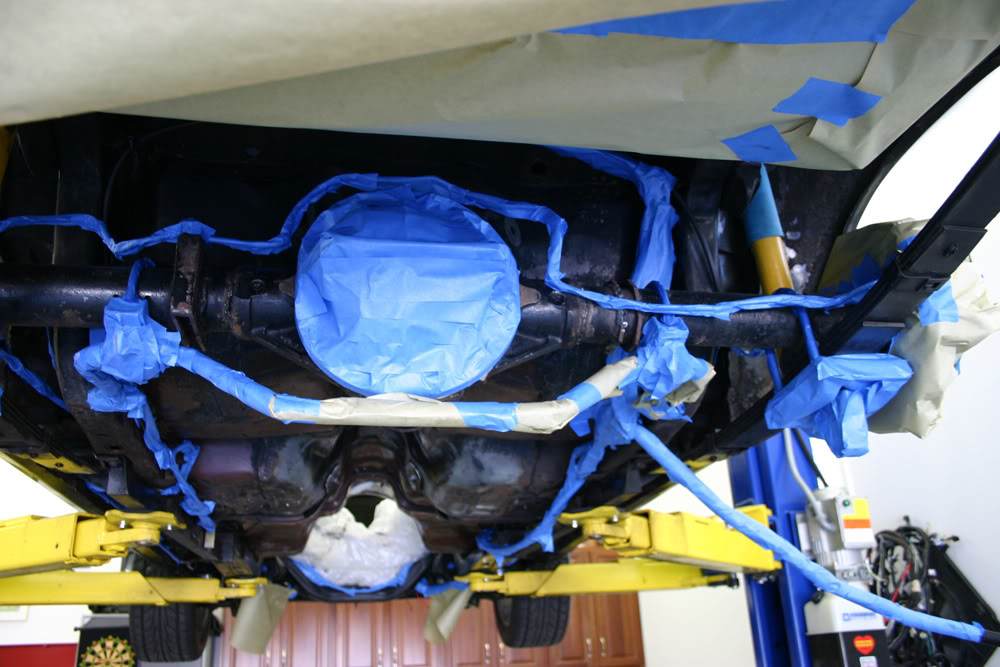
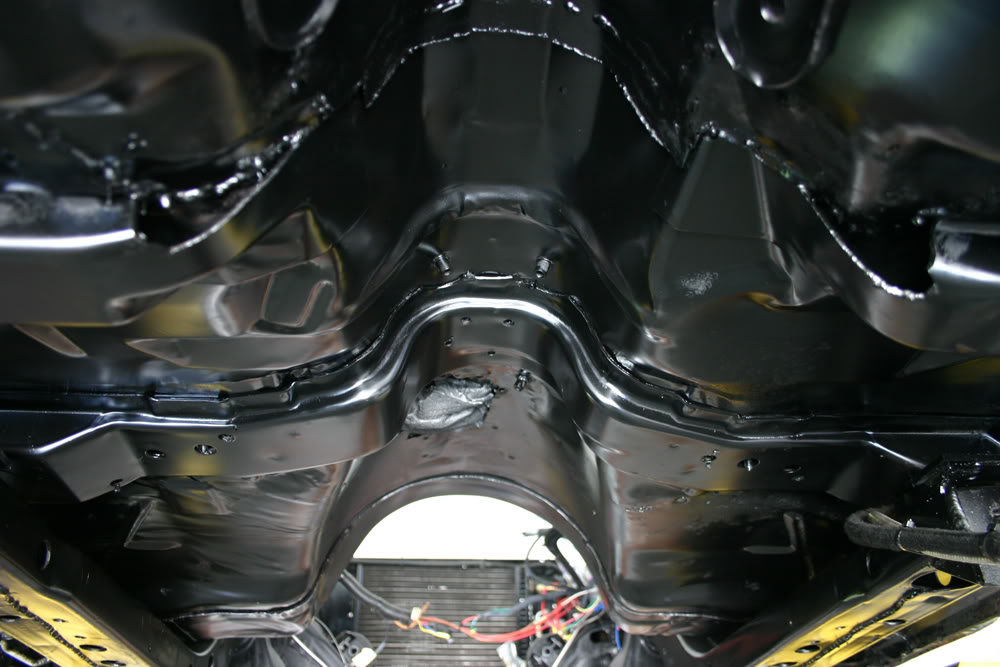
Now I can concentrate on getting the motor ready for installation. Should happen this week.
Next up is cleaning up the bottom of the car from the firewall back. I lined my walls and floor with plastic and plan on using engine degreaser and my pressure washer to clean it up. A dirty job!!!
I am glad this job is done!! Very messy cleaning up the bottom of the car. I spent Friday using engine degreaser and my pressure washer to get the bottom of the car at least respectable. As most of you know, when you do this type of cleaning, you are really only transferring the dirt. Part of it went onto the plastic and the rest went on me!! I don't have a mirror in my garage. If I had, I would not have gone out to get the mail as my face was pretty black. It took me nearly as long to clean up the mess as it did to clean the car.
Today I masked everything off and used three rattle cans to at least make it all the same color. While it won't pass a white glove inspection, it sure looks better than when I began this project.
Now I can concentrate on getting the motor ready for installation. Should happen this week.
Thread Starter
|
July 2011 ROTM
Joined: Dec 2009
Posts: 153
ROTM Winner's Club
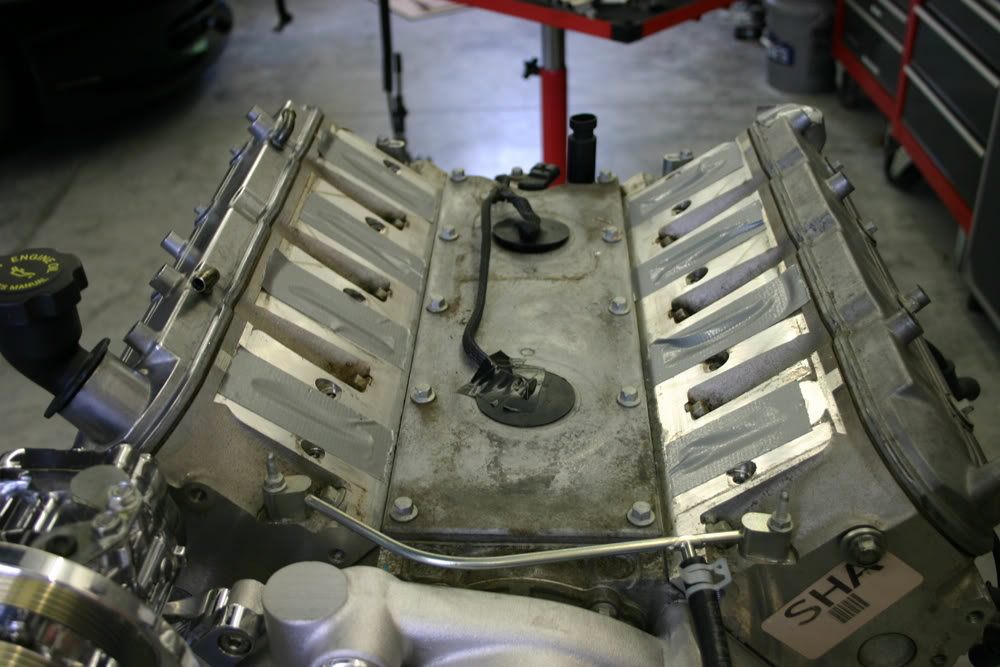
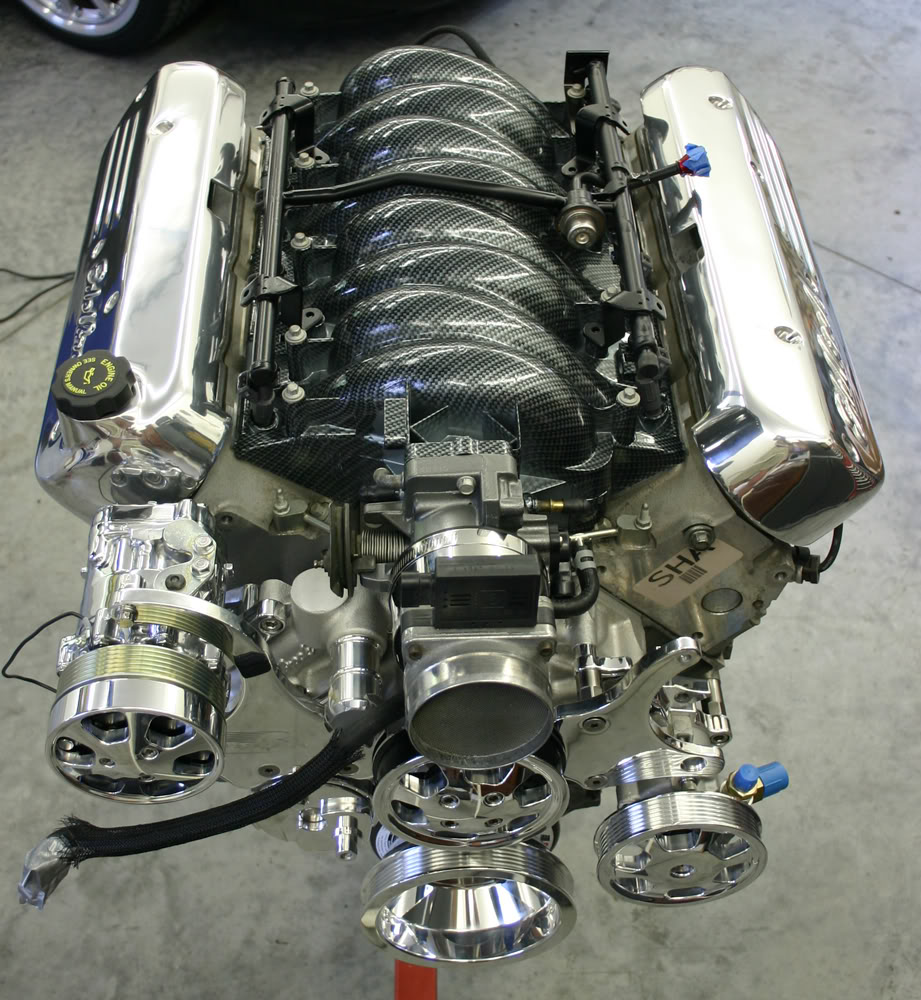
I got a lot done on the motor today. First I installed the rear coolant line plugs and the front LS6 coolant line so I could mount the intake. Got the intake mounted and then decided I did not like the army green color of the fuel rails. Painted them satin black.


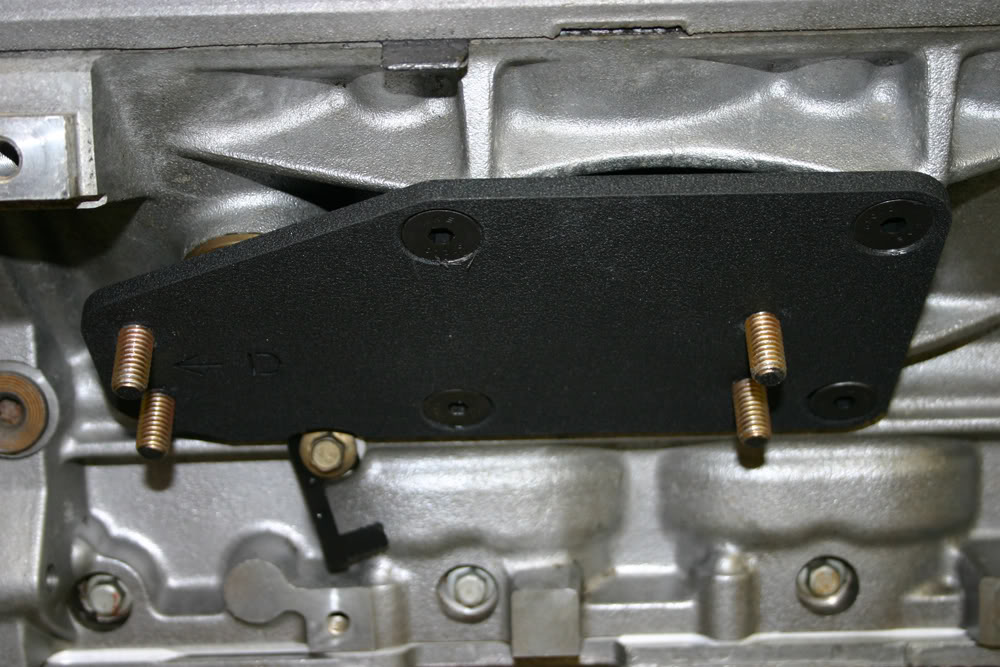
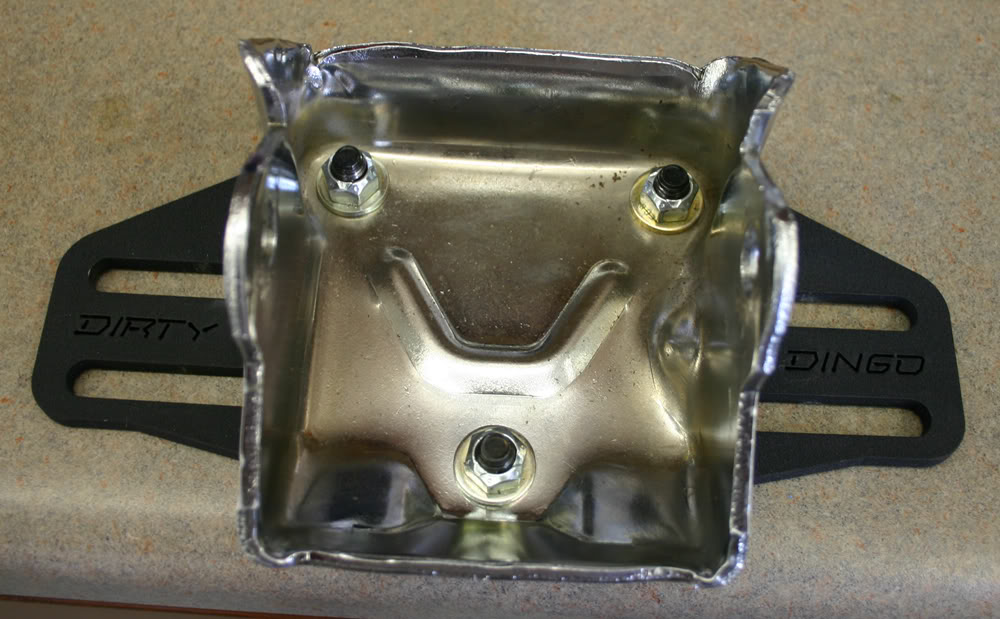
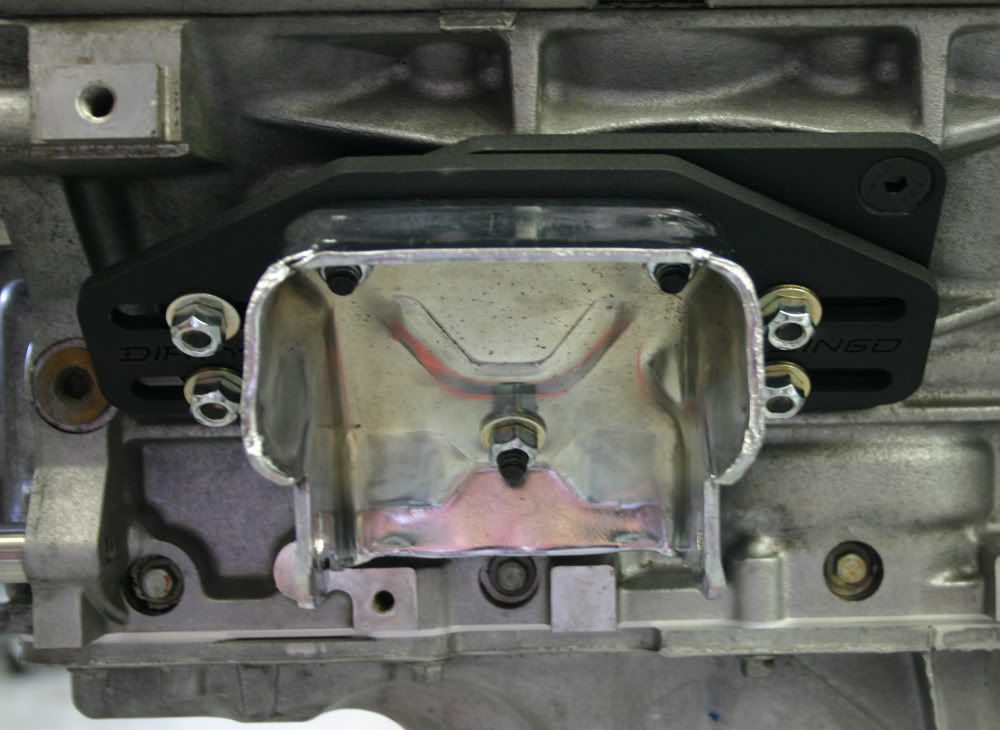
Next I mounted the Dirty Dingo slider motor mounts. First a plate is attached to the motor, then the factory elephant ear collar is attached to the other plate. The second plate is then loosely attached to the plate on the motor. There are slots and you can slide the motor back and forth 2 1/2".
I am getting close to putting the motor in. I need to align the bellhousing and can't decide whether it would be best to do it out of the car or in the car. Not sure how I can stabilize the engine and turn the crank outside the car.
Thread Starter
|
July 2011 ROTM
Joined: Dec 2009
Posts: 153
ROTM Winner's Club
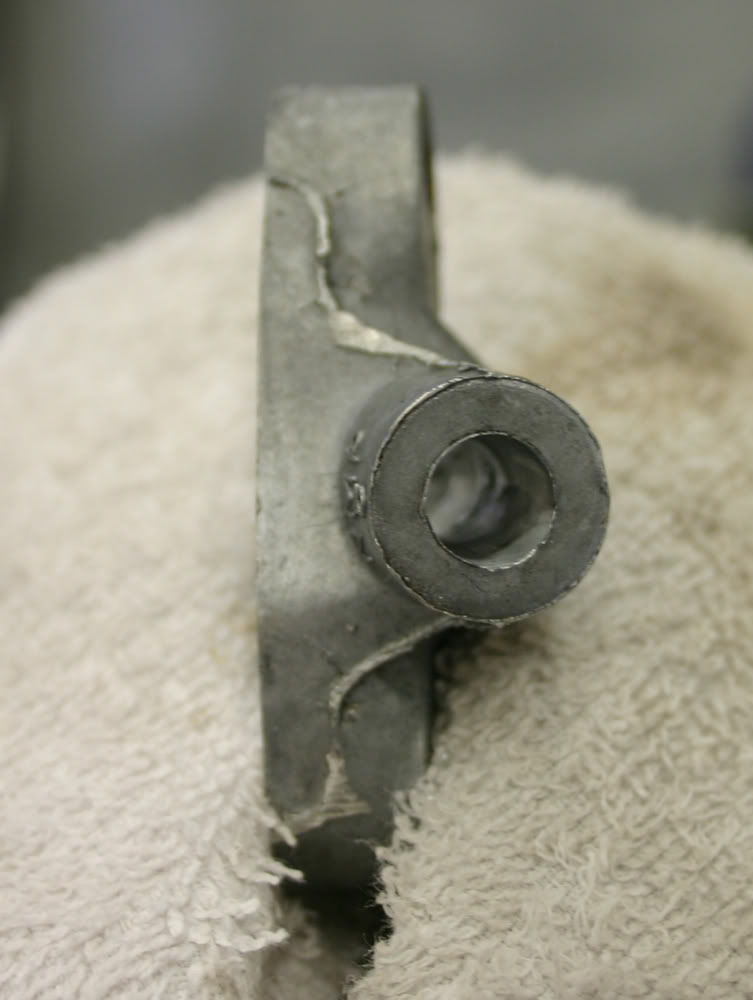
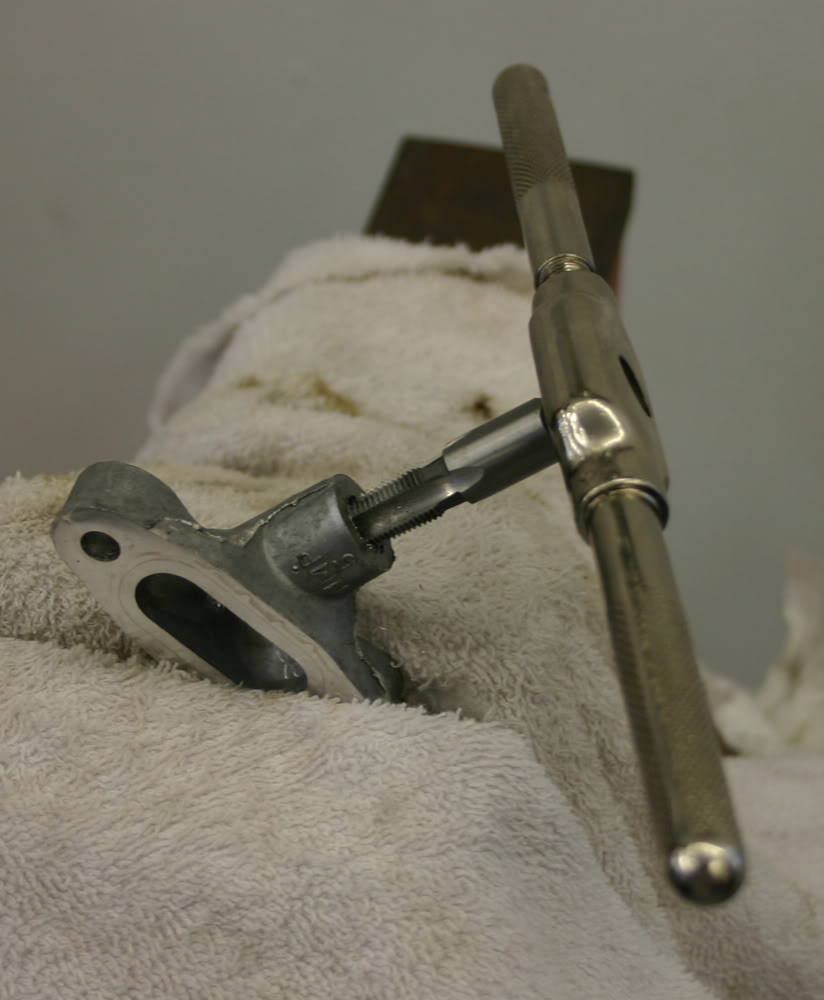
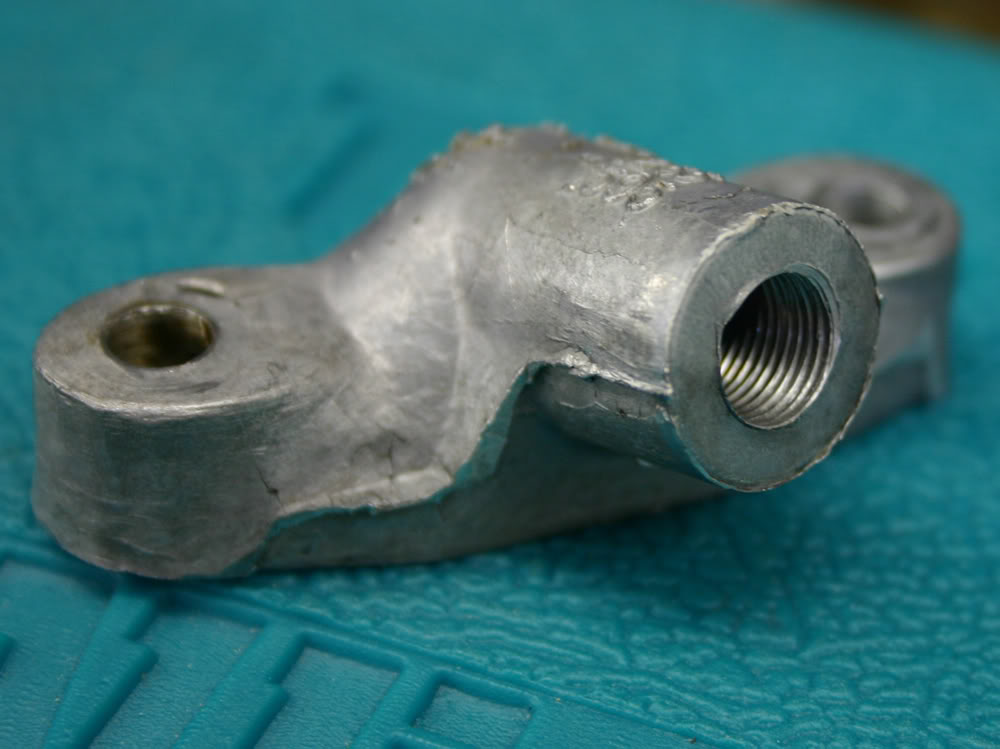
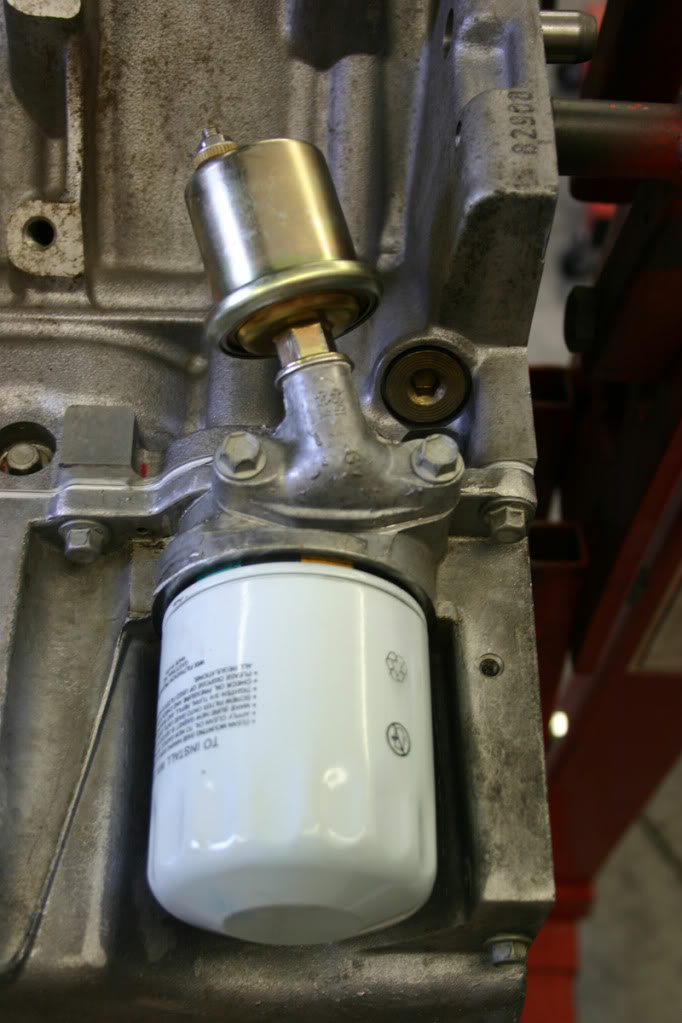
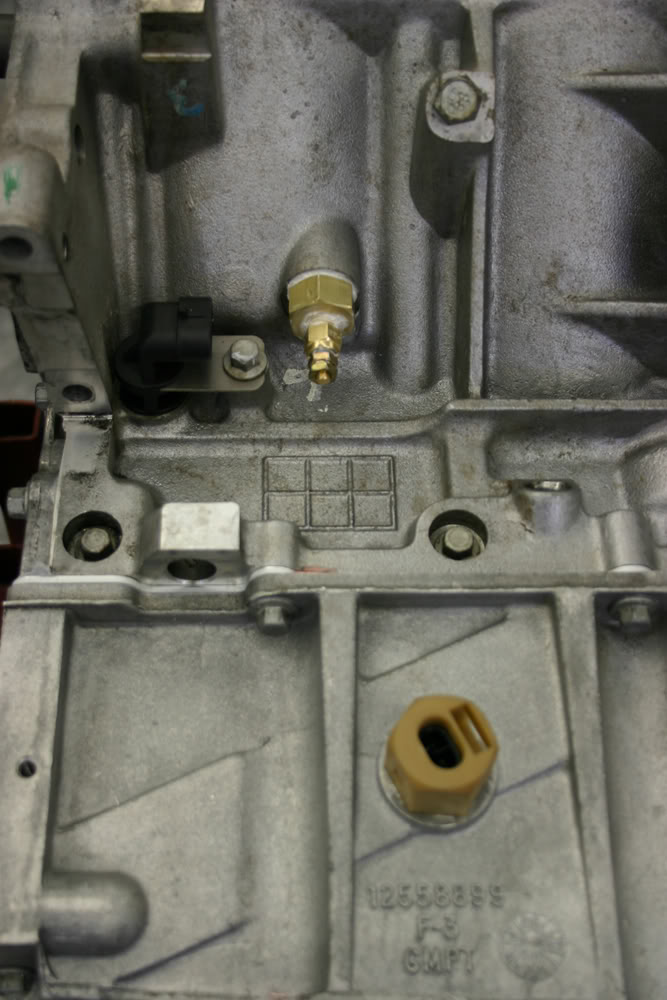
Had to mow the lawn today but still had some time to work on the motor. I removed the plate above the oil filter, drilled the hole through, tapped it for 1/8 NPT 27, and mounted my oil pressure sender for my gauges there.
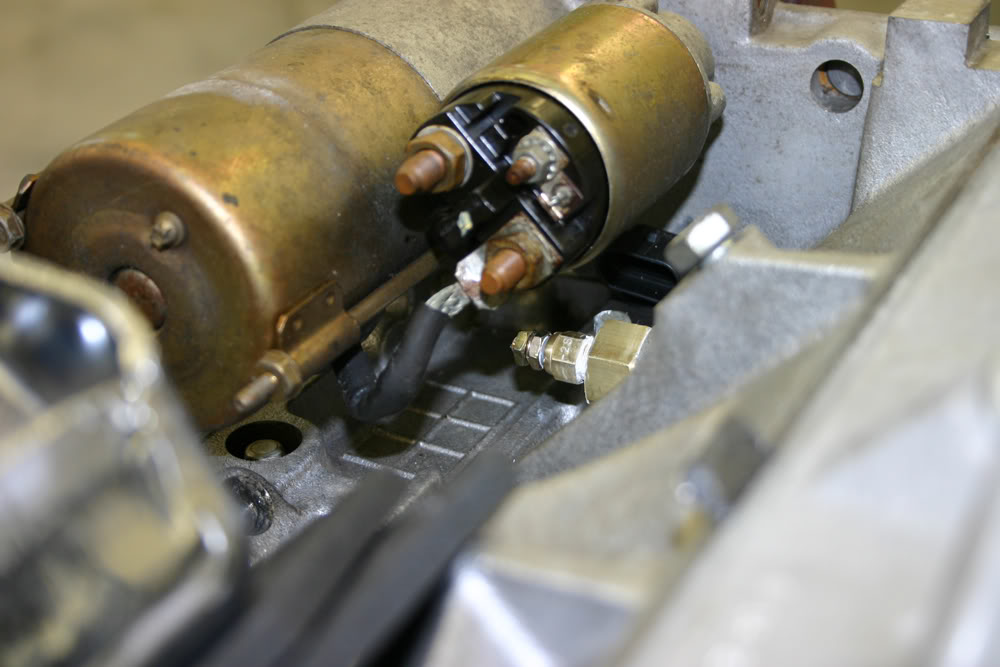
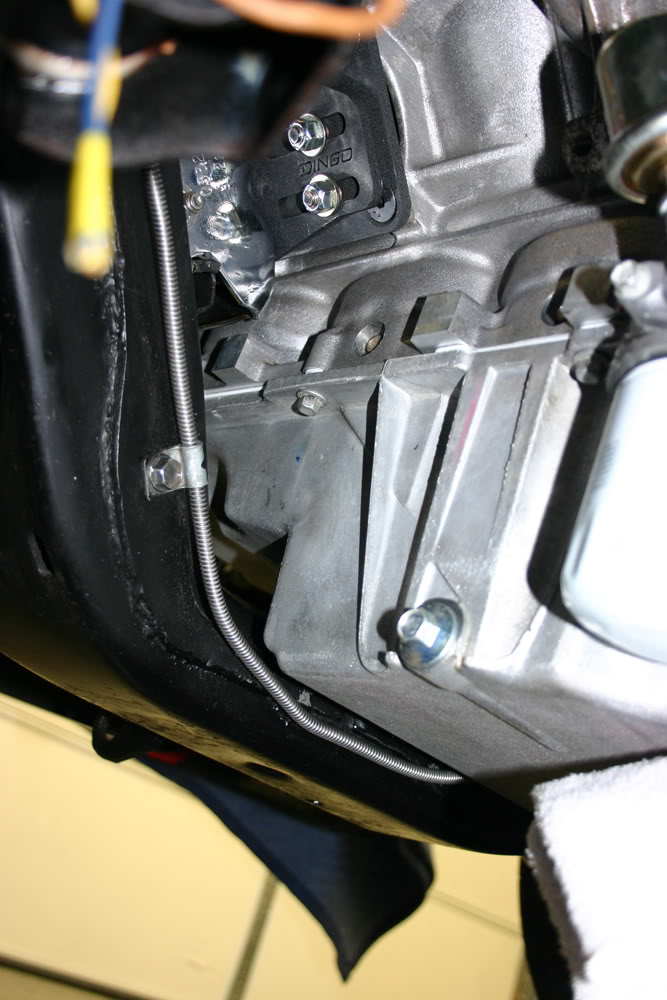
After doing a search for places to put the water temp sender for my gauges, some people recommended removing the drain plug above the starter and mounting it there. After removing the plug, I found an adapter to go to 1/8 NPT 27 thread. I talked to Autometer and they have a 1/8NPT sender that will work with my gauges. It is on the way from Summit and appears to be compact enough to clear the starter.
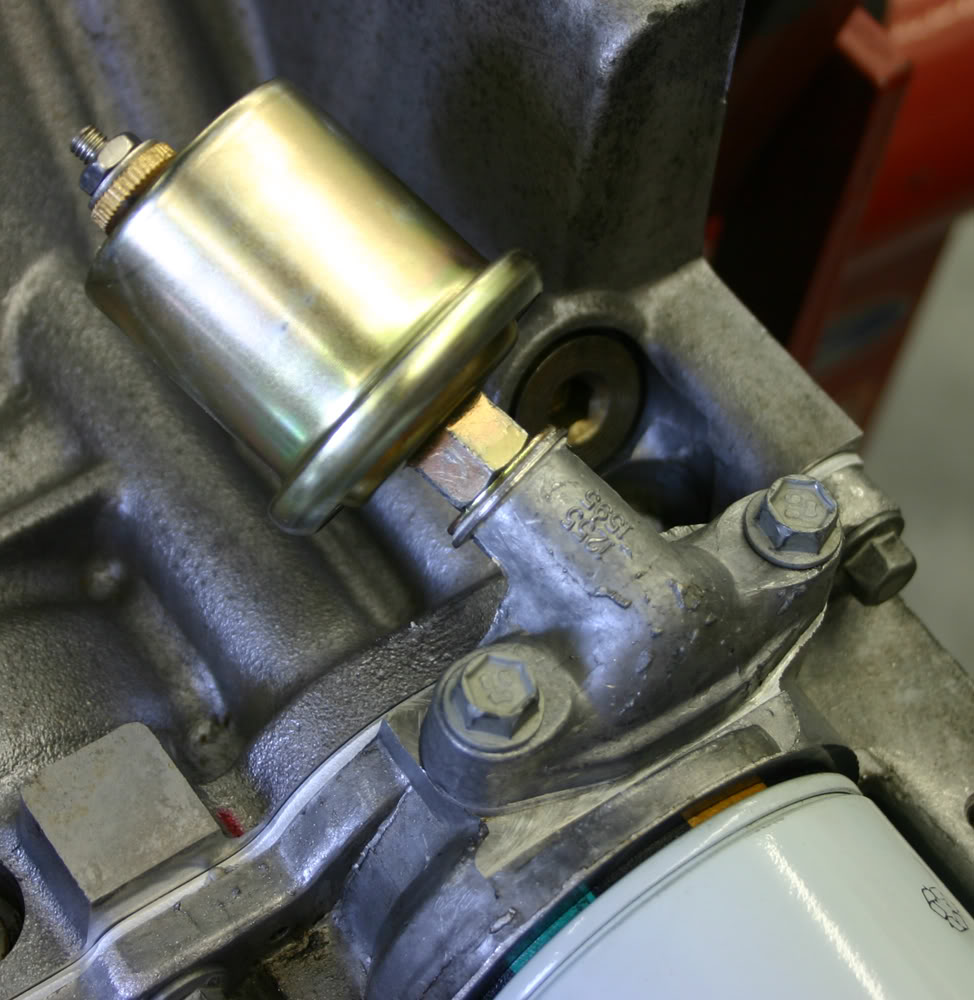
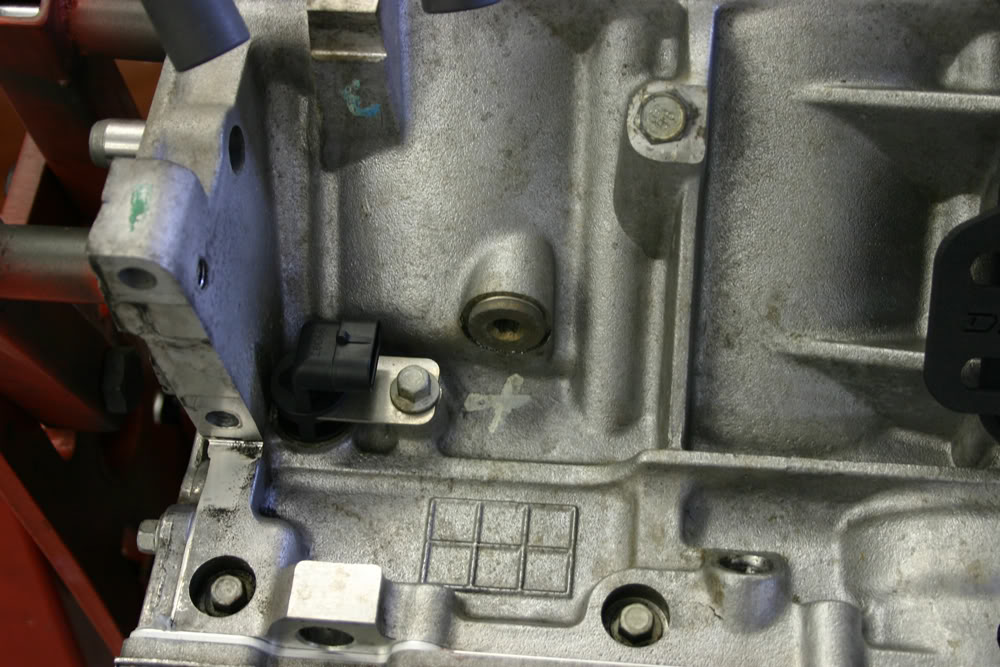
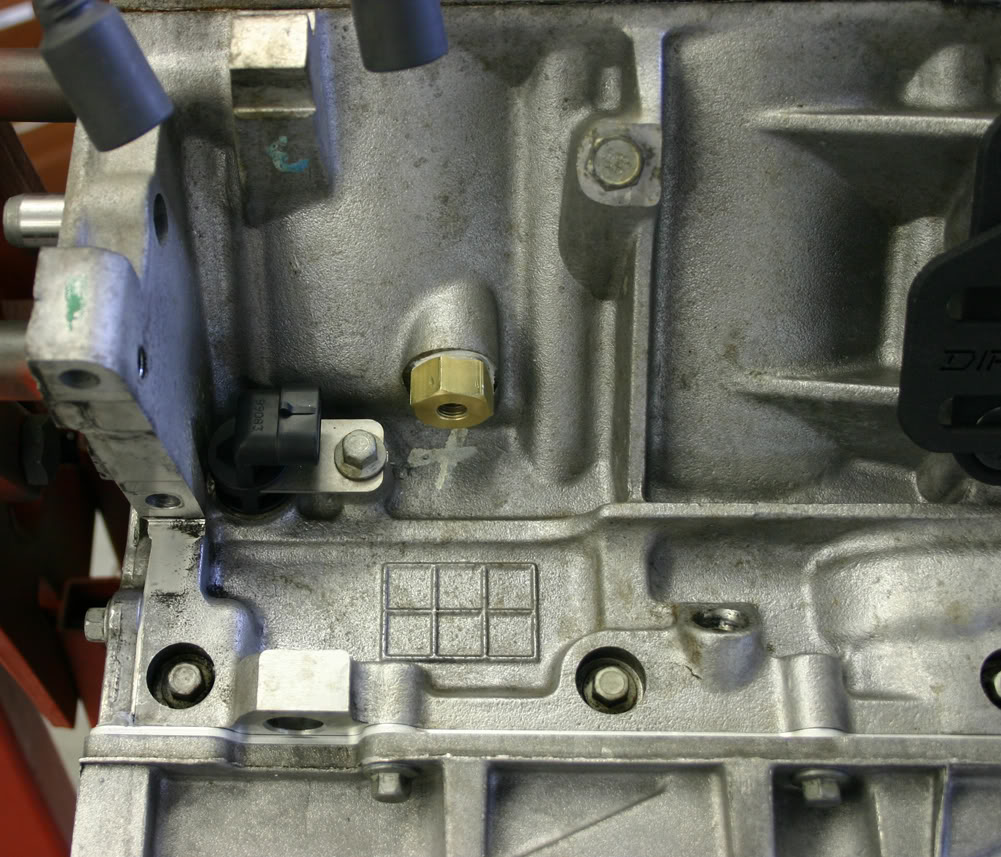
After doing a search for places to put the water temp sender for my gauges, some people recommended removing the drain plug above the starter and mounting it there. After removing the plug, I found an adapter to go to 1/8 NPT 27 thread. I talked to Autometer and they have a 1/8NPT sender that will work with my gauges. It is on the way from Summit and appears to be compact enough to clear the starter.
Thread Starter
|
July 2011 ROTM
Joined: Dec 2009
Posts: 153
ROTM Winner's Club
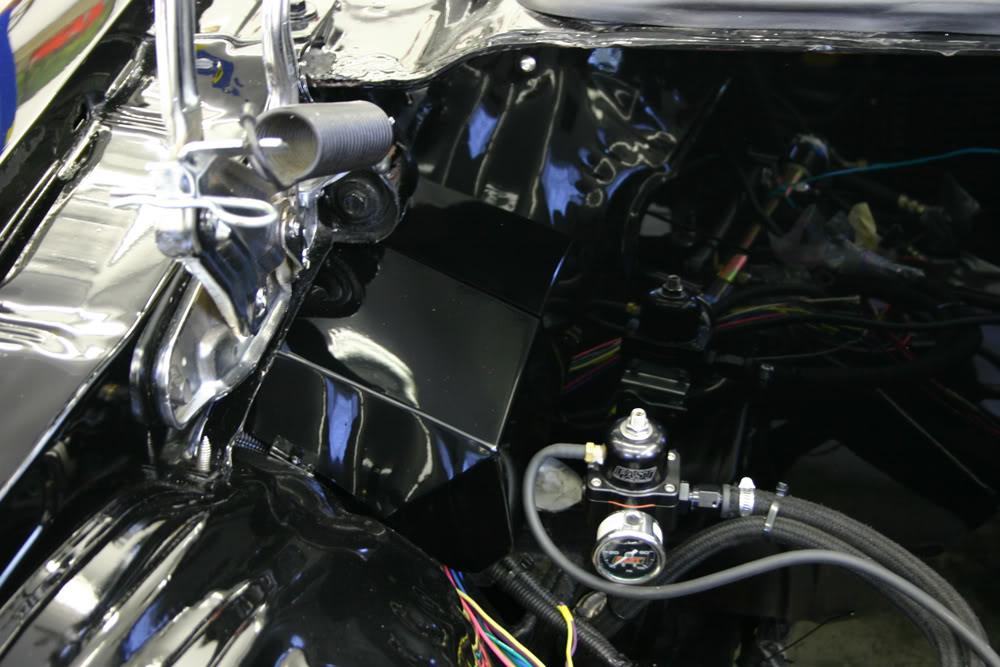
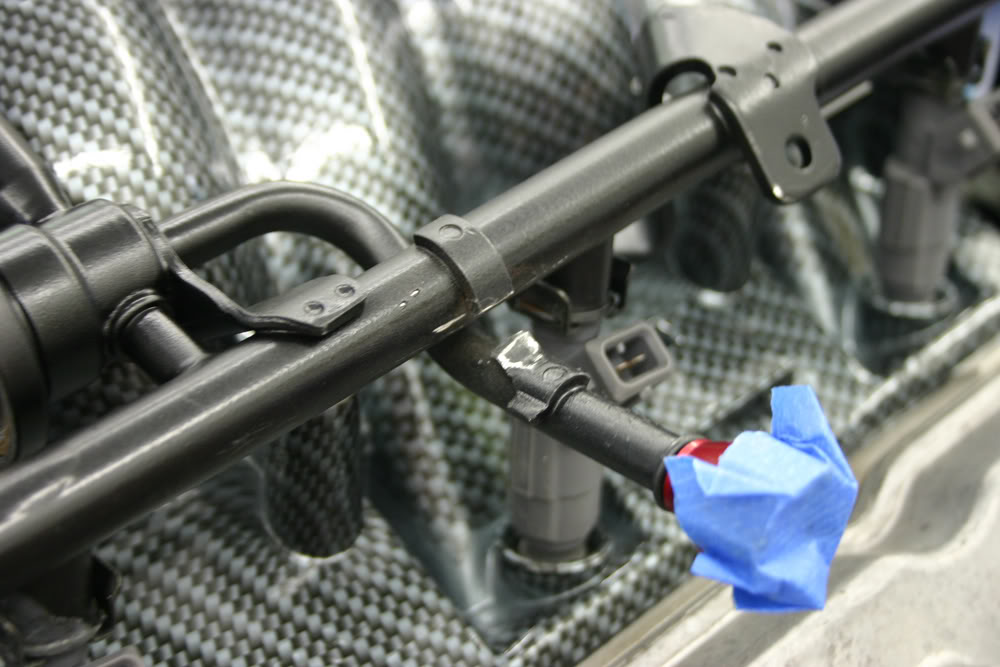
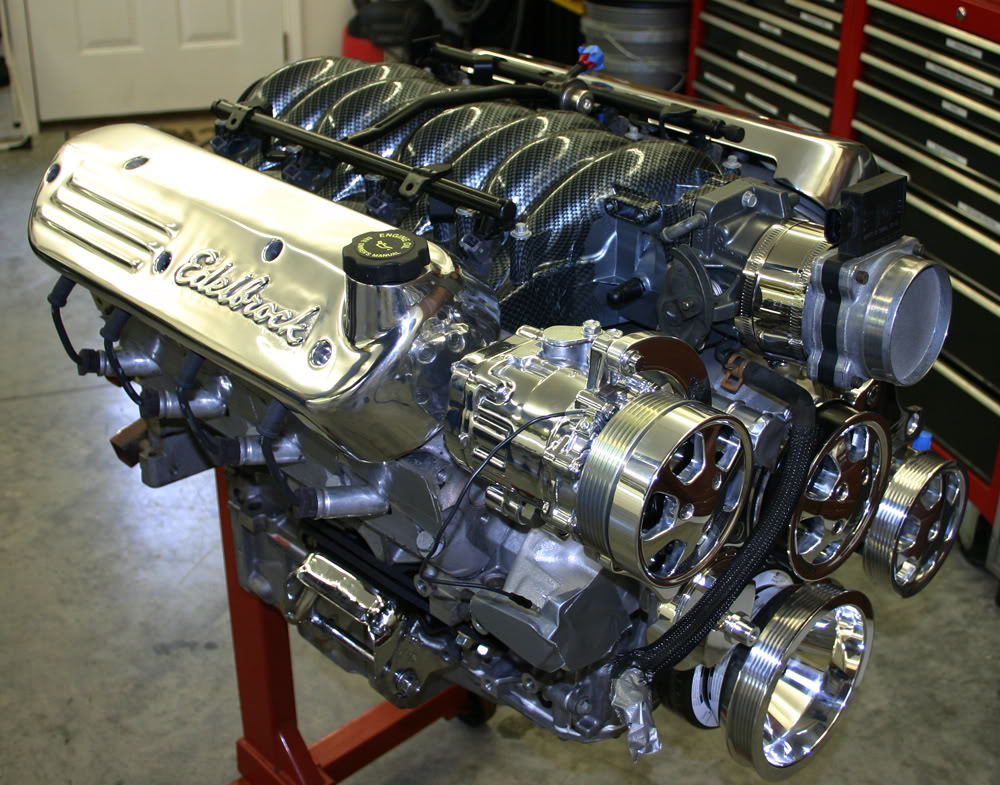
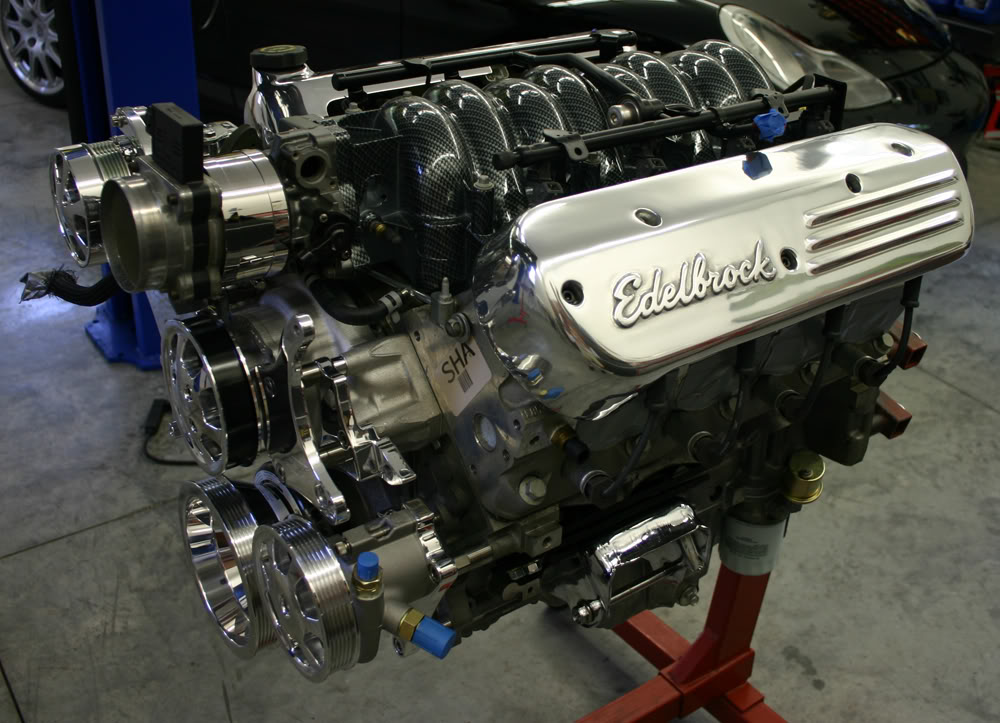
The Edelbrock polished coil covers arrived late yesterday. The coil packs install directly to the rear of the covers which allows them to sit lower. I am not wild about the Edelbrock script, but, overall, it was the look I was going for. I had to cut the support for the fuel line so I can bend it up to clear the coil covers.
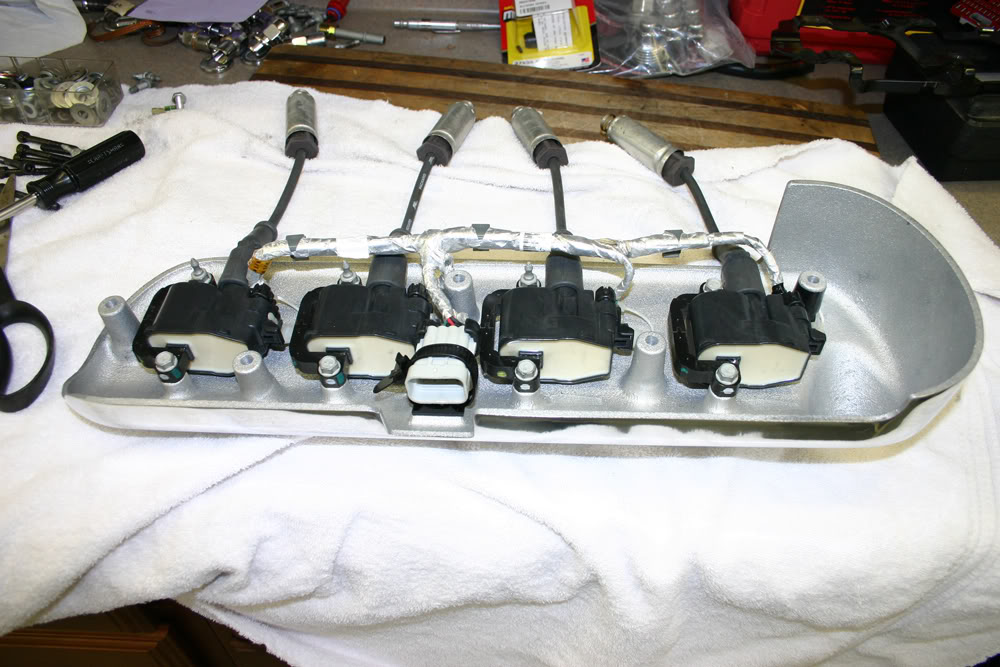
My water temp sender with 1/8 NPT threads arrived today and if fit perfectly with plenty of clearance with the starter.
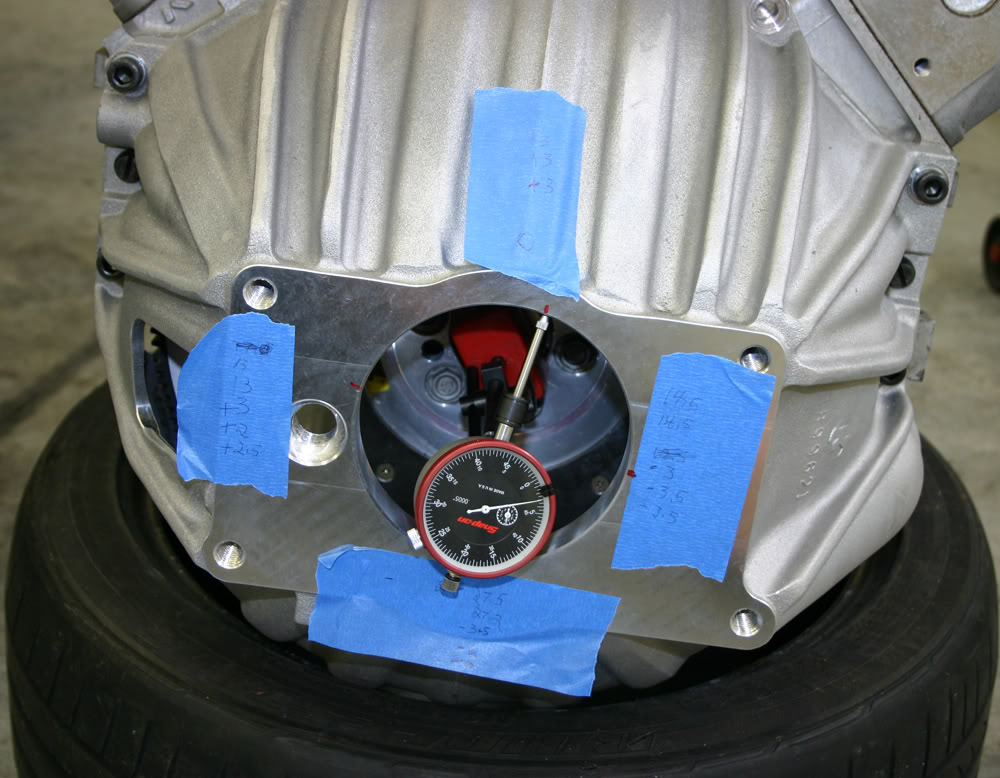
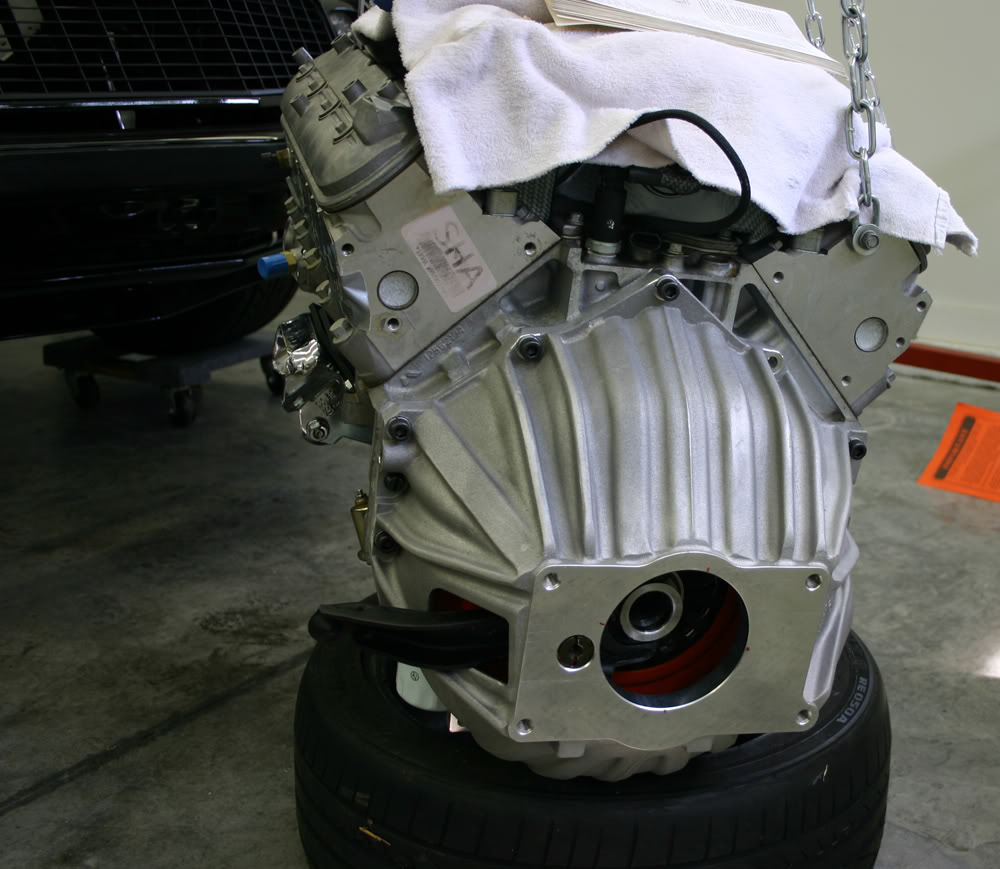
I also installed the correct pilot bearing for my transmission. I also mounted the flywheel and the bellhousing and used my son's gauge to begin the alignment procedure. I did not finish this as time ran out but will sort this out tomorrow. Once I have the bellhousing aligned, I am ready to put the motor in the car.
My water temp sender with 1/8 NPT threads arrived today and if fit perfectly with plenty of clearance with the starter.
I also installed the correct pilot bearing for my transmission. I also mounted the flywheel and the bellhousing and used my son's gauge to begin the alignment procedure. I did not finish this as time ran out but will sort this out tomorrow. Once I have the bellhousing aligned, I am ready to put the motor in the car.
Thread Starter
|
July 2011 ROTM
Joined: Dec 2009
Posts: 153
ROTM Winner's Club
Had to satisfy motorcycle withdrawal with a ride today with my best friend. Because of the heat, we left early this morning and were back home by noon. One of our neighbors is a partner in a high end dealership in Denver, NC so we checked out his business today.
After lunch, I finished up the alignment of the bellhousing. Based on the readings, I had to use a "14 adjustable dowel. I set it in place with my best guess of where it should be to get the bellhousing within spec and it worked. I was within 4 thousandths vertically and less than 2 thousandths horizontally.
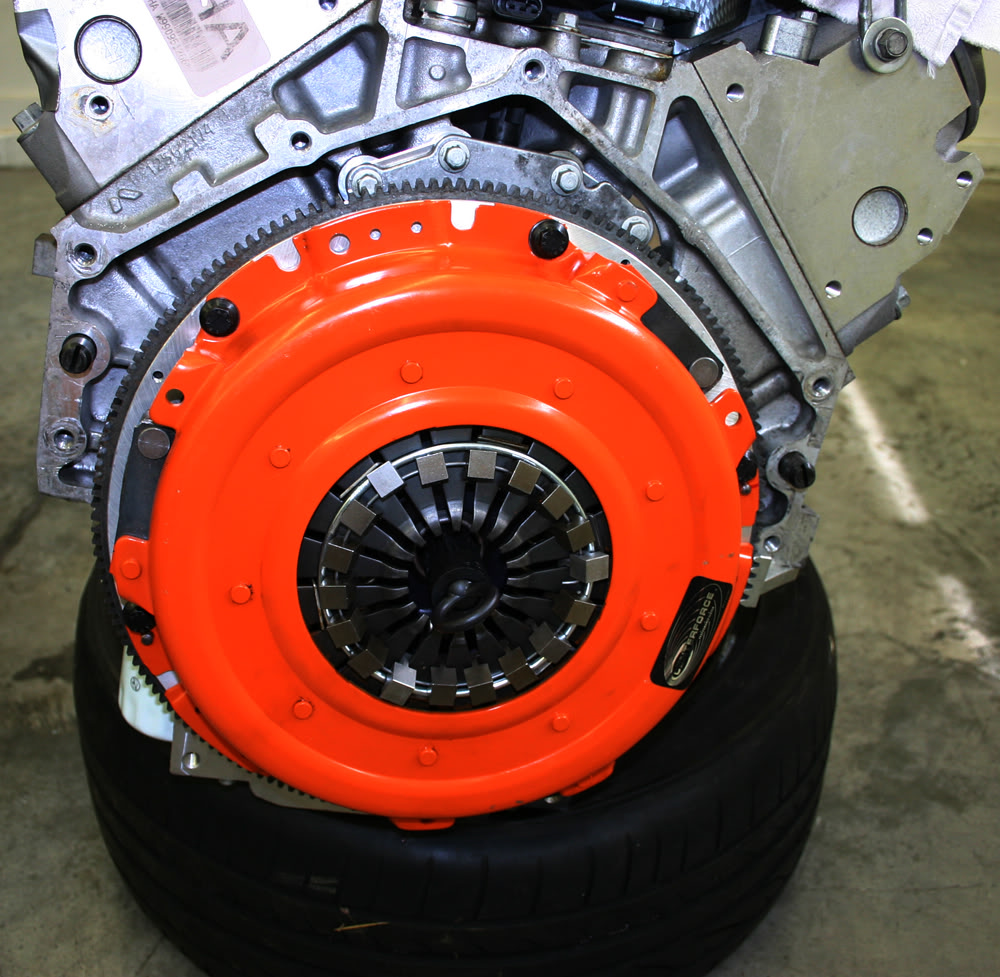
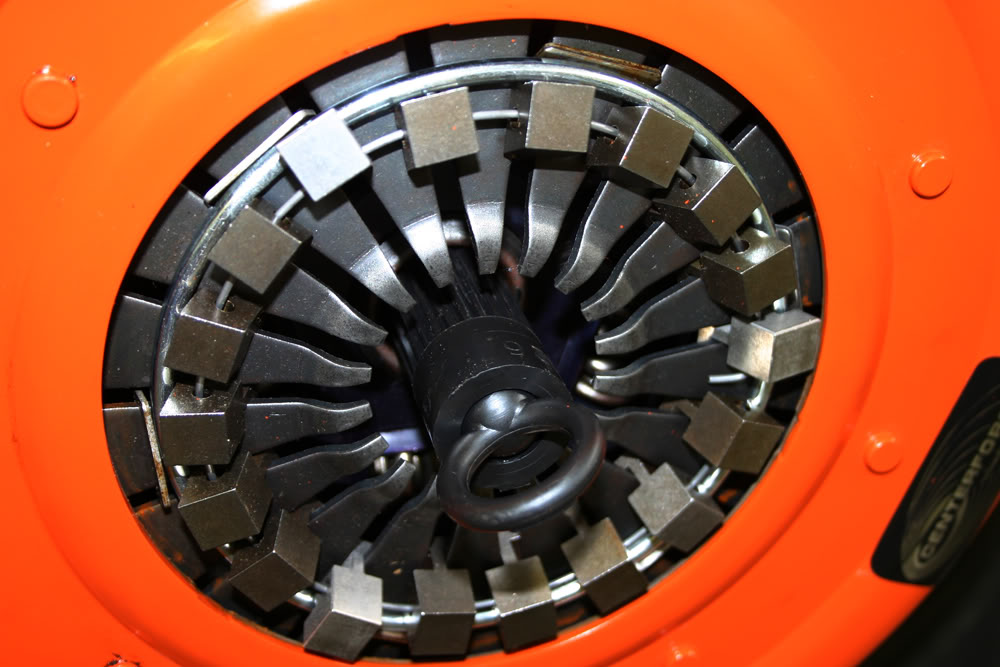
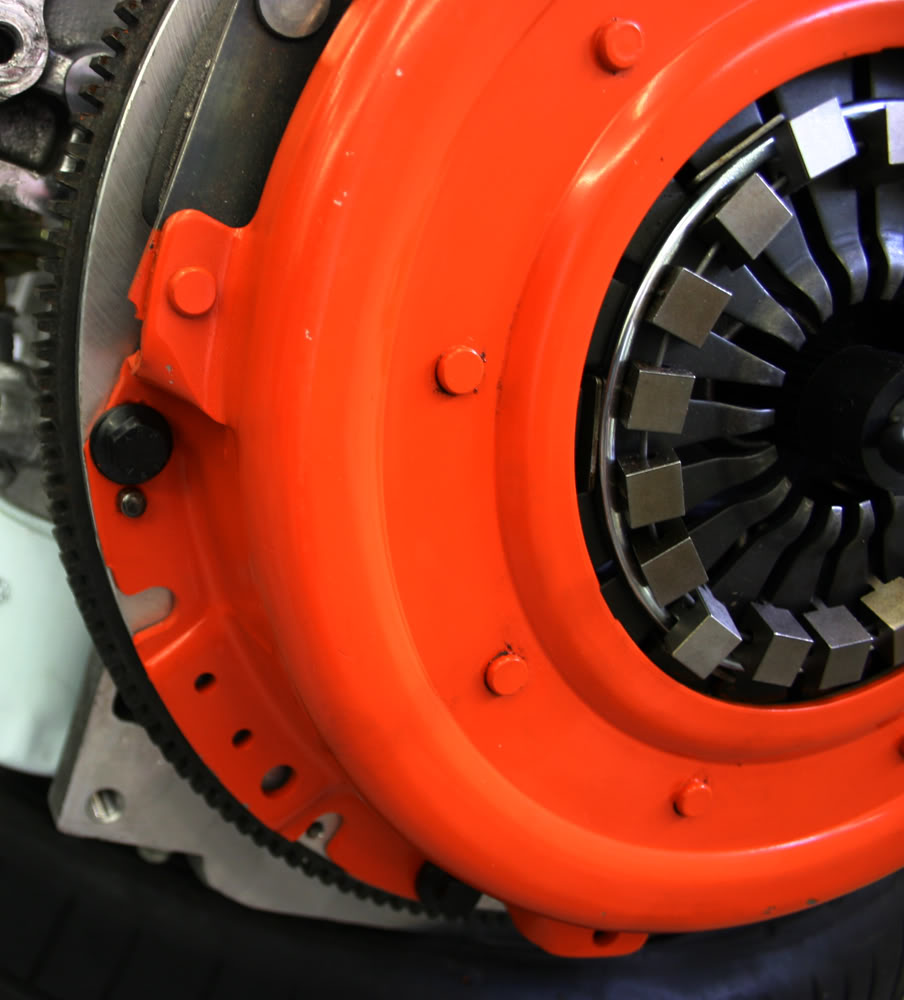
After removing the bellhousing, I installed the clutch. The LS1 flywheels have two dowel pins that must be lined up on the pressure plate for balance purposes.
I installed the clutch pivot ball in the bellhousing and have to adjust the height. Based on my late in the day measurements, I think I need a taller ball.
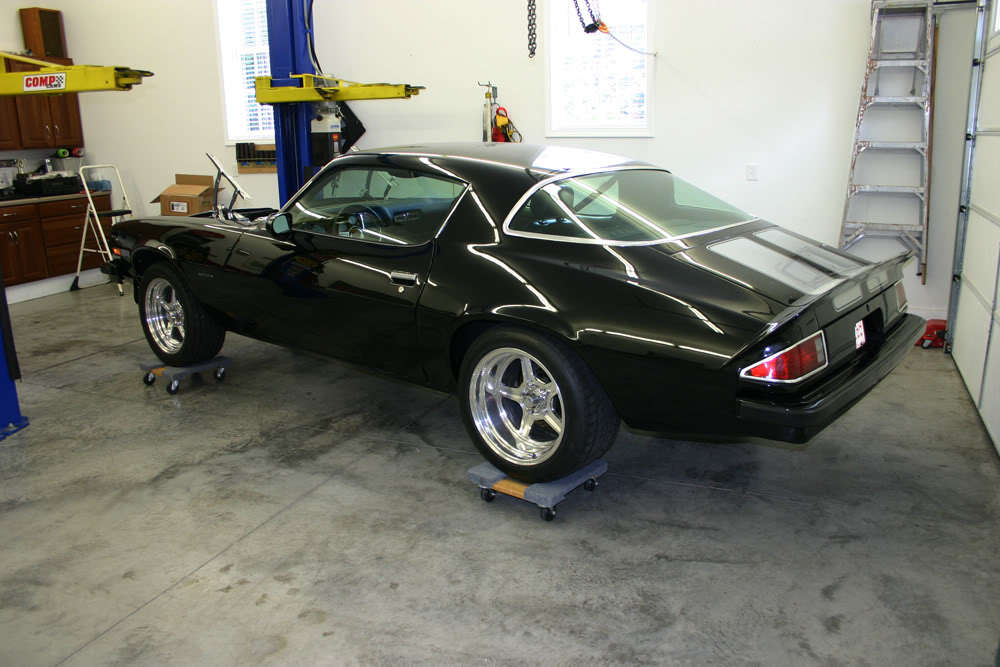
I also turned the car around in the garage to get the nose facing my ceiling hoist. My driveway is uphill outside the garage so turning it around there is not an option. I bought these dollies from Northern Tool some years ago and they have come in handy. I was able to easily turn the car around by myself. Once I get the pivot ball adjusted correctly, I am ready to put the motor in the car.
Getting close.
After lunch, I finished up the alignment of the bellhousing. Based on the readings, I had to use a "14 adjustable dowel. I set it in place with my best guess of where it should be to get the bellhousing within spec and it worked. I was within 4 thousandths vertically and less than 2 thousandths horizontally.
After removing the bellhousing, I installed the clutch. The LS1 flywheels have two dowel pins that must be lined up on the pressure plate for balance purposes.
I installed the clutch pivot ball in the bellhousing and have to adjust the height. Based on my late in the day measurements, I think I need a taller ball.
I also turned the car around in the garage to get the nose facing my ceiling hoist. My driveway is uphill outside the garage so turning it around there is not an option. I bought these dollies from Northern Tool some years ago and they have come in handy. I was able to easily turn the car around by myself. Once I get the pivot ball adjusted correctly, I am ready to put the motor in the car.
Getting close.
Thread Starter
|
July 2011 ROTM
Joined: Dec 2009
Posts: 153
ROTM Winner's Club
The motor will go in tomorrow!!! I got the pivot ball adjusted and prepared the engine bay with lots of padding. Hopefully, everything fits tomorrow. My buddy and I decided to keep the car on the dollies. Since the hoist cannot be moved, this will make it easier to move the car to line up the engine mounts.
Thread Starter
|
July 2011 ROTM
Joined: Dec 2009
Posts: 153
ROTM Winner's Club
The motor is in but it took about four hours of finagling to get it to line up with the engine mounts. For awhile, we thought that there was an alignment issue. However, time and patience eventually got everything to line up. We did have to take the driver's side mount off the motor and spread it apart a bit as it was too narrow to fit over the mount. We got a piece of threaded 1/2" rod and, using placing bolts in the middle as well as on the outside, we were able to spread it about 1/4" which was enough.
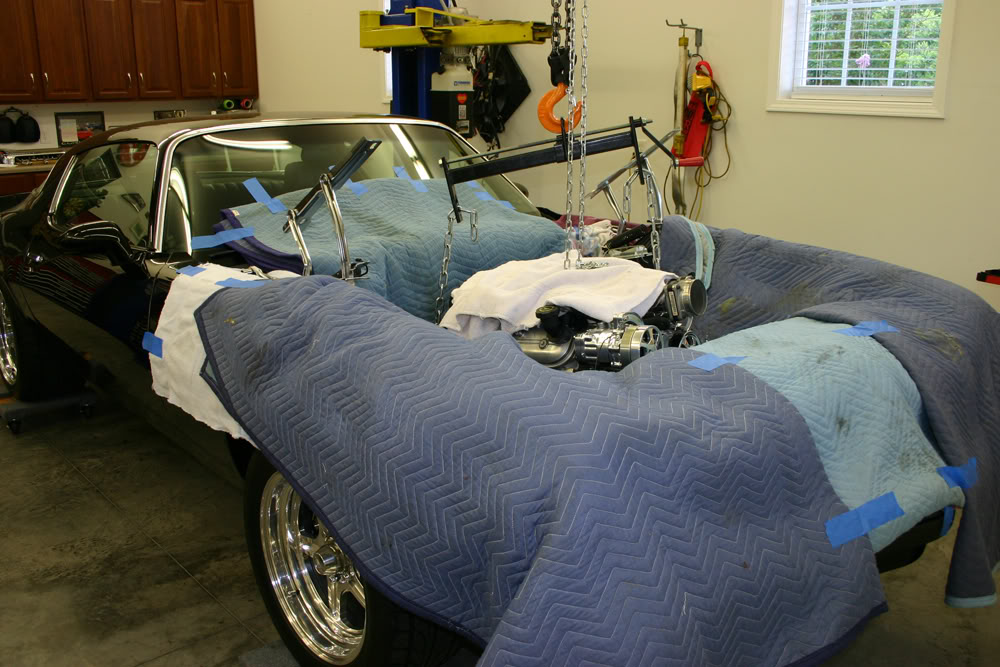
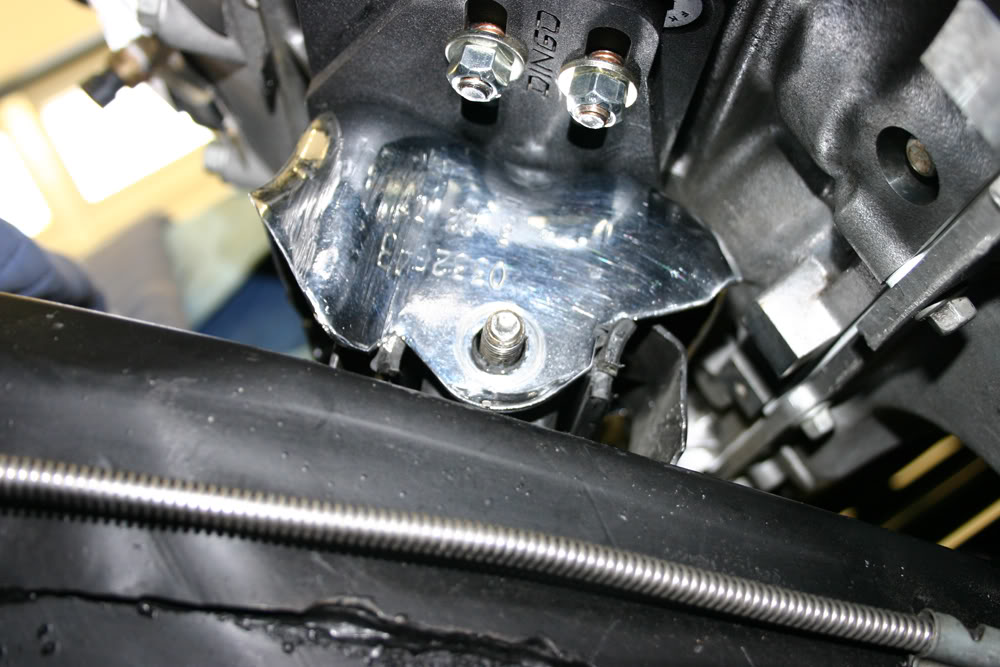
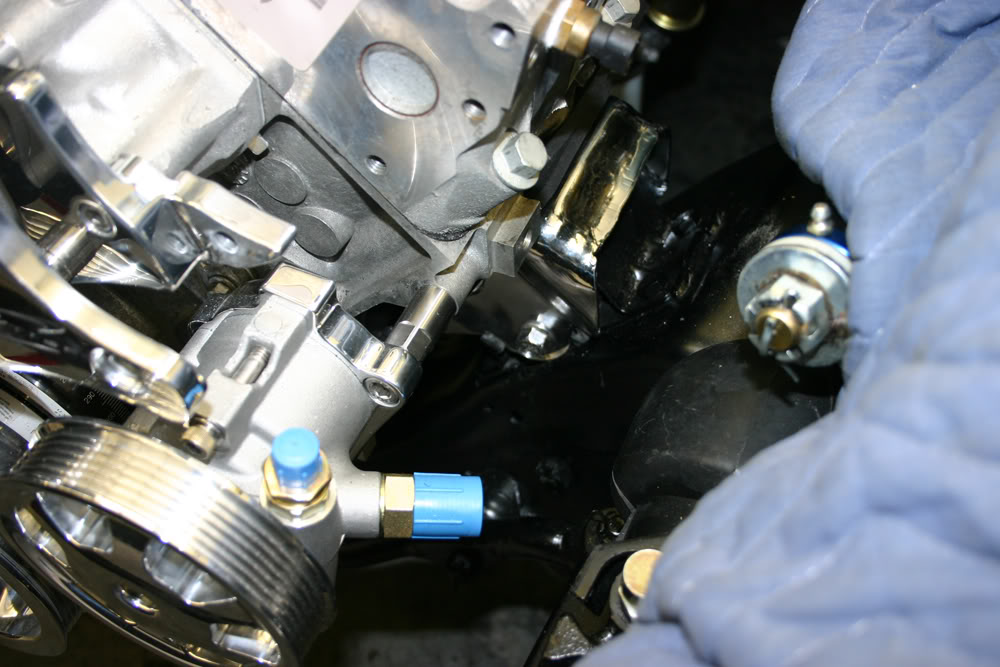
After getting it mounted on the mounts, if you let the motor hang, it wanted to rest against the brake line on the rear of the front crossmember. So I tied the front of the motor down to the front swaybar to keep it up until we install the tranny.

As you can see in some of the photos, I do have some adjustment on the mounting plates and can move the motor an inch or so to the rear. It cannot go any further forward of the oil pan will hit the crossmember.
Big job done!! Should get the tranny installed next week and then it is a matter of hooking everything up.
After getting it mounted on the mounts, if you let the motor hang, it wanted to rest against the brake line on the rear of the front crossmember. So I tied the front of the motor down to the front swaybar to keep it up until we install the tranny.
As you can see in some of the photos, I do have some adjustment on the mounting plates and can move the motor an inch or so to the rear. It cannot go any further forward of the oil pan will hit the crossmember.
Big job done!! Should get the tranny installed next week and then it is a matter of hooking everything up.
