Installing a LS1 in my 1977 Camaro
#101
 08-23-2011, 09:49 AM


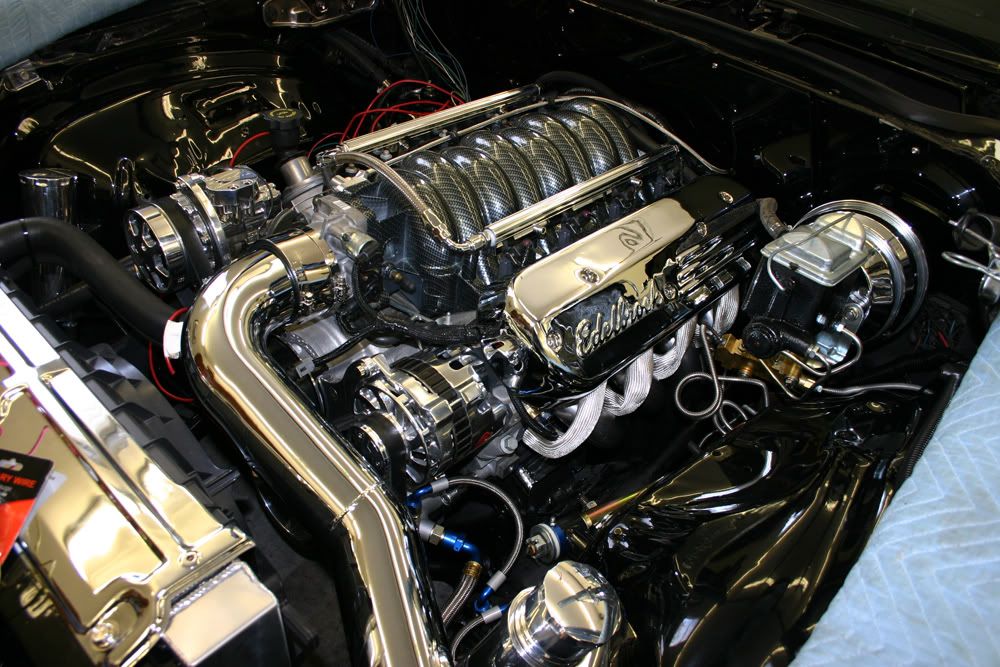
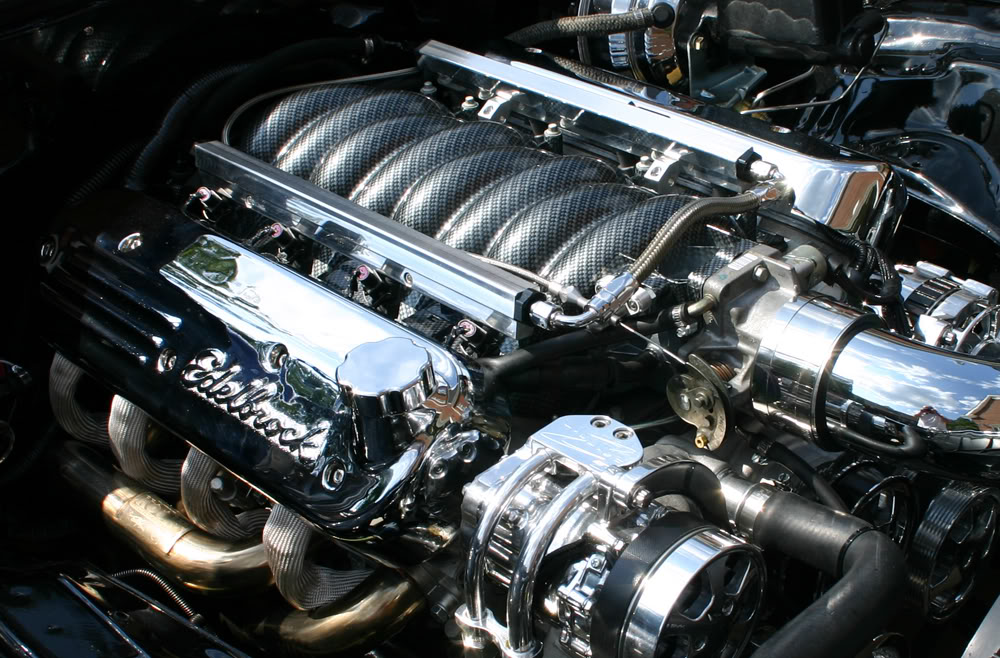
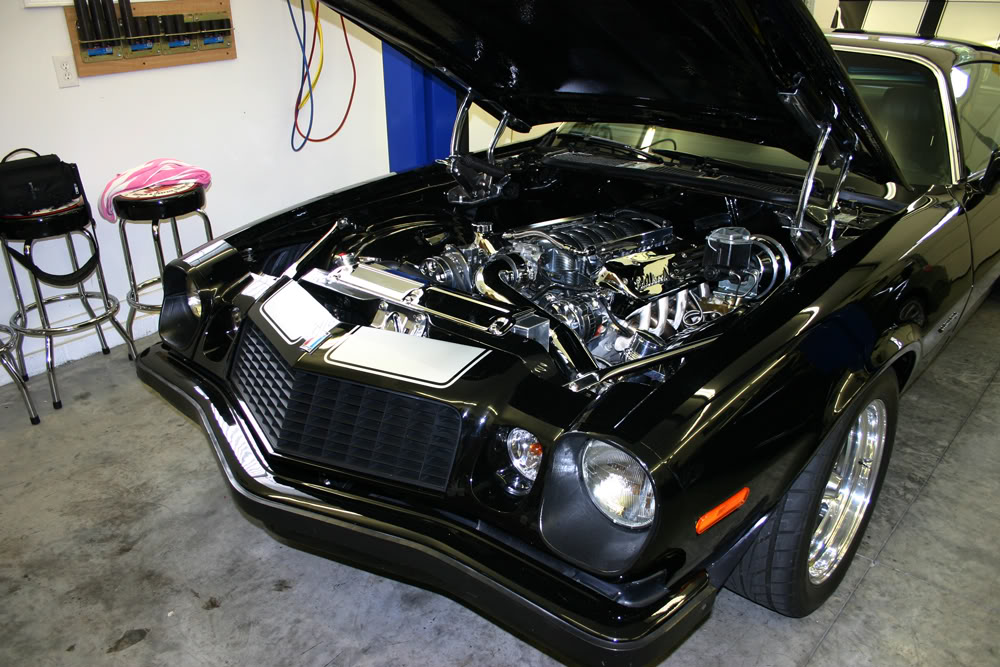
Time to install some of the chrome goodies. First up was to replace the O-rings on the injectors. Then it was simply a matter of pushing them into the fuel rails and then into the intake.
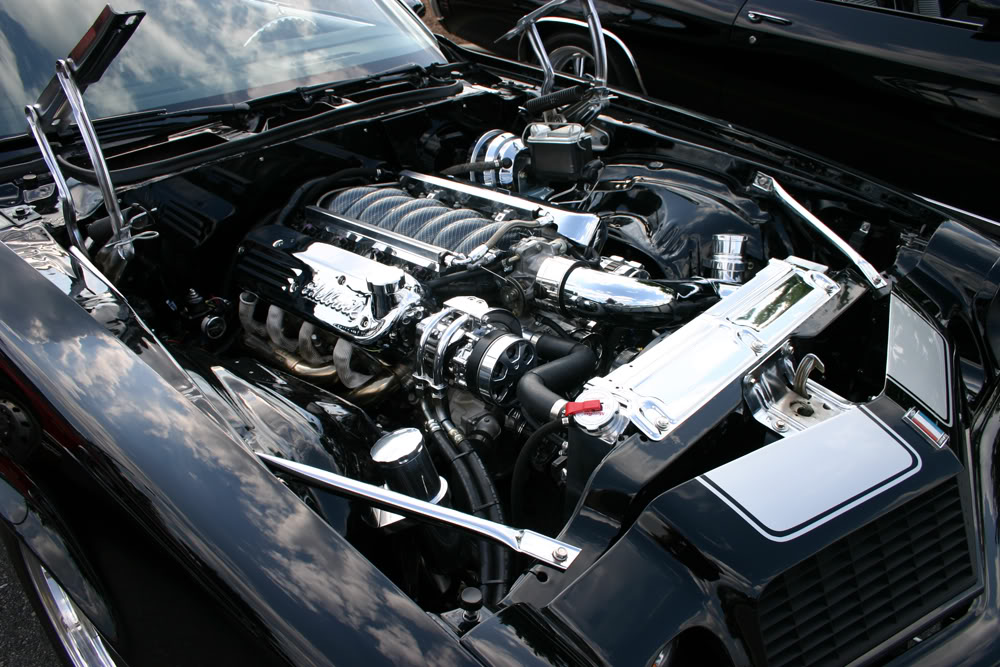
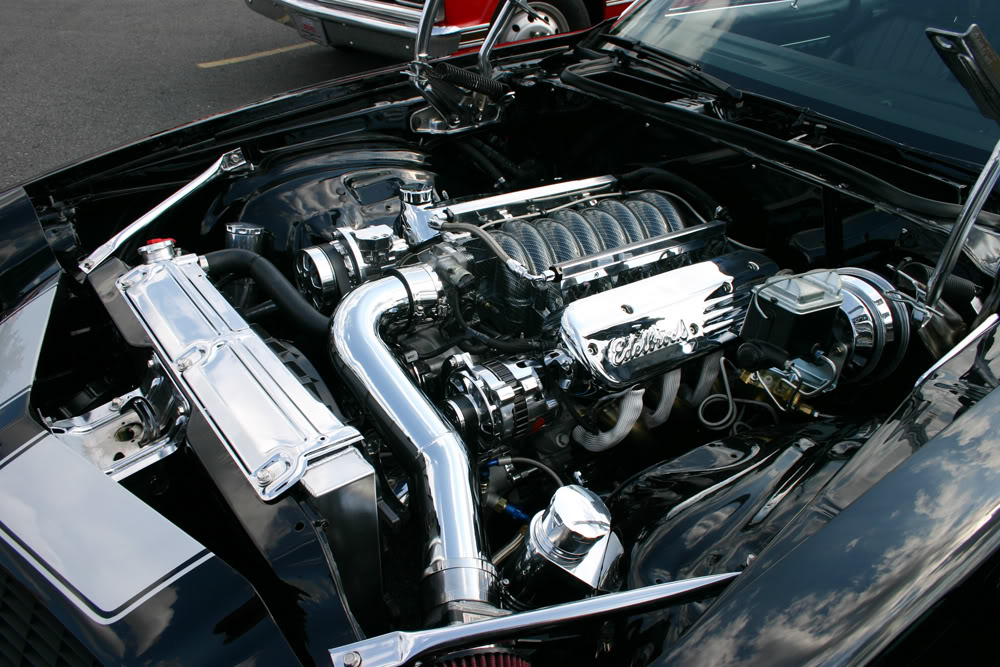
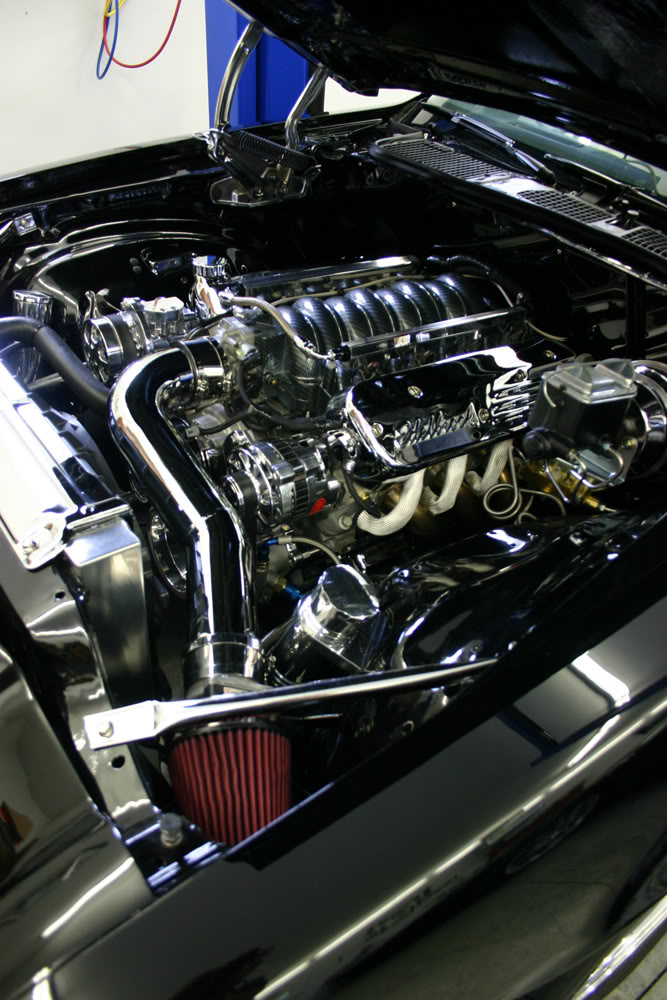
After I installed the plugs on the injectors, I wrapped all of the wiring on the left side. I used the braided mesh covering here for the wiring. I then test fitted the coil cover. I was pleasantly surprised to see that the coil cover covered most of the wiring. After removing the coil cover to make some final adjustments, I re-installed the coil cover. From the photos below you get an idea of what the finished motor will look like. In the fourth photo below, you can see some convoluted tubing running along the top of the inner fender. Once I am sure everything works, I will be loosening the inner fender and placing the tubing behind it under the outer fender.
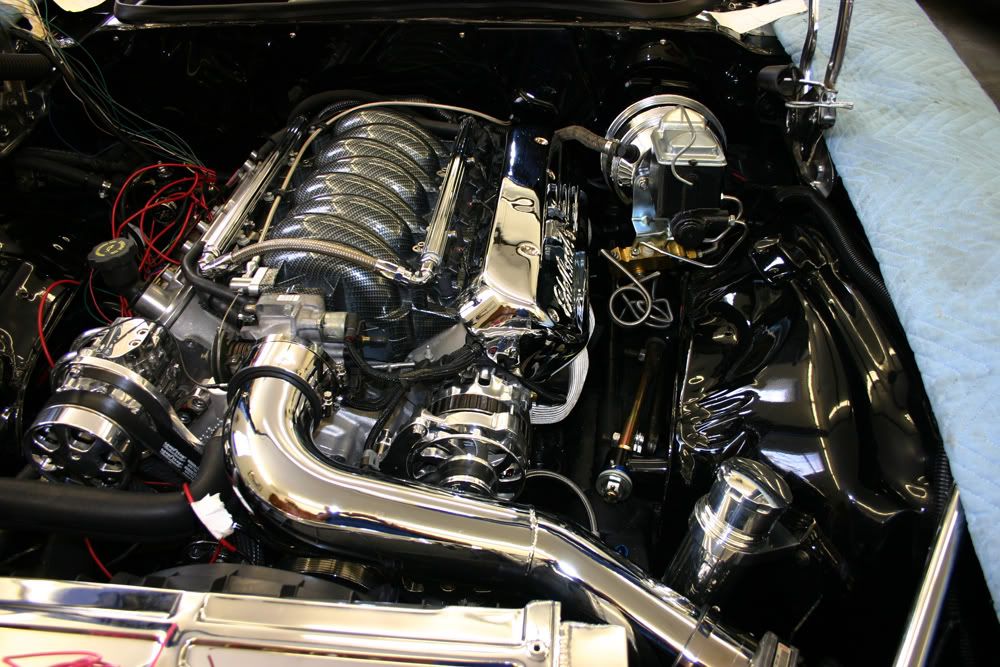
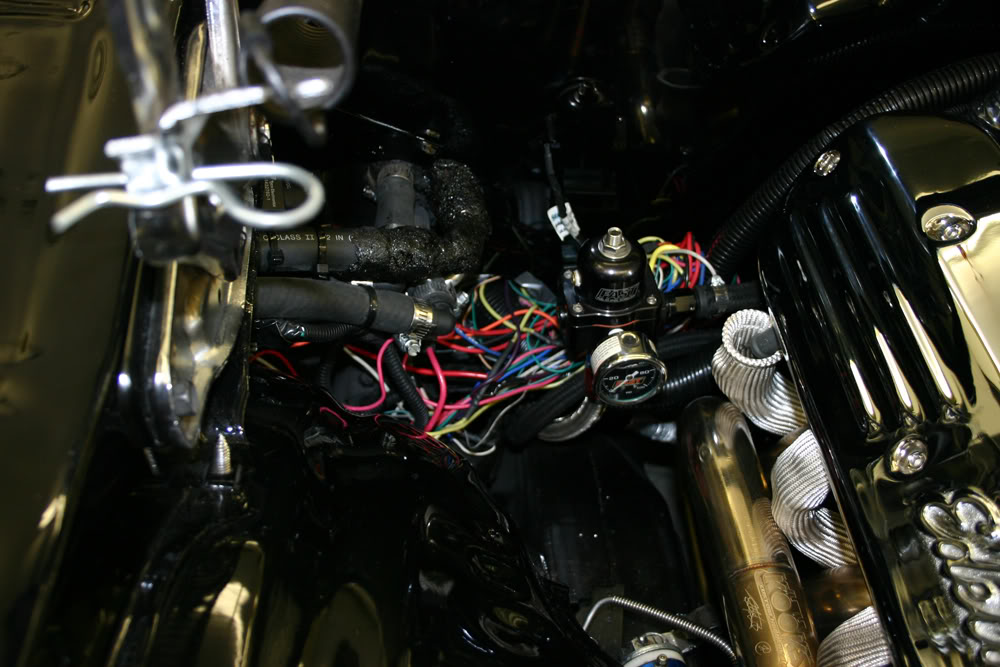
The photo below shows what is waiting for me tomorrow morning. At least there are less obstructions on this side. Still lots of wires to hook up.
www.jerryforthofer.wordpress.com
After I installed the plugs on the injectors, I wrapped all of the wiring on the left side. I used the braided mesh covering here for the wiring. I then test fitted the coil cover. I was pleasantly surprised to see that the coil cover covered most of the wiring. After removing the coil cover to make some final adjustments, I re-installed the coil cover. From the photos below you get an idea of what the finished motor will look like. In the fourth photo below, you can see some convoluted tubing running along the top of the inner fender. Once I am sure everything works, I will be loosening the inner fender and placing the tubing behind it under the outer fender.
The photo below shows what is waiting for me tomorrow morning. At least there are less obstructions on this side. Still lots of wires to hook up.
www.jerryforthofer.wordpress.com
Jerry � Your engine compartment looks awesome! Nice work!

#103
08-23-2011, 07:46 PM

Thanks.
Have to wait another day!!
The good news is I have fuel pressure and fuel. The bad news is that I have a serious fuel leak on one of the fuel rails. I had been warned on LS1Tech by a couple guys that every time they used the Professional Products fuel rails, they leaked. I should have listened to them.
The problem is that the threads are stripped on one of the fuel rails. The chromer had put the fittings in on this end of the fuel rail so he could chrome them in place. It might be his issue. One of the guys who mentioned the potential problem was Nate at Nasty Performance. I called him and he said that is the common problem with their fuel rails. They use thin material and either the threads strip or the fuel rail cracks. So, hard to tell if the chromer did anything wrong.
Nate makes his own and I ordered a set of polished ones. He uses an O-ring fitting at the fuel rails which seals better and does away with the tightening issues. They will be here tomorrow. He said he has been doing LS motors for 12 years. I am not sure how I missed finding him earlier on.
The good news is that the fuel pump was working. The fuel pressure for the EZ-EFI injection was 42lbs while I need 58lbs for the LS motor. We did run the fuel pump long enough for me to set the fuel pressure. The other good thing about the fuel pump working is that the computer has to tell it to work. So the computer is online doing something!!
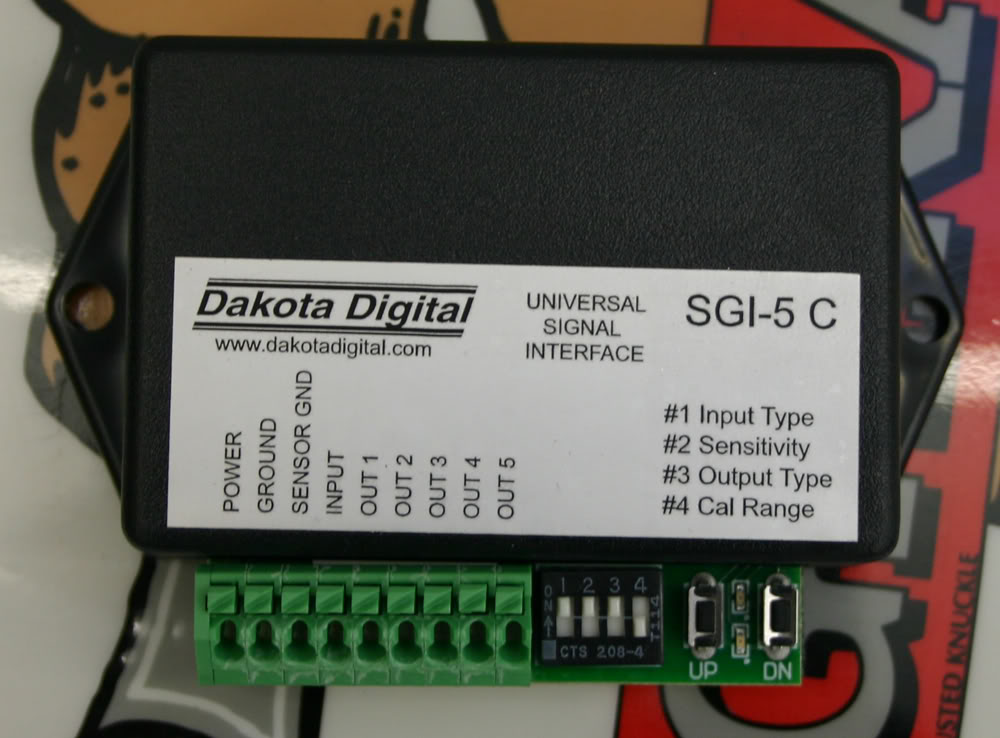
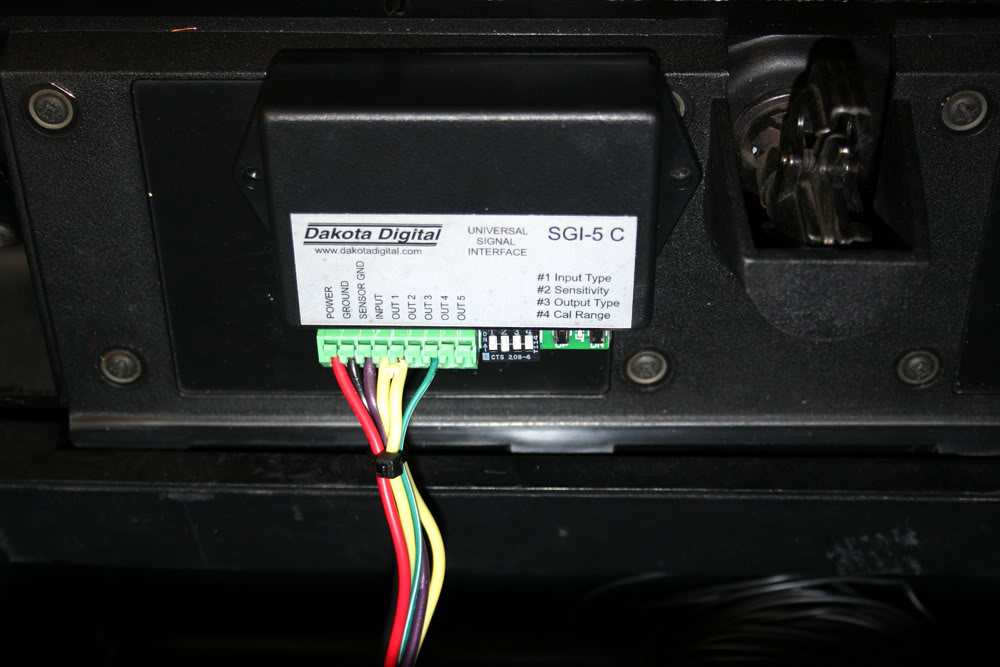
I finished up the rest of the wiring earlier today. I also installed Dakota Digital's SGI-5 interface. My speedometer needs an 8K pulse which is what my sender puts out. However, the computer needs a 4K pulse. To get both a 8K and 4K signal, I had to wire this device. As you can see, a lot of wires went into this small piece. Since there are some adjustments that can be done with this device, I decided to run the wiring to my glove box so it would be handy.
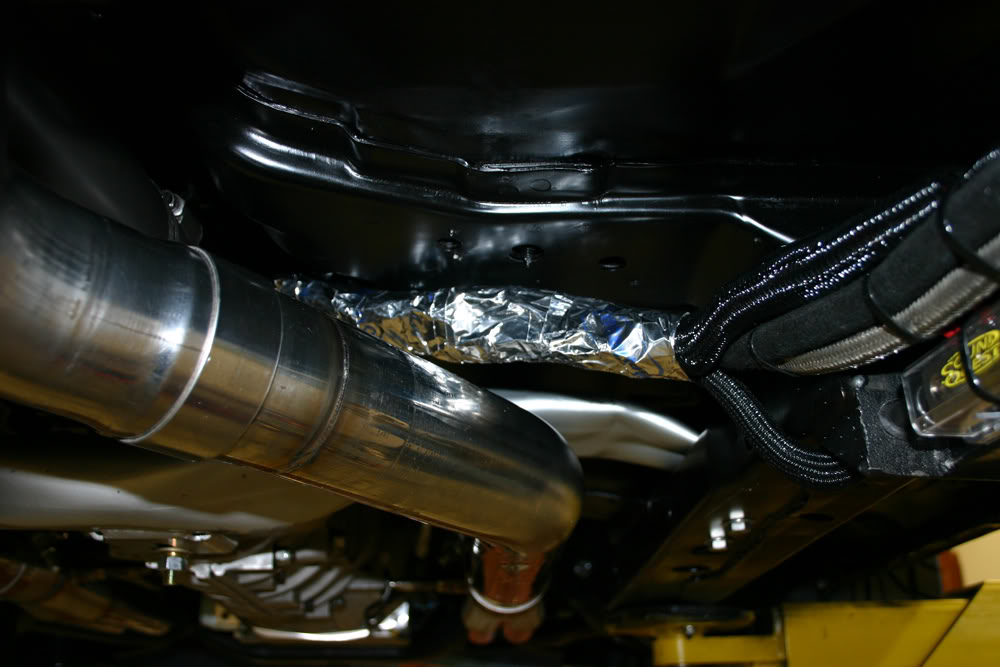
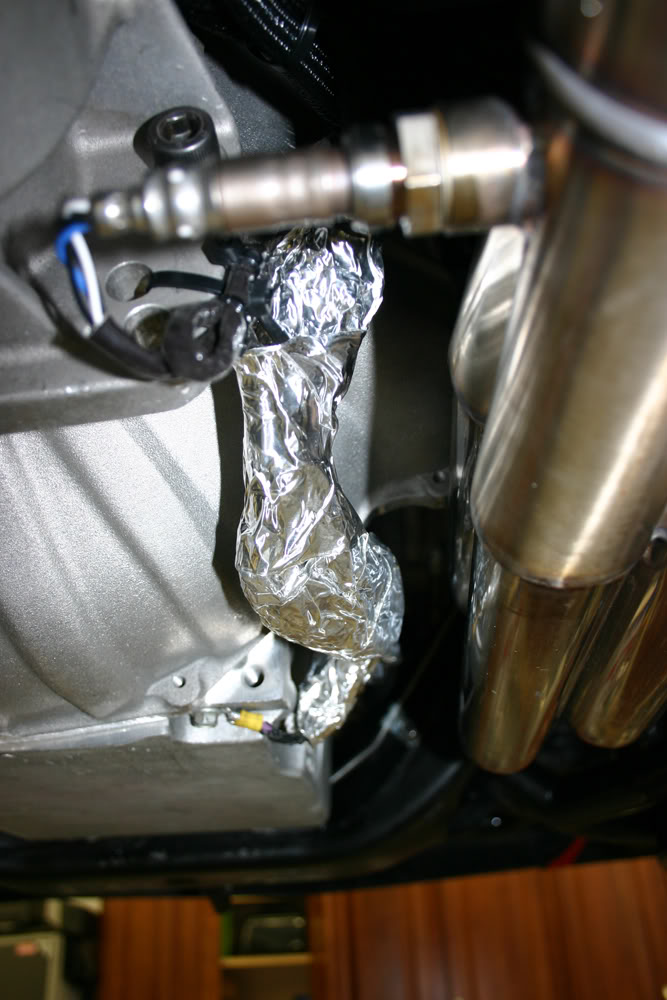
I also installed some heat shield material on some of the wiring that is directly above the exhaust.
While I am waiting for the new fuel rails to arrive, I will remove the old ones and be ready to install everything. I also have some other things that I can do to tidy up the installation. My son also mentioned that I might want to waterproof those terminal blocks somehow. He is coming over Thursday morning to charge the AC and I am sure he will have some suggestions once he looks everything over.
I am still hopeful I can make the car show this weekend at the speedway. The weather is not looking good though. We may have some rain as remnants of the hurricane. Have to play that by ear.
Have to wait another day!!
The good news is I have fuel pressure and fuel. The bad news is that I have a serious fuel leak on one of the fuel rails. I had been warned on LS1Tech by a couple guys that every time they used the Professional Products fuel rails, they leaked. I should have listened to them.
The problem is that the threads are stripped on one of the fuel rails. The chromer had put the fittings in on this end of the fuel rail so he could chrome them in place. It might be his issue. One of the guys who mentioned the potential problem was Nate at Nasty Performance. I called him and he said that is the common problem with their fuel rails. They use thin material and either the threads strip or the fuel rail cracks. So, hard to tell if the chromer did anything wrong.
Nate makes his own and I ordered a set of polished ones. He uses an O-ring fitting at the fuel rails which seals better and does away with the tightening issues. They will be here tomorrow. He said he has been doing LS motors for 12 years. I am not sure how I missed finding him earlier on.
The good news is that the fuel pump was working. The fuel pressure for the EZ-EFI injection was 42lbs while I need 58lbs for the LS motor. We did run the fuel pump long enough for me to set the fuel pressure. The other good thing about the fuel pump working is that the computer has to tell it to work. So the computer is online doing something!!
I finished up the rest of the wiring earlier today. I also installed Dakota Digital's SGI-5 interface. My speedometer needs an 8K pulse which is what my sender puts out. However, the computer needs a 4K pulse. To get both a 8K and 4K signal, I had to wire this device. As you can see, a lot of wires went into this small piece. Since there are some adjustments that can be done with this device, I decided to run the wiring to my glove box so it would be handy.
I also installed some heat shield material on some of the wiring that is directly above the exhaust.
While I am waiting for the new fuel rails to arrive, I will remove the old ones and be ready to install everything. I also have some other things that I can do to tidy up the installation. My son also mentioned that I might want to waterproof those terminal blocks somehow. He is coming over Thursday morning to charge the AC and I am sure he will have some suggestions once he looks everything over.
I am still hopeful I can make the car show this weekend at the speedway. The weather is not looking good though. We may have some rain as remnants of the hurricane. Have to play that by ear.
#104
08-25-2011, 11:36 PM
Nate's fuel rails came late yesterday. Got them on, turned on the ignition and no fuel leaks. Hurrah!!! I really like his fuel rails. Quality pieces and the mounting hardware is much better. I also like the O-ring fittings.
After making sure there were no fuel leaks, my friend Reese turned the key to start the car. Nothing!! Then stupidity reared it's ugly head. It seems your trusty writer did not hook up the wire to the solenoid!!! What a dufus. And, on top of that, I wasn't sure which wire was the correct one. I had run all of the wires back to my terminal block. By now it was 6:00PM and I was done for the day.
Today was a travel day for my son with the Red Bull NASCAR team so he had the day off until they left for Bristol at 4:00PM. By the way, this is the only time he has off all week! Not as glamourous job as you may think, but he enjoys it. Since he was about 12 years old, he could figure out things better than me so I was glad to have him there.
By the time he arrived, based on some photos I had taken of the engine bay after removing the engine, I had hooked up what I thought was the solenoid wire. So we lowered the car, hooked up the battery and had no power whatsoever. We were thinking we had blown a major fuse or whatever so we spent some time troubleshooting the problem. During this time, he was checking out the fuse block and I noticed he had knocked out my ignition wire connector. I put it back in. More about this later.
Finally, after checking voltage everywhere, I told him the only thing that had changed from yesterday was my cutting this one wire and hooking it up to the solenoid. Up in the air the car went, we temporarily connected the severed wire, hooked up the battery and we were back in business. We decided that this was a very important wire!!
This left only one other choice for the solenoid. I hooked up the tester to that wire, son Matt advanced the key to the start position and I had voltage showing on the gauge. We hooked it up to the upper large terminal on the solenoid, hooked up the battery, turned the key to start and could hear the starter motor running, but no cranking.
Fortunately, Matt had driven his 1979 El Camino with a LS1 we had installed nearly two years ago. The trusty flashlight revealed that the solenoid wire went to a small terminal in between the two larger terminal. Re-wired it, turned the key to start and it cranked but did not fire.
I called Jesse at Wait4Me Performance to get advice. He said the pink wire on the injectors should have 12V both with the ignition on and while cranking. We had 12V with ignition on, but no voltage upon cranking. I knew the computer was hooked up to the 12V ignition fuse block under the dash, so I told Matt that maybe that wire had been knocked off the connector again. Crawled under the dash to see it was plugged in. However, after getting a light so I could see better, I saw that I had plugged it into the ACC slot rather than the ignition slot. Moved the wire, cranked the motor and it immediately fired. Sighs of relief from yours truly.
We shut it off right away as I had wires precariously hanging from the harness under the car while searching for the correct solenoid wire. Made everything safe and sound and then fired it up again to check for leaks. None were found.
By this time it is nearly 1:00PM and we were both hungry. Matt has all the equipment necessary to charge the AC system, so we hooked up the vacuum pump and let it run while we were at lunch. Came back to find the that all was well on the vacuum side.
Matt suggested we now drive the car to make sure everything was operating correctlly before we charged the AC system. We took a short drive and all seemed well. He drove the car out and I drove it back and got on it a bit. We both were impressed with the power.
Checked the vacuum and it had held which meant no leaks in the AC system. I had watched Matt charge the sytem previously, but this time I told him I wanted to do it and he could show me how. Which is what I did. It was nearly 3:00 when we finished and Matt had to leave to catch his ride to Bristol. Couldn't thank him enough. I am very lucky to have a great son!!!
I still had a nest of wires to hide in the lower right corner of the engine bay near the firewall and I needed to clean up some other areas. However, everything was too hot for me to do that now. I did notice one thing though. While we were trying to figure out the solenoid hookup, Matt was trying to see the lugs on the solenoid. To get a better view, he removed the rearmost plug wire on the passenger side. In the rush to get it running, we forgot to hook it up. So, when we thought it was running pretty strong, it was actually running on seven cylinders.
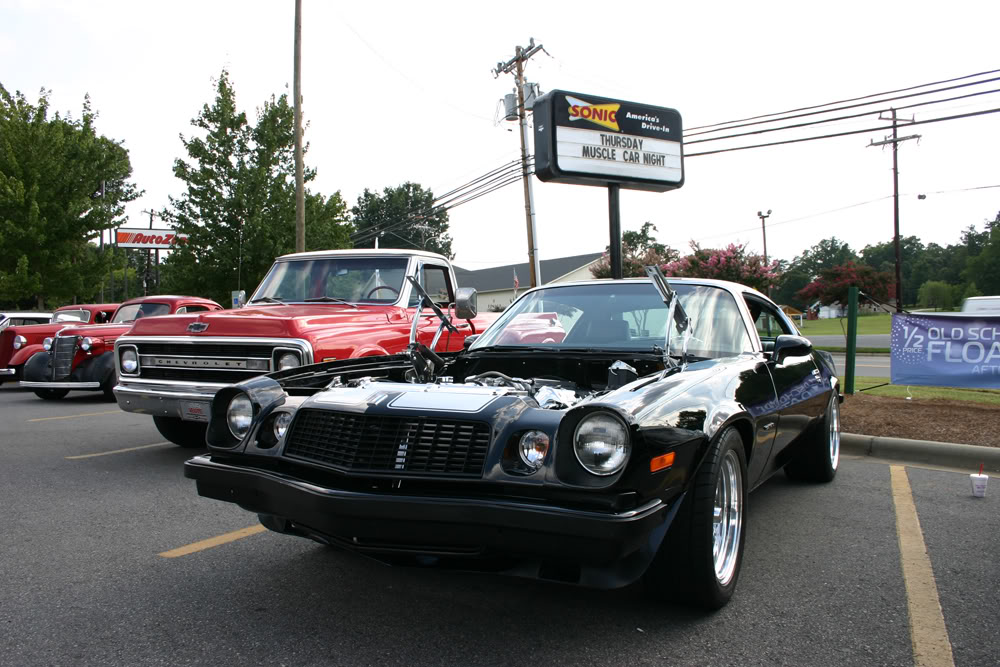
So, I washed the car, took a shower and drove it to our cruise-in at the local Sonic sans hood. The guys there knew I had been working on it for four months and gathered around to check it out. Had some very positive comments and I got to talk about the whole process many times over. Some people mentioned that they needed sunglasses because of the glare from the motor!! Great fun.
Tomorrow, I will clean up the wiring, install a heat shield on the wiring in a couple places, and get it ready for the big car show at the Charlotte Motor Speedway on Saturday and Sunday. For some reason, neither my tach nor my speedometer are working so I will try to address them as well.
I am showing with the Camaro club in the infield grass. Earlier in the week, the weather looked iffy because of hurricane Irene, but it is now projected to be further out to the east and we aren't even supposed to get any rain. And we could use some.
Impressions:
Much smoother running that my old motor.
Can now hear the gear whine from the Richmond 6 speed where before the motor drowned it out.
Love the sound of the exhaust!!! Check out the video. My buddy Reese is behind the wheel while I filmed it.
2011 08 25 22 14 19 1977 Camaro LS1 Walk Around - YouTube
Glad it is running!!!!!!!!!!!
After making sure there were no fuel leaks, my friend Reese turned the key to start the car. Nothing!! Then stupidity reared it's ugly head. It seems your trusty writer did not hook up the wire to the solenoid!!! What a dufus. And, on top of that, I wasn't sure which wire was the correct one. I had run all of the wires back to my terminal block. By now it was 6:00PM and I was done for the day.
Today was a travel day for my son with the Red Bull NASCAR team so he had the day off until they left for Bristol at 4:00PM. By the way, this is the only time he has off all week! Not as glamourous job as you may think, but he enjoys it. Since he was about 12 years old, he could figure out things better than me so I was glad to have him there.
By the time he arrived, based on some photos I had taken of the engine bay after removing the engine, I had hooked up what I thought was the solenoid wire. So we lowered the car, hooked up the battery and had no power whatsoever. We were thinking we had blown a major fuse or whatever so we spent some time troubleshooting the problem. During this time, he was checking out the fuse block and I noticed he had knocked out my ignition wire connector. I put it back in. More about this later.
Finally, after checking voltage everywhere, I told him the only thing that had changed from yesterday was my cutting this one wire and hooking it up to the solenoid. Up in the air the car went, we temporarily connected the severed wire, hooked up the battery and we were back in business. We decided that this was a very important wire!!
This left only one other choice for the solenoid. I hooked up the tester to that wire, son Matt advanced the key to the start position and I had voltage showing on the gauge. We hooked it up to the upper large terminal on the solenoid, hooked up the battery, turned the key to start and could hear the starter motor running, but no cranking.
Fortunately, Matt had driven his 1979 El Camino with a LS1 we had installed nearly two years ago. The trusty flashlight revealed that the solenoid wire went to a small terminal in between the two larger terminal. Re-wired it, turned the key to start and it cranked but did not fire.
I called Jesse at Wait4Me Performance to get advice. He said the pink wire on the injectors should have 12V both with the ignition on and while cranking. We had 12V with ignition on, but no voltage upon cranking. I knew the computer was hooked up to the 12V ignition fuse block under the dash, so I told Matt that maybe that wire had been knocked off the connector again. Crawled under the dash to see it was plugged in. However, after getting a light so I could see better, I saw that I had plugged it into the ACC slot rather than the ignition slot. Moved the wire, cranked the motor and it immediately fired. Sighs of relief from yours truly.
We shut it off right away as I had wires precariously hanging from the harness under the car while searching for the correct solenoid wire. Made everything safe and sound and then fired it up again to check for leaks. None were found.
By this time it is nearly 1:00PM and we were both hungry. Matt has all the equipment necessary to charge the AC system, so we hooked up the vacuum pump and let it run while we were at lunch. Came back to find the that all was well on the vacuum side.
Matt suggested we now drive the car to make sure everything was operating correctlly before we charged the AC system. We took a short drive and all seemed well. He drove the car out and I drove it back and got on it a bit. We both were impressed with the power.
Checked the vacuum and it had held which meant no leaks in the AC system. I had watched Matt charge the sytem previously, but this time I told him I wanted to do it and he could show me how. Which is what I did. It was nearly 3:00 when we finished and Matt had to leave to catch his ride to Bristol. Couldn't thank him enough. I am very lucky to have a great son!!!
I still had a nest of wires to hide in the lower right corner of the engine bay near the firewall and I needed to clean up some other areas. However, everything was too hot for me to do that now. I did notice one thing though. While we were trying to figure out the solenoid hookup, Matt was trying to see the lugs on the solenoid. To get a better view, he removed the rearmost plug wire on the passenger side. In the rush to get it running, we forgot to hook it up. So, when we thought it was running pretty strong, it was actually running on seven cylinders.
So, I washed the car, took a shower and drove it to our cruise-in at the local Sonic sans hood. The guys there knew I had been working on it for four months and gathered around to check it out. Had some very positive comments and I got to talk about the whole process many times over. Some people mentioned that they needed sunglasses because of the glare from the motor!! Great fun.
Tomorrow, I will clean up the wiring, install a heat shield on the wiring in a couple places, and get it ready for the big car show at the Charlotte Motor Speedway on Saturday and Sunday. For some reason, neither my tach nor my speedometer are working so I will try to address them as well.
I am showing with the Camaro club in the infield grass. Earlier in the week, the weather looked iffy because of hurricane Irene, but it is now projected to be further out to the east and we aren't even supposed to get any rain. And we could use some.
Impressions:
Much smoother running that my old motor.
Can now hear the gear whine from the Richmond 6 speed where before the motor drowned it out.
Love the sound of the exhaust!!! Check out the video. My buddy Reese is behind the wheel while I filmed it.
2011 08 25 22 14 19 1977 Camaro LS1 Walk Around - YouTube
Glad it is running!!!!!!!!!!!
#105
08-26-2011, 12:46 AM
CONGRATS!
That sounds good I mean good. You have all but have me ready to set my project back another year. I have an article from Car Craft were they took a 5.3 and added two 76mm turbos to the stock short block. The heads were CNC ported. It made 1200 hp. I will for sure pick up the motor this tax season then I will work on building that later.
Now go get the hood out of your wifes room.
#106
08-26-2011, 08:48 AM

Join Date: Aug 2008
Location: Portland, Or
Posts: 9,097
Thanks for the video! Sounds great Jerry! I bet you're pleased to finally be driving it again! Should be a huge hit at the track this weekend!
Love the Sonic sign right over your car in the first picture there! "Muscle car night"
Love the Sonic sign right over your car in the first picture there! "Muscle car night"
Last edited by 1971BB427; 08-26-2011 at 08:50 AM.
#107
08-26-2011, 07:41 PM
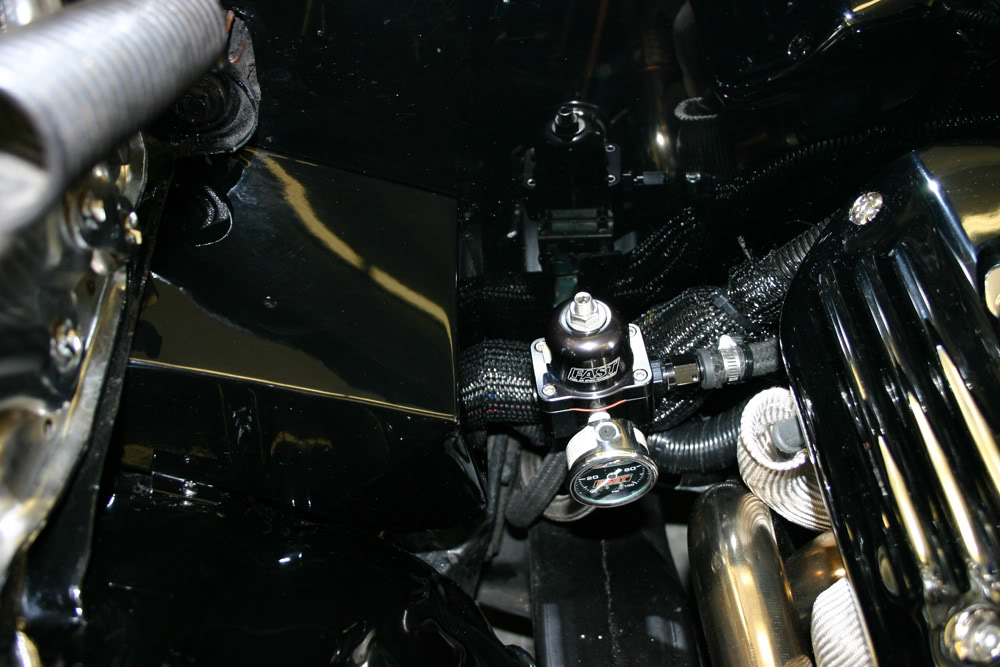
Today was tidying up day. I had a nest of wires in the lower right side next to the firewall that had to be dealt with. After tie wrapping the wires into a bundle, I was then able to use the mesh wire covers. Also, as you can see in the second photo, the cover my body man made to cover my AC and heater hoses works very well.
When my son and I were fooling around with the solenoid wire, we had initially hooked it up to one of the larger terminals. Once we discovered that it should go to the smaller terminal, I already had a fairly large connector on it. I was concerned that it might hit the other connections. So it disconnected everything, installed a small connector and then placed all the wires in covers. I also tied things away from the headers the best I could. There was still some wires that were uncomfortably close so I installed some heat shielding.
Normally during the Autofair at the speedway, my friend Reese and I usually go all four days as we cruise the vendors on Thursday and Friday and show our cars on Saturday and Sunday. Hot as it was today, Reese came back early and called to see if I was ready to put the hood on. I was and we soon had it in place.
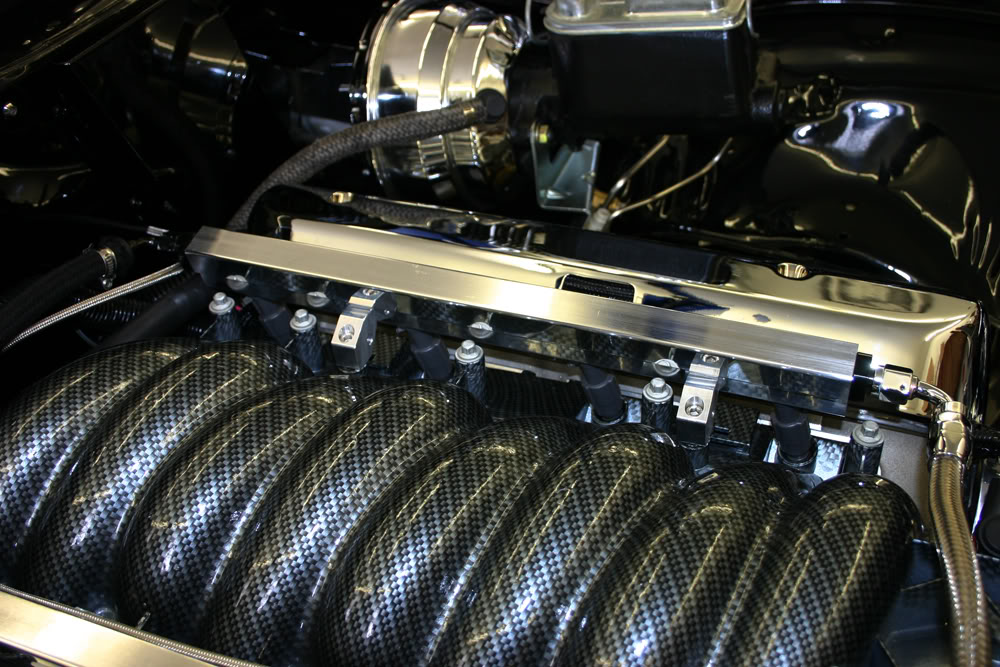
In my last post, I mentioned the Nate's fuel rails from Nasty Performance but I neglected to give you a good closeup. I was really impressed with the mounting system and the robustness of the rails.
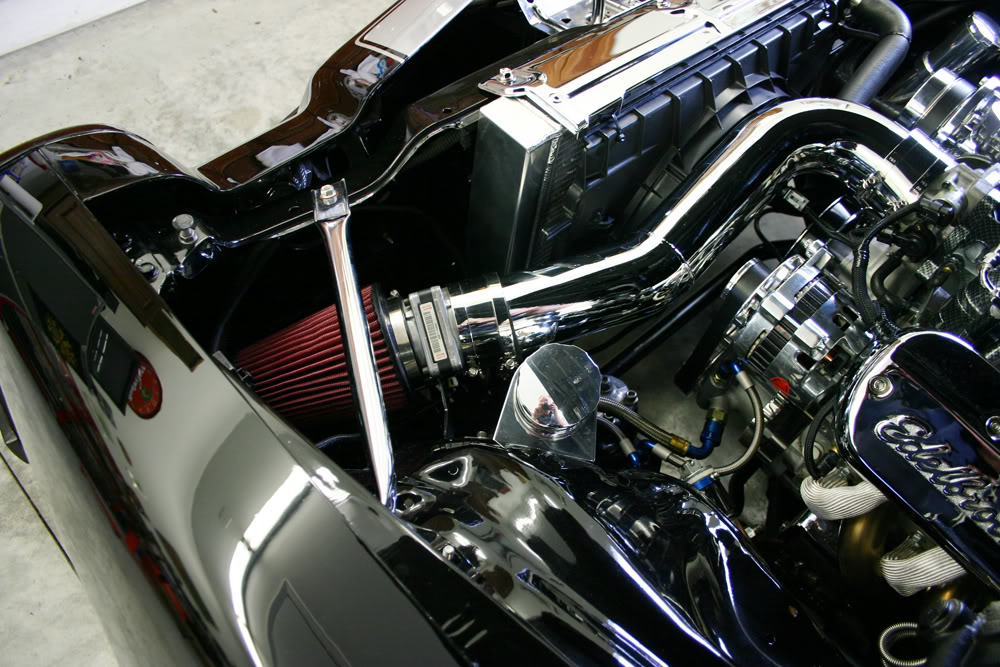
I also had not taken a really good photo of the cold air intake.
I then spent the rest of the day cleaning up the car for tomorrow's show. For the last couple weeks, I felt like I was on one of those automotive reality shows with a deadline fast approaching. Well, I made it. Look me up at Autofair tomorrow or Sunday if you are there. Looks like it will be warm, but we will miss the really bad weather from the hurricane.
Last edited by jerhofer; 08-26-2011 at 07:43 PM.
#109
08-27-2011, 07:37 PM
Join Date: Aug 2008
Location: Portland, Or
Posts: 9,097
Who says those reality car shows are all staged?  Guess we can make dealines too! Hope all goes well at the show Jerry!
Guess we can make dealines too! Hope all goes well at the show Jerry!