
Installing a LS1 in my 1977 Camaro
#71
 08-10-2011, 09:21 PM


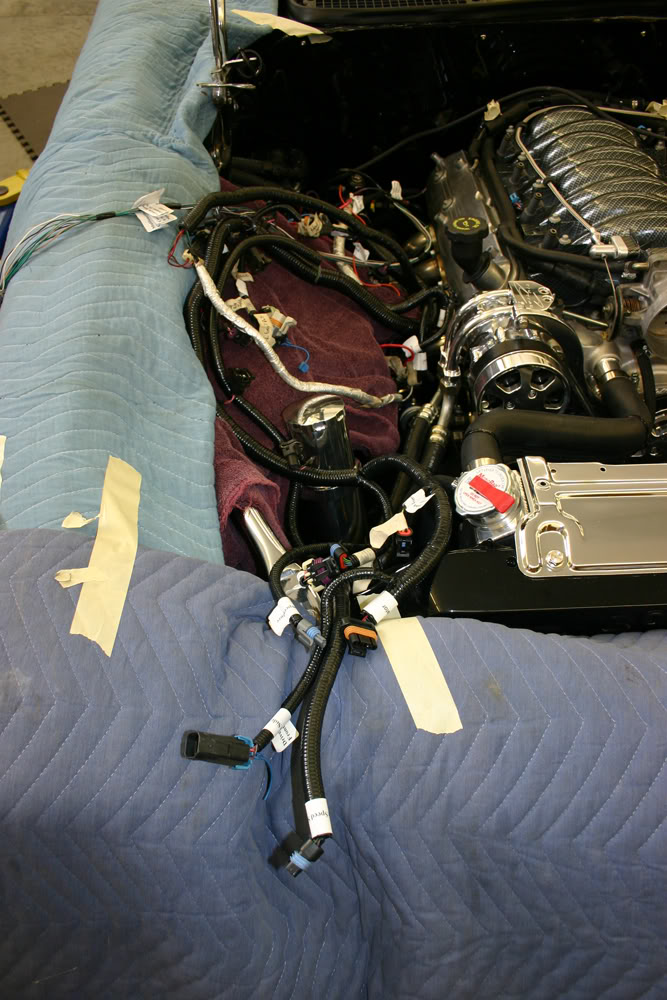
It took me an hour to feed the harness through a two inch hole from the inside of the car to the engine bay. Very tedious work on your hands and knees trying to get each of those little plugs through without damaging them. I did have to cut one off as it was too big to fit through the hole alongside the harness. Not a big deal as it was the plug for the passenger side o2 sensor. I have to extend the wiring anyway to reach my sensors.

When I was younger, getting under the dash to do something wasn't easy. At my age, it is more of a problem, especially when I try to stand up. My wife says I remind her of the old guy in "Laugh-In" (some of you may be old enough to remember the show) who takes forever to straighten up and walks with baby steps. Makes her laugh, so it cannot be all bad. For those that don't remember, check this out:
Rowan & Martin's Laugh-In Clip #11 - YouTube
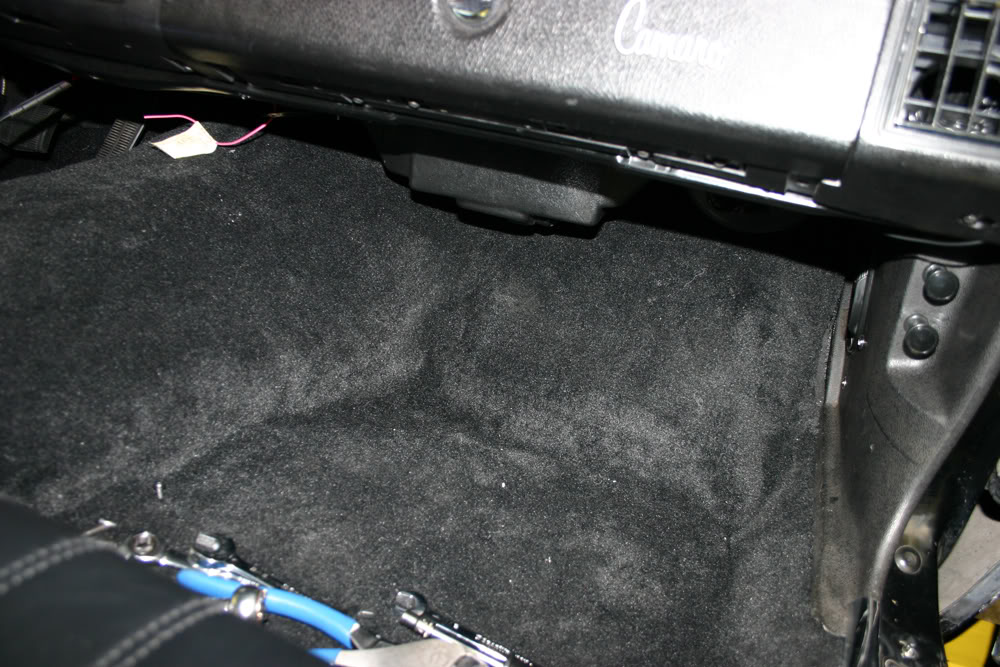
After trimming my glove box, I had placed the computer there as a possible location. I could get it in there barely and close the glove box door. However, today when I installed the two huge plugs, it did not work. I tried placing it on the hump under the dash but it stuck out like a sore thumb.
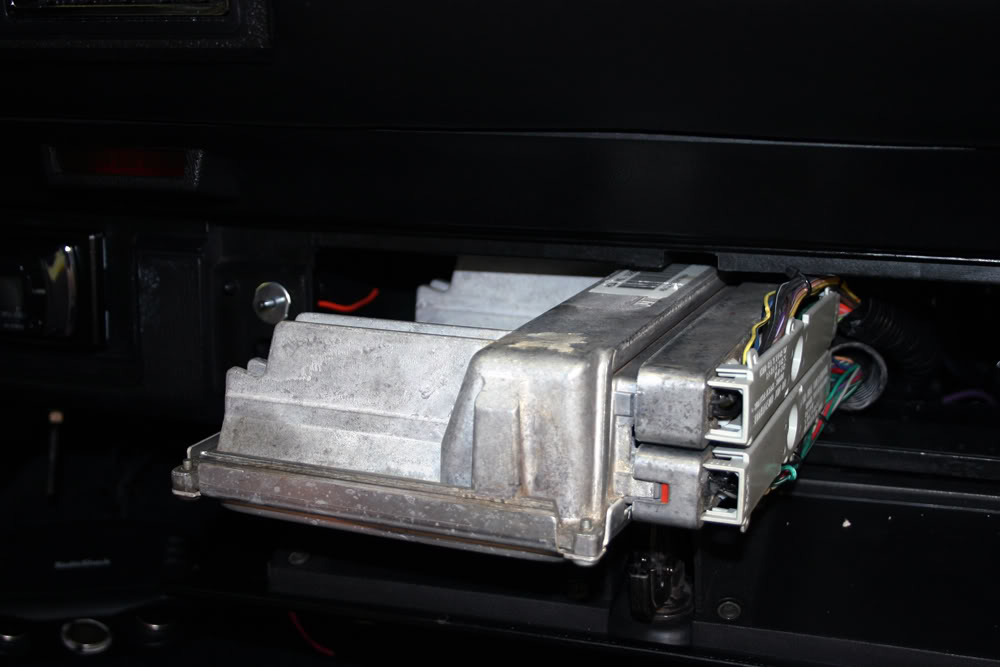
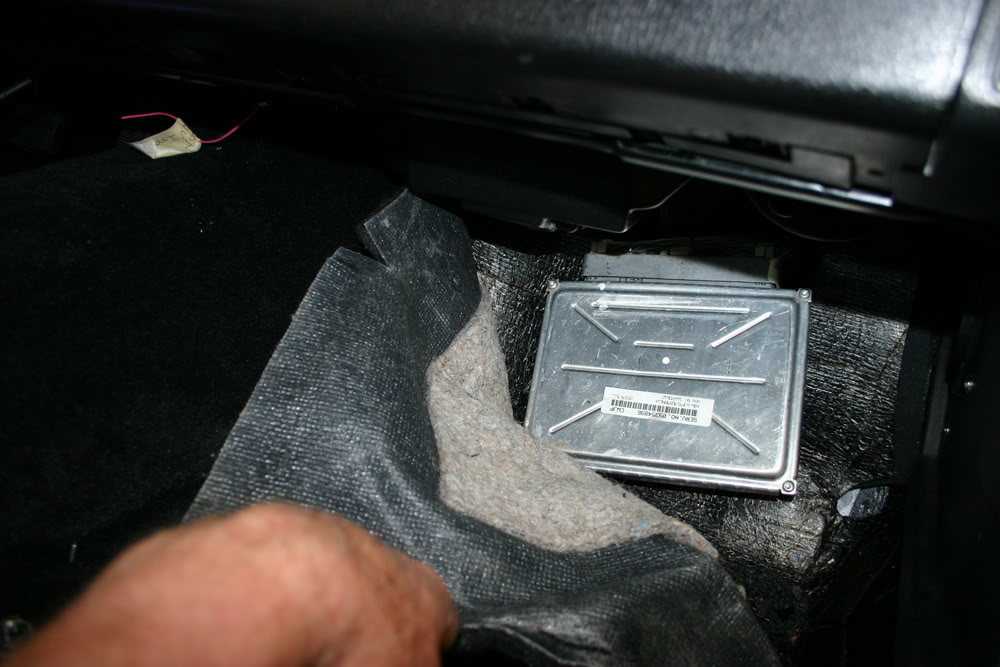
Then I pulled up the carpet in the passenger footwell, placed it on the padding on the angled area and placed the carpet over it. Unless you get down on your hands and knees, you would never know it was there. I checked online and it appears others have done this as well. My concern is heat buildup, but, considering it is normally placed in the engine bay, I cannot see how it could possible be hotter inside the car. If anyone has some feedback, I would appreciate it.
Earlier I had replaced the urethane mount on my transmisssion. When I put the engine in recently, I could not tighten up the center bolt as the threads were stripped. I had to remove all the bolts on the crossmember so I took the opportunity to replace the crappy ones with shiny stainless steel ones. No one will see them but me, but I am happier.
Now on to completing the wiring.
#72
08-10-2011, 10:49 PM

Join Date: Aug 2008
Location: Portland, Or
Posts: 9,097
Under the carpet is a good location, but I'd make a sheet metal shield to span over it and reach the trans tunnel and kick panel. That way it wont end up getting a wear pattern on the carpet the shape of the computer, and it wont end up with someone pressing against the connectors and breaking one off.
#73
08-11-2011, 06:55 AM
Under the carpet is a good location, but I'd make a sheet metal shield to span over it and reach the trans tunnel and kick panel. That way it wont end up getting a wear pattern on the carpet the shape of the computer, and it wont end up with someone pressing against the connectors and breaking one off.
#74
08-11-2011, 09:08 PM
I got a lot done today but the motor looks messier than ever. First up I installed a new set of spark plugs before I added any other obstructions. I have had the plugs for awhile, but did not want to take a chance that one would be broken during the header installation. This is a relatively painless job on this motor in this car.
There are two vacuum line outlets on the rear of the intake manifold. The large one is for the brake booster. This outlet took a much larger hose than the inlet on the brake booster. There was such a difference that I was able to use a smaller hose as a sleeve and fit the larger hose over the sleeve. I ran the small vacuum line from my fuel regulator to the other outlet.

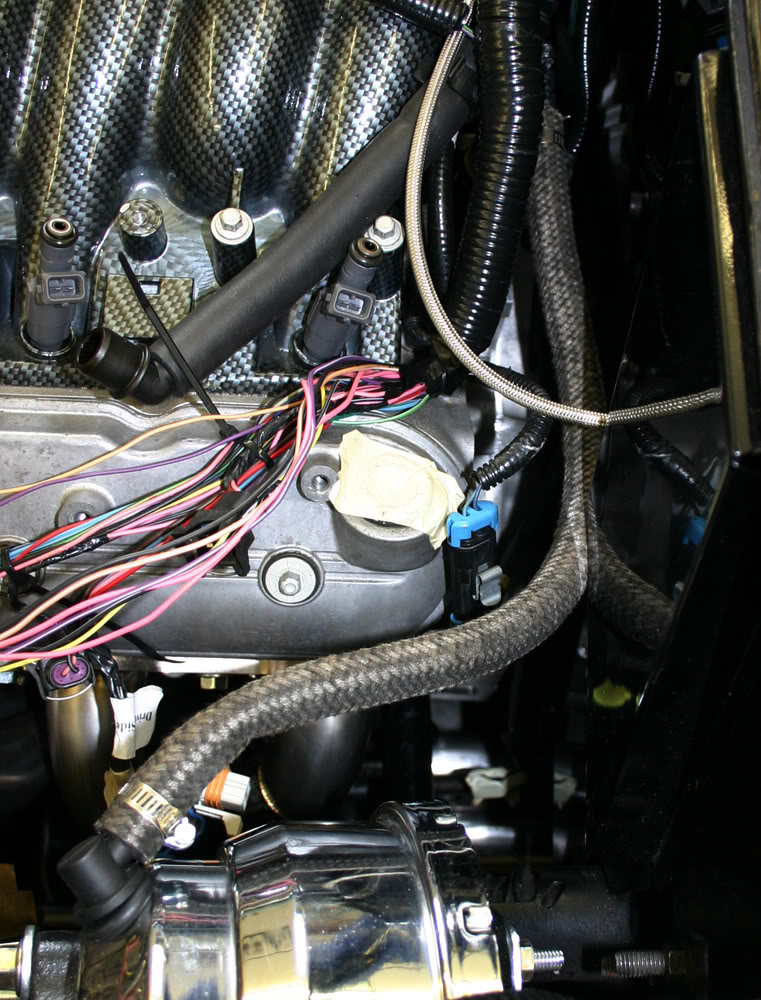
Then I routed the the main wiring harness behind the fuel regulator and along the firewall so I could lay everything out on the motor. Once I had everything in place, I began plugging in the factory plugs.

I had the harness modified by by Wait4Me Perfomance out of Warsaw, In. They marked all of the factory plugs and then added the necessary wiring that I will need to hook the car up to power, to the fuel pump, gauges, etc.
I began on the driver's side and basically took the harness apart so I could extend the MAF sensor wiring to the front corner of the car. I am running the wire in the tubing with the other wires that will be run between the outer and inner fenders. I found some appropriate color wires and began the soldering process.
Everyone has their way of doing wiring and I am a firm believer in soldering every connection. Over the years, any time I have had a wiring issue, I could trace it to the time I got lazy and crimped a connection. I have never had a soldered connection fail.
My job in the Army many years ago was aviation electronic equipment repair (funny how one remembers arcane wording from nearly 50 years ago but forgets so many other recent things). Probably explains why I feel I have to install something electronic in every car I have had over the years.
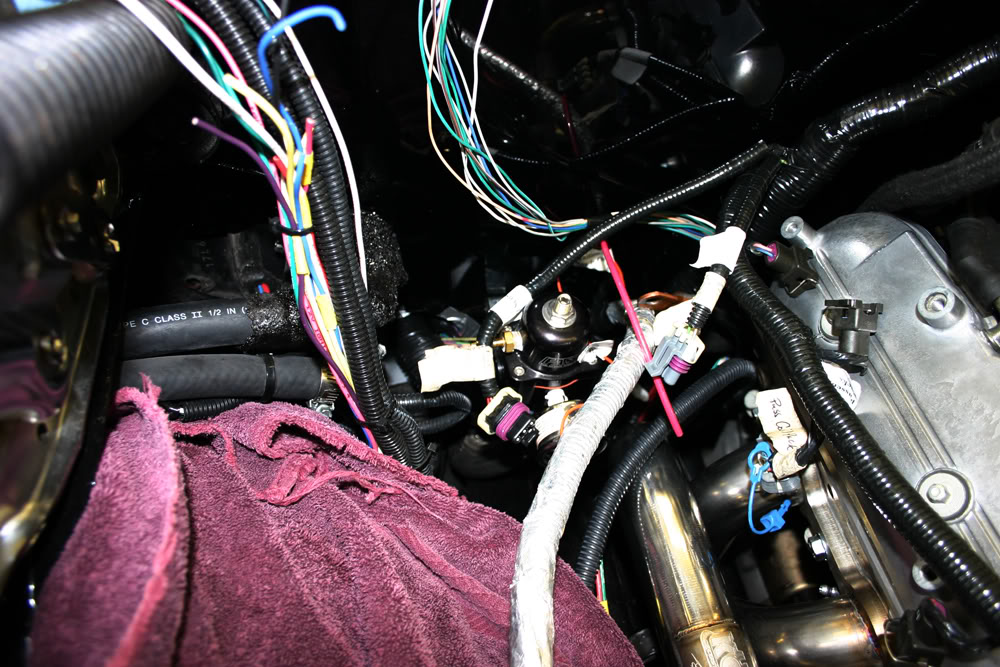
One good thing about the factory wiring harness is that it gives you very good hints as to where various connections are located due to the length of the wires. After having located all the upper connections, I raised the car on the lift to do work there.
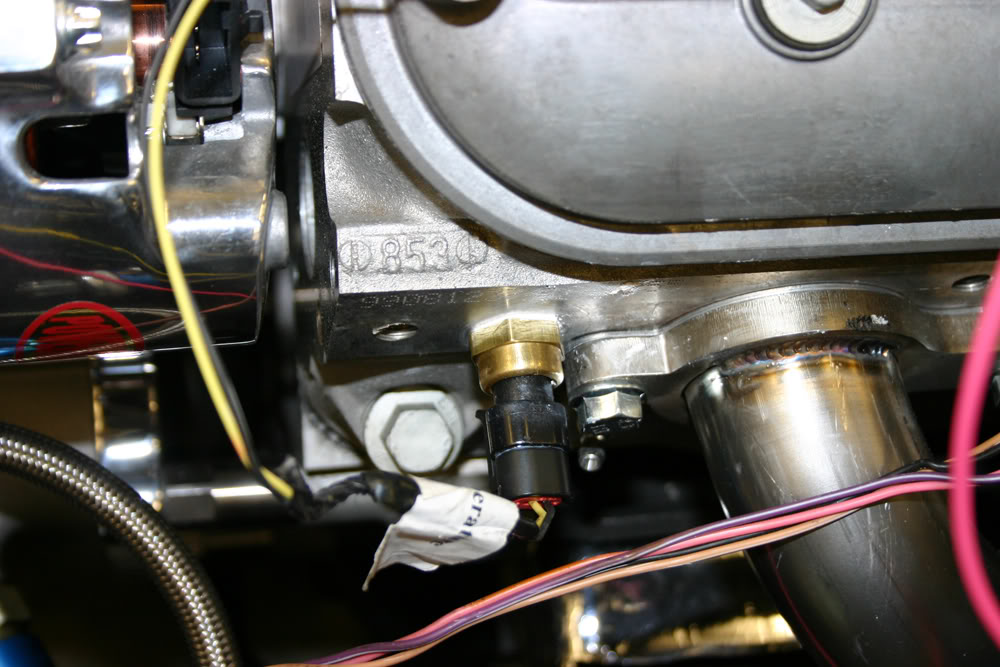
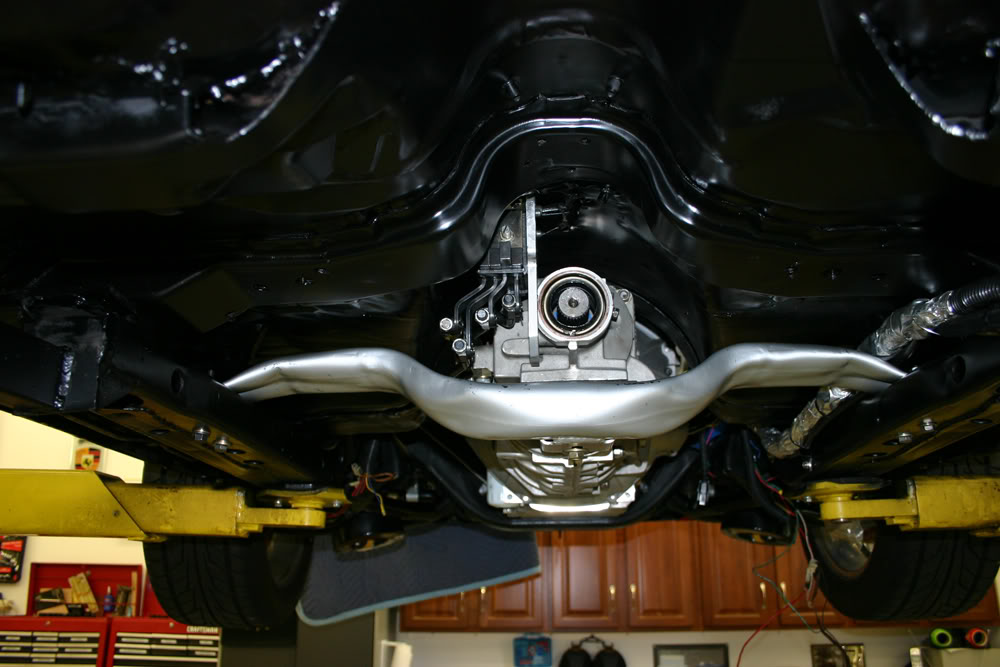
I plugged in the low oil sensor in the block and the next plug said "Crank Trigger". Since the lead was only about 8" long, I should have easily found the receptacle. After looking for a bit, I called my son to ask him where it was located. Above the starter he says.
I get out the trusty flashlight and eventually catch a small glimpse of it tucked in above the starter on the rear of the motor. This is not good. Kooks had tucked in the headers very close to keep them at least level with the bottom of the oil pan. On the other hand, this meant that you could not remove the starter unless you first removed the header! I had further complicated things by placing the water temp sensor for my dash gauge in this same area!!
I could barely get the very tips of the fingers back in this small area. After nearly two hours, trying various techniques, removing the inner starter bolt, loosening the outer bolt as far is it would go, tilting the starter away from the motor, I finally aligned the plug with the receptacle, gave it a slight push, and, voila, it locked in place!! Time for a beer!!!!!!
There are two vacuum line outlets on the rear of the intake manifold. The large one is for the brake booster. This outlet took a much larger hose than the inlet on the brake booster. There was such a difference that I was able to use a smaller hose as a sleeve and fit the larger hose over the sleeve. I ran the small vacuum line from my fuel regulator to the other outlet.
Then I routed the the main wiring harness behind the fuel regulator and along the firewall so I could lay everything out on the motor. Once I had everything in place, I began plugging in the factory plugs.
I had the harness modified by by Wait4Me Perfomance out of Warsaw, In. They marked all of the factory plugs and then added the necessary wiring that I will need to hook the car up to power, to the fuel pump, gauges, etc.
I began on the driver's side and basically took the harness apart so I could extend the MAF sensor wiring to the front corner of the car. I am running the wire in the tubing with the other wires that will be run between the outer and inner fenders. I found some appropriate color wires and began the soldering process.
Everyone has their way of doing wiring and I am a firm believer in soldering every connection. Over the years, any time I have had a wiring issue, I could trace it to the time I got lazy and crimped a connection. I have never had a soldered connection fail.
My job in the Army many years ago was aviation electronic equipment repair (funny how one remembers arcane wording from nearly 50 years ago but forgets so many other recent things). Probably explains why I feel I have to install something electronic in every car I have had over the years.
One good thing about the factory wiring harness is that it gives you very good hints as to where various connections are located due to the length of the wires. After having located all the upper connections, I raised the car on the lift to do work there.
I plugged in the low oil sensor in the block and the next plug said "Crank Trigger". Since the lead was only about 8" long, I should have easily found the receptacle. After looking for a bit, I called my son to ask him where it was located. Above the starter he says.
I get out the trusty flashlight and eventually catch a small glimpse of it tucked in above the starter on the rear of the motor. This is not good. Kooks had tucked in the headers very close to keep them at least level with the bottom of the oil pan. On the other hand, this meant that you could not remove the starter unless you first removed the header! I had further complicated things by placing the water temp sensor for my dash gauge in this same area!!
I could barely get the very tips of the fingers back in this small area. After nearly two hours, trying various techniques, removing the inner starter bolt, loosening the outer bolt as far is it would go, tilting the starter away from the motor, I finally aligned the plug with the receptacle, gave it a slight push, and, voila, it locked in place!! Time for a beer!!!!!!
Last edited by jerhofer; 08-12-2011 at 06:06 AM.
#75
08-11-2011, 09:50 PM
Join Date: Aug 2008
Location: Portland, Or
Posts: 9,097
That's the only concern I've always had with the computer controlled engines; cleaning up all the wires so it looks good. Seems like it's nearly impossible to hide all of it, but I have seen those who got most of the wiring hidden.
I've made good use of those hi temp boots made to go over spark pugs wires when they're close to headers. I bought a set of 8 at a swap meet cheap and didn't have a need for them on any of my cars. Over time I use them here and there to protect other wiring and hoses. Slipped one over my fuel line where it went from regulator to my tunnel ram, just because it might get warm near the headers. I also slipped one over my brake lines as I routed them behind the fenderwell headers and near the firewall. I slipped one over the 3 lines in a group, and tied it off to shield the brake lines from header heat.
They're clean, and have a metal ring in one end, so they can be tied off easily so they wont slide out of place.

#77
08-12-2011, 04:31 PM

Thanks.
I haven't driven it yet to see if there are any issues, but they installed everything while the car was on a four post lift so it would clear the suspension with the car on the ground. I know of a guy who built an exhaust system with the car on a two post lift and when they put the car on the ground, the pipes were touching the axle!! At rest!!!
I haven't driven it yet to see if there are any issues, but they installed everything while the car was on a four post lift so it would clear the suspension with the car on the ground. I know of a guy who built an exhaust system with the car on a two post lift and when they put the car on the ground, the pipes were touching the axle!! At rest!!!
Jerhofer - It looks like you shouldn't have that problem, but you're right, only time will tell. You're project is looking good. Are you going to drive the car on any tracks or take it to an autocross event when you're done? Maybe we'll get to see it in person one of these days.
Nice Blog too!
#78
08-12-2011, 05:04 PM
Back in 1977, I bought a then new Porsche 924 for my wife. About six months later we joined the local Porsche club in northern Indiana. We became very heavily involved doing autocrosses, track events, rallies, etc. But it did not take me long to realize that once the car was out of warranty, I could not afford to pay the dealer labor costs.
I was 32 years old and had never really worked on cars. One advantage of joining a good car club is there are people who are willing to help you. Working on cars isn't rocket science so once someone showed me how to do something, I could do that job again. Each different job generally required certain tools which I bought.
Over time, I learned to work on about everything on a car with the exception that I have not built an engine or done tranmission work. Until this current job of replacing my small block, I have only had to have one engine rebuilt in all of the cars I have had. And that was one of my track cars, a normally aspirated 944 that I ran for five years. As it turned out, I would not have had to take it apart as, at 90,000 miles, it still had the crosshatch on the cylinger walls!!
Besides the 924, I only bought one other new Porsche, a 1987 944 Turbo. This was one of my favorite cars. It had good power, handled great, got great fuel mileage and was very practical because of the hatch design. I don't normally keep cars very long, but I kept that car and the track car 944 for five years. All of the other Porsches I have owned have been used. It isn't very difficult to find a low mileage Porsche.
I bought my current 2001 911 back in February. It is a loaded car with a sticker price of just south of $100K which included around $35K in options. The good news is that you only have to pay a fraction of that after ten years. Buying a new Malibu will set you back more that what I paid for the Porsche.
Normal maintenance isn't a killer either on the new Porsches. Oil changes are 15K miles with filter changes at 30K miles. The current Porsches go 20K miles between oil changes. At one time I had a mid 90's 911 and it was 12K miles for service intervals then so they have gradually been increasing the intervals. All Porsche since the 90's have called for Mobil One synthentic oil.
If I did not do my own work, I probably would not have had Porsches after the first one. So doing my own work has allowed me to own some really nice cars over the years. And meet some wonderful car people. Whether it is Porsche's or Camaro's, car people are car people. There are posers in any group but the people who enjoy cars for the right reasons are all very similar.
#79
08-12-2011, 08:49 PM
That's the only concern I've always had with the computer controlled engines; cleaning up all the wires so it looks good. Seems like it's nearly impossible to hide all of it, but I have seen those who got most of the wiring hidden.
I've made good use of those hi temp boots made to go over spark pugs wires when they're close to headers. I bought a set of 8 at a swap meet cheap and didn't have a need for them on any of my cars. Over time I use them here and there to protect other wiring and hoses. Slipped one over my fuel line where it went from regulator to my tunnel ram, just because it might get warm near the headers. I also slipped one over my brake lines as I routed them behind the fenderwell headers and near the firewall. I slipped one over the 3 lines in a group, and tied it off to shield the brake lines from header heat.
They're clean, and have a metal ring in one end, so they can be tied off easily so they wont slide out of place.
I've made good use of those hi temp boots made to go over spark pugs wires when they're close to headers. I bought a set of 8 at a swap meet cheap and didn't have a need for them on any of my cars. Over time I use them here and there to protect other wiring and hoses. Slipped one over my fuel line where it went from regulator to my tunnel ram, just because it might get warm near the headers. I also slipped one over my brake lines as I routed them behind the fenderwell headers and near the firewall. I slipped one over the 3 lines in a group, and tied it off to shield the brake lines from header heat.
They're clean, and have a metal ring in one end, so they can be tied off easily so they wont slide out of place.
I completed the hook up of all the factory plugs. I have some questions on some of the wires that I need to resolve before I can hook everything up.
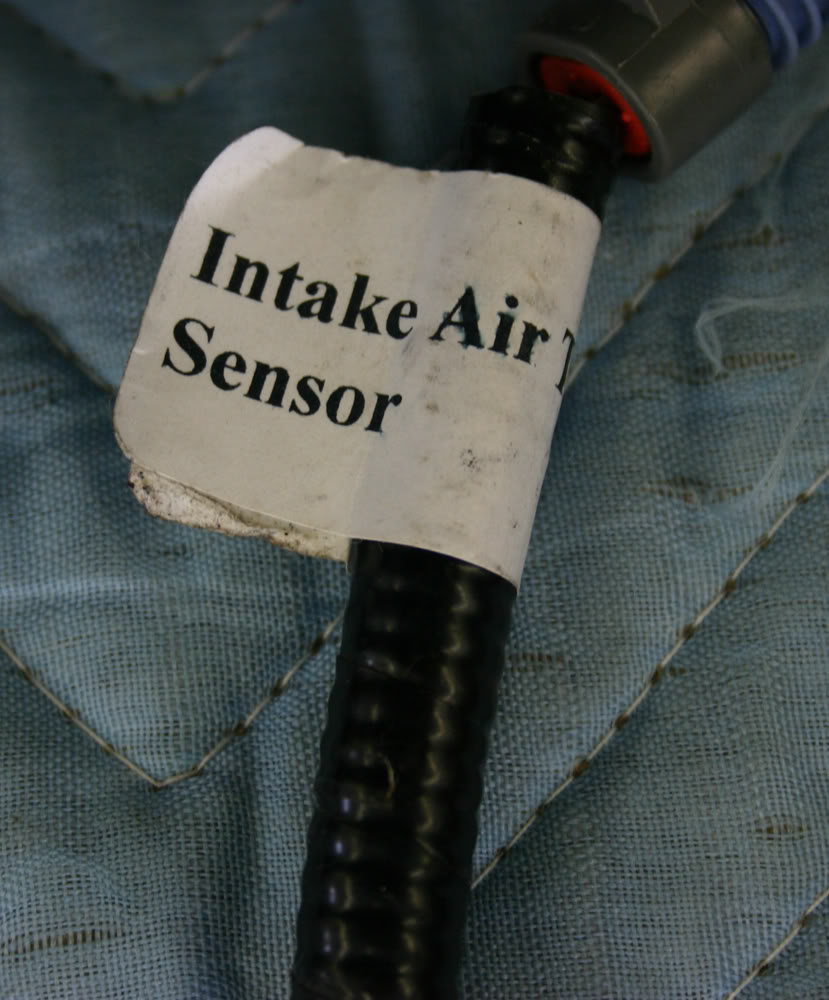
As for hiding the wires, the main wiring harness will be at the rear of the motor next to the firewall. I will have the wiring for the injectors, the alternator, the throttle body and the air intake temp sensor running towards the front on the driver's side with only the injector wiring on the passenger side. I received my braided split wire looms today and plan on making the wire looms as small as possible. Can't make them go away as there is nothing to hide them. That's why Corvette used those big plastic covers. Just another challenge.
#80
08-12-2011, 09:45 PM
Join Date: Aug 2008
Location: Portland, Or
Posts: 9,097
I hate those big covers the Corvettes use! I'd rather see the engine and all it's wiring than those ugly things. I'm waiting for someone to come up with a plastic tube that's chromed outside to hide everything inside. You'd think with all the technology today they'd figure some way to clean it up and look good doing it.
The Edelbrock valves covers are a great example of what they can do if they set their mind to it.
The Edelbrock valves covers are a great example of what they can do if they set their mind to it.