
'63 Falcon project


Thread Starter
|
Second Generation Moderator
Feb 2010 ROTM winner
Jan 2013 ROTM winner
Feb 2010 ROTM winner
Jan 2013 ROTM winner
Joined: Aug 2008
Posts: 9,097
From: Portland, Or
ROTM Winner's Club

Thread Starter
|
Second Generation Moderator
Feb 2010 ROTM winner
Jan 2013 ROTM winner
Feb 2010 ROTM winner
Jan 2013 ROTM winner
Joined: Aug 2008
Posts: 9,097
From: Portland, Or
ROTM Winner's Club
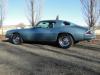
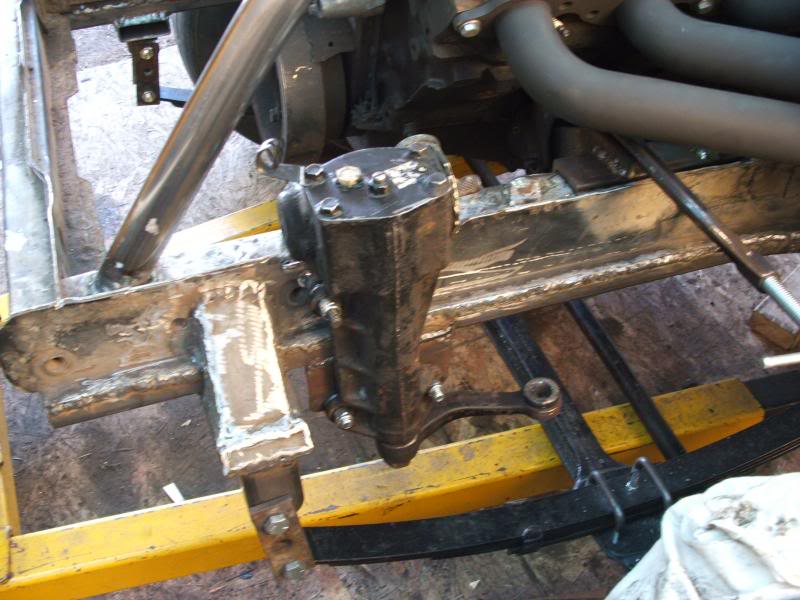
Got the mount built for the steering box today, and cut the key out of the pitman arm to reverse it. Had to notch the frame for a gusset that is cast into the steering box. Drilled the upper bolt hole large enough to sleeve the frame and welded in a heavy sleeve for that bolt. I built a plate for the lower bolts and a gusset off the rear to support it. Box is very solid, and lines up perfectly with the column. Just need a double d shaft and joint to connect it.
Last edited by 1971BB427; Mar 29, 2013 at 09:25 AM.
Thread Starter
|
Second Generation Moderator
Feb 2010 ROTM winner
Jan 2013 ROTM winner
Feb 2010 ROTM winner
Jan 2013 ROTM winner
Joined: Aug 2008
Posts: 9,097
From: Portland, Or
ROTM Winner's Club
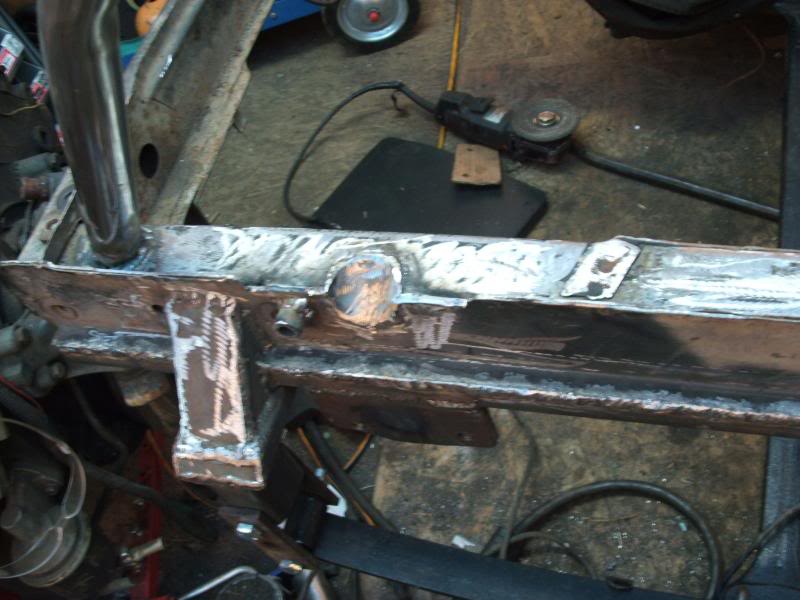
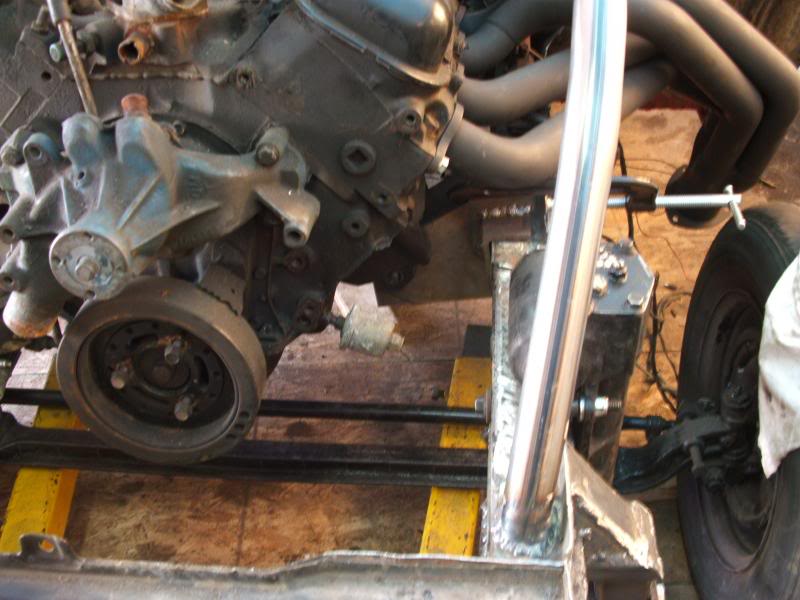
Asked my neighbor to help me move things around when we brought the cherry picker back. We put his snow tires on the back of the Falcon and pushed it out of the canopy, then picked the engine up and set it into the frame rails. Once I got it sitting down in the rails I did some measuring and cut some cardboard templates out. Then I traced the templates on flat stock and cut them out. Tacked them together and clamped them to the frame rails. I welded the plates to a piece of angle iron to spread the load over a large area, and get more weld area too.
The mounts are just clamped to the frame for now, and I can't remove the cherry picker until I get bellhousing and trans in place and a crossmember built. I couldn't put even the little 25" tires on the rear until I jacked the body up and put a 2x4 between the axle and frame, as there's no tire clearance until I radius it. I also noticed the rear axle needs to shift .5" to the passenger side before I do any welding, as it's not square yet.
I need to trim some excess off the mounts before wleding them permanently to the frame. Left a lot of extra metal below until I figured out where the holes would be. I welded schedule 80 pipe between the frame mounts so when I tighten the bolt they wont distort.

Weather was an amazing 70 degrees today, and supposed to hit 75 tomorrow, so I'm taking the day off and go for a cruise in the Austin instead!
The mounts are just clamped to the frame for now, and I can't remove the cherry picker until I get bellhousing and trans in place and a crossmember built. I couldn't put even the little 25" tires on the rear until I jacked the body up and put a 2x4 between the axle and frame, as there's no tire clearance until I radius it. I also noticed the rear axle needs to shift .5" to the passenger side before I do any welding, as it's not square yet.
I need to trim some excess off the mounts before wleding them permanently to the frame. Left a lot of extra metal below until I figured out where the holes would be. I welded schedule 80 pipe between the frame mounts so when I tighten the bolt they wont distort.
Weather was an amazing 70 degrees today, and supposed to hit 75 tomorrow, so I'm taking the day off and go for a cruise in the Austin instead!
Thread Starter
|
Second Generation Moderator
Feb 2010 ROTM winner
Jan 2013 ROTM winner
Feb 2010 ROTM winner
Jan 2013 ROTM winner
Joined: Aug 2008
Posts: 9,097
From: Portland, Or
ROTM Winner's Club
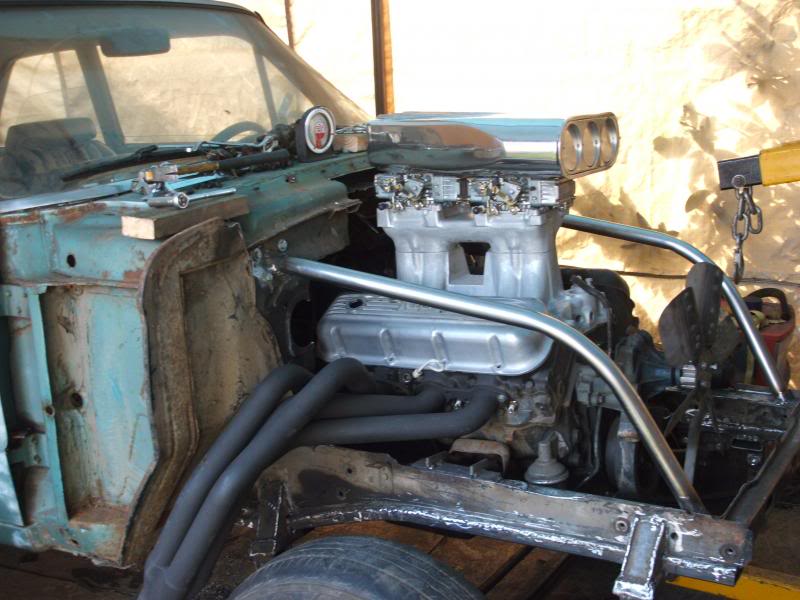
Thanks Bill! I'm axious to pull the intake and see how things fit with the tunnel ram and carbs sitting on it. I think most of the carbs will be above hood level, but not sure.
Thread Starter
|
Second Generation Moderator
Feb 2010 ROTM winner
Jan 2013 ROTM winner
Feb 2010 ROTM winner
Jan 2013 ROTM winner
Joined: Aug 2008
Posts: 9,097
From: Portland, Or
ROTM Winner's Club
Got the engine slid back another inch, and then let the chassis take the weight so I could try the bellhousing and trans, but no luck. Had to get the trusty sawzall out and open up the floor also. The tunnel was just too small for the 4 speed.
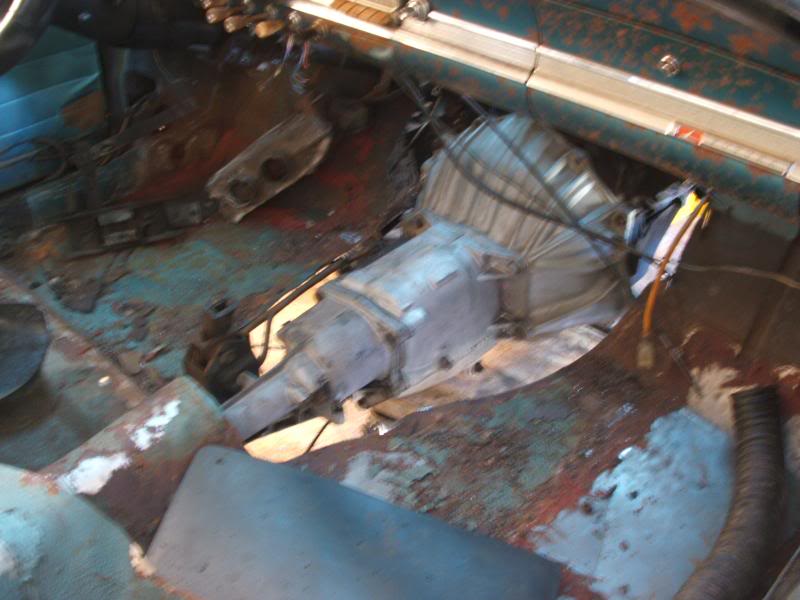
Looks like I may have to open up the driveline tunnel a little more also, as the tailshaft of the trans is only about 1.5" away, and not sure the driveline joints will clear when in place. I still haven't gotten a yoke to fit the Super T10, so I don't have a way to check for sure. I may borrow the neighboor's driveline from his Camaro to slip in and see how it clears.
Looks like I may have to open up the driveline tunnel a little more also, as the tailshaft of the trans is only about 1.5" away, and not sure the driveline joints will clear when in place. I still haven't gotten a yoke to fit the Super T10, so I don't have a way to check for sure. I may borrow the neighboor's driveline from his Camaro to slip in and see how it clears.
Thread Starter
|
Second Generation Moderator
Feb 2010 ROTM winner
Jan 2013 ROTM winner
Feb 2010 ROTM winner
Jan 2013 ROTM winner
Joined: Aug 2008
Posts: 9,097
From: Portland, Or
ROTM Winner's Club
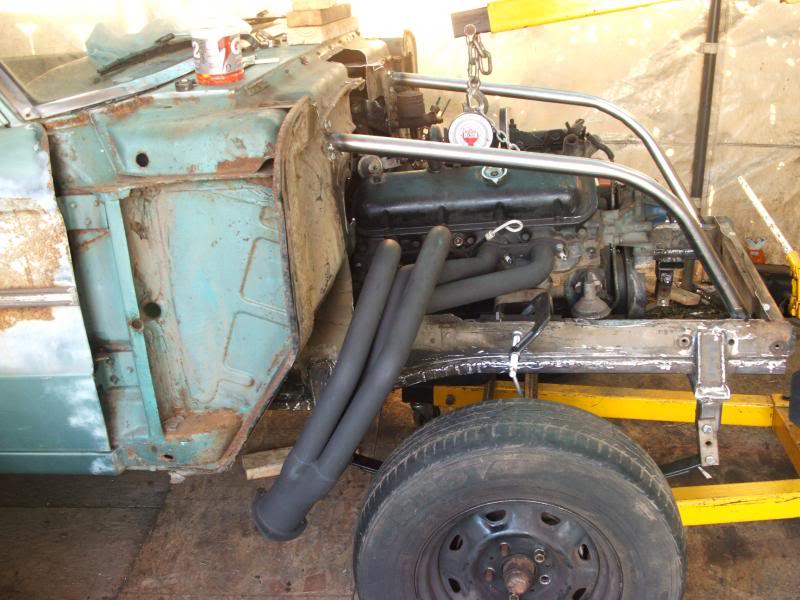
My buddy and I looked over the engine and trans today, and did all sorts of measurements to ensure it was as close to centered, level, and in the right place as possible. After that I tack welded the mounts, and removed the clamps, then finished the welding on them after removing the headers.
Once the engine was solid I made up a new piece of box tubing to go over the trans and replace the floor support I had to cut out. With the new tubing over the top of the trans I measured up and built a crossmember for the trans from 3" channel steel. Drilled it for a rubber trans mount, and jacked it up in place on the old crossmember and drilled holes through like it originally had.
With the engine and trans solid I removed the cherry picker and reinstalled the headers for one more check. All looks good, so I built a 1" sq. tube frame to attach floor panels and firewall to. I'll add some more tubing from it to the rear tube member, and then it can be covered with sheetmetal later. Need to figure out the clutch system prior to closing the floor, as it will be easier with things opened up.
I also set one of my new old bucket seats in, and it dropped right into the old holes. Unfortunately it's about 2" too far forward, and the rear needs to be about 3" higher to sit properly.
Last edited by 1971BB427; Mar 31, 2013 at 08:31 PM.
Thread Starter
|
Second Generation Moderator
Feb 2010 ROTM winner
Jan 2013 ROTM winner
Feb 2010 ROTM winner
Jan 2013 ROTM winner
Joined: Aug 2008
Posts: 9,097
From: Portland, Or
ROTM Winner's Club
I started doing some sheetmetal work today. Got most of my floor and firewall framework done, and started to close up the cowl inset. I had to do it in two pieces to close the cowl first, and then finish the lower section, so the upper area could be sealed and not leak into the car when it gets wet outside.
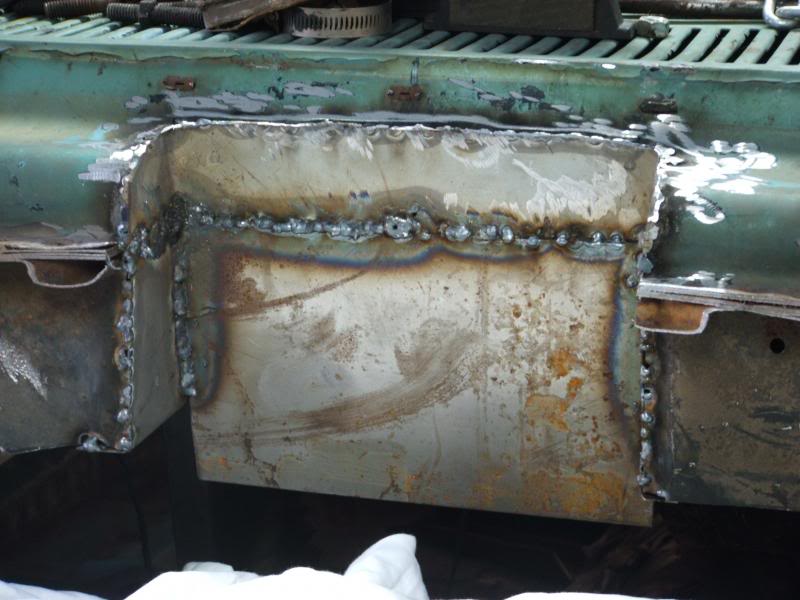
Used box tubing to build up the framework for sheetmetal, and it sure stiffened things up!

Used a hammer and dolly to smooth out the old heater outlet and get it flat for a filler plate.
Of course I "had to" test fit the tunnel ram and carbs to ensure the cutout will give plenty of clearance!
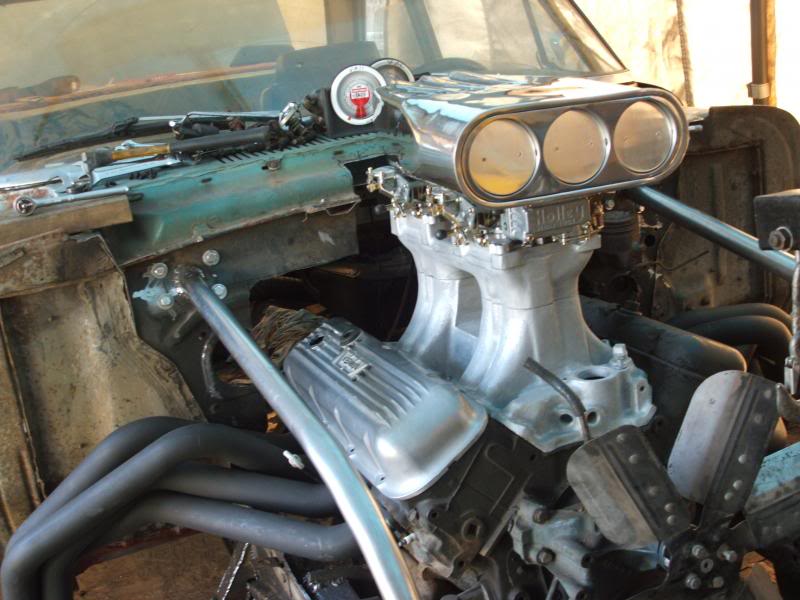
Once I put the base plates on the scoop it will just sit above the hood level. That's just where I wanted it, so got lucky and wont need a spacer.
Used box tubing to build up the framework for sheetmetal, and it sure stiffened things up!
Used a hammer and dolly to smooth out the old heater outlet and get it flat for a filler plate.
Of course I "had to" test fit the tunnel ram and carbs to ensure the cutout will give plenty of clearance!
Once I put the base plates on the scoop it will just sit above the hood level. That's just where I wanted it, so got lucky and wont need a spacer.

