So here it goes, my project thread (2nd gen)
#261
 04-20-2011, 12:58 PM


I can't seem to get the side gears back far enough to get the spiders in. The clutches don't seem to want to compress far enough. Like I said I was cold and wet, so I'll jump on it after work and hope for the best.
#262
04-22-2011, 12:28 PM

Hey I just saw your comment on my build page about the abs connector. That sucks about the pinions falling out. If you haven't gotten it back together yet maybe I could assist you.
Is this what your working with?
limitslip.gif?t=1303493163
Is this what your working with?
limitslip.gif?t=1303493163
#263
04-26-2011, 02:01 AM
Thanks, I got it the other day. Just needed some warm dry weather is all.
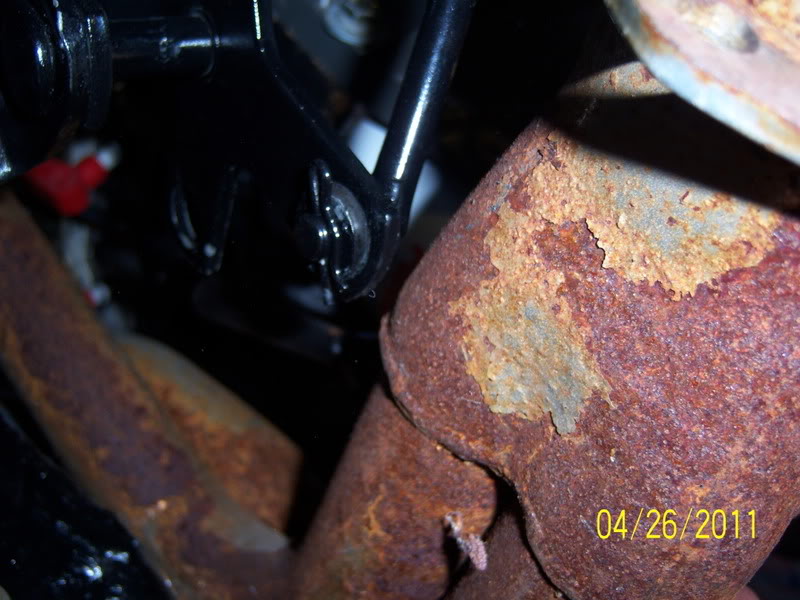
I finally got something done tonight too. I am still working on the front brake mod. Taking small steps but I am making progress. I have to start by give two big thumbs up to Hedman Headers and Inline Tube. I can't believe the fit of both my headers and brake lines. The headers are old but man I have no interference issues.
I installed the back drive linkage so that my reverse lights come on. Big help with window tint. Plus the keys will come out with out having to monkey with the column every time. Most people chucked the fourspeed ones when they installed headers. There hard to come by because of that. Check out how close it comes to the headers but never touches. I love it.
Then theres the brake lines. Like a glove. I got these last year, there stainless and ran about 180 shipped. Worth it to not fight with it.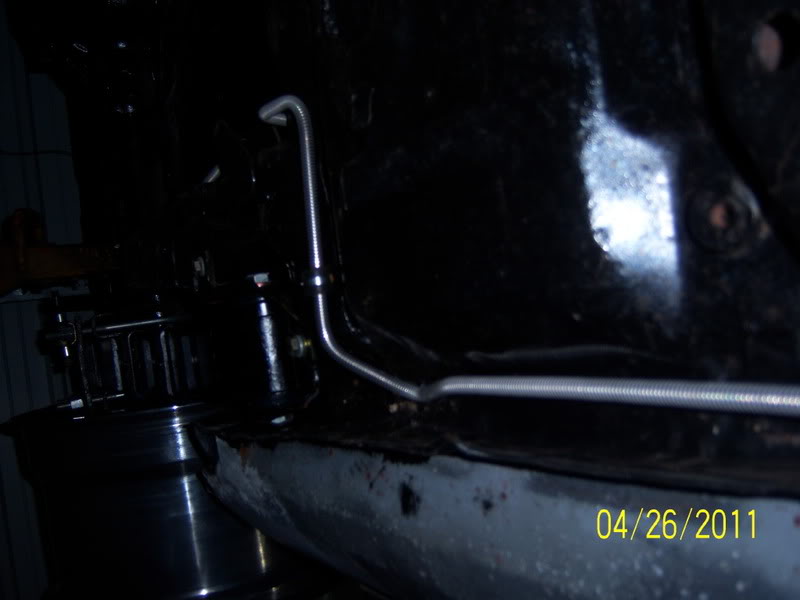

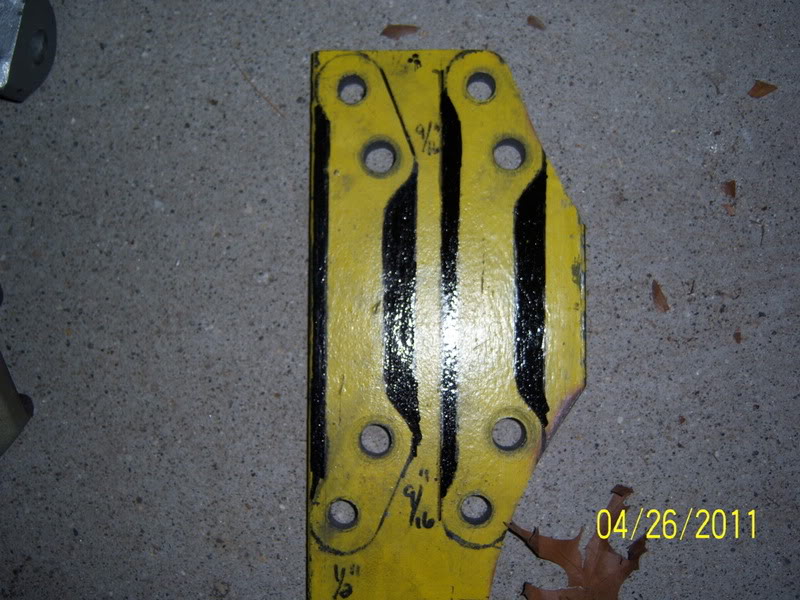
Now back to those LS brakes. Here are some pics of what i got going on. I drilled the brackets at work and brought them home to make sure the holes lined up before cutting them out the rest of the way. 1/2 plate is a bear to cut on our band saw. The black outline is where the template was shaped but I'm thinking of cutting it straight for simplicity.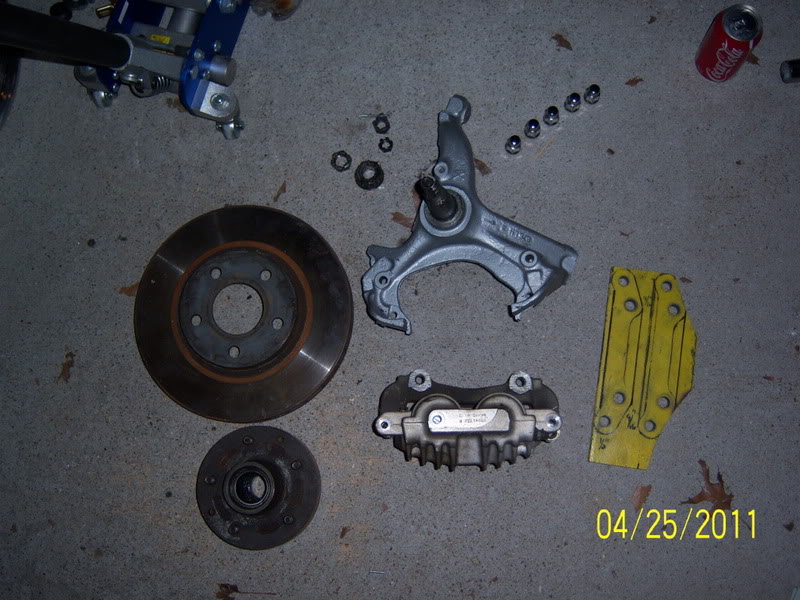
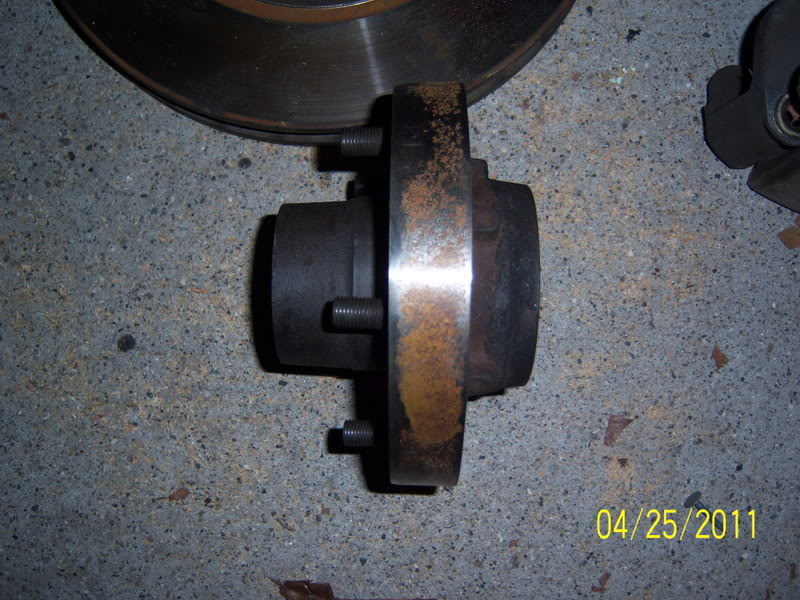
I anyone wants the template PM me and we can work it out. Here is whats left of the rotor, it gets cut and turned into a hub because the 4th gens have a hat type rotor. I did the work on a Bridgeport. Easy really. I still have to turn the od down to get it to fit inside the other rotor.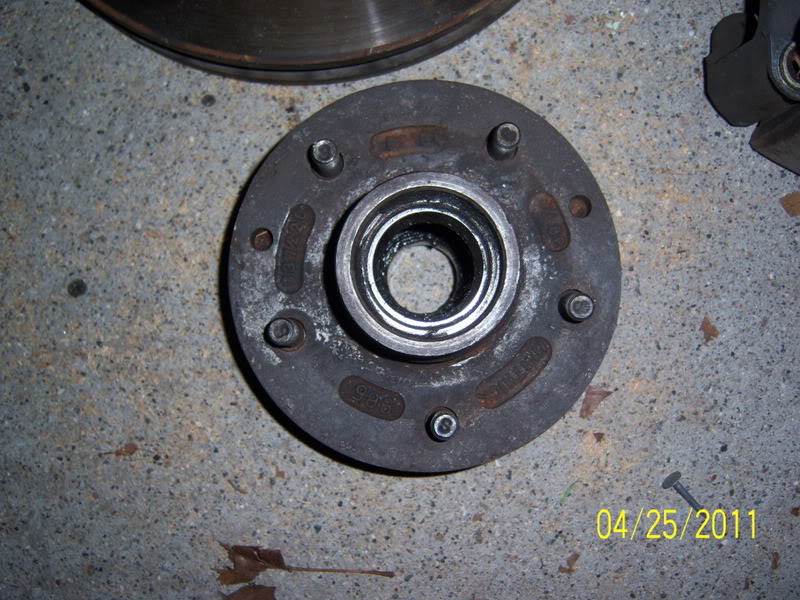

I still have to trim the ears of the spindle. I drilled the dust shield bolt holes out to 1/2" but still need to tap the to 1/2-13. Here is a good pic of how the bracket is going to work. If I had time I would draw lines on the pics for everyone but I'm lazy at this point.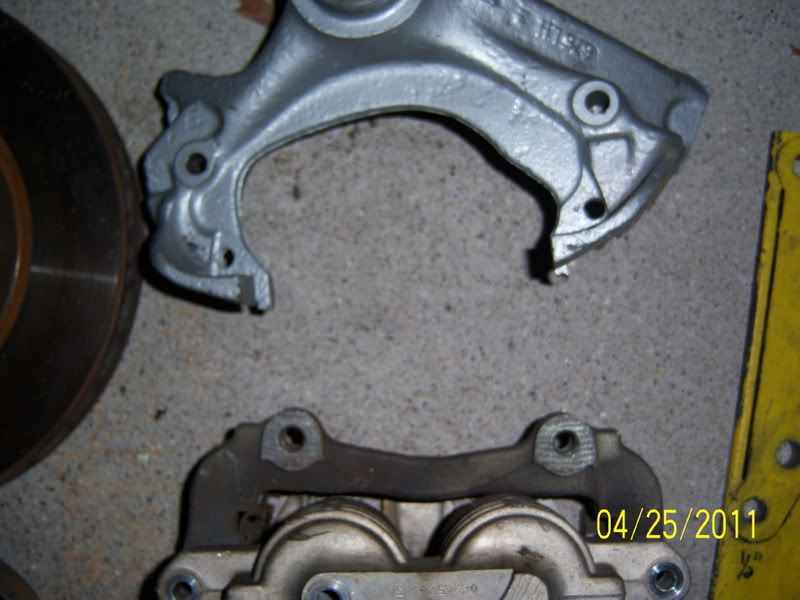
So there it is. After I get this one done I still have to do the other side and source a prop valve and master cylinder from a 2000 Camaro.
I finally got something done tonight too. I am still working on the front brake mod. Taking small steps but I am making progress. I have to start by give two big thumbs up to Hedman Headers and Inline Tube. I can't believe the fit of both my headers and brake lines. The headers are old but man I have no interference issues.
I installed the back drive linkage so that my reverse lights come on. Big help with window tint. Plus the keys will come out with out having to monkey with the column every time. Most people chucked the fourspeed ones when they installed headers. There hard to come by because of that. Check out how close it comes to the headers but never touches. I love it.
Then theres the brake lines. Like a glove. I got these last year, there stainless and ran about 180 shipped. Worth it to not fight with it.
Now back to those LS brakes. Here are some pics of what i got going on. I drilled the brackets at work and brought them home to make sure the holes lined up before cutting them out the rest of the way. 1/2 plate is a bear to cut on our band saw. The black outline is where the template was shaped but I'm thinking of cutting it straight for simplicity.
I anyone wants the template PM me and we can work it out. Here is whats left of the rotor, it gets cut and turned into a hub because the 4th gens have a hat type rotor. I did the work on a Bridgeport. Easy really. I still have to turn the od down to get it to fit inside the other rotor.
I still have to trim the ears of the spindle. I drilled the dust shield bolt holes out to 1/2" but still need to tap the to 1/2-13. Here is a good pic of how the bracket is going to work. If I had time I would draw lines on the pics for everyone but I'm lazy at this point.
So there it is. After I get this one done I still have to do the other side and source a prop valve and master cylinder from a 2000 Camaro.
#264
04-26-2011, 09:28 AM

Join Date: Aug 2008
Location: Portland, Or
Posts: 9,097
Nice setup Damon! The best part of a swap like that is it uses factory parts, so easy to find pieces later, unlike the aftermarket systems. I've alwaays wondered where anyone will get parts for the aftermarket in 10-15 yrs.
#265
04-26-2011, 10:56 AM
That is the reason right there Val. I want to put some real miles on my car after the OD swap (next year). If something goes wrong on the road I wanna be able to pull into any parts store for parts.

#268
04-26-2011, 03:10 PM
I cant wait until I can finely work on my car. It kills me to see you and everyone else making your cars ever better. Quick question, how long does it usually take to take all the paint off, and what tools do you primarily use?
#269
04-27-2011, 12:04 AM
I'm using 80g on a DA. It should be about 2 hours or less. I haven't pushed my new compressor so I don't know. I'm used to having to wait for the compressor to catch up with me.
For the nose and rear bumper cover nothing heavier than 150g.
For the nose and rear bumper cover nothing heavier than 150g.
#270
04-27-2011, 12:08 AM
I got my brackets cut today at work. LOL nice to be able to build my car and get paid for it. I also got the spindle modified to accept the bracket. My holes are a touch off but making them a little oversizing fixed that. I'll post pics tomorrow. Over all I'm happy with how these turned out. I still need to have the rotor turned down, there's a machine shop on the next block from me so I'm gonna stop by there tomorrow and seen what they'll charge.