
My 1970 Camaro w/ 572 Build
#241
 10-01-2012, 01:10 AM


I talked with the QA1 reps during power tour. They seamed like a good product. I heard some get down on them. I liked the remote adjuster available. It let you go from drag to road race from the drivers seat. They gave me a tee shirt too.
#242
10-01-2012, 02:07 AM

That would be pretty sweet to be able to adjust the ride from inside of the car. I think i should be able to adjust mine without taking the tires off but im sure that its going to be tight as the adjuster nut is down inside of the spring pocket on the LCA.
Not sure if i posted this or not but the new brake kit came with 1/2" wheel studs so i had to order some new lug nuts, I couldnt get the same ones that i have on the back so i had to order all new ones. They are supposed to be in on tuesday. I may go buy some generic ones tomorrow so that i can bolt the tire on and start working on the other side of the car.
Im hoping that the passenger side of the car only takes me a couple days now that i have already done it once, im also hoping that the powdercoat turns out as good on the passenger side as it did on the drivers side. If i had a larger oven i would be powder coating everything on the car.
#244
10-01-2012, 06:07 PM
I don't think they are going to be fancy just chrome. I'm gonna keep my eyes open for some real nice ones.
Hit the next hurdle in the road, I can't set the car on its tires because I have to adjust ride height. Napas closed so I can't buy a hook spanner until tomorrow. I'm working on the car now, got the passenger side taken apart and am just finishing up the spindle modification. I want to get it coated today, then finish tomorrow.
Hit the next hurdle in the road, I can't set the car on its tires because I have to adjust ride height. Napas closed so I can't buy a hook spanner until tomorrow. I'm working on the car now, got the passenger side taken apart and am just finishing up the spindle modification. I want to get it coated today, then finish tomorrow.
#245
10-02-2012, 12:06 AM
Well im done for the night. I got to where i was hoping tonight. I stripped apart the passenger side tonight. It went MUCH smoother then the drivers side did because i went in knowing i was going to sacrifice the sping. So i removed the brakes, and used the spring pressure to pop the balljoint, then heated the crap out of the sping and it fell right out when i lowered the LCA.
I also modified the spindle and im much happier about how this spindle looks then the first one, too bad the powder didnt take to a couple spots, but it still looks alright. I got the faraday effect in a couple spots so the coating is a little bit light. Still looks better then factory i bet.
Since i dont have anything fun to report ill explain how powder coating works just incase anyone doesnt know what its all about. Please keep in mind i am an extreme amature at this and am not very good i dont think.
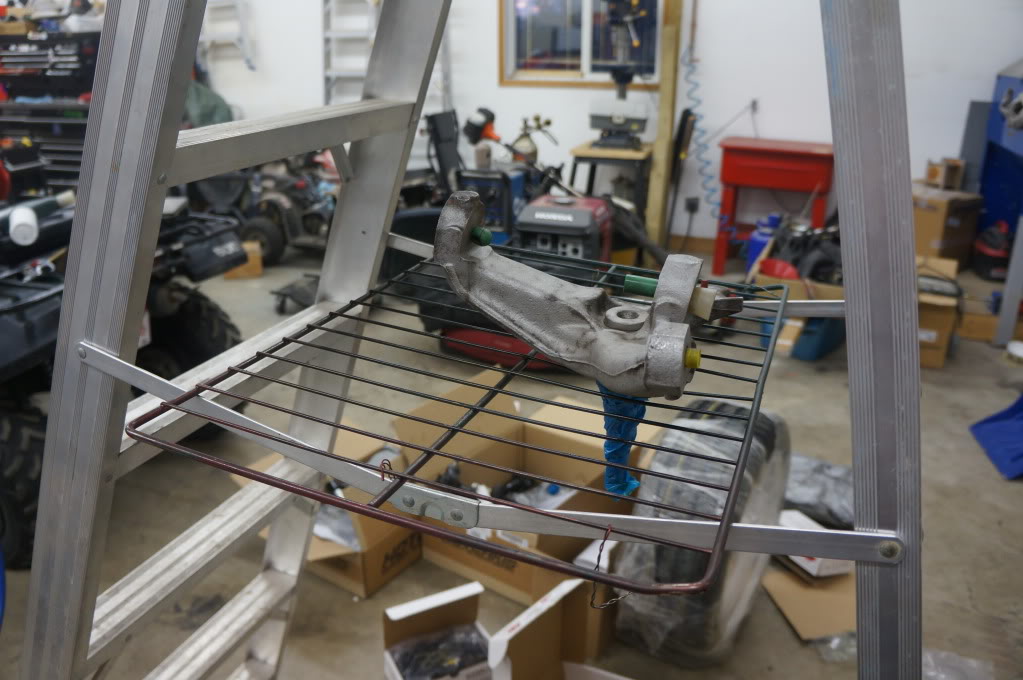
The first step is to completely clean the part. This is the most important out of anything. On a smaller gun setup like mine even a regular finger print (a clean finger) can stop the powder from adheating to the part. I usually put the part in my glass bead cabinet, the only issue with this is i use actual glass bead in the booth and it doesnt take off much more then paint and a bit of surfact rust. Once the part is out of the over i blow it off with air and clean it with an eastwood product called Pre. Its kind of like brake clean but does not leave a chaulky white residue like some break kleen products do. Another good one that i have used to clean is called Slap Shot by Walters i think.
Anyways from here i like to put the part into the oven and let it get hot. This helps burn off (off gas) any contaminents that are trapped inside of the cast. Truthfully the first spindle i didnt offgas and it actually came out better then the second one. Once all of the crap is burnt out of the part its back to the rack to let it cool down a bit.
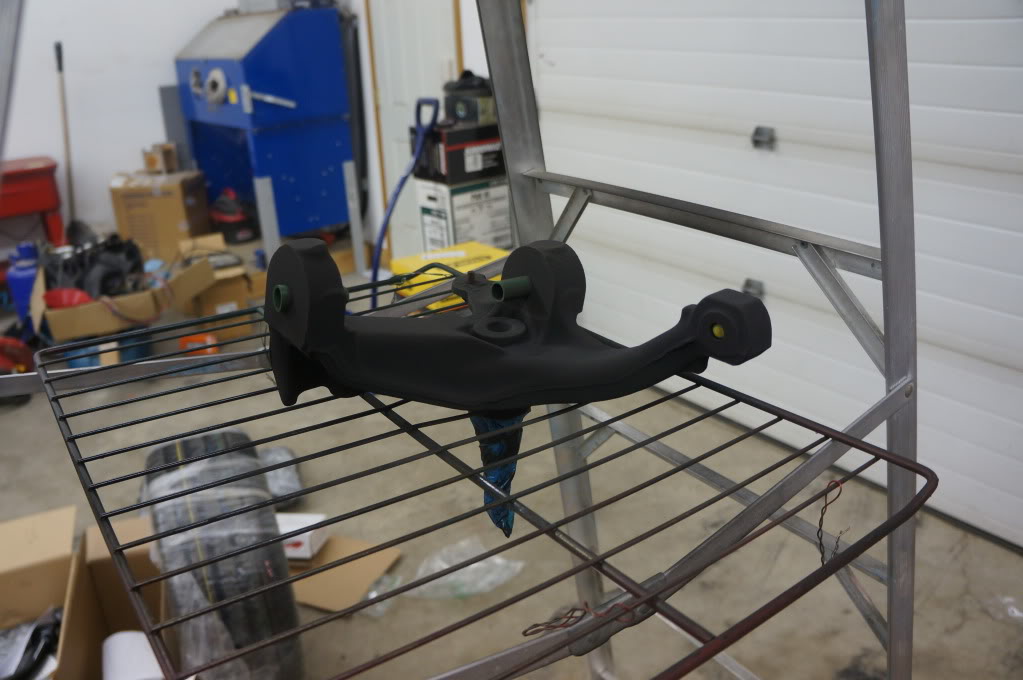
From here you ground the part you are going to spray, usually i would hang the part from the oven rack with stainless hooks and would ground to the rack, but in this case the spindle is a little heavy to hang so i set it on top. With the ground on the piece its time to spray the powder on the part. As the powder exits the gun it passes by an electrode that puts a + charge on the powder, since the parts - the powder sticks to the piece. It is really easy to put to much powder on so you kind of have to be careful. My air system in the shop is fairly industrial. I stole the design from some mobile oilfield equipment i build. It comes out of the compressor, through a coalescing filter, then through a water separator, then a dessicant dryer, then an after filter finally into the copper piping on the walls. All the filtration products are from Wilkerson.
The picture below shows the part covered in powder waiting to go into the oven. This is one of the tricky parts. Since i use an old regular house style oven i dont have the luxury to spray the powder and smoothly wheel the part into the oven. I have to very very carefully take the oven rack and slide it into the oven without disturbing it. The slightest bump or breath can make some serious imperfections as i have found out before.
Then its into the oven. The oven is preheated to 400 degrees. Now you wait until the flat powder goes liquid, this is where it looks like it is wet. Once the entire peice is liquid you start the timer. Depending on the instructions you follow you cook the powder from 350-400 degrees for 20 minutes. My ovens pretty old and terrible so i go somewhere in between.
Finally after this process the jobs done and you take the part out. The only black i have is a high gloss black from Eastwood and it is really shiney, would be a bit nicer as a bit flatter black.
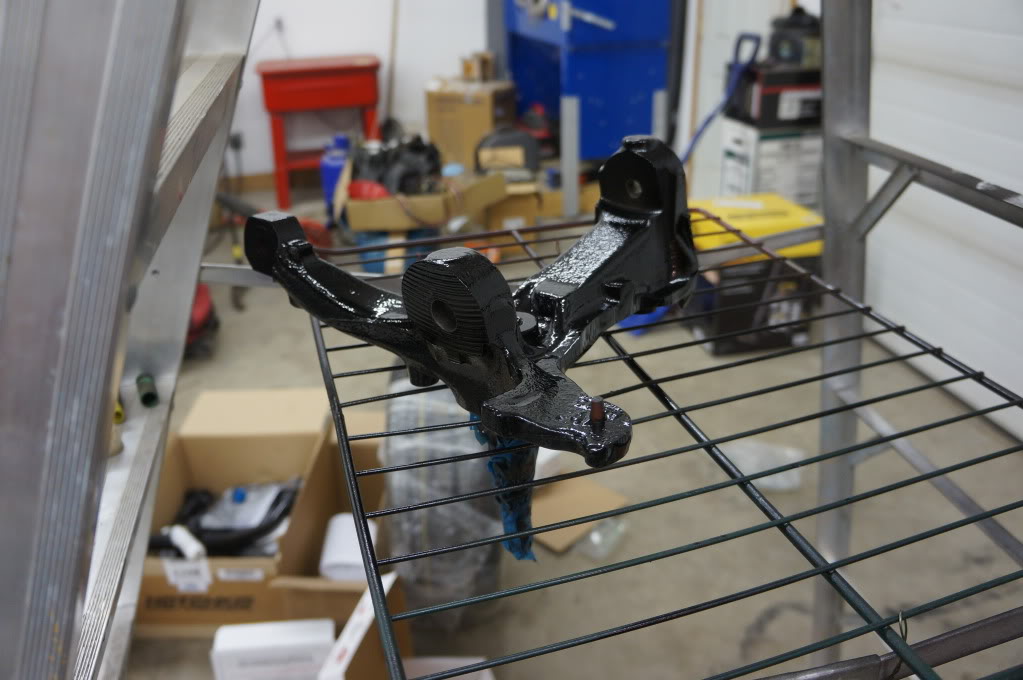
As i said before i am an amature at this so it doesnt look all the great. A better blast cabinet and a larger more accurate oven would help a bunch but for the amount i do it, it makes it turn out ok.
I hope to get back on the car tomorrow afternoon and get it sitting on all four tires again, if my lug nuts come in and i can buy a spanner wrench i will start on the subframe connectors.
I also modified the spindle and im much happier about how this spindle looks then the first one, too bad the powder didnt take to a couple spots, but it still looks alright. I got the faraday effect in a couple spots so the coating is a little bit light. Still looks better then factory i bet.
Since i dont have anything fun to report ill explain how powder coating works just incase anyone doesnt know what its all about. Please keep in mind i am an extreme amature at this and am not very good i dont think.
The first step is to completely clean the part. This is the most important out of anything. On a smaller gun setup like mine even a regular finger print (a clean finger) can stop the powder from adheating to the part. I usually put the part in my glass bead cabinet, the only issue with this is i use actual glass bead in the booth and it doesnt take off much more then paint and a bit of surfact rust. Once the part is out of the over i blow it off with air and clean it with an eastwood product called Pre. Its kind of like brake clean but does not leave a chaulky white residue like some break kleen products do. Another good one that i have used to clean is called Slap Shot by Walters i think.
Anyways from here i like to put the part into the oven and let it get hot. This helps burn off (off gas) any contaminents that are trapped inside of the cast. Truthfully the first spindle i didnt offgas and it actually came out better then the second one. Once all of the crap is burnt out of the part its back to the rack to let it cool down a bit.
From here you ground the part you are going to spray, usually i would hang the part from the oven rack with stainless hooks and would ground to the rack, but in this case the spindle is a little heavy to hang so i set it on top. With the ground on the piece its time to spray the powder on the part. As the powder exits the gun it passes by an electrode that puts a + charge on the powder, since the parts - the powder sticks to the piece. It is really easy to put to much powder on so you kind of have to be careful. My air system in the shop is fairly industrial. I stole the design from some mobile oilfield equipment i build. It comes out of the compressor, through a coalescing filter, then through a water separator, then a dessicant dryer, then an after filter finally into the copper piping on the walls. All the filtration products are from Wilkerson.
The picture below shows the part covered in powder waiting to go into the oven. This is one of the tricky parts. Since i use an old regular house style oven i dont have the luxury to spray the powder and smoothly wheel the part into the oven. I have to very very carefully take the oven rack and slide it into the oven without disturbing it. The slightest bump or breath can make some serious imperfections as i have found out before.
Then its into the oven. The oven is preheated to 400 degrees. Now you wait until the flat powder goes liquid, this is where it looks like it is wet. Once the entire peice is liquid you start the timer. Depending on the instructions you follow you cook the powder from 350-400 degrees for 20 minutes. My ovens pretty old and terrible so i go somewhere in between.
Finally after this process the jobs done and you take the part out. The only black i have is a high gloss black from Eastwood and it is really shiney, would be a bit nicer as a bit flatter black.
As i said before i am an amature at this so it doesnt look all the great. A better blast cabinet and a larger more accurate oven would help a bunch but for the amount i do it, it makes it turn out ok.
I hope to get back on the car tomorrow afternoon and get it sitting on all four tires again, if my lug nuts come in and i can buy a spanner wrench i will start on the subframe connectors.
#248
10-02-2012, 03:59 AM
Yeah more like "I wonder if my powders liquid" OH LORD JESUS IT'S A FIRE!
A little humor for this evening, it's pretty funny if you watch them in order.
http://m.youtube.com/#/watch?v=JaAd8...%3DJaAd8OuwwPk
A little humor for this evening, it's pretty funny if you watch them in order.
http://m.youtube.com/#/watch?v=JaAd8...%3DJaAd8OuwwPk