My 1970 Camaro w/ 572 Build
#221
 09-24-2012, 05:14 AM

Ok, it's Monday and 6:06am on the east coast, did you get those brakes on yet....LOL
I should talk, I got a rear end torn aprt under my car and I wanted to have it all back together by Sunday but got a stinking cold and didn't really feel like doing much.
Nomad, that's a nice little Deuce coupe that you had.
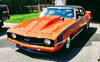
I sold my 68 Camaro that I had for a long time to some guy that lived in my old town and he bugged the crap out of me for this and that and then I was hearing from friends that he was beating the **** out of it and he couldn't handle it. He later sold it and years later after we moved from that town, here is was, sitting at a gas station with the front end smashed and sounded terrible and the driver looked like he should have been in rehab. My daughter asked me why I had a tear running down my face........
I told myself I'd never sell a car to someone that I knew or lived in the same area.
I should talk, I got a rear end torn aprt under my car and I wanted to have it all back together by Sunday but got a stinking cold and didn't really feel like doing much.
Nomad, that's a nice little Deuce coupe that you had.
I sold my 68 Camaro that I had for a long time to some guy that lived in my old town and he bugged the crap out of me for this and that and then I was hearing from friends that he was beating the **** out of it and he couldn't handle it. He later sold it and years later after we moved from that town, here is was, sitting at a gas station with the front end smashed and sounded terrible and the driver looked like he should have been in rehab. My daughter asked me why I had a tear running down my face........
I told myself I'd never sell a car to someone that I knew or lived in the same area.
#222
09-25-2012, 03:07 AM

I thing I'm done selling cars period. When I'm done there scrap metal. Thanks for the compliment. I used to get laughed at because of the pea green paint and primer doors. Then the hood I trailered it with and the deck lid were both black gel coat fiberglass Harwood pieces. Nothing matched. I had two things that shut people up. Solid 10.80-85 passes and I could tree the chit out most people. The night it went 9.97@135 was the best night ever. I just sounded different.
#223
09-25-2012, 12:51 PM

Ok i didnt get the front brakes started yet as i can not find my spring compressor. Talking to my buddy he says by putting a jack underneath the LCA you can lower it down, i may try this soon.
Instead i started with the steering box upgrade. I yanked the pitman arm off the steering box and unbolted the steering box and steering shaft. I made it as far as cutting off the rag joint until i got frustrated and quit for the day. I cant seem to get the other end of the pitman arm off of the center link. Ive whacked it several times with a picklefork and can seem to get it to pop off. I may order all new idlers, centerlink and everything just so the whole system is brand new. I will probably decide on that today. If anyone has any tips to get the pitman off the centerlink please let me know.
Im going to head back out there in a bit and try to finish the steering shaft modification and get it all buttoned up. If i can finish the steering box i may start on the front brakes and control arms.
On a side note i tried to roll my rear fenders and there is too much cancer on the fender lip it was cracking when it was getting rolled. The eastwood roller would work very well on a wheel well that is round but on our cars its kind of flat at the top and it makes the roller not work so well.
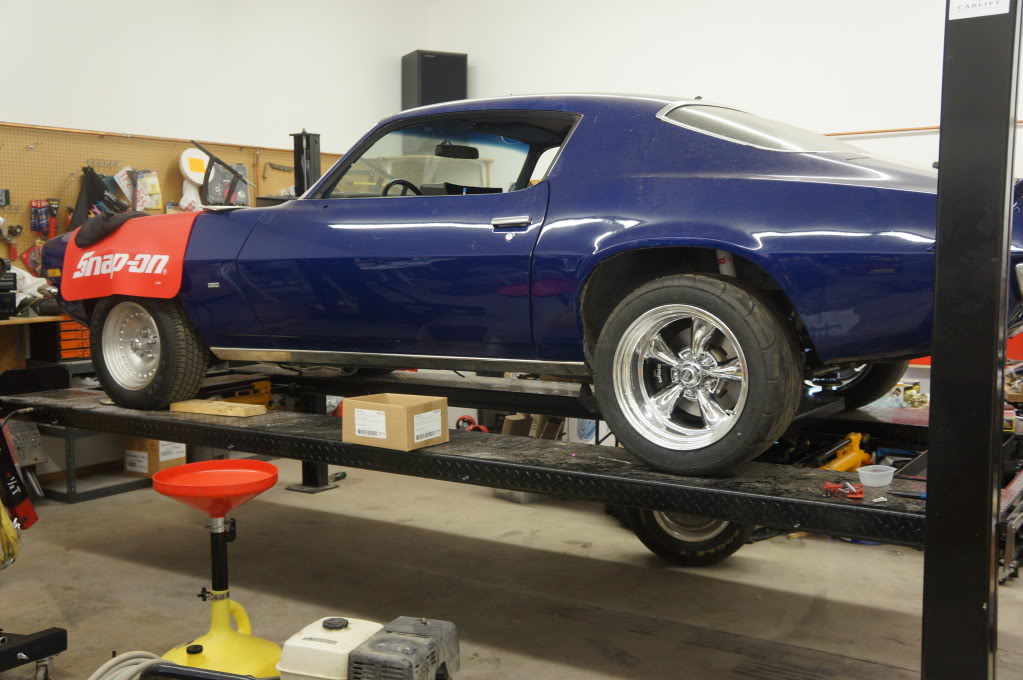
Anyways here are some photos of the new back rims on and a closeup of the rim with the brakes. Im sorry because i used my better camera and i assume these pictures are going to turn out huge.

Instead i started with the steering box upgrade. I yanked the pitman arm off the steering box and unbolted the steering box and steering shaft. I made it as far as cutting off the rag joint until i got frustrated and quit for the day. I cant seem to get the other end of the pitman arm off of the center link. Ive whacked it several times with a picklefork and can seem to get it to pop off. I may order all new idlers, centerlink and everything just so the whole system is brand new. I will probably decide on that today. If anyone has any tips to get the pitman off the centerlink please let me know.
Im going to head back out there in a bit and try to finish the steering shaft modification and get it all buttoned up. If i can finish the steering box i may start on the front brakes and control arms.
On a side note i tried to roll my rear fenders and there is too much cancer on the fender lip it was cracking when it was getting rolled. The eastwood roller would work very well on a wheel well that is round but on our cars its kind of flat at the top and it makes the roller not work so well.
Anyways here are some photos of the new back rims on and a closeup of the rim with the brakes. Im sorry because i used my better camera and i assume these pictures are going to turn out huge.
#225
09-25-2012, 03:47 PM

Join Date: Aug 2008
Location: Portland, Or
Posts: 9,097
When popping those tapered joints apart it always helps to give the outside of the receiver joint numerous whacks with a hammer first to jar the joint. Then I can usually back the nut off and give it a shot with the hammer and they pop apart. But at least they will always part with my pickle fork if I give them the treatment before using the pickle fork.
#226
09-25-2012, 10:45 PM
I'm not too sure what I'm going to do about the height thing yet. Apparently I didn't take a correct measurement when I ordered the rims and tires because I thought they were going to be the same as my old ones. Those are the details I'm going to work on down the road once its running.
I got out there to work on it again for a bit and ran in some typical issues.
I finished modifying the steering shaft for the new style steering box and painted it up. I will finish that install tomorrow when the paint is dry. It's looking pretty good so far.
I managed to get the pitman arm off of the center link by using the pitman arm puller sideways a bit. Kinda hard to explain but it worked. I whacked it many many times first and tried the pickle fork but it just wouldn't go.
I am very concerned about the new box/pitman arm combo as it seems like the arm goes too close to the crossmember. I decided to worry about that later because I'm probably buying all new linkage now.
I popped the bottom ball joint off and was planning on swinging the lca out of the way to salvage the spring seems how they have maybe 1000km on them I was sure someone would like to buy them. What I didn't plan on is the headers being in the way of swinging the lca out of the way. Things got scary trying to rig the cars up of the bridge jacks to get the spring out of there I had to end up putting heat to the spring so it's garbage.
Once I was done fighting with the spring I went on to the lca. Ram into another problem here because the lca bolt hits the header. I had to cut the bolt because the headers are a royal pain to loosen. Then I took off the uca.
Tomorrow I plan on installing the new control arms and starting on the brake modifications but who knows how that will go.
Two steps back today, hopefully two steps forward tomorrow.
#227
09-26-2012, 10:26 AM
Join Date: Aug 2008
Location: Portland, Or
Posts: 9,097
Ran into the same problem on my lower control arms and headers. I took my headers off, but should have just cut the bolts like you did, and put in new. They fit fine from the other direction.
#228
09-26-2012, 07:06 PM
Yeah I'm just going to head out there tonight hopefully. Working on buying that Edge today but I did pick up new control arm bolts.
I would really like to get the drivers side done but I'll see I guess.
I would really like to get the drivers side done but I'll see I guess.
#229
09-27-2012, 01:38 AM
Well we bought the edge tonight so that cut into the shop time a little bit. i did however get out the girlfriend out there with me for an hour or two but never really got too much accomplished.
Firs thing i attempted was installing the steering shaft.
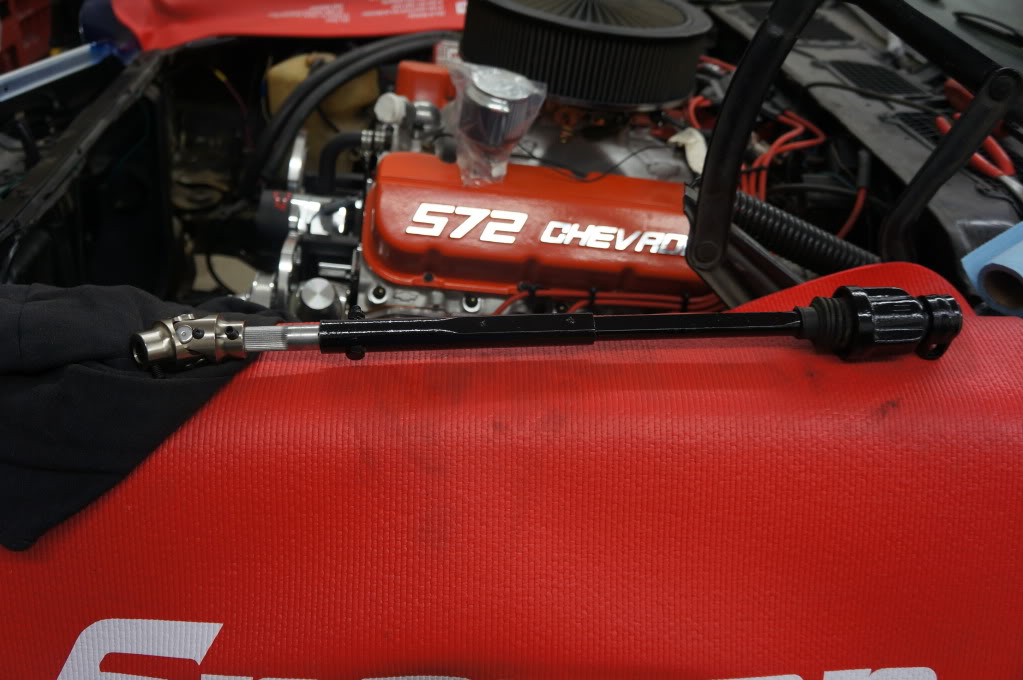
Everything was looking good and fitting nicely, right up until i tried to turn the wheel. I followed the instructions perfectly. (1. Cut off the rag joint as close as possible, 2. Drill a hole 1" from the end of the shaft) Well that little bolt you can see in the picture hits the cross member. I pretty much destroyed the paint when i was screwing around with it so tomorrow or i guess soon im gonna re-drill another hole as close to the end of the shaft as possible and reinstall it. Im also gonna wire wheel all of that paint off and start over, this time i dont think i waited long enough for the primer to set and the top coat didnt take, i may try roughing up the primer a bit next time as well.
On the positive side of things i put the control arms on and they actually seem to fit. I didnt take a picture of them because i will wait until the shocks and spindle are on.
I started modifying the spindle as well.
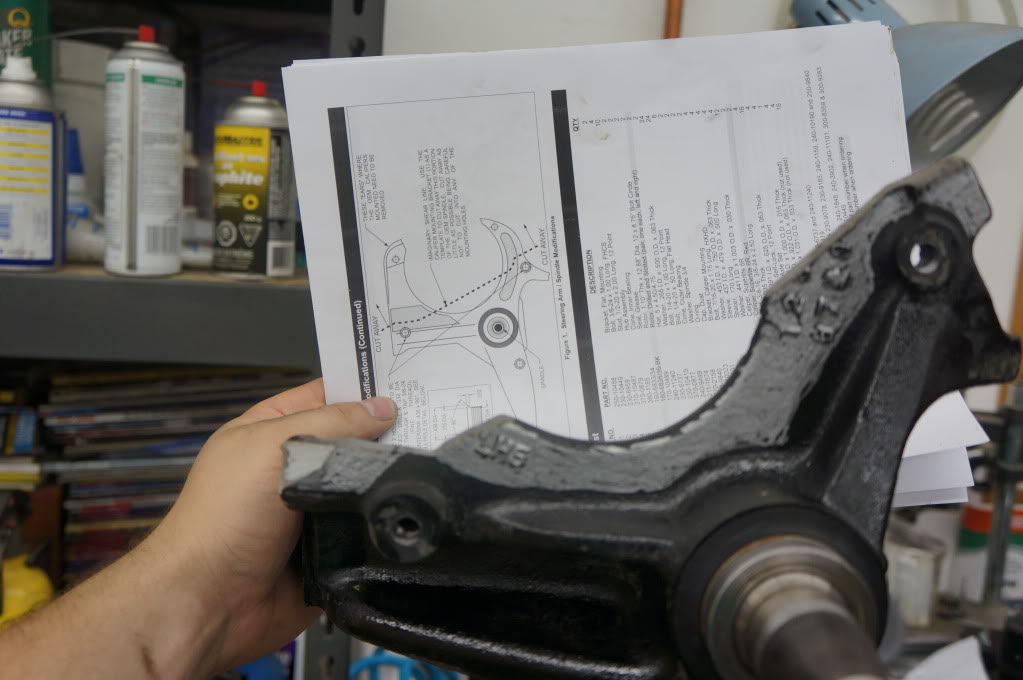
I spent way to much time making the cuts like they show in the picture even though the shape of the camaro spindle is a bit different then the instructions. The areas i have marked with silver pen is where i will cut it tomorrow. I got the holes redrilled and tapped for the Wilwood caliper mount. I am going to take the time to powder coat the spindle to try and match the control arms. I have never attempted powder coating cast before but i have heard horror stories on forums on the net. Its going to be interesting figuring a way to hang the spindle in my oven as i havent ever done something as heavy as that before.
I figure i need to set little goals each day in order to keep moving forward so my goals for tomorrow are as follows.
1. Finish cutting and grinding the original spindle.
2. Powder coat the spindle
3. Modify and paint the steering shaft
4. I havent looked into it yet but if i need to pre assemble the coil over i will get that done tomorrow night.
I would like to have the front drivers side done by the weekend. If anyones wondering why it is taking so long, its the fact i have never done anything like this before. It is much easier to manufacture multi million dollar oilfield equipment then it is to modify my own car.
Firs thing i attempted was installing the steering shaft.
Everything was looking good and fitting nicely, right up until i tried to turn the wheel. I followed the instructions perfectly. (1. Cut off the rag joint as close as possible, 2. Drill a hole 1" from the end of the shaft) Well that little bolt you can see in the picture hits the cross member. I pretty much destroyed the paint when i was screwing around with it so tomorrow or i guess soon im gonna re-drill another hole as close to the end of the shaft as possible and reinstall it. Im also gonna wire wheel all of that paint off and start over, this time i dont think i waited long enough for the primer to set and the top coat didnt take, i may try roughing up the primer a bit next time as well.
On the positive side of things i put the control arms on and they actually seem to fit. I didnt take a picture of them because i will wait until the shocks and spindle are on.
I started modifying the spindle as well.
I spent way to much time making the cuts like they show in the picture even though the shape of the camaro spindle is a bit different then the instructions. The areas i have marked with silver pen is where i will cut it tomorrow. I got the holes redrilled and tapped for the Wilwood caliper mount. I am going to take the time to powder coat the spindle to try and match the control arms. I have never attempted powder coating cast before but i have heard horror stories on forums on the net. Its going to be interesting figuring a way to hang the spindle in my oven as i havent ever done something as heavy as that before.
I figure i need to set little goals each day in order to keep moving forward so my goals for tomorrow are as follows.
1. Finish cutting and grinding the original spindle.
2. Powder coat the spindle
3. Modify and paint the steering shaft
4. I havent looked into it yet but if i need to pre assemble the coil over i will get that done tomorrow night.
I would like to have the front drivers side done by the weekend. If anyones wondering why it is taking so long, its the fact i have never done anything like this before. It is much easier to manufacture multi million dollar oilfield equipment then it is to modify my own car.
#230
09-27-2012, 02:21 AM
Off topic, just made my way through my subscribed threads, i figured there would be some more things happening but seems pretty slow.
Val, still wanna see you get a new project as your great at posting progress.
Damon, i commented on your project too, looking forward to seeing you get some time to continue on your car as well.
Anyone else thats reading this post, i really do appreciate tips, hints, ideas, criticisms, or praises. All comments are taken (some with a grain of salt) but its one of the ways i get through the issues that i run into, and definately one of the major ways to stay focused on the goal at hand. I really do get sidetracked easy and have a tendancy of stopping working when i get frustrated.
Thanks everyone for reading this, i am doing everything i can to not get back to work and be kicking myself for not getting anything done on my car.