Installing a LS1 in my 1977 Camaro
#61
 08-06-2011, 10:31 PM


I've know the Kooks name for years, only because I read WAY more magazine articles than I should. I had 5 subscriptions going at once for a while. Then had nothing to read for the three other weeks of the month.
#62
08-07-2011, 10:51 AM

Join Date: Aug 2008
Location: Portland, Or
Posts: 9,097
The Kook's exhaust and header system looks fantastic! I've never seen a 3" exhaust system fit so well, and look so good. The engine compartment looks like that LS came from the factory in a 2nd gen!
I was watching a show one weekend where they had a competition between 2 crews to see who could install a new LS the fastest in whatever early GM the crew chose. The winners got the engine for free, and a set of tools for each of the crew members. One team crew member got carried away with trying to take that piece of metal off the block that Kook's cut off on your engine. They weren't prepared well, and forgot to have the proper cutting tool to remove it, so he started beating it to break it off. Well he did break it off, along with a large protion of the block and the contest came to a screeching halt. The block was ruined and his team immediately lost. The other team finished their install in 3.5 hrs in an older GTO, if I remember correctly.
The guys on the other team didn't look too happy, especially the one who broke the block.
#64
08-07-2011, 02:23 PM

The Kook's exhaust and header system looks fantastic! I've never seen a 3" exhaust system fit so well, and look so good. The engine compartment looks like that LS came from the factory in a 2nd gen!
I was watching a show one weekend where they had a competition between 2 crews to see who could install a new LS the fastest in whatever early GM the crew chose. The winners got the engine for free, and a set of tools for each of the crew members. One team crew member got carried away with trying to take that piece of metal off the block that Kook's cut off on your engine. They weren't prepared well, and forgot to have the proper cutting tool to remove it, so he started beating it to break it off. Well he did break it off, along with a large protion of the block and the contest came to a screeching halt. The block was ruined and his team immediately lost. The other team finished their install in 3.5 hrs in an older GTO, if I remember correctly.
The guys on the other team didn't look too happy, especially the one who broke the block.
I was watching a show one weekend where they had a competition between 2 crews to see who could install a new LS the fastest in whatever early GM the crew chose. The winners got the engine for free, and a set of tools for each of the crew members. One team crew member got carried away with trying to take that piece of metal off the block that Kook's cut off on your engine. They weren't prepared well, and forgot to have the proper cutting tool to remove it, so he started beating it to break it off. Well he did break it off, along with a large protion of the block and the contest came to a screeching halt. The block was ruined and his team immediately lost. The other team finished their install in 3.5 hrs in an older GTO, if I remember correctly.
The guys on the other team didn't look too happy, especially the one who broke the block.
I am pretty sure I will have more than 3 1/2 hours in my installation!! LOL
I had a few hours available this morning and got the fuel rails installed. I was able to use my existing fuel lines as the return line is mounted to the right rear and the feed line on the left rear.
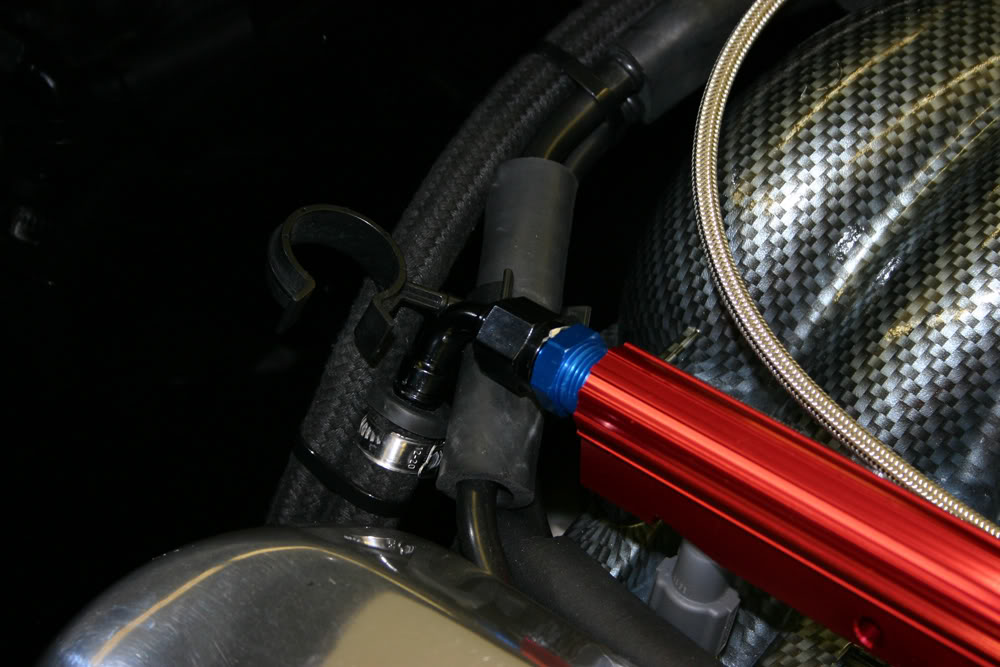
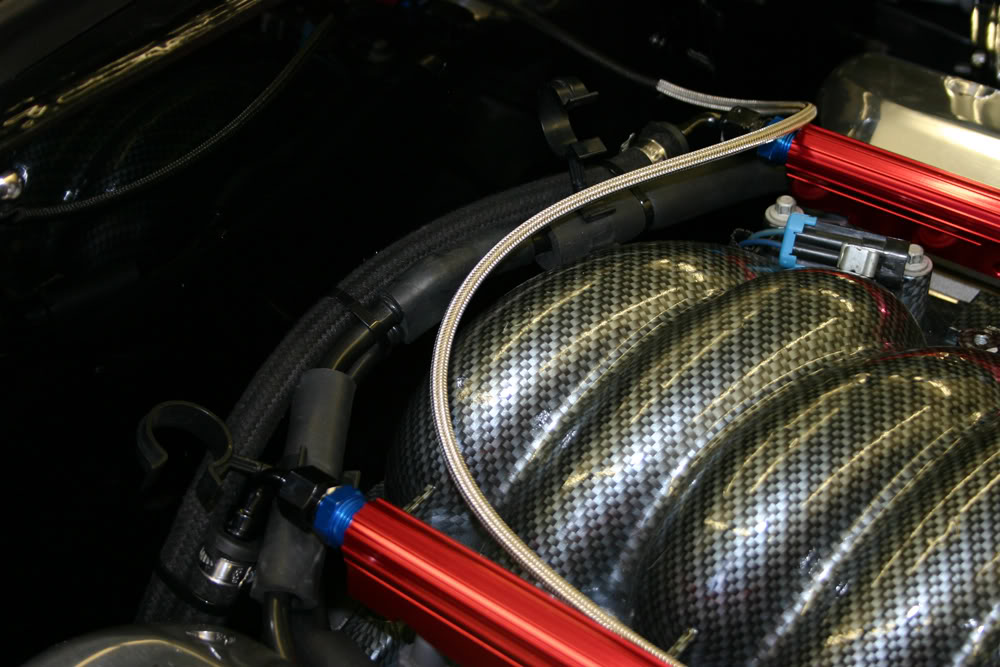
The crossover line on the front is the one that came with the kit but it is too long making it loop way too high. I will have to take one end apart and shorten it by about 1 1/2".
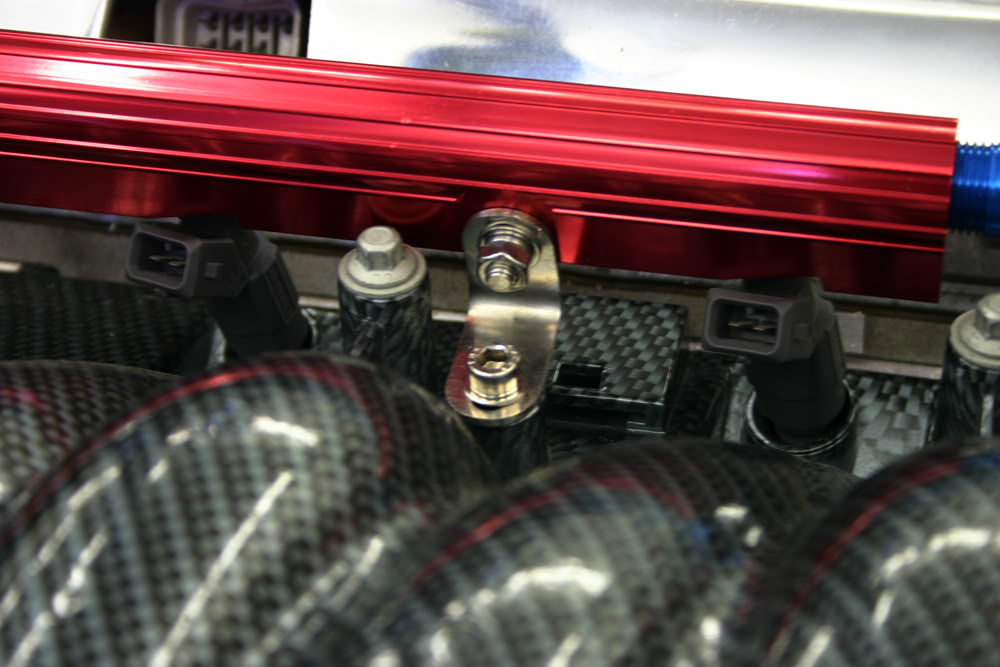
The kit came with phillips screws for the mounting brackets. I replaced them with stainless socket head bolts.
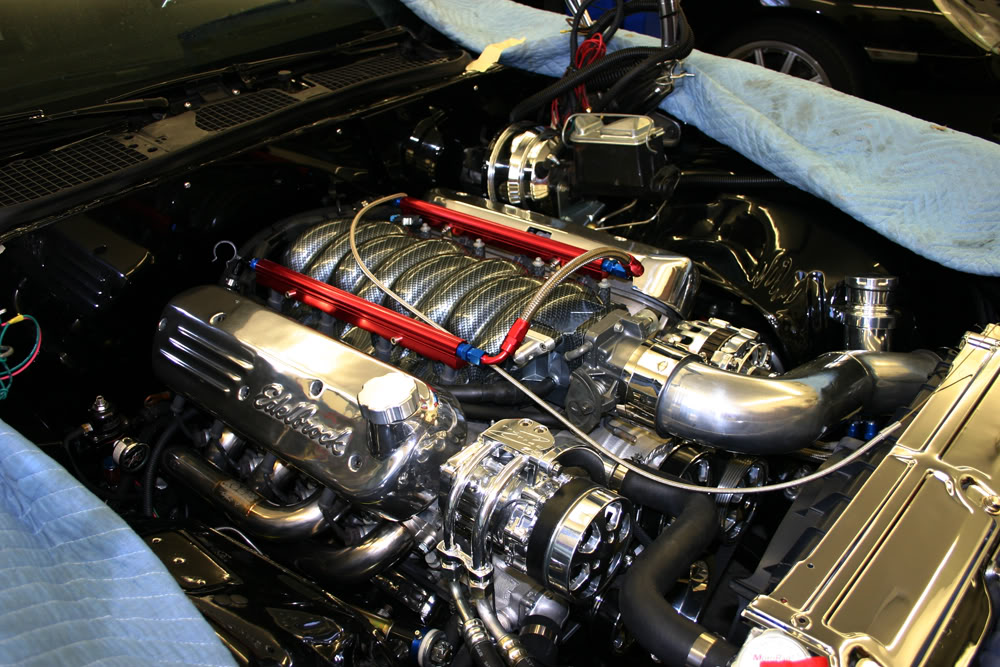
Before I go to all the trouble to paint it, I would like to hear what everyone thinks about leaving it red. I have mixed emotions. I does add some color but I am not sure I want the color. Feedback would be helpful.

#66
08-08-2011, 09:20 AM
Join Date: Aug 2008
Location: Portland, Or
Posts: 9,097
Well I'm still not sure about changing the color. I was certain before, but now after seeing them I can't decide if the small amount of red and blue is a bad thing or good. If it was me I'd leave it for awhile and think on it. I'm sure it would look great either polished or black, just not sure it doesn't look good now also. You do have a few other fittings with color on them, so it's not like it's the only thing in the engine bay that has color.
#67
08-09-2011, 01:16 PM

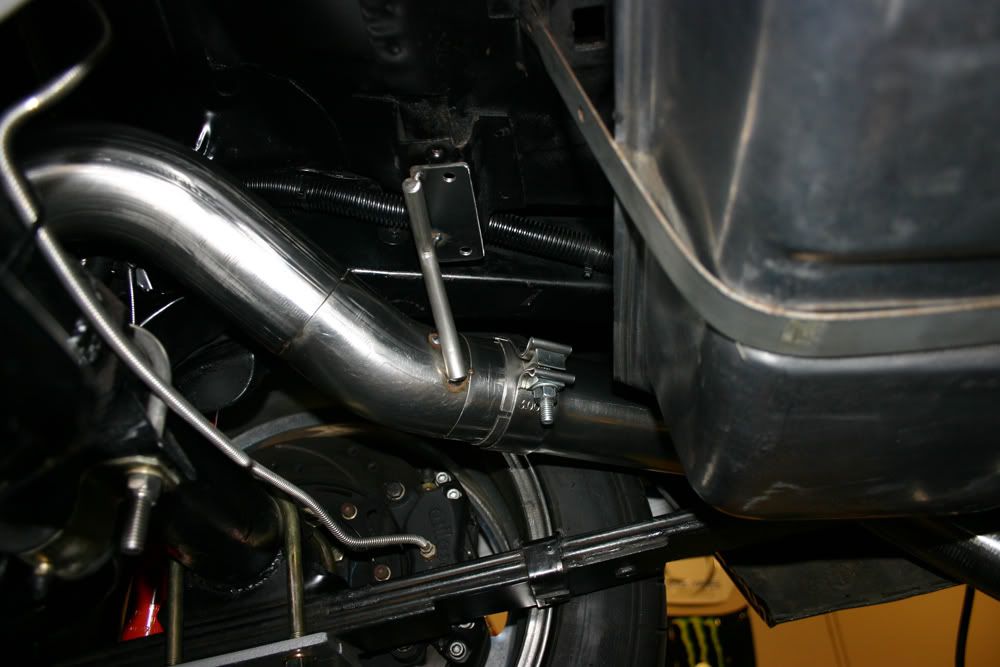
Well, I will be picking up the car Friday afternoon. I went over to Kook's today to see the exhaust while the car is still on the hoist. It looked great!! I found it interesting that the mufflers are installed at an angle. Evidently it makes it easier to line things up where the exhaust goes over the axle.
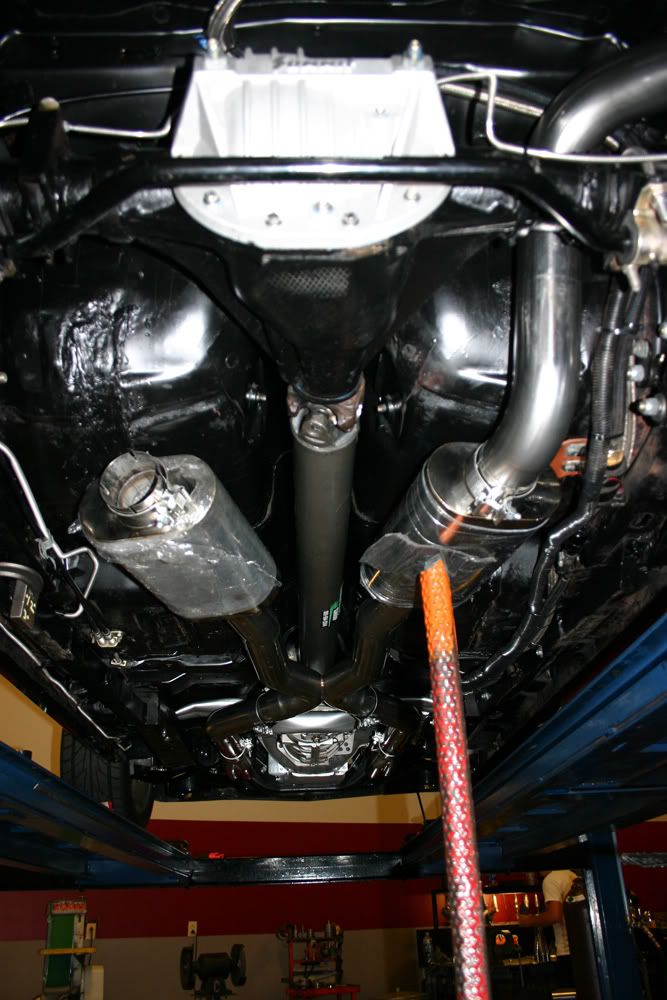
On my small block, the right header hung down about 2" lower than the left header and would drag on the road. They have both the headers tucked up close to the motor so I will not have the issue this time.
The exhaust will dump out next the leaf spring in each rear fender area. In this photo, they have marked the angle cut to be made which will result in about an inch of the exhaust showing.
This is a header I saw at the shop today. Pretty impressive piece of work.
Jerry � The custom built headers and exhaust install looks amazing! It looks like it has plenty of clearance around the axle and sway bar mounts.
#68
08-09-2011, 09:54 PM
I haven't driven it yet to see if there are any issues, but they installed everything while the car was on a four post lift so it would clear the suspension with the car on the ground. I know of a guy who built an exhaust system with the car on a two post lift and when they put the car on the ground, the pipes were touching the axle!! At rest!!!
#69
08-09-2011, 10:04 PM
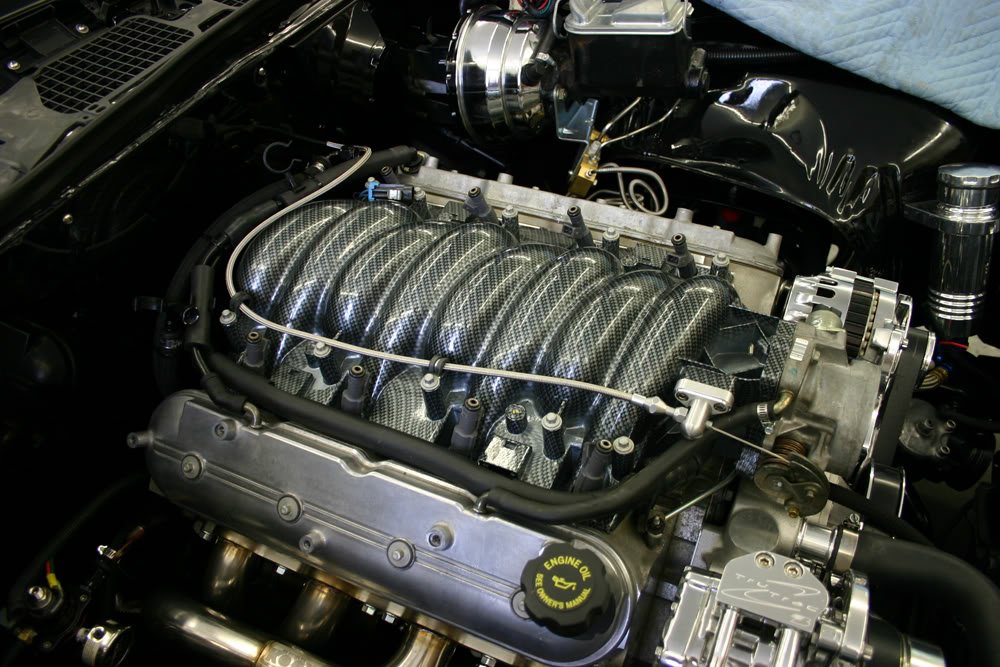
I took the fuel rails along and he said he can chrome them as well along with the fittings!! Because his prices were reasonable, I am having them chrome the coil covers as well. I had polished valve covers on my small block and they were a pain to keep them looking nice. Chrome will be easier to maintain.
So it will be a black & chrome thing. Kinds of goes with the black and silver exterior and the silver gauges.
After mowing the lawn early to beat the heat, I was able to get some basic things done today. I installed the Lokar throttle cable. I had to bring the cable down the length of the intake and I tied it off to a couple of the intake mounting bolts.
As I add the wiring, the engine is going to become a little messier. My goal is to hide what I can, but it is pretty hard to run a computer controlled car without wiring. When my wife arrived home, she discovered that she was needed to push down on the gas pedal so I could adjust the cable. She is now a contributor!!
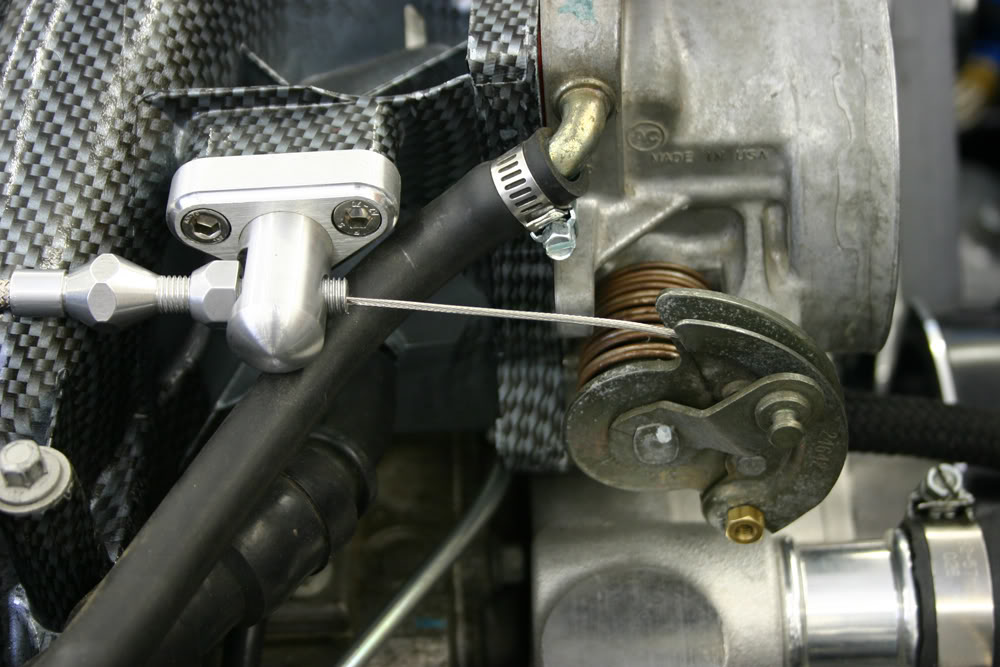
Now that I had throttle, it was time to hook up the clutch components. Kooks only allowed about a 1/4" clearance from the lower arm of the Z-Bar to the header. As long as it did not hit, everything was cool. I had to bend the arm on the Z-Bar where the clutch rod attaches as the pivot ball adapter evidently moved the Z-Rod out a bit. After getting it all back together, the rod is rubbing on the side of the hole in the firewall. It was near the end of the day, so I will address that tomorrow.
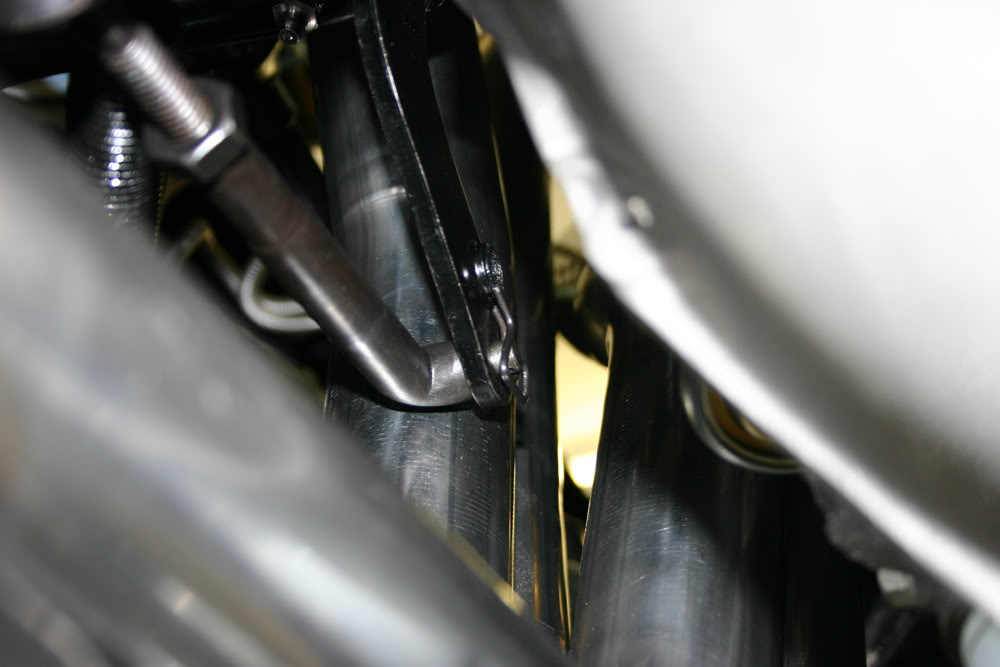
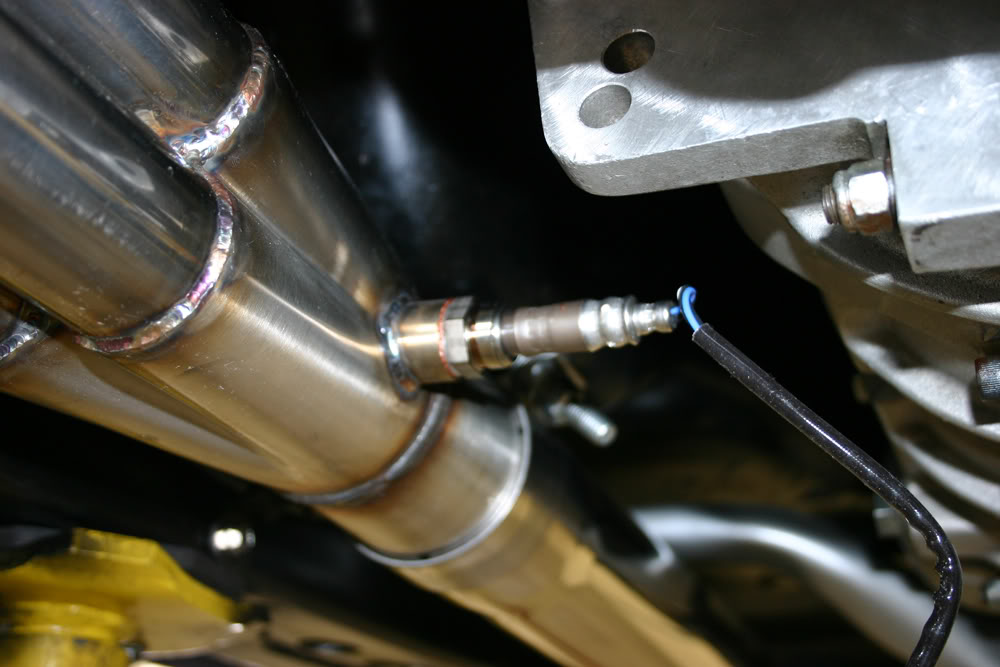
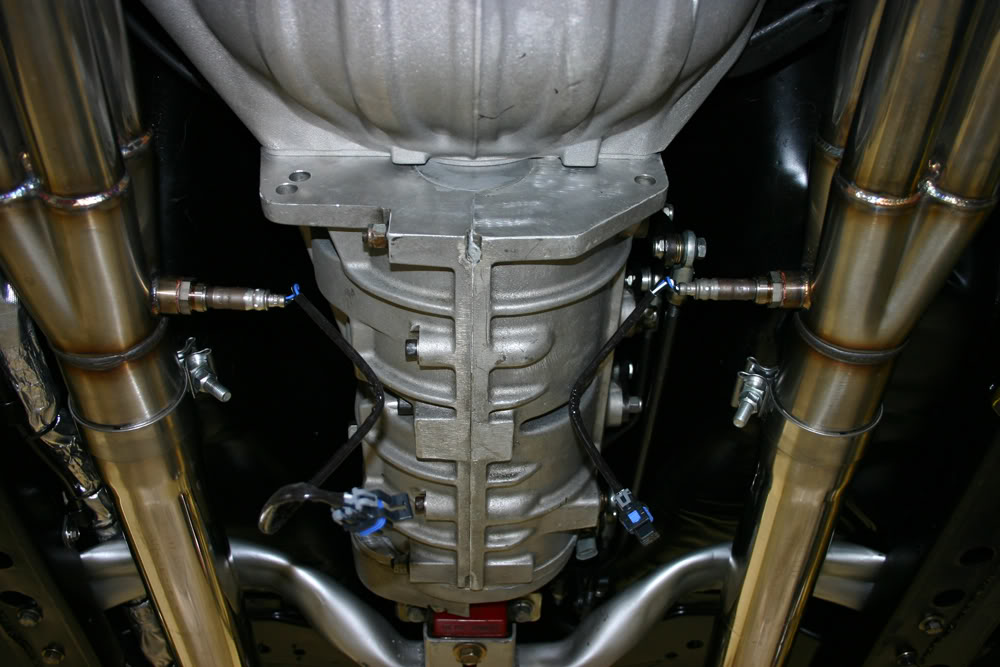
While I was under the car, I installed the O2 sensors and the speedometer sender.
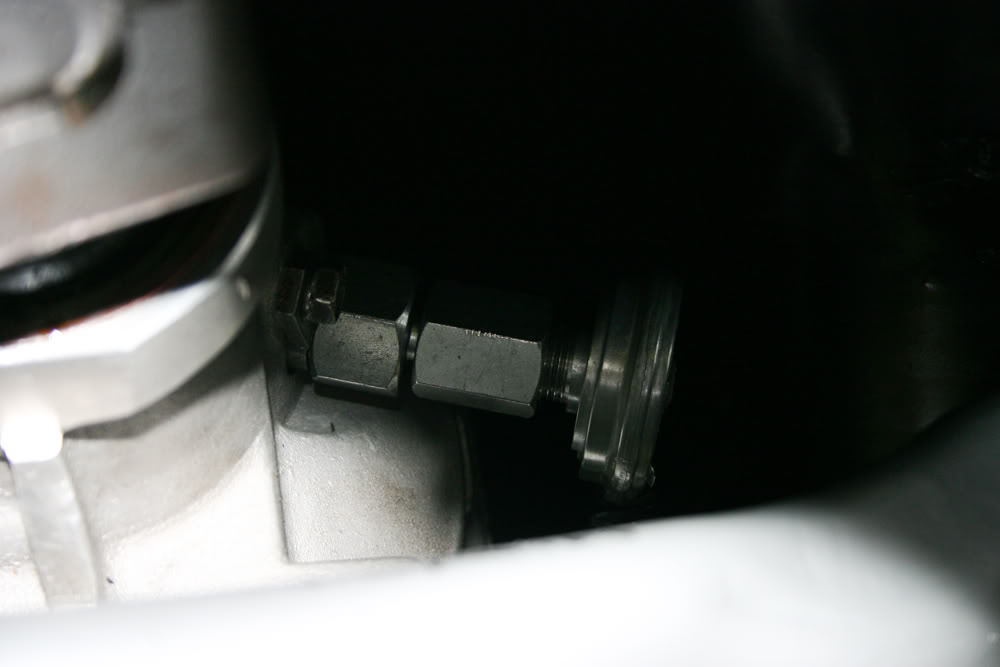
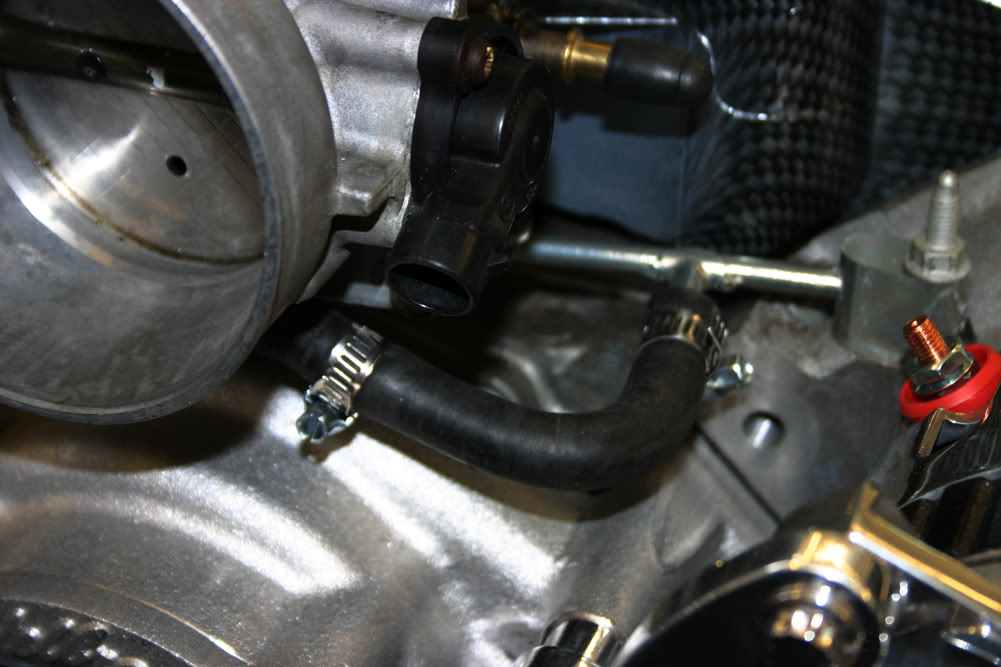
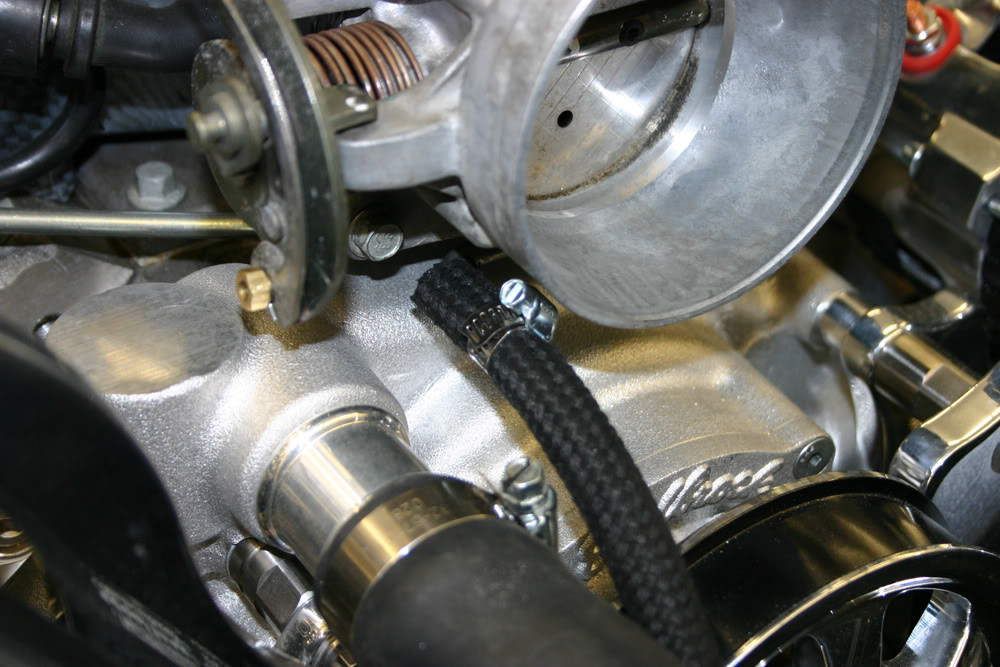
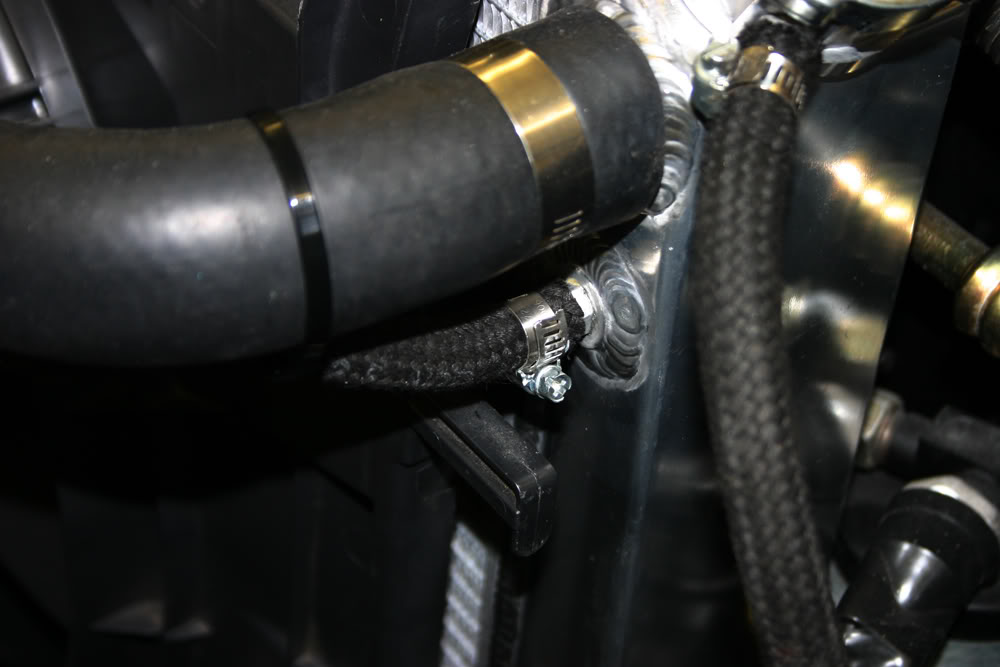
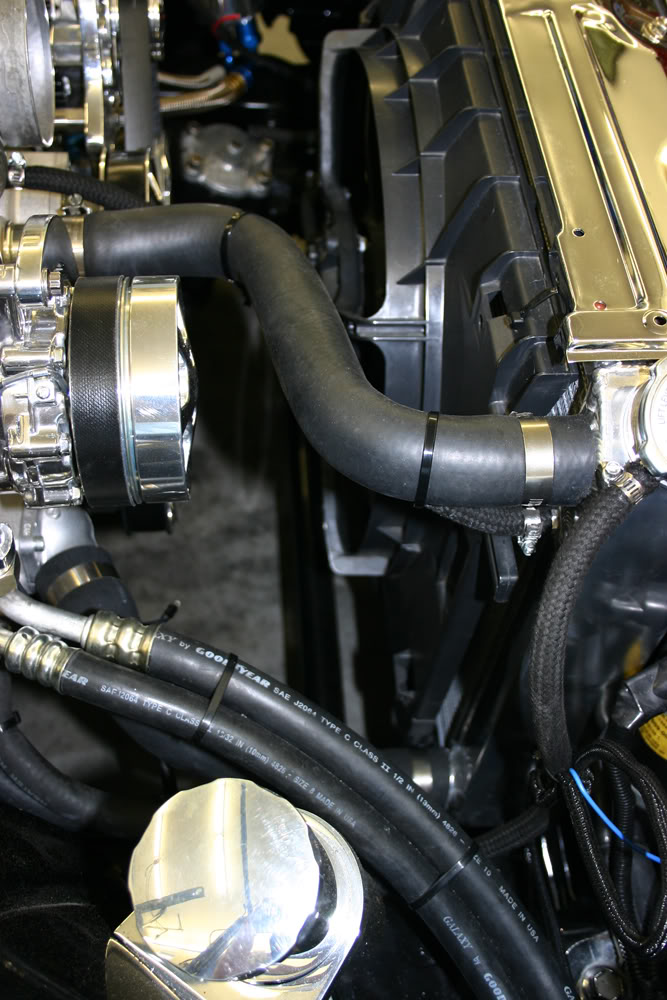
I also finished up installing the steam line to the throttle body and then to the radiator.
The power steering needed to be bled. I did the part where you turn the front wheels from lock to lock at least 20 times with the motor off. Once I get it running, I can complete the bleeding procedure.
May be time to begin the wiring tomorrow after I fix the clutch issue. It was a bear geting the Z-Bar in place so I really do not want to remove it. I'll have to see if there are any other possiblities.