
Another step closer!


1st Gear Member
Joined: Feb 2010
Posts: 217
From: So. Ga
The painting of the fins is an interesting idea. I just picked up a pair of edelbrock valve covers that are finned. Their finish is really nice, but that's kind of got me thinking...since I'm prolly gonna paint my edelbrock intake chevy orange and keep the lettering silver...hmmm

Thread Starter
|
Second Generation Moderator
Feb 2010 ROTM winner
Jan 2013 ROTM winner
Feb 2010 ROTM winner
Jan 2013 ROTM winner
Joined: Aug 2008
Posts: 9,097
From: Portland, Or
ROTM Winner's Club
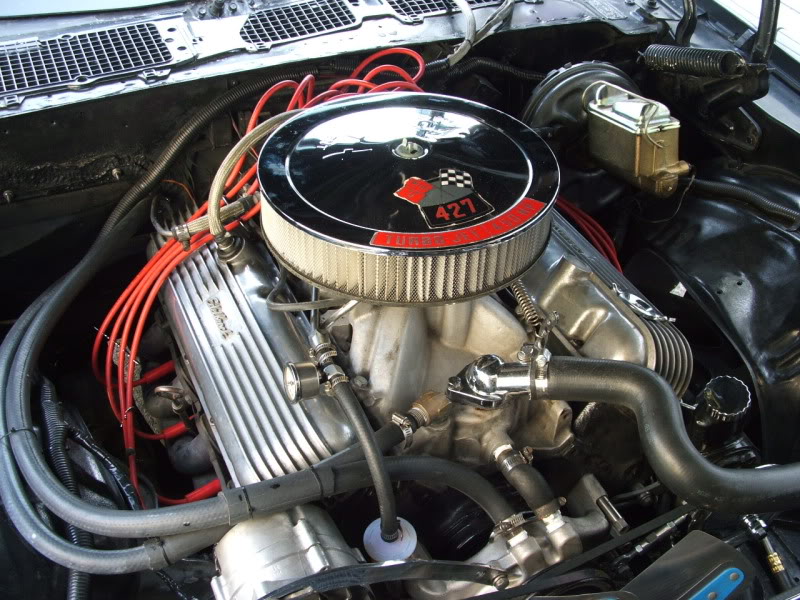
Yea, I was thinking I'd mask off the smooth polished outter areas, then paint the entire finned area. Once it dried I'd sand the fins and name with something around 400 grit and polish them again. That would leave the color just between the fins, and the rest still polished. Red would go with the new plug wires and the engine sticker on the air cleaner.
Thread Starter
|
Second Generation Moderator
Feb 2010 ROTM winner
Jan 2013 ROTM winner
Feb 2010 ROTM winner
Jan 2013 ROTM winner
Joined: Aug 2008
Posts: 9,097
From: Portland, Or
ROTM Winner's Club
I'd be afraid that thinner might leach under the adjoining paint and cause it to lift. I think I'll stick with the hard way, it might be safer.
1st Gear Member
Joined: Feb 2010
Posts: 217
From: So. Ga
U can use thinner if its on something really thin that won't soak up enough to bleed...like a shop rag that has not been folded...u just have to be really careful not to over soak a very small portion. That's what I'm gonna do with the valve covers. My intake, I'm gonna take the paint off the lettering with one of my wife's emery boards.haha
Thread Starter
|
Second Generation Moderator
Feb 2010 ROTM winner
Jan 2013 ROTM winner
Feb 2010 ROTM winner
Jan 2013 ROTM winner
Joined: Aug 2008
Posts: 9,097
From: Portland, Or
ROTM Winner's Club
Was off work early today, so I decided it was time to finish my traction bar project. Bought the chrome moly tubing several months ago, and never got around to making them.
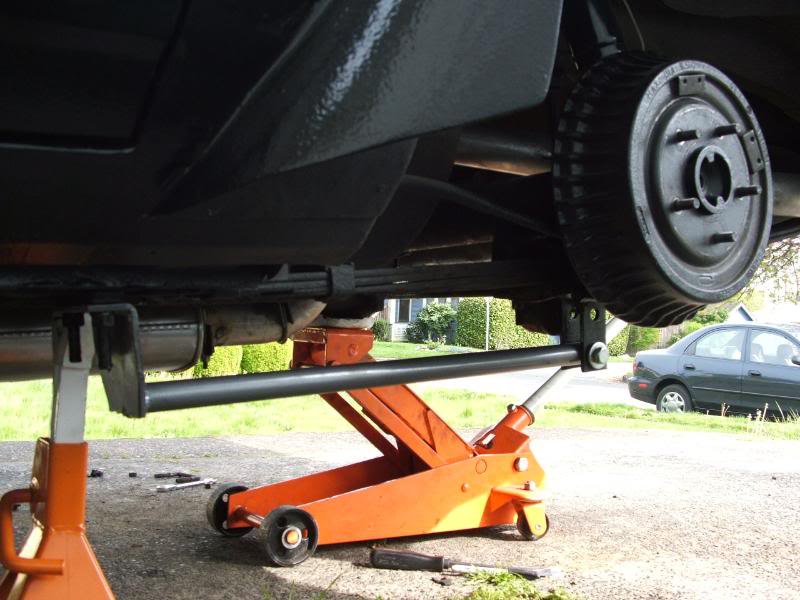
I tore the rear suspension aprt and removed the old slapper bars. Then I removed the spring plates from my rear axle and went after them with the sanding flapper disc. I got out my porta band saw and cut the hangers off the old slapper bars and ground the welds smooth. Then I cut two pieces of the tubing 24" long and cut some mounting brackets to weld to my old spring perches.
After some layout I measured and drilled the tubing for a 1/2" pivot bolt on the spring perch. Then I bolted the brackets I made to the bar and squared them up. I got out the welder and welded the old brackets I had cut off the previous bars to the front of the new bars. I set them up to mount right behind my front spring eye. I then laid the brackets out in back and welded them to the center of the spring perch, making sure they wouldn't interfere with my swaybar mounts.
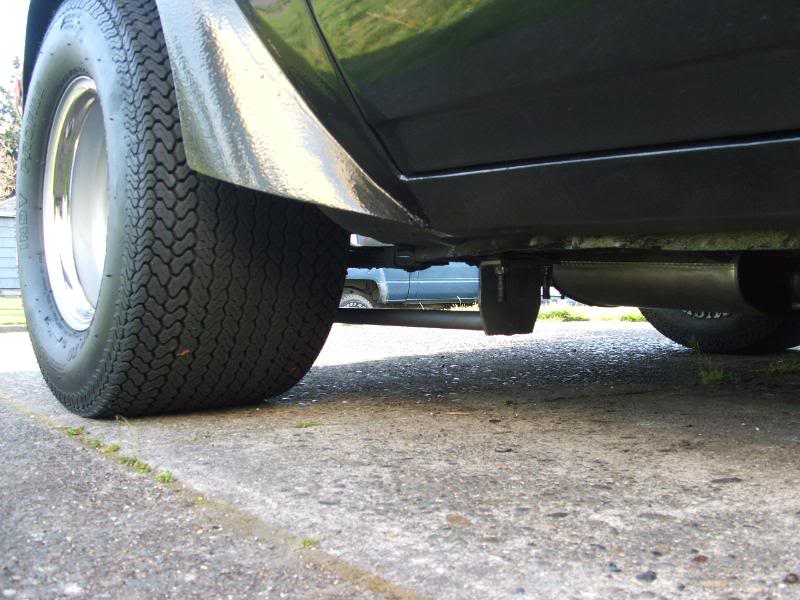
After tacking and checking, I securely welded everything together and used the grinder to clean it all up. Then I painted the spring perches black, and the new traction bars hammerite metallic gray.
Bolted it all back together, and reinstalled my shocks and swaybar. Took it for a quick spin to check that it worked well, and no issues arose. I was pleasantly surprised that my ride feels a bit softer, but traction is a bit better than it was with the old bars, so I'm very pleased with the end result.
I hadn't seen any bars done this way, and I sort of wanted them to work like the more expensive traction bars, but on a low budget. This works so well I'm going to modify my friend's slapper bars on his '69 Camaro too! Took me about 4 hrs. to do the whole job including making the bars and removal and reinstallation.
I tore the rear suspension aprt and removed the old slapper bars. Then I removed the spring plates from my rear axle and went after them with the sanding flapper disc. I got out my porta band saw and cut the hangers off the old slapper bars and ground the welds smooth. Then I cut two pieces of the tubing 24" long and cut some mounting brackets to weld to my old spring perches.
After some layout I measured and drilled the tubing for a 1/2" pivot bolt on the spring perch. Then I bolted the brackets I made to the bar and squared them up. I got out the welder and welded the old brackets I had cut off the previous bars to the front of the new bars. I set them up to mount right behind my front spring eye. I then laid the brackets out in back and welded them to the center of the spring perch, making sure they wouldn't interfere with my swaybar mounts.
After tacking and checking, I securely welded everything together and used the grinder to clean it all up. Then I painted the spring perches black, and the new traction bars hammerite metallic gray.
Bolted it all back together, and reinstalled my shocks and swaybar. Took it for a quick spin to check that it worked well, and no issues arose. I was pleasantly surprised that my ride feels a bit softer, but traction is a bit better than it was with the old bars, so I'm very pleased with the end result.
I hadn't seen any bars done this way, and I sort of wanted them to work like the more expensive traction bars, but on a low budget. This works so well I'm going to modify my friend's slapper bars on his '69 Camaro too! Took me about 4 hrs. to do the whole job including making the bars and removal and reinstallation.
Thread Starter
|
Second Generation Moderator
Feb 2010 ROTM winner
Jan 2013 ROTM winner
Feb 2010 ROTM winner
Jan 2013 ROTM winner
Joined: Aug 2008
Posts: 9,097
From: Portland, Or
ROTM Winner's Club
I used the original U bolts that came off the old slapper bars to clamp to the spring right behind the eye. That's the point of least movement on the spring, so it doesn't affect the spring rate. I put the pivot point at the axle since it moves the most. Seems to work great!

Overdrive Member
Joined: Nov 2009
Posts: 4,848
From: off the grid
Wow that does look good. Adjustable too! Man I like them. Maybe some day put a heim in the front and then you could adjust preload too. Are they for looks, you did mention it won't ever be raced again. I had a set of homemade ones on my 67 Nova, then bought slide a links. Turns out I had a better 60 foot with the homemade ones and better et with the cal tracs. Weird huh?
Last edited by 77nomad; Apr 17, 2010 at 09:31 AM.

Senior Moderator
January 2010 ROTM Winner
January 2010 ROTM Winner
Joined: Oct 2007
Posts: 18,306
From: The 'Burbs of Chicago

Looks like the workings of a pretty good setup 1971. Got a geometry question though. Slapper bars lift up against the front of the leaf spring. Your bars drive the force laterally, pushing straight forward against the front bracket. What's keeping the front clamp and bracket from tweaking?