
New old project-1946 Austin gasser


Thread Starter
|
Second Generation Moderator
Feb 2010 ROTM winner
Jan 2013 ROTM winner
Feb 2010 ROTM winner
Jan 2013 ROTM winner
Joined: Aug 2008
Posts: 9,097
From: Portland, Or
ROTM Winner's Club
Had a pinstriper come by yesterday to look at doing the pinstriping I've planned on the car. He's going to do the two thin parallel lines that follow the body lines from the grille to the lower trunk drop. He's also going to do a few other small things on the car, and then pinstripe my Falstaff cooler. All for $60, and from what I saw on my neighbor's hotrod his work is fantastic! It'll take 2-3 weeks for him to catch up and find time, as he's pretty busy right now!
Thread Starter
|
Second Generation Moderator
Feb 2010 ROTM winner
Jan 2013 ROTM winner
Feb 2010 ROTM winner
Jan 2013 ROTM winner
Joined: Aug 2008
Posts: 9,097
From: Portland, Or
ROTM Winner's Club
But mine was imported to Canada when new, and was lefthand drive from the factory!  It's never been around England long enough to learn the lingo!
It's never been around England long enough to learn the lingo!
Thread Starter
|
Second Generation Moderator
Feb 2010 ROTM winner
Jan 2013 ROTM winner
Feb 2010 ROTM winner
Jan 2013 ROTM winner
Joined: Aug 2008
Posts: 9,097
From: Portland, Or
ROTM Winner's Club
My little one hour job today. I took the old tattered gray boot off my E brake and ripped the seam open. Then laid it out on some black naugahyde and stitched up another by hand. Stitched in a little more room, so it lays better on the carpet in either position; on or off.
Before:
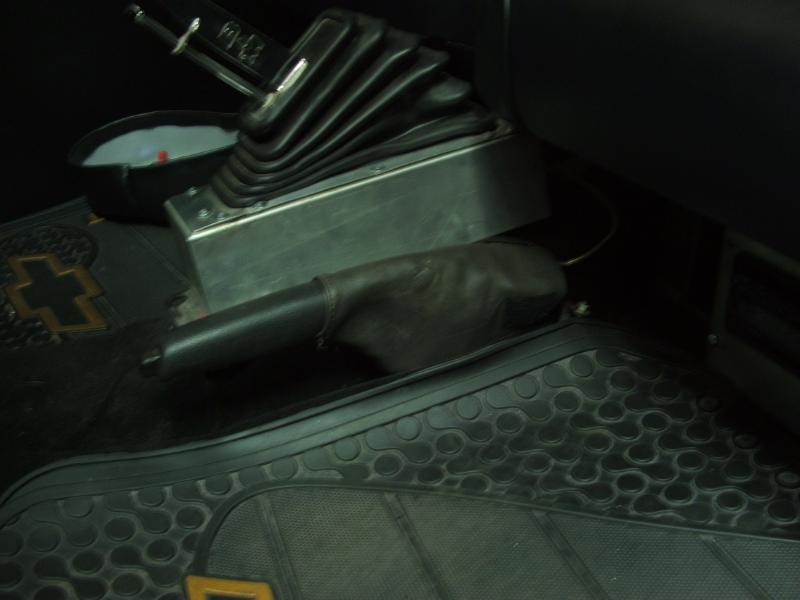
After:

Before:
After:
Thread Starter
|
Second Generation Moderator
Feb 2010 ROTM winner
Jan 2013 ROTM winner
Feb 2010 ROTM winner
Jan 2013 ROTM winner
Joined: Aug 2008
Posts: 9,097
From: Portland, Or
ROTM Winner's Club
Thread Starter
|
Second Generation Moderator
Feb 2010 ROTM winner
Jan 2013 ROTM winner
Feb 2010 ROTM winner
Jan 2013 ROTM winner
Joined: Aug 2008
Posts: 9,097
From: Portland, Or
ROTM Winner's Club
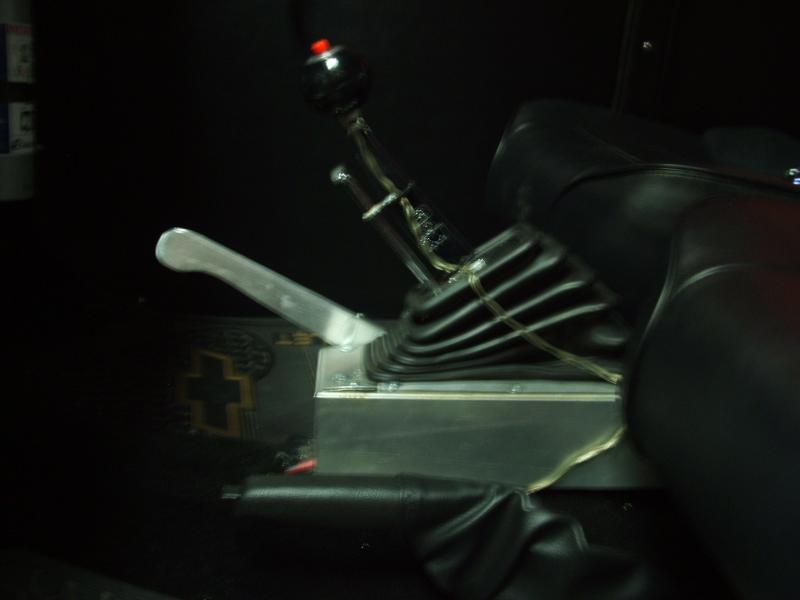
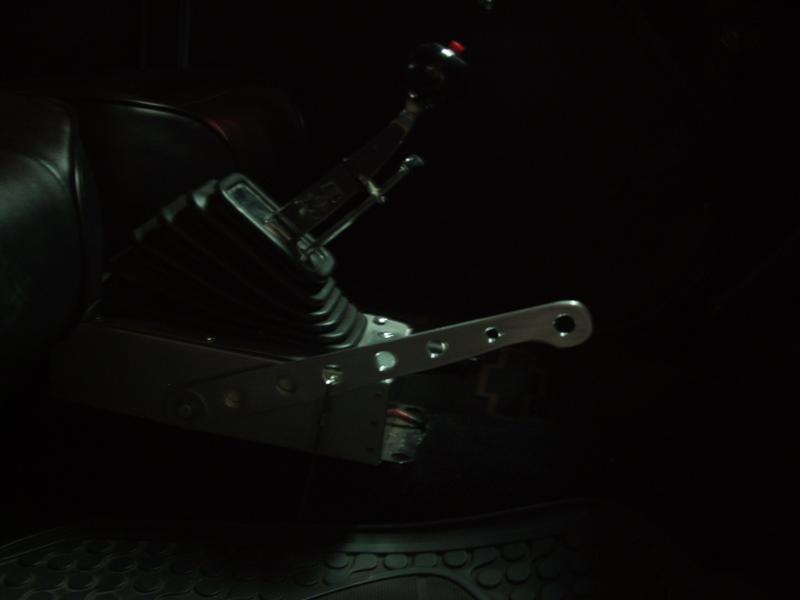
My project today was to try and make the chute functional, even if I wont ever pull the release and open it. Built a release handle, and floor bracket and incorporated the bracket into the shifter housing. Next I need to route the cable and hook up both ends. Gotta get the padlock back on the chute also, so I don't bump the handle and release the chute by accident!
Thread Starter
|
Second Generation Moderator
Feb 2010 ROTM winner
Jan 2013 ROTM winner
Feb 2010 ROTM winner
Jan 2013 ROTM winner
Joined: Aug 2008
Posts: 9,097
From: Portland, Or
ROTM Winner's Club
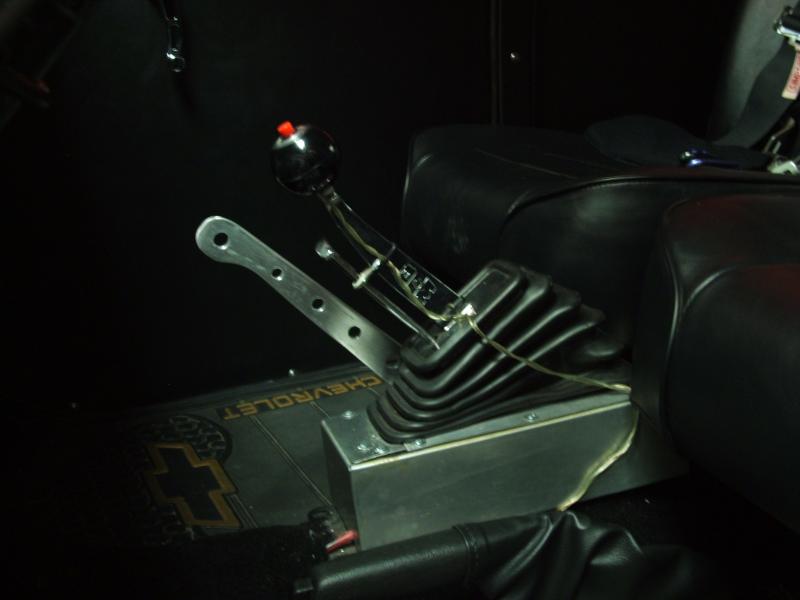
Got the chute all hooked up and tested it. Put a padlock on the bag loop, so the chute didn't open, then pulled the handle and the release opens it easily. While I had it off, I used the unibit to open the holes up slightly, so it's still strong, but looks better. What did we do before unibits?
Thread Starter
|
Second Generation Moderator
Feb 2010 ROTM winner
Jan 2013 ROTM winner
Feb 2010 ROTM winner
Jan 2013 ROTM winner
Joined: Aug 2008
Posts: 9,097
From: Portland, Or
ROTM Winner's Club
Been having some strange noises when starting the car, and replaced a starter that was kicking out recently. What was supposed to be a quick and easy day just checking the flexplate, turned into a nightmare of a day! I thought maybe I'd dress up any buggered teeth with a file or the dremel. Once I got the cover off all the teeth looked good until I got halfway around and saw one tooth missing!
I switched to pull the trans mode, and thought I could slip the flexplate out by moving the trans back an inch or so. Seems that's not so easy when you box yourself in building your trans tunnel!!!! I got everything so close that I could only access the two bottom bolts, and the other 4 were blocked.
Drop back and punt. I decided to walk down to the neighbor's house and measure the spacing on his BBC bellhousing. I drew up a diagram and headed back to lay it out on the tunnel, and drill large 1.25" holes with a holesaw to access the bolts from inside the car. Later I can make removeable covers for the holes. Got it all drilled, and got the bolts out. Moved the trans back 1.5" and got the crankshaft bolts out. Headed to the local Autozone, as they were the only place that had a flexplate in stock, and picked one up. Get it home and bolted up, then bolt the trans back up, and when I slide the torque converter forward to bolt in, the bolt pattern doesn't match!!!
My high stall converter is smaller and uses the inside pattern. The new flexplate has 6 holes, but all 6 are the same large pattern, not 3 of each like my old flexplate!! I removed the new flexplate and looked up another on Autozone's site, but too tired and disappointed to even think about it today. I'll head over tomorrow and take mine with me to see if they have anything that matches up to it.
Happy New Years!