So here it goes, my project thread (2nd gen)


 Thats exactly why. I want to hide the fact I didnt do body work and I dont have the money to finish it.
#972
 06-23-2013, 02:21 AM
What a day. I started this morning with a short block. I had to do so much to the already built motor I refuse to call this a rebuild. It all started with a freeze plug working out over the winter. After pulling a heap of savings from the hole I desided a teardown and clean were in order. Then I found that my rings had hung up in two and six and they werent spinning. Bummer! So I ordered a new set of rings after breaking one that was stuck. I still have no idea why this happened other then I may have been dirty while assembling. This was the first motor I ever stroked so the grinding I did got trash everywhere and the garage I built it in didnt have a compressor. I spent 75 buck on brake cleaner though. So this time I did a bunch of work to the block, opening the oil returns up and smoothing the flow of them. I also deburred the block inside and out. The results are smooth as silk valley walls.

I will get more pics tomorrow. They didnt upload for some reason.
I will get more pics tomorrow. They didnt upload for some reason.
#974
06-23-2013, 09:26 PM

Lookin' good! Gotta feel good to have the new rings and pistons back in there. Did you paint the valley to help the oil flow? I've seen other pics of engines that have the valley painted and I sort of thought that the paint might cause a problem down the road if it started to flake/peel off. I know you mentioned a good deal of brake cleaner but was just curious. Again, looks great sir.


#976
06-24-2013, 09:11 AM

Join Date: Aug 2008
Location: Portland, Or
Posts: 9,097
Lookin' good! Gotta feel good to have the new rings and pistons back in there. Did you paint the valley to help the oil flow? I've seen other pics of engines that have the valley painted and I sort of thought that the paint might cause a problem down the road if it started to flake/peel off. I know you mentioned a good deal of brake cleaner but was just curious. Again, looks great sir.
#977
06-25-2013, 11:46 AM
Yeah it was a flow back thing. I got bored waiting for parts and wanted to see what I could do. I removes the casting flash all the way down as well as radiused the drains to aid in flow. I also radiused the fronts were it goes through to the timing chain. I added a channel for the oil to flow off instead of the sharp corner that has to build up oil before it flows back. The paint is VHT. I have had oil on it for days now and it looks good still. The valley was also polished smooth first and a chamfer added to the center holes to drain faster. I have a high volume pump and I didnt want any chance of it sucking my pan dry. Its seven quart anyhow but I didnt plan on filling it with seven. The farther the oil is away from the crank the better the windage will be. What I have read I guess.
#978
06-25-2013, 11:59 AM
Here it is bolted in. Yeah!
IMG_20130623_015701_014_zps7cfe1955.jpg?t=1372092540
PROBLEM! I forgot to set the headers in the frame before hand. It doesnt help they are Camaro headers but I have tools and a welder. It will go!
IMG_20130623_204710_393_zpsb788b4b4.jpg?t=1372093782
GAWD DAMMMIT!
Here we go again! Hammer time!
IMG_20130623_211428_702_zps08f0923b.jpg?t=1372093951
It got much better after I put the tranny mount in. At least 1/8".
IMG_20130623_211435_511_zpsfb30989b.jpg?t=1372094650
As you can see my shifter rods I made are still not on. I didnt drill deep enough and the heim is out too far for me to be comfortable. They are still going on later..
IMG_20130623_233614_023_zps0670206d.jpg?t=1372098462
Left it here due to rain. Its coming down in buckets. I did get lucky, the ball for the zbar doesnt line up with the zbar. BUT, the scattershield had the mount in it for Corvette ( I think) mounting. There is literaly a spot to bolt it to the side of the bellhousing. Saved by luck.
#979
07-27-2013, 10:01 AM
Well I have not updated in a bit but the truck is running. Spent an entire week building an exhaust for it. I dont know if I'll ever do that again. I picked up a Flowtech X pipe in 2.5" and cut up a perfectly good exhaust that was on the truck. The tail pipes were within a few inches of my fuel cell an I just wasnt comfortable with it. Im sure it wouldnt have melted but the heated fuel isnt going to help me either.
Heres a good way to make things level and straight... and getto as heck too!
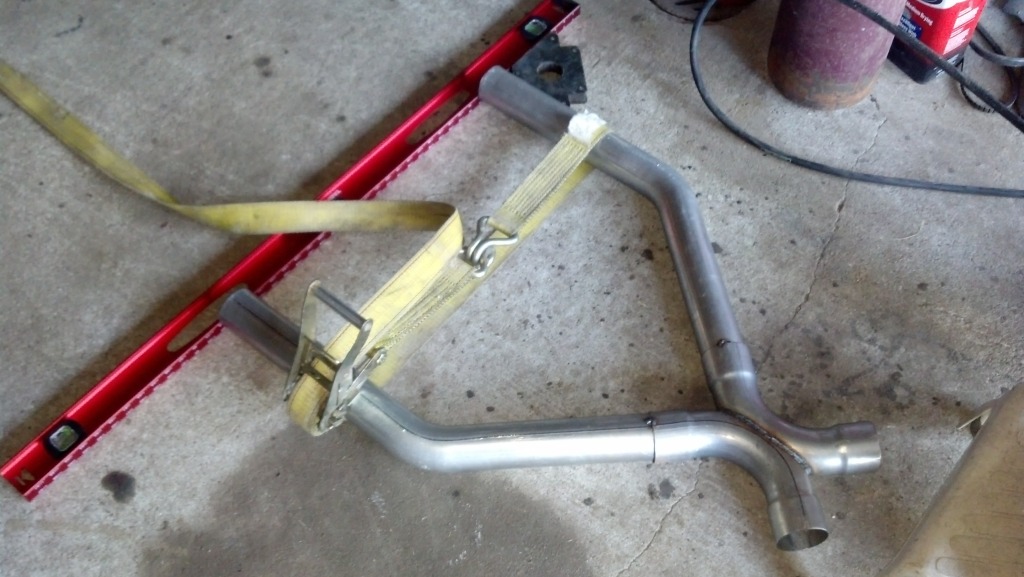
Right in the middle of all this I ran out of argon. So I had to teach myself to use flux core wire. But I managed to get through it after reading the inside lid. It turns out I needed no heat at all to make good welds. I lie. I cant weld with this crap!

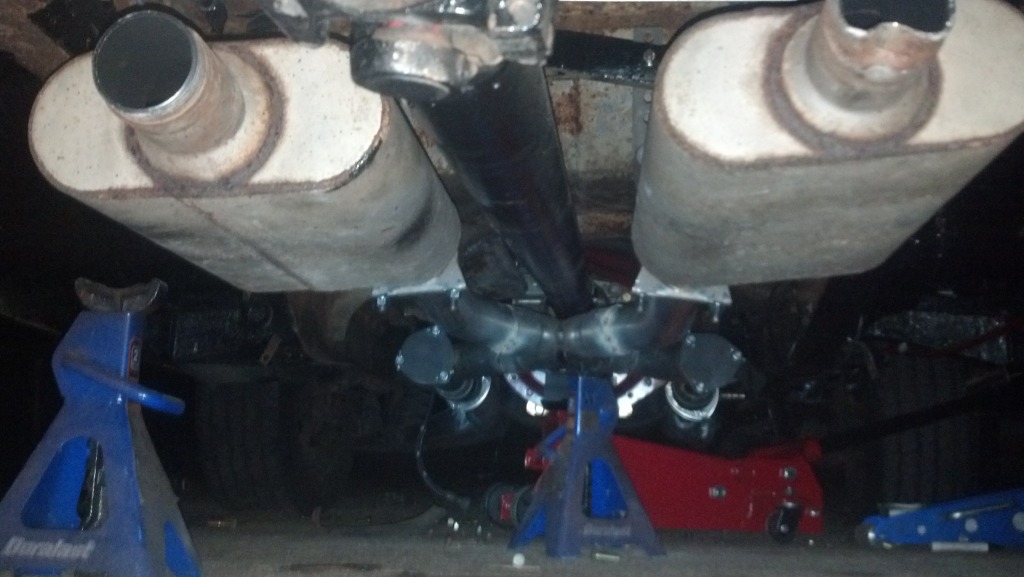
In the end I got it all done and it looks ok. It tucks up under so I can slam the truck without worry of dragging pipes. The muffs are flush with the pinch weld. But I had to improvise when it came to hooking to the headers. They arent exactly pointed in the right direction so I used stainless flex pipes to make up for my alignment issues.
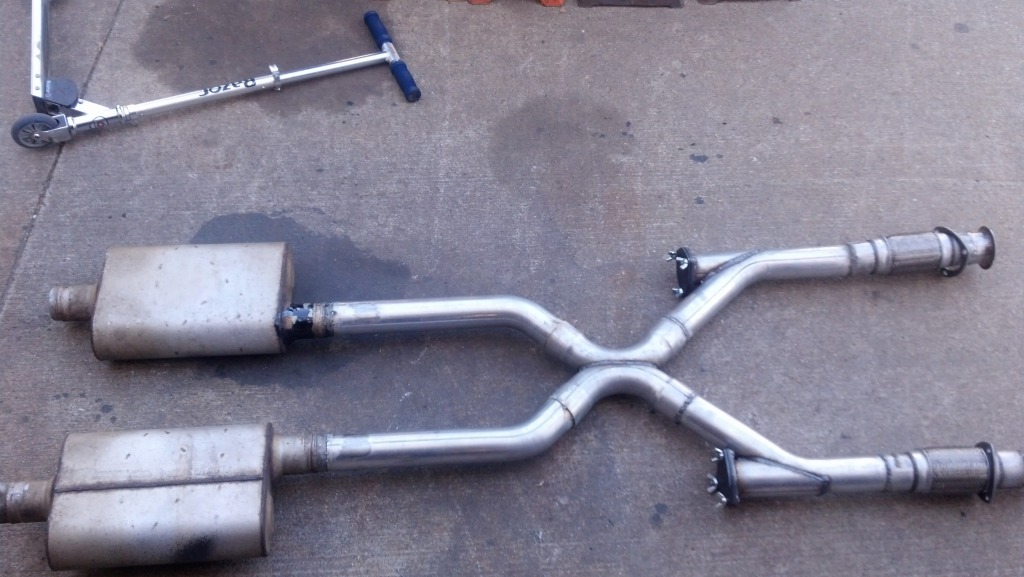
Here is the last pic I took before pulling it back off for the last (and 50th) time. I did fix the clocking on the right side. It was just tacked at this point.
Now I need to finish my trans crossmember. I whipped one up with general measurements that turned out just too small to fit around the trans. So I may get one from TransDapt. 70 Bucks and its exactly what I want.
Heres a good way to make things level and straight... and getto as heck too!
Right in the middle of all this I ran out of argon. So I had to teach myself to use flux core wire. But I managed to get through it after reading the inside lid. It turns out I needed no heat at all to make good welds. I lie. I cant weld with this crap!
In the end I got it all done and it looks ok. It tucks up under so I can slam the truck without worry of dragging pipes. The muffs are flush with the pinch weld. But I had to improvise when it came to hooking to the headers. They arent exactly pointed in the right direction so I used stainless flex pipes to make up for my alignment issues.
Here is the last pic I took before pulling it back off for the last (and 50th) time. I did fix the clocking on the right side. It was just tacked at this point.
Now I need to finish my trans crossmember. I whipped one up with general measurements that turned out just too small to fit around the trans. So I may get one from TransDapt. 70 Bucks and its exactly what I want.
#980
07-27-2013, 08:52 PM
Join Date: Aug 2008
Location: Portland, Or
Posts: 9,097
Looks like the muffler on the right has a big old ding in the outlet tube!!!!
I usually build mine from kits, even if there's no kit for the particular vehicle I'm working on. When I did the exhaust for the 464 BBC in my Falcon, I bought a Jegs kit for a late 60's Chevelle, and just cut things up and made it all fit my application. Only cost $159 for the whole kit, plus it came with a lot of clamps, hangers, and pieces that I made work for places I needed to hang it. Didn't use any of the U clamps to connect tubing, but did use them for hangers.
Did you swap polarity on your welder when you switched to flux core? Need to do so to get any kind of decent weld.