The "Slow but Steady" '78 Project Build
#691
 11-23-2013, 10:44 AM


Val, you have a Hurst Comp Plus dont you? Mine is "home" in the 3-4 position. I have to apply slight pressure toward my leg to over come the spring inside on the 1-2 shift, that keeps mine in the 1-2 side. Then when I hammer 3rd it a jab forward as hard as I can. The spring in the shifter throws it over into the 3-4 side as fast as I can push it forward. Reverse is a solid forceful push toward my leg and up. No pulling up on the stick though. The ITM shifter had to be pushed down I think but pull up is new to me. Anyhow getting the second lever for reverse is cool.
#692
11-23-2013, 10:57 AM

Join Date: Jul 2011
Location: Northern Michigan
Posts: 992
Yes, his skills are limited, but he's always been a car guy. That's always puzzled me also. In the many years I've known him he's always paid someone to do his mechanical work. What brought it all to a halt was his business closing in recent years due to the economy, and paying a local builder a bunch of money to do the chassis on his '35 Plymouth coupe, which turned out horrible. I was looking at the coupe when they brought it home to finish the body work, and began pointing out things that were not only wrong, but unsafe. I told him he could do better himself, and not pay someone to do work he needed to redo.
He's not totally unable to do mechanical work, but needs guidance to show him what and how it's done. I have had resistance from him on learning to weld, as he just seems to think he can't get the hang of it. But if I tell him what needs to be done mechanically, and show him how it's done, then he jumps right in and does it. He's still very apprehensive about engine work also. Things like a cam change, or timing set really scare him.
We got things to a point yesterday where he's got at least a week of cleaning/painting before I can go back and show him how to assemble it, so I'll get started on the Falcon now.
I should probably just keep quite since it's none of my business, it just seems a little odd to have that much interest in building these cars and not know how to/want to do any of the work. Apologies in advance if this is brash or offensive. It certainly appears as if: A self confidence boost is needed, he's still stuck in "delegate work mode" as a prior business owner or REALLY slick at manipulation. Either way, kudos to him for successfully managing to get these cars built and kudos to you for being so generous with your time, skills and (most likely) tools sir!
Damon, the kit only comes with 4 steels for the direct. I sanded an old one and used that as it was still in good shape. You must be talking about the 2-3 accumulator in the vb? I removed the spring and put a spacer in to block mine also. I left 2 check ***** in and took 2 out. I left the 1-2 alone and just put the spring back in. Hopefully you've got the bushings that you need, should only need 1 extra sungear bushing plus 1 extra for the stator shaft. Still haven't found a waved plate yet?
#693
11-23-2013, 11:52 AM
Wait? The sun gets four correct? And yes i meant 2-3. I found only the one and I'm not certain they have it. the website says they do. I'm not gonna pay $20 for it. I have a guy at work with a whole trans for $50. I'll most likely go that route.
So let me get this right. They sold me 10 clutches and 9 steels on purpose?
I'll send you pics in a bit. I have dont remember him putting an extra in the stator. Right now I have two bushings in one side of the sun. I thought he was putting two in each side.
So let me get this right. They sold me 10 clutches and 9 steels on purpose?
I'll send you pics in a bit. I have dont remember him putting an extra in the stator. Right now I have two bushings in one side of the sun. I thought he was putting two in each side.
Last edited by 77nomad; 11-23-2013 at 11:57 AM.
#694
11-24-2013, 09:40 PM

Join Date: Aug 2008
Location: Portland, Or
Posts: 9,097
Val, you have a Hurst Comp Plus dont you? Mine is "home" in the 3-4 position. I have to apply slight pressure toward my leg to over come the spring inside on the 1-2 shift, that keeps mine in the 1-2 side. Then when I hammer 3rd it a jab forward as hard as I can. The spring in the shifter throws it over into the 3-4 side as fast as I can push it forward. Reverse is a solid forceful push toward my leg and up. No pulling up on the stick though. The ITM shifter had to be pushed down I think but pull up is new to me. Anyhow getting the second lever for reverse is cool.
I know some people don't like ITM, but I've always loved them. I haven't been around a worn out ITM, but mine is totally rebuilt, and feels just like they did when new in the early 70's. They're a little stronger than a Hurst with their much larger shifter rods, so less flex when you're really banging gears.
#695
11-24-2013, 09:47 PM
Join Date: Aug 2008
Location: Portland, Or
Posts: 9,097
I should probably just keep quite since it's none of my business, it just seems a little odd to have that much interest in building these cars and not know how to/want to do any of the work. Apologies in advance if this is brash or offensive. It certainly appears as if: A self confidence boost is needed, he's still stuck in "delegate work mode" as a prior business owner or REALLY slick at manipulation. Either way, kudos to him for successfully managing to get these cars built and kudos to you for being so generous with your time, skills and (most likely) tools sir!
He's gotten previous cars built by just writing checks. Unfortunately his business failed, and he still has the urge, so I'm helping him. I do get him to come give a hand whenever I need some muscle. He's not afraid of work, just afraid of doing any that's complicated by his standards. No confidence when it comes to technical stuff.
#696
11-30-2013, 09:36 PM
Join Date: Jul 2011
Location: Northern Michigan
Posts: 992
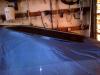
Here's the pics of the tank installed, not very exciting, but as promised. I stuck a filter on the end of the vent hose and hung it up with a old leftover fuel line clamp. Is that what you were saying to do Vall? Now, any suggestions on where I should mount this Fram-esque canister filter back there? I'm a bit stumped on where to put it. Not necessarily looking to show it off or anything, but the only place that looks good and out of the way of exhaust would be off the tail panel. If I mount it on the frame rail, it might be in the way of exhaust and is awful close to the wheel well. I'm not liking that spot too much. Again, any suggestions would be superb!
#697
11-30-2013, 09:47 PM


Join Date: Oct 2007
Location: The 'Burbs of Chicago
Posts: 18,306
Tank looks perty! You're not running the gas line to the front in rubber, are you? That would be a flaming hot accident waiting to happen. I presume that's just for the vent.
Last edited by Camaro 69; 11-30-2013 at 09:49 PM.
#698
11-30-2013, 11:14 PM
Join Date: Jul 2011
Location: Northern Michigan
Posts: 992
No sir, that's a pic of the filter on the end of the vent hose like I was mentioning to Vall. I have braided stainless fuel line to run up front after I get the filter mounted back by the tank. Haven't been home this week and I finally got out to get the bumper put back on that was sitting in the middle of the garage. Never got a chance to take pics of the tank installed so I finally did today. Trying to figure out where to mount this canister, or where other people have mounted it.
#700
12-01-2013, 07:57 AM

Uncle BoB