
Installing a LS1 in my 1977 Camaro


Thread Starter
|
July 2011 ROTM
Joined: Dec 2009
Posts: 153
ROTM Winner's Club
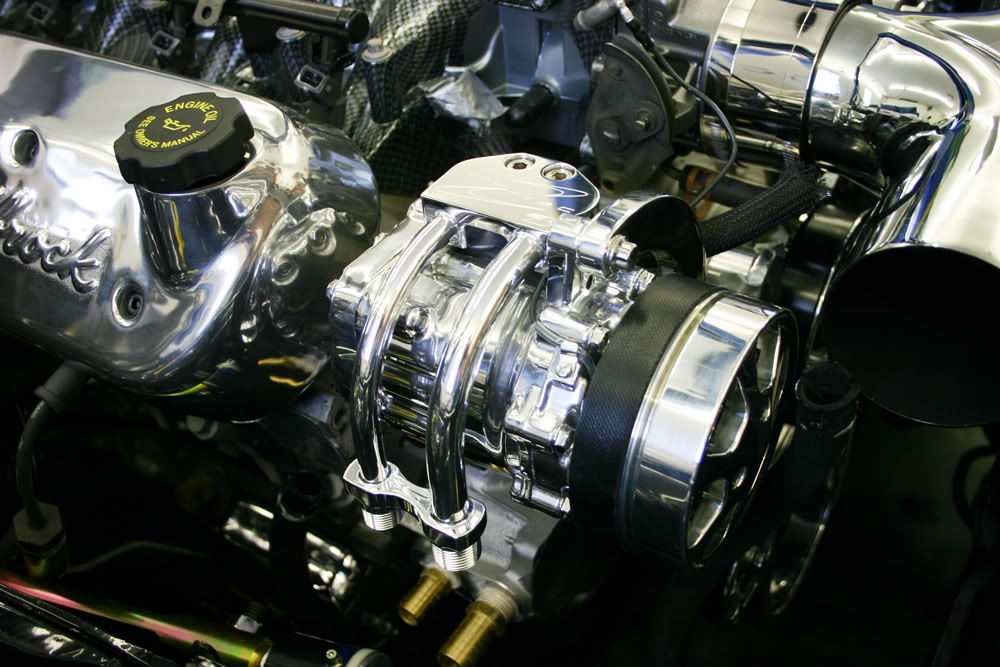
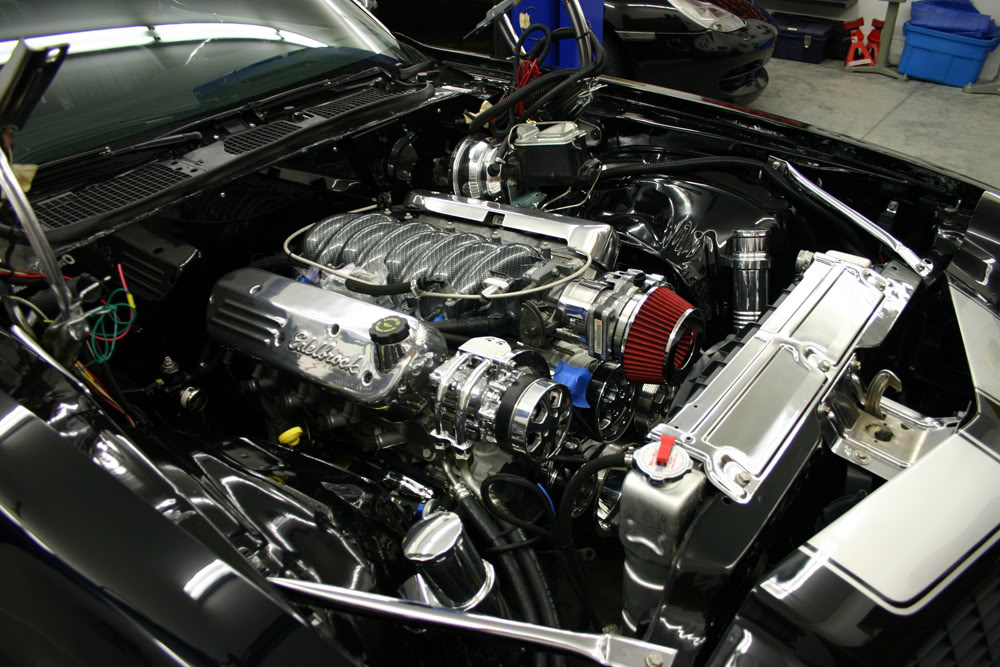
Had a good day today!! I had a Billet Specialties front runner kit on my old motor. When I looked at their front runner kit for the LS motor, I noticed that the compressor and the power steering pump were in basically the same locations as on my small block. With any luck, my existing lines would work.
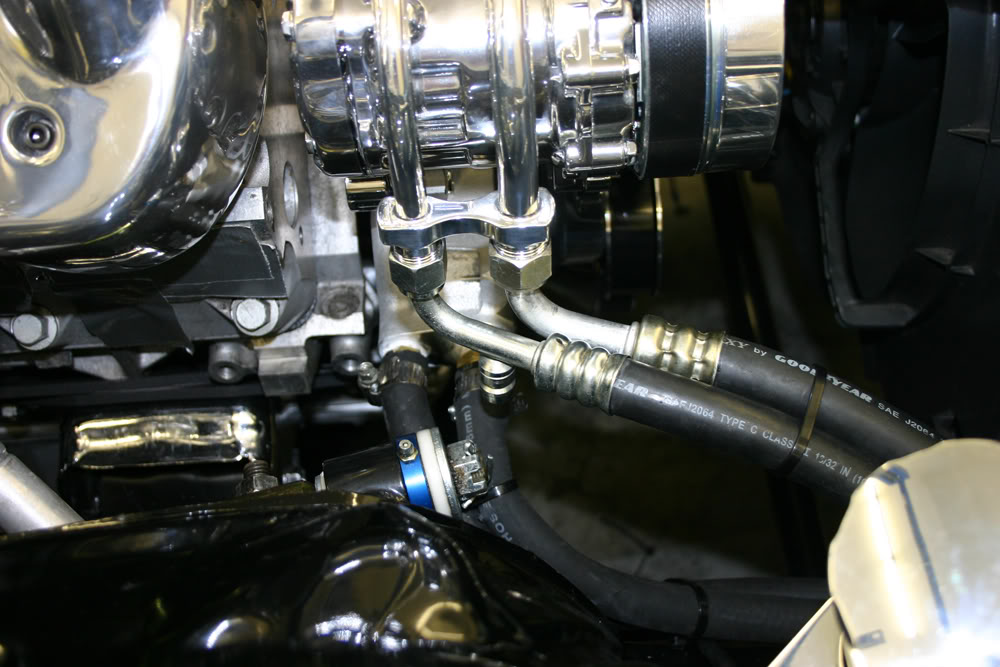
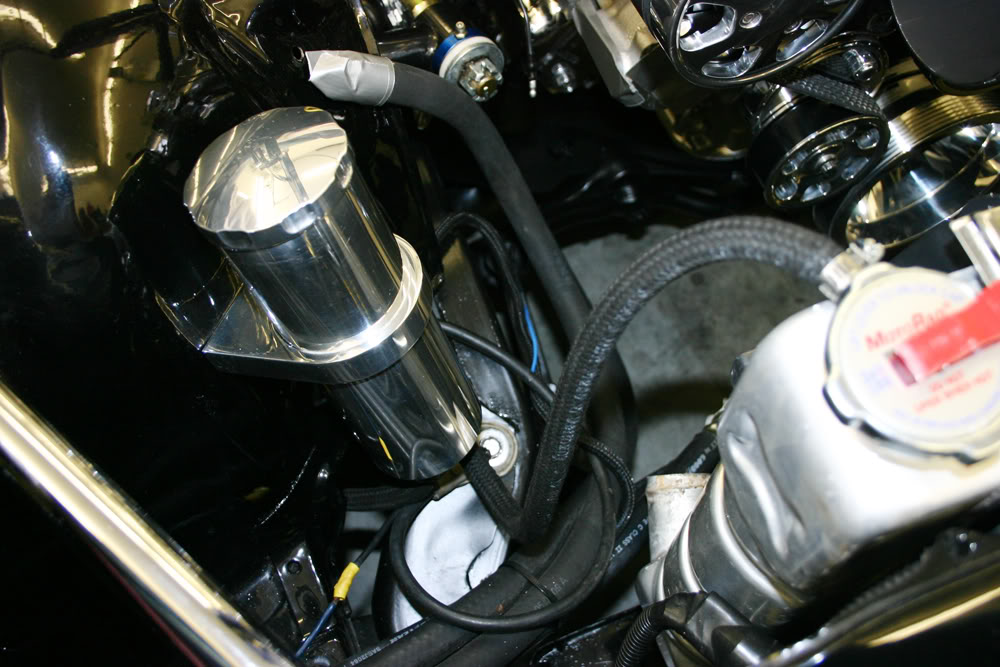
They did!! Based on a discussion with Billet Specialties, I was pretty sure my AC lines would fit. The PS lines were more of a question mark. The reality was that they fit perfectly. Major victory here. The remote reservoir and the lines fit exactly as they did on the old motor.
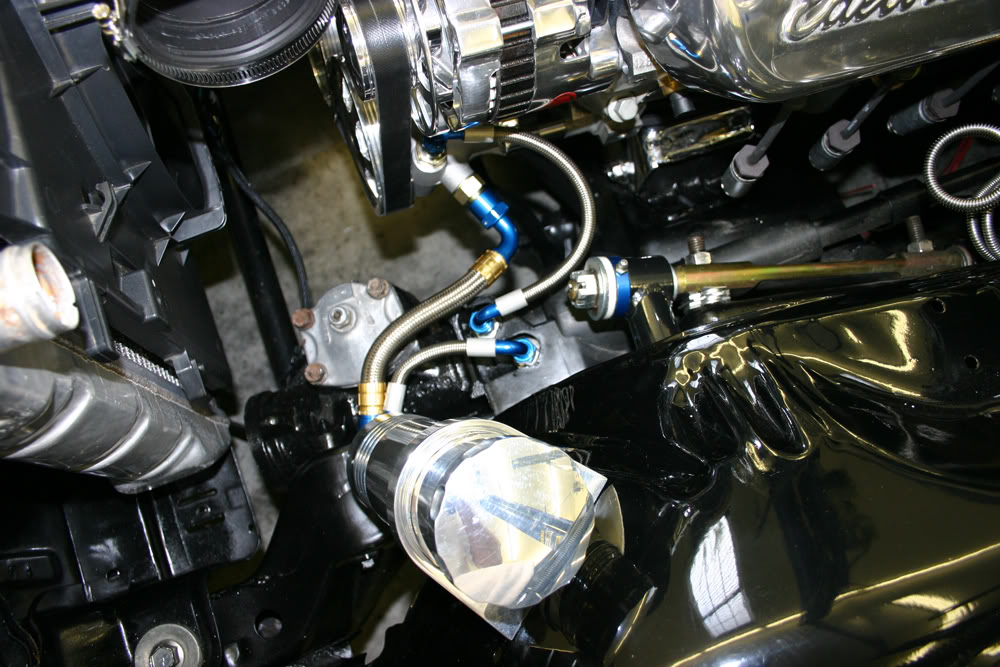
One of the key features I really like on the Billet Specialties front runner is the AC manifold that places the hookup for the lines near the bottom of the compressor. Because of this, you do not have the lines conspicuously placed on the top of the motor. This allowed me to run my AC and heater hose lines above the inner fender liner under the fender to keep the engine bay clear. The lines fit as I guessed they would.
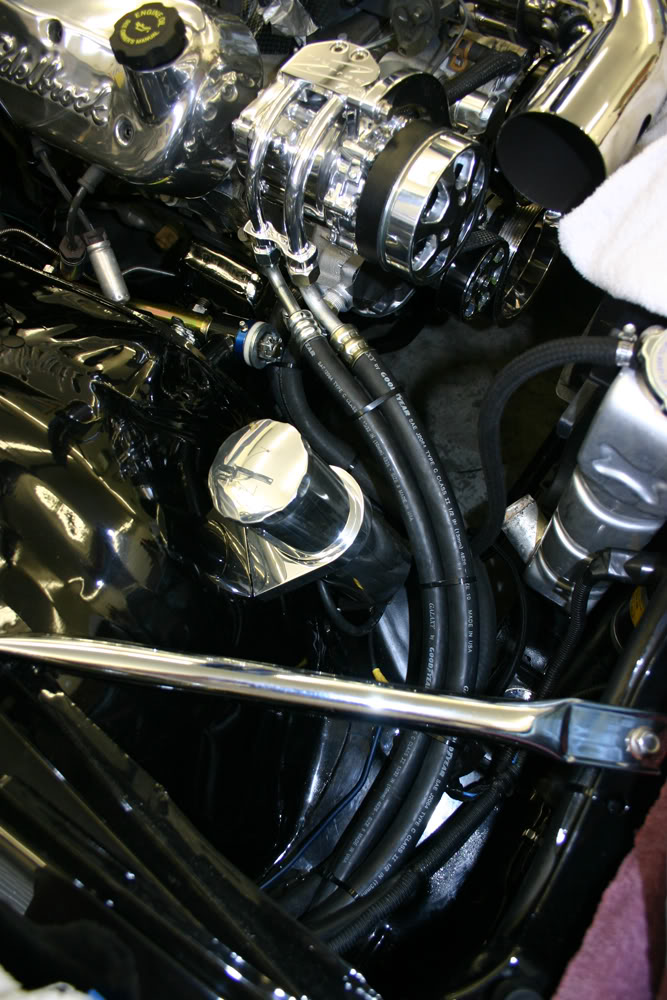
Because the heater hose hookup location is quite a bit different, I had to cut off about 6" of each line to make them work. Even cleaner installation here than on the old motor where the hookups were on top of the water pump.

I also re-installed the radiator overflow tank and line.
Some research showed that to make my existing fuel lines work, I would need to change the fuel rail. One is on the way.
I got a lot done today.
They did!! Based on a discussion with Billet Specialties, I was pretty sure my AC lines would fit. The PS lines were more of a question mark. The reality was that they fit perfectly. Major victory here. The remote reservoir and the lines fit exactly as they did on the old motor.
One of the key features I really like on the Billet Specialties front runner is the AC manifold that places the hookup for the lines near the bottom of the compressor. Because of this, you do not have the lines conspicuously placed on the top of the motor. This allowed me to run my AC and heater hose lines above the inner fender liner under the fender to keep the engine bay clear. The lines fit as I guessed they would.
Because the heater hose hookup location is quite a bit different, I had to cut off about 6" of each line to make them work. Even cleaner installation here than on the old motor where the hookups were on top of the water pump.
I also re-installed the radiator overflow tank and line.
Some research showed that to make my existing fuel lines work, I would need to change the fuel rail. One is on the way.
I got a lot done today.
Thread Starter
|
July 2011 ROTM
Joined: Dec 2009
Posts: 153
ROTM Winner's Club
Don't know about that but I sure appreciate the comment.
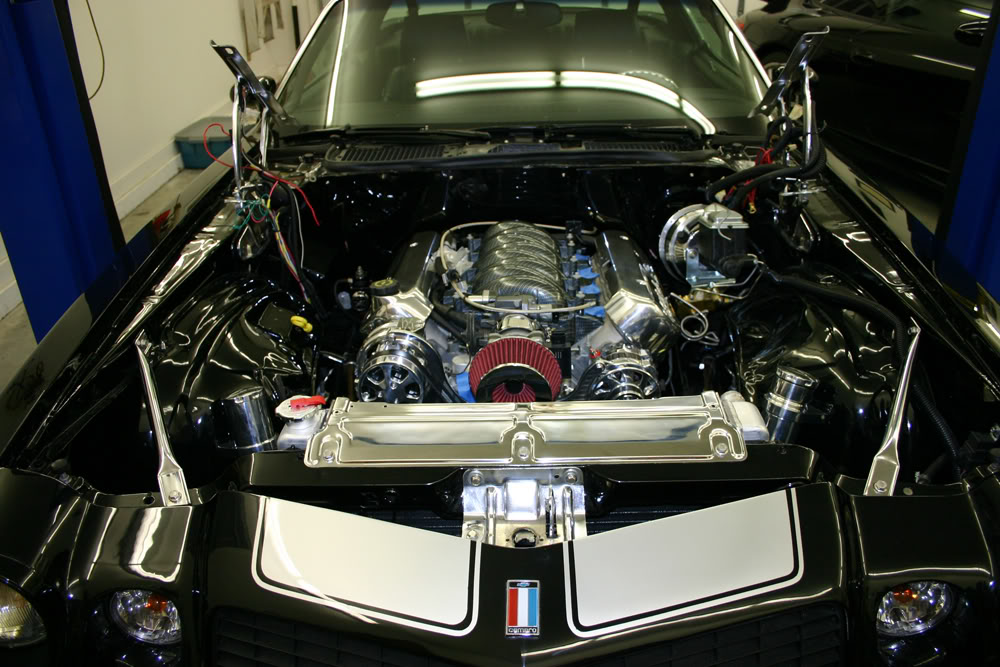
The photo above says it all for recent activity. Some other things had to be done so no car work for a few days. As of the last post, I was waiting for the new fuel rails. Not here yet.
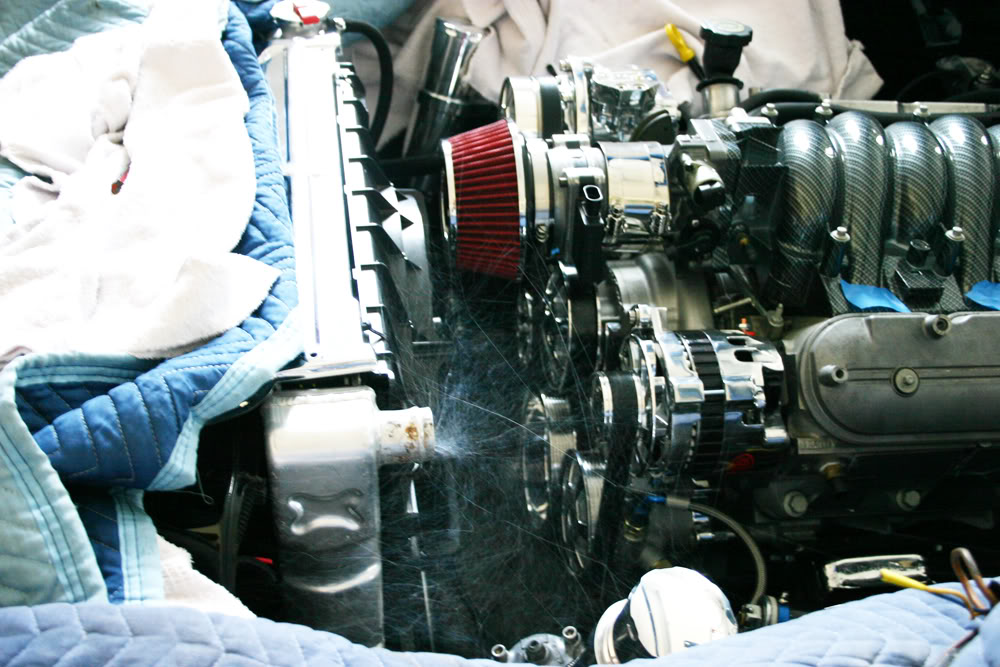
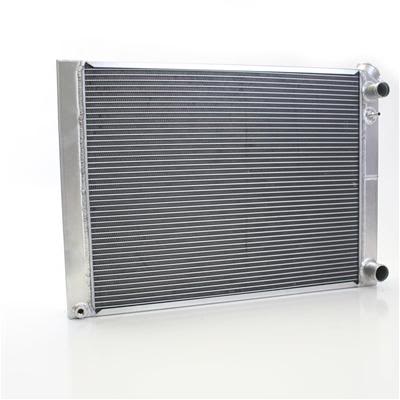
I did get the spacer for the throttle body, but, while it did solve the clearance problem with the compressor, on the other end the filter sat exactly where I needed to put the radiator hose. In searching for an answer to this problem, I discovered that I will need a different radiator. The LS radiator hose sizes are different from the SBC. I have a Griffin radiator coming that has both of the hose hookups on the passenger side. It also has provisions for hooking up the steam release hose.
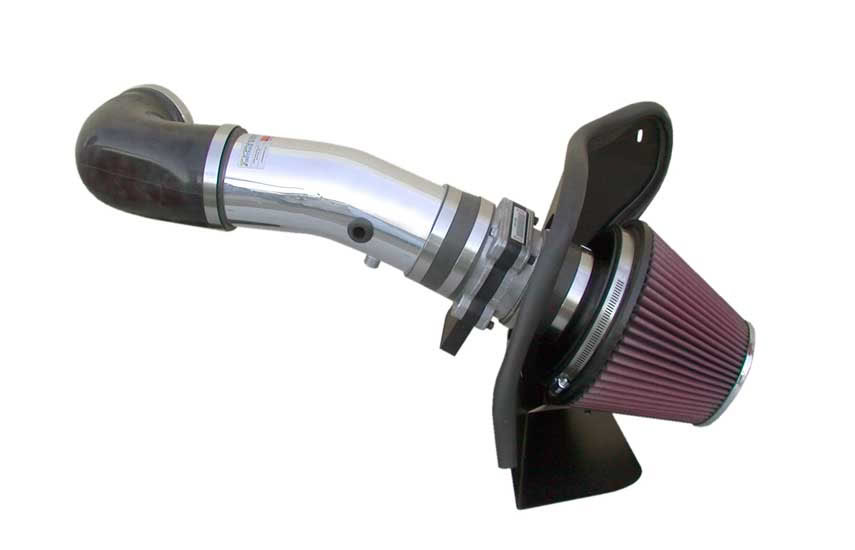
The downside is that all of these hookups preclude any intake going to the passenger side. I have had to give up on the twin snorkel. I was at Autozone and found a very small filter. I did mount it, but I am afraid it will not flow enough air.
Plus, according to my son, the MAF works best when the air has some distance to flow into the throttle body after the MAF. I have a K & N intake designed for late model GTO's on the way.
The car is going to Kooks Custom Headers in Statesville, NC on June 27th. So I have been getting the car ready to be transported by securing the wires and installing the Z-bar. I am still waiting for the Z-Bar ball adapter that mounts to the bellhousing. It has been over 8 weeks. The guy says he has 12 people waiting for them. Their supplier keeps telling them they will be shipped but, as of today, still no adapter.
I sold my old clutch to a guy in south Charlotte. He asked if I had anything else and I mentioned that I had removed the Competition Engineering Slide-a-Link traction bars. He is a drag racer and was interested in them. I told him that the rear mounts that doubled as the lower spring plate and shock mount were still on the car. He said he had a set of stock plates which he sent to me.
The traction bar plates had the left rear shock mounted inside the spring. It was in kind of a strange position and rubbed on the exhaust. The stock plates place both shocks outside the spring. I mounted the right plate first and everything bolted in place as it should.
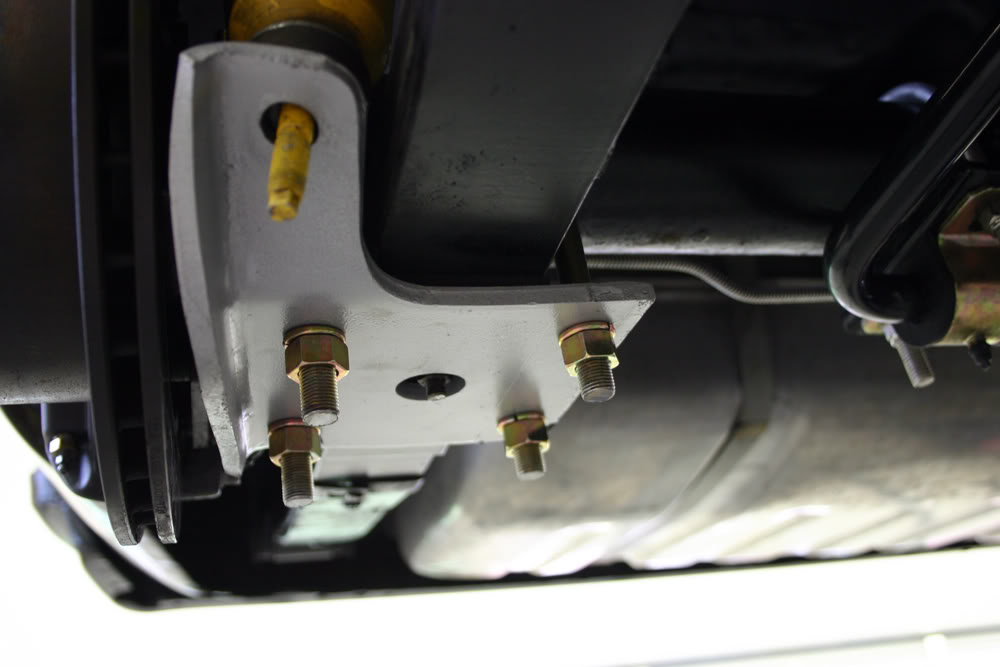
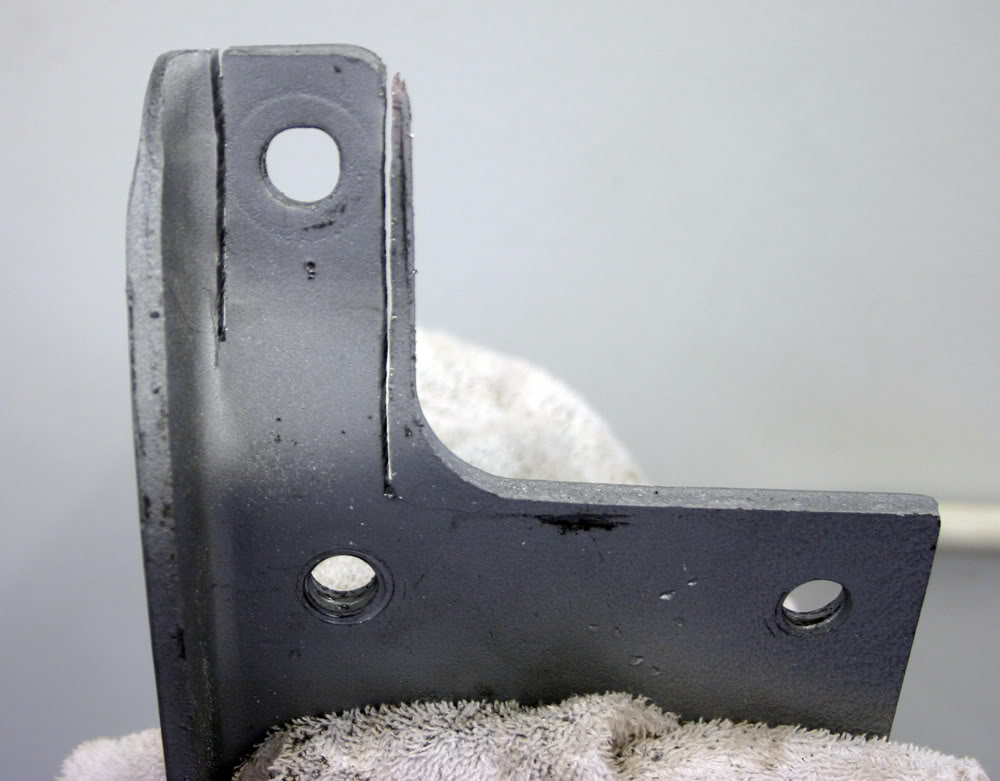
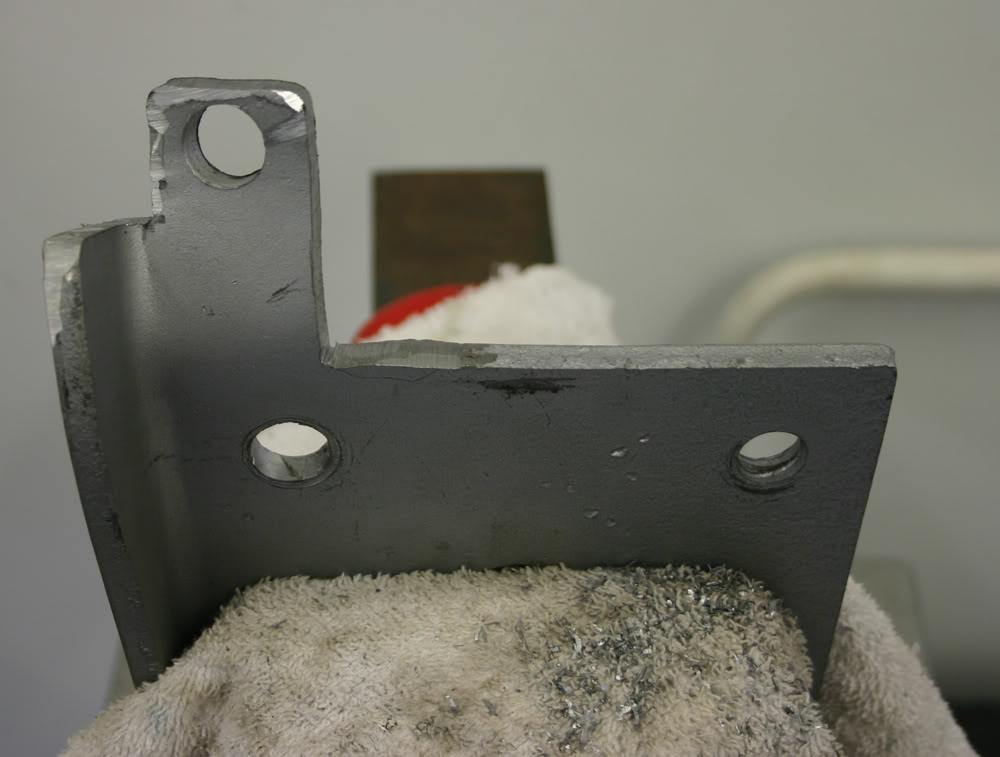
When I tried to mount the left plate, I had interference problems with the brake caliper. I assume this was because the car did not originally have rear disc brakes. I had to do some custom work on that piece to make it work. I am glad I did this before they fit the exhaust as the location of that left shock was strange.
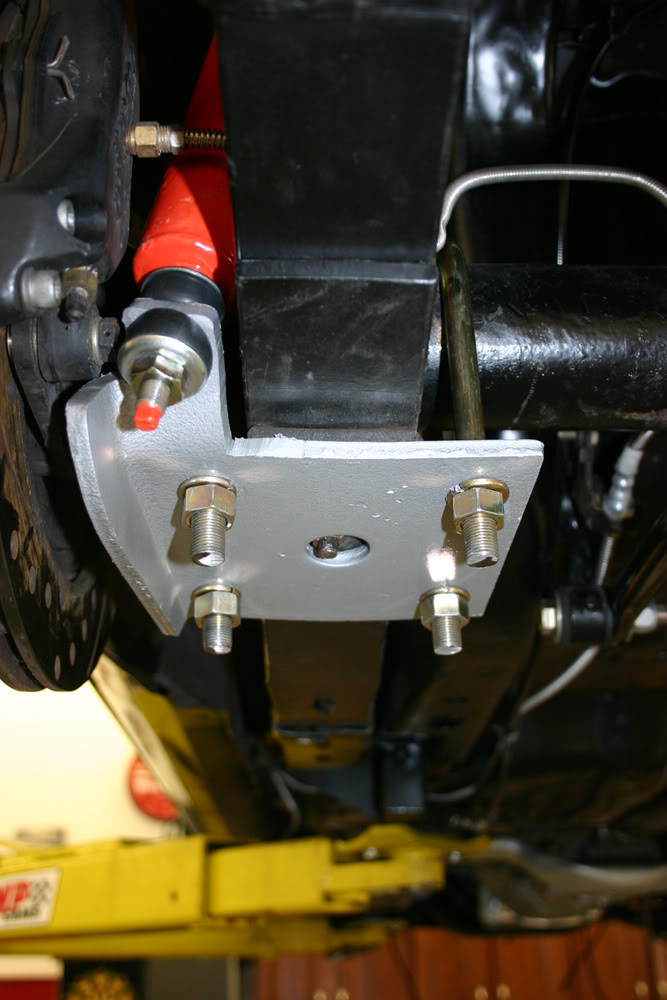
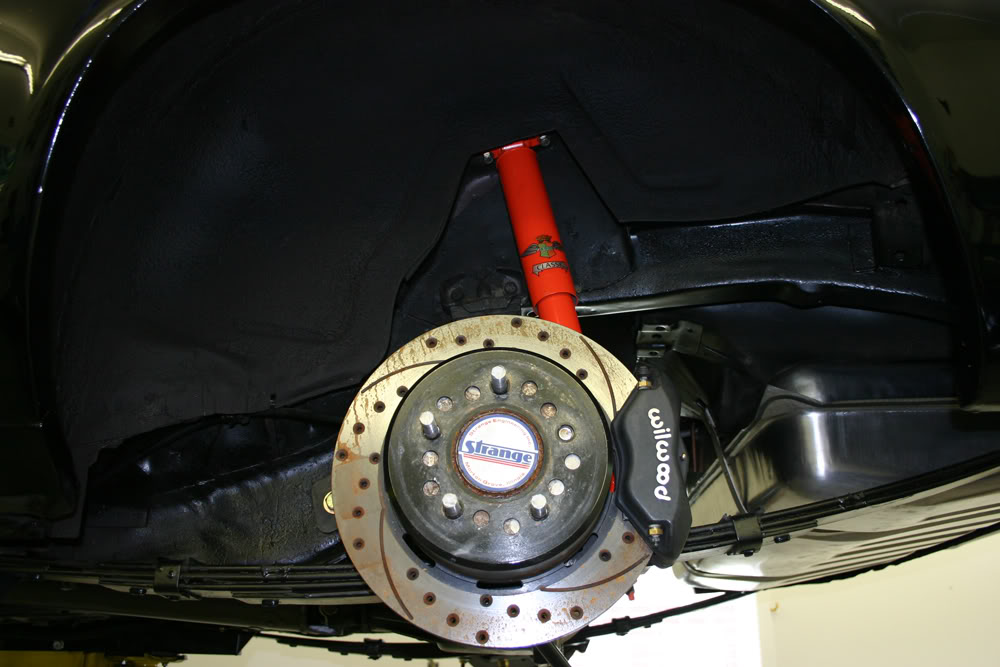
I also installed a set of Koni shocks. I have used Koni's for years and prefer them to other shocks. One advantage to these shocks compared the Bilsteins that I removed is that they are not as big around. I needed that extra clearance on the left side to clear the brake line. It will be interesting to see if there is any difference in the shocks as well as having the shock back in its stock location.
I cleaned up the car today and it is ready to get some headers and exhaust next week. They will have the car for 2-3 weeks so I will have some time to do some other projects around the house.
The photo above says it all for recent activity. Some other things had to be done so no car work for a few days. As of the last post, I was waiting for the new fuel rails. Not here yet.
I did get the spacer for the throttle body, but, while it did solve the clearance problem with the compressor, on the other end the filter sat exactly where I needed to put the radiator hose. In searching for an answer to this problem, I discovered that I will need a different radiator. The LS radiator hose sizes are different from the SBC. I have a Griffin radiator coming that has both of the hose hookups on the passenger side. It also has provisions for hooking up the steam release hose.
The downside is that all of these hookups preclude any intake going to the passenger side. I have had to give up on the twin snorkel. I was at Autozone and found a very small filter. I did mount it, but I am afraid it will not flow enough air.
Plus, according to my son, the MAF works best when the air has some distance to flow into the throttle body after the MAF. I have a K & N intake designed for late model GTO's on the way.
The car is going to Kooks Custom Headers in Statesville, NC on June 27th. So I have been getting the car ready to be transported by securing the wires and installing the Z-bar. I am still waiting for the Z-Bar ball adapter that mounts to the bellhousing. It has been over 8 weeks. The guy says he has 12 people waiting for them. Their supplier keeps telling them they will be shipped but, as of today, still no adapter.
I sold my old clutch to a guy in south Charlotte. He asked if I had anything else and I mentioned that I had removed the Competition Engineering Slide-a-Link traction bars. He is a drag racer and was interested in them. I told him that the rear mounts that doubled as the lower spring plate and shock mount were still on the car. He said he had a set of stock plates which he sent to me.
The traction bar plates had the left rear shock mounted inside the spring. It was in kind of a strange position and rubbed on the exhaust. The stock plates place both shocks outside the spring. I mounted the right plate first and everything bolted in place as it should.
When I tried to mount the left plate, I had interference problems with the brake caliper. I assume this was because the car did not originally have rear disc brakes. I had to do some custom work on that piece to make it work. I am glad I did this before they fit the exhaust as the location of that left shock was strange.
I also installed a set of Koni shocks. I have used Koni's for years and prefer them to other shocks. One advantage to these shocks compared the Bilsteins that I removed is that they are not as big around. I needed that extra clearance on the left side to clear the brake line. It will be interesting to see if there is any difference in the shocks as well as having the shock back in its stock location.
I cleaned up the car today and it is ready to get some headers and exhaust next week. They will have the car for 2-3 weeks so I will have some time to do some other projects around the house.
Last edited by jerhofer; Jun 23, 2011 at 10:31 PM.

Overdrive Member
Joined: Nov 2009
Posts: 4,848
From: off the grid
I have the same interference problem on my passenger side shock. I haven't decided what I want to do yet but what you did is similar to what I had thought of. I need to redrill the hole farther away though.
Oh yeah. I stand by my previous statement. Very nice car.
Oh yeah. I stand by my previous statement. Very nice car.
Thread Starter
|
July 2011 ROTM
Joined: Dec 2009
Posts: 153
ROTM Winner's Club
I also had to re-drill the hole. The brake line to the caliper was in the way in the original hole location. I have lost some strength with this modification, but it is a pretty stout piece of steel. Amazingly, once I removed all the gunk and paint on the mounts, there was no rust.

Second Generation Moderator
Feb 2010 ROTM winner
Jan 2013 ROTM winner
Feb 2010 ROTM winner
Jan 2013 ROTM winner
Joined: Aug 2008
Posts: 9,097
From: Portland, Or
ROTM Winner's Club
I've seen people cut the shock mount tab off and relocate it to the front of the spring plate on disc brake swaps. Seems to be a pretty common issue when folks swap discs on a 2nd Gen Camaro. I actually like the idea of both shocks being in front of the axle to do a better job of traction control.
Thread Starter
|
July 2011 ROTM
Joined: Dec 2009
Posts: 153
ROTM Winner's Club
I've seen people cut the shock mount tab off and relocate it to the front of the spring plate on disc brake swaps. Seems to be a pretty common issue when folks swap discs on a 2nd Gen Camaro. I actually like the idea of both shocks being in front of the axle to do a better job of traction control.
Second Generation Moderator
Feb 2010 ROTM winner
Jan 2013 ROTM winner
Feb 2010 ROTM winner
Jan 2013 ROTM winner
Joined: Aug 2008
Posts: 9,097
From: Portland, Or
ROTM Winner's Club
I actually think the design was supposed to increase handling. Since the pinion nose tries to rise under acceleration having both shocks in front would be a bit better for traction control.
Overdrive Member
Joined: Nov 2009
Posts: 4,848
From: off the grid
I thought it was for traction too. The stagger helps wheel hop. I know our car hop like crap and how, but. If you think of it as one tire pushes and hops then the other. One shock on each side puts a load on either side to control that. Then you look at a drag car it has them on the same side rather close together. I think that is because the weight transfer is dialed in and hop isn't a issue. They want to be able to control the rise in the front. If one side is lifting faster that the other then preload can be added to the opposite side.
I honestly am not as smart with suspension as I should be, so these are just my thoughts. I have nothing to back up either statement.
I honestly am not as smart with suspension as I should be, so these are just my thoughts. I have nothing to back up either statement.