


632ci engine installation in 78 camaro


Thread Starter
|
2nd Gear member
Joined: Nov 2013
Posts: 397

Nice set up too. I was thinking of doing the cross member from one frame rail to the other but not to mount the shock, just to strengthen both frame rails together. Make sense?
I'd also sandwich it to the frame rails, and the floor pan, which would really tie it all together, and make a great setup.
And to where the floor pan is sandwiched, I can use this location to mount the rear roll cage bars. So I have one center point of force area.
Why is the shock angle an important factor?
I'd also sandwich it to the frame rails, and the floor pan, which would really tie it all together, and make a great setup.
And to where the floor pan is sandwiched, I can use this location to mount the rear roll cage bars. So I have one center point of force area.
Why is the shock angle an important factor?
Second Generation Moderator
Feb 2010 ROTM winner
Jan 2013 ROTM winner
Feb 2010 ROTM winner
Jan 2013 ROTM winner
Joined: Aug 2008
Posts: 9,097
From: Portland, Or
ROTM Winner's Club
Nice set up too. I was thinking of doing the cross member from one frame rail to the other but not to mount the shock, just to strengthen both frame rails together. Make sense?
I'd also sandwich it to the frame rails, and the floor pan, which would really tie it all together, and make a great setup.
And to where the floor pan is sandwiched, I can use this location to mount the rear roll cage bars. So I have one center point of force area.
Why is the shock angle an important factor?
I'd also sandwich it to the frame rails, and the floor pan, which would really tie it all together, and make a great setup.
And to where the floor pan is sandwiched, I can use this location to mount the rear roll cage bars. So I have one center point of force area.
Why is the shock angle an important factor?
Shock angle has a lot to do with how the suspension works, and can help in tuning ride and handling. A straight up shock works to put more weight directly on a coilover, so if the ride is a little stiff it can be lessened by adding a slight angle. Sometimes you can't dial in the proper spring rate, and ride, and get the height you want. So being able to adjust angle will give the car one more dimension of adjustment, and allow it to be fine tuned further. It's also so inexpensive to add multiple mounting holes, that it's a no brainer.
I did 632 Aluminum block with aluminum heads in 68 Camaro. I love it. Lots and lots of work as the tall deck makes all the pullies just not quite fit. Also the hood situation is tough unless you want a huge 4" scoop. keeping it cool was tough, tough, tough.
I love the 632 at the track. Raw engine hp is awesome.
I love the 632 at the track. Raw engine hp is awesome.
Thread Starter
|
2nd Gear member
Joined: Nov 2013
Posts: 397
I did 632 Aluminum block with aluminum heads in 68 Camaro. I love it. Lots and lots of work as the tall deck makes all the pullies just not quite fit. Also the hood situation is tough unless you want a huge 4" scoop. keeping it cool was tough, tough, tough.
I love the 632 at the track. Raw engine hp is awesome.
I love the 632 at the track. Raw engine hp is awesome.
The 572 is dart block and dart aluminium heads. Well engine not bought yet but saving money for it
Hood - I already bought the fiber glass hood with a 6" cowl, so the intake has a plenty of room.
Cooling - The engine builder recommended me Ron Davis Radiator dual row, dual pass with 13" and 14" SPAL fans. Should not be an issue - will see. Radiator on the way and will be here within 2 months.
Do you have any pictures of the engine bay?
What rear end you have and what ratio and tyres?
Thread Starter
|
2nd Gear member
Joined: Nov 2013
Posts: 397
Not sure why one wouldn't mount the coilovers to a full crossmember if you put one in it? It will definitely stiffen the chassis, especially if a rollcage is added and ties to it!
Shock angle has a lot to do with how the suspension works, and can help in tuning ride and handling. A straight up shock works to put more weight directly on a coilover, so if the ride is a little stiff it can be lessened by adding a slight angle. Sometimes you can't dial in the proper spring rate, and ride, and get the height you want. So being able to adjust angle will give the car one more dimension of adjustment, and allow it to be fine tuned further. It's also so inexpensive to add multiple mounting holes, that it's a no brainer.
Shock angle has a lot to do with how the suspension works, and can help in tuning ride and handling. A straight up shock works to put more weight directly on a coilover, so if the ride is a little stiff it can be lessened by adding a slight angle. Sometimes you can't dial in the proper spring rate, and ride, and get the height you want. So being able to adjust angle will give the car one more dimension of adjustment, and allow it to be fine tuned further. It's also so inexpensive to add multiple mounting holes, that it's a no brainer.
Thread Starter
|
2nd Gear member
Joined: Nov 2013
Posts: 397
What technique shall I use to mount the top arm of the 4 link system to the frame rails? I am not sure if I shall use the given bolts or weld it to the frame rails. It is an optional way to go.
If I use the bolts to mount it to the frame rails, do I need to make bushings through the frame so that when I tighten it will not squeeze the frame rails sideways?
Any tips on this and how to do it correctly?
If I use the bolts to mount it to the frame rails, do I need to make bushings through the frame so that when I tighten it will not squeeze the frame rails sideways?
Any tips on this and how to do it correctly?
hello mate. 632 nice one too. I will buy my 572 complete, dyno and with the pulleys. Its an extra cost but better that getting into complications with pulleys.
The 572 is dart block and dart aluminium heads. Well engine not bought yet but saving money for it
Hood - I already bought the fiber glass hood with a 6" cowl, so the intake has a plenty of room.
Cooling - The engine builder recommended me Ron Davis Radiator dual row, dual pass with 13" and 14" SPAL fans. Should not be an issue - will see. Radiator on the way and will be here within 2 months.
Do you have any pictures of the engine bay?
What rear end you have and what ratio and tyres?
The 572 is dart block and dart aluminium heads. Well engine not bought yet but saving money for it
Hood - I already bought the fiber glass hood with a 6" cowl, so the intake has a plenty of room.
Cooling - The engine builder recommended me Ron Davis Radiator dual row, dual pass with 13" and 14" SPAL fans. Should not be an issue - will see. Radiator on the way and will be here within 2 months.
Do you have any pictures of the engine bay?
What rear end you have and what ratio and tyres?
I think the 6" cowl will be perfect as far as height and clearance. I went 3" L88 hood and it still looks like normal street car. ( The motor does hit the hood on launch a little, also I went through about 4 air cleaners in order to make one fit.)
I have a graveyard of fans, shrouds and hoses to try to cool this thing. I got some tips from Yellow bullet forums to go with a SINGLE fan set up from a Lincoln car or something, so I googled it, looked around and ordered one. Wired in and no more cooling problems. This fan puts out more air than 2 fans on back and 2 pushers combined.
I went with a 4L80E and I love it on trans. It cost a fortune, but I love the tuning on it, and my trans brake.
On the back is a Ford 9" with 393's...or something like that. It runs on freeway at 80-90 no problem. Tires are 15" Nitto's on back with skinnies on front. Centerline Convo Pro's. No rub issues, but Nitto's SUCK. At the track it would not hold traction AT ALL!!!!! it was embarrassing. Almost wrecked it. Last week put slicks on and ran way better.
Will get some pictures up later, its so dirty I cant even look at it right now.
Second Generation Moderator
Feb 2010 ROTM winner
Jan 2013 ROTM winner
Feb 2010 ROTM winner
Jan 2013 ROTM winner
Joined: Aug 2008
Posts: 9,097
From: Portland, Or
ROTM Winner's Club
What technique shall I use to mount the top arm of the 4 link system to the frame rails? I am not sure if I shall use the given bolts or weld it to the frame rails. It is an optional way to go.
If I use the bolts to mount it to the frame rails, do I need to make bushings through the frame so that when I tighten it will not squeeze the frame rails sideways?
Any tips on this and how to do it correctly?
If I use the bolts to mount it to the frame rails, do I need to make bushings through the frame so that when I tighten it will not squeeze the frame rails sideways?
Any tips on this and how to do it correctly?
Another way to go is to bolt it snug, but not to the point of collapsing the frame, and then weld around the perimeter. This will allow you to drill the holes, and bolt it in. Then take it to a good welder to weld it up solid. But be sure to grind paint and junk off the pieces at the edge before assembly.
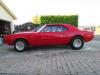
Here are a few photos, I didn't have time to wash it. I threw the old slicks away and put the (waste of money) Nittos back on. I will order some good MT's later.
Thread Starter
|
2nd Gear member
Joined: Nov 2013
Posts: 397
Hello black panther. Nice car man. And a good healthy looking engine too.
Do you have a roll cage? I will do one. Mind you I will not use the car for drag racing. Just shows only and driving around town.
Thanks for the pics
