
1971 Camaro continuing project


Thread Starter
|
Second Generation Moderator
Feb 2010 ROTM winner
Jan 2013 ROTM winner
Feb 2010 ROTM winner
Jan 2013 ROTM winner
Joined: Aug 2008
Posts: 9,097
From: Portland, Or
ROTM Winner's Club
I've owned my 1971 Camaro SS396 since 1973. I'm the 2nd owner, and the original owner had the engine swapped to a 427 BBC at the dealership in San Bernadino, Ca. when he bought it new. He said he wanted something that would, "surprise other guys" when he had the swap done. Cost him a whopping $857 and his new 396 in trade to have it done. Seems cheap today, but considering what the car cost back then, it added about 25% to the initial price tag.
When I first bought the car I had just lost my '55 Chev gasser to thieves, so the Camaro became my daily driver and weekend racer. For 16 yrs. it faithfully took me to work all week, and to the drags on weekends, and it got pretty thrashed. In 1989 it just gave up and died one Sat. pulling out of the garage. Couldn't get it running, as the cam had literally worn out. We pushed it back in and it sat for 11 yrs. while other interests took a priority, until my aunt passed and left a small inheritance. It was at that time my lovely wife suggested I use the funds to get the '71 back on the road, so a full rebuild of the engine was done, and I drove it another 7-8 yrs, then it sat again.
Then in 2009 I decided it needed to go away, but I thought it should be "fixed up" prior to selling it, so I began to rebuild the body and get ready for paint. Once that began I soon found myself enjoying the work so much I changed my mind, and the little fix up became a full on restoration.
I've still got some things to do this year, and probably firever, but it is a project afterall.
Here's some pics from the past:
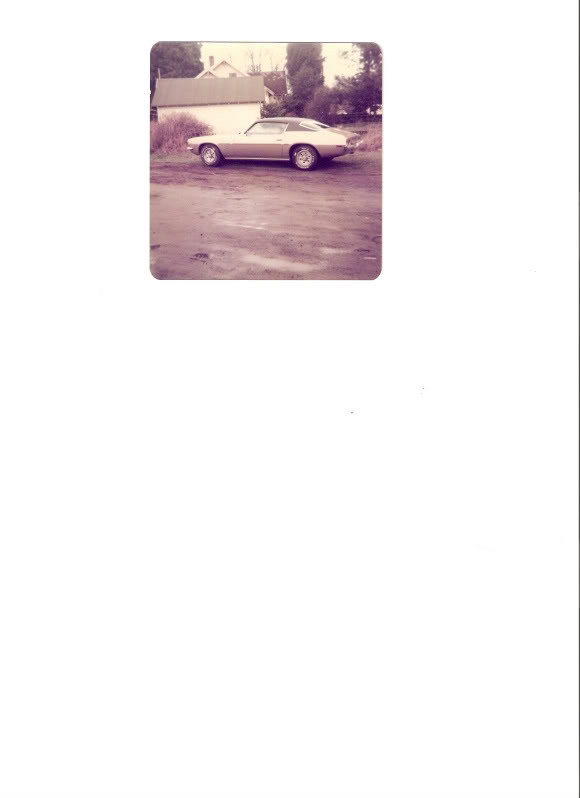
This was taken not long after I bought the Camaro:
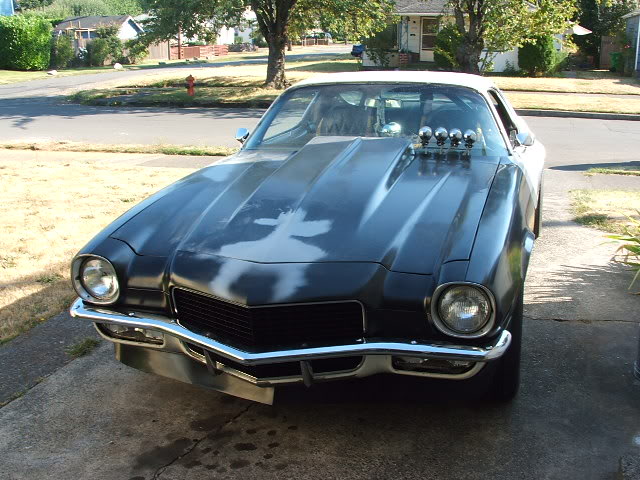
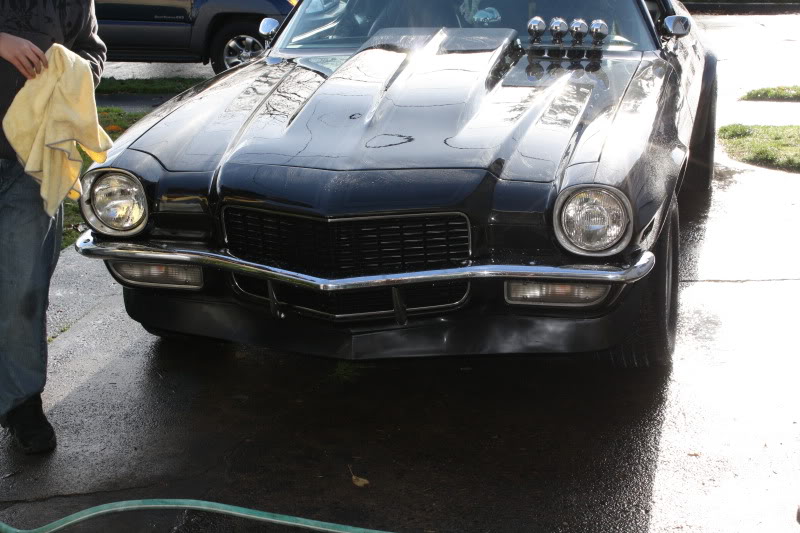
Hated the color, so I changed it to black. This was taken when I was racing it and had added a high rise intake. Note the exhaust. Built these and connected them into the headers, with glasspacks internal to the sidepipes; they were pretty loud, but fun!:

And another change later. The snorkel scoop gave a little more fresh air for the tunnel ram and dual Holleys. This was around 1982 I think.:

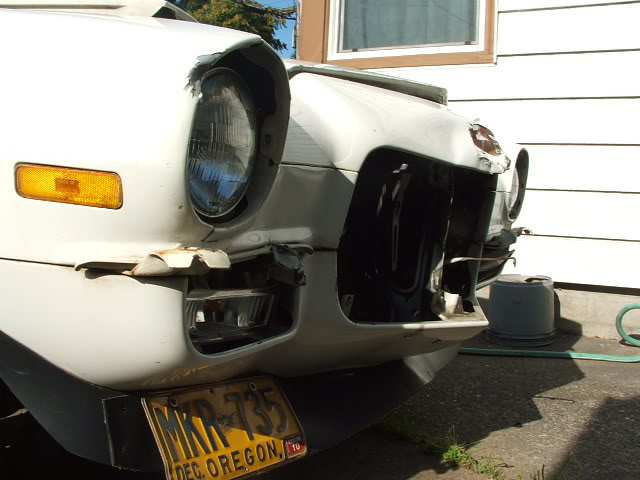
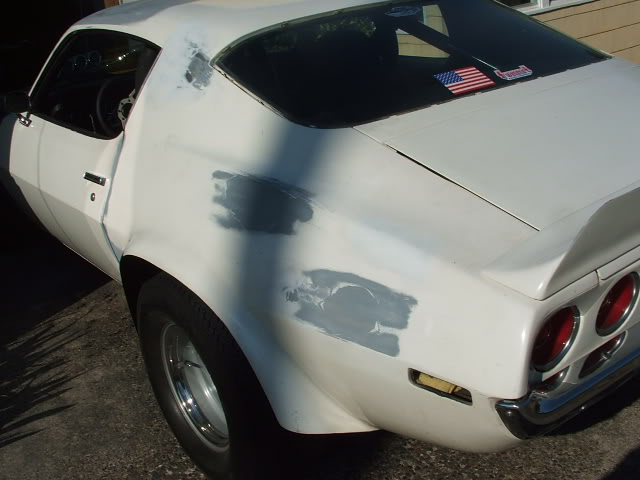
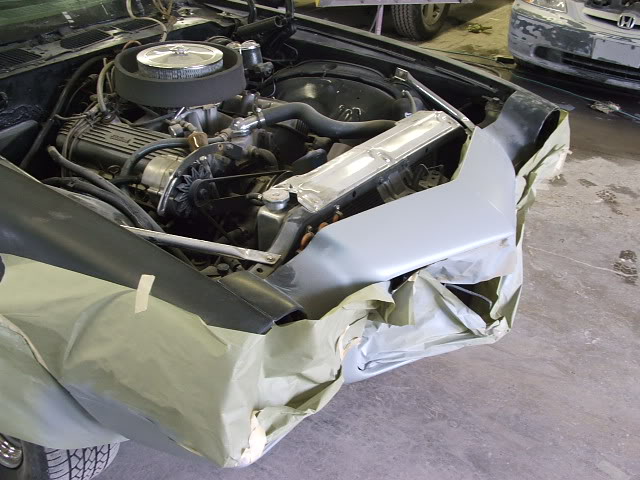
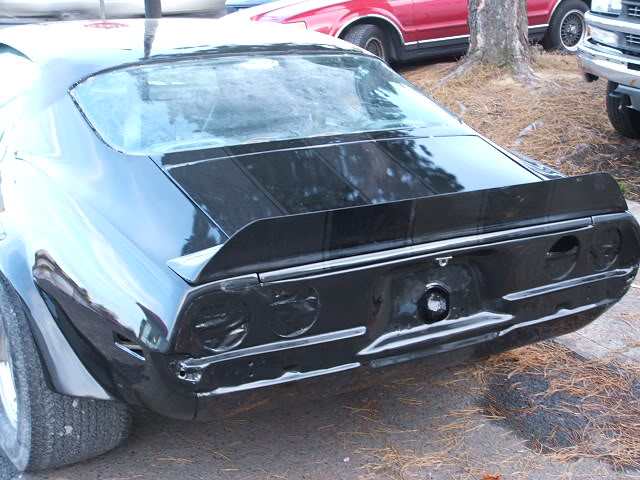
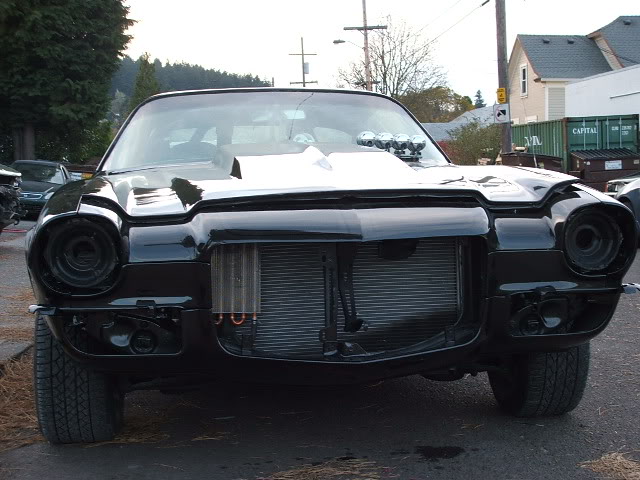
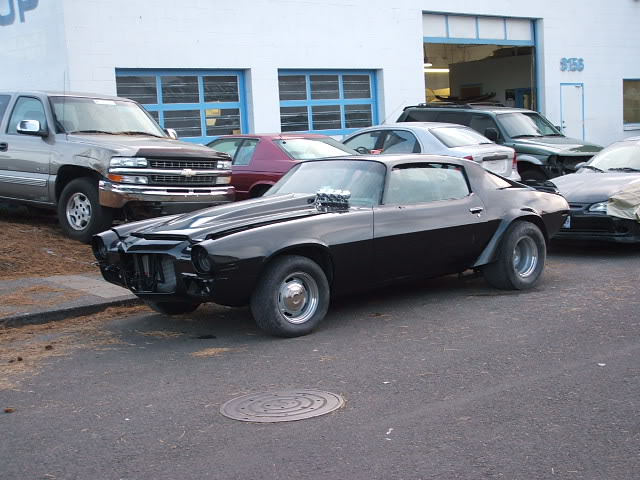
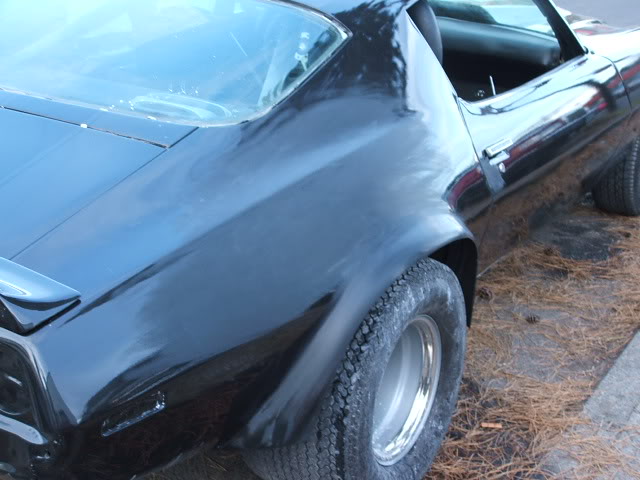
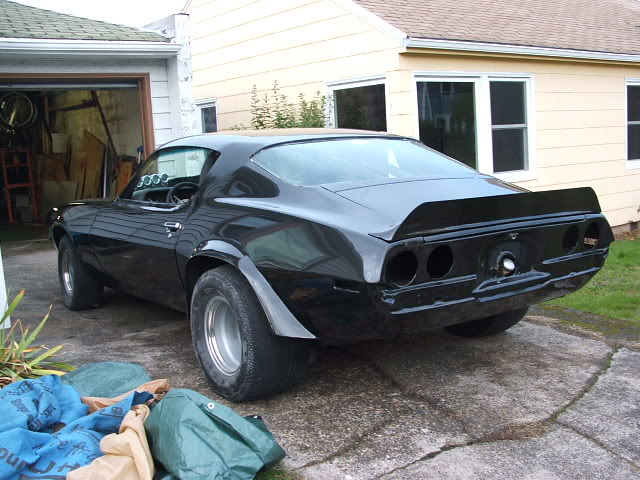
Springing forward to a couple years ago. While trying to fix her up to sell, I ended up in the Camaro's first accident. That's when I realised how much I still liked the car, as it really hurt to see it crunched! The decision to fix the damage, also became the rebuild project.:

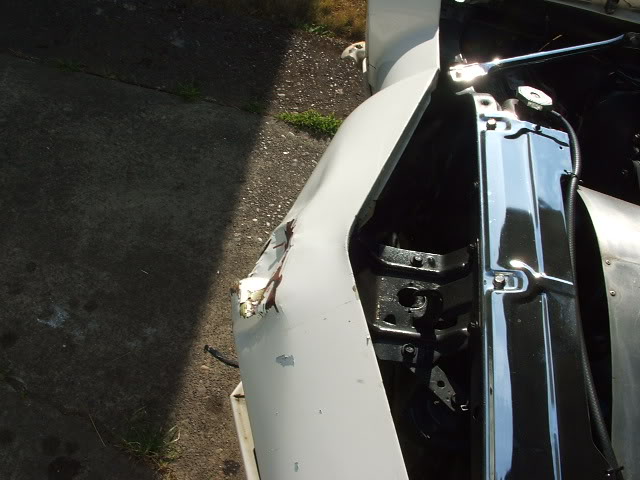
I originally planned to buy a new header panel, and straighten the driver's fender. Should have gone that route, as fitting crap aftermarket fenders, and parts was a pain. I ended up buying a whole new clip, including hood, and core support. My hood was OK, and my lower valance was straightenable, but I decided all new was better. Ended up sending the lower valance back, and using the old one, and doing major welding, cutting, and reworking to get the rest to work. Only good fitting part was the hood, but it was flimsy compared to the stock hood. Bent it just latching it one day, fortunately before it went to paint!
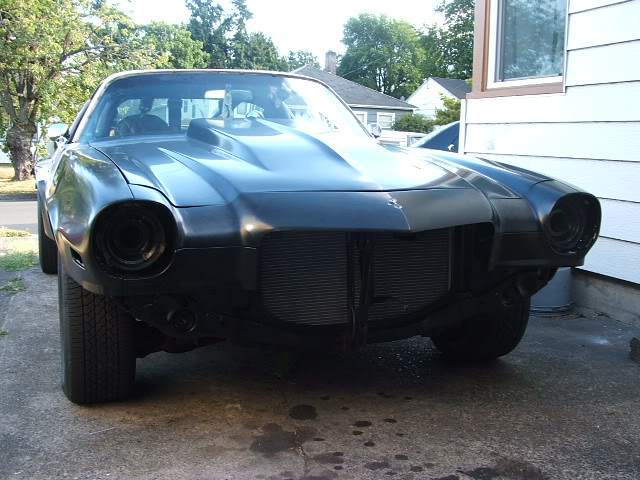
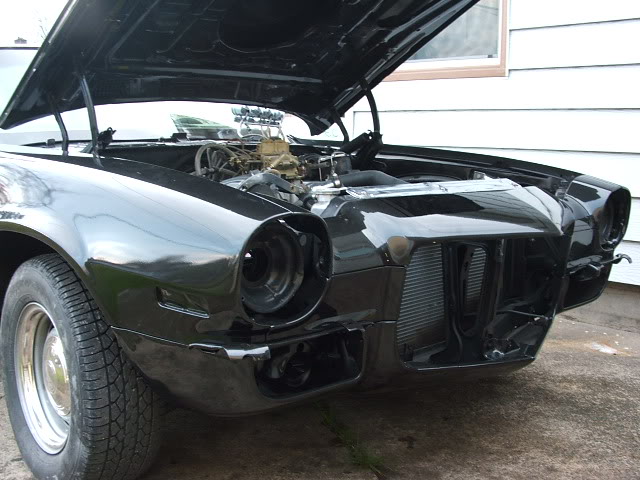
Didn't get a lot of early pics, but here's one with the new sheetmetal installed:
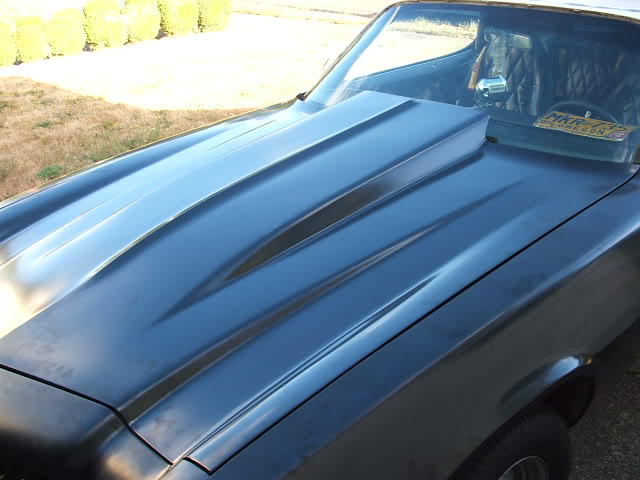

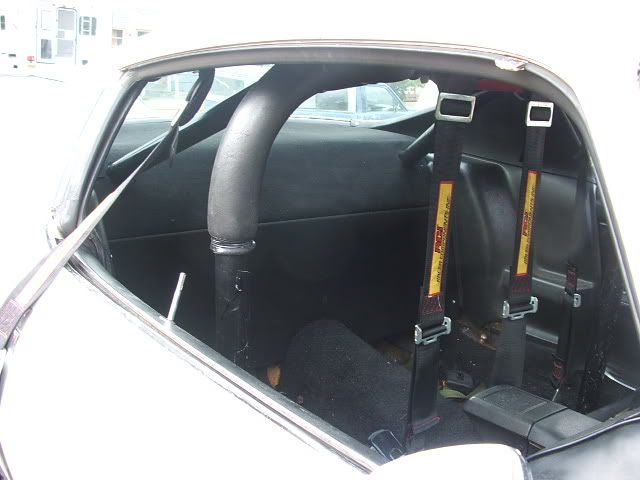
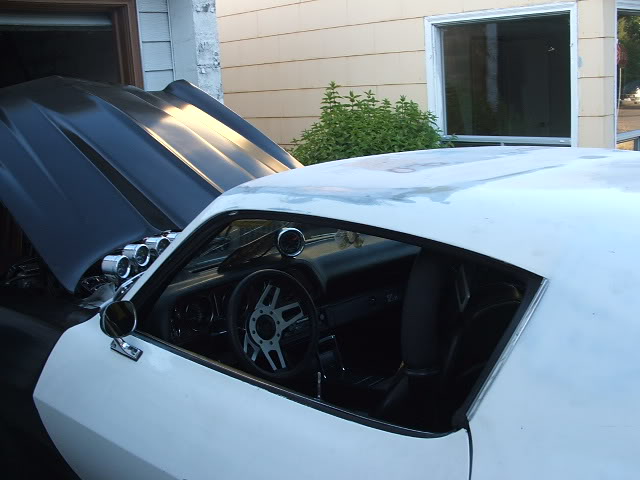
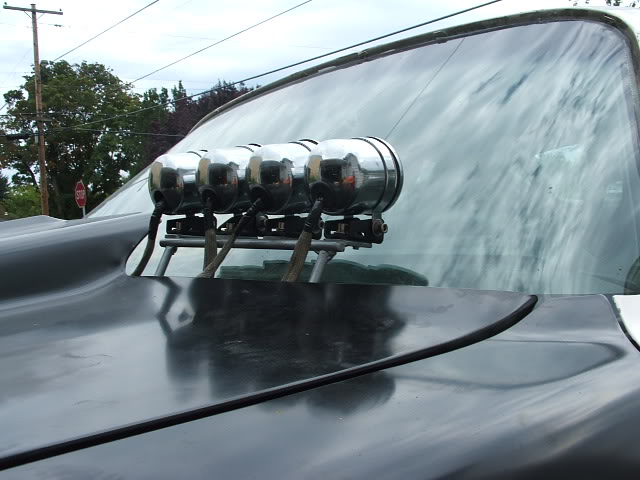
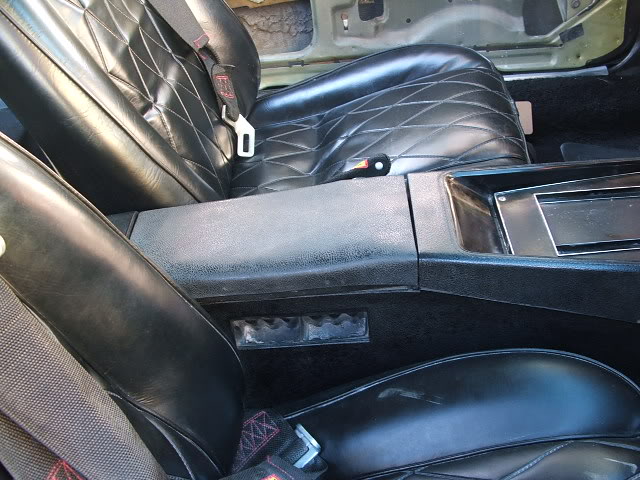
I decided to keep some things from the car's past, so the rollbar, harnesses, hood mounted pod gauges, etc. all were kept. The sunroof had to go, as did the L88 hood. I hadn't run backseats for years, so I figured why now? The decision was made to make things prettier in back, so panels were built, and covered in carpet:

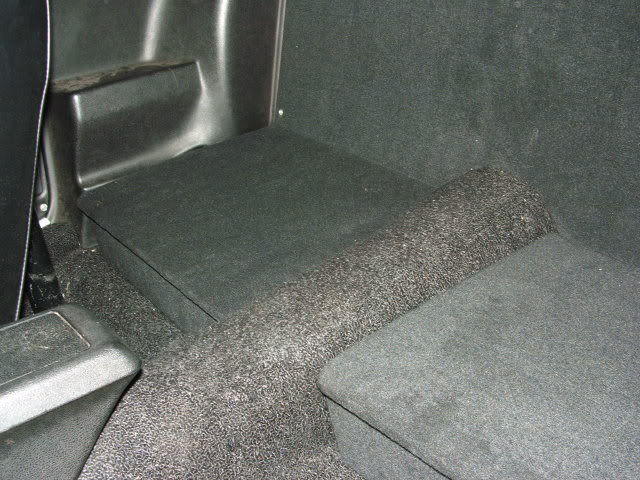
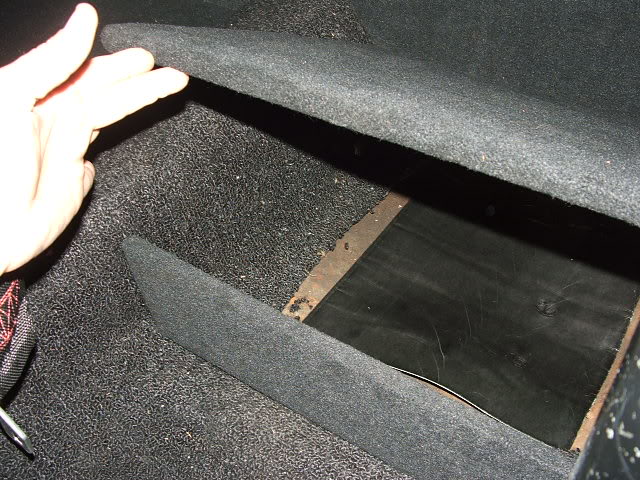
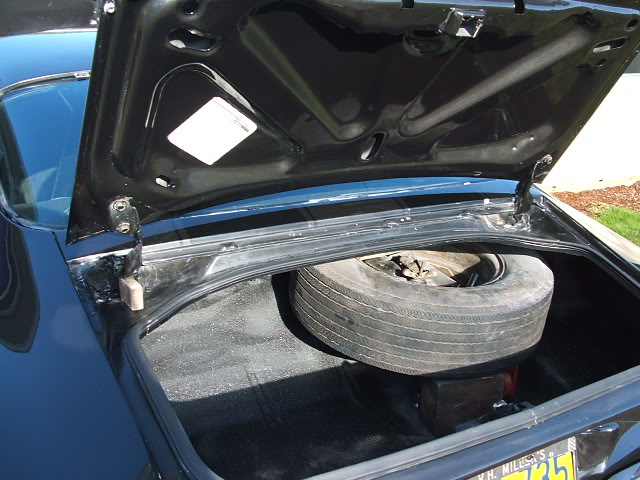
Seat bottom areas were made into storage compartments so I could keep valuables out of sight at shows, etc.:
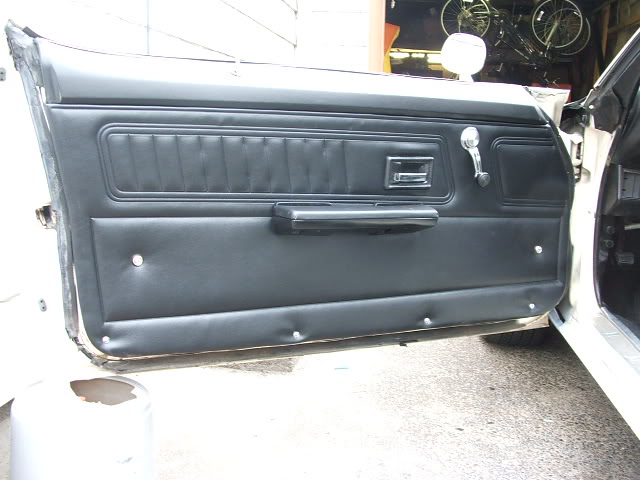
New door panels were also on the list, but I never liked the full length armrests of the Camaro, so I used '65 Chevelle armrests, and filled in the door handle areas, then bondo and some paint to finish them; a couple mounting holes and they were done. I love them now:
Glovebox badge to let 'em know what's under the hood! :
:

When I first bought the car I had just lost my '55 Chev gasser to thieves, so the Camaro became my daily driver and weekend racer. For 16 yrs. it faithfully took me to work all week, and to the drags on weekends, and it got pretty thrashed. In 1989 it just gave up and died one Sat. pulling out of the garage. Couldn't get it running, as the cam had literally worn out. We pushed it back in and it sat for 11 yrs. while other interests took a priority, until my aunt passed and left a small inheritance. It was at that time my lovely wife suggested I use the funds to get the '71 back on the road, so a full rebuild of the engine was done, and I drove it another 7-8 yrs, then it sat again.
Then in 2009 I decided it needed to go away, but I thought it should be "fixed up" prior to selling it, so I began to rebuild the body and get ready for paint. Once that began I soon found myself enjoying the work so much I changed my mind, and the little fix up became a full on restoration.
I've still got some things to do this year, and probably firever, but it is a project afterall.
Here's some pics from the past:
This was taken not long after I bought the Camaro:
Hated the color, so I changed it to black. This was taken when I was racing it and had added a high rise intake. Note the exhaust. Built these and connected them into the headers, with glasspacks internal to the sidepipes; they were pretty loud, but fun!:
And another change later. The snorkel scoop gave a little more fresh air for the tunnel ram and dual Holleys. This was around 1982 I think.:
Springing forward to a couple years ago. While trying to fix her up to sell, I ended up in the Camaro's first accident.
That's when I realised how much I still liked the car, as it really hurt to see it crunched! The decision to fix the damage, also became the rebuild project.:I originally planned to buy a new header panel, and straighten the driver's fender. Should have gone that route, as fitting crap aftermarket fenders, and parts was a pain. I ended up buying a whole new clip, including hood, and core support. My hood was OK, and my lower valance was straightenable, but I decided all new was better. Ended up sending the lower valance back, and using the old one, and doing major welding, cutting, and reworking to get the rest to work. Only good fitting part was the hood, but it was flimsy compared to the stock hood. Bent it just latching it one day, fortunately before it went to paint!
Didn't get a lot of early pics, but here's one with the new sheetmetal installed:
I decided to keep some things from the car's past, so the rollbar, harnesses, hood mounted pod gauges, etc. all were kept. The sunroof had to go, as did the L88 hood. I hadn't run backseats for years, so I figured why now? The decision was made to make things prettier in back, so panels were built, and covered in carpet:
Seat bottom areas were made into storage compartments so I could keep valuables out of sight at shows, etc.:
New door panels were also on the list, but I never liked the full length armrests of the Camaro, so I used '65 Chevelle armrests, and filled in the door handle areas, then bondo and some paint to finish them; a couple mounting holes and they were done. I love them now:
Glovebox badge to let 'em know what's under the hood!
:
Last edited by 1971BB427; May 26, 2011 at 05:52 PM.
Thread Starter
|
Second Generation Moderator
Feb 2010 ROTM winner
Jan 2013 ROTM winner
Feb 2010 ROTM winner
Jan 2013 ROTM winner
Joined: Aug 2008
Posts: 9,097
From: Portland, Or
ROTM Winner's Club
Back to the bodywork. I found a guy on Craigslist selling 2nd gen Firebird parts, and for $40 I chopped the roof off a Firebird to repair mine. Should have done a whole roof, but I decided it might be easier to weld in just the sunroof hole. About two days and 400 tack welds later I had it in.
Once it was in I noticed it had a severe bulge in the donor roof section! Geez! How'd I miss that? A friend who's a great bodyman came over to assist in "shrinking" the bulge, and brought his shrinker along. He said I had to completely remove the paint on the donor section, so I started grinding. All sorts of bondo came off the patch panel, and I soon realised the bulge was too much bondo over a tiny scratch! Once removed it was perfect, and ready to be blended back in! Lucky break!
Got it all blended in, and ready for the paint shop:
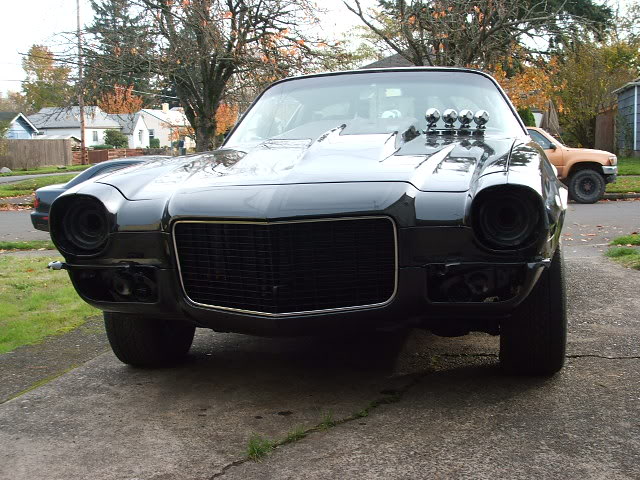
Started back on soime minor bodywork, and eventually got all the trim fitted and bumpers back on to make sure it all fit correctly before disassembly and trip to the body shop:
Gauges used to mount to the grille area of the old hood, so I had to make a free standing bracket. This one was too tall, so it came back off and lowered another inch or so:
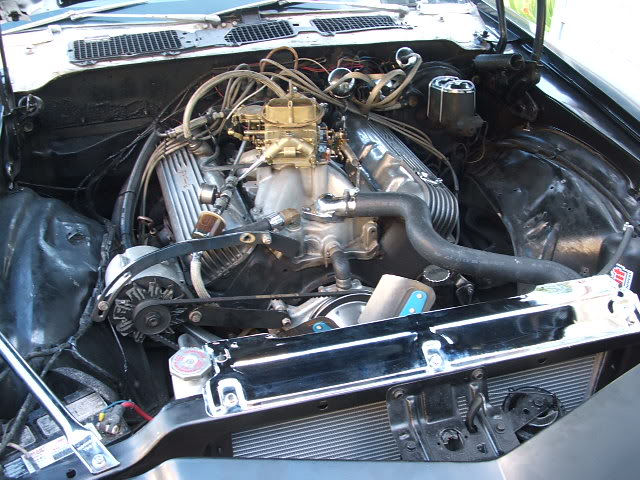
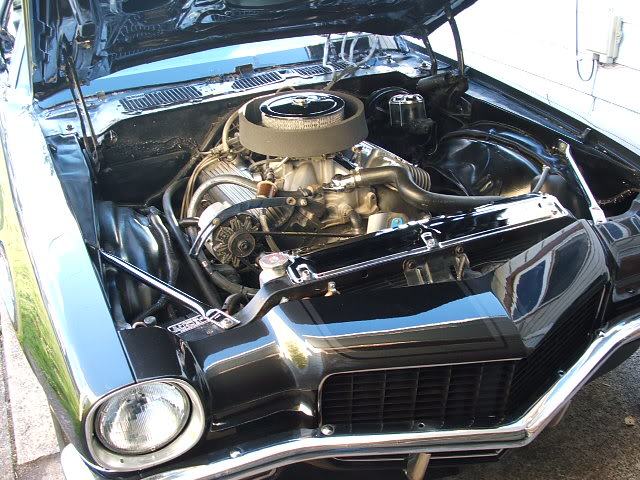
Got the new radiator installed, after a lot of cutting and fab work on the core support to accomodate it. Engine compartment and engine needed a lot of general cleanup, but it would wait until after paint:
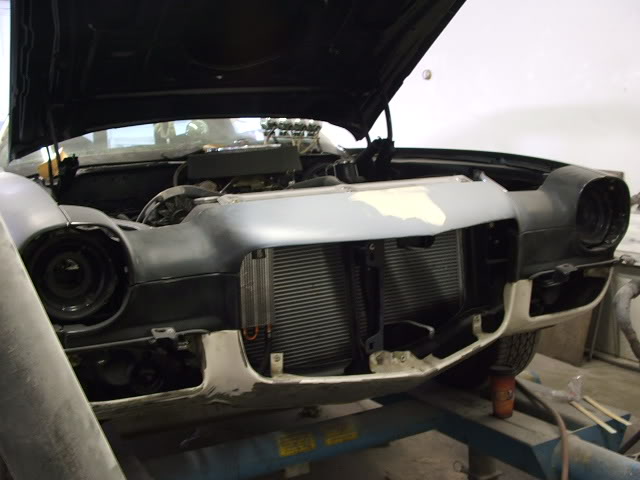
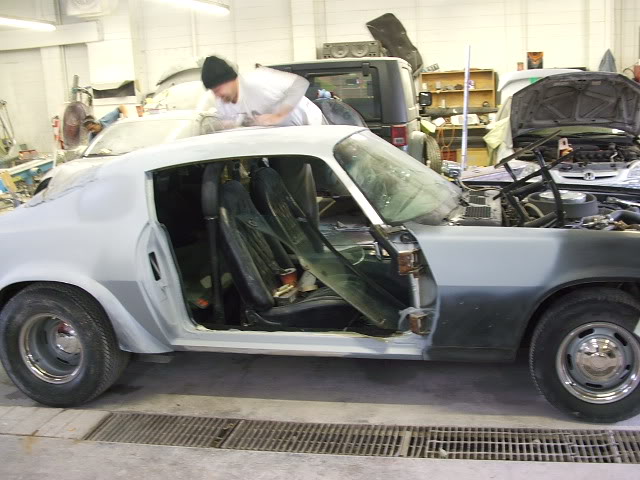
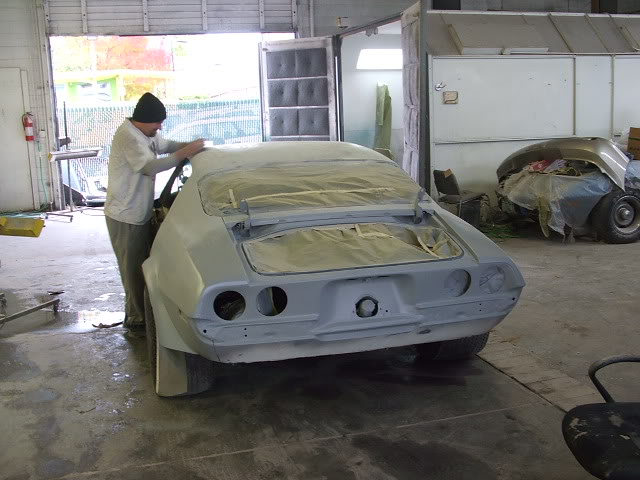
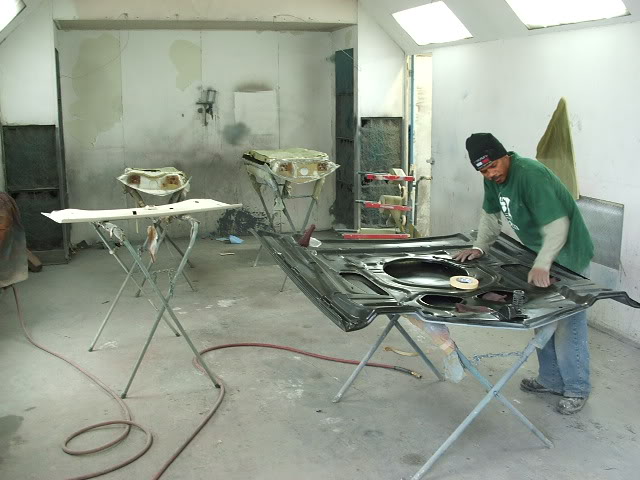
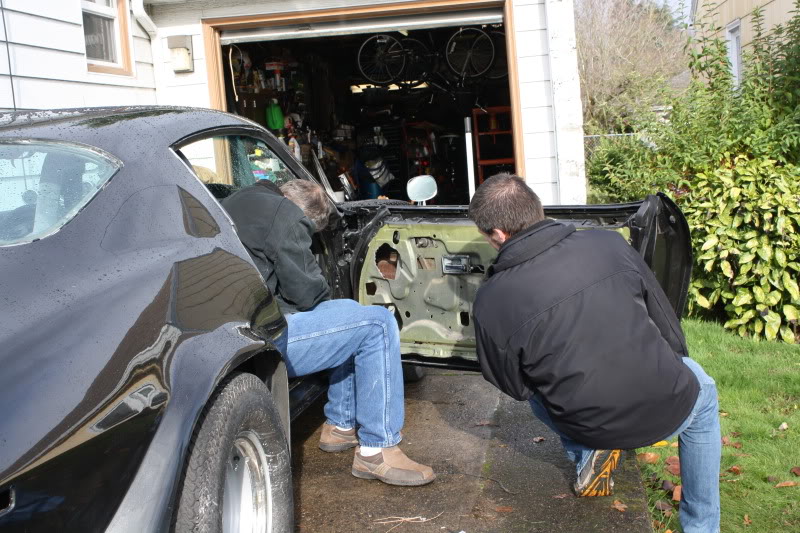
I hate having to do things multiple times, but all the chrome trim, bumpers, etc. that I fitted and assembled had to come back off for paint. Inclusing the windows. Bodyshop took the doors, trunk lid, and hood off for paint stripping. Here's what I saw a few days after I dropped it at the shop:


Rob (one of the bodymen) was the prime guy on my car. He spent lots of hours on the roof to get it perfect, and it really showed in the end! Great work on his part!:

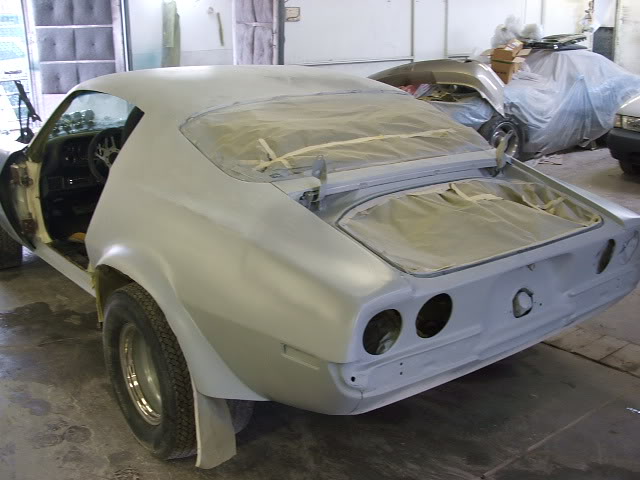
More work on the nose to eliminate the Camaro badge:
Rear quaters completed and getting finish sanding of base primer. Epoxy primer came much later after lots of blocking. Still more work on that roof repair:

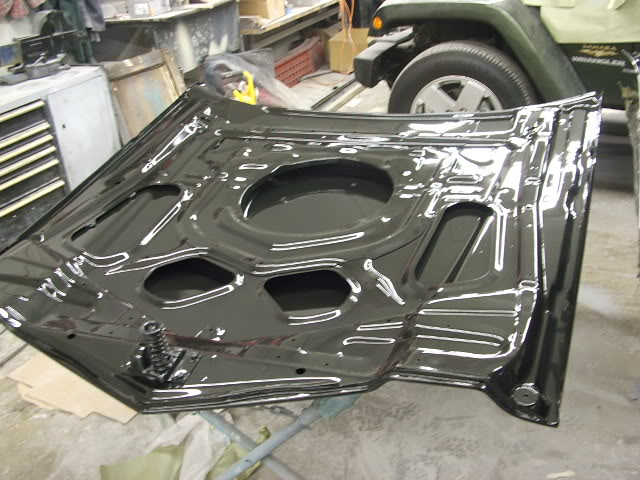
Finally ready to go to the booth for epoxy primer:
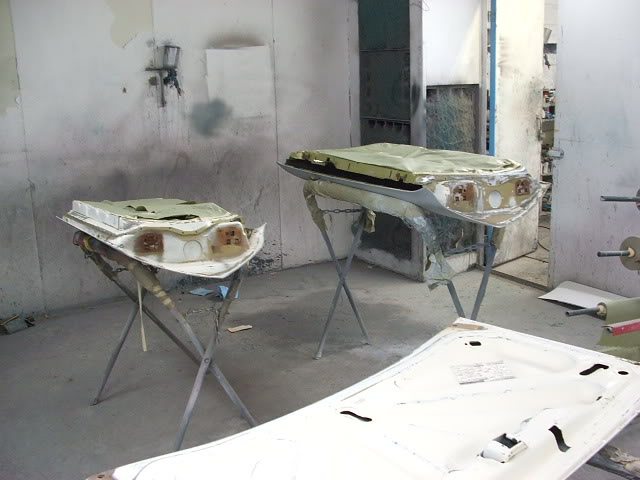
All the doors, trunk lid, hood, getting sanded and jambed before they're hung for paint. Color choice was GM Stealth Gray Pearl, which is an almost black graphite color. Stripes to be black with a saphire pearl in the black:
]http://static.summitracing.com/global/images/prod/large/lak-20462_w.jpg[/img]
Once it was in I noticed it had a severe bulge in the donor roof section! Geez! How'd I miss that? A friend who's a great bodyman came over to assist in "shrinking" the bulge, and brought his shrinker along. He said I had to completely remove the paint on the donor section, so I started grinding. All sorts of bondo came off the patch panel, and I soon realised the bulge was too much bondo over a tiny scratch! Once removed it was perfect, and ready to be blended back in! Lucky break!
Got it all blended in, and ready for the paint shop:
Started back on soime minor bodywork, and eventually got all the trim fitted and bumpers back on to make sure it all fit correctly before disassembly and trip to the body shop:
Gauges used to mount to the grille area of the old hood, so I had to make a free standing bracket. This one was too tall, so it came back off and lowered another inch or so:
Got the new radiator installed, after a lot of cutting and fab work on the core support to accomodate it. Engine compartment and engine needed a lot of general cleanup, but it would wait until after paint:
I hate having to do things multiple times, but all the chrome trim, bumpers, etc. that I fitted and assembled had to come back off for paint. Inclusing the windows. Bodyshop took the doors, trunk lid, and hood off for paint stripping. Here's what I saw a few days after I dropped it at the shop:
Rob (one of the bodymen) was the prime guy on my car. He spent lots of hours on the roof to get it perfect, and it really showed in the end! Great work on his part!:
More work on the nose to eliminate the Camaro badge:
Rear quaters completed and getting finish sanding of base primer. Epoxy primer came much later after lots of blocking. Still more work on that roof repair:
Finally ready to go to the booth for epoxy primer:
All the doors, trunk lid, hood, getting sanded and jambed before they're hung for paint. Color choice was GM Stealth Gray Pearl, which is an almost black graphite color. Stripes to be black with a saphire pearl in the black:
]http://static.summitracing.com/global/images/prod/large/lak-20462_w.jpg[/img]
Last edited by 1971BB427; May 26, 2011 at 05:57 PM.
Thread Starter
|
Second Generation Moderator
Feb 2010 ROTM winner
Jan 2013 ROTM winner
Feb 2010 ROTM winner
Jan 2013 ROTM winner
Joined: Aug 2008
Posts: 9,097
From: Portland, Or
ROTM Winner's Club
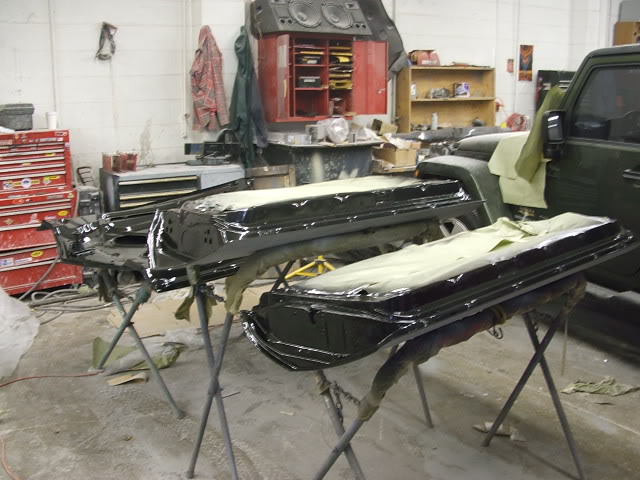
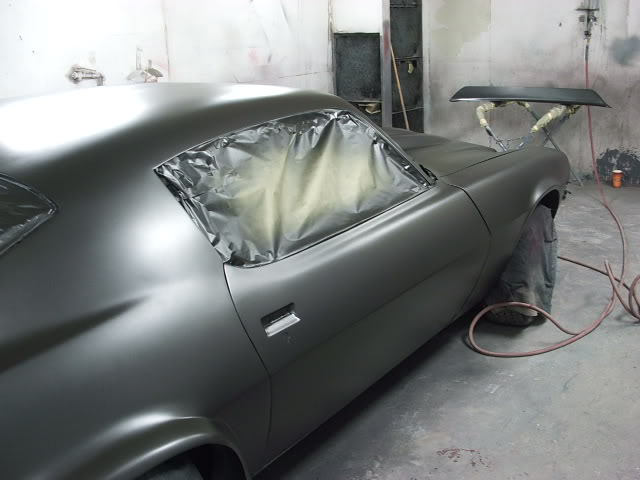
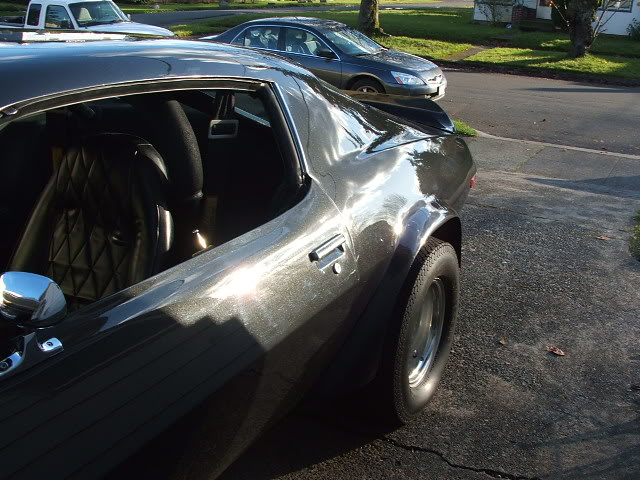
Base coat, clear coat finish, so here's the base: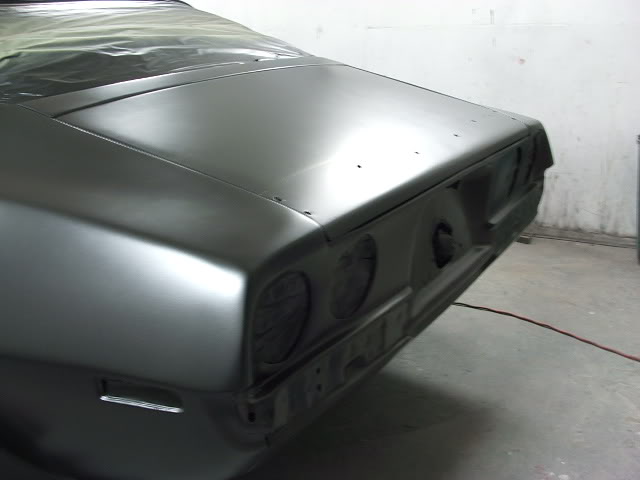
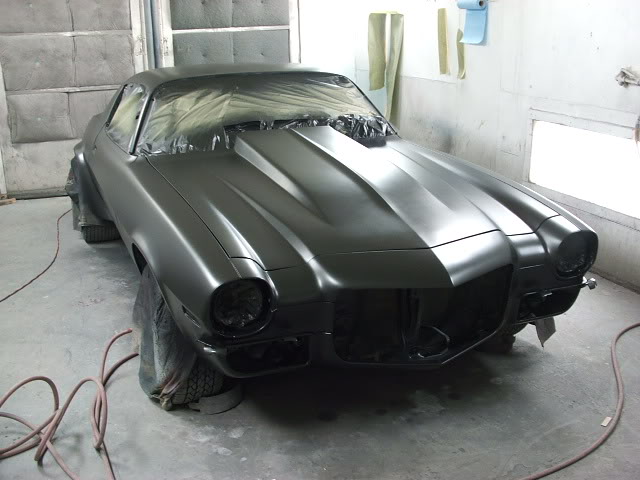
We decided to bring the car home for a month to let it cure prior to buffing it out. So this was straight out of the booth and ready to go sit in the garage for a month. Man was that a long wait having to see it every day, but not do anything to it!
And holy crap! Boy was I surprised to see this on the 1/4 panel! Guess they had a run in the clear, so they sanded it out before I picked up the car, just so it would be easier when it was softer:
Just before it went into the garage for a 30 day slumber:
One month later it was back to the shop, and two days later home again! My son and grandson came to town to help with reassembly!:
Me and my 13 yr. old grandson. He's putting lights back in:
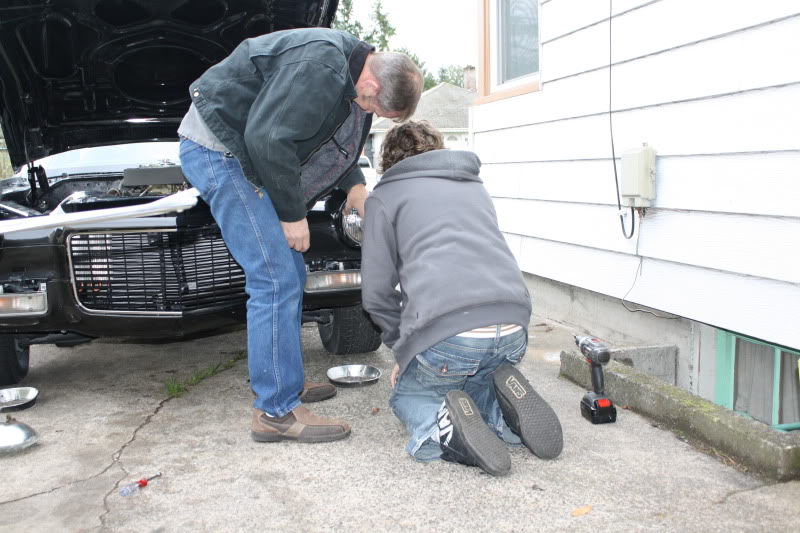
My son and I readjusting the doors:
Got a rain shower, so we had to push it in the garage, then back out once it stopped:
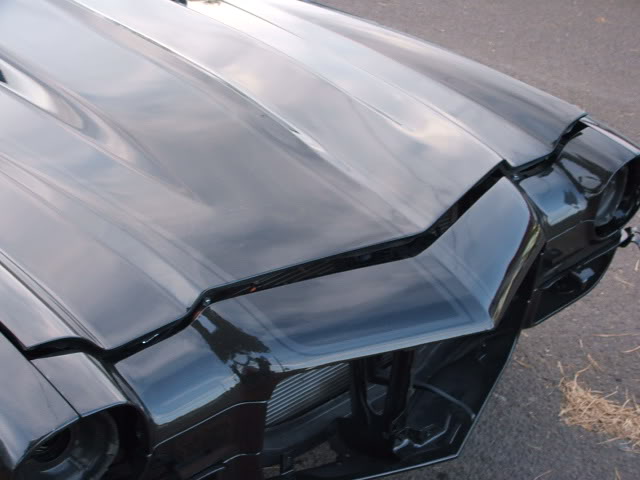
Getting closer to completed!:
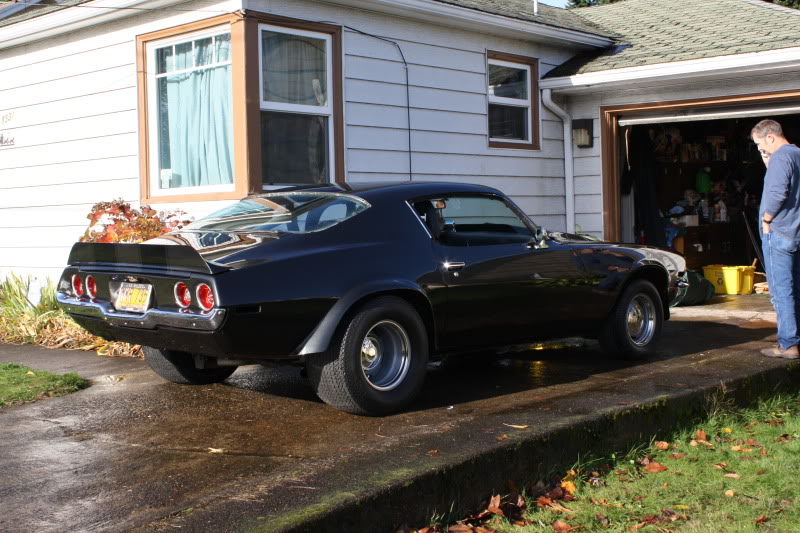
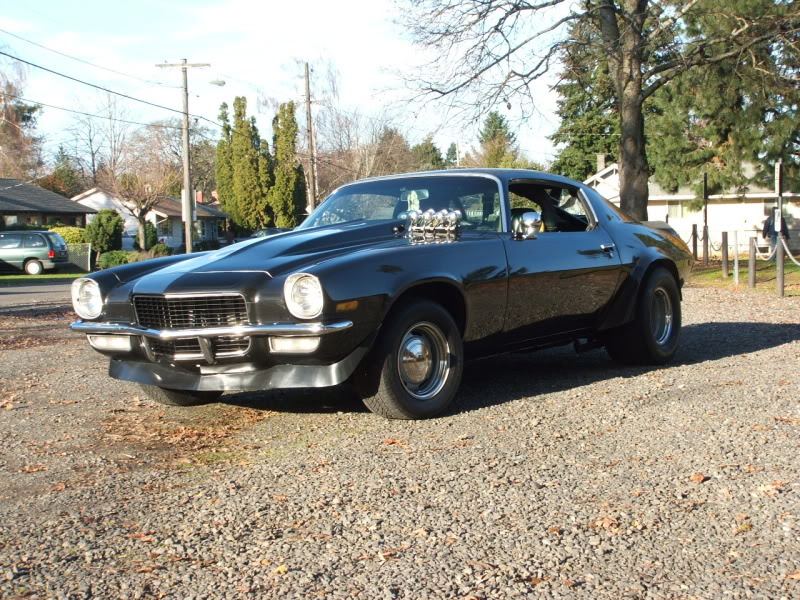
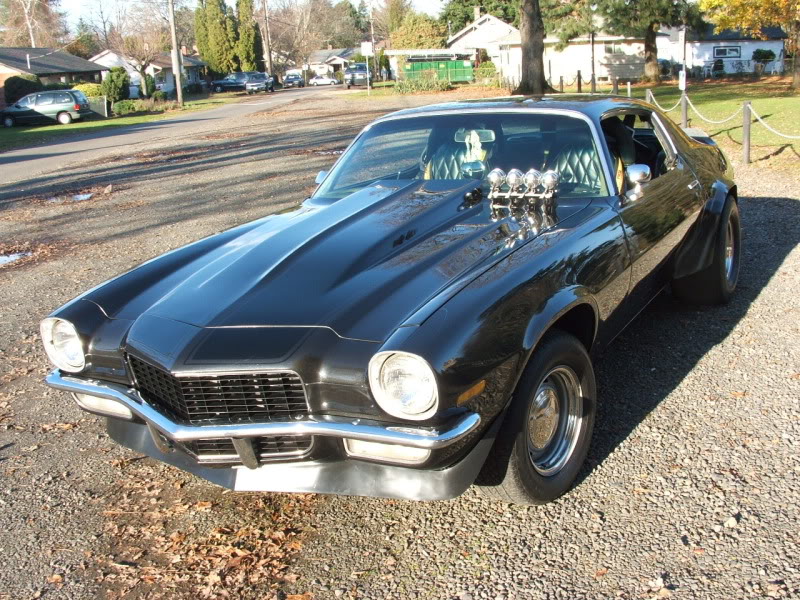
Exterior completed:
We decided to bring the car home for a month to let it cure prior to buffing it out. So this was straight out of the booth and ready to go sit in the garage for a month. Man was that a long wait having to see it every day, but not do anything to it!
And holy crap! Boy was I surprised to see this on the 1/4 panel! Guess they had a run in the clear, so they sanded it out before I picked up the car, just so it would be easier when it was softer:
Just before it went into the garage for a 30 day slumber:
One month later it was back to the shop, and two days later home again! My son and grandson came to town to help with reassembly!:
Me and my 13 yr. old grandson. He's putting lights back in:
My son and I readjusting the doors:
Got a rain shower, so we had to push it in the garage, then back out once it stopped:
Getting closer to completed!:
Exterior completed:
Thread Starter
|
Second Generation Moderator
Feb 2010 ROTM winner
Jan 2013 ROTM winner
Feb 2010 ROTM winner
Jan 2013 ROTM winner
Joined: Aug 2008
Posts: 9,097
From: Portland, Or
ROTM Winner's Club
On to interior details. Glovebox in the console was broken. Had to repair it, and reinstall the old skin. Some sheet aluminum, pop rivets, and epoxy. Good as new now:


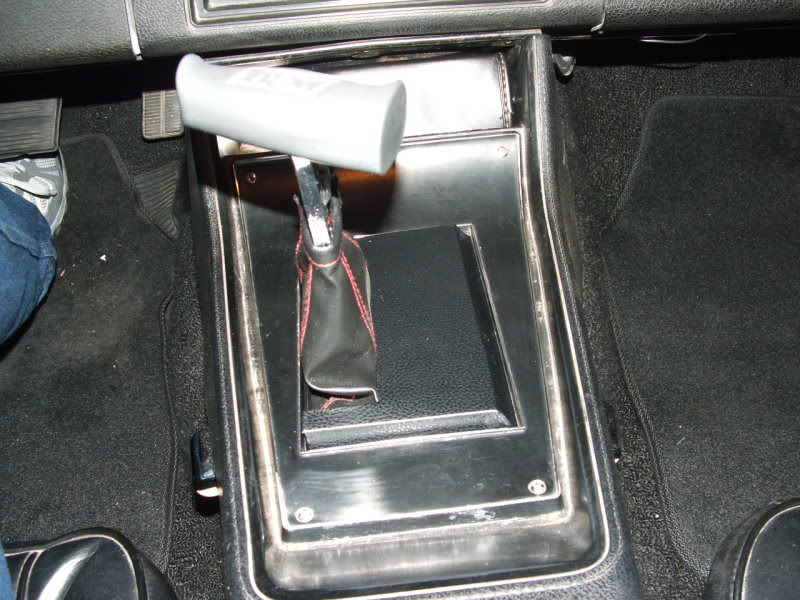
My stock horseshoe shifter broke after all these years of slamming it, so got a nice used B&M Megashifter off Fleabay for $17, and a new cable from Summit. Adapted it to fit my console:

Took a couple tries, but I ended up with this in the end. It worked out good with a leather boot:

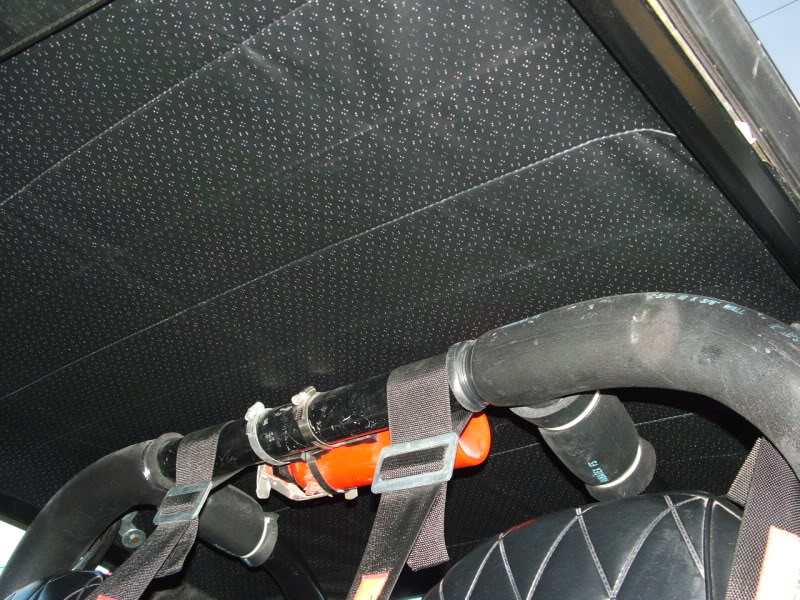
Back to the interior. Installed my first headliner! Not knowing how to do it, I had some big ole paper clips, so I stretched it out and clipped it in place, then removed the clips one at a time and adjusted it until the ripples were mostly out. Once completed I removed one clip at a time to glue the liner, then reattached the clips. After it set up I warmed it with the heat gun to finally get the last ripples. Came out fine after that:

Replaced the rear tires with another set just like before; MT N50's!:

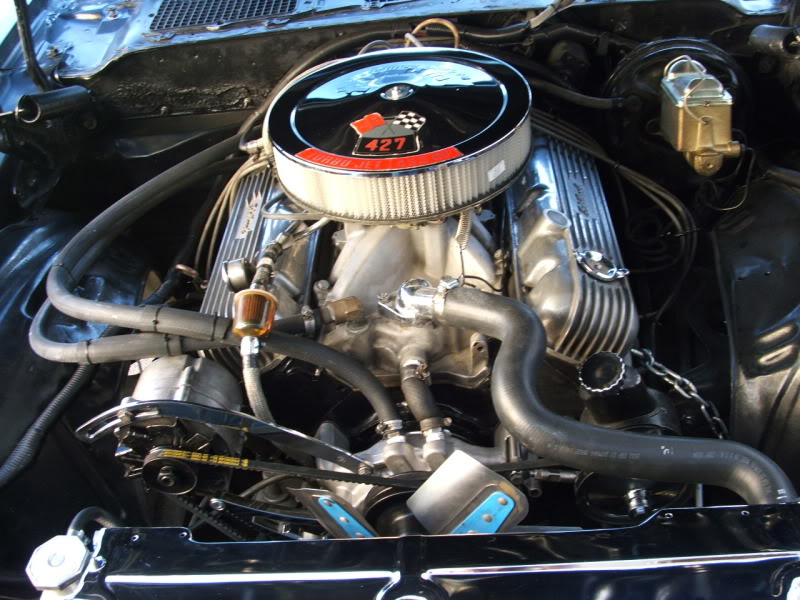
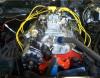
On to engine details. Removed the old water pump to change to a long pump and pulleys. New Weiand hi flow aluminum:


While I was under the hood, I replaced all the bolts that show with stainless steel button head allens:

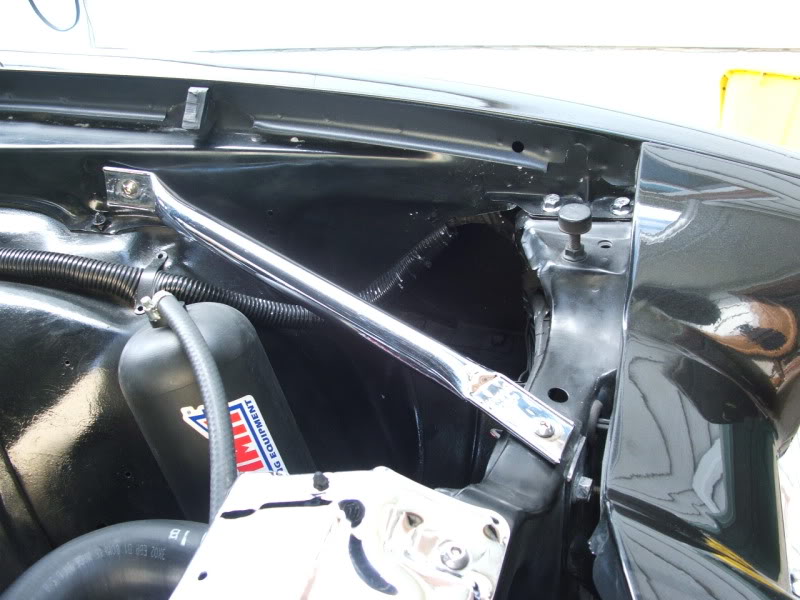
Aluminum supports I built for the front spoiler:

And finally the old Edelbrock valve covers got a rework to match the new plug wires:


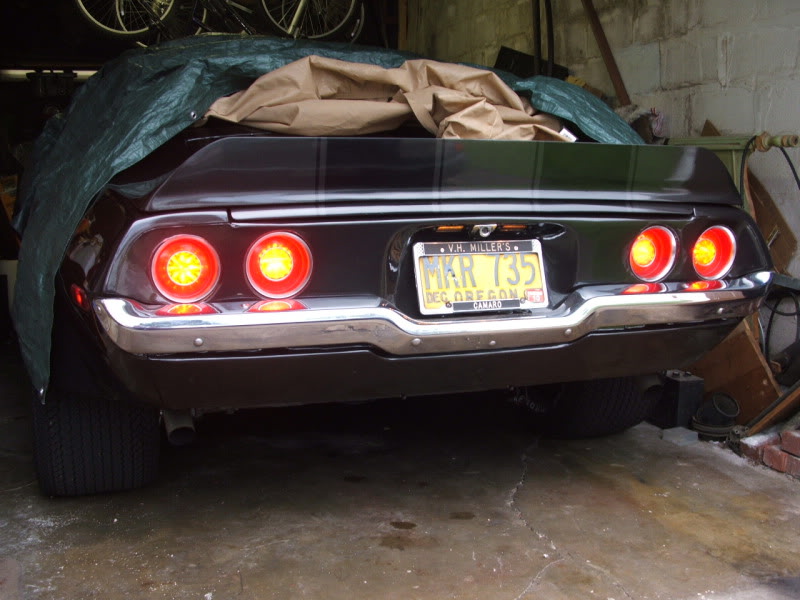
More details! Rebuilt the tailights using LED laights. Converted the backup lights to work with outside lights, so it really lights up now when I hit the headlights and brakes!:
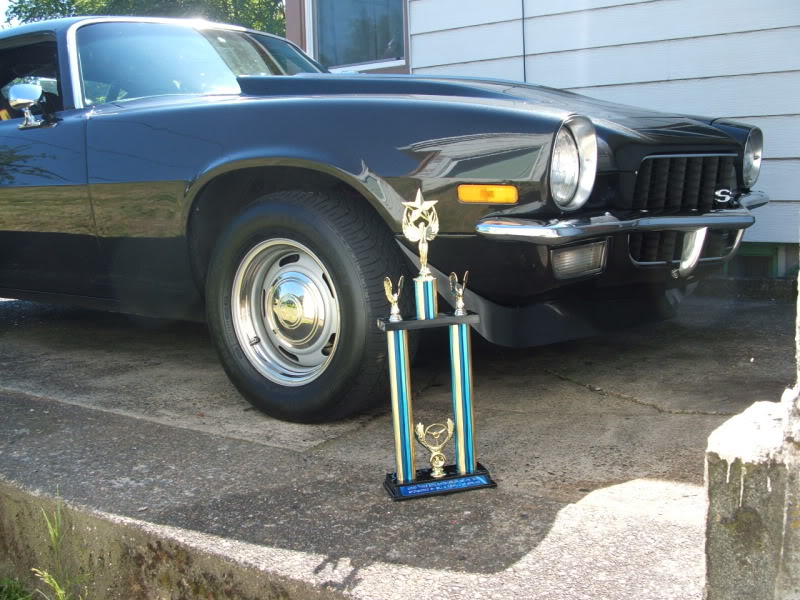
First cruise in car show! She took one home for the first time ever since I bought it!:
My stock horseshoe shifter broke after all these years of slamming it, so got a nice used B&M Megashifter off Fleabay for $17, and a new cable from Summit. Adapted it to fit my console:
Took a couple tries, but I ended up with this in the end. It worked out good with a leather boot:
Back to the interior. Installed my first headliner! Not knowing how to do it, I had some big ole paper clips, so I stretched it out and clipped it in place, then removed the clips one at a time and adjusted it until the ripples were mostly out. Once completed I removed one clip at a time to glue the liner, then reattached the clips. After it set up I warmed it with the heat gun to finally get the last ripples. Came out fine after that:
Replaced the rear tires with another set just like before; MT N50's!:
On to engine details. Removed the old water pump to change to a long pump and pulleys. New Weiand hi flow aluminum:
While I was under the hood, I replaced all the bolts that show with stainless steel button head allens:
Aluminum supports I built for the front spoiler:
And finally the old Edelbrock valve covers got a rework to match the new plug wires:
More details! Rebuilt the tailights using LED laights. Converted the backup lights to work with outside lights, so it really lights up now when I hit the headlights and brakes!:
First cruise in car show! She took one home for the first time ever since I bought it!:
Thread Starter
|
Second Generation Moderator
Feb 2010 ROTM winner
Jan 2013 ROTM winner
Feb 2010 ROTM winner
Jan 2013 ROTM winner
Joined: Aug 2008
Posts: 9,097
From: Portland, Or
ROTM Winner's Club
Sitting in the garage is all new suspension, and bushings. New leaf springs, ball joints, you name it. Also just ordered new Lakewood ladder bars for the rear, which will go on once the weather gets good enough to work in the driveway!
No room in the garage for a suspension rebuild, so it has to wait for better weather!
Here's the new traction/ladder bars:

Also plan on changing the upholstery on the front seats. I had the diamond tuck pattern done long ago, and I like it, but it's starting to show signs of wear, so I'm ordering stock black upholstery from NPD and I'll recover the fronts to stock. Cheaper than having new covers built at around $219 a pair.
No room in the garage for a suspension rebuild, so it has to wait for better weather!
Here's the new traction/ladder bars:
Also plan on changing the upholstery on the front seats. I had the diamond tuck pattern done long ago, and I like it, but it's starting to show signs of wear, so I'm ordering stock black upholstery from NPD and I'll recover the fronts to stock. Cheaper than having new covers built at around $219 a pair.
Last edited by 1971BB427; May 26, 2011 at 05:34 PM.


Thread Starter
|
Second Generation Moderator
Feb 2010 ROTM winner
Jan 2013 ROTM winner
Feb 2010 ROTM winner
Jan 2013 ROTM winner
Joined: Aug 2008
Posts: 9,097
From: Portland, Or
ROTM Winner's Club
Thanks! Hope to get back on it soon, if this darn rain ever stops!


Overdrive Member
Joined: Nov 2009
Posts: 4,848
From: off the grid
The one good thing about your accident, well besides the total resto. It got ride of those fog lights on the bumper. I really do like your car sincerely. I hope I can get mine that flat after blocking and the hood is a for sure gotta have. Just the right size and shape.