What did you do to your camaro today
#521
 01-11-2011, 04:51 PM


today i looked at pictures of my camaros because they are nestled in the garage at home sleeping. since im a couple of hours away at oregon state for the school year. next time i get a weekend at home pulling the seats of my 68 to put new foam in them. hopefully getting a fold down rear seat for it soon.

#523
01-11-2011, 06:29 PM

Banned
Join Date: Oct 2009
Location: Raised in Tilton NH now residing in Kings Mountain KY
Posts: 496
Dropped off an outer wheel well at the bodyshop today. He's been working on putting quarters in a mustang the last couple days. Said he's about ready to jump back on mine so hopefully I can put up some more progress pics soon. I also called Summit today to let them know that the springs that came with my hood did not hold it open. They called Harwood on another line and sorted out that the wrong springs had been shipped with the hood and they would send out the right ones asap.

#526
01-12-2011, 08:03 PM

Join Date: Aug 2008
Location: Portland, Or
Posts: 9,097
I will be getting back on the 71 Camaro in the spring and summer, as I want to redo all the suspension front and rear.
I've got the Austin over at the neighbor's garage the last couple days. So nice to work in a heated garage! I got all the carpets done, and today I finished off the backer boards and did the door panel covering, then installed them on the Austin. It's starting to really look complete inside!
Had a minor setback yesterday when I pulled into his garage. The tranny started puking fluid on the floor! Looked like a major leak, and I rushed to get a catch pan to put under it. After getting a light I found the transmission kickdown cable was broken where it enters the housing and was leaking bad. I took it out, built a rubber gasket to cover the hole and used the tab and bolt to hold the gasket tight. No more kickdown, no more leak! I don't use the kickdown anyway, as I manually shift it when I want it to go down a gear.
#527
01-13-2011, 06:46 PM

I got a TA 1.25" front sway bar and 3/4" rear sway bar. I painted the rear sway bar black and will paint front maybe tomorrow or sat. I ordered a new set of poly front sway bar bushings and end links since it's a bigger bar. I also ordered frame connectors and body bushings.
#528
01-13-2011, 06:52 PM
Join Date: Aug 2008
Location: Portland, Or
Posts: 9,097
Not much done today. Got the rear inner fenderwells covered with carpet, and got all the rear panels secured in. Measured the headliner up so we could mark out the material and sew it.
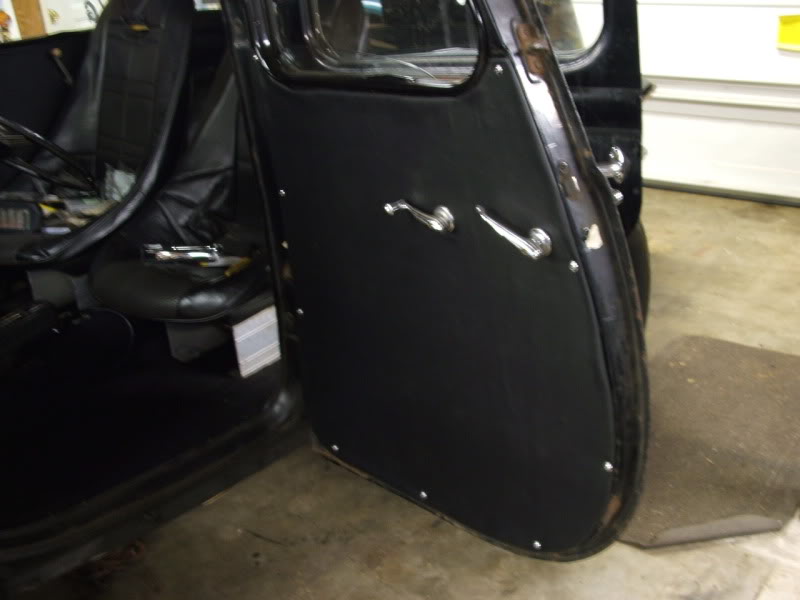
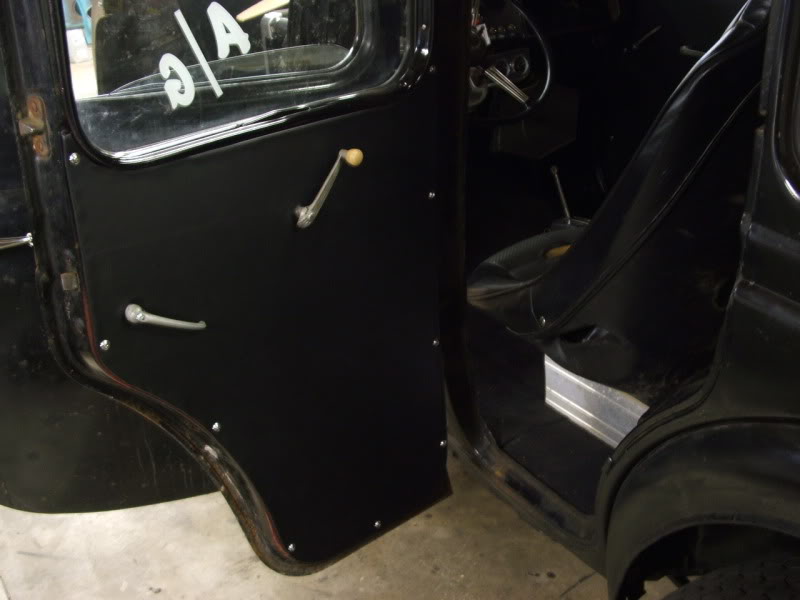
Here's the somewhat plain door panels, which is what I was hoping for. Not too custom for a street legal gasser:
Front-
Rear-
Rear package shelf-

Front carpet-

Here's the somewhat plain door panels, which is what I was hoping for. Not too custom for a street legal gasser:
Front-
Rear-
Rear package shelf-
Front carpet-
#529
01-14-2011, 09:41 PM
Join Date: Aug 2008
Location: Portland, Or
Posts: 9,097
Last night I brought home a detailed map of the bows on the interior roof of the Austin so my lovely wife could sew it up. We laid it all out on the floor of the living room, and marked the back side of the material with sewing chalk. We made the loops 1" tall, so we marked out 3 lines for ea. loop. Then we folded the material at the center line and pinned it every 8" or so. Once all the bow loops were pinned, my wife ran them all through her sewing machine and permanently sewed the loops in.
Today I took the headliner over and made up wires from 1/8" rod to slip into each loop. I started at the middle loop and stapled it in the middle, then worked my way to both sides pulling it tight and stapling the loops. All my ceiling metal supports have wood attached to them, so stapling is the method to install.
I repeated the loop stapling while I worked towards the rear window. Eventually I got all 5 bows stapled, and then began to stretch the material towards the doors. I use those heavy duty spring steel paper clpis to hold the edges at the door openings, and keep loosening, or tightening as I add clips.
Once it's all close to looking good I remove one portion at a time and glue it in place. I use 3M 77 spray glue on the edges, and the material. When it dries I carefully pull the material into place and reinstall the clips. If I do it before it's too dry I can actually pull it and reset it if it's not quite right the first try.
Got it all set in place, and then I installed the recovered edge trim I did in matching black naugahyde. Still more trim to install, but the headliner is in and only cost me $9 for material on sale! Figured I could screw several up, and still save a ton of money over the quoted price of $400 to make and install one!
Today I took the headliner over and made up wires from 1/8" rod to slip into each loop. I started at the middle loop and stapled it in the middle, then worked my way to both sides pulling it tight and stapling the loops. All my ceiling metal supports have wood attached to them, so stapling is the method to install.
I repeated the loop stapling while I worked towards the rear window. Eventually I got all 5 bows stapled, and then began to stretch the material towards the doors. I use those heavy duty spring steel paper clpis to hold the edges at the door openings, and keep loosening, or tightening as I add clips.
Once it's all close to looking good I remove one portion at a time and glue it in place. I use 3M 77 spray glue on the edges, and the material. When it dries I carefully pull the material into place and reinstall the clips. If I do it before it's too dry I can actually pull it and reset it if it's not quite right the first try.
Got it all set in place, and then I installed the recovered edge trim I did in matching black naugahyde. Still more trim to install, but the headliner is in and only cost me $9 for material on sale!
Figured I could screw several up, and still save a ton of money over the quoted price of $400 to make and install one!
#530
01-14-2011, 09:51 PM
Banned
Join Date: Oct 2009
Location: Raised in Tilton NH now residing in Kings Mountain KY
Posts: 496
Way to go Vall. After watching someone put in my headliner I kicked myself in the butt. Next one I'll do myself. Makes a big difference to the overall look of your interior I'm sure. Any pics for us?