
my 69 camaro project


Thread Starter
|
December 2011 ROTM
Santas Little Helper
Santas Little Helper
Joined: Jul 2007
Posts: 1,242
From: Casselberry, FL
ROTM Winner's Club
Sorry to disappoint you all but very little has been done to the car since she came home. My job keeps me very busy, but I am very thankful for the work when I see so many businesses going under......& my son turned 18 on Halloween. That has been a battle in itself with him wanting to growup as fast as he can. I have to remember what I was doing when I turned 18 and let go a bit.......one thing I was doing was driving a 67 purple metallic camaro.
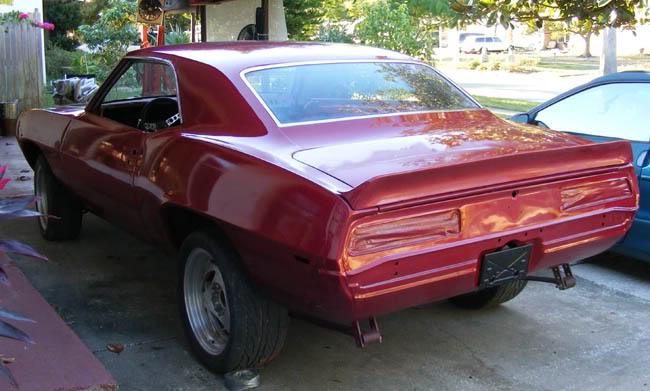
As for an update: A few weeks ago we pulled her out of the carport to give her a good look at and found alot of little tweaking that will need done to the body, which I'm sure will come in time.
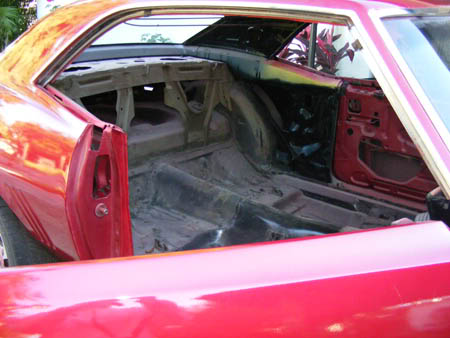
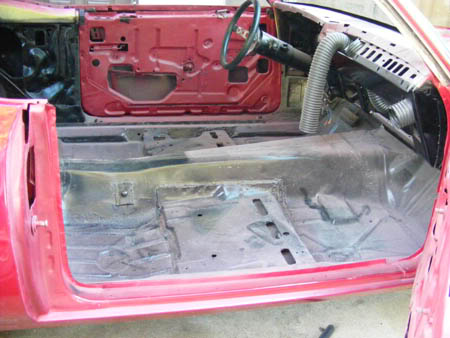
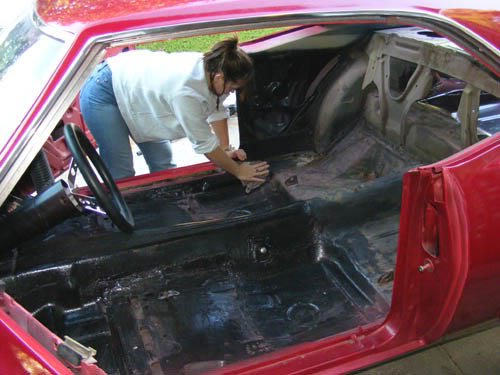
The 1st thing we did was to wash the inside of her out.
Hello....this is me
And now..........welcome to the patio pile of stuff......lol. This has been accumulating for the last year and now it was finally time to go thru it all.
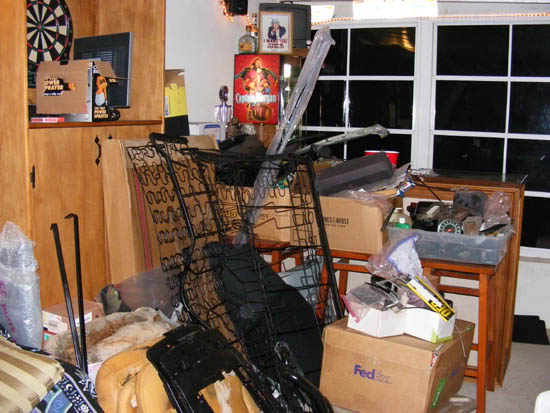
This pile became 3 piles.
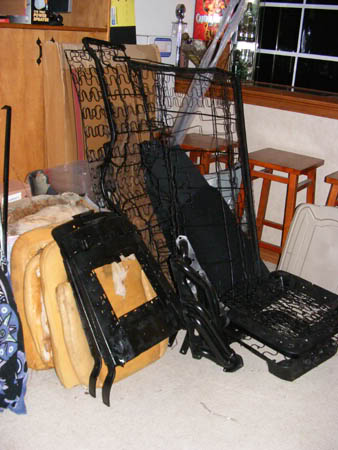
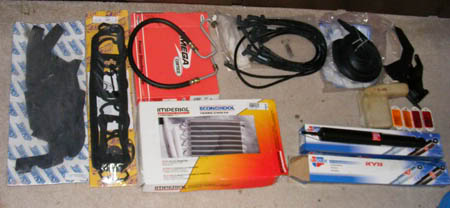
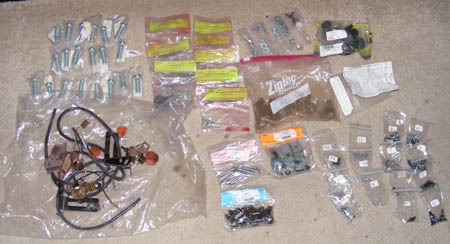
Stuff to clean up
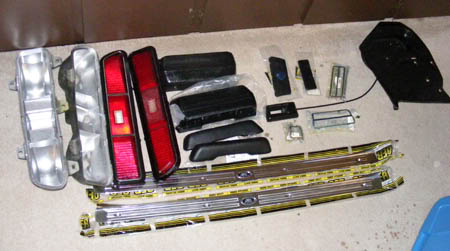
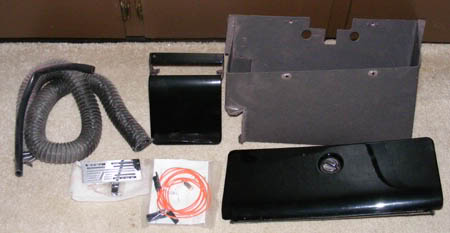
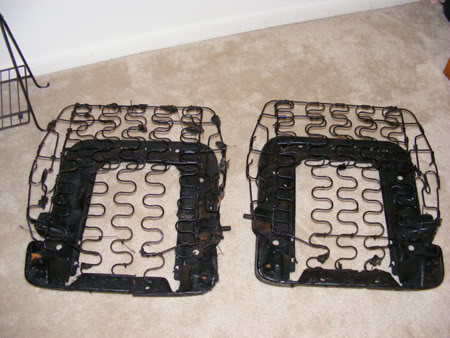
all the seats,interior panels, and dash pad
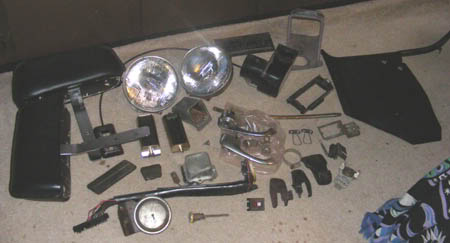
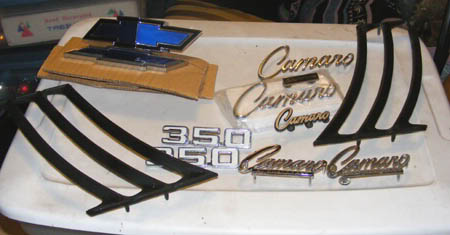
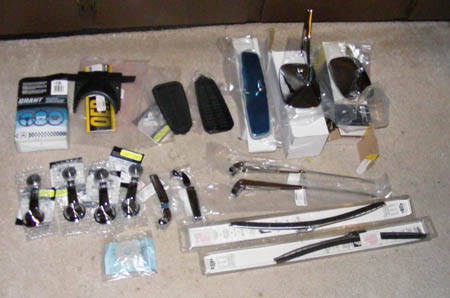
And everything you could need to put together a 69 camaro

And finally, its all packed away in tubs and safely out in my shed till I do get to it all, little by little. 1st what I am going to do, startingthis weekend is recover the seats. I went and got some new burlap, felt batting, and cheescloth to get me started. Tomorrow I am getting the roll of cotton batting for the benches.
As for an update: A few weeks ago we pulled her out of the carport to give her a good look at and found alot of little tweaking that will need done to the body, which I'm sure will come in time.
The 1st thing we did was to wash the inside of her out.
Hello....this is me
And now..........welcome to the patio pile of stuff......lol. This has been accumulating for the last year and now it was finally time to go thru it all.
This pile became 3 piles.
Stuff to clean up
all the seats,interior panels, and dash pad
And everything you could need to put together a 69 camaro
And finally, its all packed away in tubs and safely out in my shed till I do get to it all, little by little. 1st what I am going to do, startingthis weekend is recover the seats. I went and got some new burlap, felt batting, and cheescloth to get me started. Tomorrow I am getting the roll of cotton batting for the benches.


Wow, awesome pics. youve got alot of stuff there. I dont have the drive to get all mine together, lay it out and photo it. I've got stuff in the garage, all over the florida room and under the porch cover on the deck. The inside of your Camaro looks alot like mine... nothing there!! I even pulled the steering colunm once I put her on wheel dollies. Your car is looking great, I'm jealous. I love the color. Keep up the great work. Thanks for posting the pics, somebody needs to so the rest of us lazy guys will get off our cans and get back to work on our rides!
Thread Starter
|
December 2011 ROTM
Santas Little Helper
Santas Little Helper
Joined: Jul 2007
Posts: 1,242
From: Casselberry, FL
ROTM Winner's Club
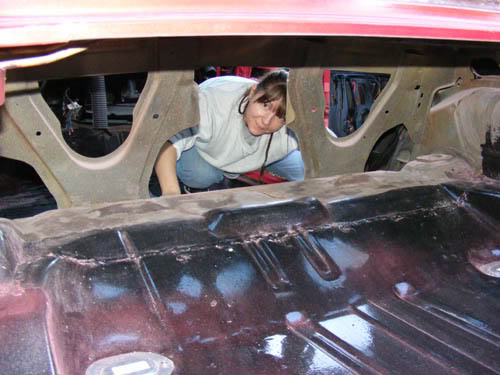
So the more and more I look at the underside of this car the more pissed off I am getting. Too many things look unfinished and that should have been done better. But hey I am no expert. Plus the paint job on the rockers has a ton of scratches on them. Lots of things I will have to address with my guy when it goes back to get buffed out.
Well I finally got something done on the camaro. Its tough with the busy holidays and all but we did get things started. After spending a day cleaning up and organizing our carport we got the camaro up on some jackstands to remove the rear suspension. After about 15 min I realized that I wasnt going to get anywhere fast since the clip bolts failed. So I let the squid take over to spend the rest of the day grinding off the bolts. But finally in the end we won the battle.
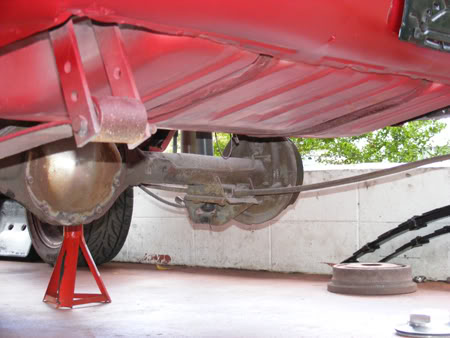
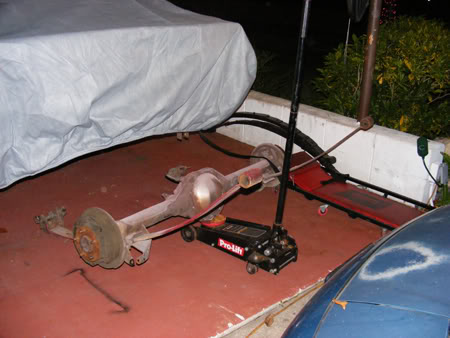
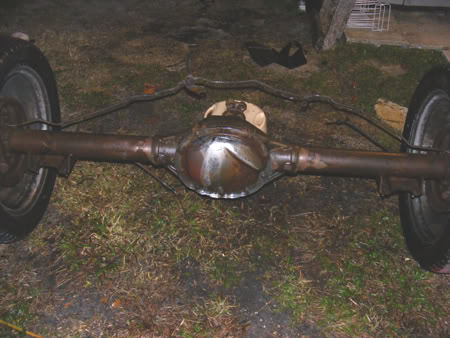
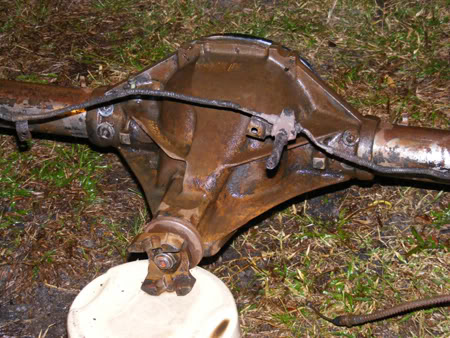
So yesterday I got a chance to scrub the inch of crud and get rid of the old single leaf springs. Once the new year festivities have come and gone there will be nothing to get in the way of really getting some work done.
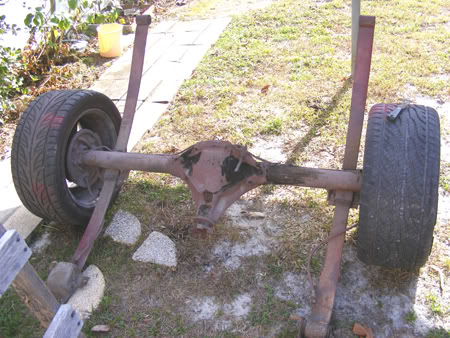
Well I finally got something done on the camaro. Its tough with the busy holidays and all but we did get things started. After spending a day cleaning up and organizing our carport we got the camaro up on some jackstands to remove the rear suspension. After about 15 min I realized that I wasnt going to get anywhere fast since the clip bolts failed. So I let the squid take over to spend the rest of the day grinding off the bolts. But finally in the end we won the battle.
So yesterday I got a chance to scrub the inch of crud and get rid of the old single leaf springs. Once the new year festivities have come and gone there will be nothing to get in the way of really getting some work done.
Thread Starter
|
December 2011 ROTM
Santas Little Helper
Santas Little Helper
Joined: Jul 2007
Posts: 1,242
From: Casselberry, FL
ROTM Winner's Club
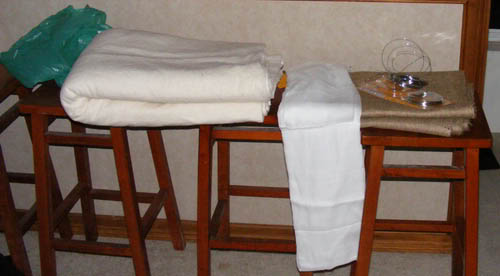
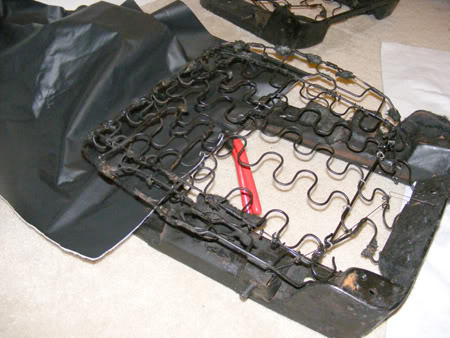
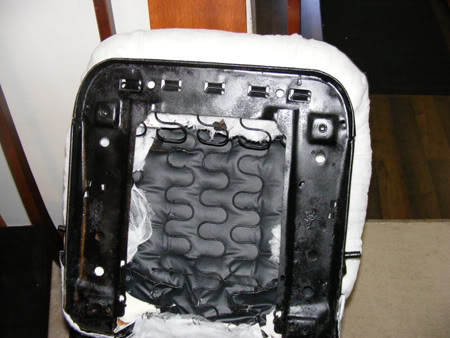
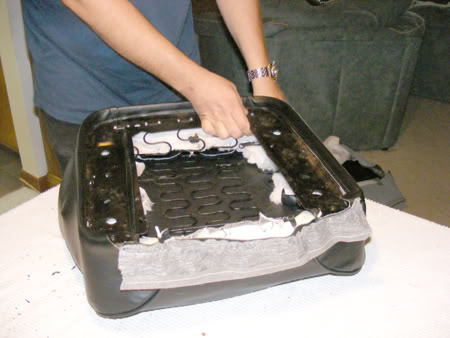
Ok so its time for upholstery 101. I finally found some time and dug out my seat frames to recover them. It was a bit of a challenge but I think I will be able to finish them in no time. I hope these pics will be helpfull to anyone who is going to attempt this job. And if you've already done this sort of thing, sorry if it seems a bit redundant but here goes nothing.
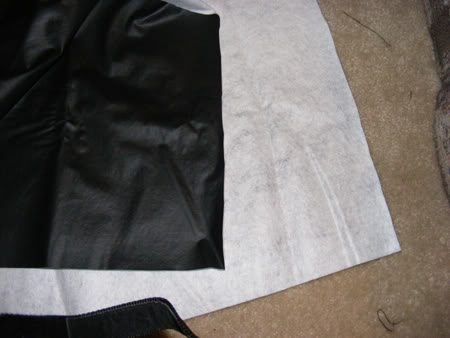
So I started out with some vinal backed felt fabric to wrap the front seat bottom frames that was similar to what I found when I took the old covers off.
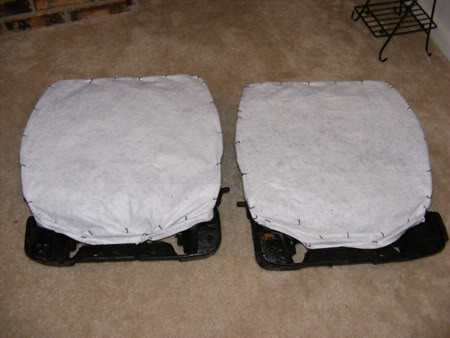
Then I used some spray adhesive to wrap fabric around the rest of the frame.
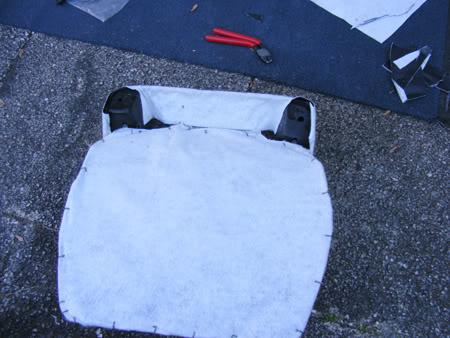
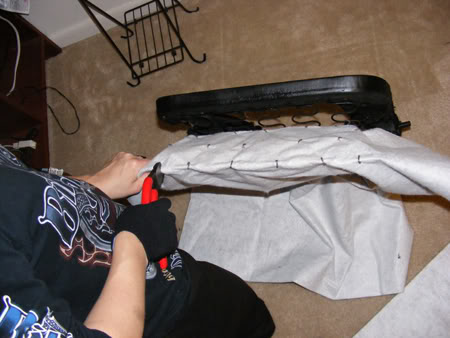
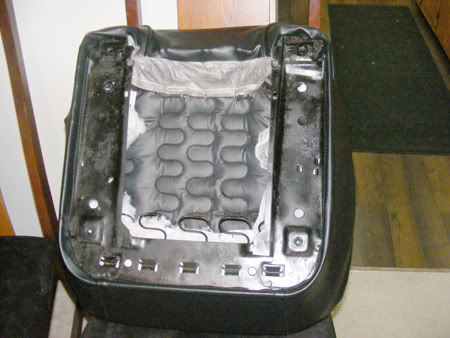
The foam from the seats were in pretty good shape so I reused them. I attached them down the 2 groves. I did take a damp cloth and wiped them off a bit cause they had a bit of a musty smell to them. After they dried I started to attach the seat covers. Here's where it got a bit tougher in getting thru the layers of foam, felt, and attaching the rings around the frame itself.
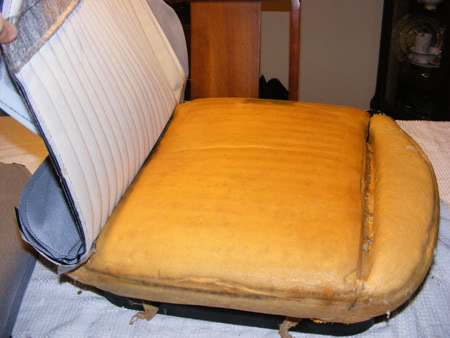
I also put 2 layers of a felt fabric in between the frame and foam.
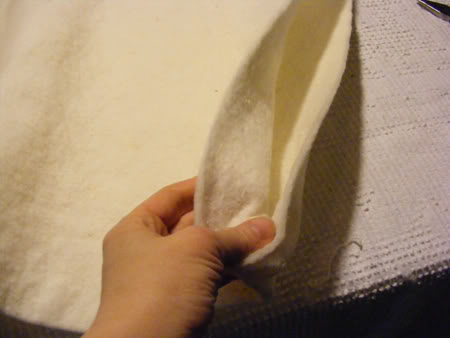
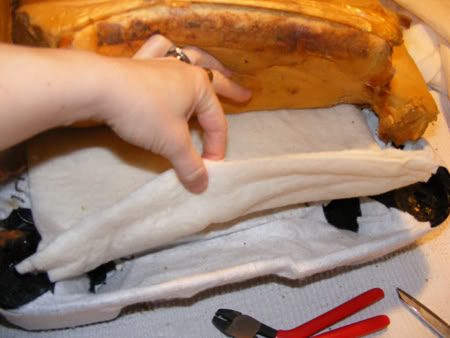
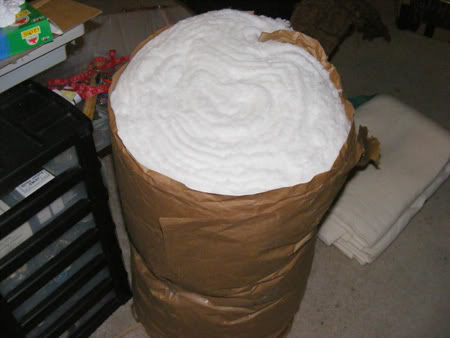
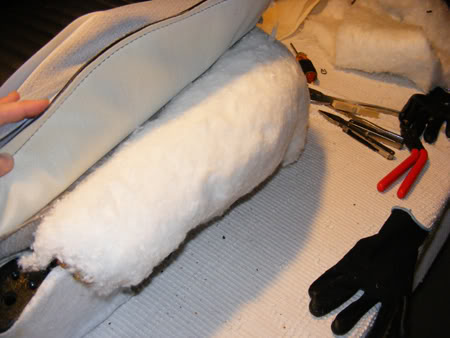
My seat foam is in good condition but are old so they may have shrunk a bit over the years so I felt some extra padding was needed. I got this roll at my local upholstery shop for 26$. After adding a layer of the cotton batting I put a layer of cheesecloth over it to just help keep it in place.
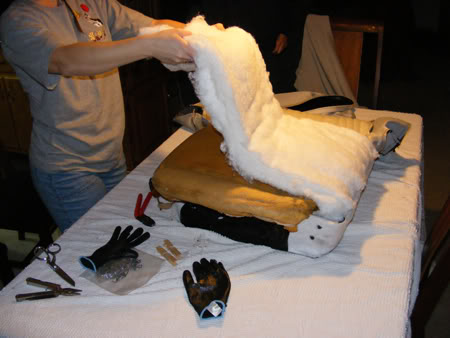
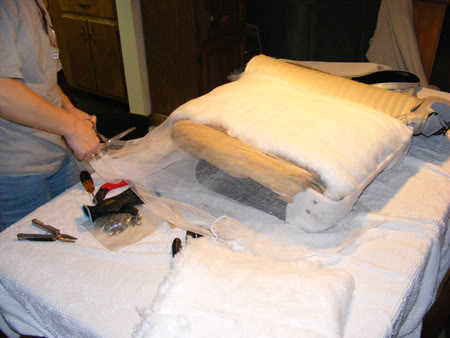
And now for the real fun....attaching the other side of the seat cover with all the extra padding. Once that part is done you are on the home stretch. I also added a layer of the cotton batting to the sides along with the cheesecloth, wrapped it around to the back and attached it with hog rings.
So I started out with some vinal backed felt fabric to wrap the front seat bottom frames that was similar to what I found when I took the old covers off.
Then I used some spray adhesive to wrap fabric around the rest of the frame.
The foam from the seats were in pretty good shape so I reused them. I attached them down the 2 groves. I did take a damp cloth and wiped them off a bit cause they had a bit of a musty smell to them. After they dried I started to attach the seat covers. Here's where it got a bit tougher in getting thru the layers of foam, felt, and attaching the rings around the frame itself.
I also put 2 layers of a felt fabric in between the frame and foam.
My seat foam is in good condition but are old so they may have shrunk a bit over the years so I felt some extra padding was needed. I got this roll at my local upholstery shop for 26$. After adding a layer of the cotton batting I put a layer of cheesecloth over it to just help keep it in place.
And now for the real fun....attaching the other side of the seat cover with all the extra padding. Once that part is done you are on the home stretch. I also added a layer of the cotton batting to the sides along with the cheesecloth, wrapped it around to the back and attached it with hog rings.
Last edited by orocker; Jan 20, 2009 at 10:56 PM.
Thread Starter
|
December 2011 ROTM
Santas Little Helper
Santas Little Helper
Joined: Jul 2007
Posts: 1,242
From: Casselberry, FL
ROTM Winner's Club
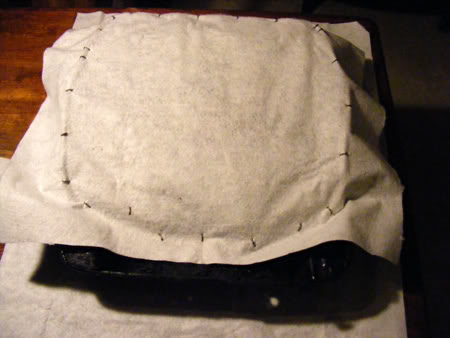
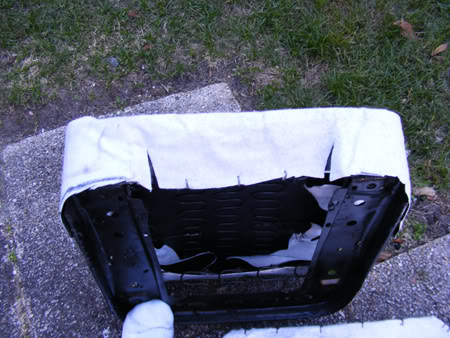
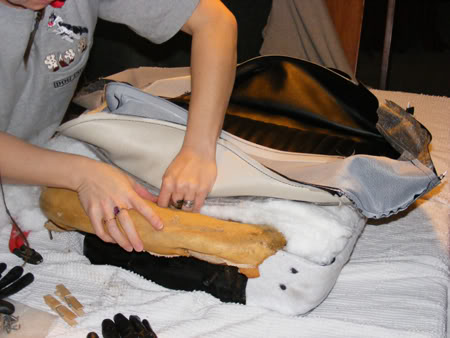
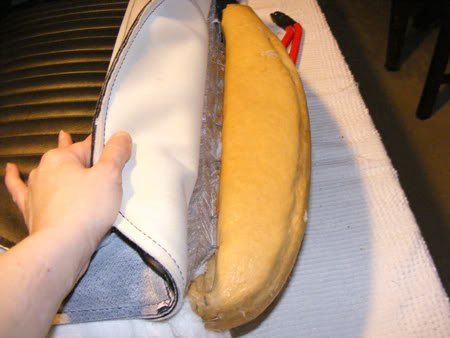
Now it was time to turn the seat cover right side out and wrap it around the bottom. I found it best to start at the front and work your way around. Then flip the seat over to wrap the edge around the bottom of the seat. There is a plastic piece that is sewn around the bottom that is to be inserted into the lip that is around the bottom edge of the seat frame. This was the hardest part of the whole job. And lastly I attached the back piece to the bottom.
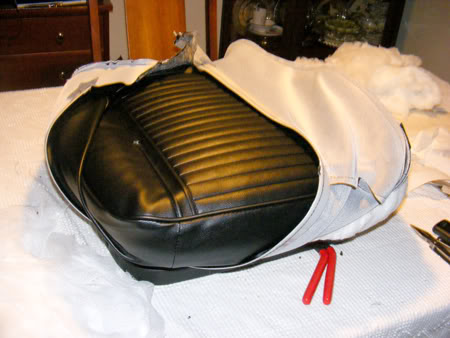
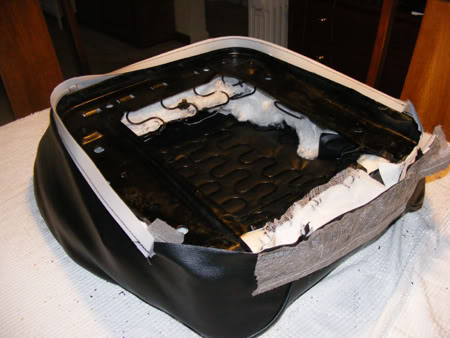
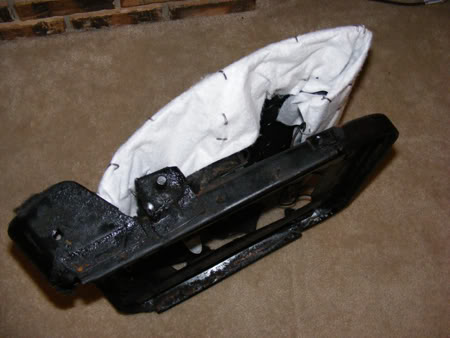
And whala....the finished product.
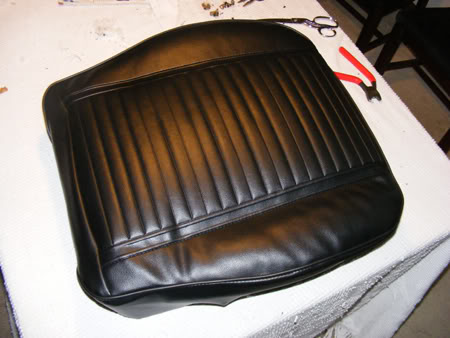
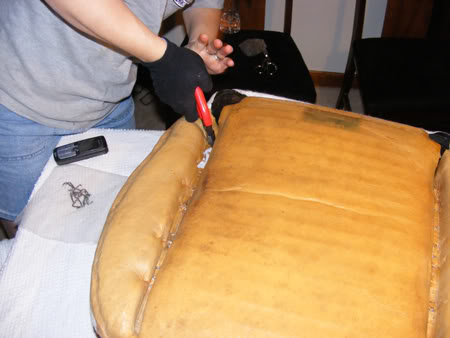
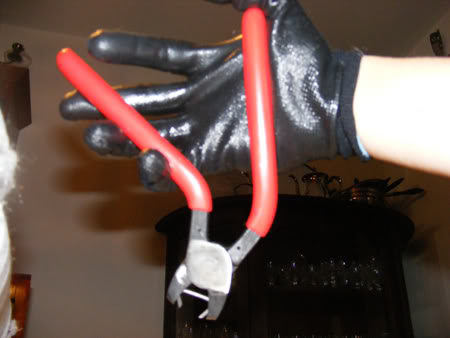
And now I am out of hog rings.......time to order more.....lol. After doing this much of the job, I would say it wasnt as hard as I thought it was going to be. One tip I have, hold the hog ring pliers like this and it wont tear up your palm as much.
And whala....the finished product.
And now I am out of hog rings.......time to order more.....lol. After doing this much of the job, I would say it wasnt as hard as I thought it was going to be. One tip I have, hold the hog ring pliers like this and it wont tear up your palm as much.

Newbie
Joined: Jan 2009
Posts: 7
From: New York Blahhh.
Awesome job man!!! I am new to the site and went through your posts and i'm impressed. I am building a 69 camaro and it is taking some time. I got it when I was 17 and now i am 22 lol. I'm chipping away at it, and going to school. Best project ever, i'm glad I fell into one. I wanted to know what did you put on your window guides for the doors? Mine are worn out like yours were and i just need to replace the fabric on them. I too am doing my seats, i am going to do the houndstooth and black seats. Unfortunately i need foam! Otherwise they will be the best looking, most uncomfortable seats ever!!! Keep on posting car looks great!


Newbie
Joined: Feb 2009
Posts: 7
The project looks great. I have a question for Scooch, What size rims and tires do you have on your car? Do yiou know the backspacing? I have a 69 camaro and am having trouble figuring out the best size and backspacing. Thanks.
Thread Starter
|
December 2011 ROTM
Santas Little Helper
Santas Little Helper
Joined: Jul 2007
Posts: 1,242
From: Casselberry, FL
ROTM Winner's Club
thanks guys. Quadman I sent you a pm.
Just to give you guys an update, I got the paint for the rear axle this weekend but the weather was not warm enough to paint it and it looked like rain too much. Gonna try to do that in the next few days. Sunday I purchased a bunch of new parts from Summit. So here's what I am getting.
mufflers
http://store.summitracing.com/partde...0&autoview=sku
exhaust
http://store.summitracing.com/partde...0&autoview=sku
Headers
http://store.summitracing.com/partde...0&autoview=sku
Differential cover kit
http://store.summitracing.com/partde...0&autoview=sku
Alternator
http://store.summitracing.com/partde...0&autoview=sku
leaf spring conversion kit
http://store.summitracing.com/partde...5&autoview=sku
And today I bought the wiring harness. Thanks for the link scooch.
http://cgi.ebay.com/ebaymotors/ws/eB...%3AIT&viewitem=
So soon it will be Christmas again at my house and I will be able to get some much needed work done.
You are doing an awesome Job O. I am so proud of you and all your progress! I cant wait for you to come over and help me cover my seats. And, I am so glad you are going to get your car wired before me.  we'll talk more about that later. Keep up the good work girl!!
we'll talk more about that later. Keep up the good work girl!!