
Installing mini-tubs, DSE Quadra Link, and more


Thread Starter
|
July 2011 ROTM
Joined: Dec 2009
Posts: 153
ROTM Winner's Club
Thanks.
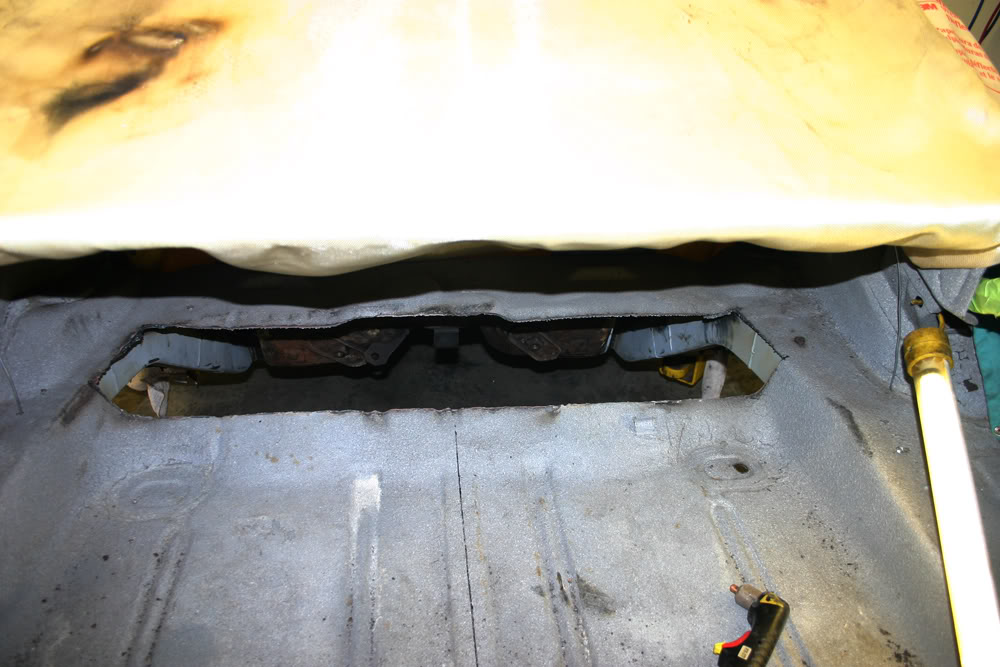
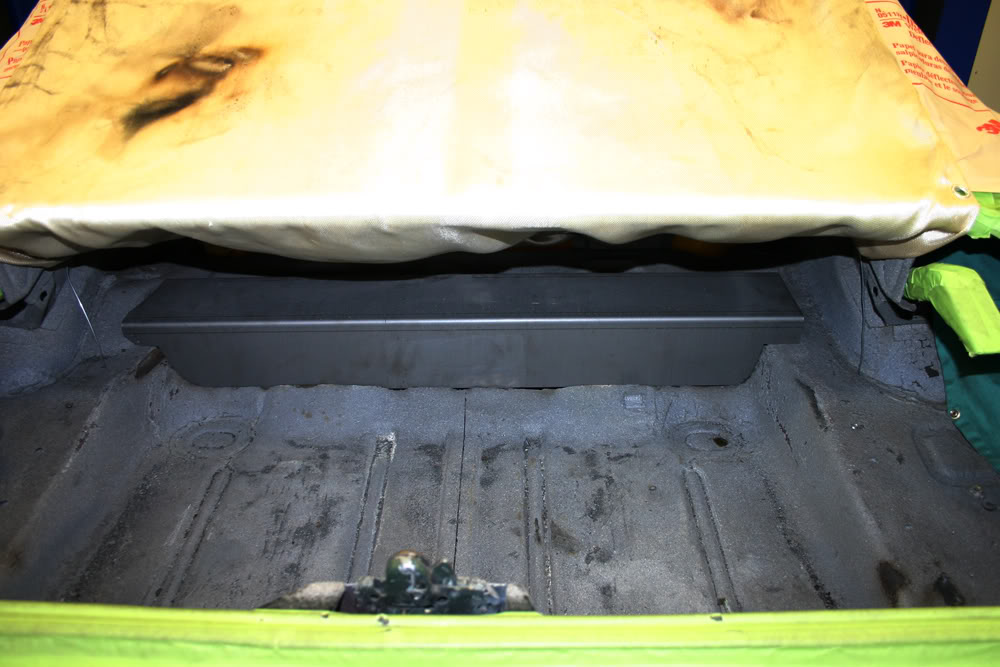
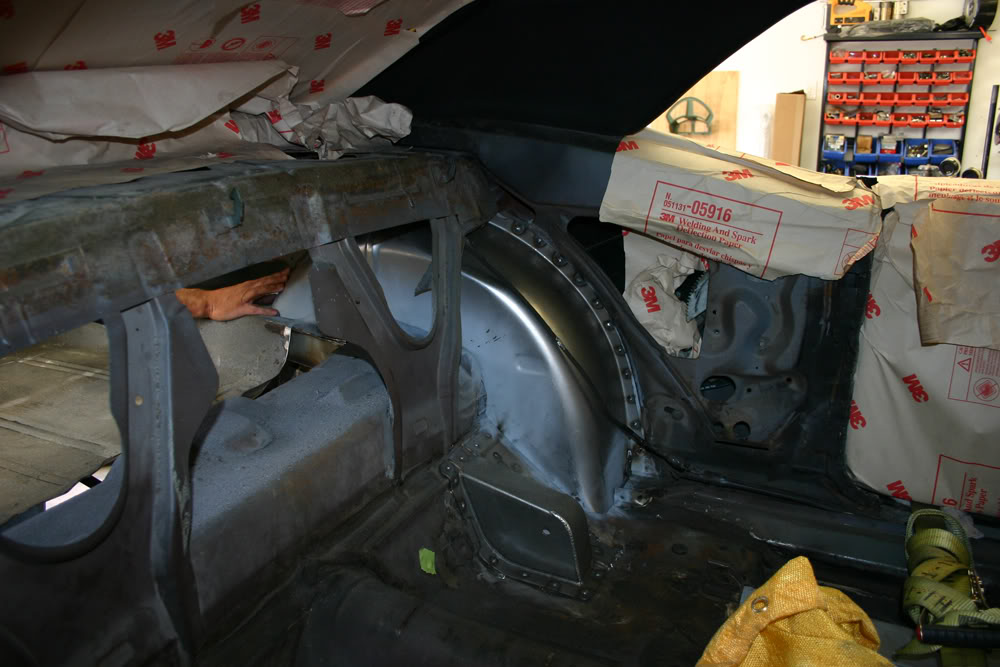
Yesterday and today were days of making big holes and then preparing to fill them. Since we are installing the Quadra Link rear suspension, the next step was installing the shock tower brace. This required cutting a large hole in the trunk area. The plasma cutter made short work of this but it did take some trimming and fitting to get the brace to fit into the hole. It will be welded in later.
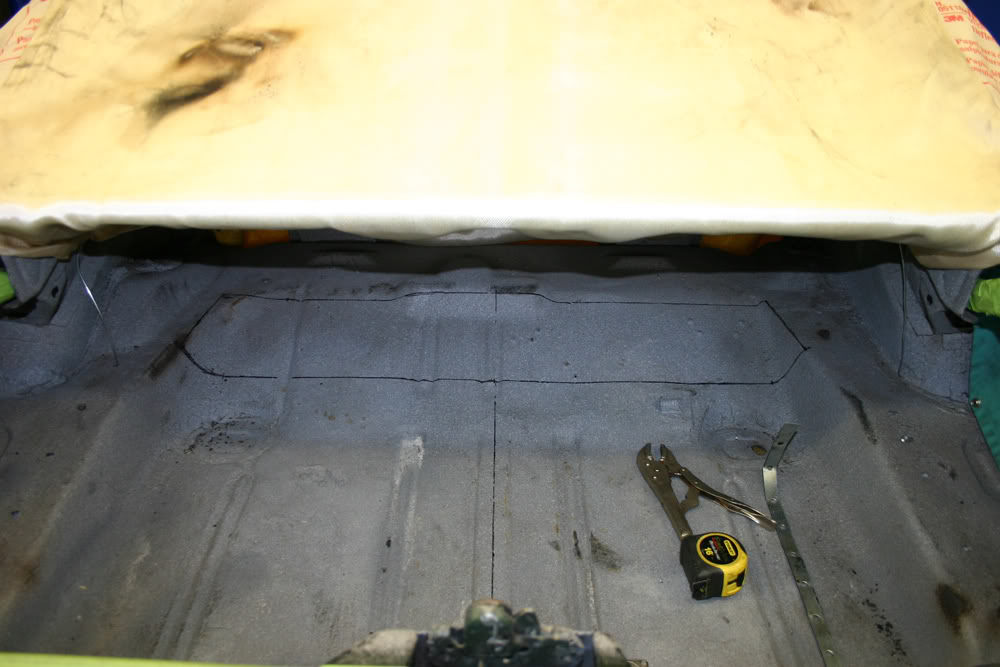
Next Matt used a sharpie to mark the cut lines for the inner wheel well. Before we could cut it out, we had to drill out the welds on the bracket that supports the trunk lid hinge and the rear seat bracket where it attaches to the wheel well. Matt purchased a special bit for this step. It helped but separating the bracket from the wheel well still took some persuading. To remove the inner wheel wells, DSE recommends drilling out all of the welds. After seeing how long it took to do the two small brackets, we decided to forgo this step and use the plasma cutter to remove the wheel well. Even with the plasma cutter, this step took awhile requiring Matt to get into the trunk (For your information, a body will fit into the trunk of a Camaro!!) and contort his body to get the cutter where it needed to be. Part of it is also cut out from the interior. Eventually, we had our large hole.
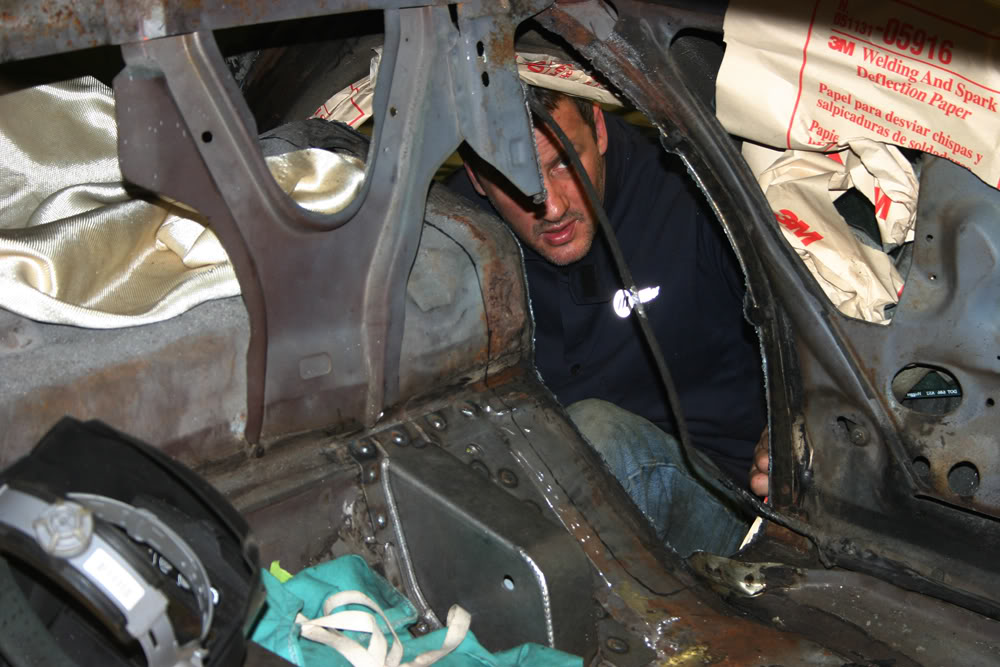
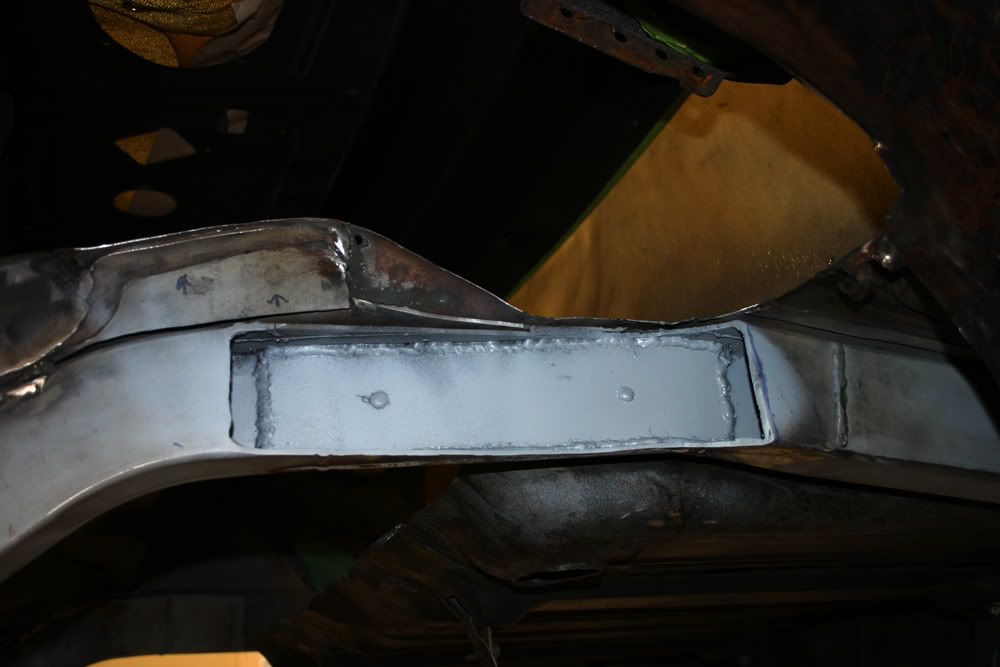
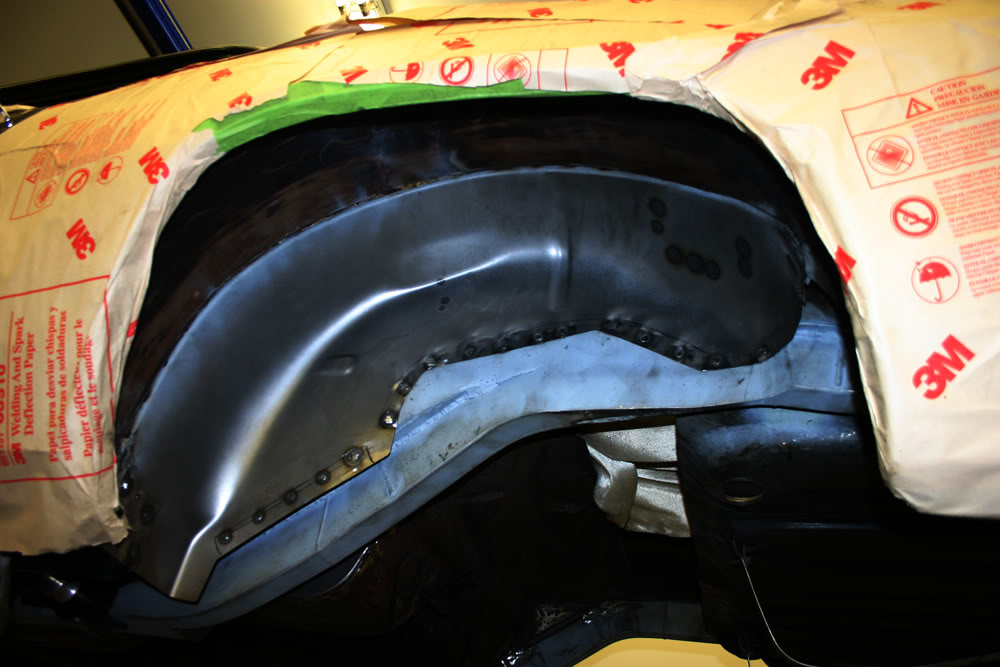
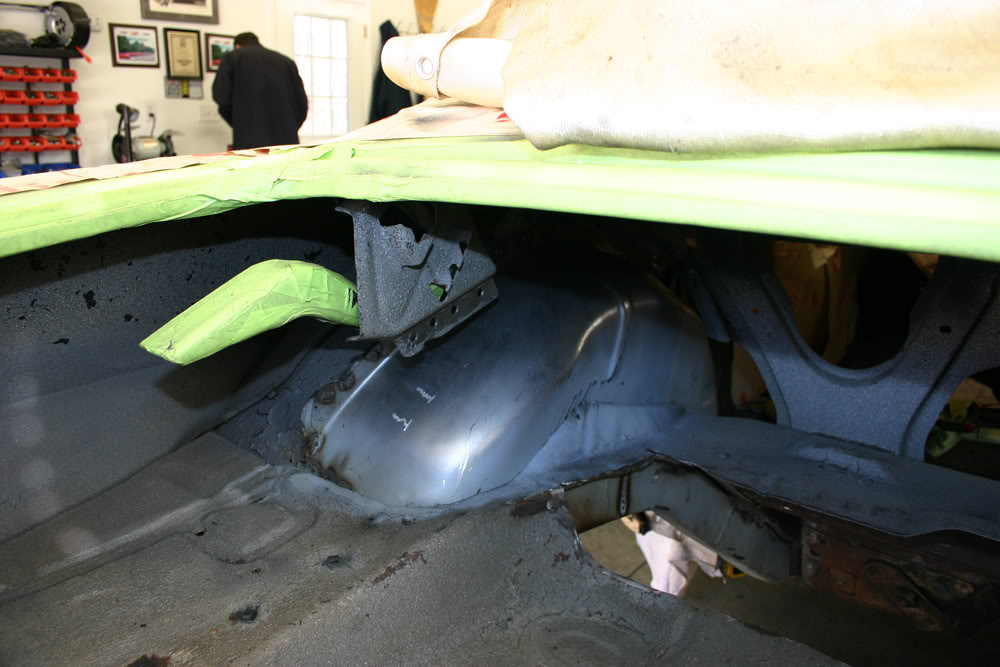
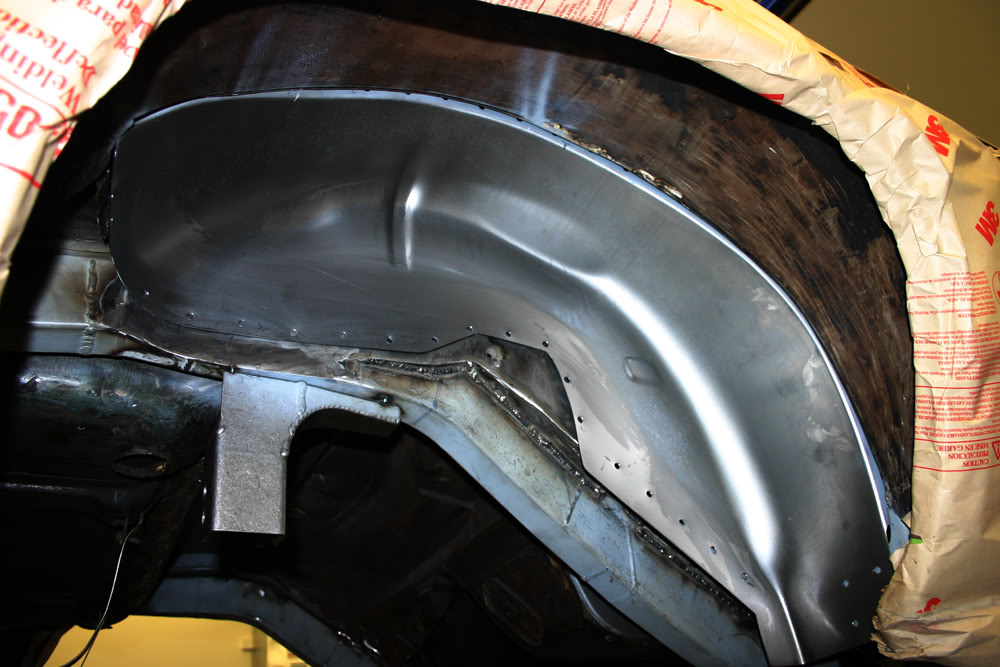
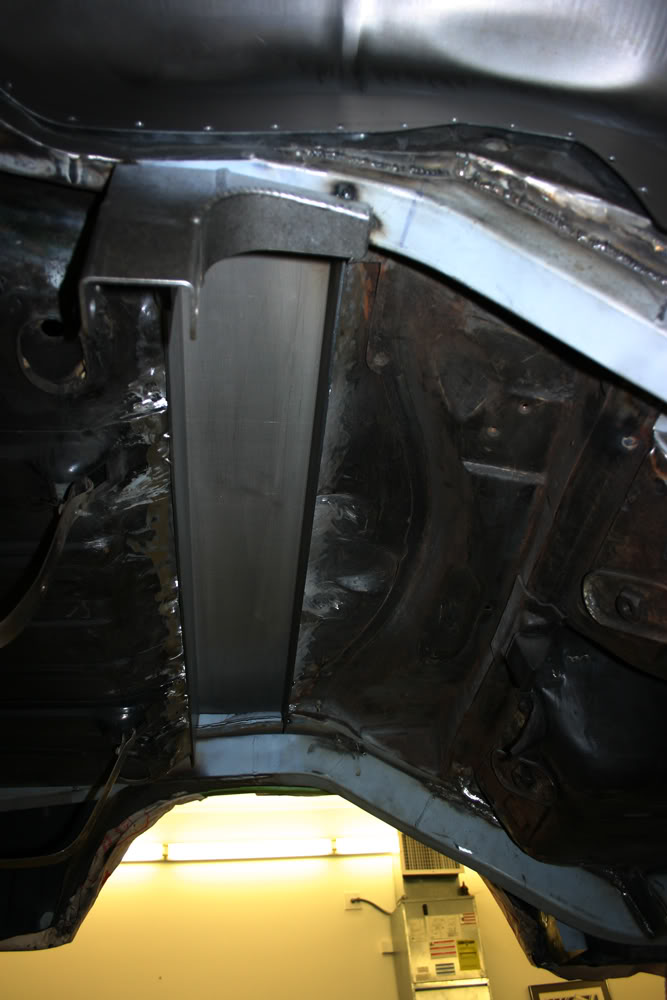
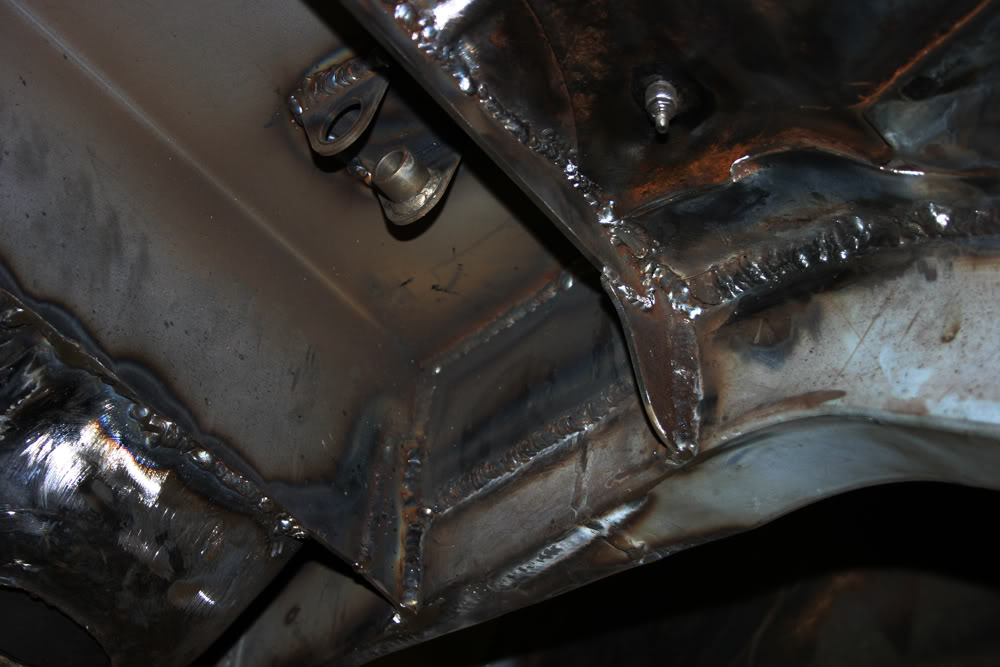
Today we began the process of filling the hole in the wheel well. As usual, getting the tub to fit require some cutting and trimming. We trimmed a little bit at a time to make sure it fit as well as possible. Once we had it fitting like it should, Matt had to make plates to cover the openings above the frame rail. The instructions also called for cutting into our new frame rail. Before we closed up the frame rail, Matt cut a 3/16" plate and welded it inside the frame rail. He then made the fabricated the frame rail cover from 1/8" steel plate. At the narrowest part, there were basically three plates welded back to back. It should be plenty strong. We still have one more plate to fabricate tomorrow morning and then we will be ready to weld in the tub at the holes I drilled earlier today.

Yesterday and today were days of making big holes and then preparing to fill them. Since we are installing the Quadra Link rear suspension, the next step was installing the shock tower brace. This required cutting a large hole in the trunk area. The plasma cutter made short work of this but it did take some trimming and fitting to get the brace to fit into the hole. It will be welded in later.
Next Matt used a sharpie to mark the cut lines for the inner wheel well. Before we could cut it out, we had to drill out the welds on the bracket that supports the trunk lid hinge and the rear seat bracket where it attaches to the wheel well. Matt purchased a special bit for this step. It helped but separating the bracket from the wheel well still took some persuading. To remove the inner wheel wells, DSE recommends drilling out all of the welds. After seeing how long it took to do the two small brackets, we decided to forgo this step and use the plasma cutter to remove the wheel well. Even with the plasma cutter, this step took awhile requiring Matt to get into the trunk (For your information, a body will fit into the trunk of a Camaro!!) and contort his body to get the cutter where it needed to be. Part of it is also cut out from the interior. Eventually, we had our large hole.
Today we began the process of filling the hole in the wheel well. As usual, getting the tub to fit require some cutting and trimming. We trimmed a little bit at a time to make sure it fit as well as possible. Once we had it fitting like it should, Matt had to make plates to cover the openings above the frame rail. The instructions also called for cutting into our new frame rail. Before we closed up the frame rail, Matt cut a 3/16" plate and welded it inside the frame rail. He then made the fabricated the frame rail cover from 1/8" steel plate. At the narrowest part, there were basically three plates welded back to back. It should be plenty strong. We still have one more plate to fabricate tomorrow morning and then we will be ready to weld in the tub at the holes I drilled earlier today.
Thread Starter
|
July 2011 ROTM
Joined: Dec 2009
Posts: 153
ROTM Winner's Club
More progress today. Matt finished up the small insert piece and the welded in the tub. It came out great and fit really well.
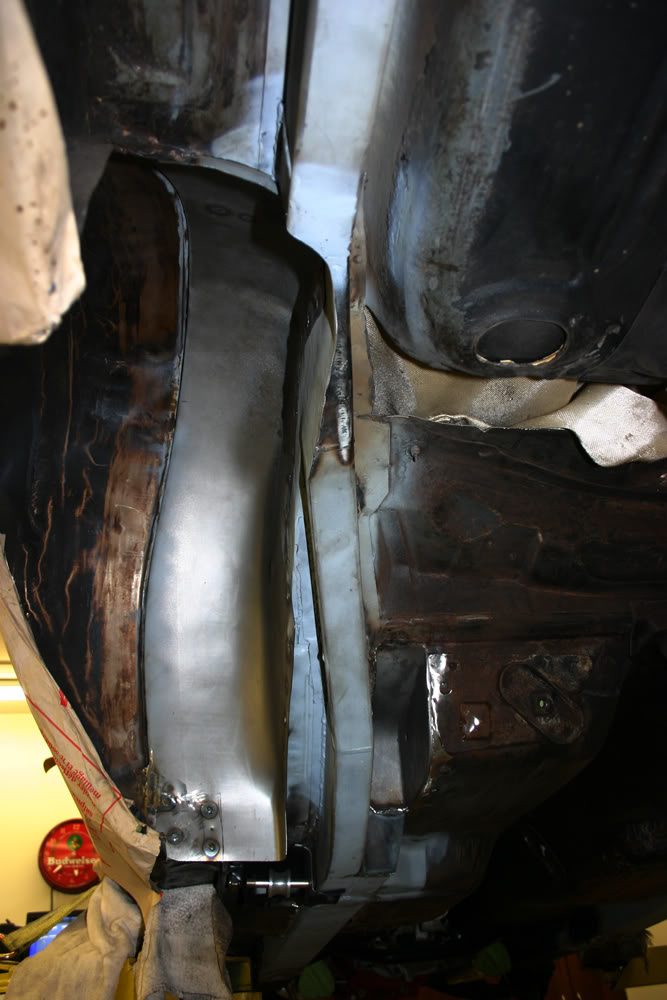
Other than seam seal, all that remained was modifying the trunk lid bracket by shortening it and re- attaching the rear seat back to the tub.

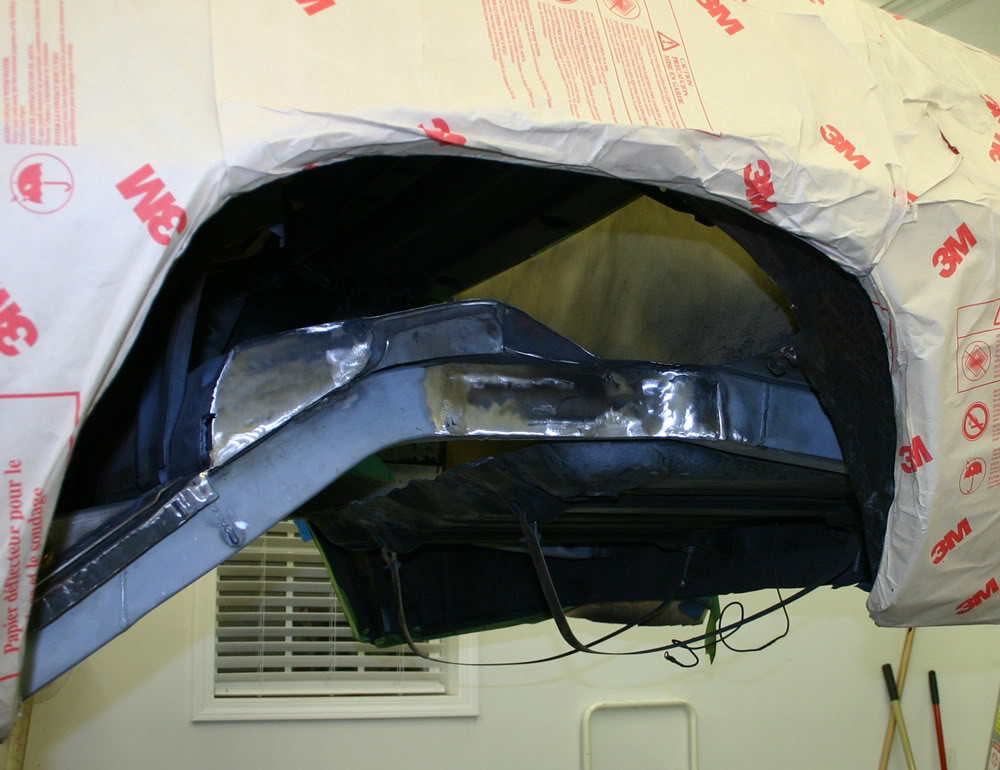
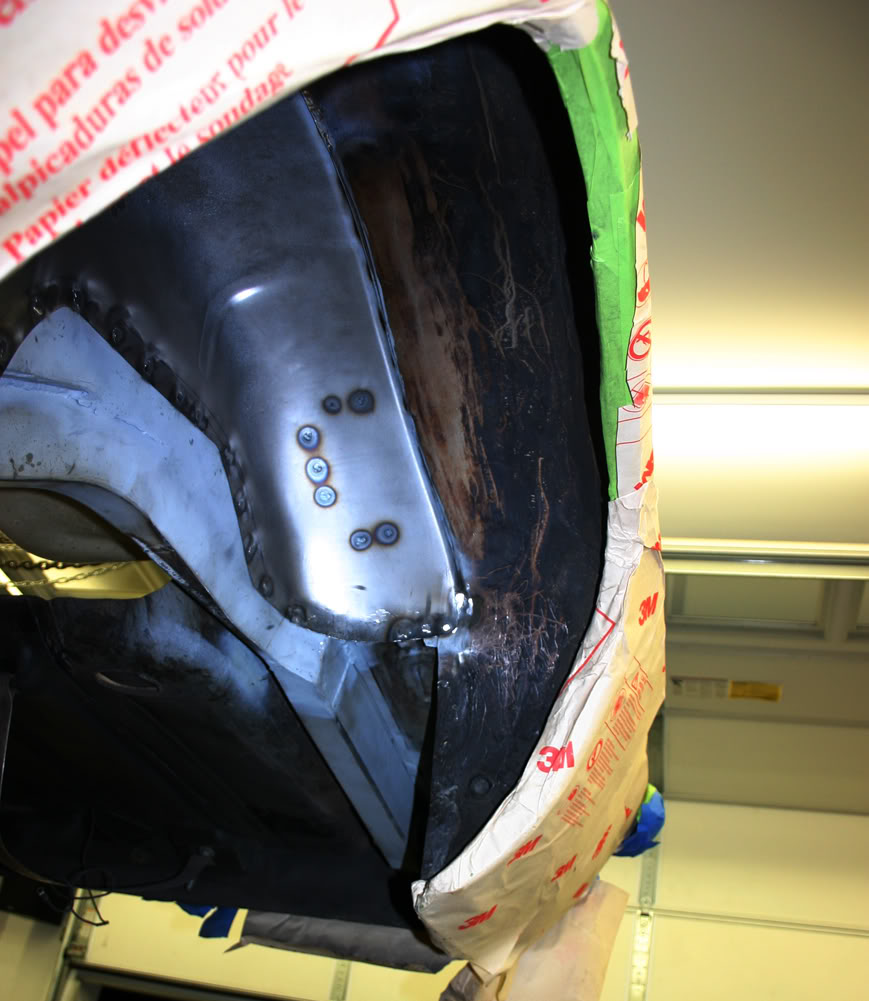
We finished the day with Matt removing the right side inner fenderwell panel. You can see the cut line of 2 3/4" below.
I shot the video below of the last piece that Matt cut out today. A little bit of Chop, Cut, Rebuild action!!
Last cut for mini-tub 1969 Camaro - YouTube
Tomorrow we fit the right side tub, make the fill-in panels and, with any luck, weld it in.
Getting closer.
Other than seam seal, all that remained was modifying the trunk lid bracket by shortening it and re- attaching the rear seat back to the tub.
We finished the day with Matt removing the right side inner fenderwell panel. You can see the cut line of 2 3/4" below.
I shot the video below of the last piece that Matt cut out today. A little bit of Chop, Cut, Rebuild action!!
Last cut for mini-tub 1969 Camaro - YouTube
Tomorrow we fit the right side tub, make the fill-in panels and, with any luck, weld it in.
Getting closer.
Thread Starter
|
July 2011 ROTM
Joined: Dec 2009
Posts: 153
ROTM Winner's Club
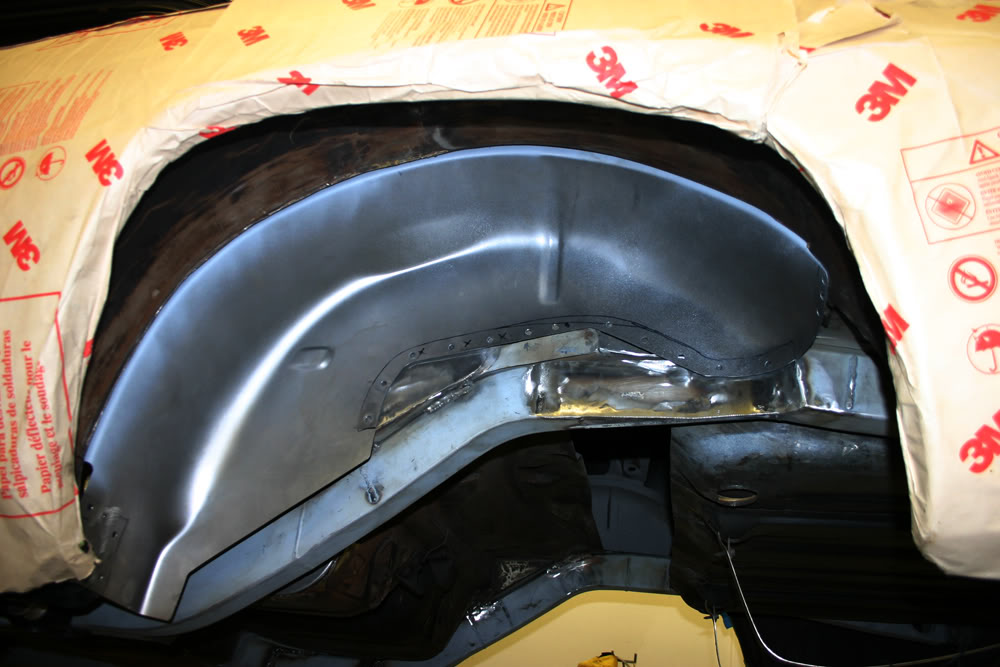
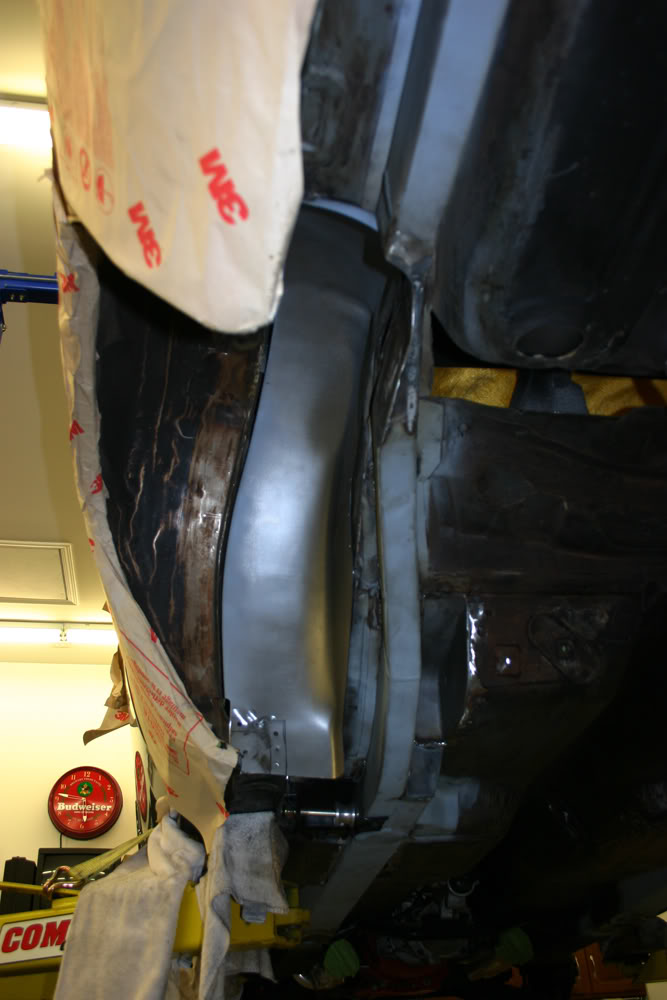
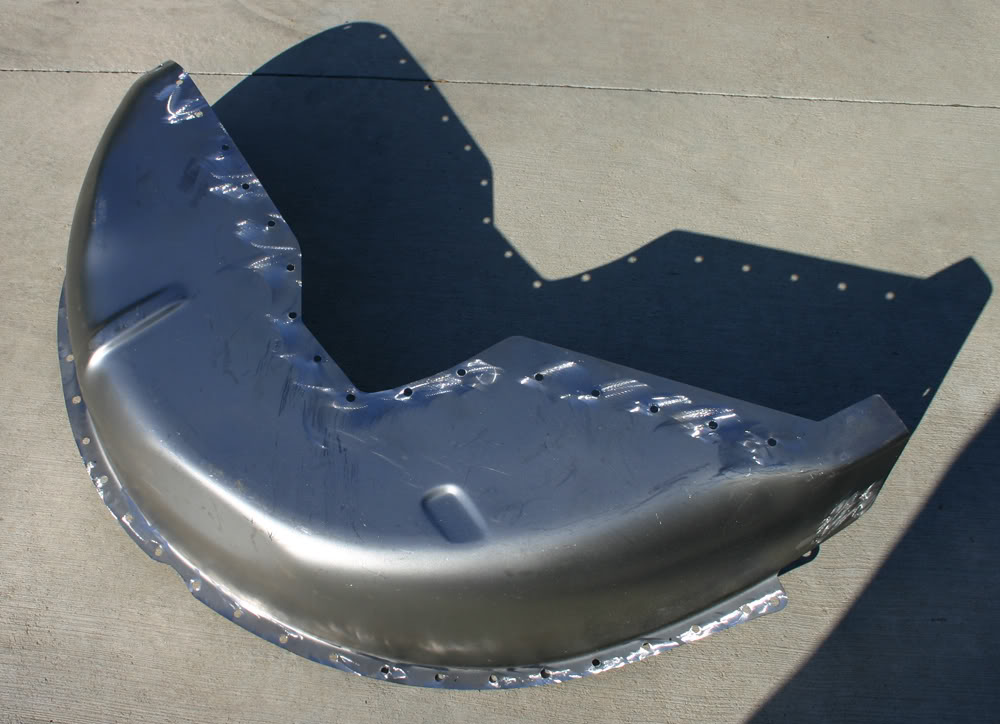
First up today was fitting the tub in our newly cut hole. I did not count the holes, but I drilled many of them into the tub. Once that was done, Matt fabricated the filler panels for the frame rail and the area above it.
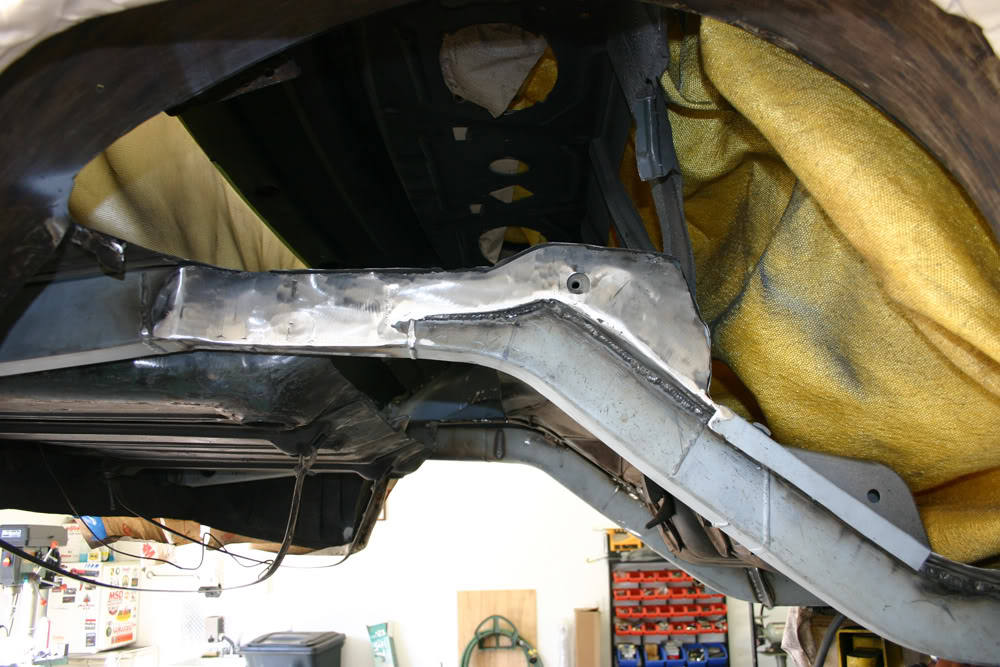
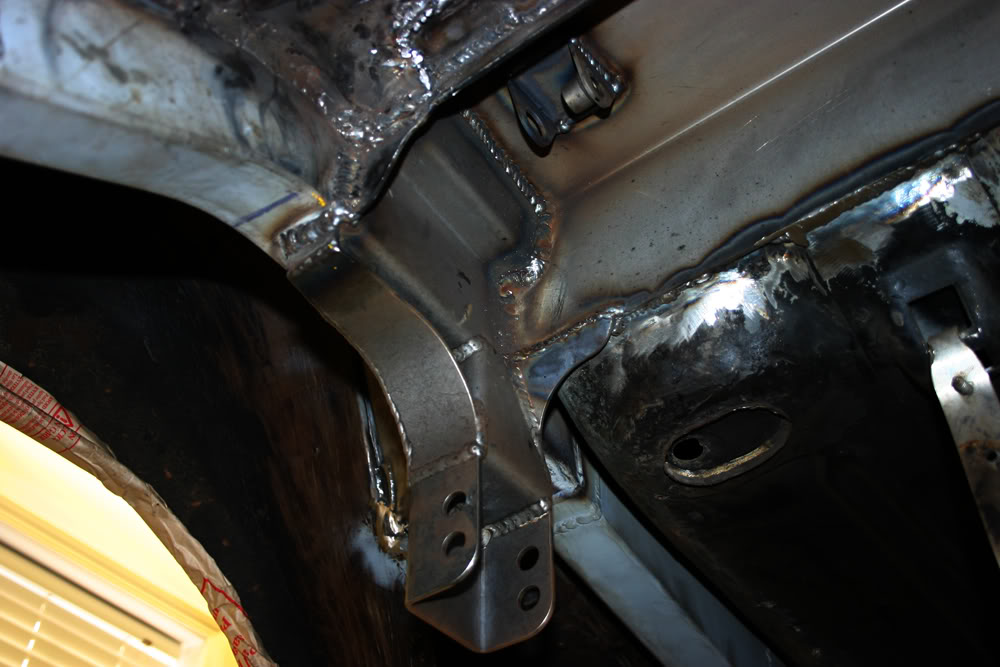
Before we welded in the tub, it was time to install the panhard bar bracket to the frame rail and to the shock tower brace. Since the tub would hide the welding areas for the bracket, Matt welded it in and also welded those areas of the shock tower brace that would have been difficult once the tub was in.
Tomorrow the tub will be welded in. This will complete the major fabbing. Before Matt does his finishing welding, we are going to mock up the rear suspension and make sure everything fits. So tomorrow we should see those fat wheels under the car!!!
Thread Starter
|
July 2011 ROTM
Joined: Dec 2009
Posts: 153
ROTM Winner's Club
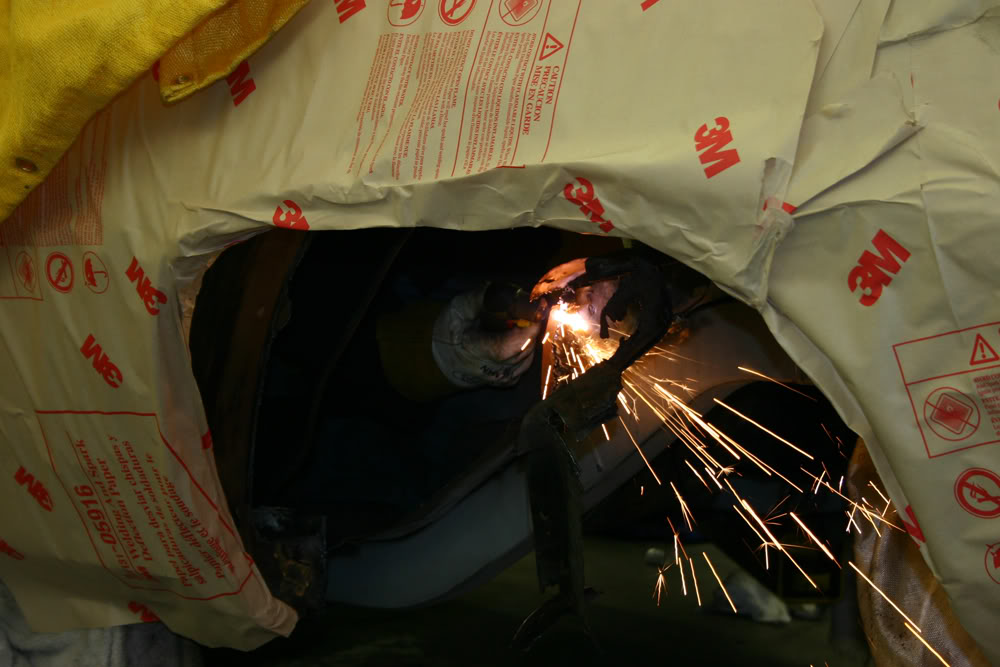
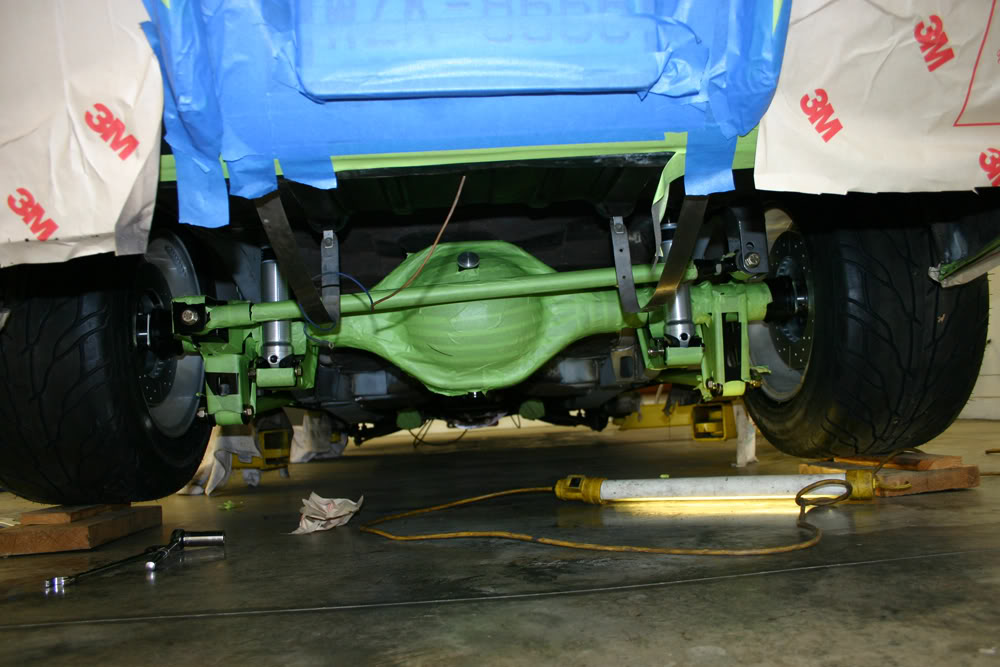
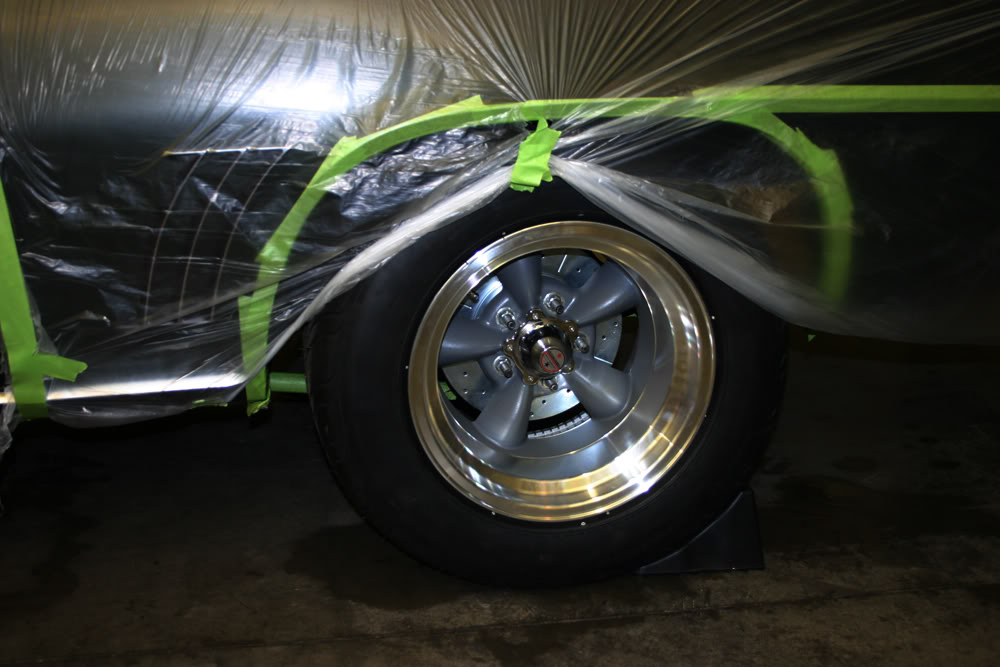
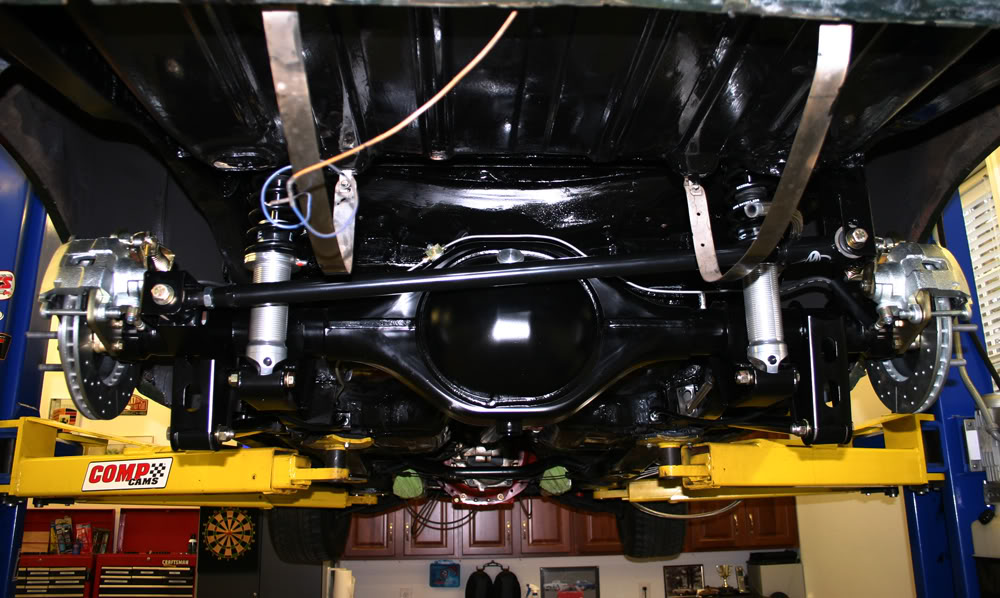
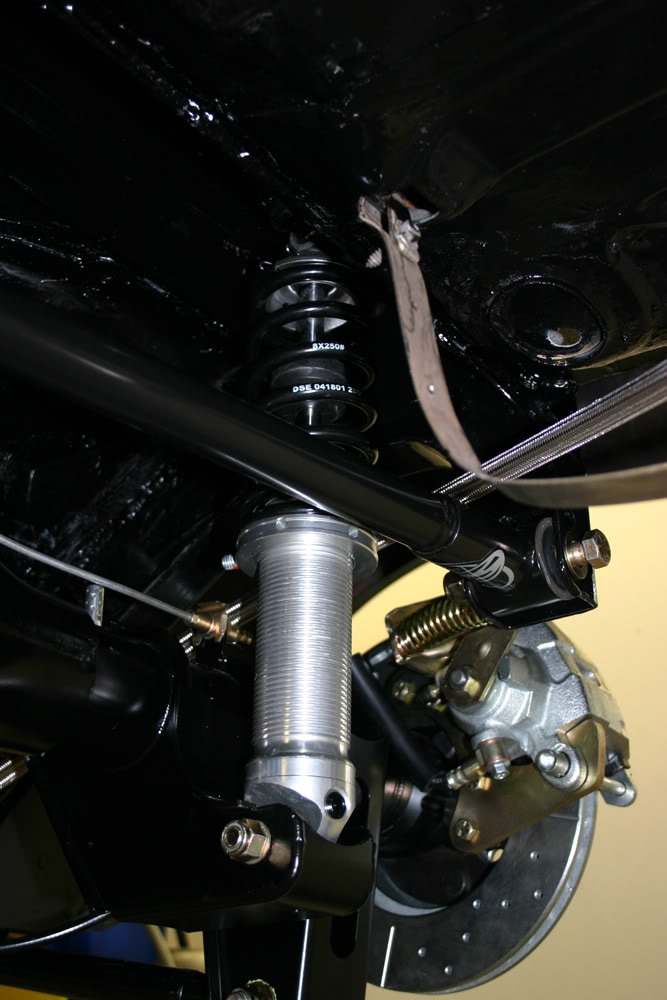
Those big wheels and tires were under the car today...at least for a little bit. We installed the axles in the housing, slipped on the disc brakes and mounted the wheels and tires. Next we attached the suspension arms. Then we rolled the axle under the car and hooked everything up. We needed to get the car at approximate ride height so we set the tires on wooden blocks. Once we had the axle located laterally and longitudinally, we installed the shocks so we could locate the mounts on the bottom of the shock tower brace. After tacking the shock mounts, we disassembled everything and Matt began the finish welding. He welded from 11AM to 6PM until he ran out of wire. More welding tomorrow, then it will be time to lay some seam sealer, paint the pieces, and begin putting the car back together. We are on the downhill run now.
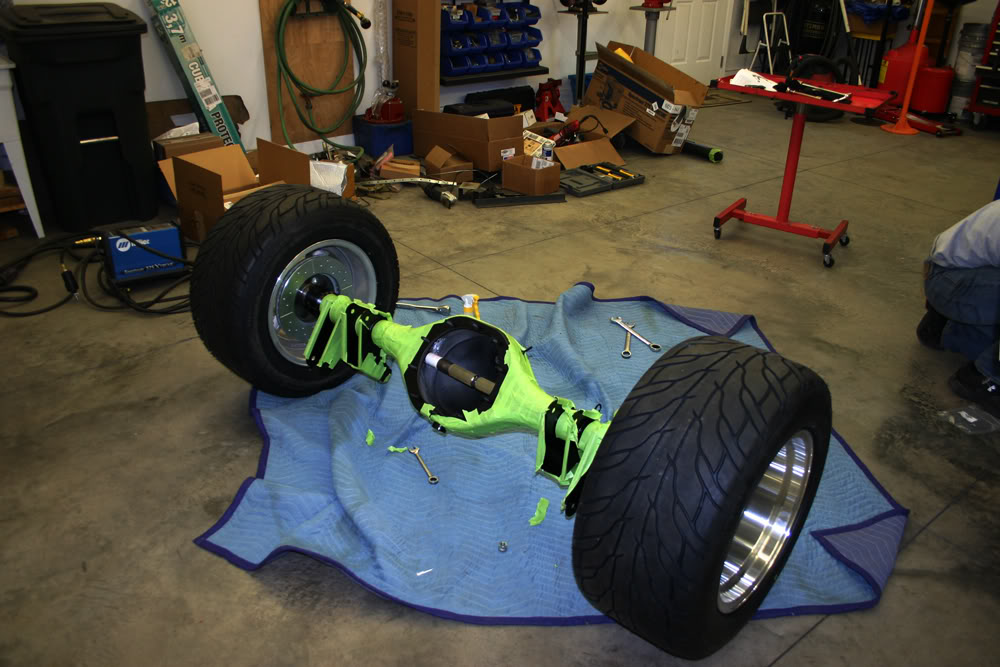
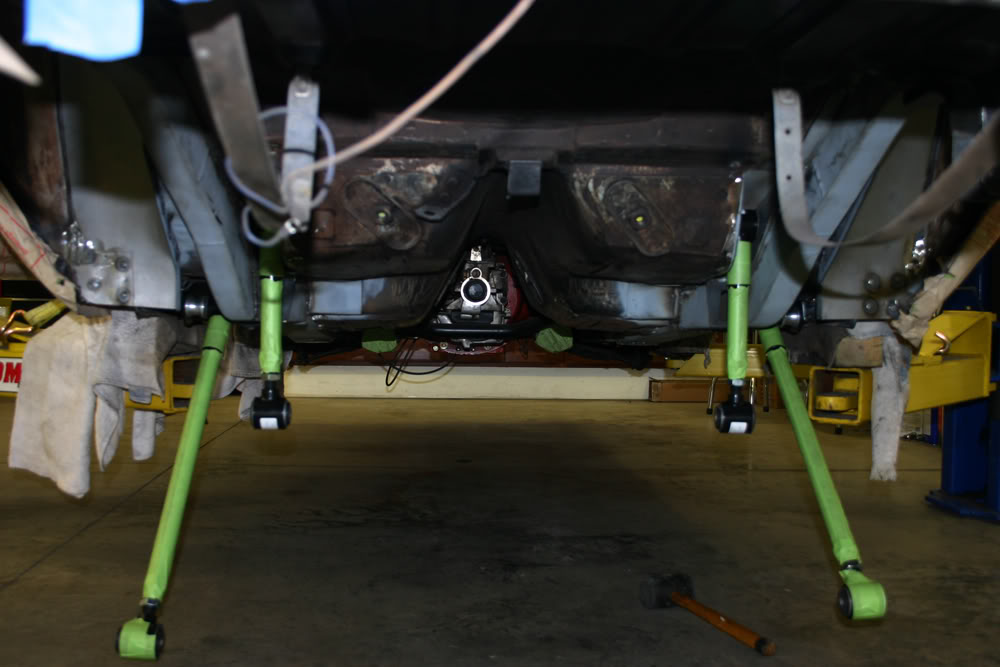
Those big wheels and tires were under the car today...at least for a little bit. We installed the axles in the housing, slipped on the disc brakes and mounted the wheels and tires. Next we attached the suspension arms. Then we rolled the axle under the car and hooked everything up. We needed to get the car at approximate ride height so we set the tires on wooden blocks. Once we had the axle located laterally and longitudinally, we installed the shocks so we could locate the mounts on the bottom of the shock tower brace. After tacking the shock mounts, we disassembled everything and Matt began the finish welding. He welded from 11AM to 6PM until he ran out of wire. More welding tomorrow, then it will be time to lay some seam sealer, paint the pieces, and begin putting the car back together. We are on the downhill run now.
Thread Starter
|
July 2011 ROTM
Joined: Dec 2009
Posts: 153
ROTM Winner's Club
Matt spent nearly all day yesterday welding, making some gussets for the shock tower brace and wire wheeling some areas in preparation for painting.
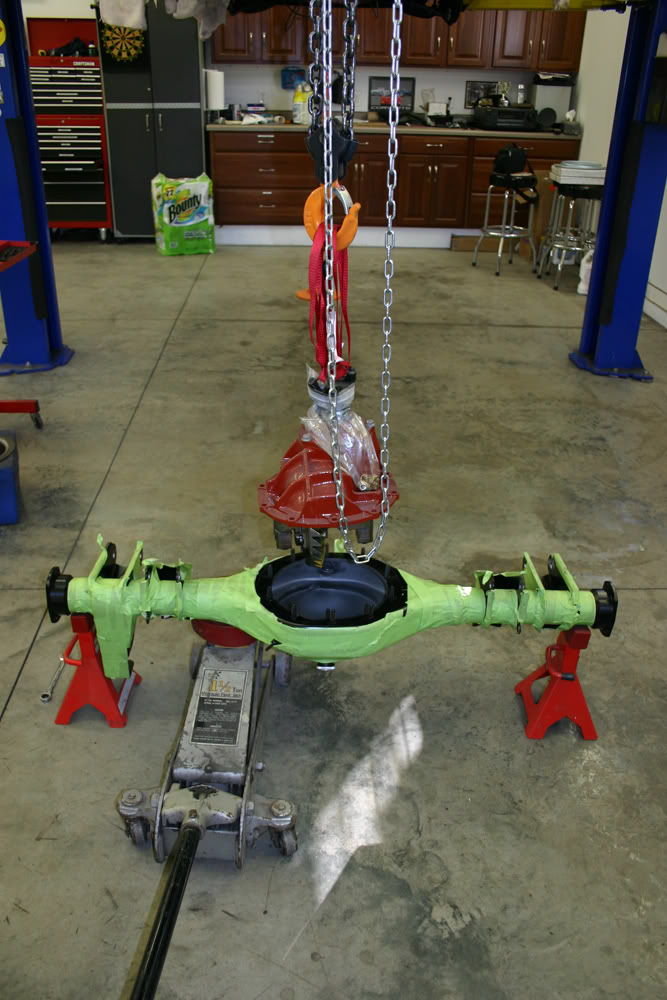
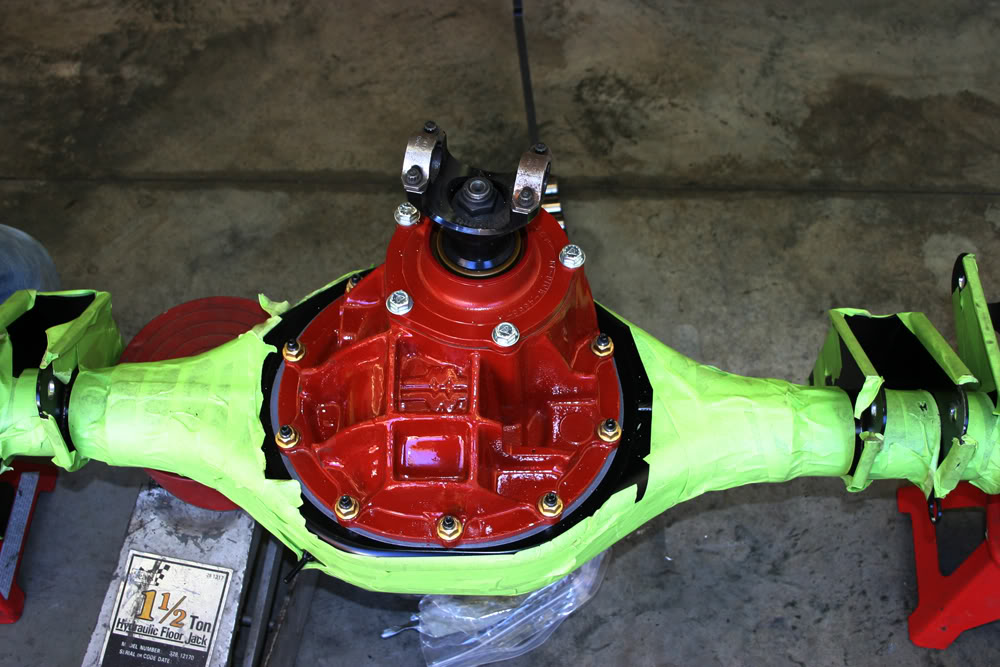
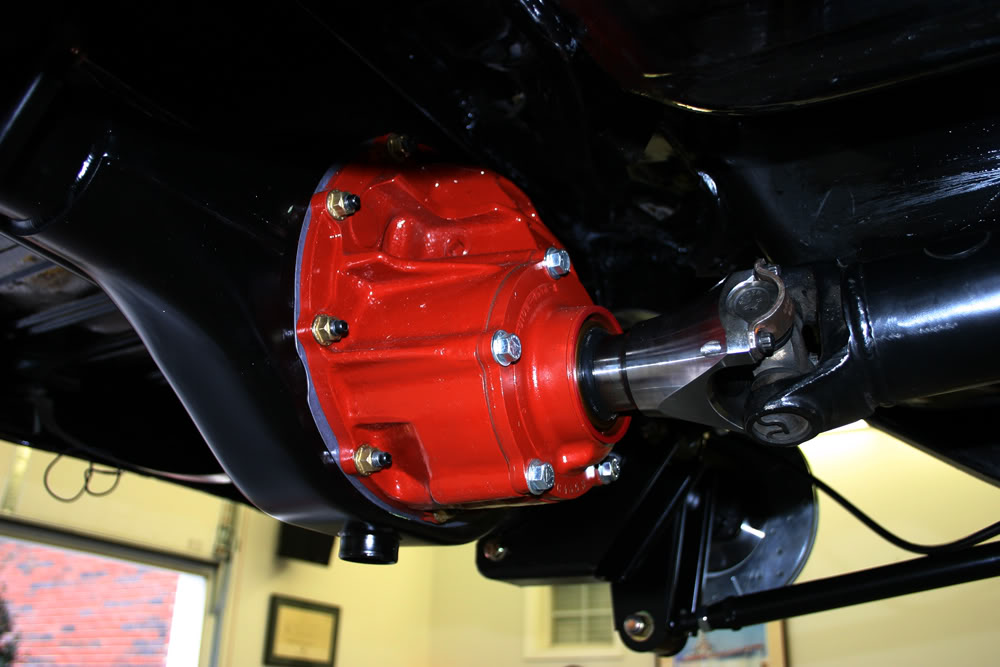
About seven years ago Matt had back surgery. All of the work of the past three weeks is beginning to take a toll on his poor back. One of the next jobs was installing the pumpkin in the axle assembly. He had a meeting this morning so, while he was gone, I pushed the container holding the pumpkin to the area below my overhead hoist. We then used the hoist to first lift the pumpkin and then lower it onto the axle. Saved both of our backs.
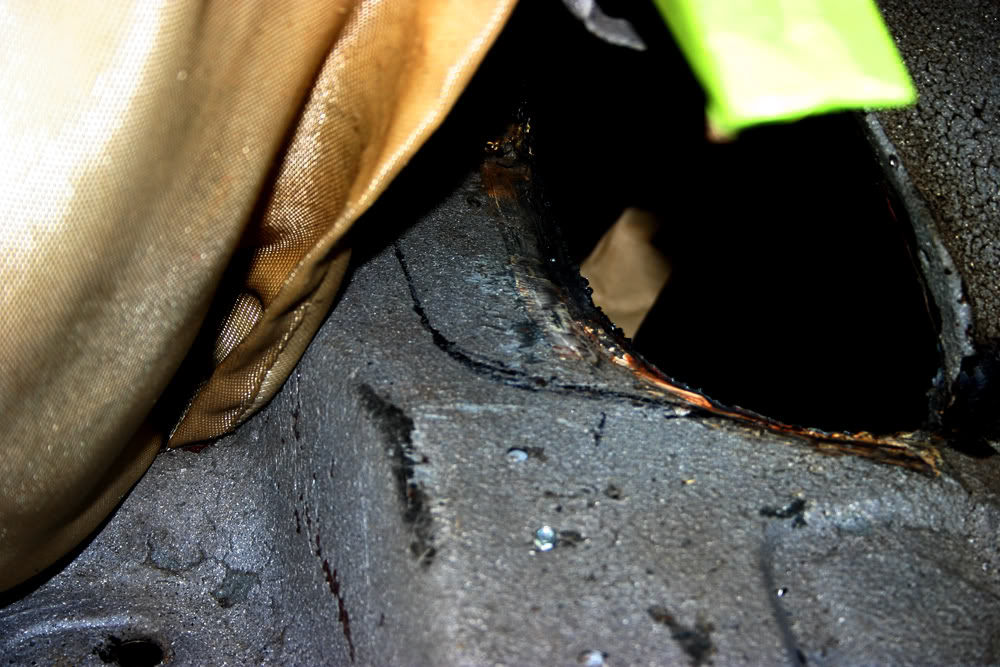
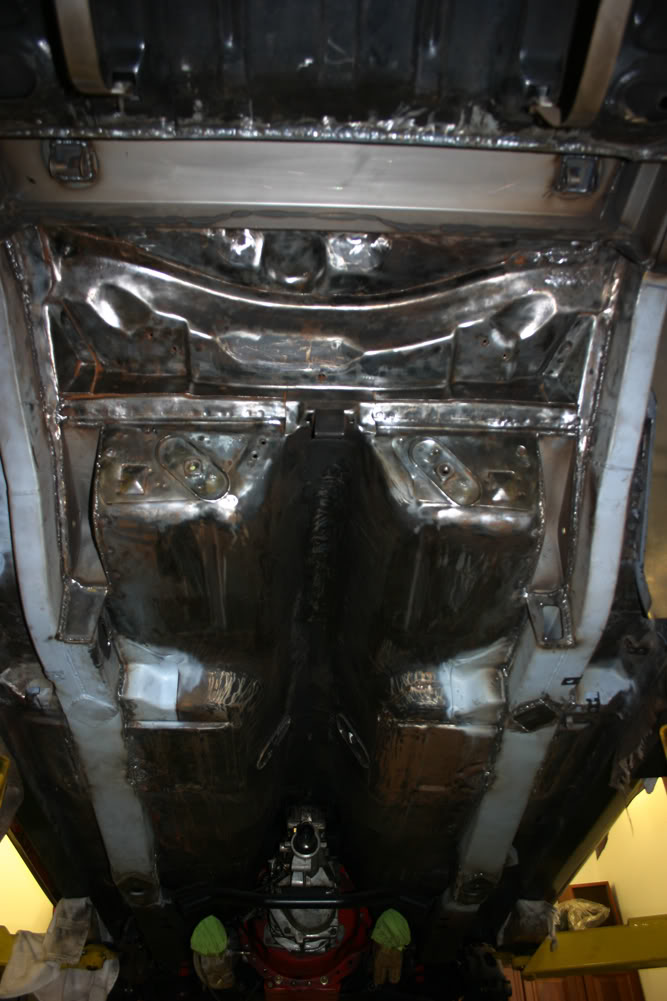
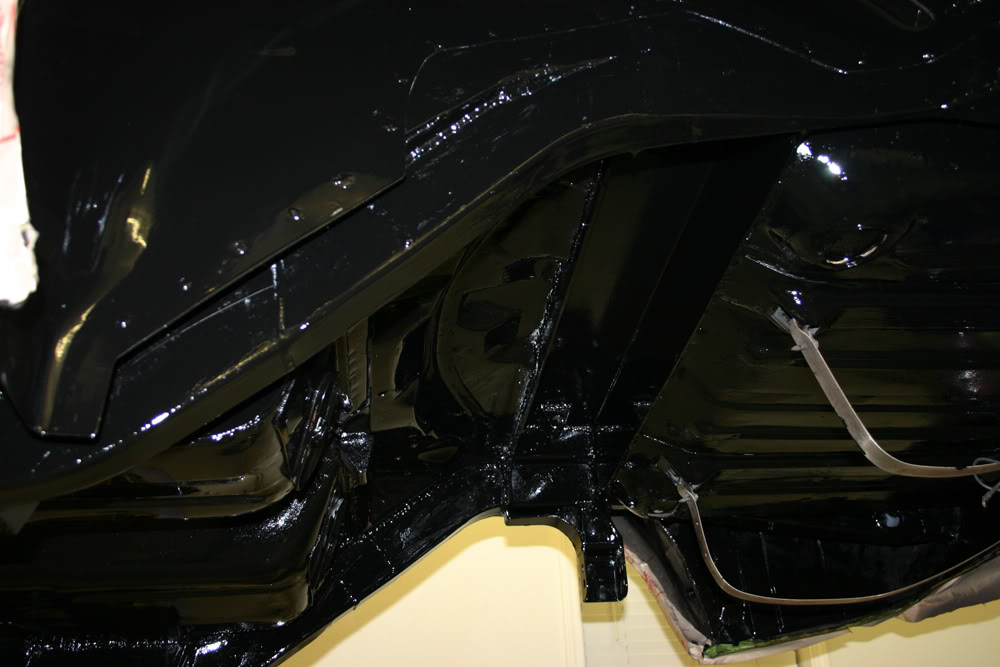
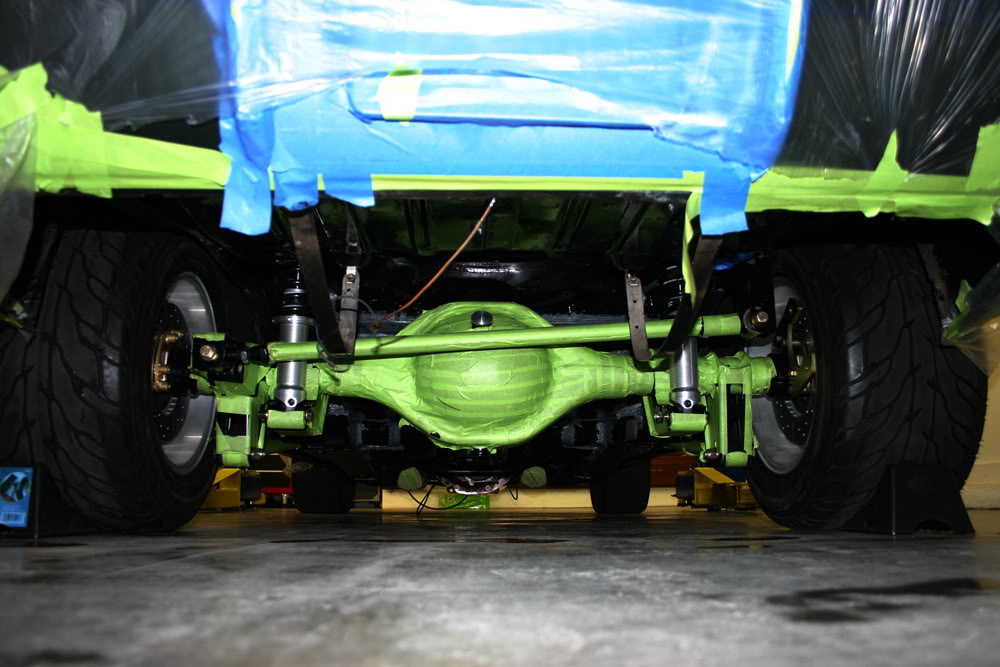
Now we were ready to paint the bottom. First we went over the entire bottom with brake cleaner to remove the remaining dirt. We used POR15 and began with their Prep & Ready material. We brushed on the Prep & Ready and let it sit for about 15 minutes. For paint, we decided to brush on the POR15 as we wanted really good penetration in the welds and other seam areas. This material has the best coverage of any type of paint material we have ever used. It only took a little over a pint to paint the entire bottom from the transmission back.
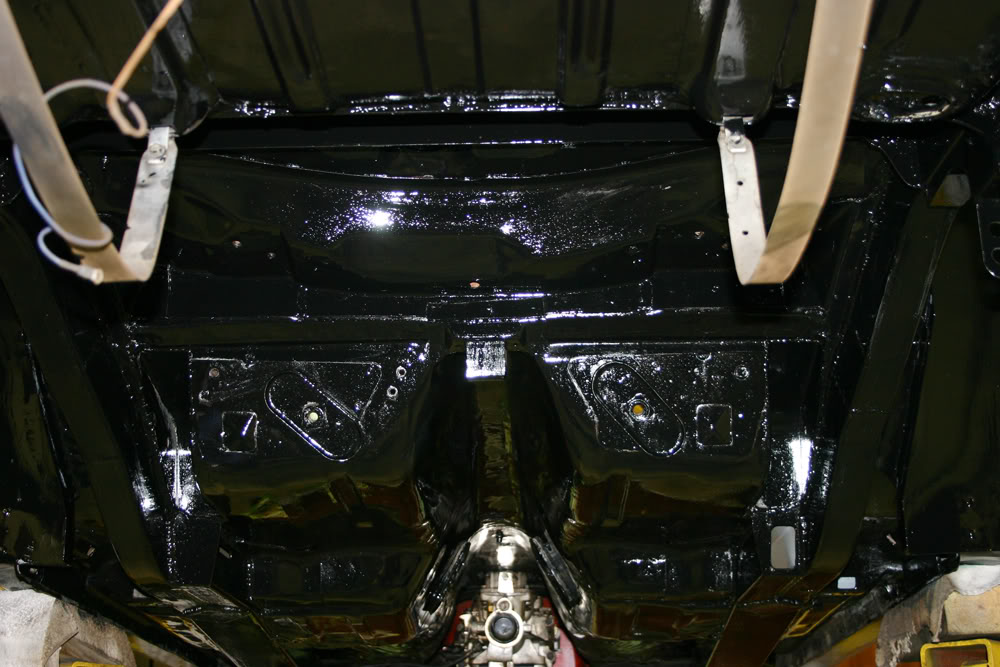
Tomorrow we are going to address some areas on the interior, paint the trunk area and use seam sealer on all seams. After that, we can finally begin to put the car back together. Won't be long now.
About seven years ago Matt had back surgery. All of the work of the past three weeks is beginning to take a toll on his poor back. One of the next jobs was installing the pumpkin in the axle assembly. He had a meeting this morning so, while he was gone, I pushed the container holding the pumpkin to the area below my overhead hoist. We then used the hoist to first lift the pumpkin and then lower it onto the axle. Saved both of our backs.
Now we were ready to paint the bottom. First we went over the entire bottom with brake cleaner to remove the remaining dirt. We used POR15 and began with their Prep & Ready material. We brushed on the Prep & Ready and let it sit for about 15 minutes. For paint, we decided to brush on the POR15 as we wanted really good penetration in the welds and other seam areas. This material has the best coverage of any type of paint material we have ever used. It only took a little over a pint to paint the entire bottom from the transmission back.
Tomorrow we are going to address some areas on the interior, paint the trunk area and use seam sealer on all seams. After that, we can finally begin to put the car back together. Won't be long now.

Thread Starter
|
July 2011 ROTM
Joined: Dec 2009
Posts: 153
ROTM Winner's Club
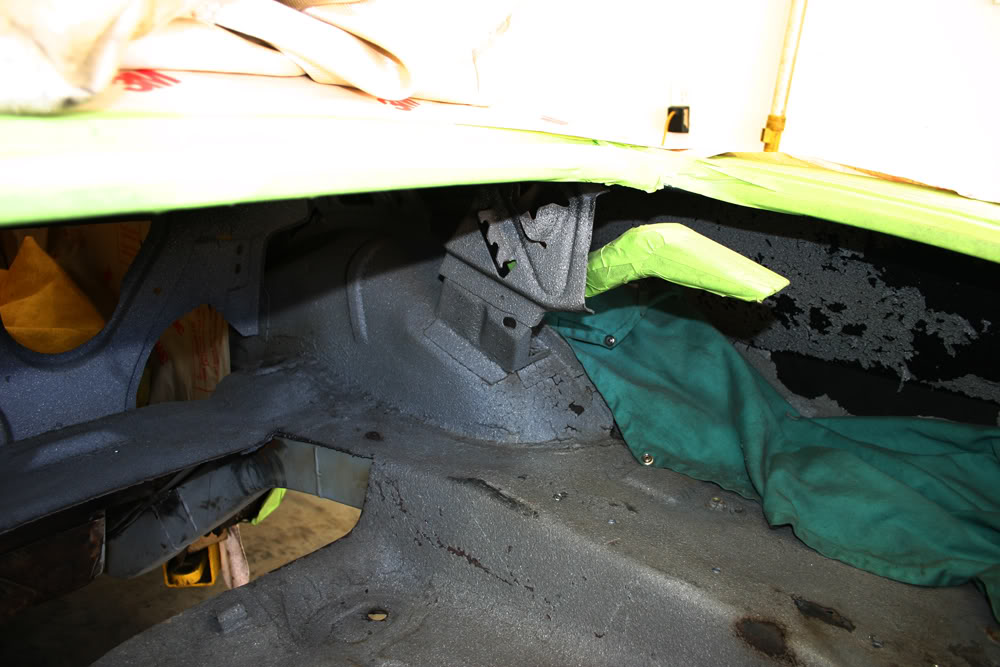
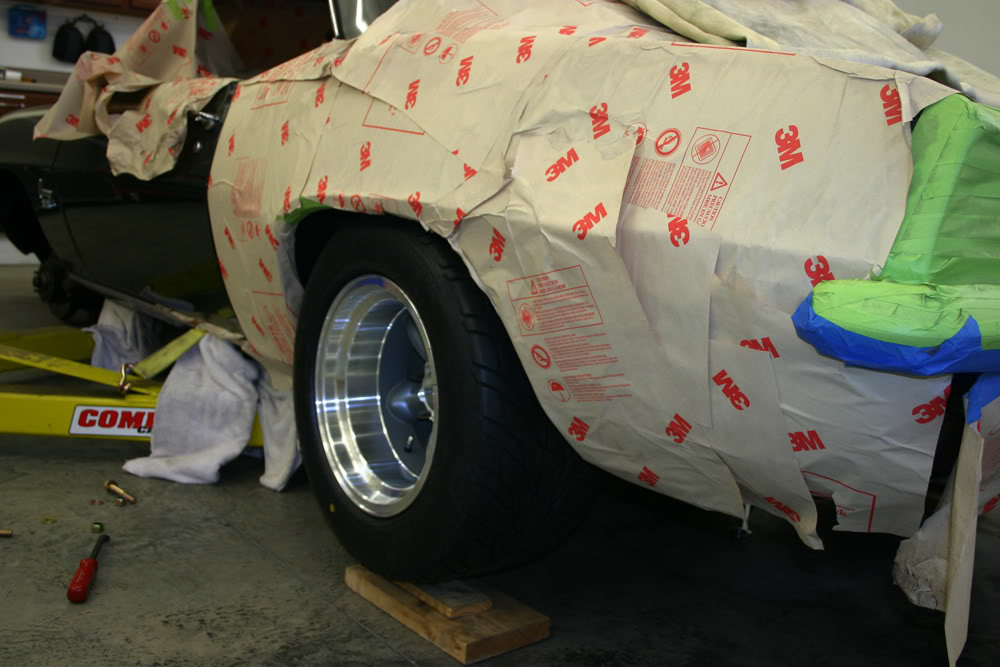
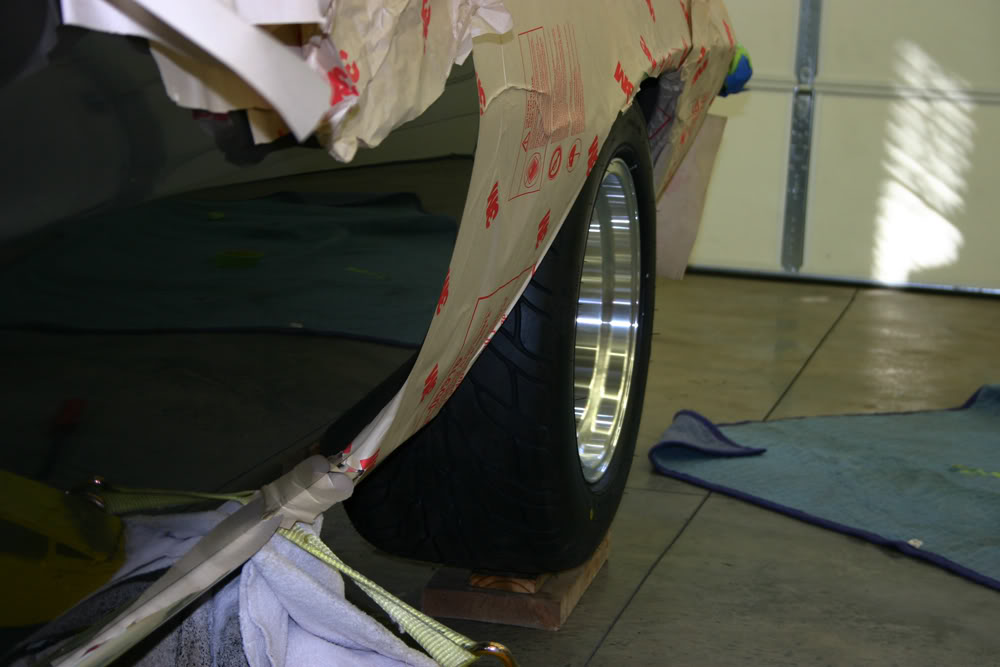
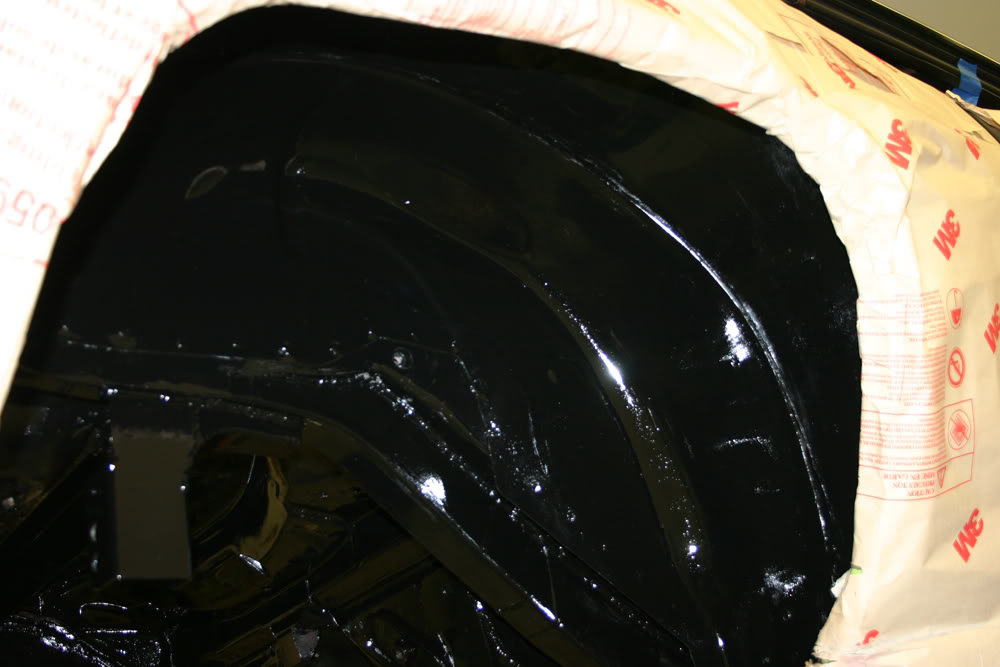
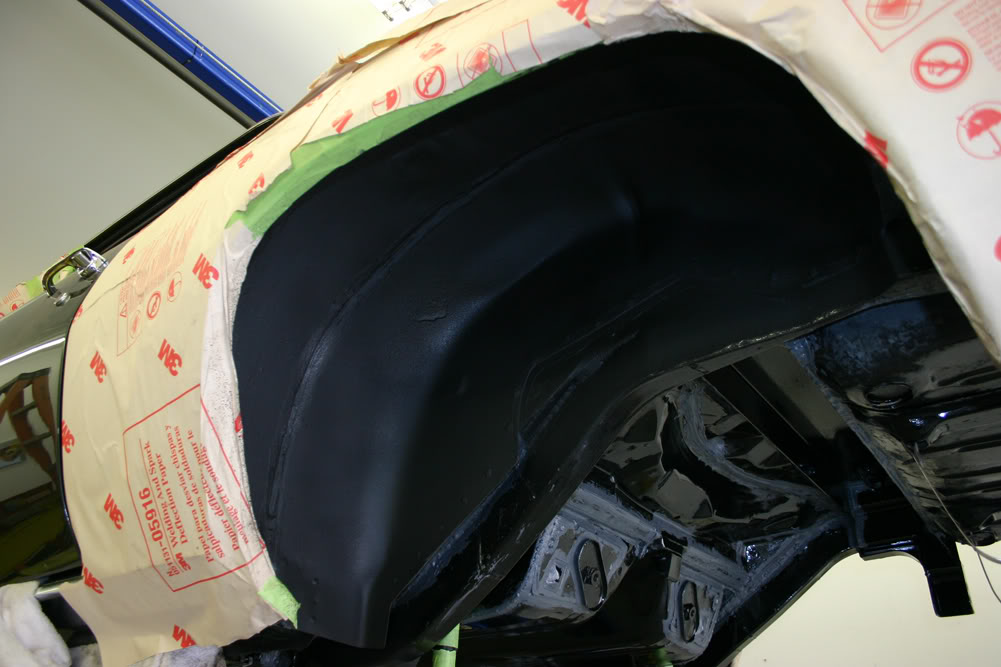
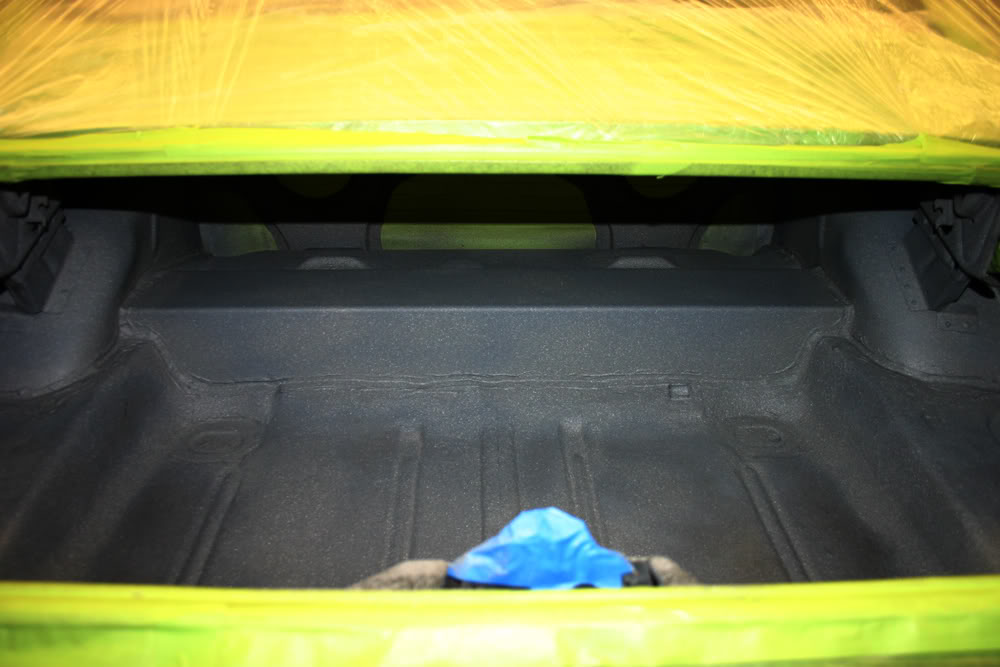
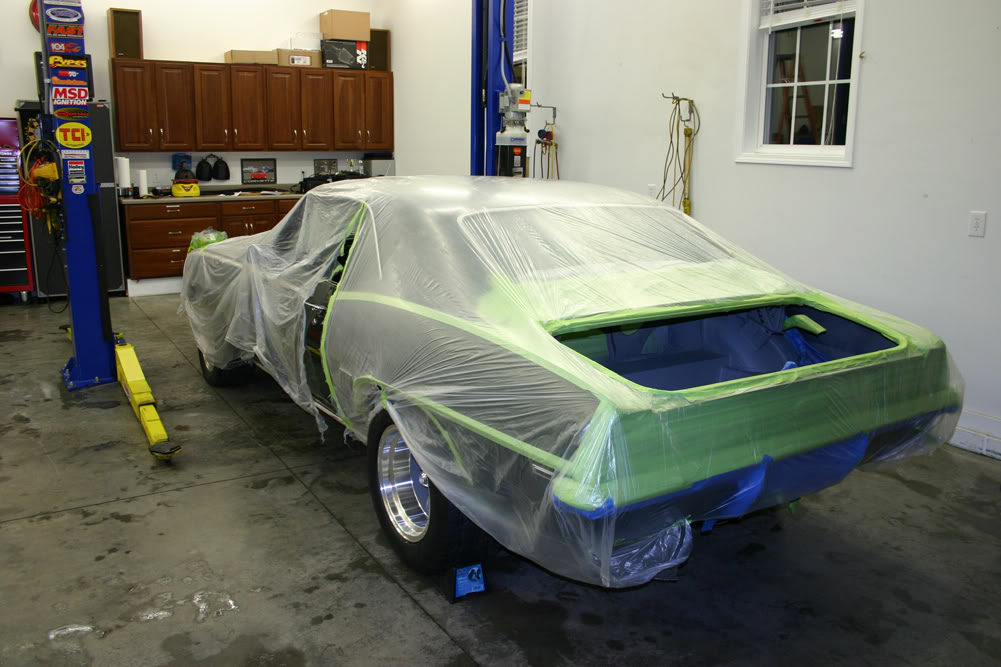
He did apply the seam seal to all seams today. He also sprayed the wheelwells with a textured finish. We then installed the Quadra Link suspension pieces. Everything fit well. Since we have not installed the gas tank, the interior, the exhaust and the drive shaft, I stood in the trunk while Matt set the ride height. He will probably have to adjust it once we have everything installed. After preparing the trunk area, he painted it with the factory gray/white spot paint. He still has to apply the clear to the trunk as the paint was not dry by the time we were ready to quit. As you can see below, we masked off the entire car to prevent overspray so I do not have a good picture of the car's stance.
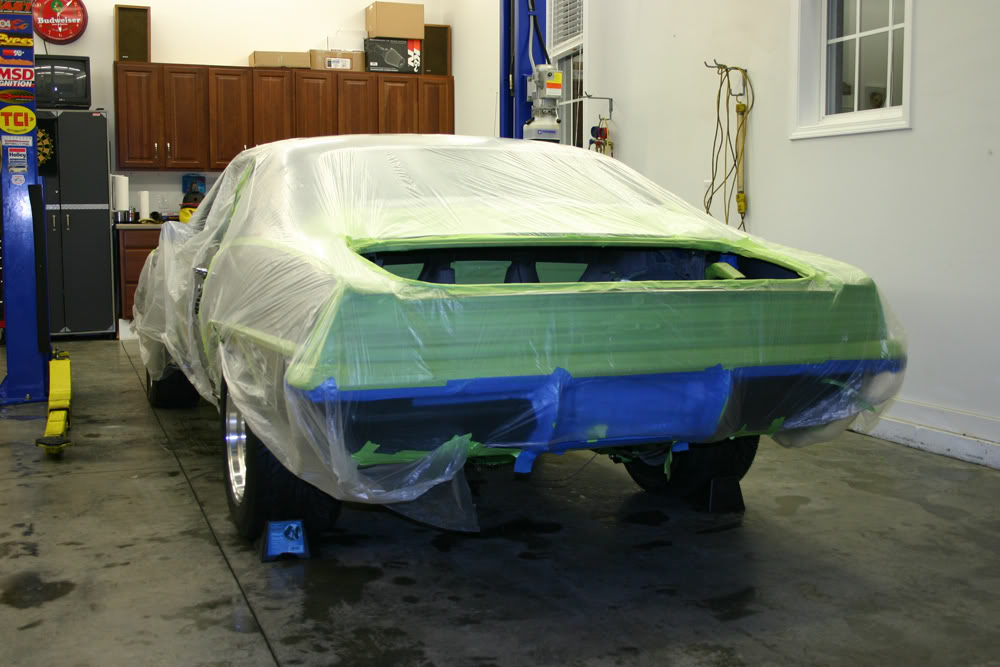
We spent a good deal of time today cleaning up my garage. Three weeks of cutting, grinding, and sanding pretty much trashed it. However, it cleaned up well.
Tomorrow we plan on installing the drive shaft, the exhaust, the fuel tank, run some fuel and brake lines, bleed brakes and hopefully drive it.
Thread Starter
|
July 2011 ROTM
Joined: Dec 2009
Posts: 153
ROTM Winner's Club
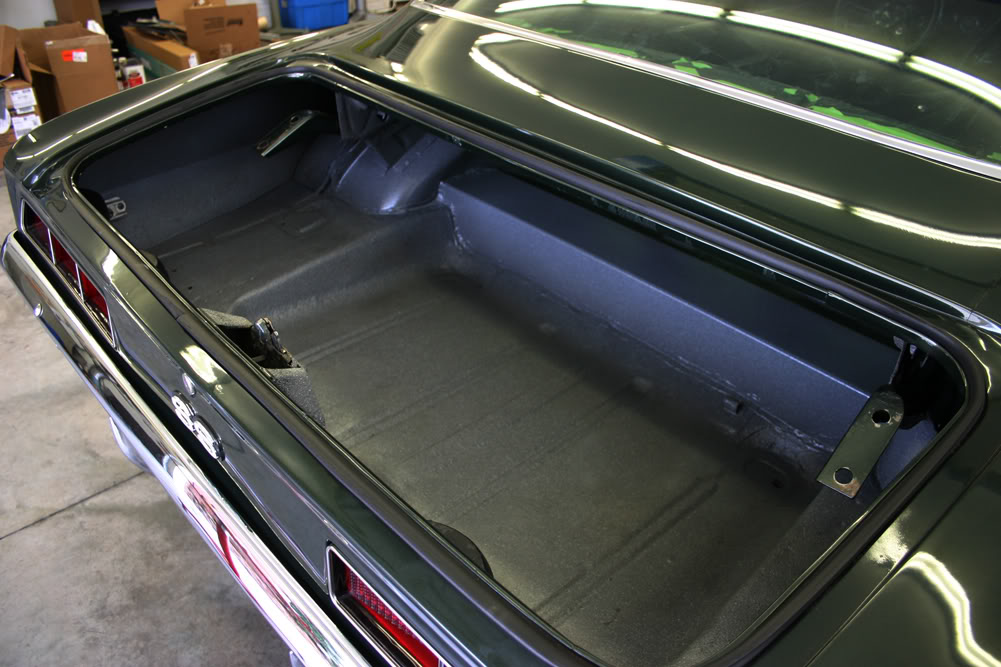
After applying the clear coat to the trunk today, we spent a good bit of time removing the masking tape from the car and the suspension. The trunk came out great. Matt's research told him that the drive shaft would be a inch short with the Ford 9". The pumpkin is basically a NASCAR unit built by one of Matt's friends. His friend had a one inch longer yoke so Matt picked it up yesterday evening. It is a Roush NASCAR piece and it fit perfectly. One major worry down on the driveshaft.
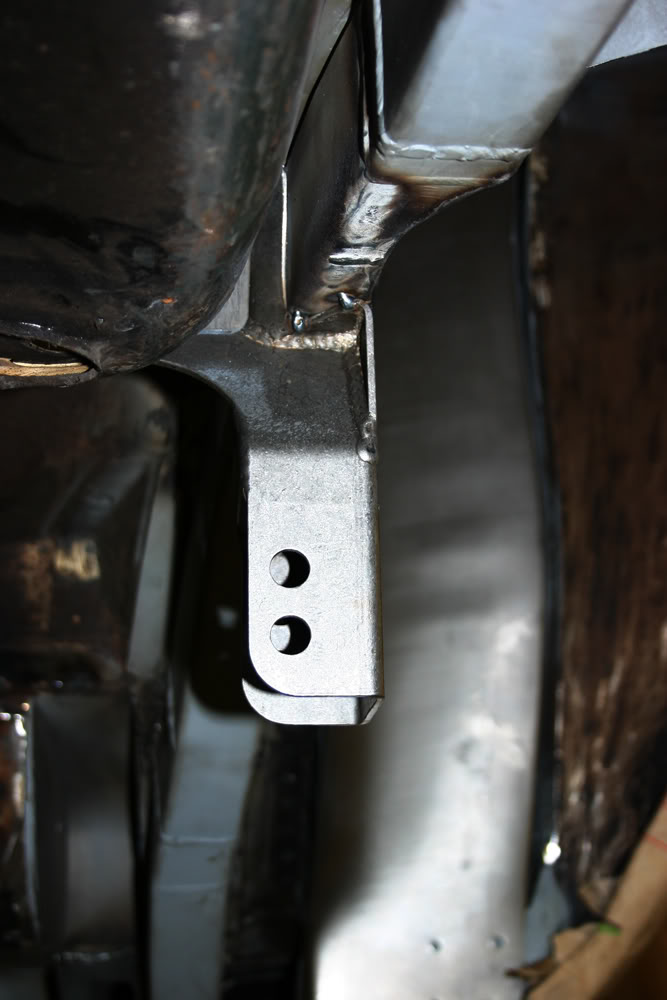
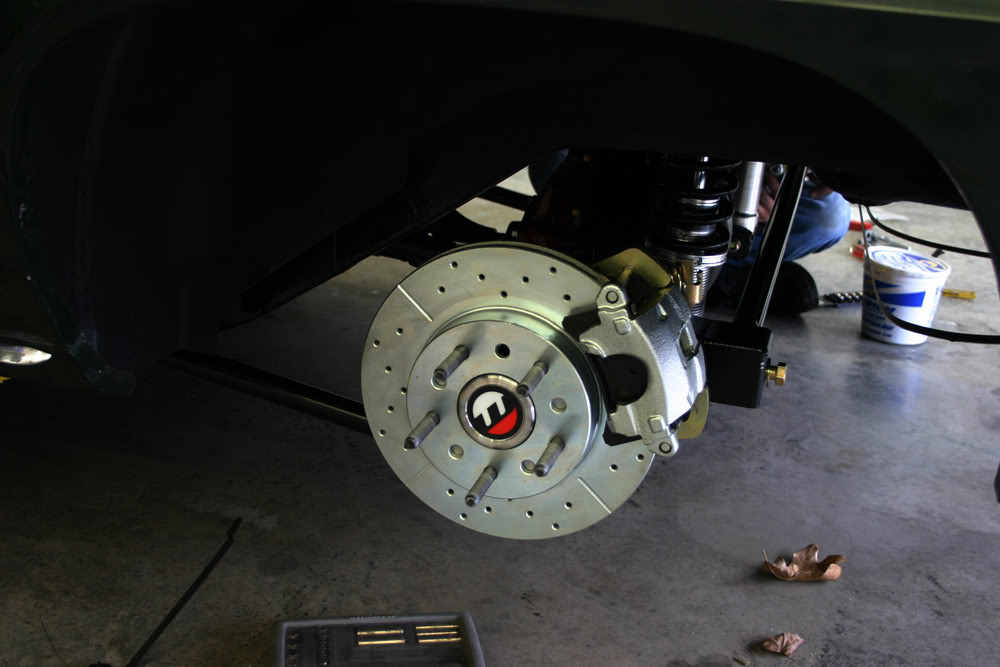
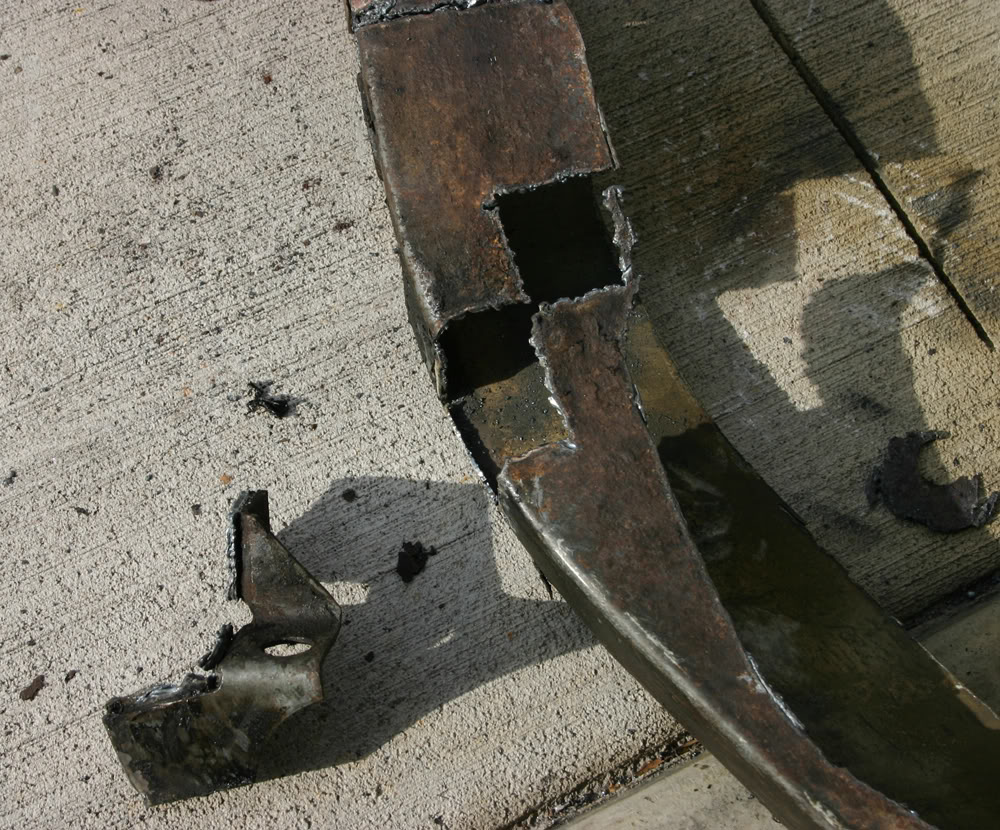
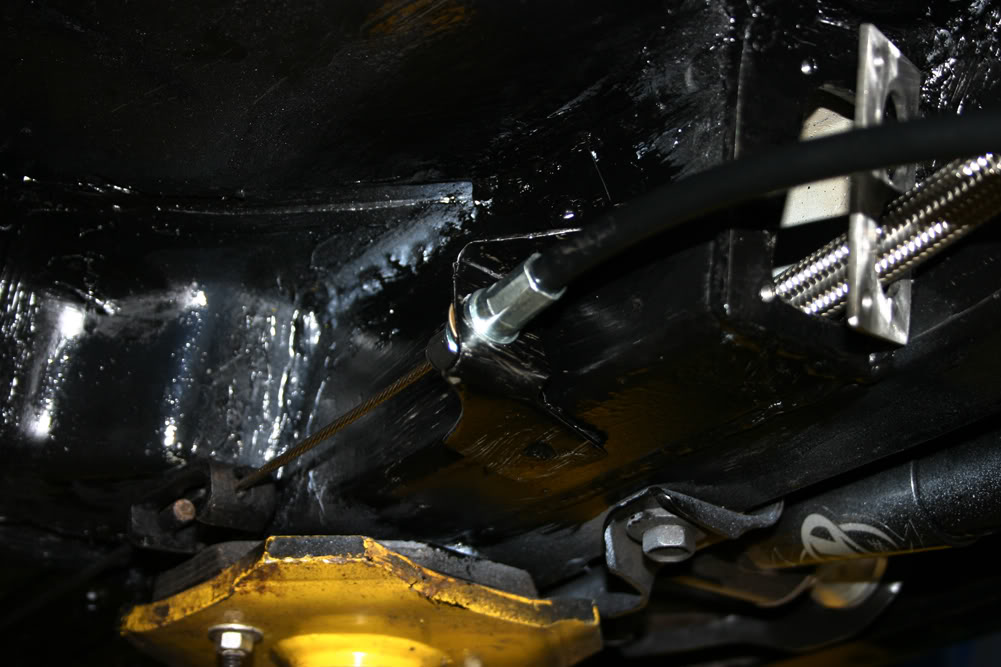
Next we installed the brakes and the brake lines on the axle. Now it was time to hook up the emergency brakes. The brake kit Matt bought to fit within 15" wheels uses brakes from a Cadillac Eldorado. The emergency brake applies the brake piston to the rotor. The kit came with the necessary lines. Earlier on in this thread, you may recall I cut out the emergency brake mounts from the inner wheel well. Matt modified these slightly and mounted them to the lower part of the frame rail.
At the end of the day, we were running the new brake lines and had routed one of the fuel lines. While Matt was doing some of these things, I cleaned up Borla exhaust and clamps that he has had on the car for over 10 years. I also installed the rear interior side panels during one of the few times the car was on the ground and cleaned up the seats. Still a fair amount of work to do but the end is near.
We knocked off early today and took my wife out to dinner for her birthday. 39 again!!!!