
Installing mini-tubs, DSE Quadra Link, and more


Thread Starter
|
July 2011 ROTM
Joined: Dec 2009
Posts: 153
ROTM Winner's Club
My son has a 1969 SS Camaro that he has owned for 12 years. Over the years he has installed Vintage Air, Tremec 5 speed, and a fuel injection system that he designed and built from scratch.
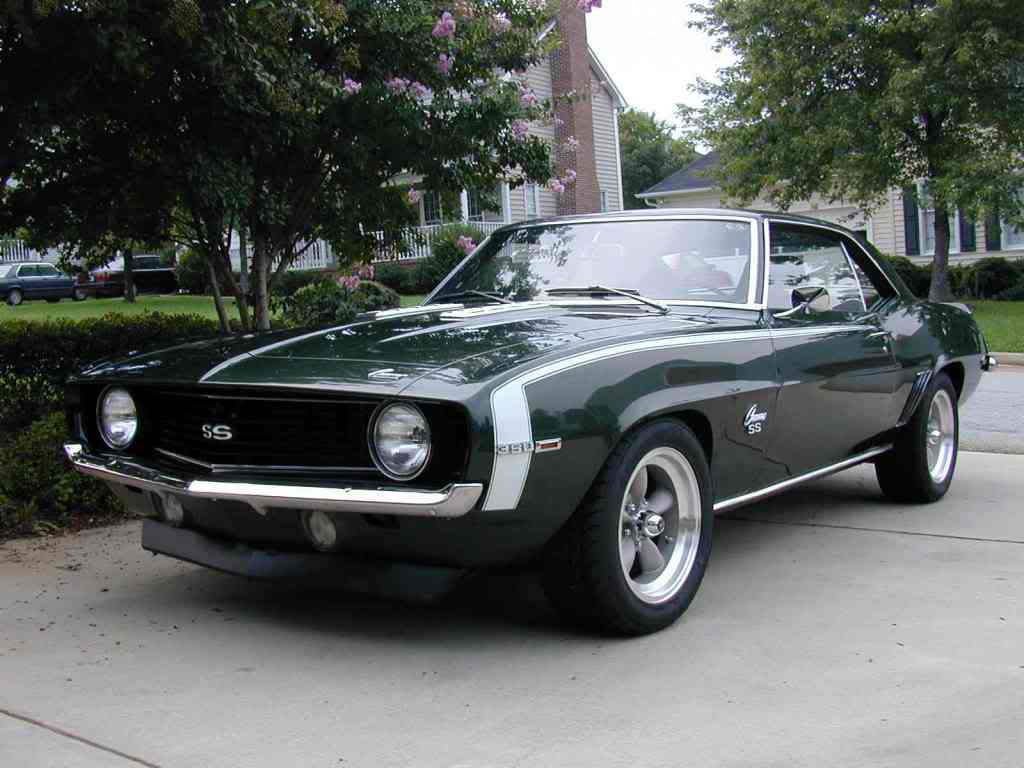
In an attempt to reduce the stress cracks that appear from twisting of the body under torque, he had decided to replace the rear frame pieces and install heavy duty frame connectors. We are also going to mini-tub it and install the DSE Quadra-Link rear suspension.
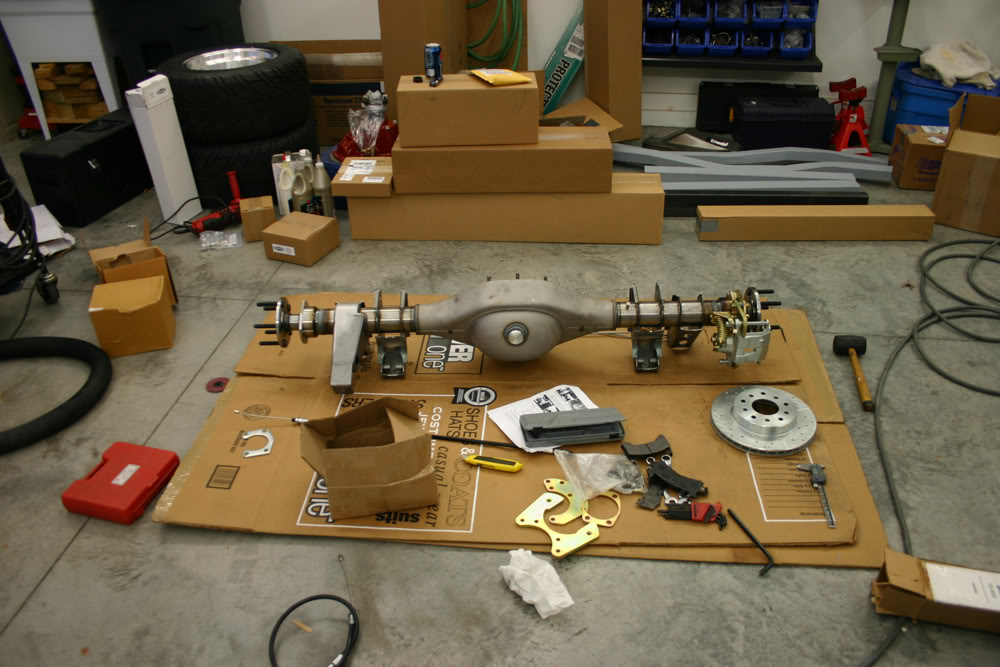
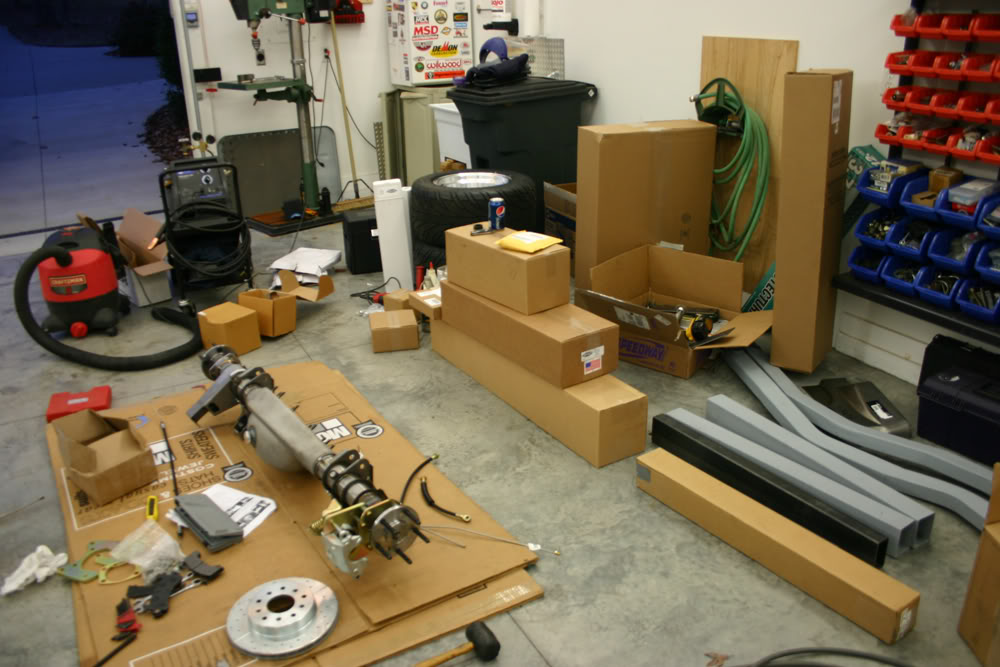
My neighbor had two extra stalls and graciously allowed me to take my cars there so we would have the entire garage for this project. Today my son hauled all of the various parts to my house. After unloading them from his sagging '79 El Camino, we trial assembled the rear disc brakes along with his new 15x10 Torque Thrust wheels. Everything fit as it should.
To make cutting out the frame members, wheelwell sheet metal and the metal for installing the frame extenders, he bought a plasma cutter. He has been practicing with it in making some of the gussets that will be needed.
Tomorrow he is bringing the car over and we will begin taking out the interior, remove the rear end, springs, gas tank, etc. It should be interesting.
In an attempt to reduce the stress cracks that appear from twisting of the body under torque, he had decided to replace the rear frame pieces and install heavy duty frame connectors. We are also going to mini-tub it and install the DSE Quadra-Link rear suspension.
My neighbor had two extra stalls and graciously allowed me to take my cars there so we would have the entire garage for this project. Today my son hauled all of the various parts to my house. After unloading them from his sagging '79 El Camino, we trial assembled the rear disc brakes along with his new 15x10 Torque Thrust wheels. Everything fit as it should.
To make cutting out the frame members, wheelwell sheet metal and the metal for installing the frame extenders, he bought a plasma cutter. He has been practicing with it in making some of the gussets that will be needed.
Tomorrow he is bringing the car over and we will begin taking out the interior, remove the rear end, springs, gas tank, etc. It should be interesting.
Last edited by jerhofer; Nov 21, 2011 at 09:24 PM.
Thread Starter
|
July 2011 ROTM
Joined: Dec 2009
Posts: 153
ROTM Winner's Club
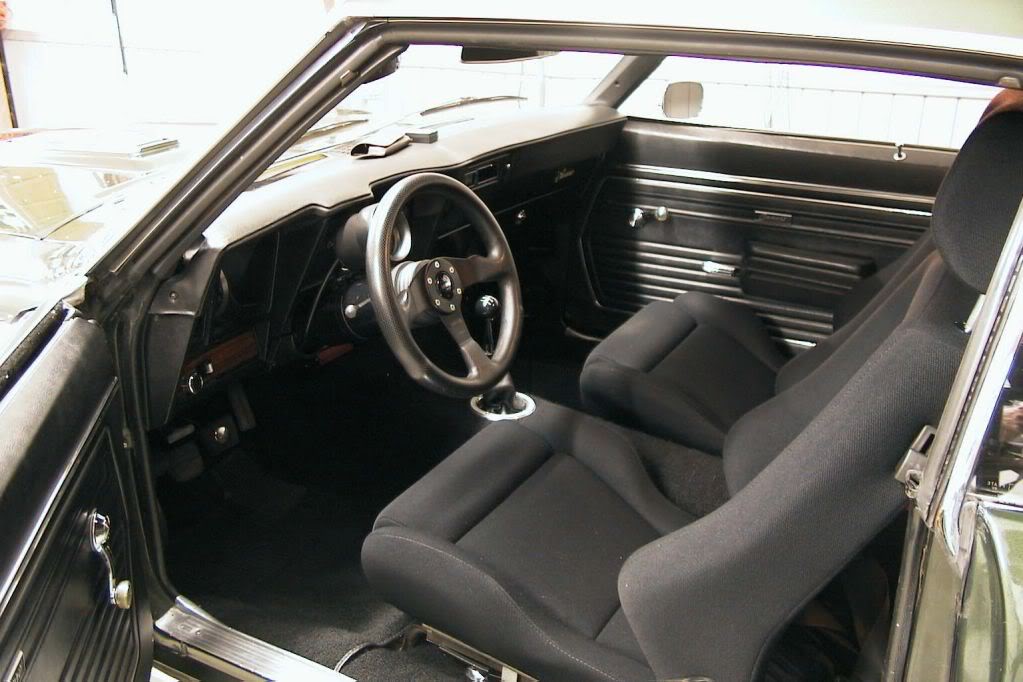
Those are Recaro seats and it is a MOMO steering wheel. Matt installed the steering wheel not long after he got the car. He worked for Michelin for 12 years designing race tires. Michelin posted him to France for three years and I stored the Camaro for him. I found the seats and installed them while I had the car. I also installed the Cal Tracs while I had the car so we both have time invested in this car.
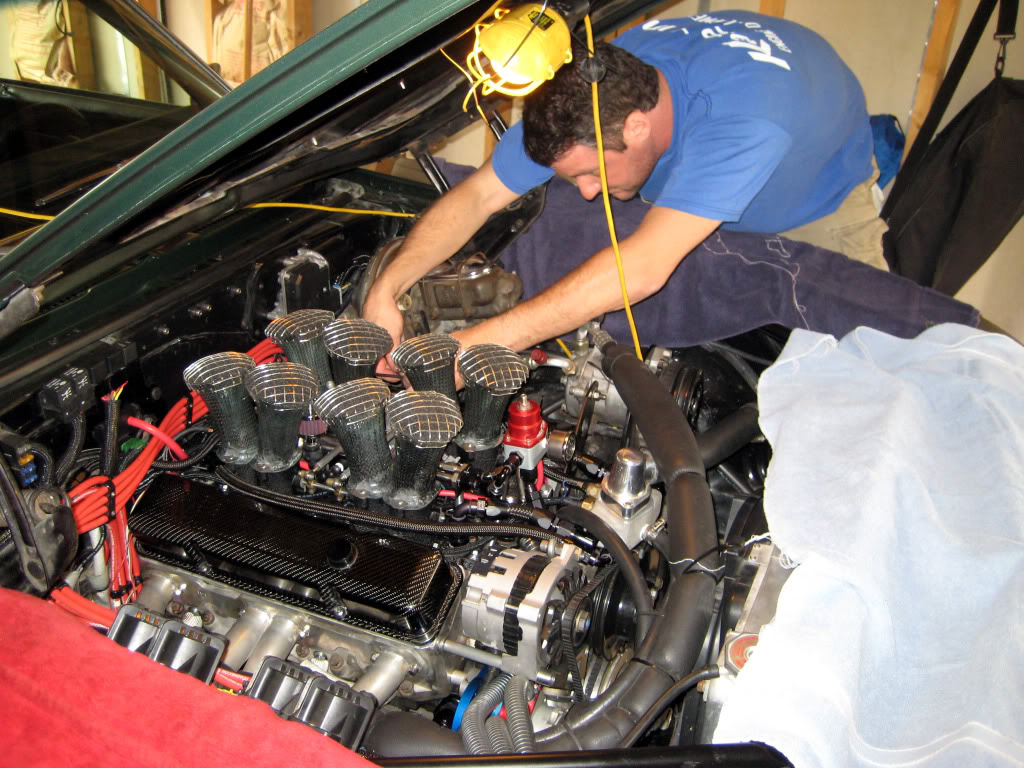
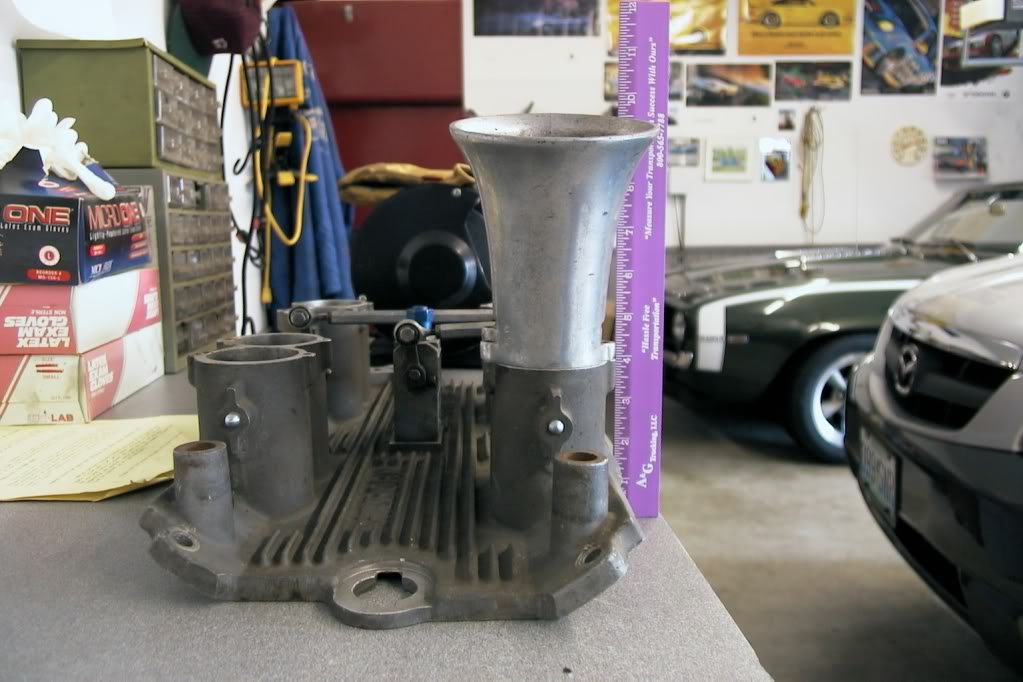
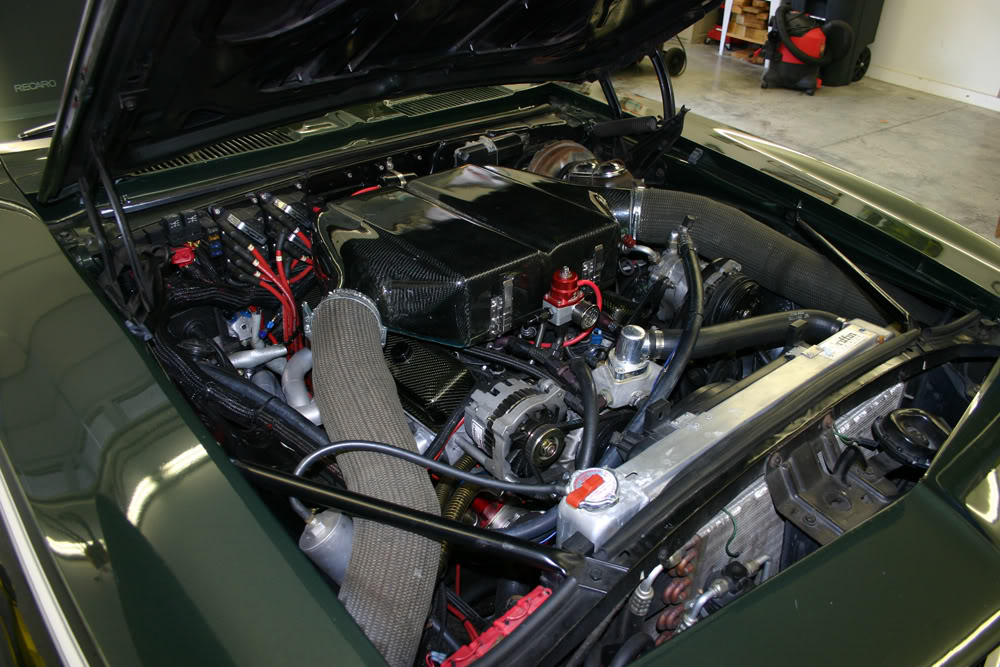
The pictures of Matt's engine on the original post were old photos. I took some of the current setup today. He made all of the carbon fiber pieces you see with the exception of the valve covers. I got a call from him from France and he told me he needed some measurements of the Hilborn intake manifold. He wanted me to use a ruler to show the scale. I happened to have a very purple and white ruler which showed up great in the photos. From these 30 photos, he designed all of the linkage, the sizes he need to make the trumpets, where the injectors would go after he drilled the holes, and to allow enough clearance for the hood to clear all of this. On top of that, he built an oven in his garage to cure the carbon fiber pieces. He said he nearly burnt down his French garage.


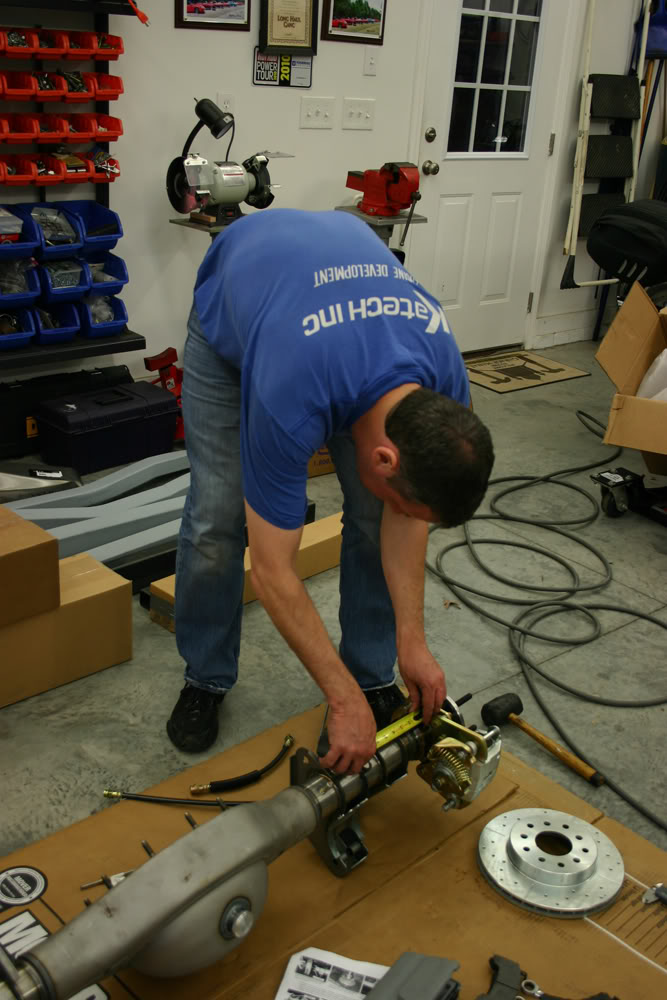
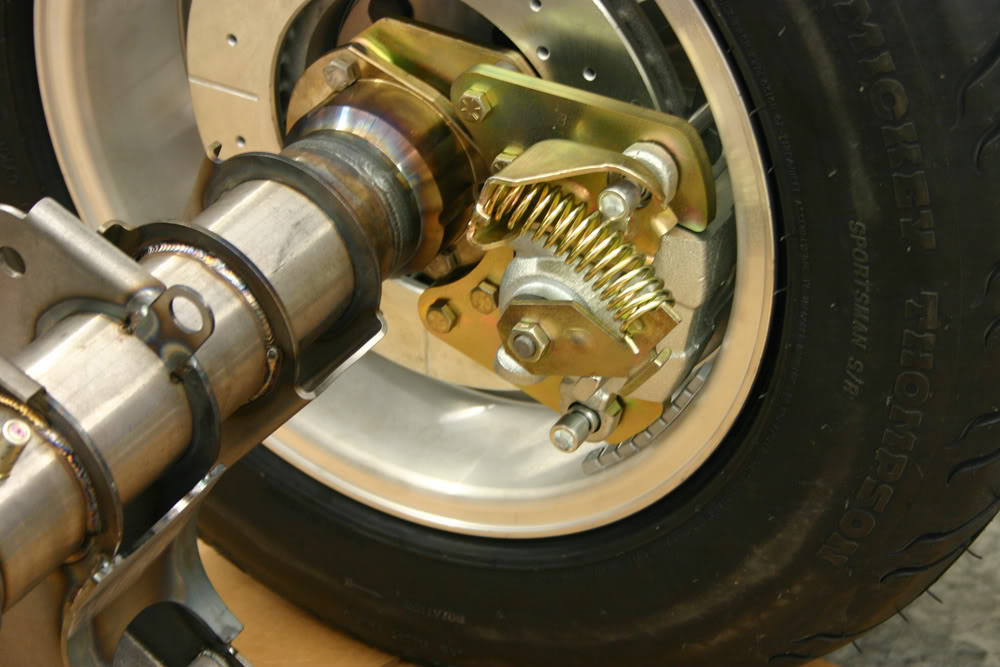
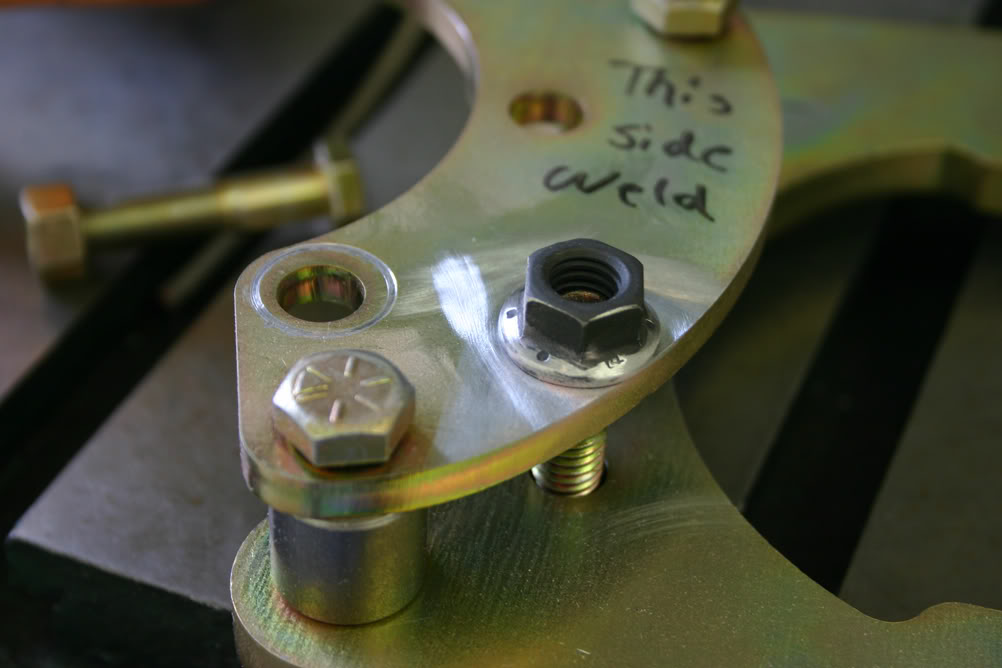
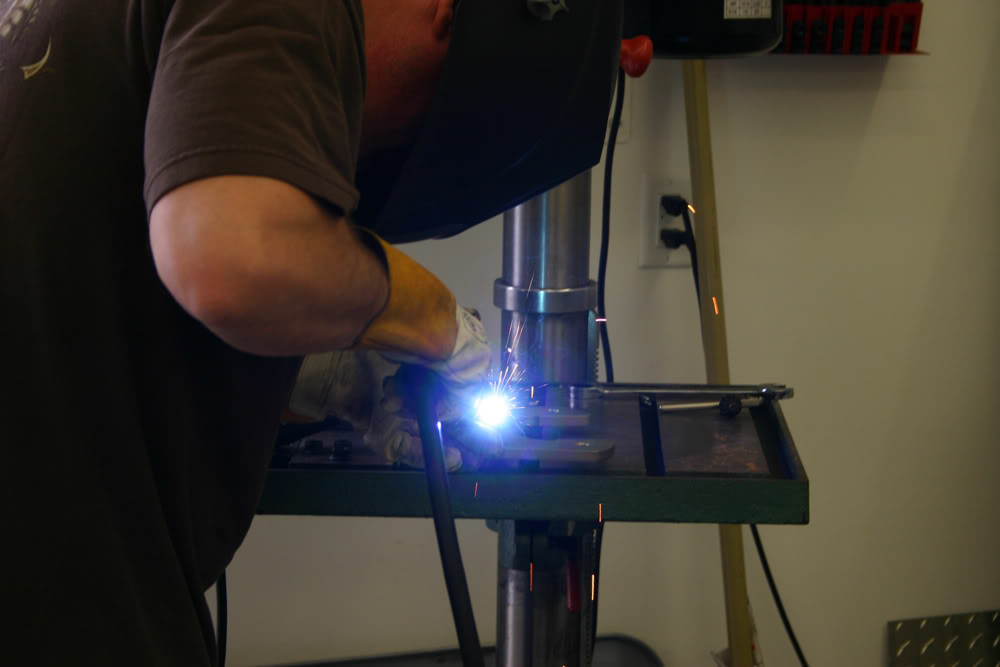
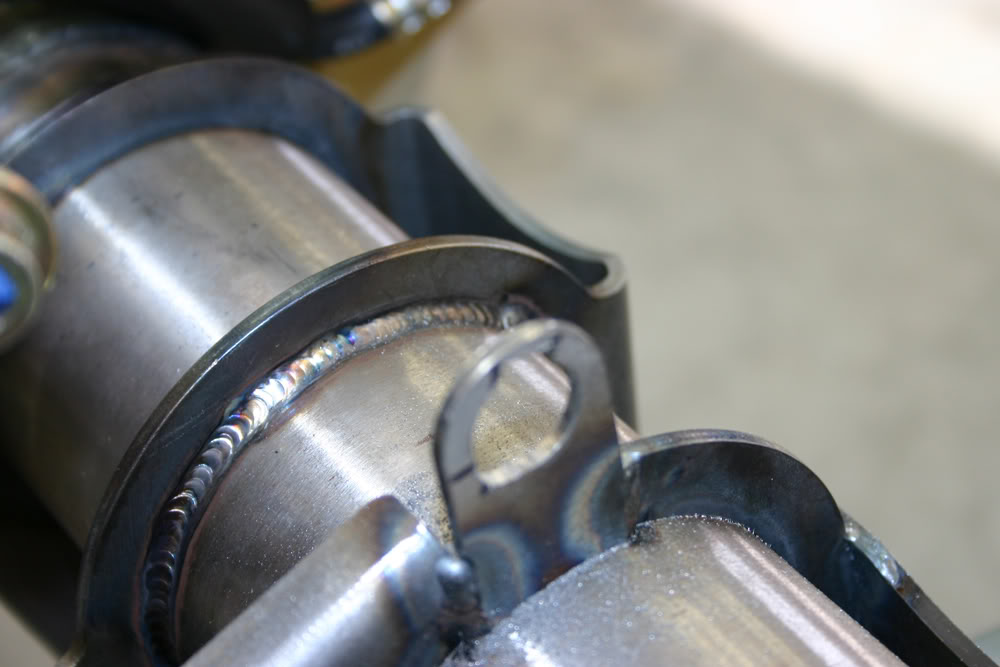
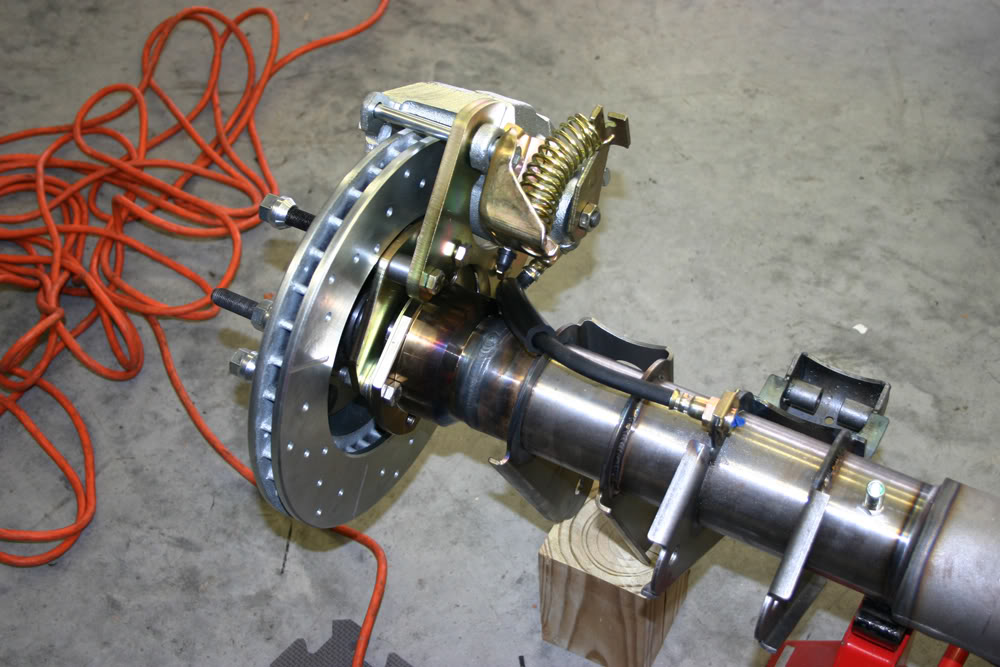
It was a long day but we accomplished a lot today. Matt decided it would be best to mock up the axle with the brakes and lines to make sure everything fit. All was well on one side, but the other presented a problem. He could not install the long bolt that holds the brake pads as it interfered with a bracket on the axle. Our first thought was to drill a hole in the bracket so we could pass the bolt through it. However, as luck would have it, the place we needed to drill a hole was exactly on one of the welds. Time for plan "B"
After some discussion, it was decided that we would have to install the caliper with pads to the mount and then install the mount to the axle. This presented another problem as the nuts were not accessible once we mounted the rotor. The solution was to weld nuts on the back side of the mount so we could install the bracket. This makes changing the pads on this side a royal pain in the !@#. However, since rear brake pads wear so slowly, it was a compromise we could live with.
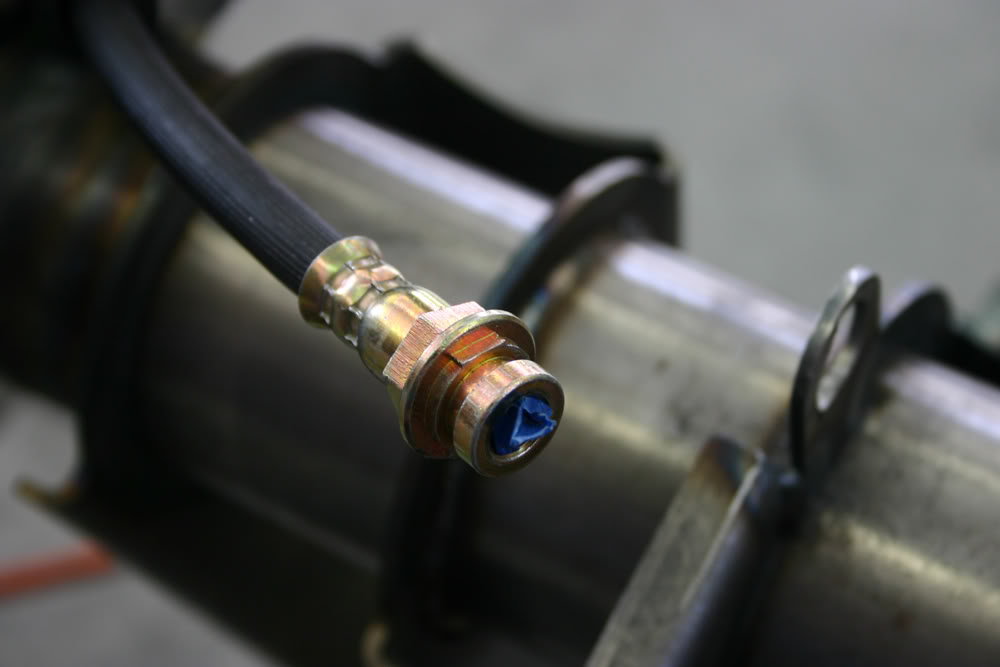
We also had to modify the brake line holder to accomodate the fitting with it's locating keys. Matt also welded on a stud to hold the distribution block for the brake lines. Once he was sure everything fit, he removed all of the parts so he could have the axle housing either painted or powder coated.
The pictures of Matt's engine on the original post were old photos. I took some of the current setup today. He made all of the carbon fiber pieces you see with the exception of the valve covers. I got a call from him from France and he told me he needed some measurements of the Hilborn intake manifold. He wanted me to use a ruler to show the scale. I happened to have a very purple and white ruler which showed up great in the photos. From these 30 photos, he designed all of the linkage, the sizes he need to make the trumpets, where the injectors would go after he drilled the holes, and to allow enough clearance for the hood to clear all of this. On top of that, he built an oven in his garage to cure the carbon fiber pieces. He said he nearly burnt down his French garage.
It was a long day but we accomplished a lot today. Matt decided it would be best to mock up the axle with the brakes and lines to make sure everything fit. All was well on one side, but the other presented a problem. He could not install the long bolt that holds the brake pads as it interfered with a bracket on the axle. Our first thought was to drill a hole in the bracket so we could pass the bolt through it. However, as luck would have it, the place we needed to drill a hole was exactly on one of the welds. Time for plan "B"
After some discussion, it was decided that we would have to install the caliper with pads to the mount and then install the mount to the axle. This presented another problem as the nuts were not accessible once we mounted the rotor. The solution was to weld nuts on the back side of the mount so we could install the bracket. This makes changing the pads on this side a royal pain in the !@#. However, since rear brake pads wear so slowly, it was a compromise we could live with.
We also had to modify the brake line holder to accomodate the fitting with it's locating keys. Matt also welded on a stud to hold the distribution block for the brake lines. Once he was sure everything fit, he removed all of the parts so he could have the axle housing either painted or powder coated.
Last edited by jerhofer; Nov 22, 2011 at 09:57 PM.
Thread Starter
|
July 2011 ROTM
Joined: Dec 2009
Posts: 153
ROTM Winner's Club
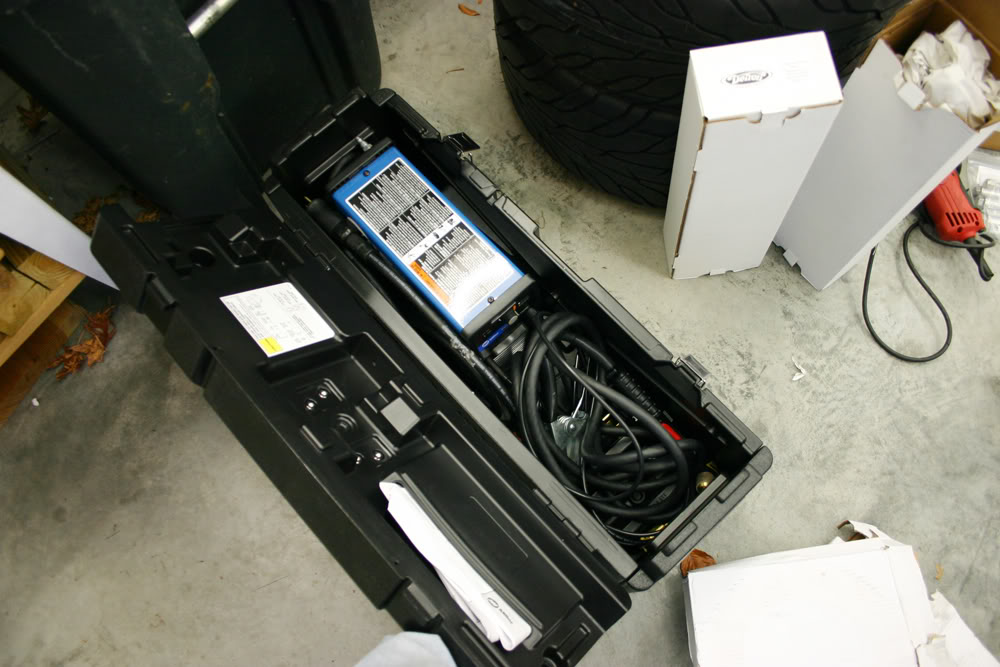
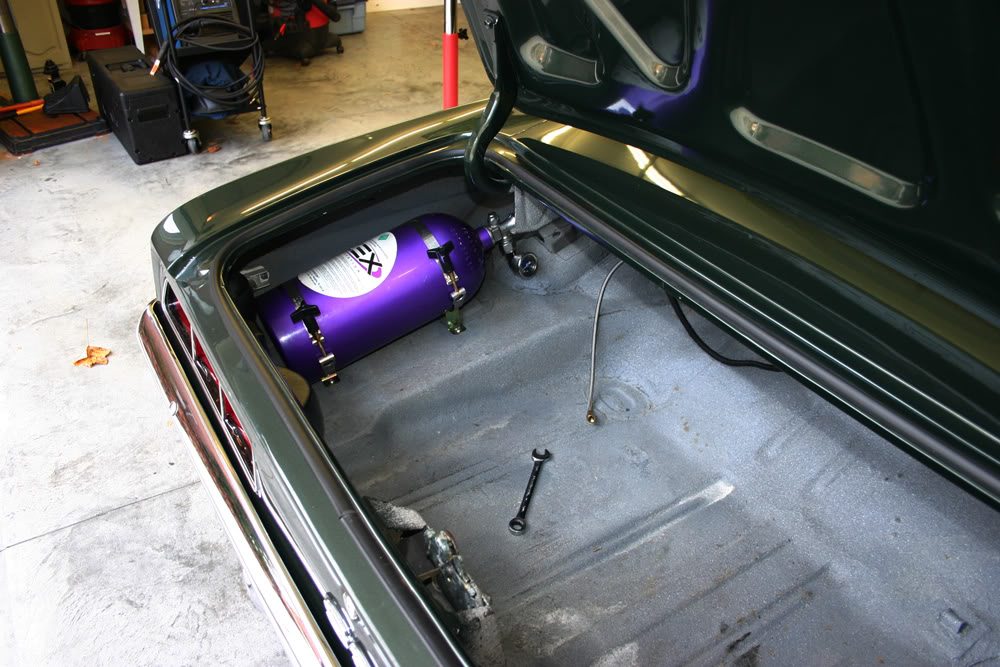
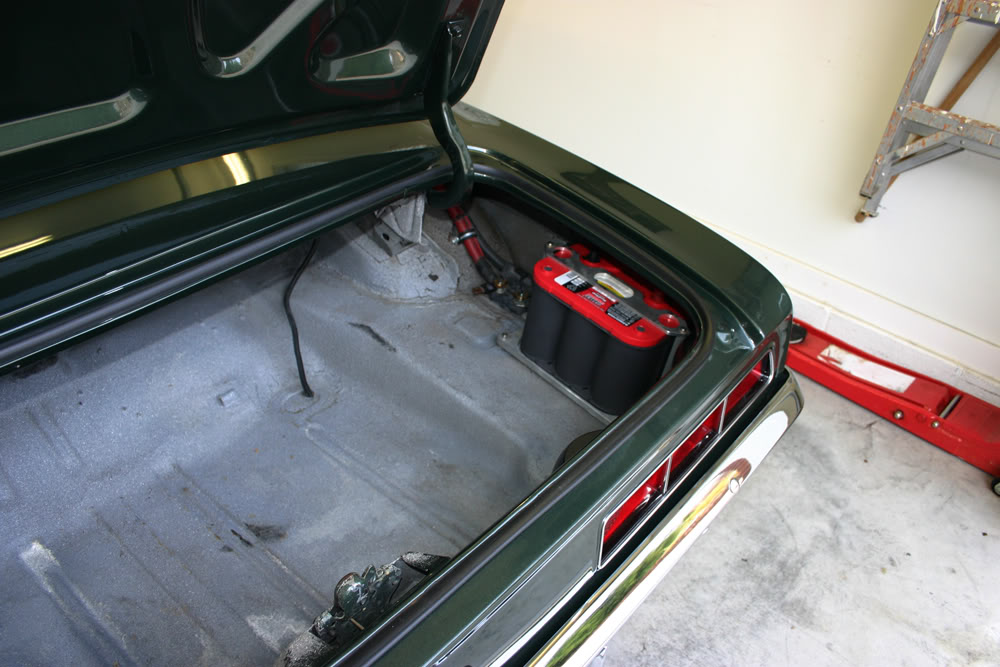
While Matt was working on the axle, I was preparing the trunk and interior. Everything had to come out of the trunk including the battery and the NOS bottle.
Now it was time to remove the seats, carpet, electronics, rear side panels, seat belts, etc. He had the floor pans replaced about three years ago but a problem surfaced on the passenger side. It appears condensation is leaking from the AC system and is pooling in that footwell. We will have to look into that. The pans under the rear seats are original and have some very slight surface rust. Overall, it looked better than Matt expected. We are going to replace all of the original insulation pieces with Dynamat. After pulling the carpet and seeing how faded and worn it was, I now know what his Christmas present will be!
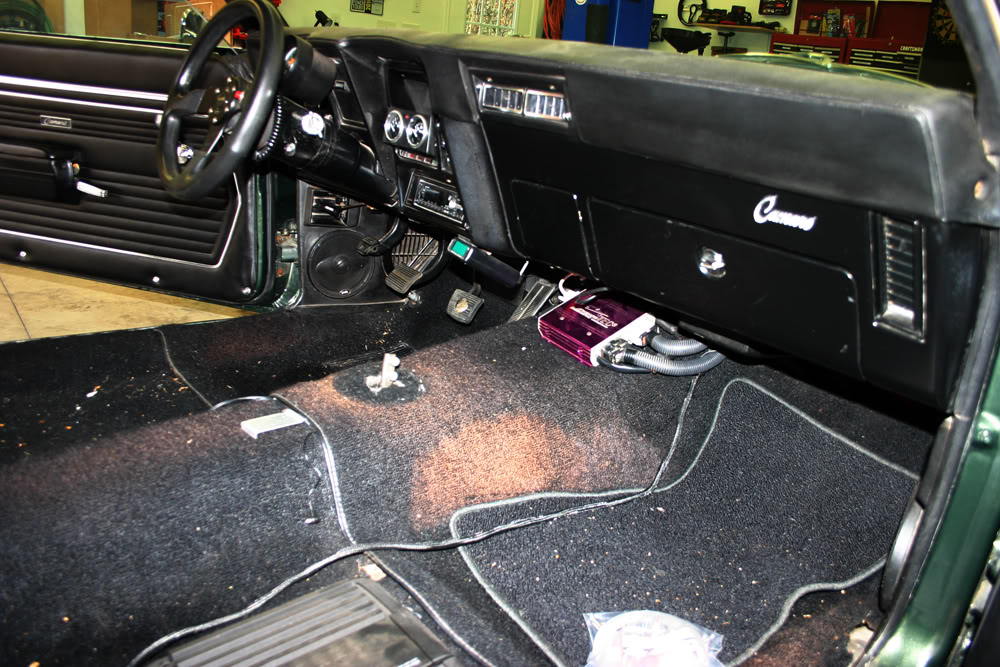
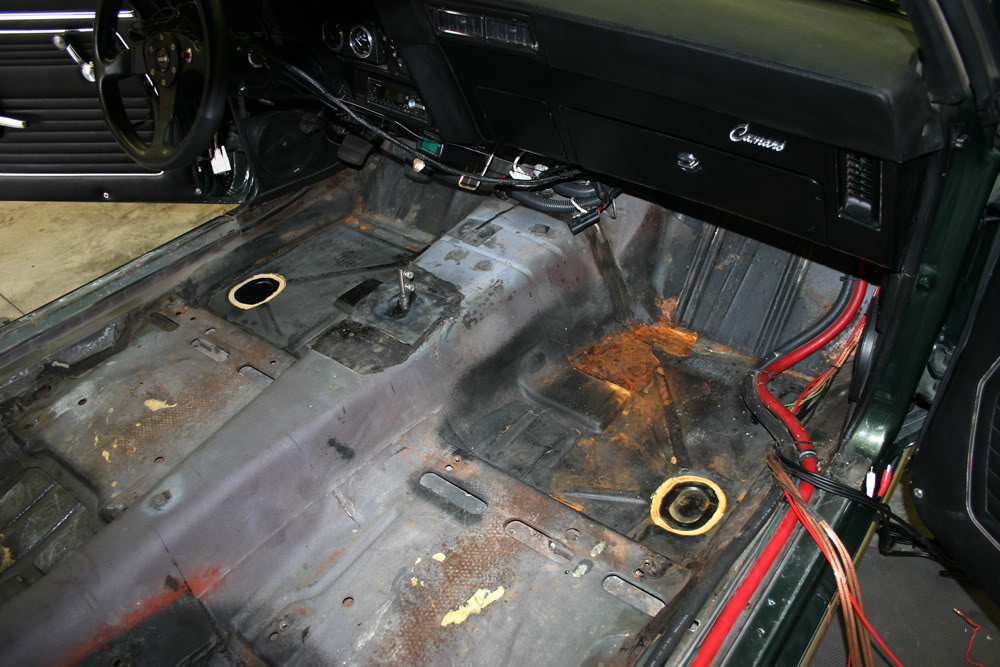
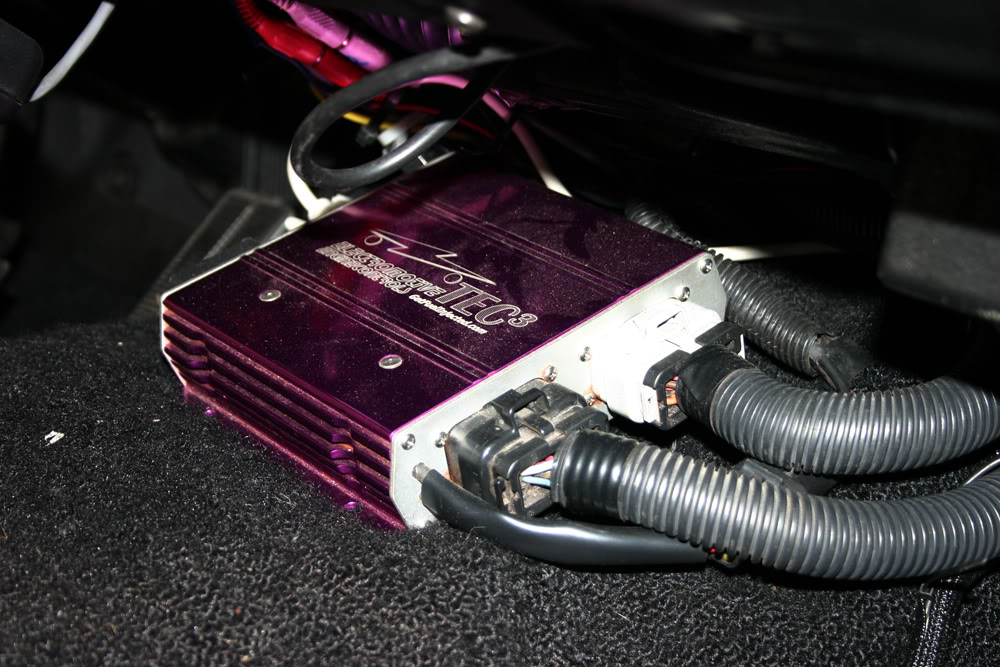
He uses a Tec 3 computer to control the fuel injection.
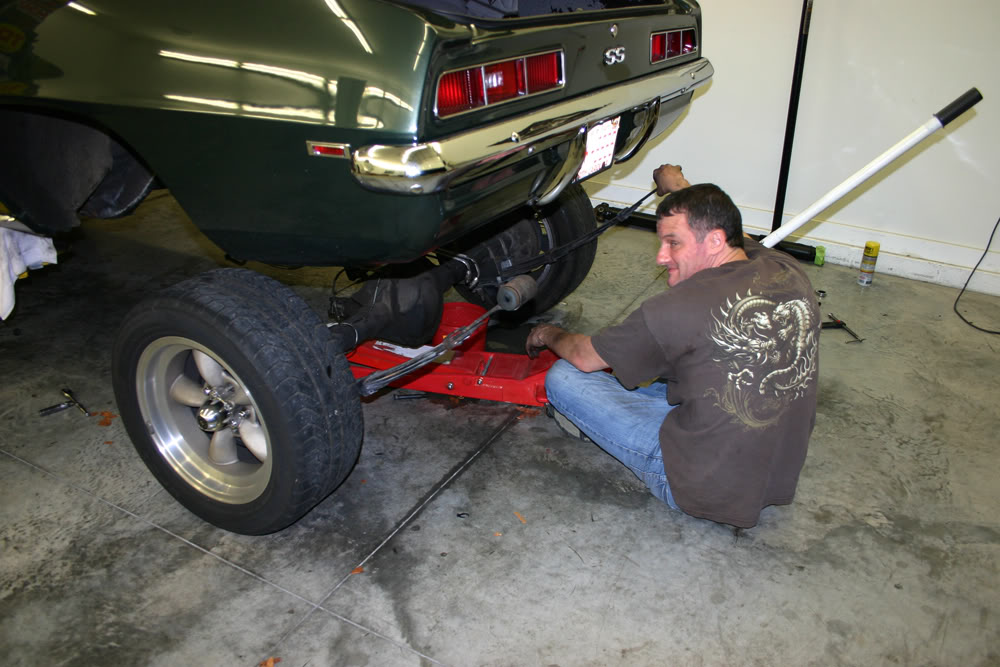
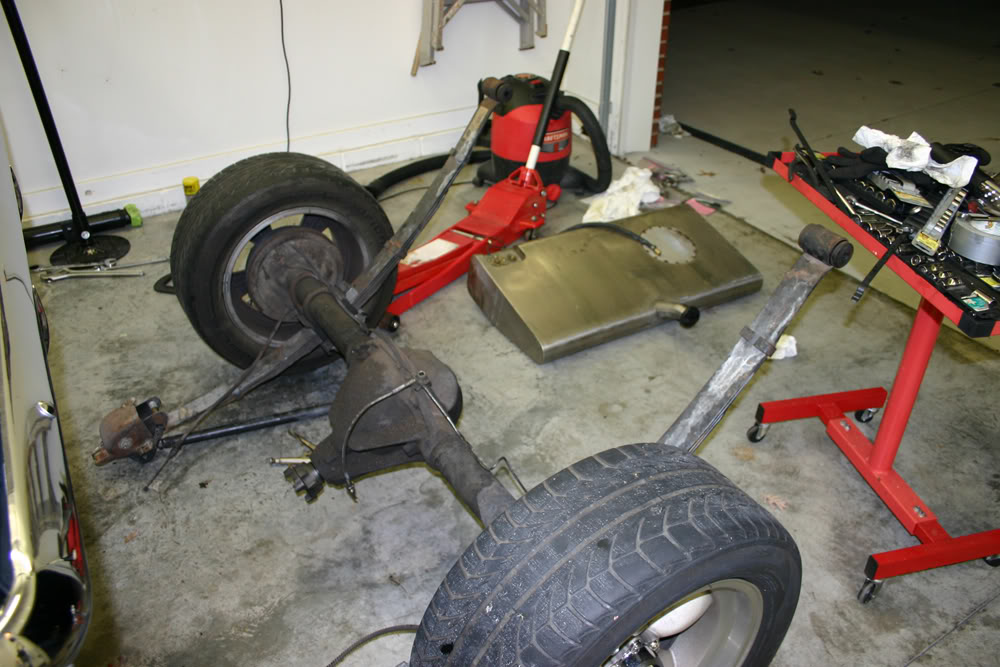
After lunch at Mickey D's and his fourth stop at Ace Hardware to buy fasteners, we began to attack the bottom. First thing to go was the exhaust, then the drive shaft and the gas tank. He is replacing the brake lines so we cut out the old ones rather than trying to remove the rusted fittings.
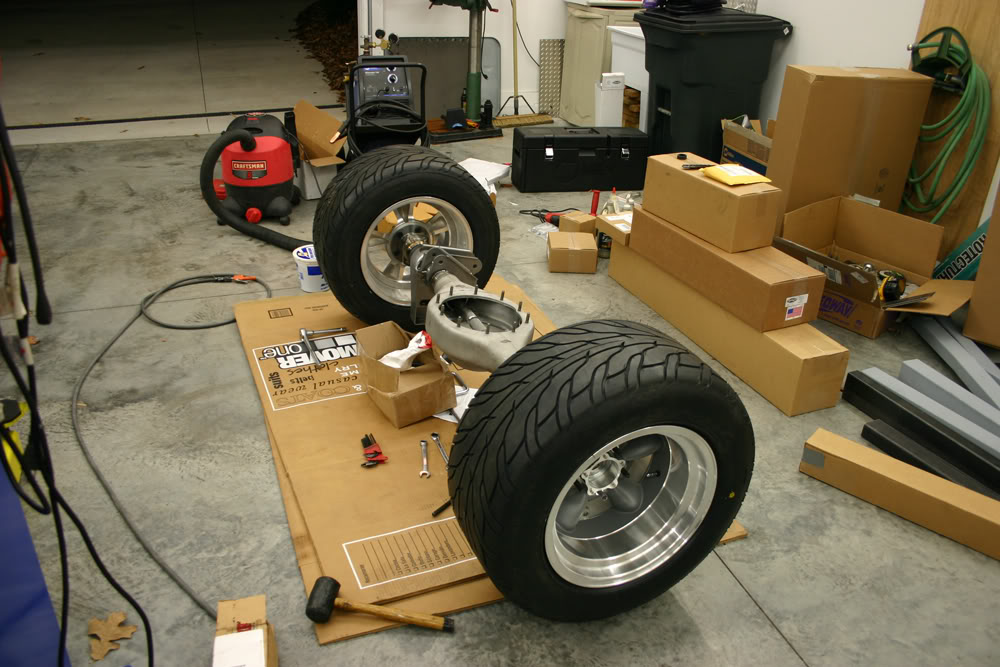
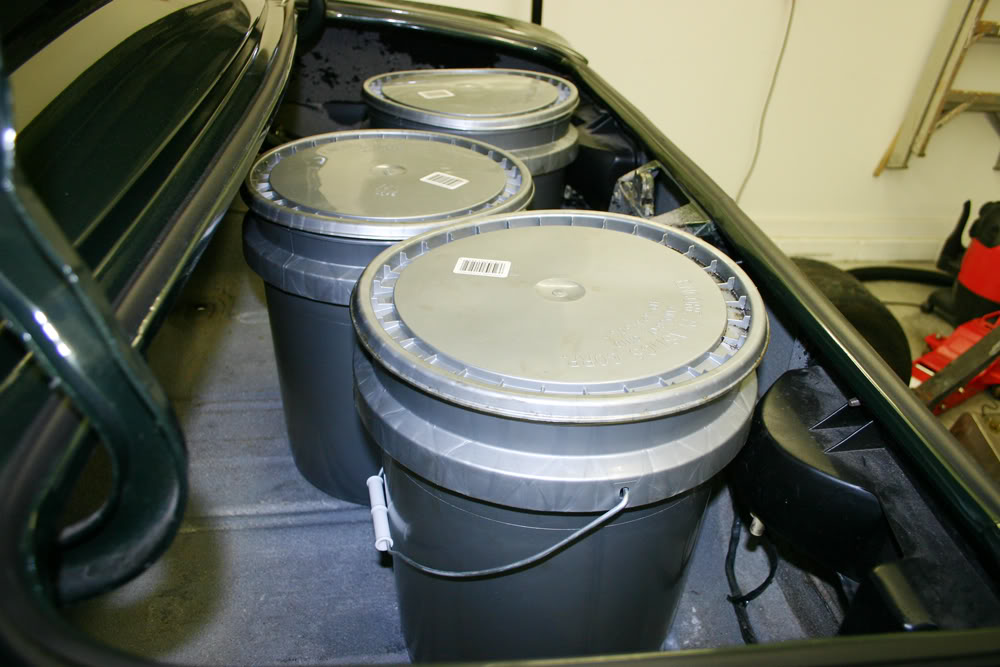
Time to get the big heavy rear end out of there. Matt was very concerned about the chang in the balancing point once we removed the axle and leaf springs. We sure did not want the car to tip off the hoist so we tied the car to the hoist with tie down straps. Good thing because even with the straps in place, the rear of the car came up off the supports. We had to ratchet the straps even tighter. Plus the driver's door now did not want to close. To put some weight on the rear, we put three five gallon pails in the trunk and filled them with water. The door now closed. When we are cutting and fitting everything, we are going to use my tall jack supports under the front end to make sure the car stays in alignment.

We remounted the wheels and tires, removed all of the fasteners, and then simply raised the car away from everything. Worked like a charm and it was now 6:30PM and time to quit for the day.
Now it was time to remove the seats, carpet, electronics, rear side panels, seat belts, etc. He had the floor pans replaced about three years ago but a problem surfaced on the passenger side. It appears condensation is leaking from the AC system and is pooling in that footwell. We will have to look into that. The pans under the rear seats are original and have some very slight surface rust. Overall, it looked better than Matt expected. We are going to replace all of the original insulation pieces with Dynamat. After pulling the carpet and seeing how faded and worn it was, I now know what his Christmas present will be!
He uses a Tec 3 computer to control the fuel injection.
After lunch at Mickey D's and his fourth stop at Ace Hardware to buy fasteners, we began to attack the bottom. First thing to go was the exhaust, then the drive shaft and the gas tank. He is replacing the brake lines so we cut out the old ones rather than trying to remove the rusted fittings.
Time to get the big heavy rear end out of there. Matt was very concerned about the chang in the balancing point once we removed the axle and leaf springs. We sure did not want the car to tip off the hoist so we tied the car to the hoist with tie down straps. Good thing because even with the straps in place, the rear of the car came up off the supports. We had to ratchet the straps even tighter. Plus the driver's door now did not want to close. To put some weight on the rear, we put three five gallon pails in the trunk and filled them with water. The door now closed. When we are cutting and fitting everything, we are going to use my tall jack supports under the front end to make sure the car stays in alignment.
We remounted the wheels and tires, removed all of the fasteners, and then simply raised the car away from everything. Worked like a charm and it was now 6:30PM and time to quit for the day.

Thread Starter
|
July 2011 ROTM
Joined: Dec 2009
Posts: 153
ROTM Winner's Club
Progress slowed dramatically the past two days. My son had an appointment Wednesday morning concerning his new job that begins later in December. Once he was back from the appointment, we hauled the new 9" rear end to my body guy to have it painted. It will be ready next week.
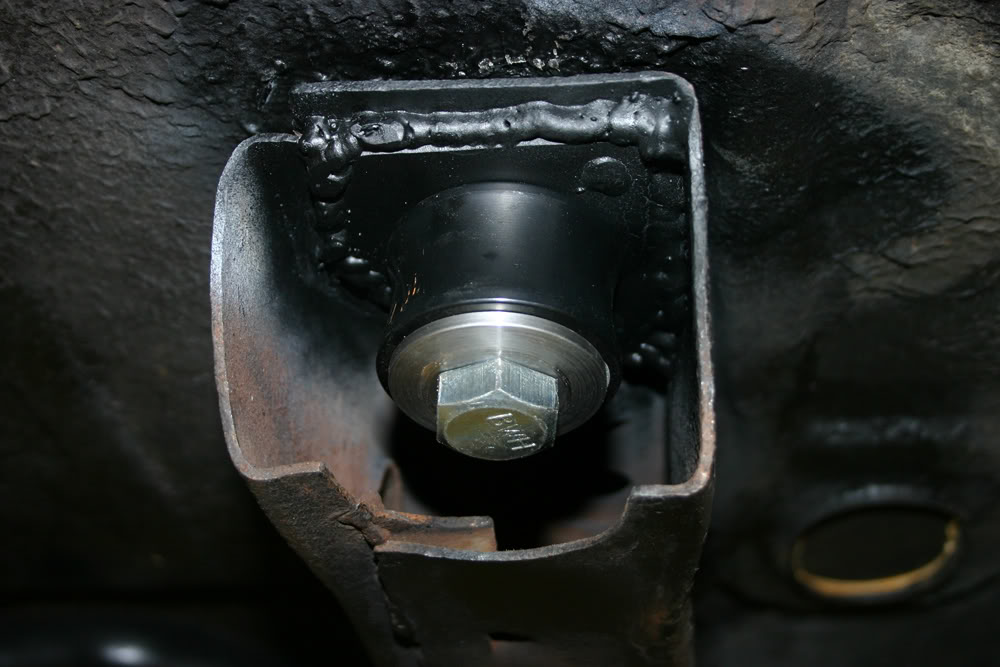
After lunch, we tackled the next item on his list. According to his research, if you install sub-frame connectors, you should also install solid front sub-frame bushings. We purposely raised the car by the rocker panels so we could first loosen and then remove the old bushings. Here is where our forward motion hit the pause mode.
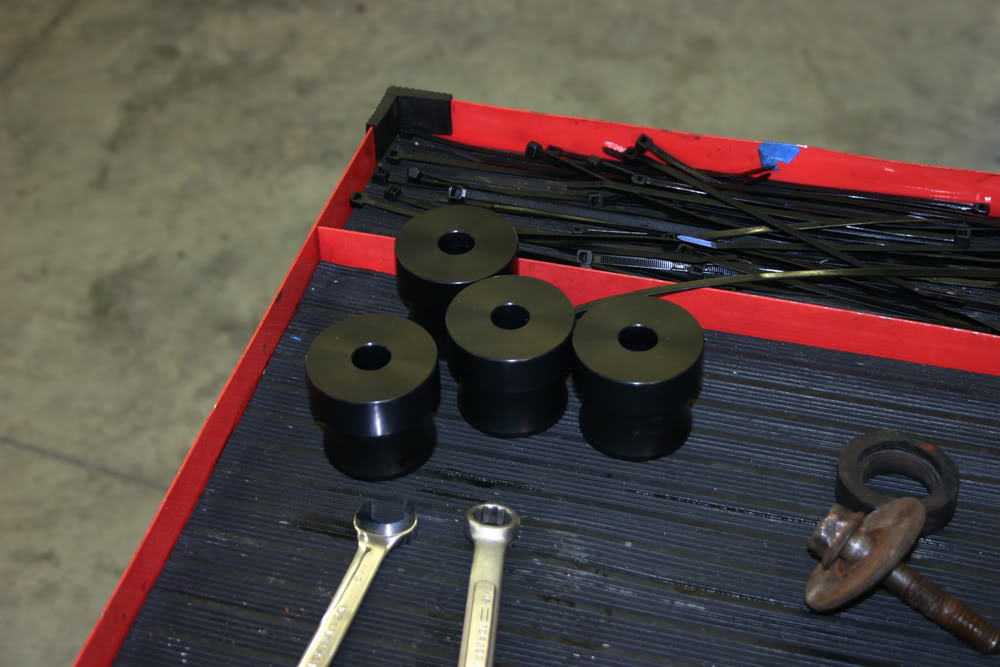
Five of the six mounts had substantial rust damage on the front sub-frame. Enough rust that Matt had to install reinforcing plates. This presented an opportunity for using his new plasma cutter which worked great. After cutting the pieces, drilling the center hole for the bushing and then welded in each plate. Including the time it took to get some necessary parts, most of yesterday and today was spent on this project. This discovery may have caused some of the flexing that he has noticed. Fortunately, the rust was limited to the sub frame area as the body area at each mount was in good shape.
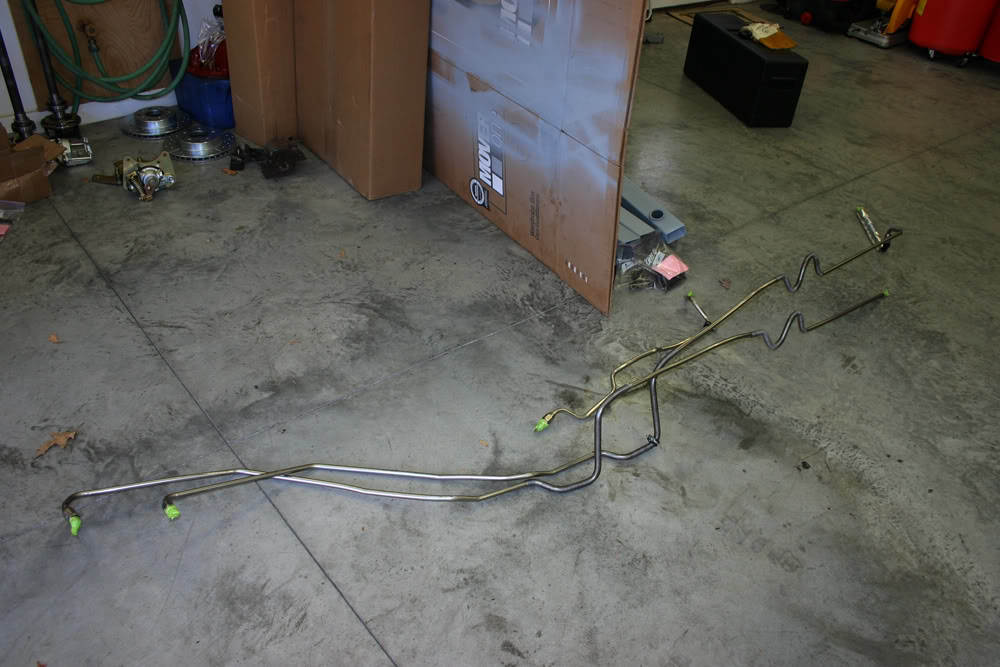
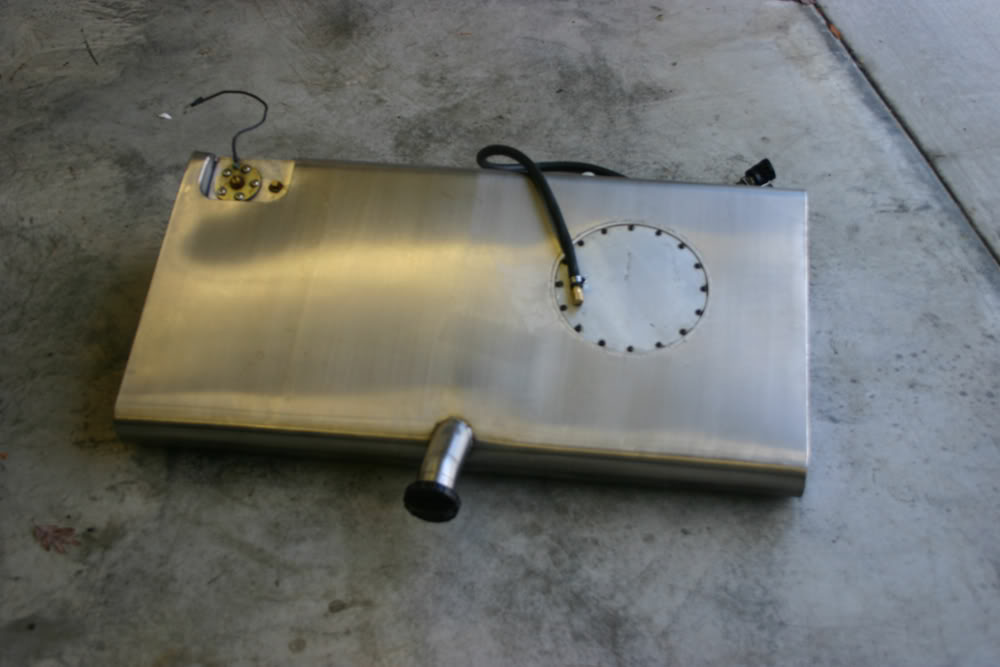
While Matt was doing repairs, I was cleaning up some of the items we had taken off and out of the car. A few years back, he had installed stainless steel fuel lines and an aftermarket fuel tank for his fuel injection. A little scrubbing saw both of them clean up nicely.
Other items needing cleaning was his computer brain, his Alpine amp that had been under the passenger seat, the fuel filter assembly and his seat belts. The rear seat belts cleaned up nicely but the fronts showed some significant wear and he ordered a set to replace them. Probably a good move. All of the belts were had 1969 on the tags.
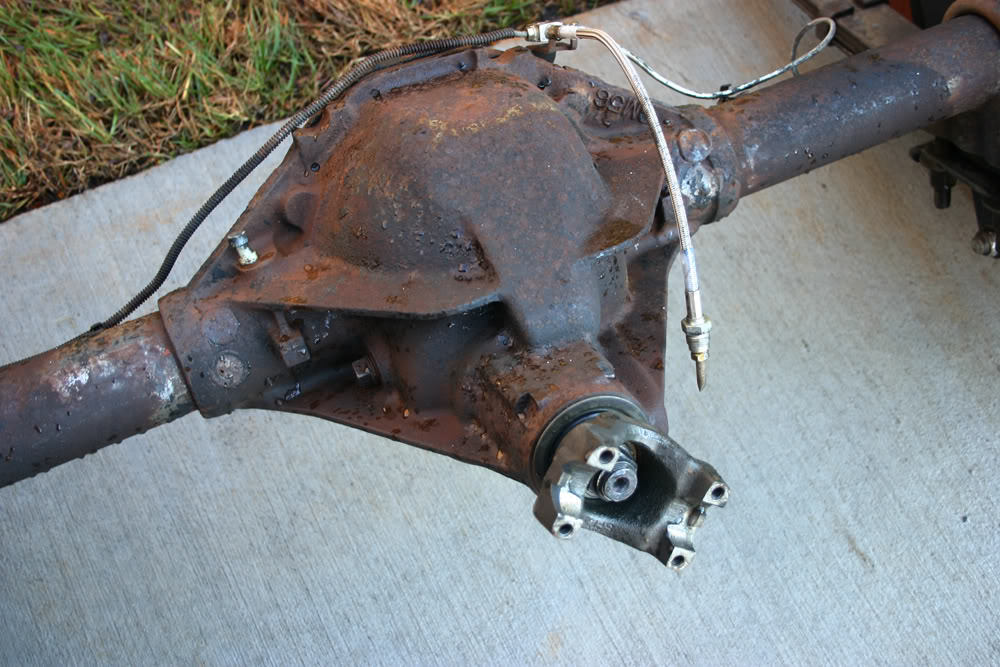
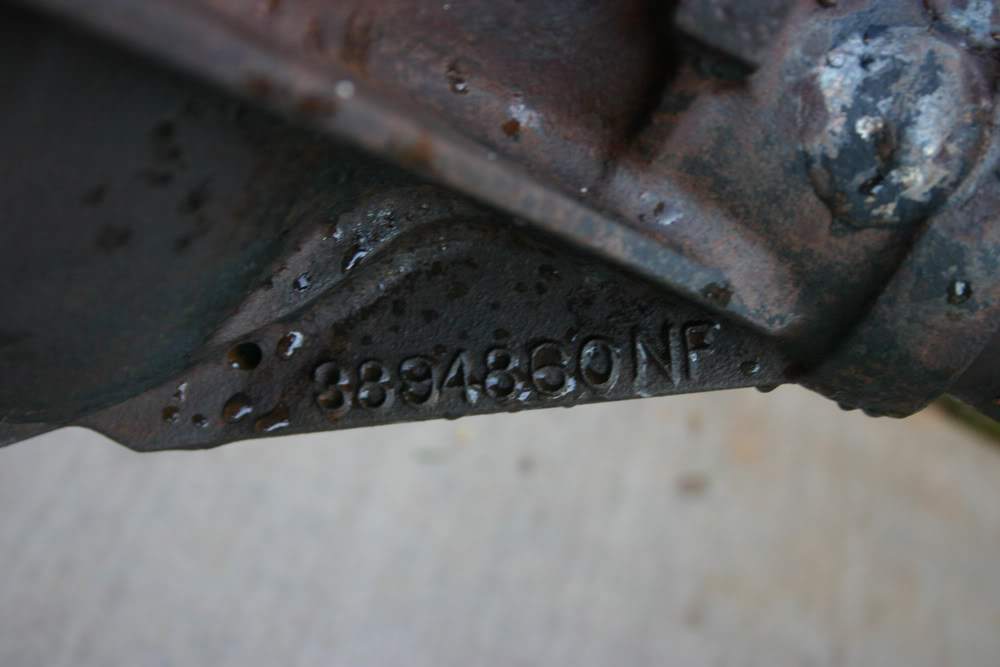
I also rolled out the pressure washer and cleaned up the old 12 bolt rear end that he is going to put on Craigslist. Since his car is a real SS, it came with this rear end from the factory. It still has the Cal-Trac's on the leaf springs as well as the original drum brakes.

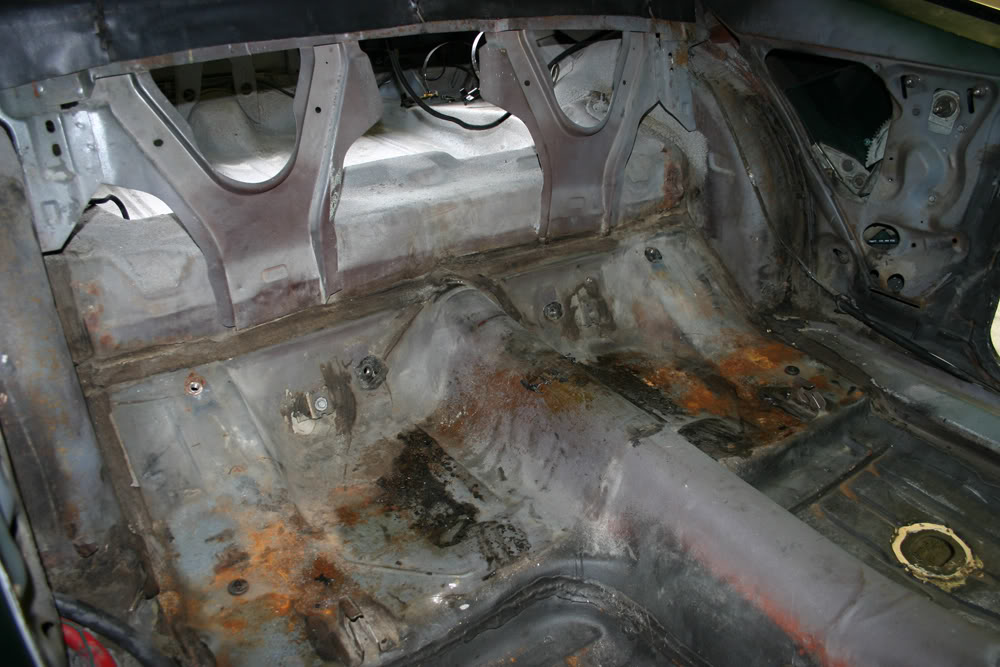
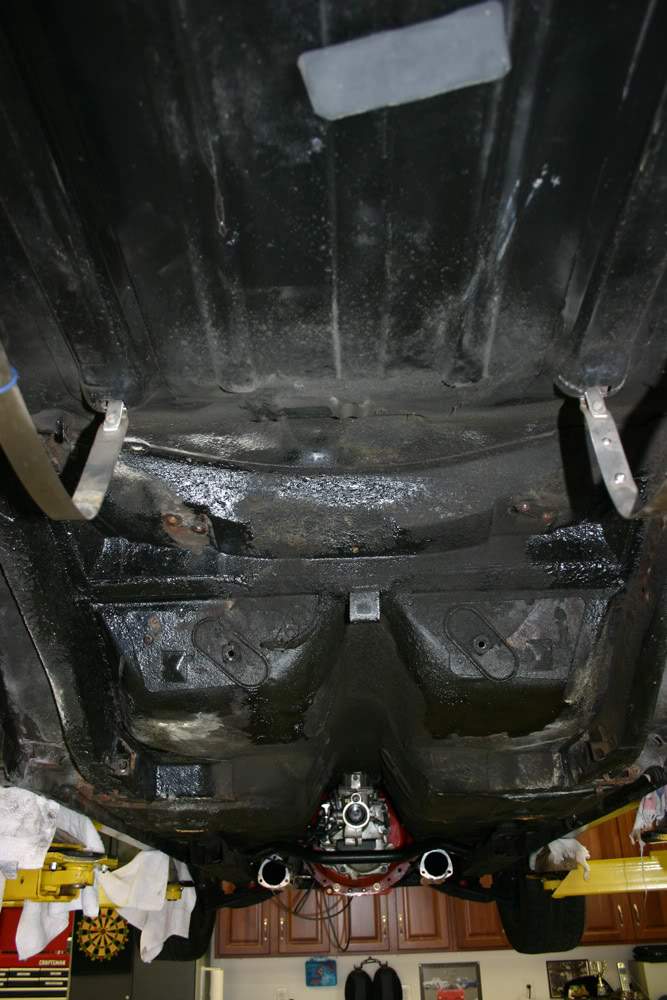
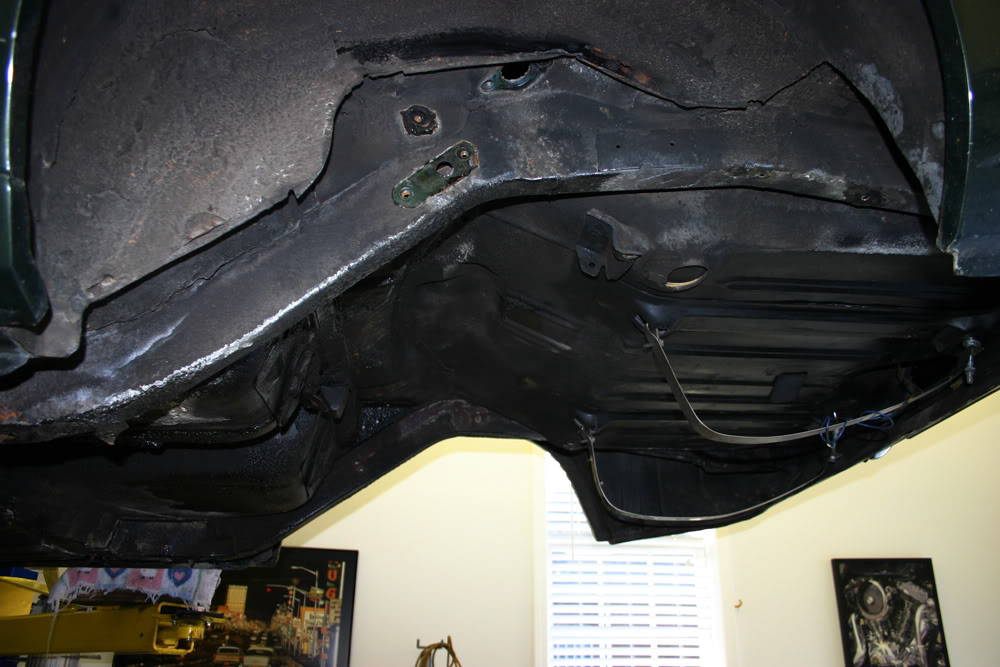
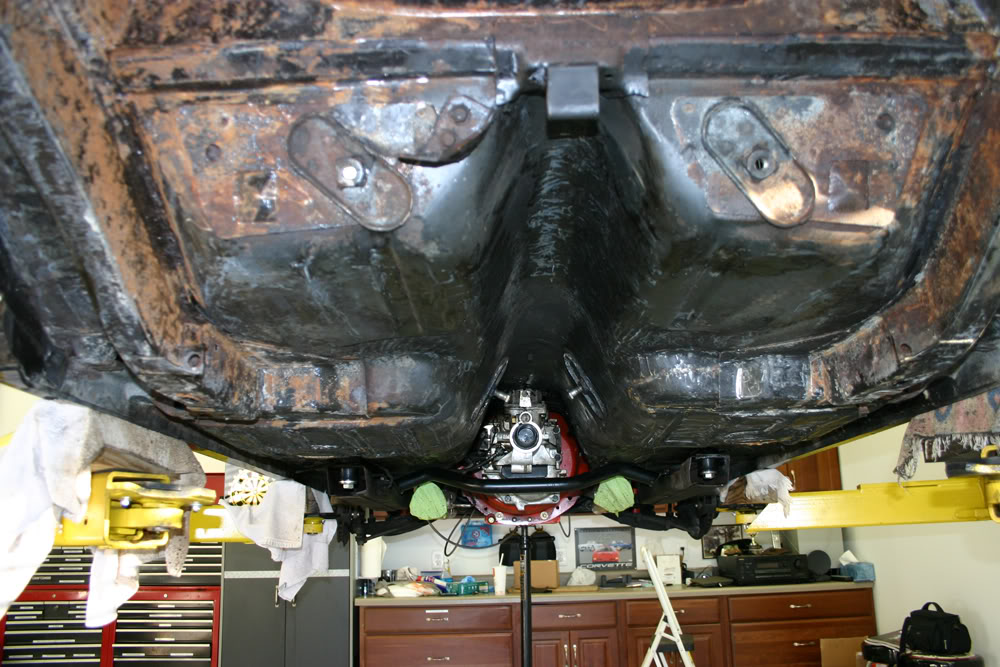
Below are some photos of the bottom of the car with everything removed. Tomorrow we are going to spray the bottom of the car with engine degreaser, let it sit for an hour or so and then use the pressure washer to clean it up as best we can before we begin cutting. Matt and his family are going away for a few days for a much needed vacation. We will resume work the middle of next week, although I will continue to clean up his seats and other sundry items while he is gone.
After lunch, we tackled the next item on his list. According to his research, if you install sub-frame connectors, you should also install solid front sub-frame bushings. We purposely raised the car by the rocker panels so we could first loosen and then remove the old bushings. Here is where our forward motion hit the pause mode.
Five of the six mounts had substantial rust damage on the front sub-frame. Enough rust that Matt had to install reinforcing plates. This presented an opportunity for using his new plasma cutter which worked great. After cutting the pieces, drilling the center hole for the bushing and then welded in each plate. Including the time it took to get some necessary parts, most of yesterday and today was spent on this project. This discovery may have caused some of the flexing that he has noticed. Fortunately, the rust was limited to the sub frame area as the body area at each mount was in good shape.
While Matt was doing repairs, I was cleaning up some of the items we had taken off and out of the car. A few years back, he had installed stainless steel fuel lines and an aftermarket fuel tank for his fuel injection. A little scrubbing saw both of them clean up nicely.
Other items needing cleaning was his computer brain, his Alpine amp that had been under the passenger seat, the fuel filter assembly and his seat belts. The rear seat belts cleaned up nicely but the fronts showed some significant wear and he ordered a set to replace them. Probably a good move. All of the belts were had 1969 on the tags.
I also rolled out the pressure washer and cleaned up the old 12 bolt rear end that he is going to put on Craigslist. Since his car is a real SS, it came with this rear end from the factory. It still has the Cal-Trac's on the leaf springs as well as the original drum brakes.
Below are some photos of the bottom of the car with everything removed. Tomorrow we are going to spray the bottom of the car with engine degreaser, let it sit for an hour or so and then use the pressure washer to clean it up as best we can before we begin cutting. Matt and his family are going away for a few days for a much needed vacation. We will resume work the middle of next week, although I will continue to clean up his seats and other sundry items while he is gone.
Thread Starter
|
July 2011 ROTM
Joined: Dec 2009
Posts: 153
ROTM Winner's Club
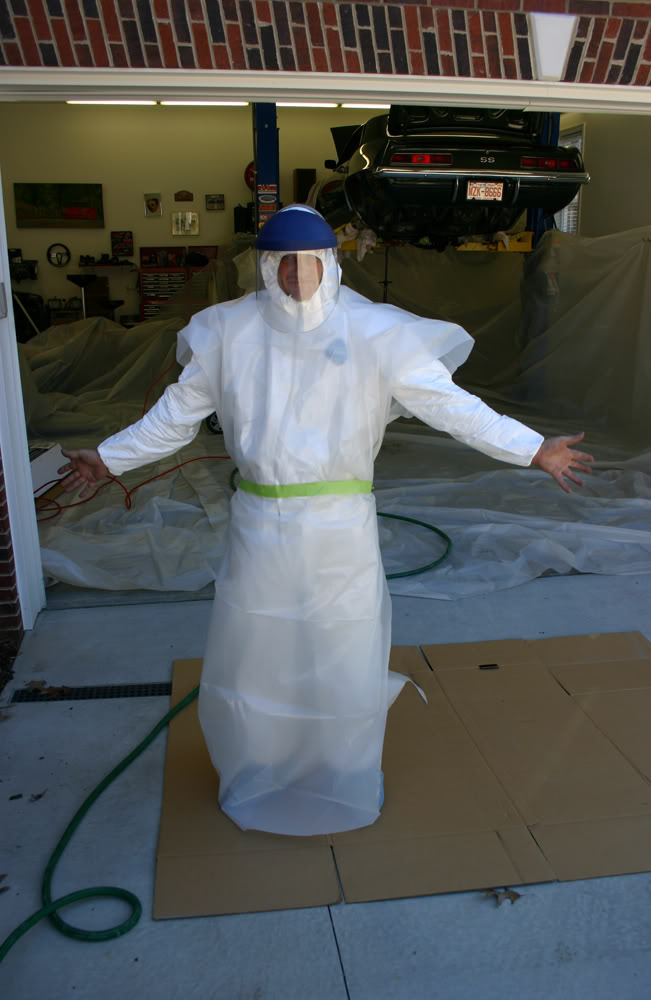
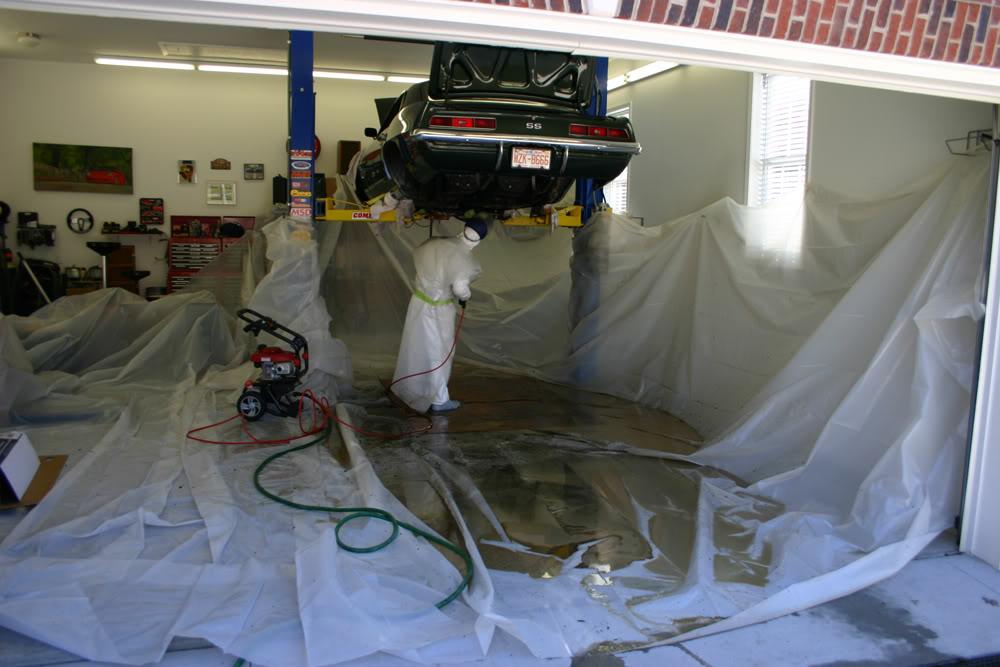
Messy day today!! We lined the walls with plastic, sprayed the bottom with degreaser and used the high pressure sprayer to clean up the bottom of the car. Matt's family came over around noon to celebrate a late Thanksgiving.

Thread Starter
|
July 2011 ROTM
Joined: Dec 2009
Posts: 153
ROTM Winner's Club
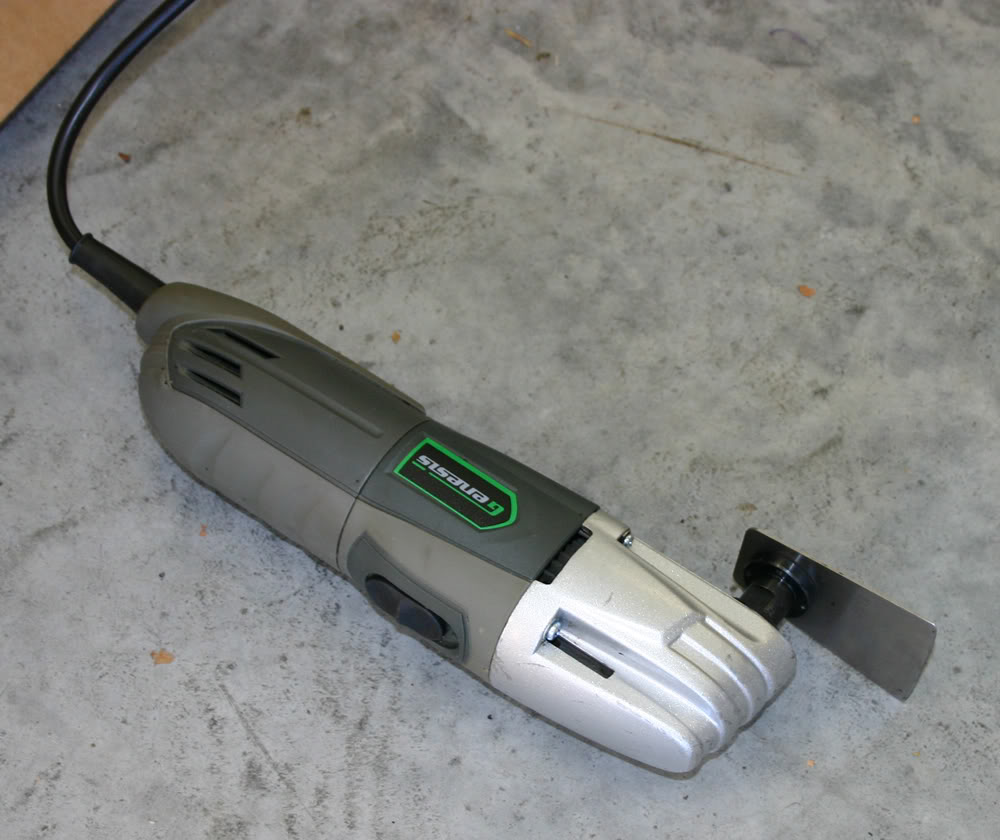
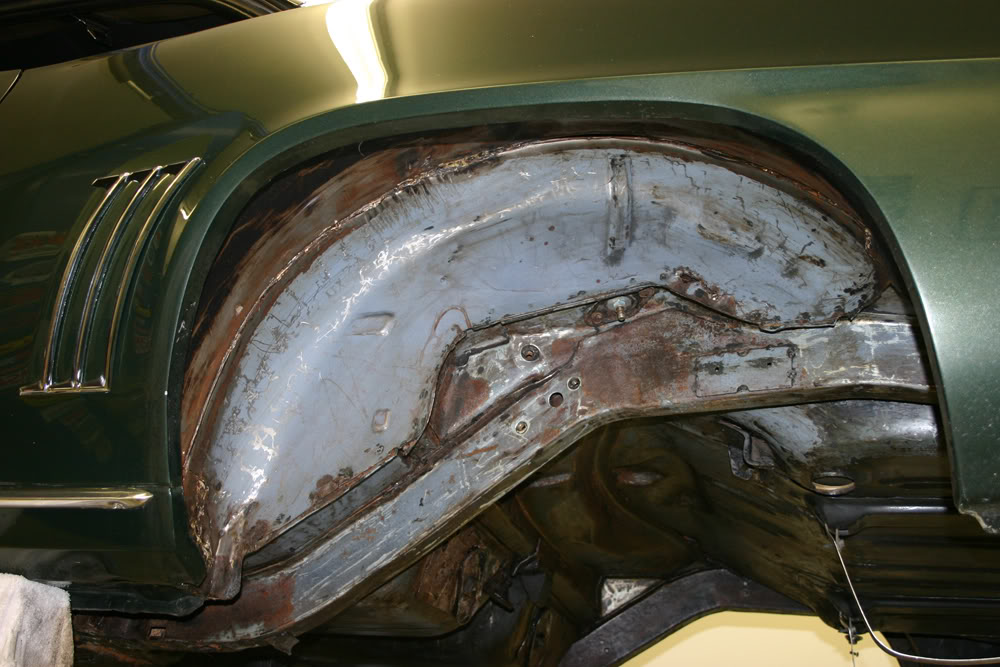
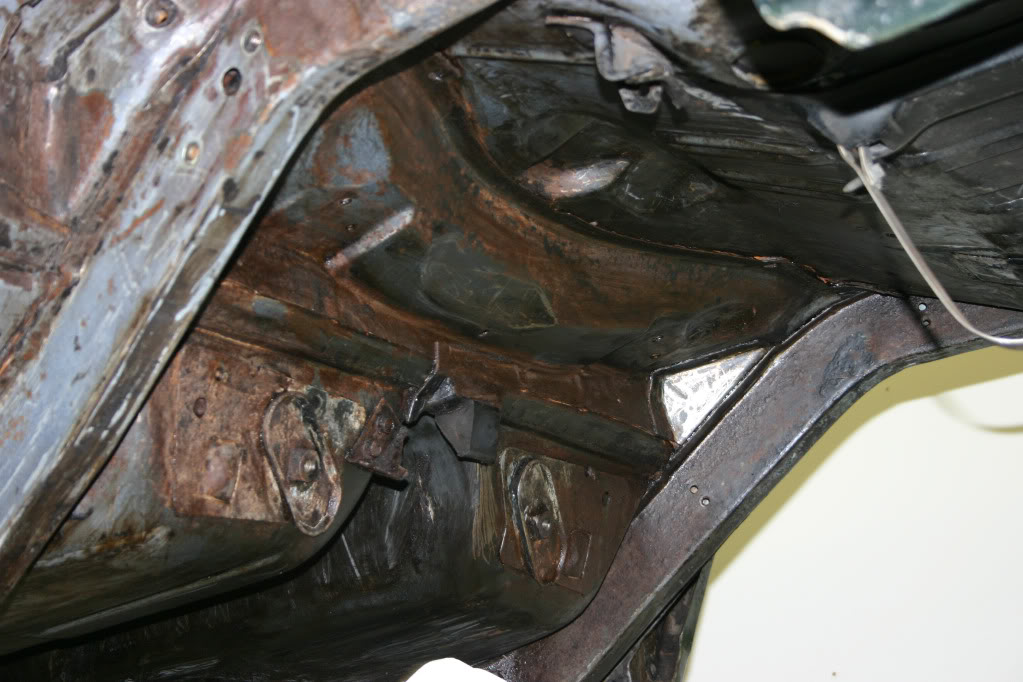
Lots of grunt work being done to make sure we don't have a fire when we begin cutting. To that end, we needed to remove the undercoating in the cutting areas as well as others for cosmetic clean up. Matt bought a power scraper that worked very well in removing most of the undercoating.
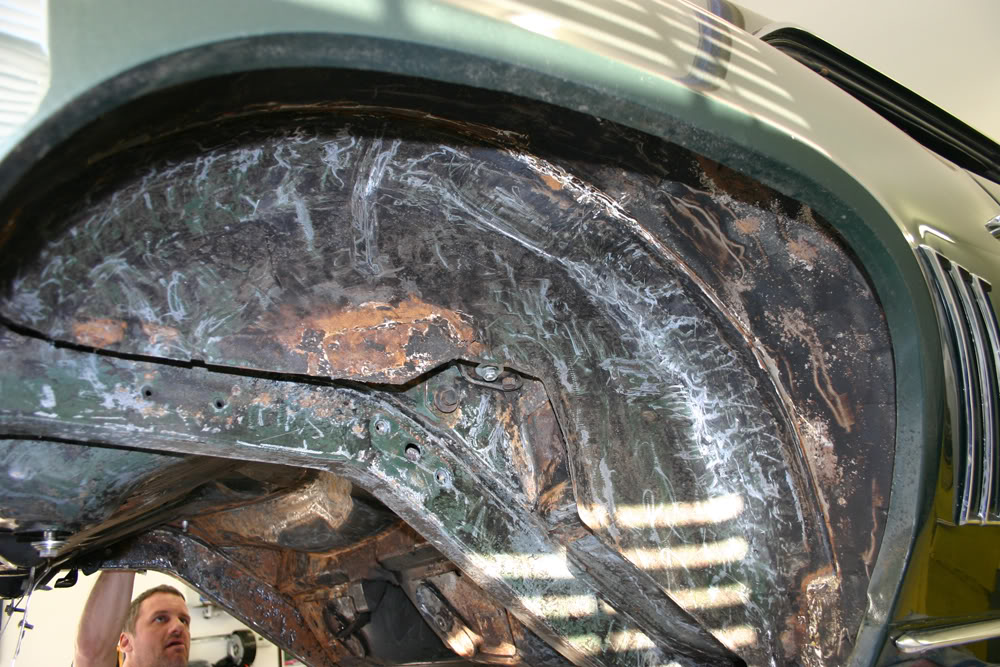
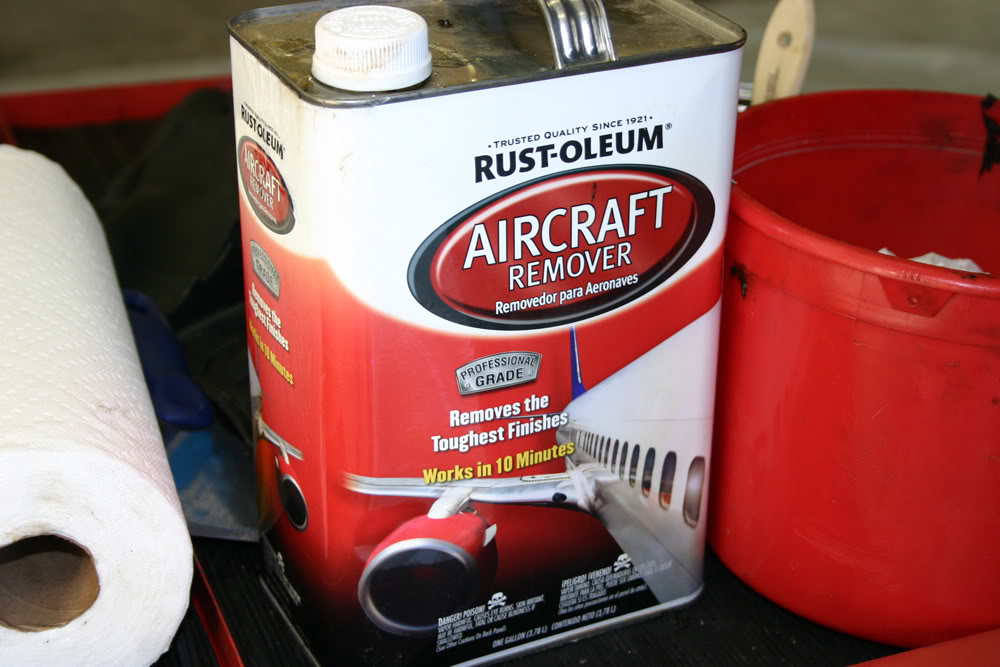
To get the rest of it, we began brushing on Aircraft Remover, scraped the areas and then used paper towels to remove the excess. This did the trick in the areas we completed today. We still have some additional areas to clean up tomorrow and then the cutting will begin.
To get the rest of it, we began brushing on Aircraft Remover, scraped the areas and then used paper towels to remove the excess. This did the trick in the areas we completed today. We still have some additional areas to clean up tomorrow and then the cutting will begin.


Thread Starter
|
July 2011 ROTM
Joined: Dec 2009
Posts: 153
ROTM Winner's Club
Sure if you think that would be better.