


1939 Chev coupe

Thread Starter
|
Second Generation Moderator
Feb 2010 ROTM winner
Jan 2013 ROTM winner
Feb 2010 ROTM winner
Jan 2013 ROTM winner
Joined: Aug 2008
Posts: 9,097
From: Portland, Or
ROTM Winner's Club
 1939 Chev coupe
Long time since I've done a new project, and going on 70 yrs. old I figured I had one more left in me. One year ago I was at our big swap meet when I stumbled across this rust bucket '39 Chev coupe. No price on it, but having had a 1940 coupe in 1968, I was curious enough to look at this one with my buddy. After looking it over awhile a gentleman walked up and said, "Nice old coupe, huh?"
Well by that time I'd looked enough to know it certainly was straight, but it also had huge rust issues! So I told him we must be looking at two different cars if he thought this was nice? He laughed, and said that he'd owned it forever, and being in his 80's he knew he'd never finish it, so decided to sell. I asked him what he wanted, and he asked me what I thought it was worth? I told him I wondered if it was free, if it would be worth fixing, as the parts and labor could cost more than buying a better one.
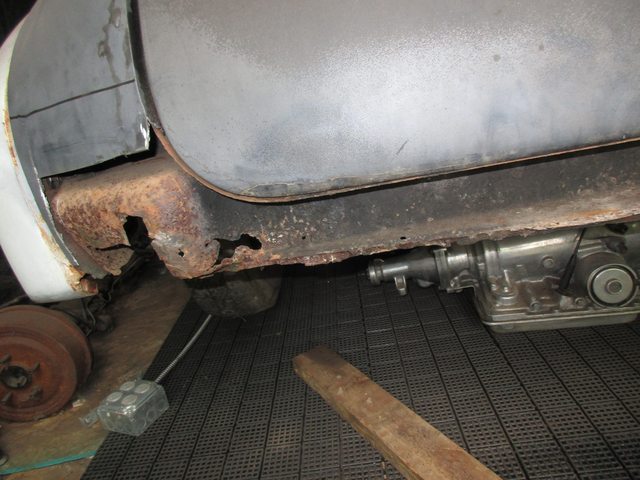
After a little joking he told me he wanted $2200, which was laughable. No rockers left, no floors intact, lower doors rotted out, tail panel rotted out, and basically the whole bottom 4" of the car rotted away, except the trunk floor. It somehow survived in perfect shape! And somehow the frame appeared to be perfect, and maybe swapped from another car? More back and forth, and he showed me the interior full of spare parts, plus a extra hood, and a complete one piece fiberglass frontend. He told me to make him an offer, and I said I didn't want it. He responded with one price after another, until he got down to $1500, and I asked if he'd deliver it to my house at that price? He agreed and I bought the rusty hulk.
So this is what it looked like then. If you slammed the doors, the whole side of the car swung like a gate a couple inches! It was totally rusted loose from the floor pan!
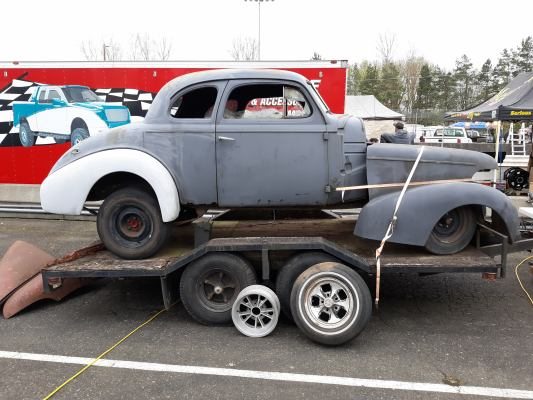
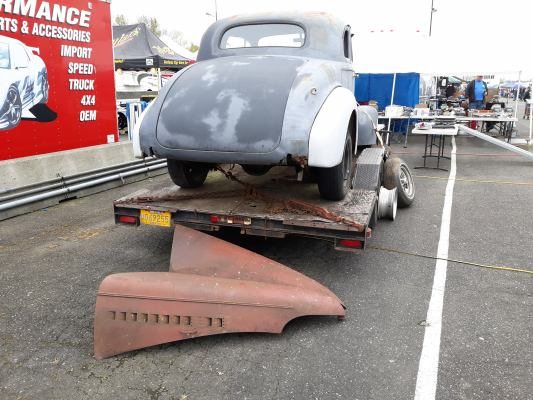
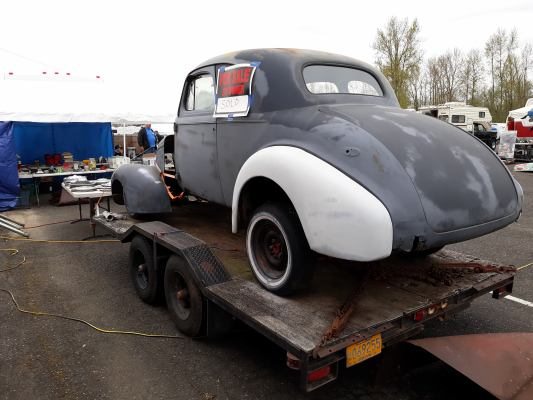
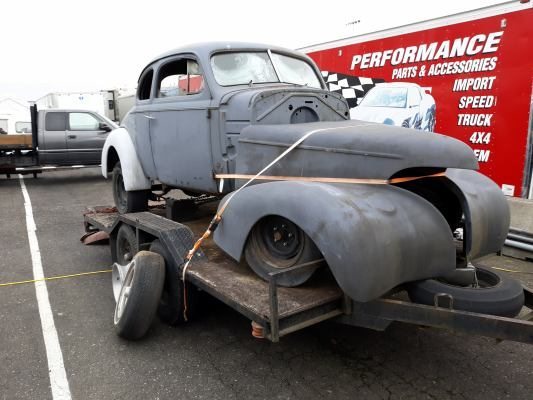
As we walked away my buddy said, "You're way braver than me!" Of course he was spot on in his assessment of the car, and the future project!
I got the car a couple days later. I left it siting as I was in the midst of putting sheet metal roofing and siding on my backyard shop. So it was a couple months before I even uncovered it. I did an inventory of parts, and decided what I'd keep, and what to sell. Then rolled it into the shop with help from friends.
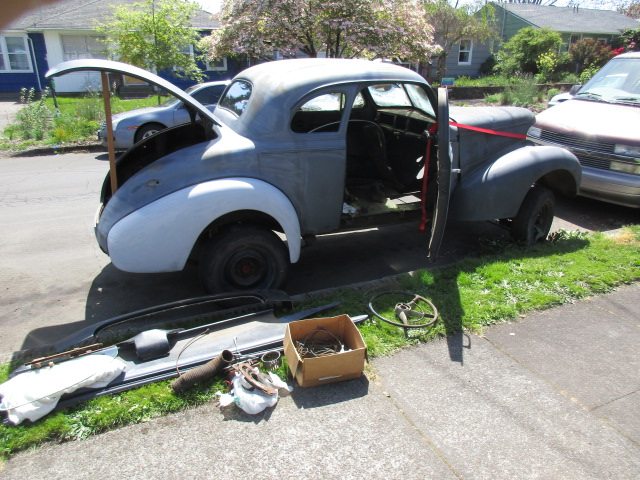
I quickly realized the front suspension was almost nonexistent, as the wheels weren't connected together via tierods, so each went their own direction when we tried to push it! I stopped and figured out the issue. Then I drilled a 2x4 with holes on each end, and wired it to the two steering arms at each wheel. Then we were able to push it, and kick the tires left or right to steer it.
Inside the shop I removed the fiberglass frontend, and sat it outside. Space is cramped, so it needed to go outside until I needed it. I began stripping the suspension off, with plans to eliminate the knee action shock system, and return it to the lower Master Model with straight axle, vs. the Master Deluxe knee action it was.
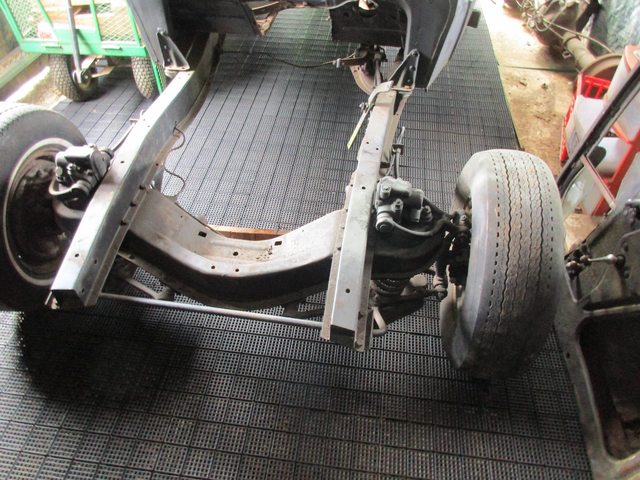
But first I figured the rust repairs on the body needed to be done so it was solid, and the body not moving. The body had about 16 body bolt mounts, but only two bolts holding it on! I first bolted a half dozen more bolts before beginning rust repairs. Then I went to work on bending up rockers first. They're pretty basic, and easy to bend, plus new ones were priced at about $225 ea., so making them was a big savings.
Fortunately the floor braces weree solid, so I was able to attach the new rockers to the braces, and add a little patch at the A pillar, B pillars to tie them in.
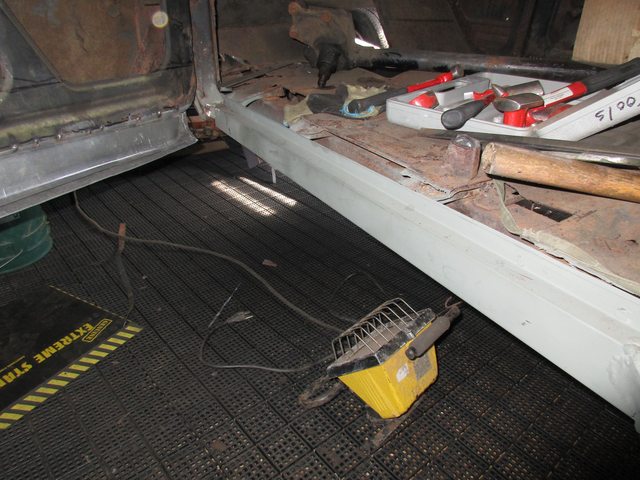
Lower 1/4 panels were next, as they were a real mess!
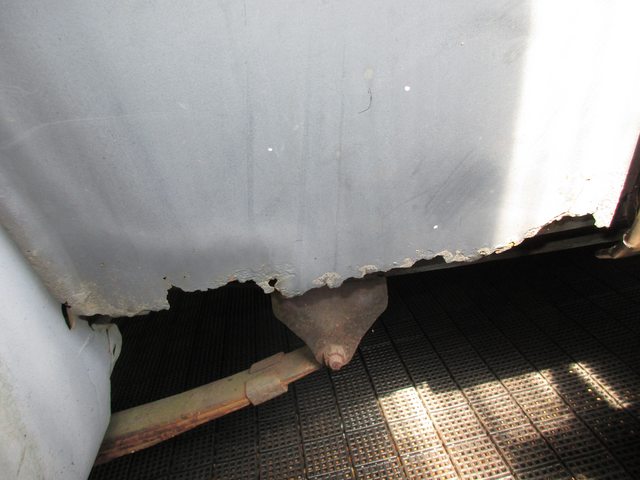
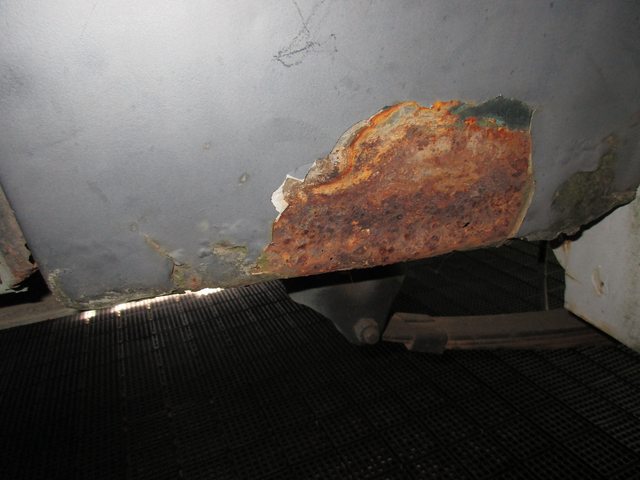
I found lower door skins in a "universal" fit almost any early Chevy cheap, so bought them, and cut them up to make patch panels for the lower 1/4's. Then bent up more 18 ga. metal to tie them to the floors behind. Had to do these in 3 pieces as the ends needed special shapes to match the door opening and the raised contour by the fenders.
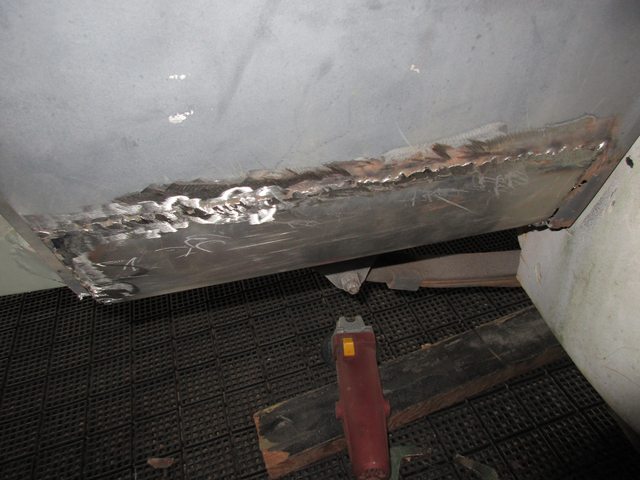
Then I purchased lower door repair kits, inner and outer. They were a poor fit, and inner were 1/4" too long. So had to split them in half, and section 1/4" out before I could use them! Irritating. I did the sectioning at one end to make it easier.
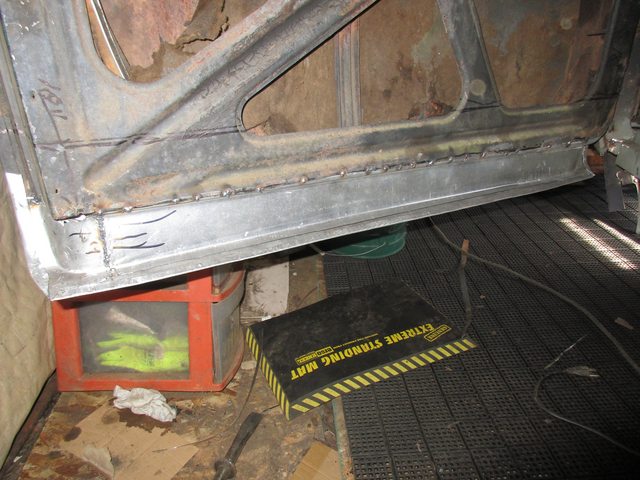
Got the outer door panel checked and it looked much better fit, so tacked it in place. Hundreds of more tacks later to make it a solid weld across inner and outer door panels. And of course a lot of work to avoid warping!!!
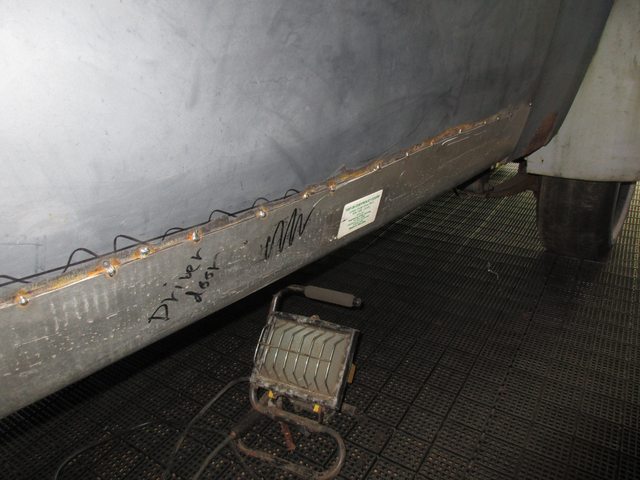
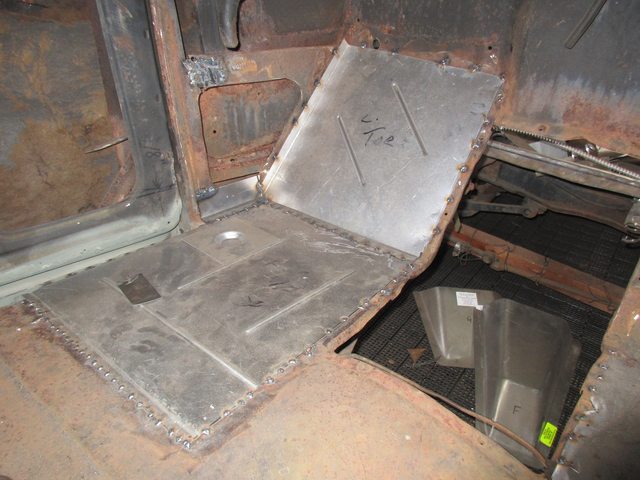
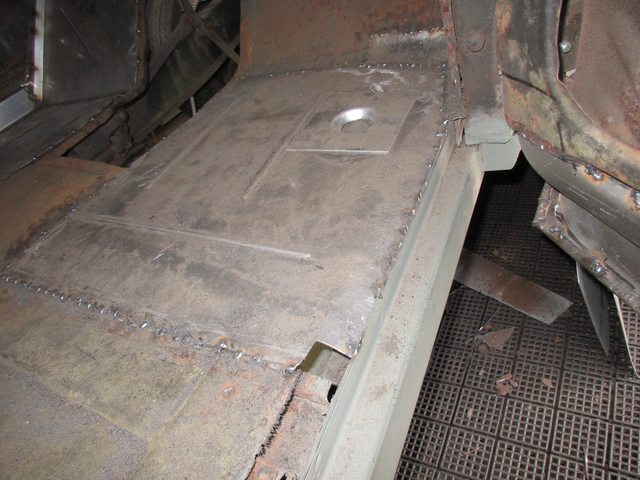
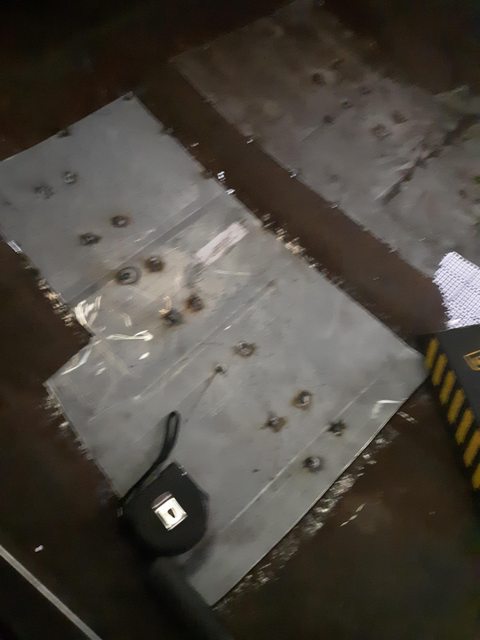
A floor kit showed up later, and it was a disappointment too. Kit said, "1937-38-39" but when it arrived the tag on it read, "1937-38 and '39 with some modification". Well the fronts were semi close, but lacking to reach the center filler. The rears were so far off I should have sent them back and built my own!! Totally worthless, but I modified them, and made them work anyway.
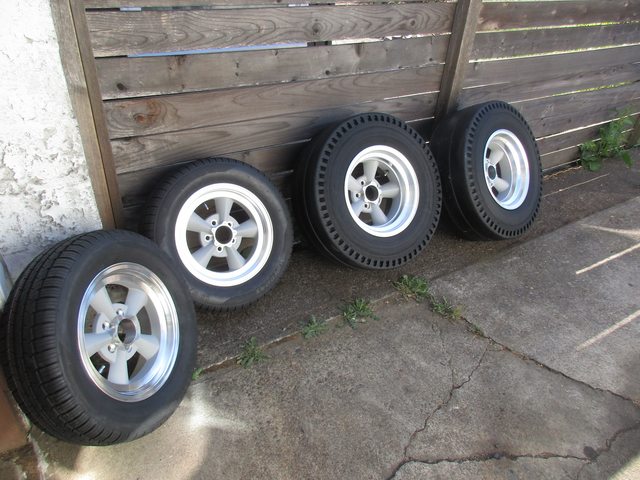
Getting ahead of the build, but I found a deal on 4 American Torq Trust Old style TTO's in as cast centers. So ordered them, plus new pie crust cheater slicks from Towel City, and radials for the front. 8.5 x 15" rear, and 5.5 x 15 fronts. The pie crusts are 9"x 29" x 15".
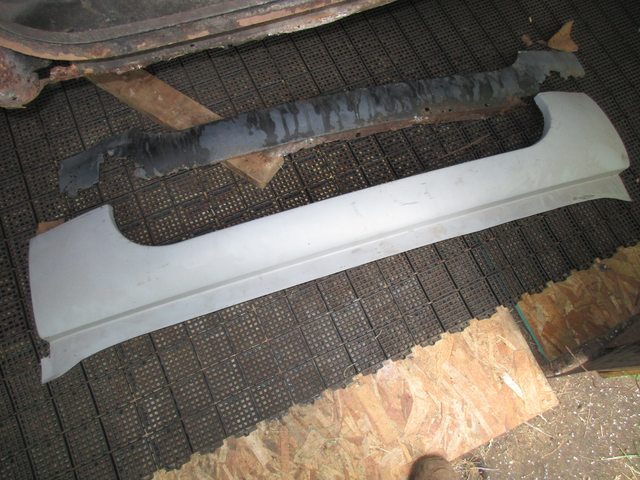
By chance a daily search of Craigslist turned up a NOS EMS tail panel locally! And at about half price over new! I ran over and bought it, and cut the rusted tail panel out.
Well by that time I'd looked enough to know it certainly was straight, but it also had huge rust issues! So I told him we must be looking at two different cars if he thought this was nice? He laughed, and said that he'd owned it forever, and being in his 80's he knew he'd never finish it, so decided to sell. I asked him what he wanted, and he asked me what I thought it was worth? I told him I wondered if it was free, if it would be worth fixing, as the parts and labor could cost more than buying a better one.
After a little joking he told me he wanted $2200, which was laughable. No rockers left, no floors intact, lower doors rotted out, tail panel rotted out, and basically the whole bottom 4" of the car rotted away, except the trunk floor. It somehow survived in perfect shape! And somehow the frame appeared to be perfect, and maybe swapped from another car? More back and forth, and he showed me the interior full of spare parts, plus a extra hood, and a complete one piece fiberglass frontend. He told me to make him an offer, and I said I didn't want it. He responded with one price after another, until he got down to $1500, and I asked if he'd deliver it to my house at that price? He agreed and I bought the rusty hulk.
So this is what it looked like then. If you slammed the doors, the whole side of the car swung like a gate a couple inches! It was totally rusted loose from the floor pan!
As we walked away my buddy said, "You're way braver than me!" Of course he was spot on in his assessment of the car, and the future project!
I got the car a couple days later. I left it siting as I was in the midst of putting sheet metal roofing and siding on my backyard shop. So it was a couple months before I even uncovered it. I did an inventory of parts, and decided what I'd keep, and what to sell. Then rolled it into the shop with help from friends.
I quickly realized the front suspension was almost nonexistent, as the wheels weren't connected together via tierods, so each went their own direction when we tried to push it! I stopped and figured out the issue. Then I drilled a 2x4 with holes on each end, and wired it to the two steering arms at each wheel. Then we were able to push it, and kick the tires left or right to steer it.
Inside the shop I removed the fiberglass frontend, and sat it outside. Space is cramped, so it needed to go outside until I needed it. I began stripping the suspension off, with plans to eliminate the knee action shock system, and return it to the lower Master Model with straight axle, vs. the Master Deluxe knee action it was.
But first I figured the rust repairs on the body needed to be done so it was solid, and the body not moving. The body had about 16 body bolt mounts, but only two bolts holding it on! I first bolted a half dozen more bolts before beginning rust repairs. Then I went to work on bending up rockers first. They're pretty basic, and easy to bend, plus new ones were priced at about $225 ea., so making them was a big savings.
Fortunately the floor braces weree solid, so I was able to attach the new rockers to the braces, and add a little patch at the A pillar, B pillars to tie them in.
Lower 1/4 panels were next, as they were a real mess!
I found lower door skins in a "universal" fit almost any early Chevy cheap, so bought them, and cut them up to make patch panels for the lower 1/4's. Then bent up more 18 ga. metal to tie them to the floors behind. Had to do these in 3 pieces as the ends needed special shapes to match the door opening and the raised contour by the fenders.
Then I purchased lower door repair kits, inner and outer. They were a poor fit, and inner were 1/4" too long. So had to split them in half, and section 1/4" out before I could use them! Irritating. I did the sectioning at one end to make it easier.
Got the outer door panel checked and it looked much better fit, so tacked it in place. Hundreds of more tacks later to make it a solid weld across inner and outer door panels. And of course a lot of work to avoid warping!!!
A floor kit showed up later, and it was a disappointment too. Kit said, "1937-38-39" but when it arrived the tag on it read, "1937-38 and '39 with some modification". Well the fronts were semi close, but lacking to reach the center filler. The rears were so far off I should have sent them back and built my own!! Totally worthless, but I modified them, and made them work anyway.
Getting ahead of the build, but I found a deal on 4 American Torq Trust Old style TTO's in as cast centers. So ordered them, plus new pie crust cheater slicks from Towel City, and radials for the front. 8.5 x 15" rear, and 5.5 x 15 fronts. The pie crusts are 9"x 29" x 15".
By chance a daily search of Craigslist turned up a NOS EMS tail panel locally! And at about half price over new! I ran over and bought it, and cut the rusted tail panel out.
Thread Starter
|
Second Generation Moderator
Feb 2010 ROTM winner
Jan 2013 ROTM winner
Feb 2010 ROTM winner
Jan 2013 ROTM winner
Joined: Aug 2008
Posts: 9,097
From: Portland, Or
ROTM Winner's Club
I again bent up my own inner panel for the "tool drop" since it was flat metal with just a 90 degree bend. And not running a bumper I wanted to omit the bumper bracket openings anyway.
Got the new tail panel tacked in, and it was such a nice fit it only took a couple hours! Solid welds at the 1/4 panel drops, and spot welds along the trunk opening lip.
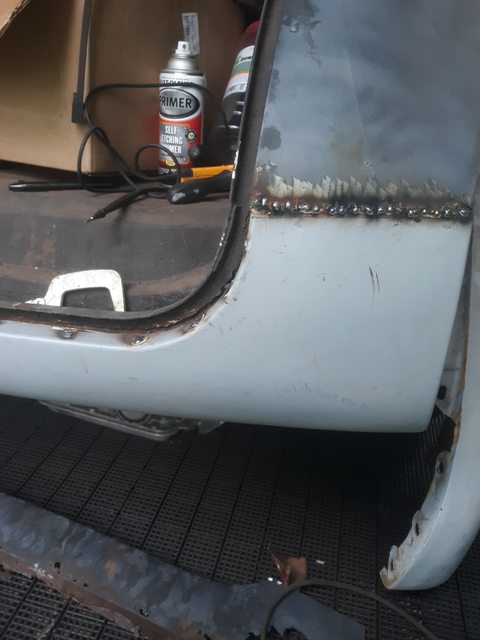

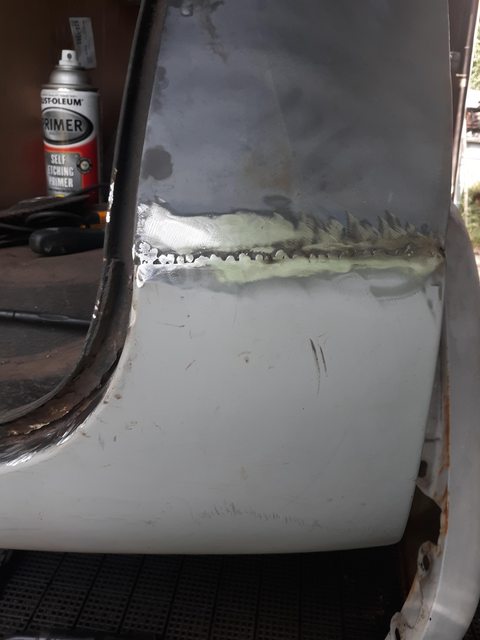
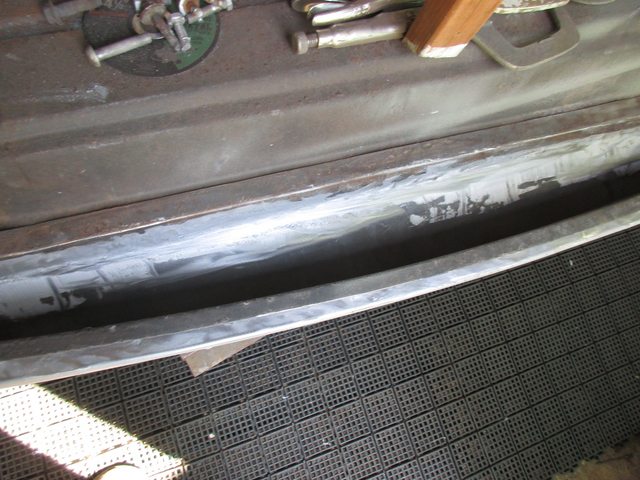
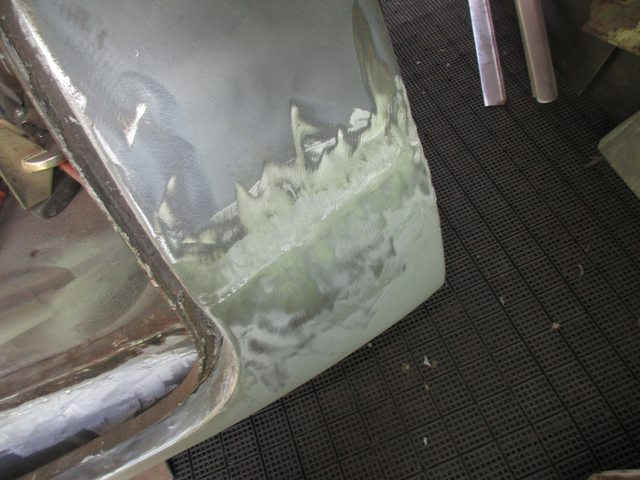
Inner panel in and sealed with All Metal.
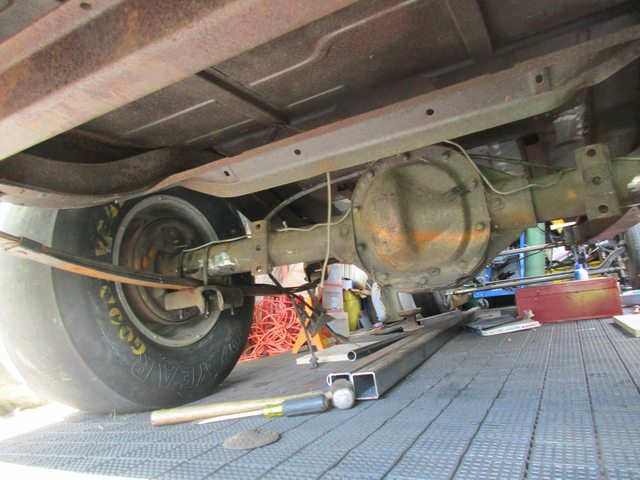
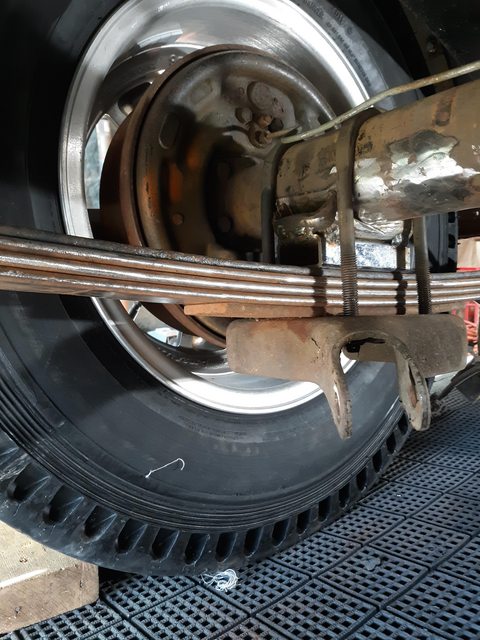
I located a Chevy truck axle from a 1/2 ton 1958. A little too wide, but I can fix that. Ordered a disc brake conversion for it from Speedway, and got it special ordered with 4.5" x 5" pattern to match the 8.8" For posi with 3.73 gears I had already sitting in storage here. Also ordered a pair of short 29" leaf springs to mount it up. I cleaned the axle, and of course had to drill some 1" speed holes for looks!
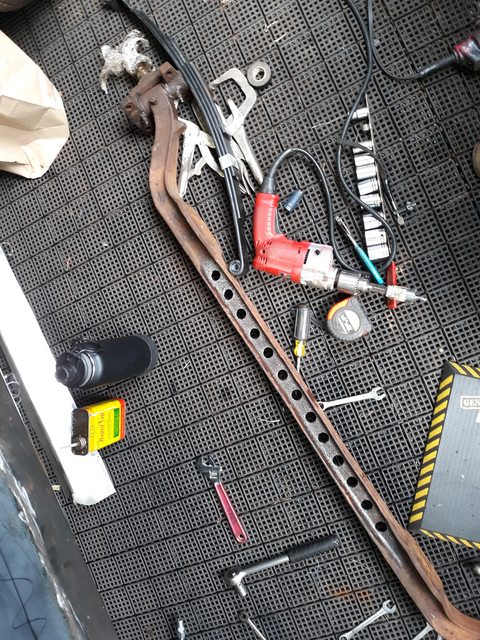
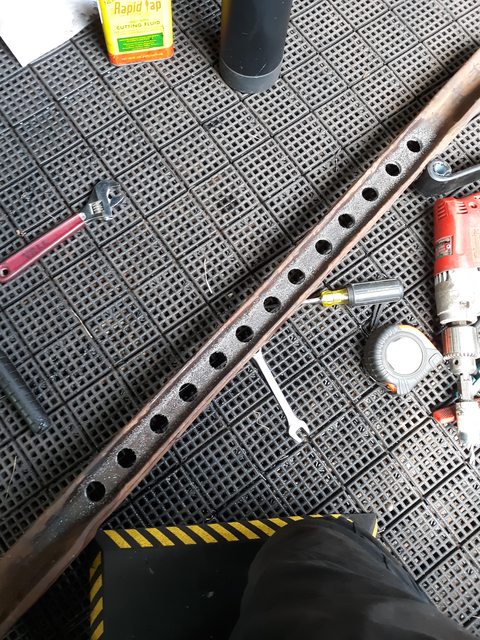
Then I measured the width, and did a 5" section on the I beam axle. Made a "Z cut" for strength, and welded it back together using tubing clamped to it to keep it aligned. Square box on the opposite side to also hold until it was welded in numerous places.
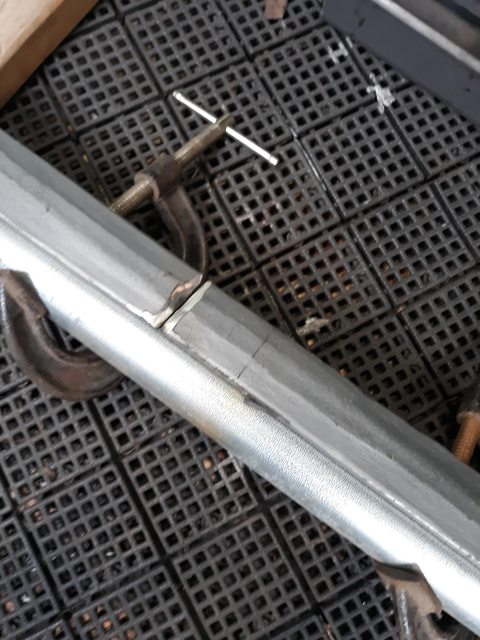
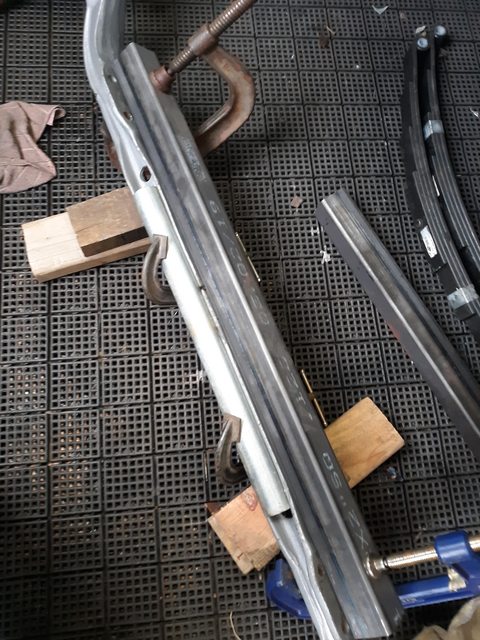
You can see how the Z cut goes through a couple holes, and goes down and up 5" apart. Once welded, I filled the back side with a 3/8" plate, and welded that into the I beam too. Then redrilled the two holes through the plate.
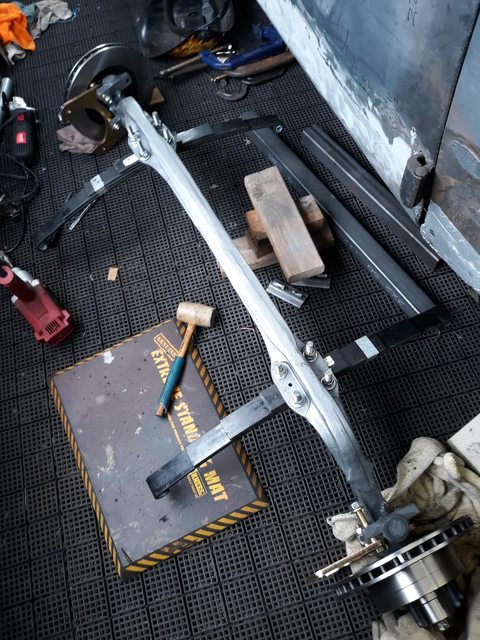
The freshly narrowed axle and new discc brake conversions.
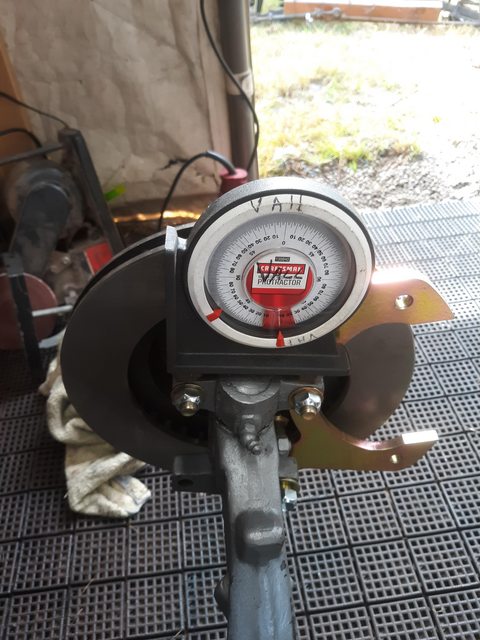
Setting up the 7 degree inclination for correct geometry. The box tubing across the frame rails to hold them parallel until I install a round tube crossmember later.

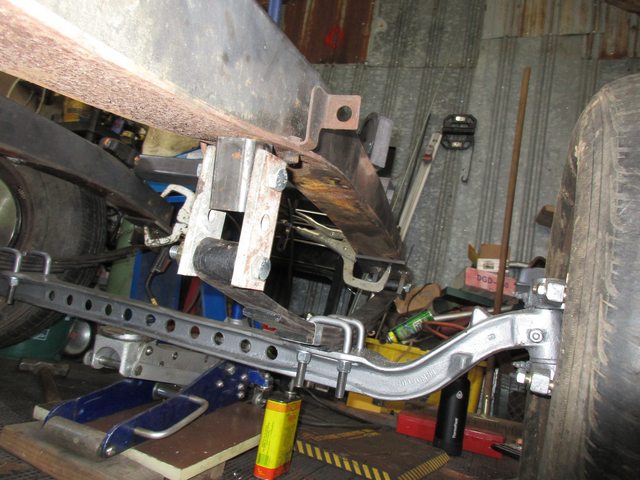
Fabricating shackles and mounts. This will be a front side steer, so shackles on the rear of the springs.
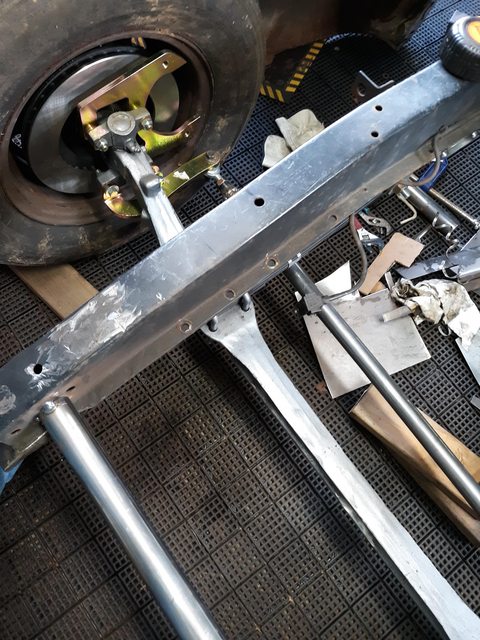
Round tube tacked in for now.
The 8.8" Ford axle mocked up so I can adjust pinion angle, and tack perches on it. Had to build up the perches 1" to lower the rear stance a bit.
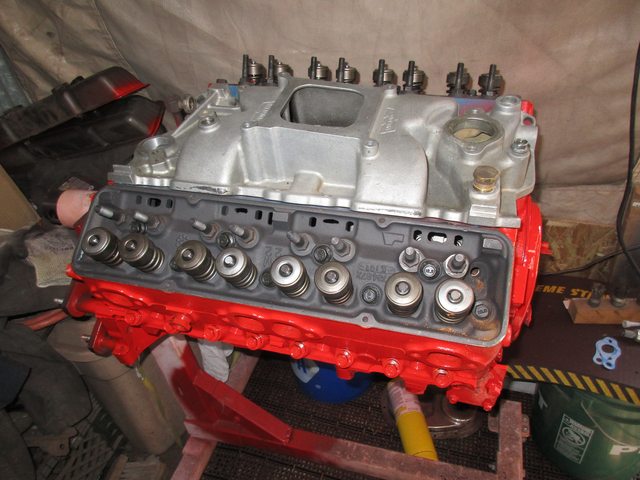
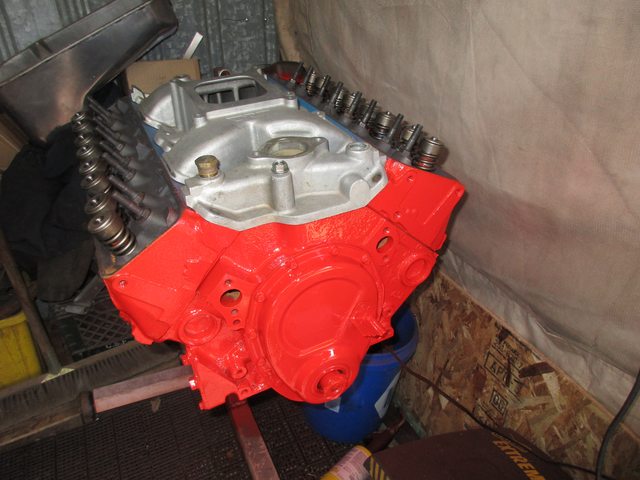
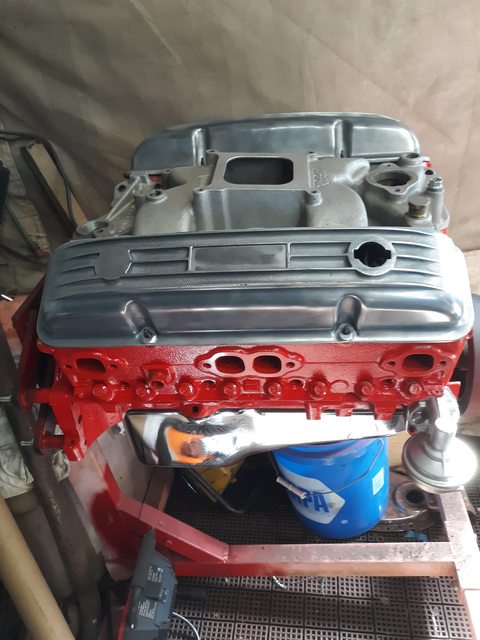
I stumbled onto the deal of the century!! Another CL ad for a 1990 Chev van 350 roller motor, completely rebuilt for $100. I figured it's a scam, but it was 1/2 mile away, so went to look. It was just the short block, and after pulling a couple main caps, and rod caps to see brand new bearings I bought it quickly! Complete with roller lifters and an RV cam. I tossed the cam and installed a Howards roller cam. .530"/.535" lift, 284/286 duration, 109 LSA. Also bought a pair of 487x heads, and had new seats, guides, SS valves, screw in studs, and of course a valve job done. Bolted them and the cam on, and ready for install with a 700R4 I had here already from a friend's '55 Chevy who went 5 speed stick.
Fortunately being a 1990 it was milled for a mechanical fuel pump! So I added the pushrod, and plate, and put a mechanical fuel pump on it.
Got the new tail panel tacked in, and it was such a nice fit it only took a couple hours! Solid welds at the 1/4 panel drops, and spot welds along the trunk opening lip.
Inner panel in and sealed with All Metal.
I located a Chevy truck axle from a 1/2 ton 1958. A little too wide, but I can fix that. Ordered a disc brake conversion for it from Speedway, and got it special ordered with 4.5" x 5" pattern to match the 8.8" For posi with 3.73 gears I had already sitting in storage here. Also ordered a pair of short 29" leaf springs to mount it up. I cleaned the axle, and of course had to drill some 1" speed holes for looks!
Then I measured the width, and did a 5" section on the I beam axle. Made a "Z cut" for strength, and welded it back together using tubing clamped to it to keep it aligned. Square box on the opposite side to also hold until it was welded in numerous places.
You can see how the Z cut goes through a couple holes, and goes down and up 5" apart. Once welded, I filled the back side with a 3/8" plate, and welded that into the I beam too. Then redrilled the two holes through the plate.
The freshly narrowed axle and new discc brake conversions.
Setting up the 7 degree inclination for correct geometry. The box tubing across the frame rails to hold them parallel until I install a round tube crossmember later.
Fabricating shackles and mounts. This will be a front side steer, so shackles on the rear of the springs.
Round tube tacked in for now.
The 8.8" Ford axle mocked up so I can adjust pinion angle, and tack perches on it. Had to build up the perches 1" to lower the rear stance a bit.
I stumbled onto the deal of the century!! Another CL ad for a 1990 Chev van 350 roller motor, completely rebuilt for $100. I figured it's a scam, but it was 1/2 mile away, so went to look. It was just the short block, and after pulling a couple main caps, and rod caps to see brand new bearings I bought it quickly! Complete with roller lifters and an RV cam. I tossed the cam and installed a Howards roller cam. .530"/.535" lift, 284/286 duration, 109 LSA. Also bought a pair of 487x heads, and had new seats, guides, SS valves, screw in studs, and of course a valve job done. Bolted them and the cam on, and ready for install with a 700R4 I had here already from a friend's '55 Chevy who went 5 speed stick.
Fortunately being a 1990 it was milled for a mechanical fuel pump! So I added the pushrod, and plate, and put a mechanical fuel pump on it.
Thread Starter
|
Second Generation Moderator
Feb 2010 ROTM winner
Jan 2013 ROTM winner
Feb 2010 ROTM winner
Jan 2013 ROTM winner
Joined: Aug 2008
Posts: 9,097
From: Portland, Or
ROTM Winner's Club
Beginning installation of engine and trans.

Built engine and trans mounts from 2" box tubing 3/16" wall. Plenty strong for whatever power the SBC 350 makes.
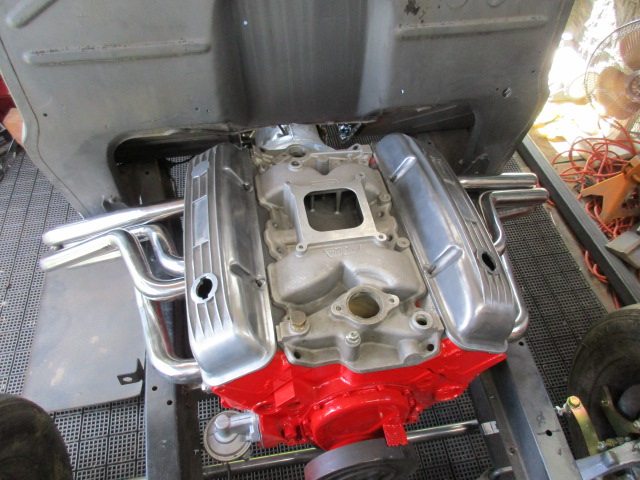
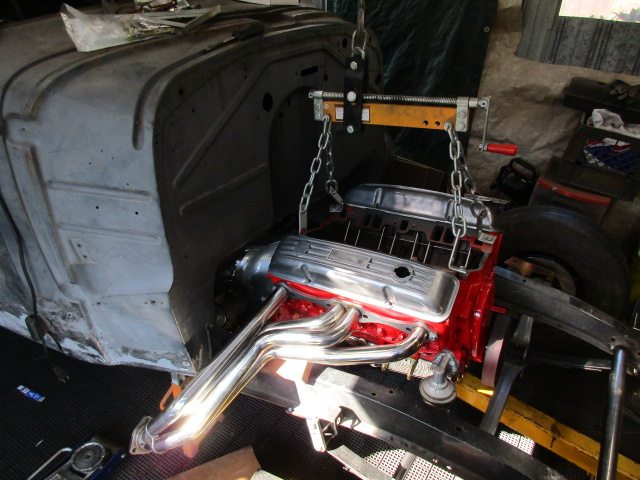
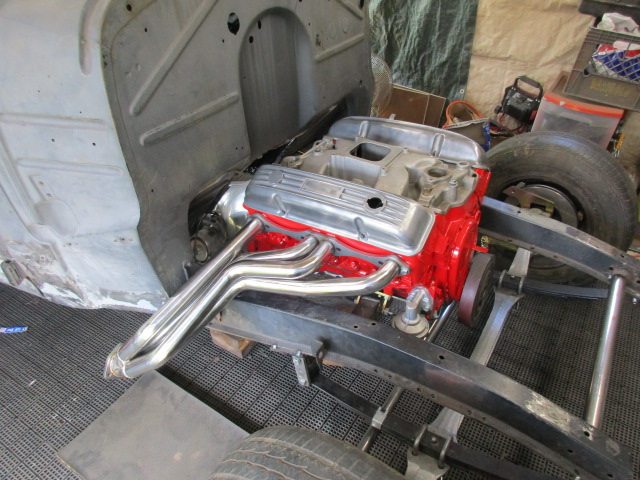
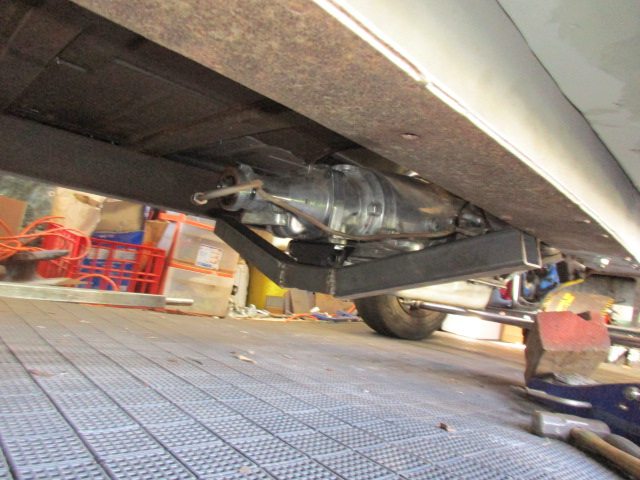
Nestled the engine/trans deep in the frame and was able to maintain a flat floor inside, with just a slight 3/4" rise in the tunnel area!
Setting up the Vega steering box, and drag link to connect to the '99 Chevy truck tilt column.
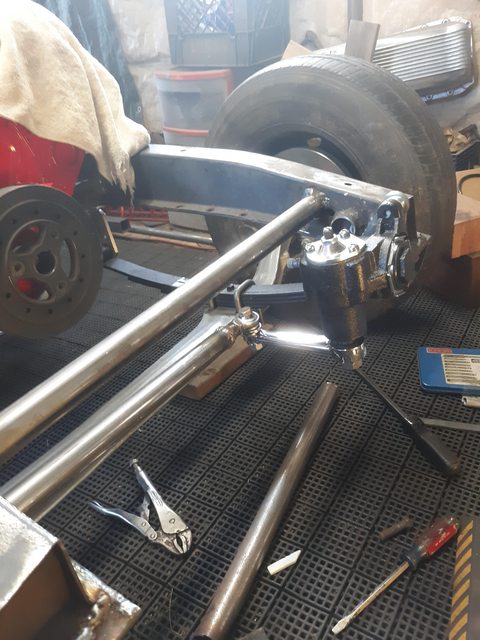
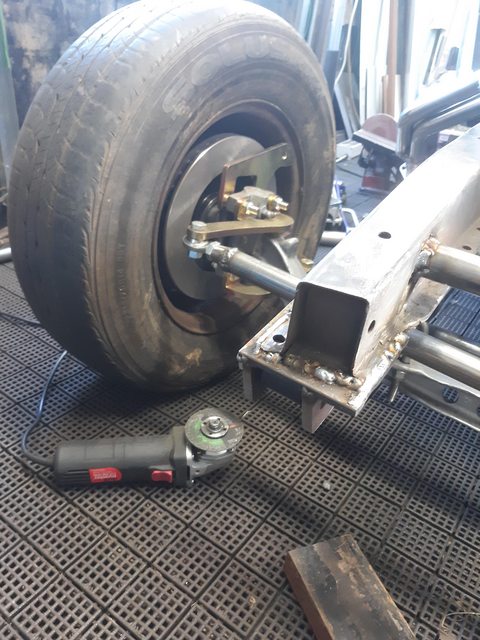
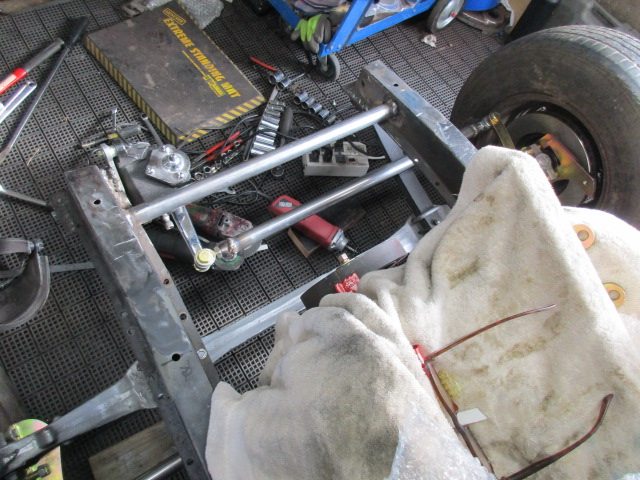
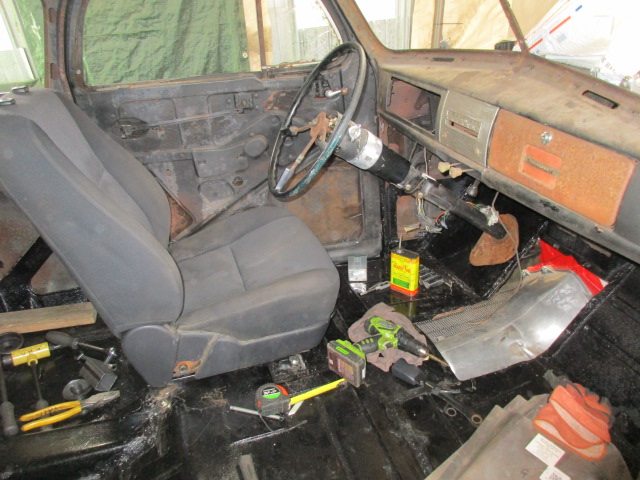
Mocking up column and seat to see where it works. Need to figure out DD shaft, joints, etc. to connect column to Vega box.
More later!
Built engine and trans mounts from 2" box tubing 3/16" wall. Plenty strong for whatever power the SBC 350 makes.
Nestled the engine/trans deep in the frame and was able to maintain a flat floor inside, with just a slight 3/4" rise in the tunnel area!
Setting up the Vega steering box, and drag link to connect to the '99 Chevy truck tilt column.
Mocking up column and seat to see where it works. Need to figure out DD shaft, joints, etc. to connect column to Vega box.
More later!
Thread Starter
|
Second Generation Moderator
Feb 2010 ROTM winner
Jan 2013 ROTM winner
Feb 2010 ROTM winner
Jan 2013 ROTM winner
Joined: Aug 2008
Posts: 9,097
From: Portland, Or
ROTM Winner's Club
Next step was fitting a modern master cylinder to the firewall to eliminate the under floor master. I got a large 12" x 12" x 1/4" SS plate and after making a cardboard template for the master bolt pattern, I then got a 2000 Subaru Impreza pedal assembly and mounted it to the template also to mock up my pattern.
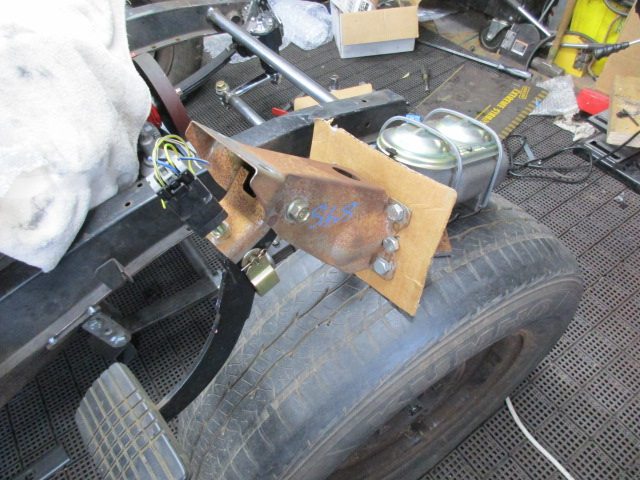
Once I got the pattern made, I transferred it to the SS plate, and the firewall. Both master and pedal assembly were threaded to the plate, plus nuts added to secure even further. Then the master bolted up to the firewall, and pedal assembly inside the firewall. Also attached to the dash to triangulate it, and brace it.
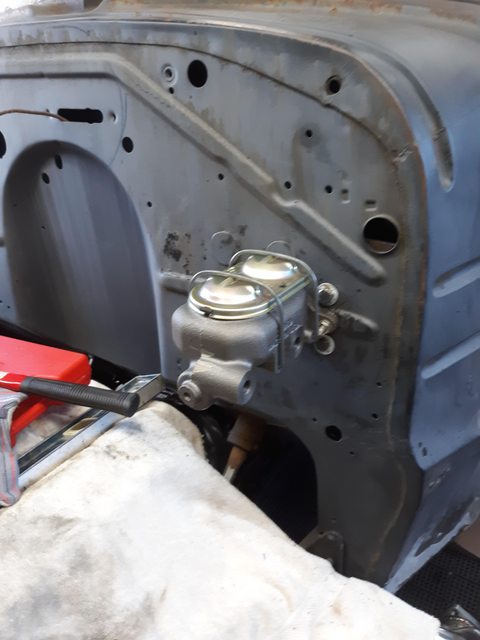
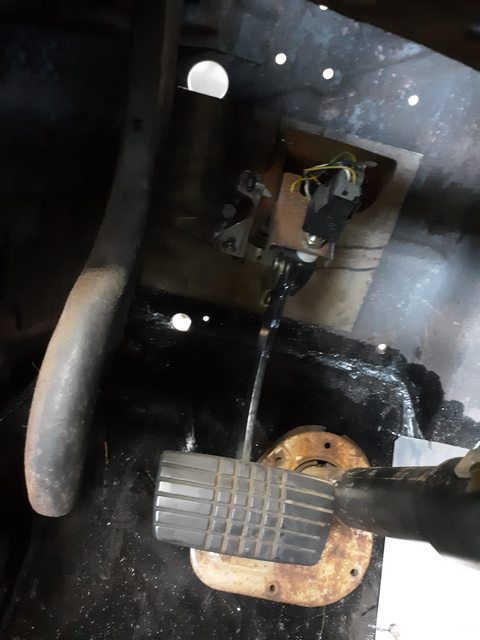
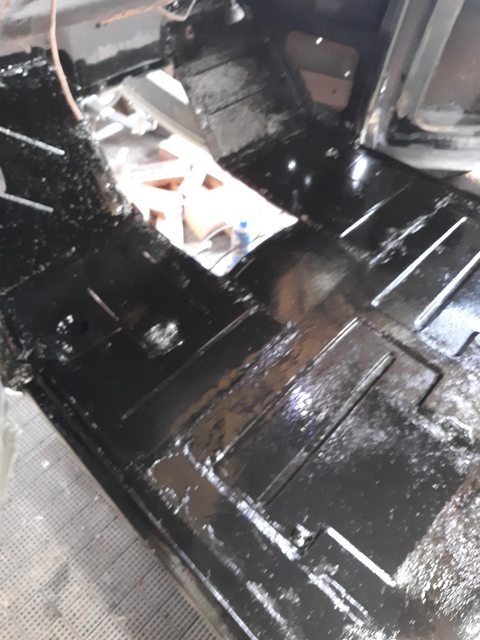
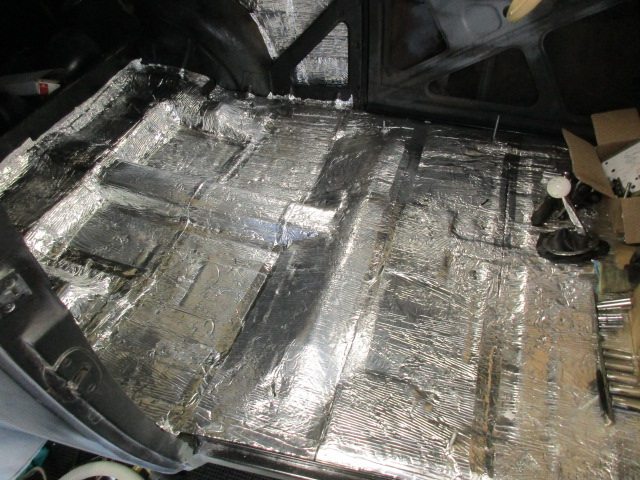
Jumped back on the floors and painted them. Then insulated them for sound and heat.

Removed the master, and began welding all the holes shut in the firewall. Over 2 doen of them, and all factory for who knows what?

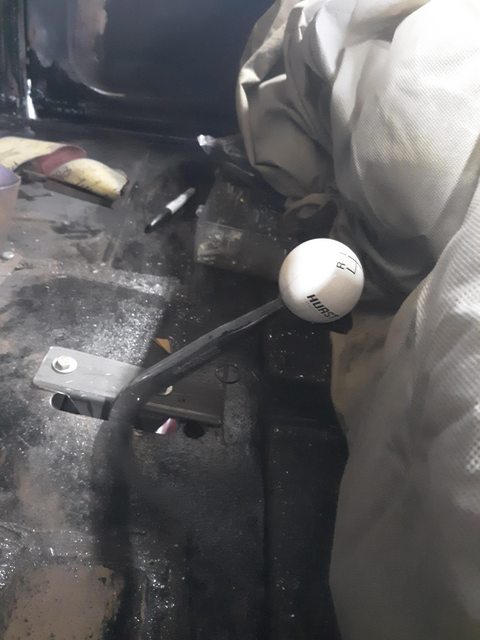
Using an old Hurst shifter arm, I built my own mount, and fabricated linkage to shift the 700R4. Wanted the 4 speed look for this build.
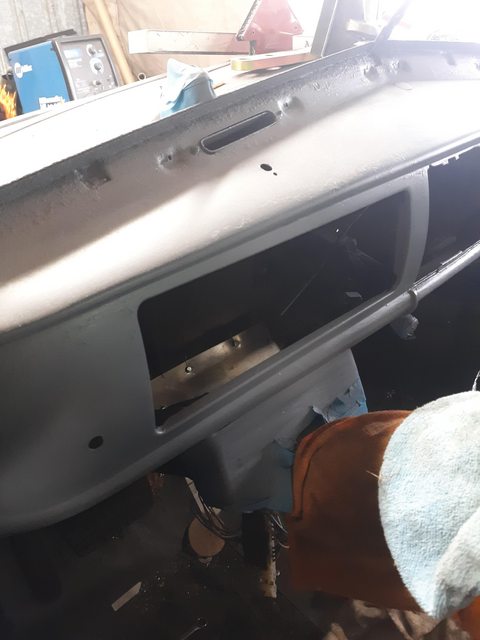
Sanded down the dashboard and gave it a coat of primer.
Once I got the pattern made, I transferred it to the SS plate, and the firewall. Both master and pedal assembly were threaded to the plate, plus nuts added to secure even further. Then the master bolted up to the firewall, and pedal assembly inside the firewall. Also attached to the dash to triangulate it, and brace it.
Jumped back on the floors and painted them. Then insulated them for sound and heat.
Removed the master, and began welding all the holes shut in the firewall. Over 2 doen of them, and all factory for who knows what?
Using an old Hurst shifter arm, I built my own mount, and fabricated linkage to shift the 700R4. Wanted the 4 speed look for this build.
Sanded down the dashboard and gave it a coat of primer.

Thread Starter
|
Second Generation Moderator
Feb 2010 ROTM winner
Jan 2013 ROTM winner
Feb 2010 ROTM winner
Jan 2013 ROTM winner
Joined: Aug 2008
Posts: 9,097
From: Portland, Or
ROTM Winner's Club
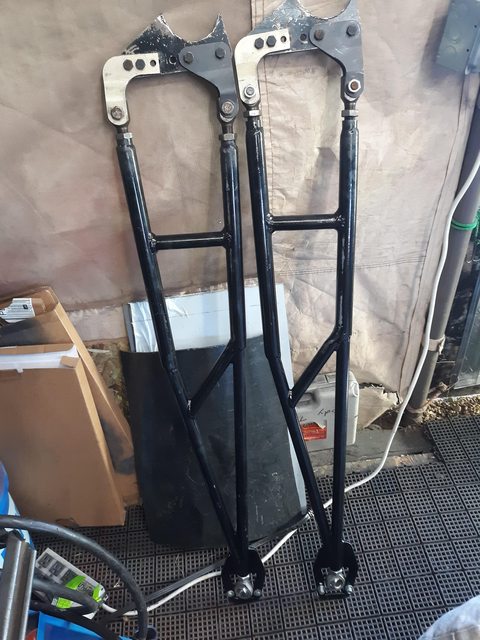
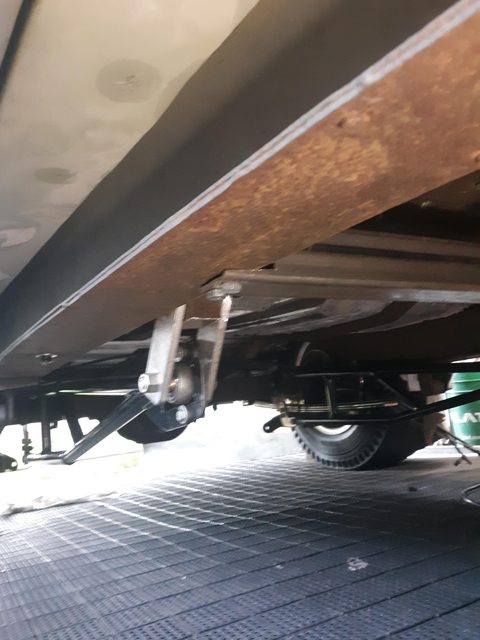
I like to jump around on my builds to stay interested. So I got some DOM tubing and built these 4.5' ladder bars to help plant the rear tires. Then welded them to the rear axle, and built up front shackles to prevent spring bind.
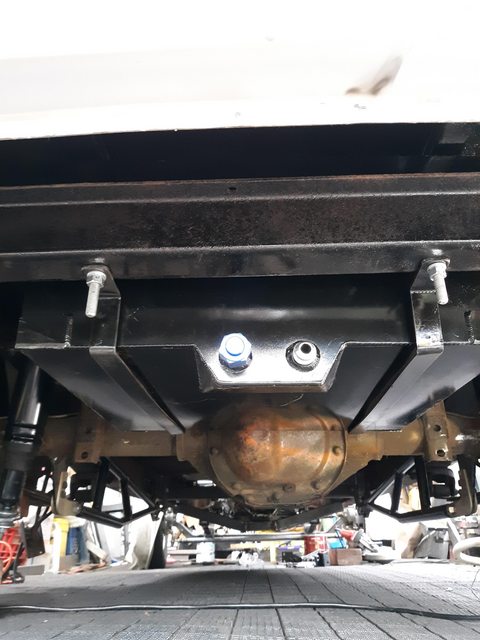
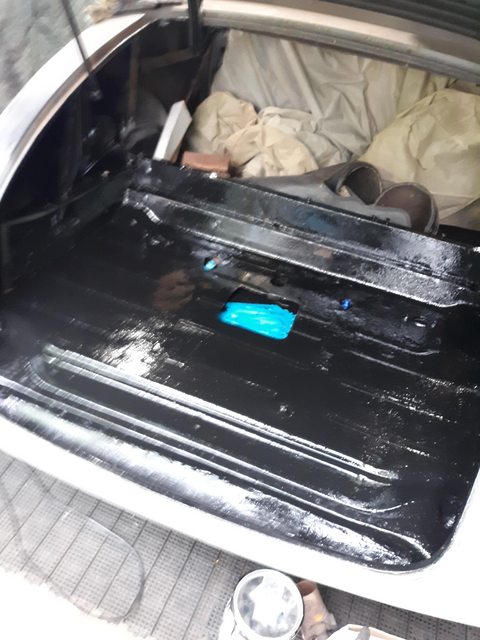
My new 16 gallon fuel cell arrived, so I made up straps and mounted it under the trunk floor. Then cut a hole in the trunk to allow access to the cap.
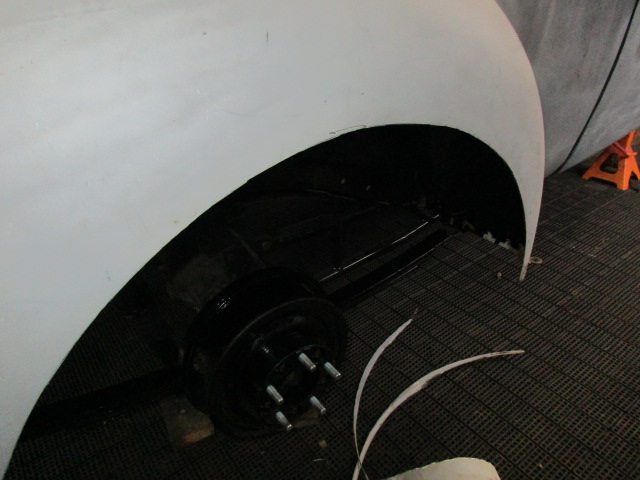
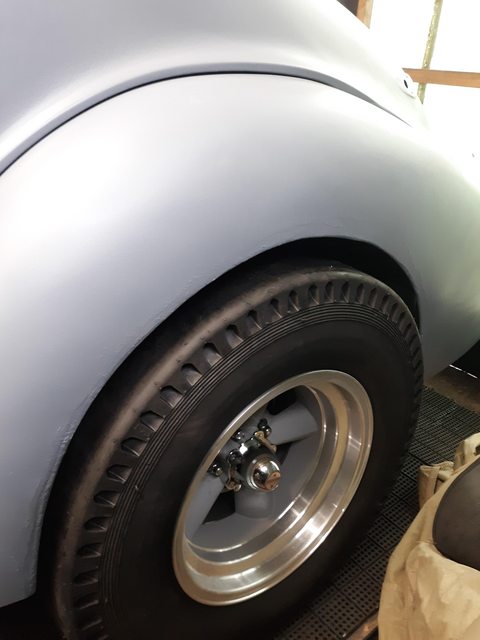
After fitting the new tires I needed a slight trim around the rear fender radius. Cut the openings, and then edged them inside with 1/4" round rod welded on.
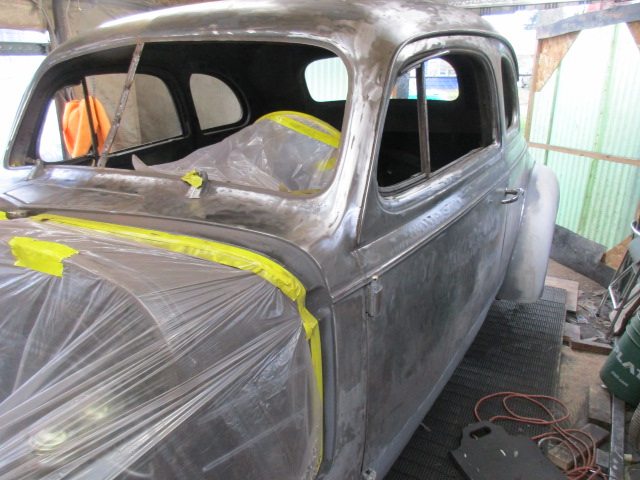
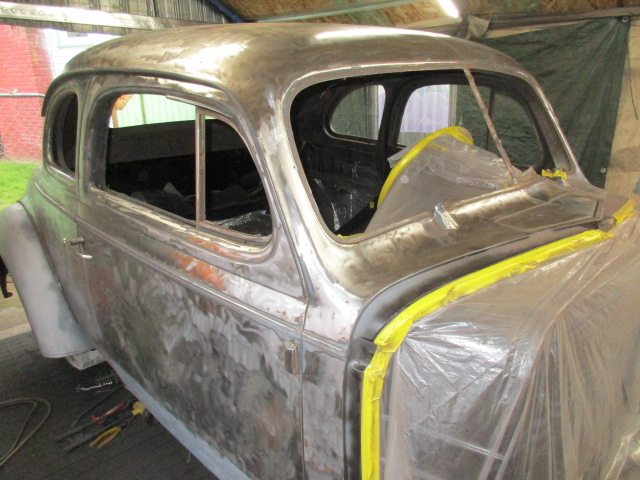
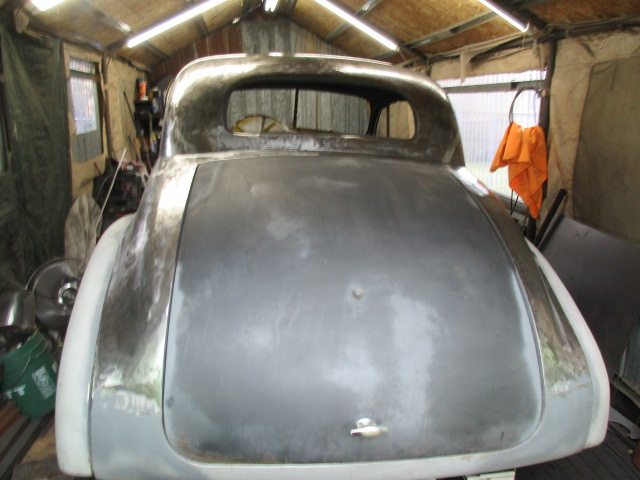
Time to strip the car to bare metal! Fortunately no surprises, and no more rust or bondo under the old primer!
Trunk lid is also glass, so no stripping needed.
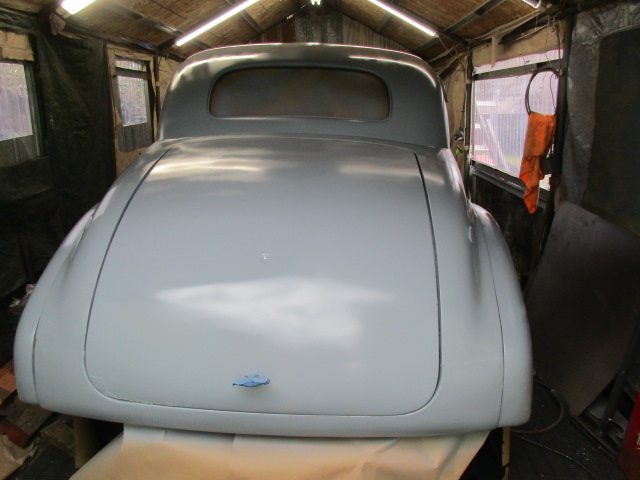
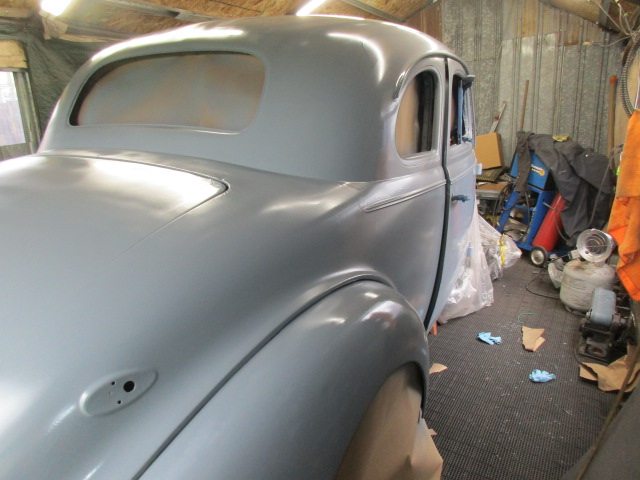
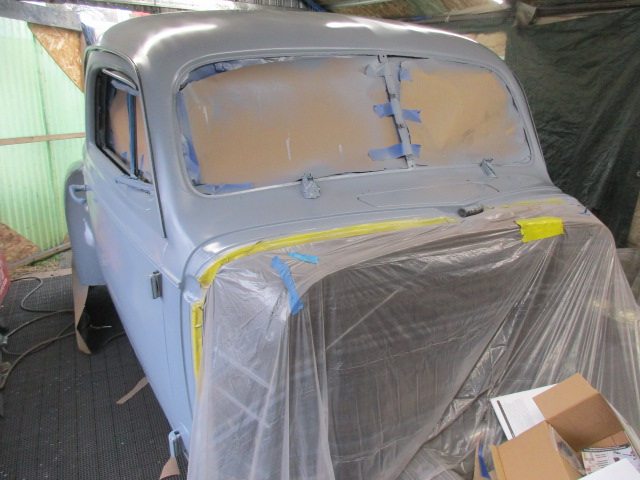
New epoxy sealer all over.
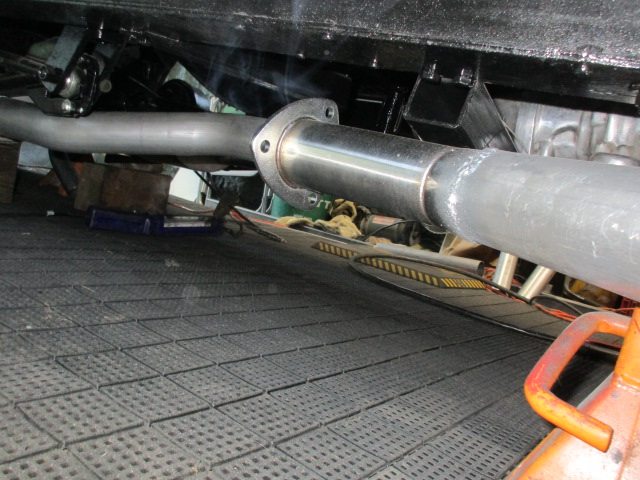
Buttoning up the engine, and starting full exhaust system.
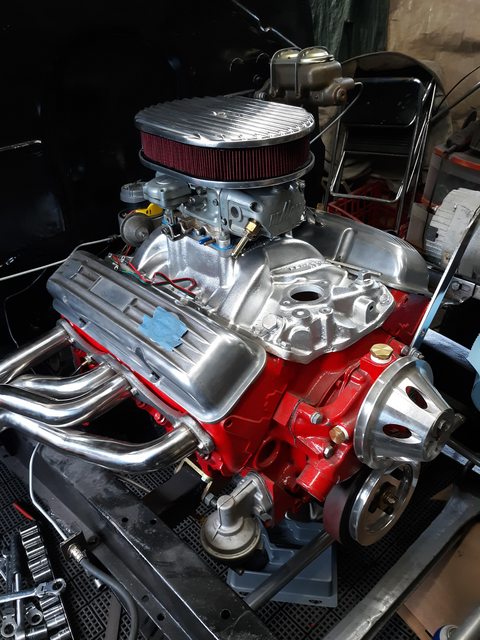
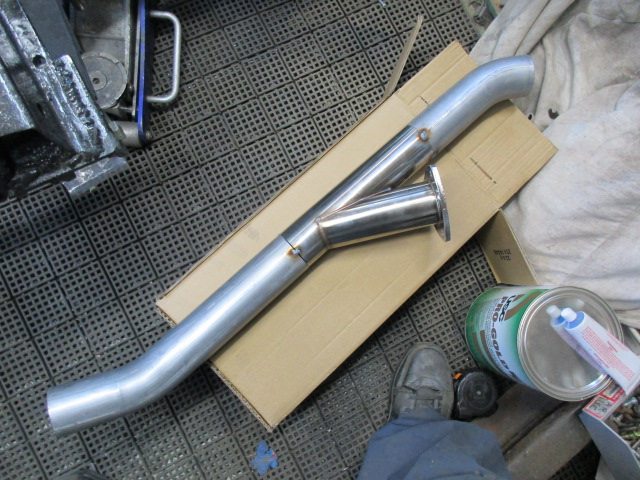
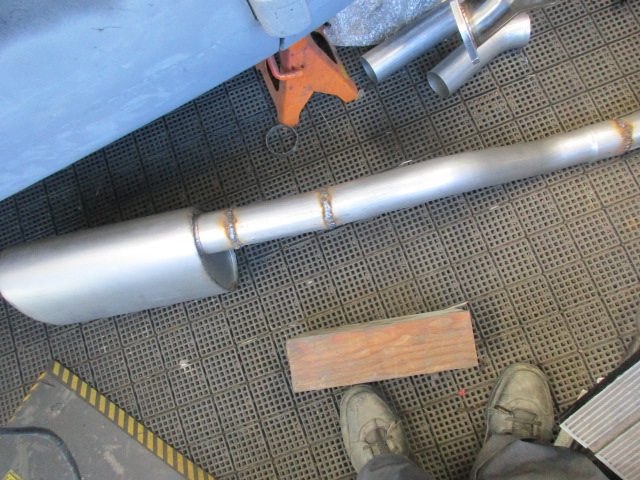
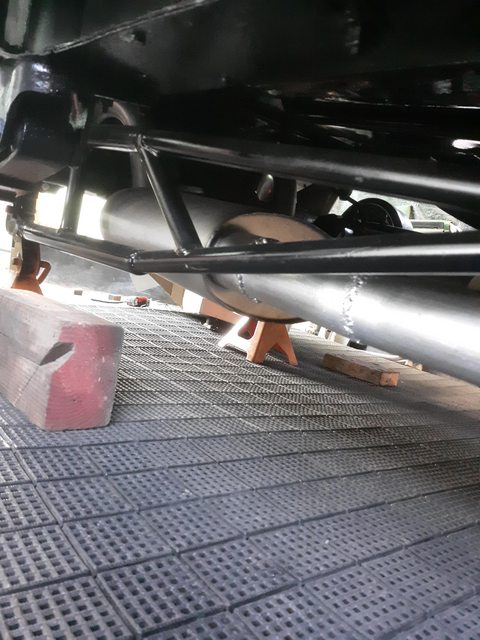
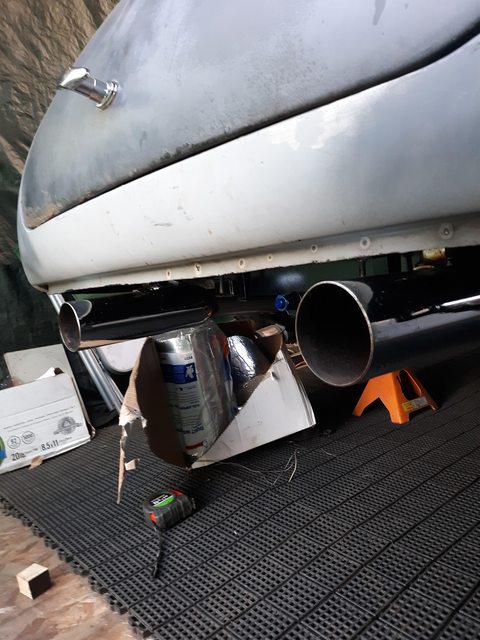
Electric cutouts of course for when I want to get a little rowdy.
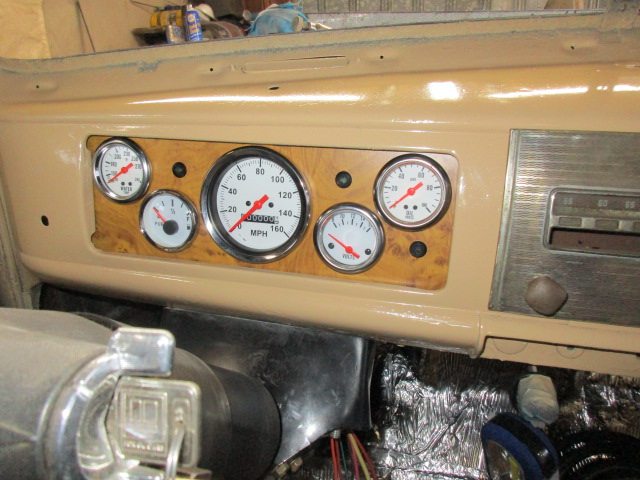
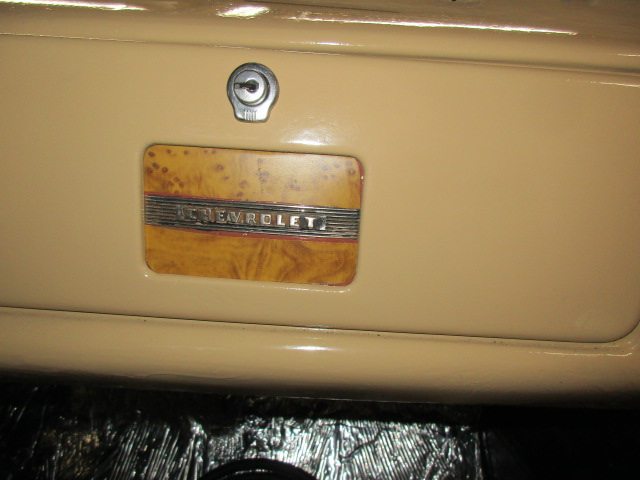
Jumped back inside and painted the dash. Then built up an aluminum gauge panel, and covered it with wood veneer.
More later!
My new 16 gallon fuel cell arrived, so I made up straps and mounted it under the trunk floor. Then cut a hole in the trunk to allow access to the cap.
After fitting the new tires I needed a slight trim around the rear fender radius. Cut the openings, and then edged them inside with 1/4" round rod welded on.
Time to strip the car to bare metal! Fortunately no surprises, and no more rust or bondo under the old primer!
Trunk lid is also glass, so no stripping needed.
New epoxy sealer all over.
Buttoning up the engine, and starting full exhaust system.
Electric cutouts of course for when I want to get a little rowdy.
Jumped back inside and painted the dash. Then built up an aluminum gauge panel, and covered it with wood veneer.
More later!
Thread Starter
|
Second Generation Moderator
Feb 2010 ROTM winner
Jan 2013 ROTM winner
Feb 2010 ROTM winner
Jan 2013 ROTM winner
Joined: Aug 2008
Posts: 9,097
From: Portland, Or
ROTM Winner's Club
Thanks! This has actually taken the last year to complete.
Thread Starter
|
Second Generation Moderator
Feb 2010 ROTM winner
Jan 2013 ROTM winner
Feb 2010 ROTM winner
Jan 2013 ROTM winner
Joined: Aug 2008
Posts: 9,097
From: Portland, Or
ROTM Winner's Club
I've never made it there so far. I'm always afraid to get my hotrod filthy dirty driving in the rain. But I don't plan on painting the '39 until this coming winter, so it might make it there! I've got a neighbor, and a nephew who both own places at Long Beach, so I'd have free room if I go.
Going to just shoot the '39 satin black for the summer, and think about paint for a few months.
Going to just shoot the '39 satin black for the summer, and think about paint for a few months.



