
Looking to Buy New Plug Wires


April 2011 ROTM

Joined: Mar 2009
Posts: 22,027
From: Tokeland, Washington
ROTM Winner's Club
i use photobucket and copy the img code to the post. not sure you cqn do thqt with imageshack. ahh and yah wires and plugs are a pita, lol. sounds like round two may go better.
April 2011 ROTM
Joined: Mar 2009
Posts: 22,027
From: Tokeland, Washington
ROTM Winner's Club
havnt had time to work on the car. been dealing with a buick 3800 on my pot pump and my van. pretty much got the pump goin good, today i found i am gona need a new suction hose. lol,,, that sucks.

Thread Starter
|
1st Gear Member
Joined: Mar 2009
Posts: 206
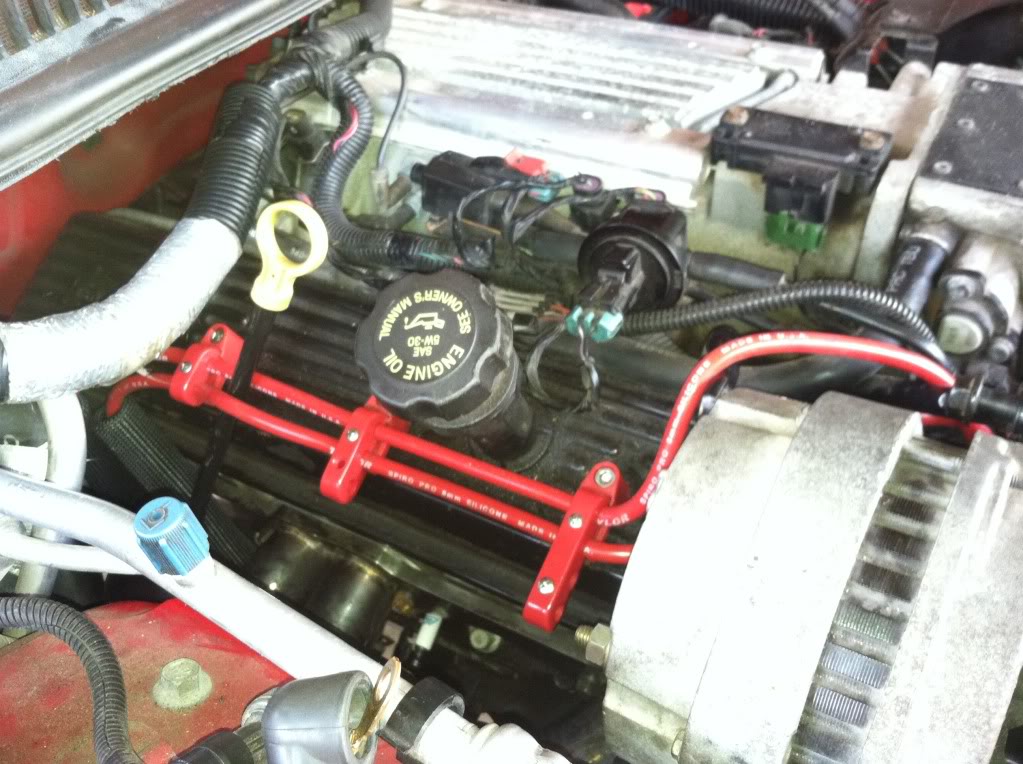
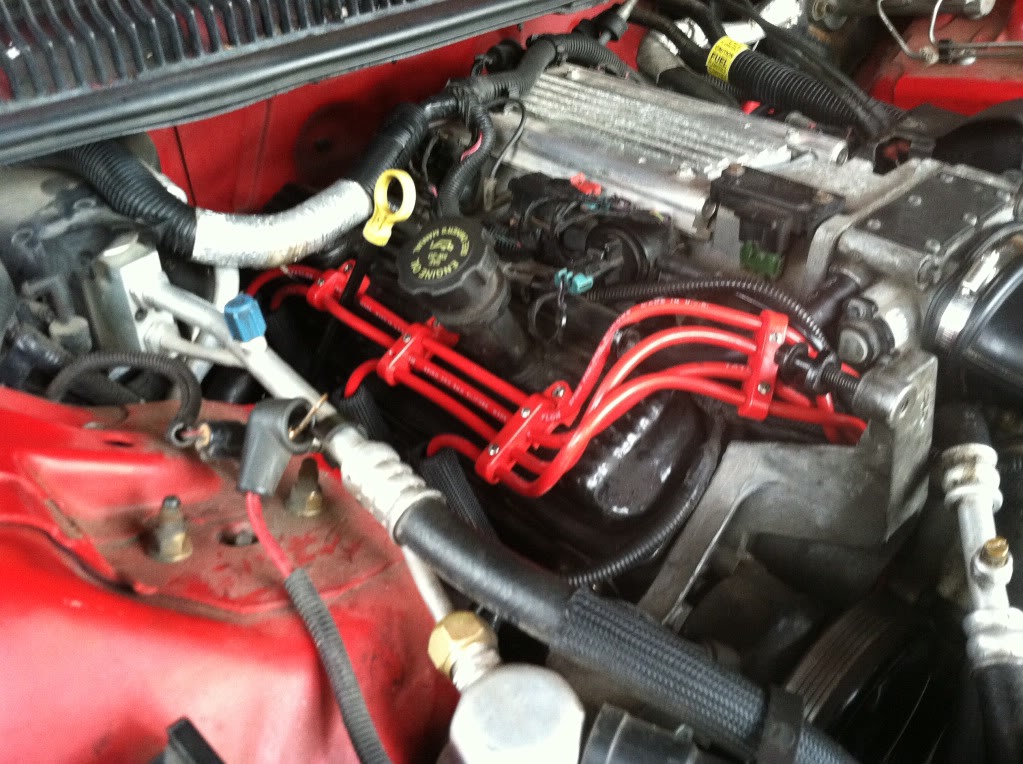
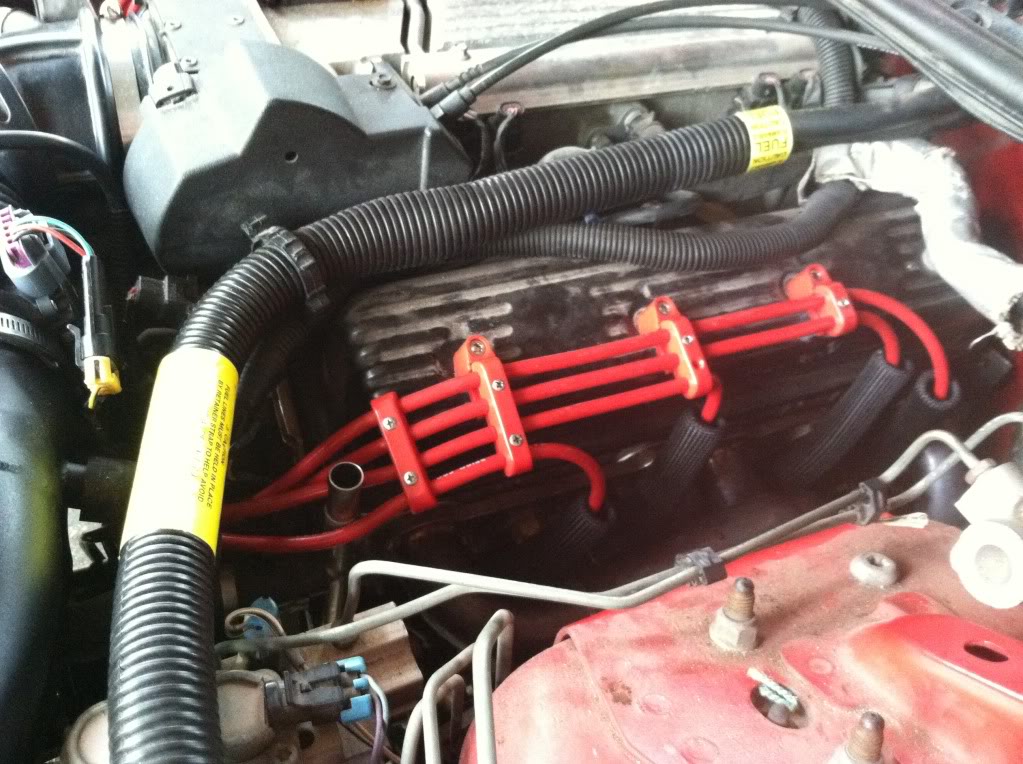
Hey everyone. Sorry it took me until today to post the pics. But here they are.
All finished.
The first day was difficult because I think I overwhelmed myself thinking about all what had to be done. But I took the next day to devise a plan. After doing that I was able to finish the wires the following day. They really aren't THAT bad. The biggest issue I had was getting the boots to slide over the wires before I crimped the terminal.
The directions say to use WD40 or Silicone spray, but I didn't have Silicone spray and the WD40 wasn't really helping.
My dad recommended Axle Grease....That worked a lot better. I still had some difficulties getting the boot on. With some wires I had to put grease on them and slide them on and they would make it about half way, then I would have to pull them off and re apply grease and then they would slide through.
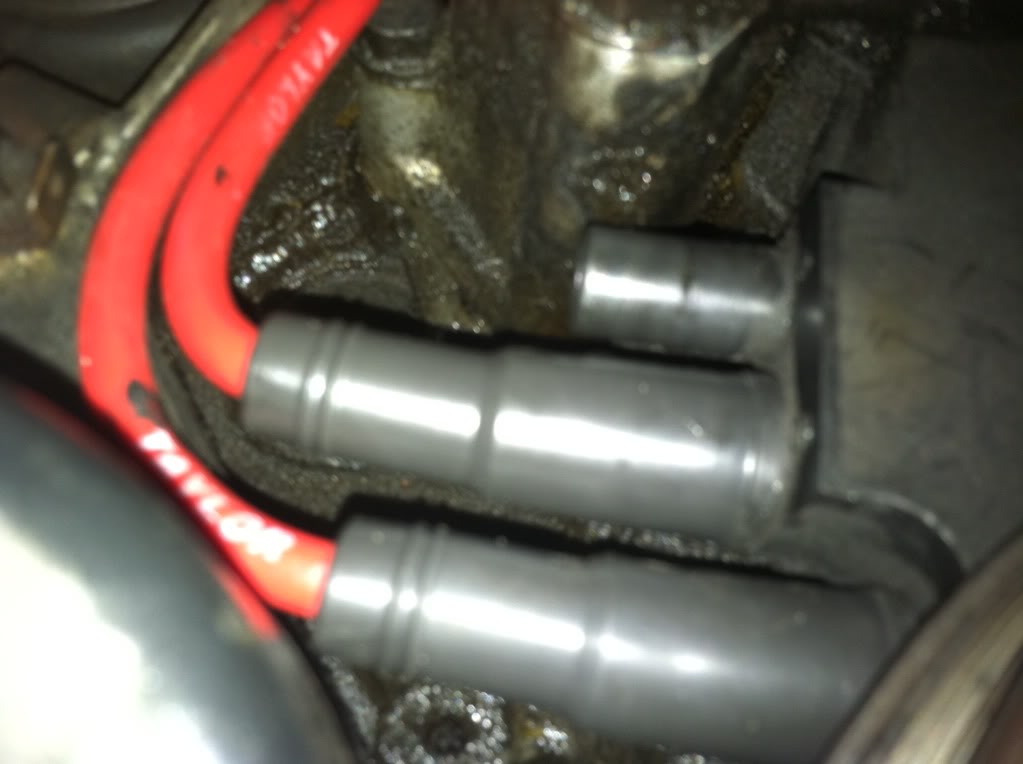
The hardest spark plug to snap the plug wire on is the #6 cylinder on the passenger side because the dipstick is right next to it. I thought I was gonna have to remove the dipstick bolt....but that would have meant taking the starter off ! Use your right hand to slide it up between the header and the starter. There is one plug to disconnect...but its really easy. Squeeze the middle of it and it slides off...Not sure which plug it is.
Also, make sure you cut the wires LONG....I almost cut a wire too short, but it worked out ok...whew.
I'll take some more pictures if you guys want to see any more of them.

https://camaroforums.com/forum/%3Ca%20href=%22


All finished.
The first day was difficult because I think I overwhelmed myself thinking about all what had to be done. But I took the next day to devise a plan. After doing that I was able to finish the wires the following day. They really aren't THAT bad. The biggest issue I had was getting the boots to slide over the wires before I crimped the terminal.
The directions say to use WD40 or Silicone spray, but I didn't have Silicone spray and the WD40 wasn't really helping.
My dad recommended Axle Grease....That worked a lot better. I still had some difficulties getting the boot on. With some wires I had to put grease on them and slide them on and they would make it about half way, then I would have to pull them off and re apply grease and then they would slide through.
The hardest spark plug to snap the plug wire on is the #6 cylinder on the passenger side because the dipstick is right next to it. I thought I was gonna have to remove the dipstick bolt....but that would have meant taking the starter off ! Use your right hand to slide it up between the header and the starter. There is one plug to disconnect...but its really easy. Squeeze the middle of it and it slides off...Not sure which plug it is.
Also, make sure you cut the wires LONG....I almost cut a wire too short, but it worked out ok...whew.
I'll take some more pictures if you guys want to see any more of them.
https://camaroforums.com/forum/%3Ca%20href=%22
Last edited by craby; Apr 6, 2011 at 10:16 AM. Reason: fixed most of it
Thread Starter
|
1st Gear Member
Joined: Mar 2009
Posts: 206
I don't know if we have any electric grease or not.
I thought about using Vaseline. But the axle grease worked out ok.
Next time, I'll be more prepared ! Haha.
Also there are a couple screws missing out of the looms in the pictures....I hadn't tightened everything down yet. Now all the screws are in place..
Oh hey Craby I wanted to tell you....you are probably already aware of this but just in case....when you push the nut out of the looms for the longer screws to screw into the brackets....I don't know if you can get your fingers under there or not for the nut to go in....I couldn't but I have big hands....I just super glued them on.... On the bracket where the nut sets in place for the longer screw.
Just putting that in there....You probably already know that, but just in case.
Last edited by Turbolag86; Apr 6, 2011 at 12:29 PM.

4th Gear Member
Joined: Nov 2008
Posts: 2,614
From: under the hood
I don't know if we have any electric grease or not.
I thought about using Vaseline. But the axle grease worked out ok.
Next time, I'll be more prepared ! Haha.
Also there are a couple screws missing out of the looms in the pictures....I hadn't tightened everything down yet. Now all the screws are in place..
Oh hey Craby I wanted to tell you....you are probably already aware of this but just in case....when you push the nut out of the looms for the longer screws to screw into the brackets....I don't know if you can get your fingers under there or not for the nut to go in....I couldn't but I have big hands....I just super glued them on.... On the bracket where the nut sets in place for the longer screw.
Just putting that in there....You probably already know that, but just in case.
I thought about using Vaseline. But the axle grease worked out ok.
Next time, I'll be more prepared ! Haha.
Also there are a couple screws missing out of the looms in the pictures....I hadn't tightened everything down yet. Now all the screws are in place..
Oh hey Craby I wanted to tell you....you are probably already aware of this but just in case....when you push the nut out of the looms for the longer screws to screw into the brackets....I don't know if you can get your fingers under there or not for the nut to go in....I couldn't but I have big hands....I just super glued them on.... On the bracket where the nut sets in place for the longer screw.
Just putting that in there....You probably already know that, but just in case.
lose that plastic intake elbow with donkey di$$^ and get a good looking elbow

Thread
Thread Starter
Forum
Replies
Last Post