Changing a 4th gen auto transmission


Thread Starter
|
April 2011 ROTM

Joined: Mar 2009
Posts: 22,040
From: Tokeland, Washington
ROTM Winner's Club
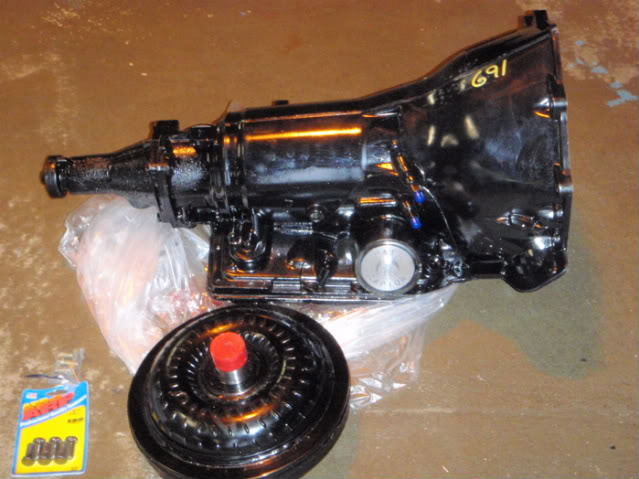
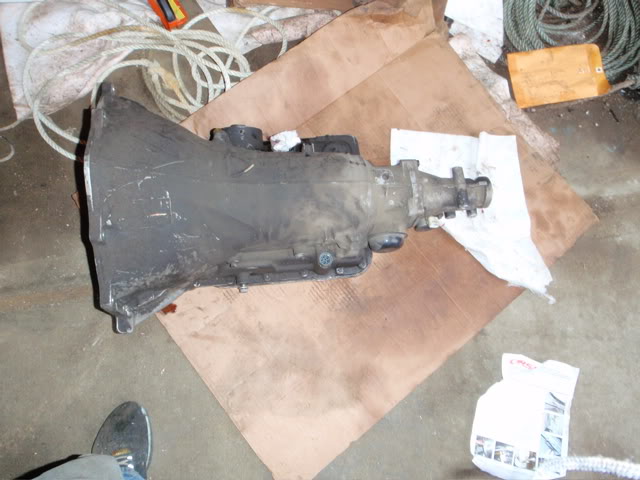
Hows this,,,Got my 700r4 back from PATC and after a couple weeks decided it was time to put it back in.
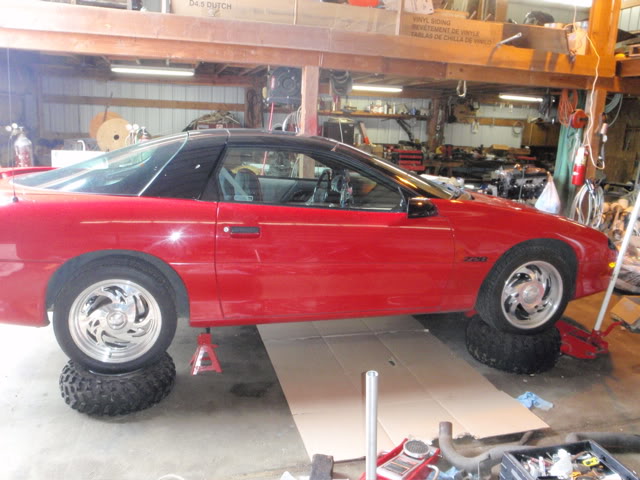
Job takes from 6 to 12 hrs depending on experience and equipment. First you will need to get the car up in the air. (Before doing so unhook the TV cable at the throttle body) I use some ATV tires i have under the tires and then if i need to raise the car more i used the car jacks, that way if it did fall the tires and floor jack would stop it.
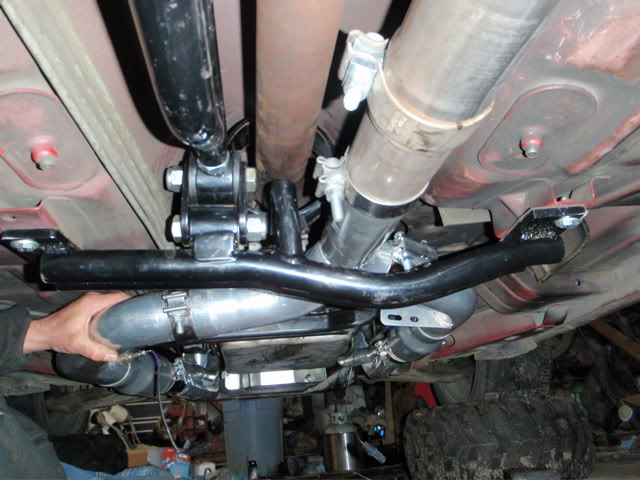
Next you will need to take the crossmember brace off. As you can see i have the crossmember mounted torque bar with the driveshaft loop.
Mark the drive shaft at the rear universal joint and the yoke so you are sure to get it back on the same way. I jacked the rear up so the wheels would spin, raised the jackstands and put the transmission in neutral so i could get access to all the bolts on the u joint and removed. I use electrical tape to keep the u joint caps from coming off.
I left the driveshaft in the transmission untill it was flat on the floor, this avoided having to empty the fluid from the transmission and spillage was minimal. Very little from the lines and fill hole when they were unhooked and i plugged the fill hole as best i could with a paper towel.
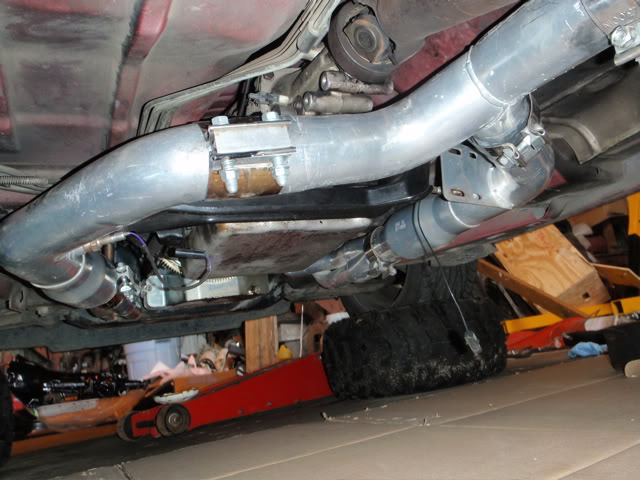
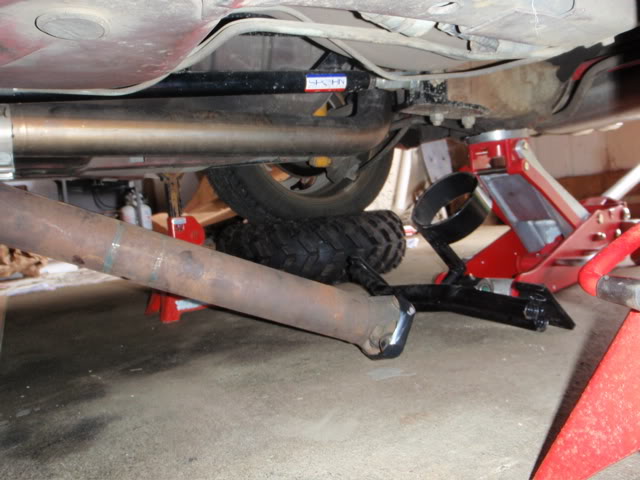
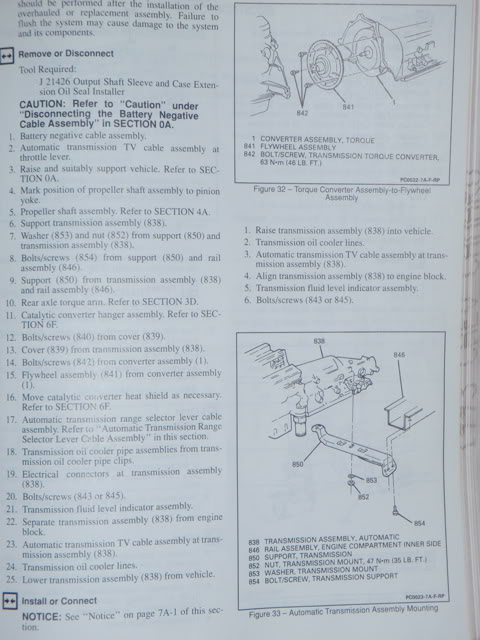
Remove the converter cover, converter bolts, exhaust and support the transmission, then remove the transmission mount crossbar.
Sift the transmission to 1st gear and remove the nut holding the shift lever to the transmission gear selector shaft, (i put it back in park after) Remove the two pan bolts holding the shift cable bracket and reposition out of the way. Reinstall the two bolts and tighten, gasket leaks if you dont.
You will need a few extensions for removing the transmission bolts. something like this.

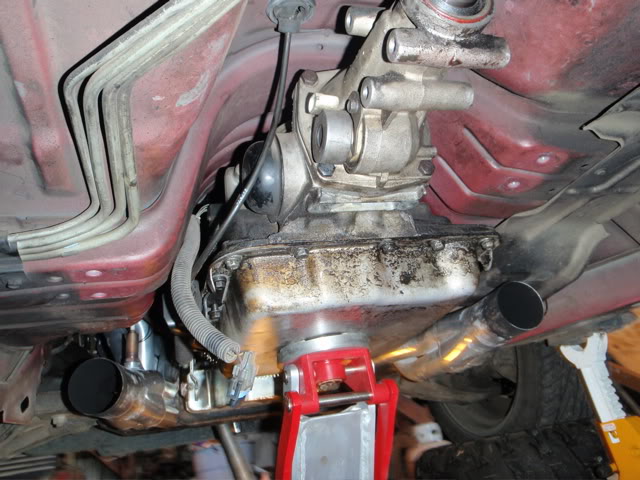
Now you can lower the transmission to gain access to the fluid cooling lines, wiring, TV cable (if so equipped) and mounting bolts.
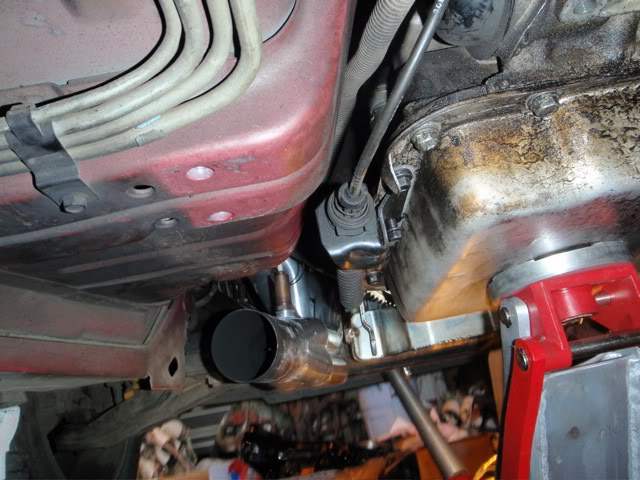
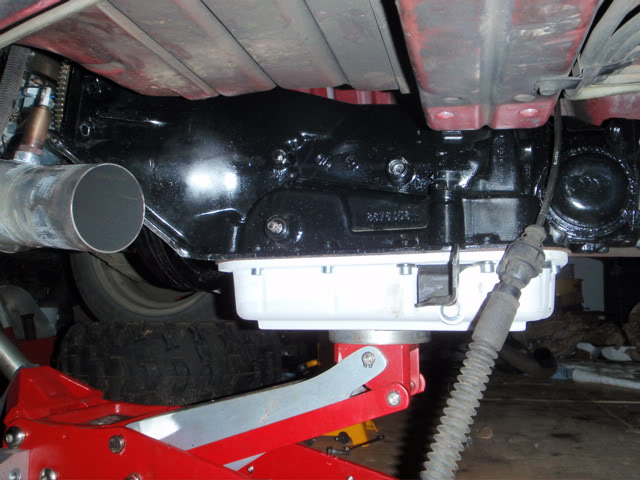
You will need to pop the fluid cooling lines out of the clip on the oil pan (towards the front of the motor)and reposition out of the way.
I removed all the wiring and TV cable before taking the mounting bolts out. Take the mounting bolt that holds the fill tube out first to you can adjust it out of the way, do not remove from transmission until its needed to avoid ATF spilling on the work area. At least this way no prolonged laying in ATF or dripping in your face. You will need a universal joint for the end of your extension on two of the bolts and the second bolt up on the driver side will need a wrench to get it out. Use a six sided socket. I also found that if you use a few short extensions on the end they flex a little putting a slite bend to it letting the socket fit a little better on the bolts. Once all the bolts are out drop the tranny an inch, pull the converter towards the transmission so it wont fall off, then pull the transmission back away from the motor. As you drop the unit a little at a time pull it back until its clear of any obstacles (my headers were in the way) and drop all the way. I then slid the transmission off the jack and onto a piece of cardboard and used it to pull it from under the car. I did have to jack the front up and raise the jackstands so i could get it out.
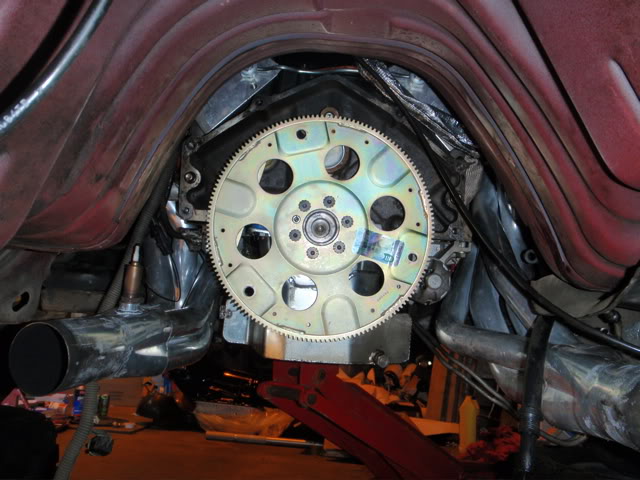
If you plan on running at the track now would be a good time to put a compliant flywheel in. (notice the fluid cooling line tucked under the header to the right)
Next slide the trans under the car and up onto the jack then if using a different converter fill it with about a qt of ATF fluid and(to minimize spillage watch the fluid level and slowly bring converter to the vertical position) install on transmission, then install transmission by reversing the procedure.
Once close to in place you will need to pull the rear down the front up to get it lined up right, go slow if your on your own as i was and it should go right in. Keep an eye on the alignment *****, it helps to line it up.

here are some links to good info
how to adjust the shift cable,,, http://shbox.com/trans/A4_trans_linkage.html
tips on your 700r4,,, http://www.transmissioncenter.net/700r4.htm
speedometer info,,, http://www.transmissioncenter.net/sp...n_______va.htm
heres some more information to aid you in taking your transmission out.

Job takes from 6 to 12 hrs depending on experience and equipment. First you will need to get the car up in the air. (Before doing so unhook the TV cable at the throttle body) I use some ATV tires i have under the tires and then if i need to raise the car more i used the car jacks, that way if it did fall the tires and floor jack would stop it.
Next you will need to take the crossmember brace off. As you can see i have the crossmember mounted torque bar with the driveshaft loop.
Mark the drive shaft at the rear universal joint and the yoke so you are sure to get it back on the same way. I jacked the rear up so the wheels would spin, raised the jackstands and put the transmission in neutral so i could get access to all the bolts on the u joint and removed. I use electrical tape to keep the u joint caps from coming off.
I left the driveshaft in the transmission untill it was flat on the floor, this avoided having to empty the fluid from the transmission and spillage was minimal. Very little from the lines and fill hole when they were unhooked and i plugged the fill hole as best i could with a paper towel.
Remove the converter cover, converter bolts, exhaust and support the transmission, then remove the transmission mount crossbar.
Sift the transmission to 1st gear and remove the nut holding the shift lever to the transmission gear selector shaft, (i put it back in park after) Remove the two pan bolts holding the shift cable bracket and reposition out of the way. Reinstall the two bolts and tighten, gasket leaks if you dont.
You will need a few extensions for removing the transmission bolts. something like this.
Now you can lower the transmission to gain access to the fluid cooling lines, wiring, TV cable (if so equipped) and mounting bolts.
You will need to pop the fluid cooling lines out of the clip on the oil pan (towards the front of the motor)and reposition out of the way.
I removed all the wiring and TV cable before taking the mounting bolts out. Take the mounting bolt that holds the fill tube out first to you can adjust it out of the way, do not remove from transmission until its needed to avoid ATF spilling on the work area. At least this way no prolonged laying in ATF or dripping in your face. You will need a universal joint for the end of your extension on two of the bolts and the second bolt up on the driver side will need a wrench to get it out. Use a six sided socket. I also found that if you use a few short extensions on the end they flex a little putting a slite bend to it letting the socket fit a little better on the bolts. Once all the bolts are out drop the tranny an inch, pull the converter towards the transmission so it wont fall off, then pull the transmission back away from the motor. As you drop the unit a little at a time pull it back until its clear of any obstacles (my headers were in the way) and drop all the way. I then slid the transmission off the jack and onto a piece of cardboard and used it to pull it from under the car. I did have to jack the front up and raise the jackstands so i could get it out.
If you plan on running at the track now would be a good time to put a compliant flywheel in. (notice the fluid cooling line tucked under the header to the right)
Next slide the trans under the car and up onto the jack then if using a different converter fill it with about a qt of ATF fluid and(to minimize spillage watch the fluid level and slowly bring converter to the vertical position) install on transmission, then install transmission by reversing the procedure.
Once close to in place you will need to pull the rear down the front up to get it lined up right, go slow if your on your own as i was and it should go right in. Keep an eye on the alignment *****, it helps to line it up.
here are some links to good info
how to adjust the shift cable,,, http://shbox.com/trans/A4_trans_linkage.html
tips on your 700r4,,, http://www.transmissioncenter.net/700r4.htm
speedometer info,,, http://www.transmissioncenter.net/sp...n_______va.htm
heres some more information to aid you in taking your transmission out.

3rd Gear Member
Joined: Jun 2008
Posts: 1,028
From: hamilton, nj
i hate transmissions lol. didnt rear it all but it looks like a nice write up. the pics make it look simple. in the last five months ive change a few transmissions in trucks and it sucks. did both auto and manual


In the Staging Lanes
Joined: Jan 2010
Posts: 76
From: connecticut
nice job craby,i was lucky that when i did the tranny in my other 4th gen i had the use of a lift. i know from experience its a pta doing jobs like that on your back, thats how i do most of my projects.