
Stealth Bomber


Thread Starter
|
In the Staging Lanes
Joined: May 2010
Posts: 74
From: Colorado
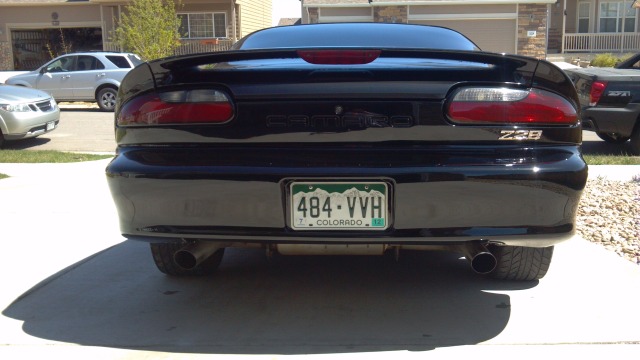
After driving it all summer I started to notice some bubbling/lifting in the paint on the rear bumper cover and taillight filler, so I pulled them off and had the shop respray them again (under warranty) The car was going into winter storage anyway, so I didnt care too much...
Pieces off...

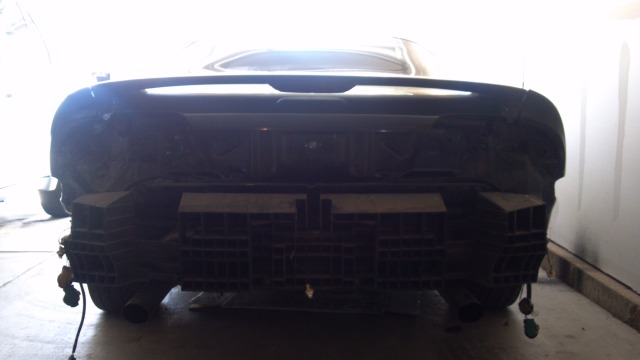
All good again....
Pieces off...
All good again....
Thread Starter
|
In the Staging Lanes
Joined: May 2010
Posts: 74
From: Colorado
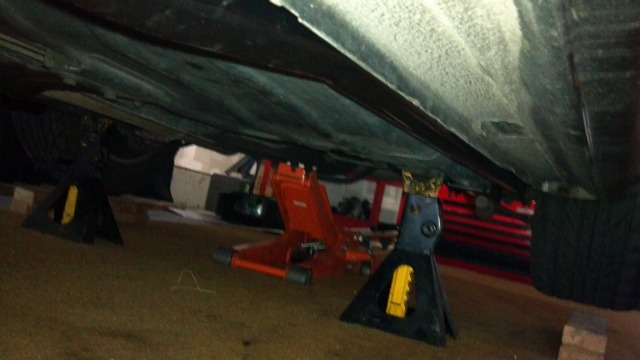
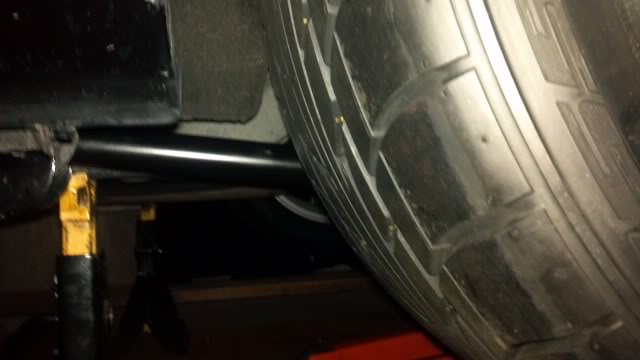
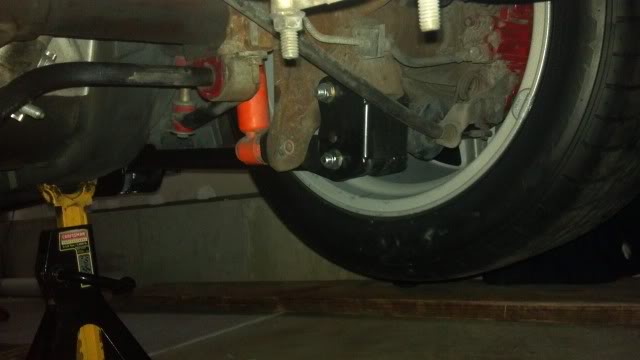
Next up I decided to help out the rear suspension for better cornering and to help cope with being lowered. I purchased an adjustable Pan Hard Bar (PHB) and the lower control arm relocation brackets (LCARB's) from Founders and also some Sub Frame Connectors (SFC's) from UMI.
Here are the pics.
Front mount (SFC's)
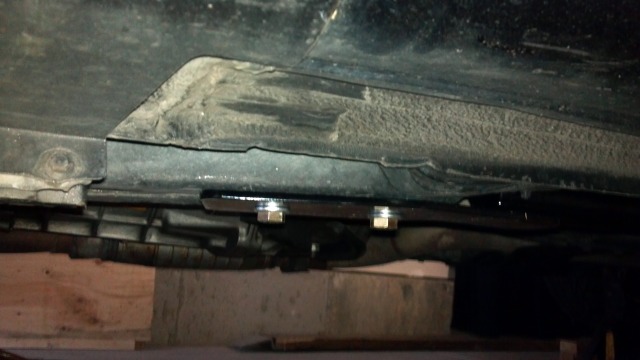
Looking towards the rear.

Relocation brackets.
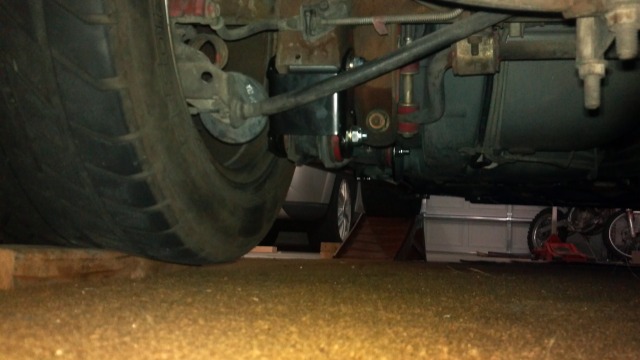
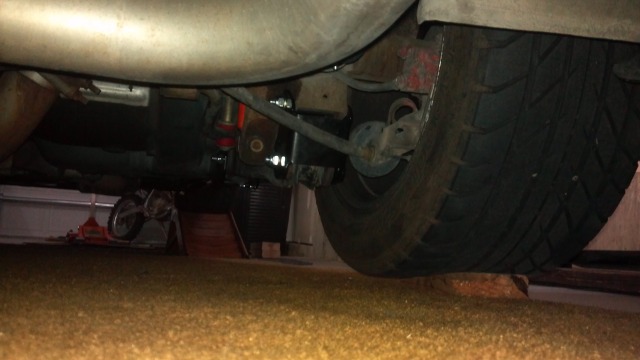
I couldnt believe the difference these items made, the car is much stiffer now, handles bumps better, launches better, etc.
Here are the pics.
Front mount (SFC's)
Looking towards the rear.
Relocation brackets.
I couldnt believe the difference these items made, the car is much stiffer now, handles bumps better, launches better, etc.
Last edited by Black95M6; Feb 18, 2013 at 12:57 PM. Reason: text
Thread Starter
|
In the Staging Lanes
Joined: May 2010
Posts: 74
From: Colorado
I enjoyed driving the car all summer and had a blast. I was going over the car one day and noticed the front tires were getting worn, the rears not far behind and I was sick of cleaning the salad shooters... (which also showed their age and had a few dings, scratches, etc)
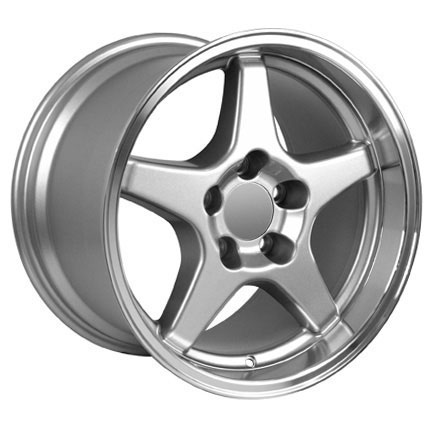
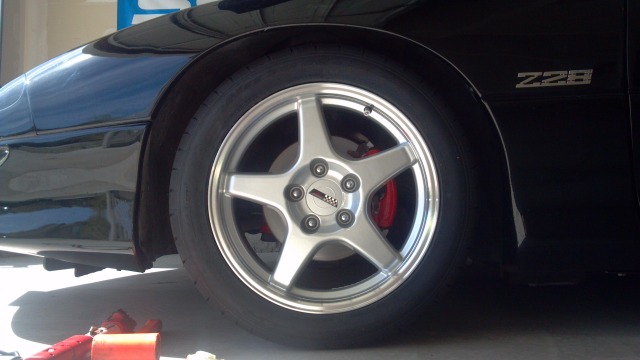
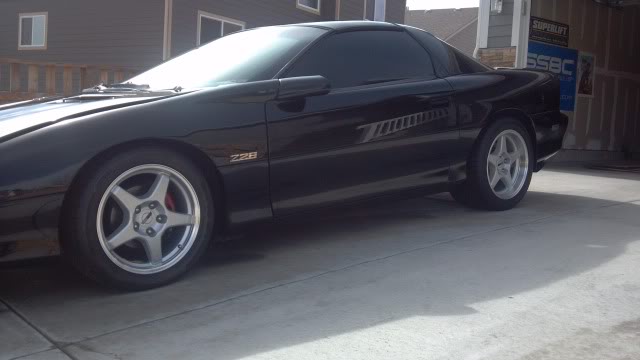
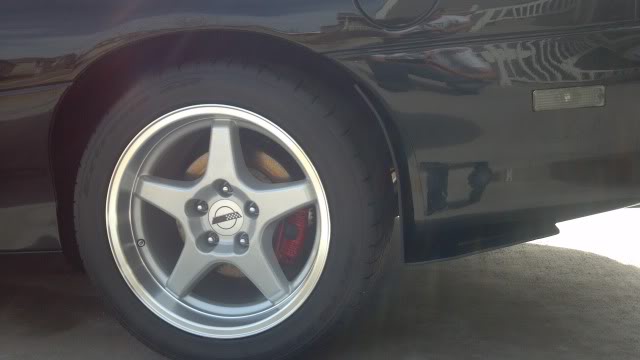
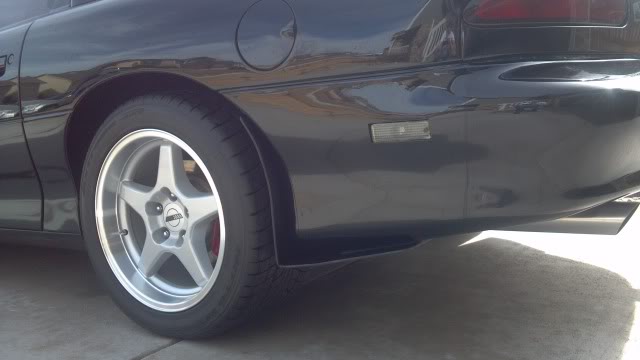
So I went on the hunt for a decent wheel/tire combo that would allow me to update the looks, performance and handling of the car. I was also obessed with getting the widest tire on the rear that fit "comfortably"
After many personal debates and lots of research, I landed on the 17" Corvette ZR1 replicas from OE Wheel. I chose the 17x9.5" front and the 17x11" rear so I could run good size rubber. After comparing tires and pricing I settled on the Nitto NT555's for the car, the typical 275 front, 315 rear combo.
I also chose to order some urethane bump stops (the universal "Jeep" ones) so I could replace my busted up stockers while I had the wheels off.
Pics:
Wheels
Bump Stops
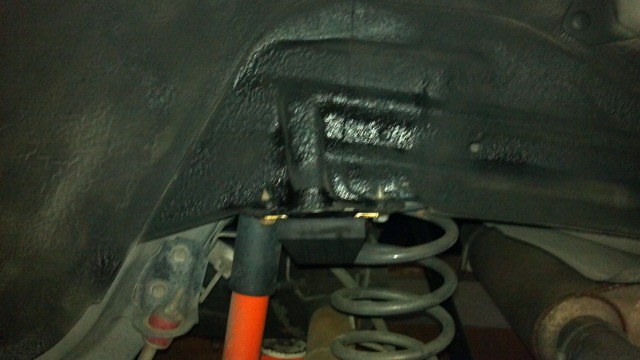
Mounted (front)
Rear
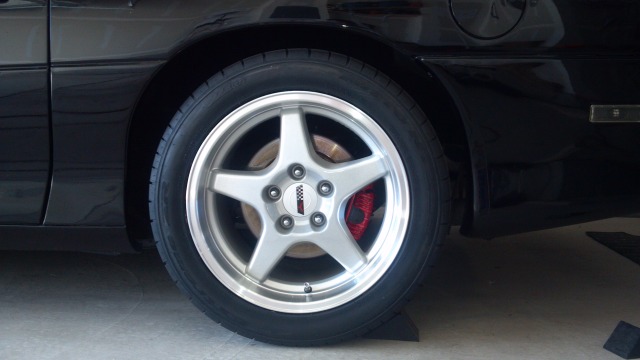
Then off course my aging calipers looked like crap, so I repainted them Red (again) and put new pads on the rear.
Front

Rear brackets

Front

Rear

So I went on the hunt for a decent wheel/tire combo that would allow me to update the looks, performance and handling of the car. I was also obessed with getting the widest tire on the rear that fit "comfortably"
After many personal debates and lots of research, I landed on the 17" Corvette ZR1 replicas from OE Wheel. I chose the 17x9.5" front and the 17x11" rear so I could run good size rubber. After comparing tires and pricing I settled on the Nitto NT555's for the car, the typical 275 front, 315 rear combo.
I also chose to order some urethane bump stops (the universal "Jeep" ones) so I could replace my busted up stockers while I had the wheels off.
Pics:
Wheels
Bump Stops
Mounted (front)
Rear
Then off course my aging calipers looked like crap, so I repainted them Red (again) and put new pads on the rear.
Front
Rear brackets
Front
Rear
Last edited by Black95M6; Feb 18, 2013 at 01:13 PM. Reason: text
Thread Starter
|
In the Staging Lanes
Joined: May 2010
Posts: 74
From: Colorado
That brings us up to last fall, I drove the car twice with the new wheels and tires, then my plates were due and I failed the emissions test. (epically)
So I parked the car for the winter and didnt really touch it for a few months. Well then the weather started to get better and I was getting itchy to have the car drivable again (legally)
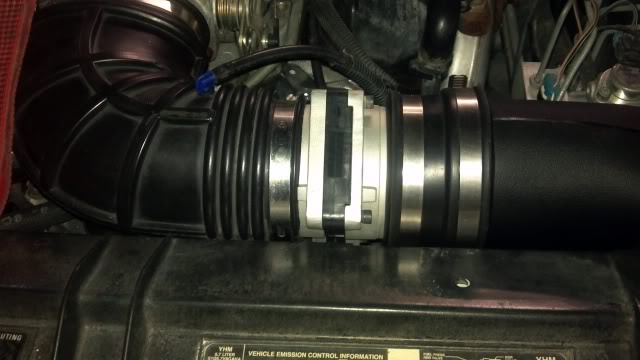
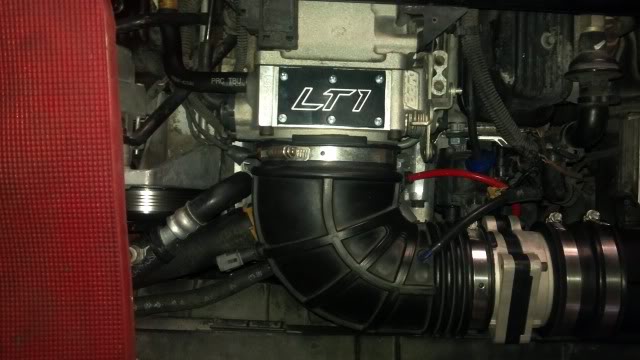
I started to do some research on possible causes for my high emissions output and narrowed it down to an aging MAF, TPS, Cat and the rich factory tune. I purchased a new MAF, TPS, Magnaflow Y-pipe/cat (direct fit style) and sent my ECU off to Solomon (LT1 Tuning) for a tune. I decided to clean up the MAF ends while it was apart also, so I sand blasted them at work, then cleaned up all the casting marks and blasted them again.
Pics
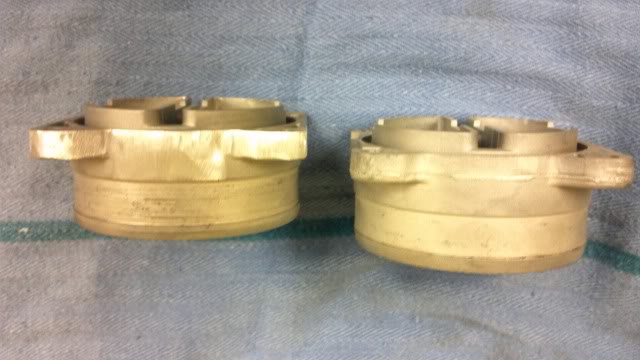
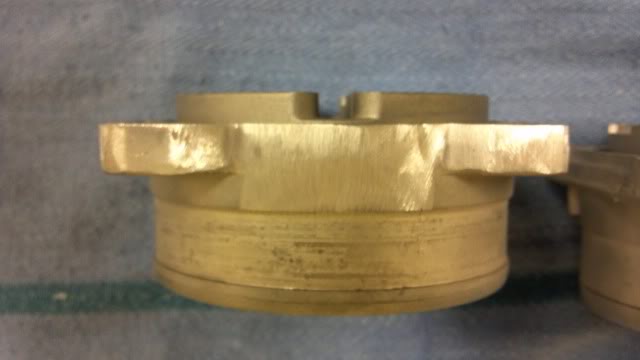

And re-installed with new MAF
Next up I installed new spark plugs (wasnt sure their age), new O2 sensors (wasnt sure their condition due to it running so rich and the brand of them), new knock sensor (recommended with the tune), the new TPS (just for good measure) and the Magnaflow y-pipe. I was really impressed with the y-pipe, nice mandrel bends, smooth merge, fit great...
Pics


Hoping to pass emissions sometime this week or next (weather dependent)
So I parked the car for the winter and didnt really touch it for a few months. Well then the weather started to get better and I was getting itchy to have the car drivable again (legally)
I started to do some research on possible causes for my high emissions output and narrowed it down to an aging MAF, TPS, Cat and the rich factory tune. I purchased a new MAF, TPS, Magnaflow Y-pipe/cat (direct fit style) and sent my ECU off to Solomon (LT1 Tuning) for a tune. I decided to clean up the MAF ends while it was apart also, so I sand blasted them at work, then cleaned up all the casting marks and blasted them again.
Pics
And re-installed with new MAF
Next up I installed new spark plugs (wasnt sure their age), new O2 sensors (wasnt sure their condition due to it running so rich and the brand of them), new knock sensor (recommended with the tune), the new TPS (just for good measure) and the Magnaflow y-pipe. I was really impressed with the y-pipe, nice mandrel bends, smooth merge, fit great...
Pics
Hoping to pass emissions sometime this week or next (weather dependent)
Thread Starter
|
In the Staging Lanes
Joined: May 2010
Posts: 74
From: Colorado
This weekend I finished everything up, re-installed the tuned ECU, changed the oil/filter and gave her a much needed bath. I still need to clay bar, buff and wax, but Im getting there...
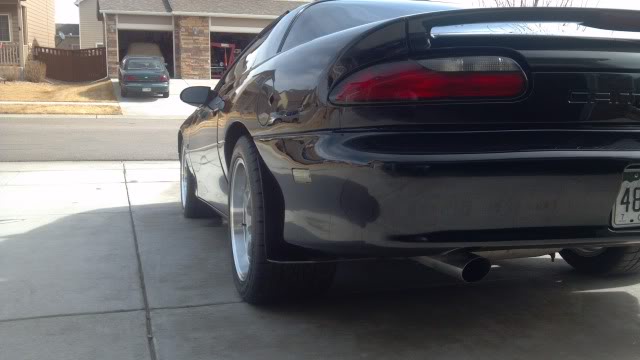
I had also been working on some "mud flaps" for the rear of the car to help protect the bumper cover and keep crap from slinging everywhere.... My inspiritation was/is the flaps available from 6LE, but i wanted something a little different and honestly didnt have the extra money to buy theirs.
Let me know what you think, Im still on the fence.

I also installed some Founders adjustable Lower Control Arms to help with rear suspension bind and give a little more clearence around the tires.
I had also been working on some "mud flaps" for the rear of the car to help protect the bumper cover and keep crap from slinging everywhere.... My inspiritation was/is the flaps available from 6LE, but i wanted something a little different and honestly didnt have the extra money to buy theirs.
Let me know what you think, Im still on the fence.
I also installed some Founders adjustable Lower Control Arms to help with rear suspension bind and give a little more clearence around the tires.
Last edited by Black95M6; Feb 18, 2013 at 01:34 PM. Reason: text/pics


Senior Moderator
January 2010 ROTM Winner
January 2010 ROTM Winner
Joined: Oct 2007
Posts: 18,306
From: The 'Burbs of Chicago


Thread Starter
|
In the Staging Lanes
Joined: May 2010
Posts: 74
From: Colorado
jkeaton (and Camaro 69),
Thanks man, its been a ton of work, but fun at the same time. The fuel line mod involves unhooking the plastic lines (feed/return/EVAP), pulling them out the inner fender, drilling a hole in the back of the shock tower and routing the lines up over the brake booster. Basically it is so they run under the cowl instead of out towards the front of the car on top of the inner wheel well. This just helps to clean up the looks under the hood.
The hood release cable is much the same, you drill a hole in the shock tower and route the cable inside the wheel well (between the plastic liner and the actual steel inner fender) and then up to the hood release lever. Same concept, just helps clean up under the hood.
I still need to do the wire mod on the passenger side, which again involves drilling a hole in the back of the shock tower and routing the wiring up to front between the inner liner and the wheel well.
EDIT: Also thank you Camaro 69, I am very happy with the paint finish on the car with all things considered. I do need to finish buffing and waxing it again, but you know black, its a PITA!
Last edited by Black95M6; Feb 18, 2013 at 03:38 PM. Reason: text
November 2010 ROTM
October 2011 ROTM
October 2011 ROTM
Joined: Jan 2010
Posts: 1,104
From: Maryland
ROTM Winner's Club
jkeaton (and Camaro 69),
Thanks man, its been a ton of work, but fun at the same time. The fuel line mod involves unhooking the plastic lines (feed/return/EVAP), pulling them out the inner fender, drilling a hole in the back of the shock tower and routing the lines up over the brake booster. Basically it is so they run under the cowl instead of out towards the front of the car on top of the inner wheel well. This just helps to clean up the looks under the hood.
The hood release cable is much the same, you drill a hole in the shock tower and route the cable inside the wheel well (between the plastic liner and the actual steel inner fender) and then up to the hood release lever. Same concept, just helps clean up under the hood.
I still need to do the wire mod on the passenger side, which again involves drilling a hole in the back of the shock tower and routing the wiring up to front between the inner liner and the wheel well.
