
Here are some pics of My 94 Z28 LT1 engine rebuild


Thread Starter
|
1st Gear Member
Joined: Jul 2009
Posts: 269
From: Ms Gulf Coast
%
Our project began with a 1994 Z28 LT1 with blown head gasket and a spun main bearing that set-up untouched for 2 yrs....
Here we began in the driveway, for all you guys who don't have a shop, you can do it !! and it will take all night long too... LOL
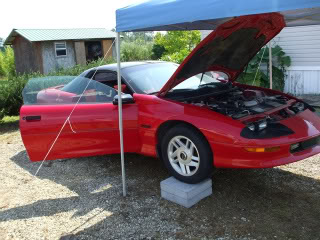
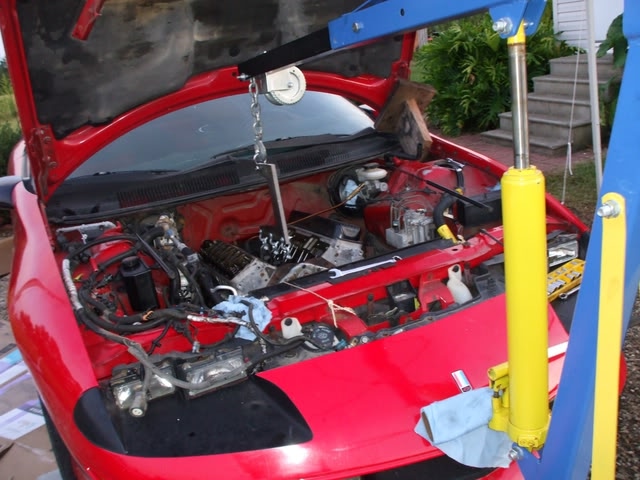
Not pretty under the hood... kinda scary starting something like this...
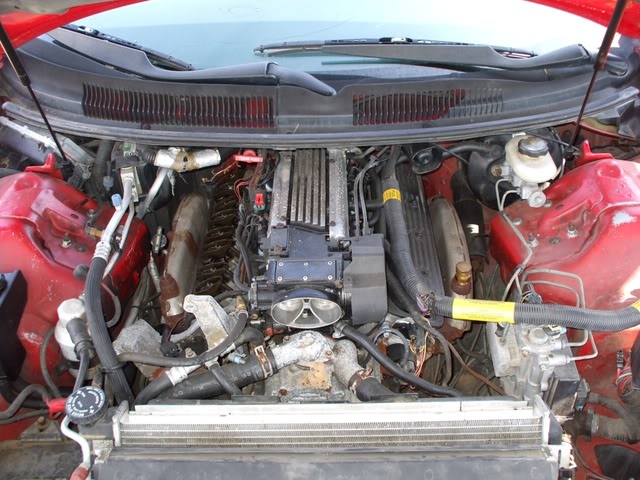
You will need to strip everything off the engine to get out and back in...
Disconnect the tranny and torque converter from the engine and back them both off together so as to not dammage the tranny pump...
Here I made a C-shaped tool and clamped it to the 3 lifter bolt holes so it would clear the windsheild ...
Beer Time.....
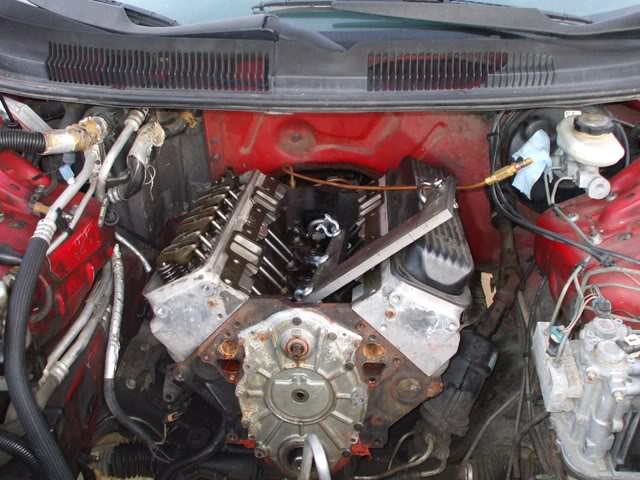
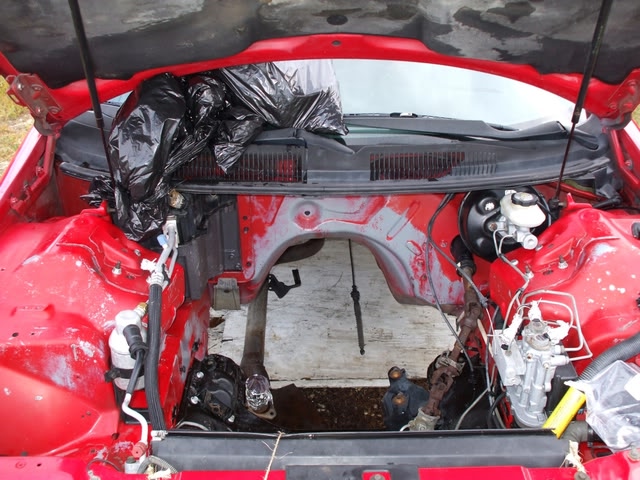
Aftermath.... what have I gotten in to ??

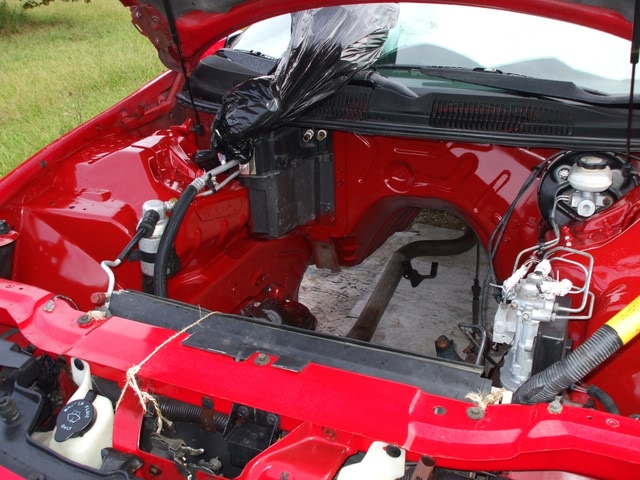
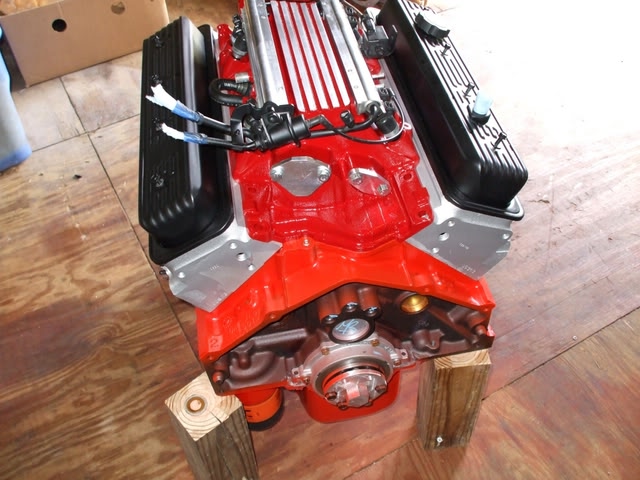
Cleaned and ready for painting...
Used 500 deg paint, but it still fadded to dark orange later....
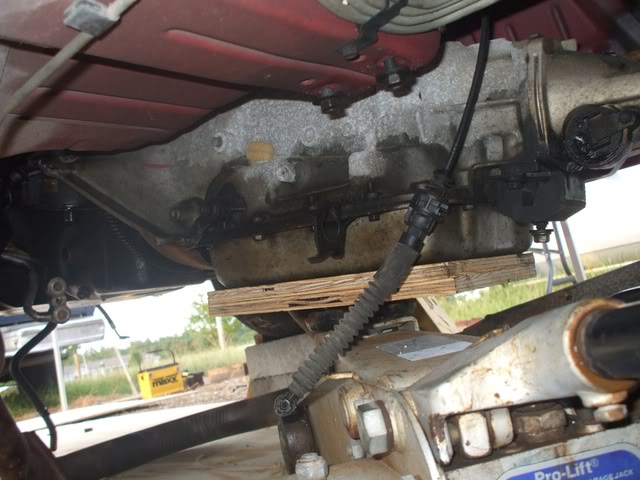
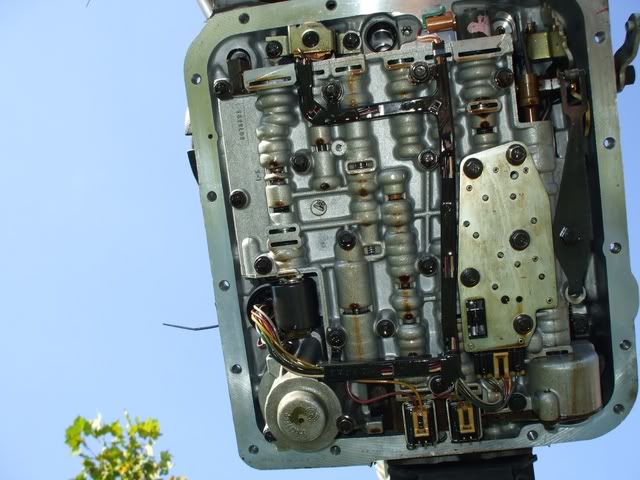
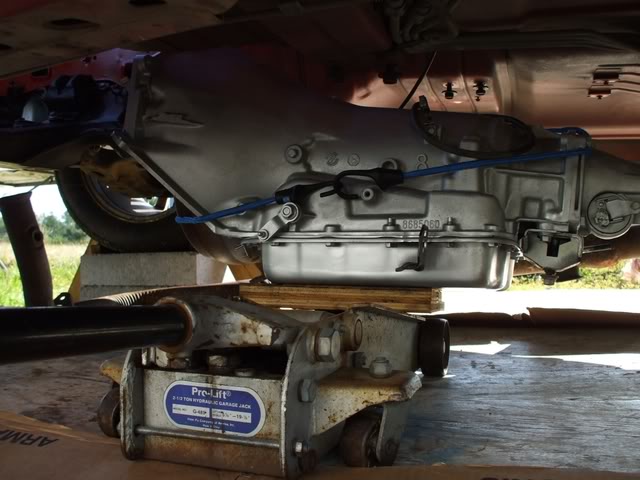
cleaned and changed filter & fluid, seals in the 4L60E tranny...
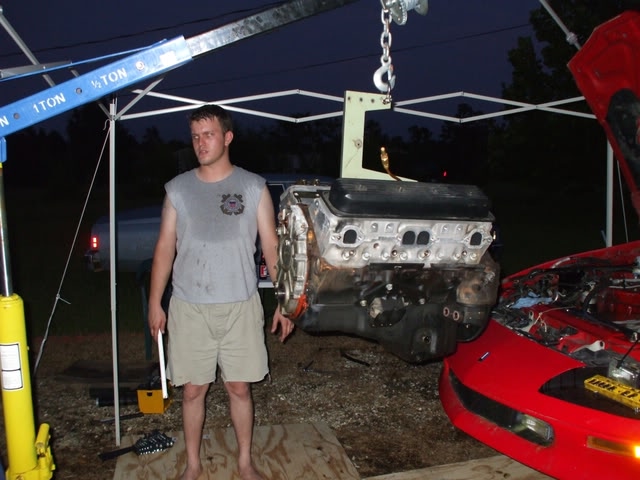
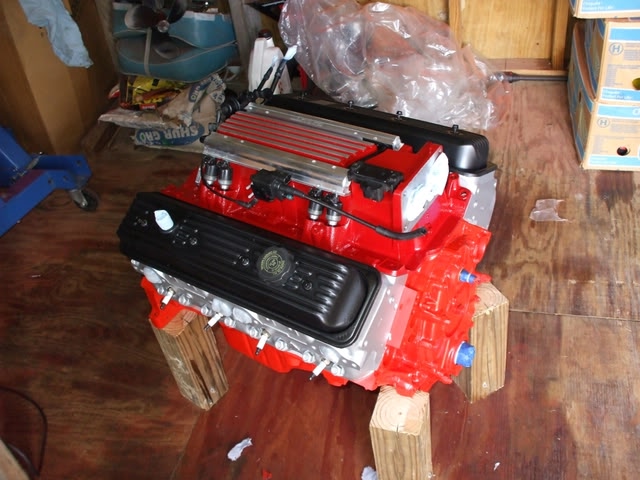
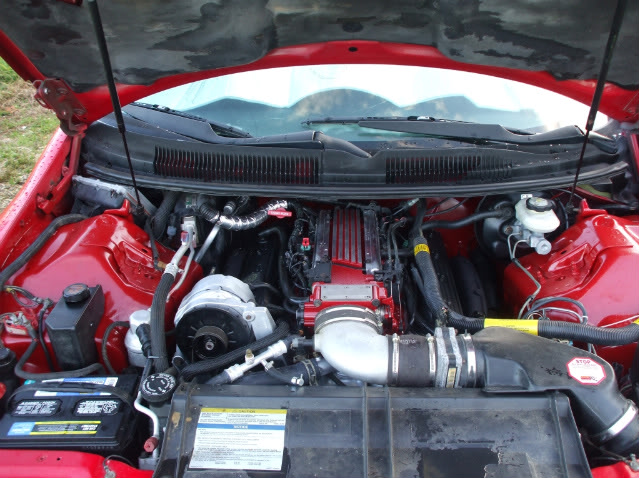
The rebuilt longblock from http://www.groomsengines.com/ in Tenn. $2,300 for a good rebuild, check them out, they specialize in the LT family...
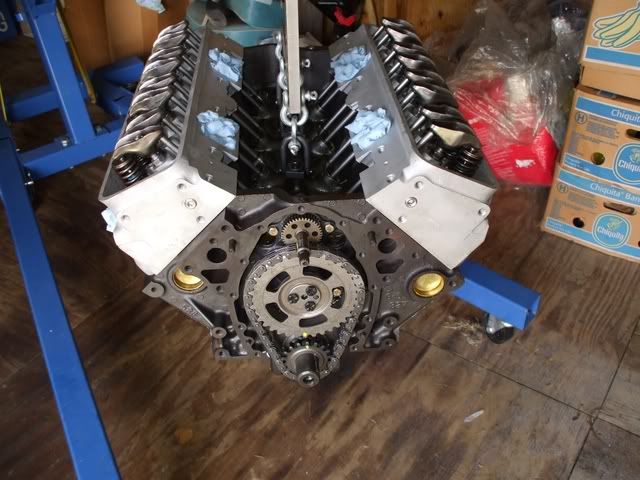
The 4 bolt mains, the orignal owner blew the engine while under warranty, so the dealership replaced it with this one.....
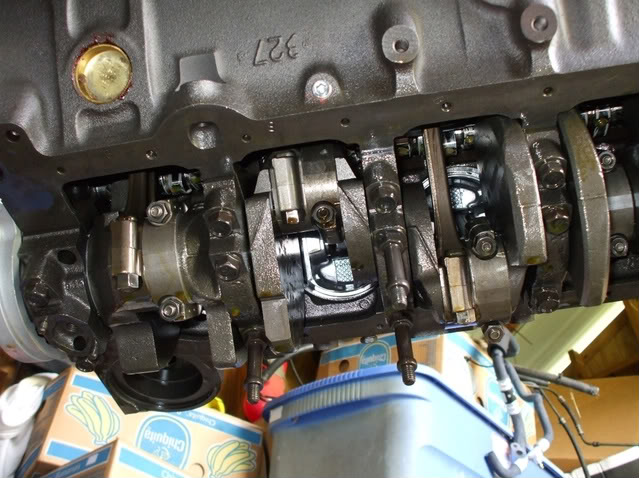
This may appear easy, but it is alot of work to get this far....
Note: no EGR, had PCM reprogrammed to remove it...
Tranny in position to re-hook it up ....
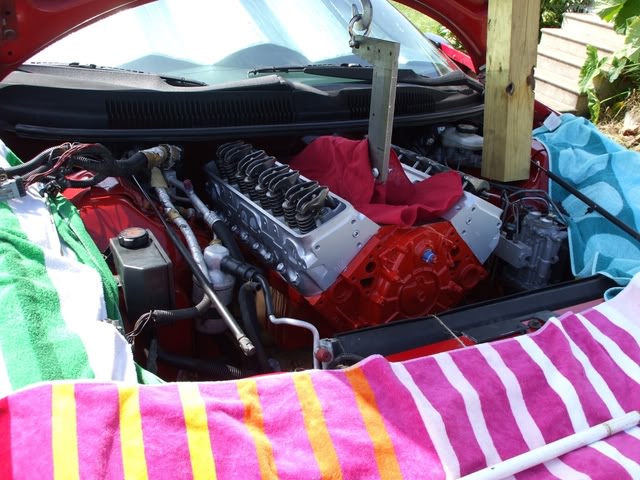
Turn the engine with the front facing the drivers side to drop it in...
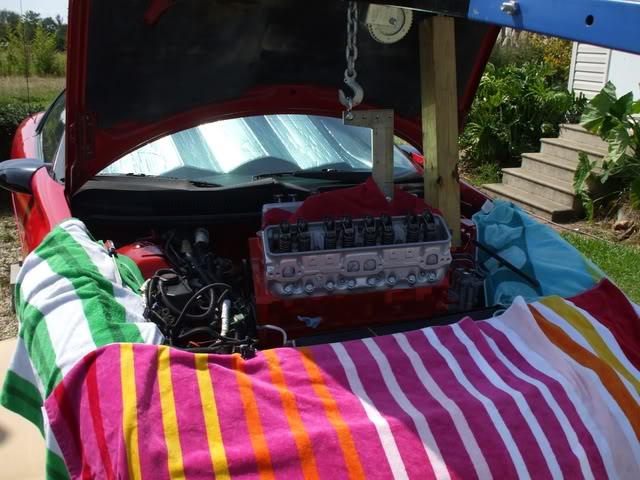
Then turn it back after it is below the windshield ....
Finished !!!! Rain and $ delay = 6 months
Back in the saddle again, And YES its worth the effort !!!
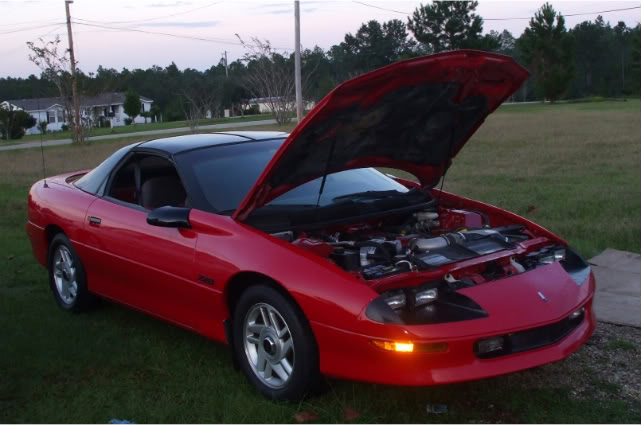
Across the street from the Beach Ball water tower by the Pensacola Pier on a needed Vacation .... stayed at the Paridise Inn...

Total cost was around $5,000...$2,300 for rebuild and another $2,000 or so for opti, starter, alternator, plugs & wires, harness for opti, all coolant hoses, ALL sensors everywhere, harmonic balancer, ECM, ect...
Could have had a more powerful engine but I wanted to drive it alot and on long trips, plus Grooms warranty of lifetime unlimited miles kept me stock....
%
Our project began with a 1994 Z28 LT1 with blown head gasket and a spun main bearing that set-up untouched for 2 yrs....
Here we began in the driveway, for all you guys who don't have a shop, you can do it !! and it will take all night long too... LOL
Not pretty under the hood... kinda scary starting something like this...
You will need to strip everything off the engine to get out and back in...
Disconnect the tranny and torque converter from the engine and back them both off together so as to not dammage the tranny pump...
Here I made a C-shaped tool and clamped it to the 3 lifter bolt holes so it would clear the windsheild ...
Beer Time.....
Aftermath.... what have I gotten in to ??
Cleaned and ready for painting...
Used 500 deg paint, but it still fadded to dark orange later....
cleaned and changed filter & fluid, seals in the 4L60E tranny...
The rebuilt longblock from http://www.groomsengines.com/ in Tenn. $2,300 for a good rebuild, check them out, they specialize in the LT family...
The 4 bolt mains, the orignal owner blew the engine while under warranty, so the dealership replaced it with this one.....
This may appear easy, but it is alot of work to get this far....
Note: no EGR, had PCM reprogrammed to remove it...
Tranny in position to re-hook it up ....
Turn the engine with the front facing the drivers side to drop it in...
Then turn it back after it is below the windshield ....
Finished !!!! Rain and $ delay = 6 months
Back in the saddle again, And YES its worth the effort !!!
Across the street from the Beach Ball water tower by the Pensacola Pier on a needed Vacation .... stayed at the Paridise Inn...
Total cost was around $5,000...$2,300 for rebuild and another $2,000 or so for opti, starter, alternator, plugs & wires, harness for opti, all coolant hoses, ALL sensors everywhere, harmonic balancer, ECM, ect...
Could have had a more powerful engine but I wanted to drive it alot and on long trips, plus Grooms warranty of lifetime unlimited miles kept me stock....
%


Wow, CNCman, I'm in a parallel V6 universe. Same year, same color car, same t-tops. I'm just missing two cylinders!
I did virtually the same thing you did but dropped everything out the bottom and didn't touch the trans (budget).
I painted my 3.4 Chevy orange and did a similar underhood cleanup. I've been driving mine a little bit and that 3.4 is nothing to scoff at. As a daily driver it is more than adequate. I'm sure the LT1 is a blast and a half.
I need to get an alignment and the a/c charged before mine sees daily service.
For me it was almost 09 months from pull to turn the key but I pulled the crossmember and front suspension then blasted/painted that stuff prior to reinstall. Plus new control arm bushings, balljoints, sway bar links, etc. Oh, I had my original engine rebuilt instead of swapping one in. That slowed things down a bit.
Last edited by 1augapfel; Jul 21, 2010 at 09:45 PM.