
Depowering a rack and pinion...
#1
 12-19-2012, 08:31 PM


Does anyone know how to depower a rack and pinion? I'm not talking about doing that looping trick. I know that Rack Doctor sells OEM racks modified to be manual by removing a couple rings/seals and it should be identical to a manual rack aside from a slightly lower gear ratio which could equate to less turns lock to lock (I think?) depending on how you look at it, it may actually be an advantage over purchasing a manual rack...
Here's what I am talking about: 1993-1997 Chevrolet Camaro Manaul Steering Rack and Pinion
Here are pics of someone modifying a miata rack to remove the "power assist"
Flyin' Miata : Tech: 1.8 conversion
Their are pictures of other people doing this mod on different makes and models but these were the best I could find. I couldn't even find any rebuild guides on GM rack and pinions... I picked up a diagram from the dealership but I'm still kind of stuck. I have the adjuster and spring out, boots off, but can't figure out how to remove the tie rods or pull the piston out.
So has anyone done this mod or can guide me in the direction I would like to go?
Thanks,
Austin
#2
12-19-2012, 11:41 PM

Curious as to why you want to remove power steering? Weight loss, I presume? Other things can be rid of first before PS.
Tie rods need a tie rod removal tool to get them out.
Tie rods need a tie rod removal tool to get them out.
#3
12-20-2012, 12:52 AM


Join Date: Mar 2009
Location: Tokeland, Washington
Posts: 21,750
exploded view here http://shbox.com/1/rack&pinion.jpg i would not use a power steering rack without power. the reduction or lack of make steering at slow speeds very hard and could be dangerous, heres another pic
#4
12-20-2012, 06:23 AM
@ MKcoconuts
I want to do this for several reasons.
1. better steering responsiveness for fast driving/on tracks
2. better appearance, no hoses going every direction
3. one less thing to worry about leaking
4. about a 30lb weight reduction
@craby, have you ever driven a car with a depowered rack? My friend has a honda with one that he bought like this and you cannot tell the difference between it and a manual. Also, thank you for the pictures
#5
12-20-2012, 06:43 AM

The flowing power steering fluid in the rack is responsible for the lubrication of the assembly. Here in PA Manual steering racks/boxs are fine, disconnect power steering rack/boxs is concidered a saftey issue and will not pass the yearly saftey inspection.
On a side note from my old budget racing days. Guys that ran disconnected power steering boxs use to buy 2 or 3 from the junk yard at a time to get througt a season. guys that found manual boxs rarly had issues.
You really want to think about this move, I have push several project 4th gens around with the motor not running. They do not turn well at all. Try getting down to low speeds in your car and kill the engine and see how it handles. Don't do it to many times because it will damage the rack pretty quickly.
Last edited by Gorn; 12-20-2012 at 06:48 AM.
#6
12-20-2012, 07:26 AM
@Gorn yeah but you LITERALLY CUT OFF the metal rings and the seals that hold the pressure and gut out the power steering parts until its literally just a manual rack with only the rack and pinion. I have a bucket of grease that I am going to use for lubrication and I have read the most people just use general purpose grease for lubrication. It won't be a "disconnected steering box" it will literally be a manual rack and pinion afterwards.
Has anyone done this before?
Has anyone done this before?
#7
12-20-2012, 01:58 PM
@ MKcoconuts
I want to do this for several reasons.
1. better steering responsiveness for fast driving/on tracks
2. better appearance, no hoses going every direction
3. one less thing to worry about leaking
4. about a 30lb weight reduction
@craby, have you ever driven a car with a depowered rack? My friend has a honda with one that he bought like this and you cannot tell the difference between it and a manual. Also, thank you for the pictures
I want to do this for several reasons.
1. better steering responsiveness for fast driving/on tracks
2. better appearance, no hoses going every direction
3. one less thing to worry about leaking
4. about a 30lb weight reduction
@craby, have you ever driven a car with a depowered rack? My friend has a honda with one that he bought like this and you cannot tell the difference between it and a manual. Also, thank you for the pictures
I'm not saying you shouldn't do this, just it's going to make street driving a pita. You'll be going from using a finger and thumb to turn the car at low speeds to using both hands.
#8
12-20-2012, 02:41 PM

Join Date: Oct 2007
Location: The 'Burbs of Chicago
Posts: 18,306
Manual steering keeps you strong and manly! With that said, my 69 has manual steering. lol
Seriously though, I have no problem at all steering my car...with the exception of (rarely) parallel parking which requires a little more effort. My plans are to eventually convert from a conventional box to a manual rack & pinion setup. I'm all for simplicity. R&P works easier than a box, so I expect the manual rack to steer easier than my current steering box does.
Seriously though, I have no problem at all steering my car...with the exception of (rarely) parallel parking which requires a little more effort. My plans are to eventually convert from a conventional box to a manual rack & pinion setup. I'm all for simplicity. R&P works easier than a box, so I expect the manual rack to steer easier than my current steering box does.
#9
12-20-2012, 04:31 PM
Comparing a car that was designed to have manual steering and one that was not is a mistake. A car designed to have manual steering will have a different ratio and a MUCH bigger wheel. My 68 short bed truck was fine with manual steering. But like I said you want to turn your motor off and drive the car at slow speed. Now imagine yourself in a 2 hour traffic jam after a 4 hour, muddy, football game. (yea, been there done that). Manual steering box and a 3200 lb clutch. No falling asleep in that car
From an engineering stand point replacing flowing hydraulic fluid with stagnate grease might not be as good of a move as you think. When we design bearing and bushing the type of fluid used determines the clearances designed in. Thick lubricants needs more clearance. This means the grease may not be able to get where it needs to be. Also the engineer is assuming constant flow. With stagnate grease the grease may just be pushed out of the way. The manual rack may have wipers or a redirection system to keep the grease cycling. I have even seen internal brushed that brush the grease over the gears every time the rack cycles. I am not saying it will not work but it is hooky at best. In the eyes of a safety inspection mechanic as long as those ports are on the outside of the rack it is a power assist rack and it will need to work. But that is just in PA. You should check with your local inspection mechanic (if you have inspections)
From an engineering stand point replacing flowing hydraulic fluid with stagnate grease might not be as good of a move as you think. When we design bearing and bushing the type of fluid used determines the clearances designed in. Thick lubricants needs more clearance. This means the grease may not be able to get where it needs to be. Also the engineer is assuming constant flow. With stagnate grease the grease may just be pushed out of the way. The manual rack may have wipers or a redirection system to keep the grease cycling. I have even seen internal brushed that brush the grease over the gears every time the rack cycles. I am not saying it will not work but it is hooky at best. In the eyes of a safety inspection mechanic as long as those ports are on the outside of the rack it is a power assist rack and it will need to work. But that is just in PA. You should check with your local inspection mechanic (if you have inspections)
Last edited by Gorn; 12-20-2012 at 09:30 PM.
#10
12-21-2012, 03:01 PM
@gorn, they sell aftermarket rack and pinions for this car? The older camaros were much heavier and many had manual steering? I see many valid points tho with the different lubrication types. The guy at napa is pretty smart, albeit he's probably not an engineer. He directed me to a grease that would work and me and my friends got the project done in about 3 hours.
Here's my write up in case anyone else wants to do this. Maybe I should put this in a new thread? or change the title of this one?
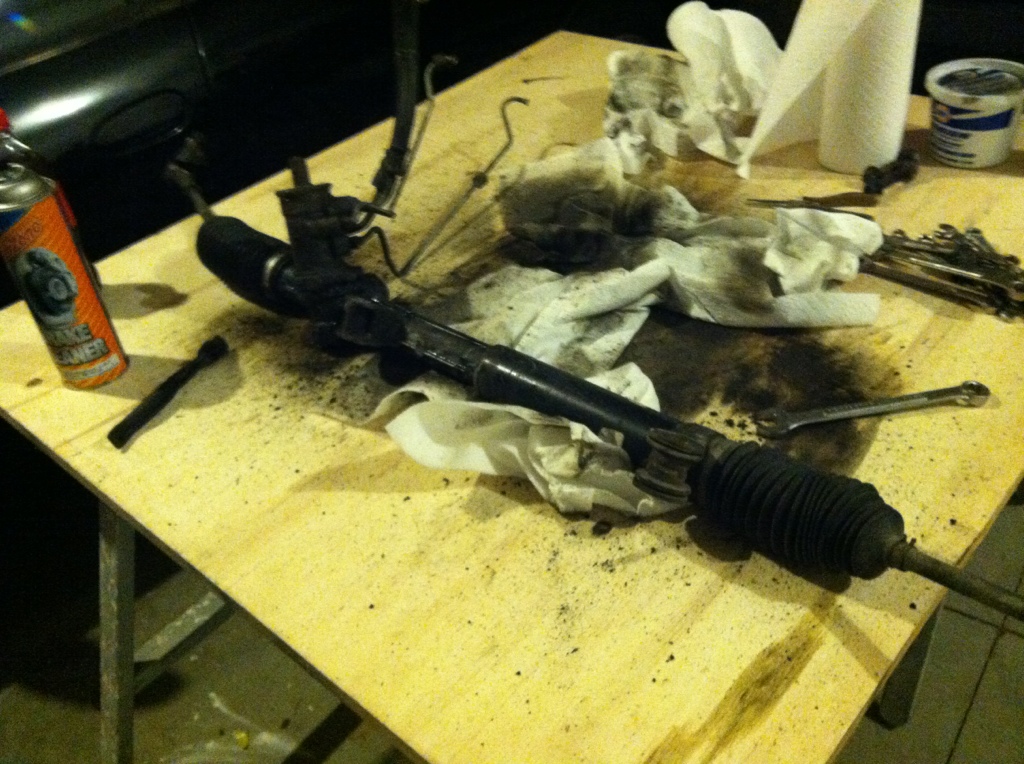
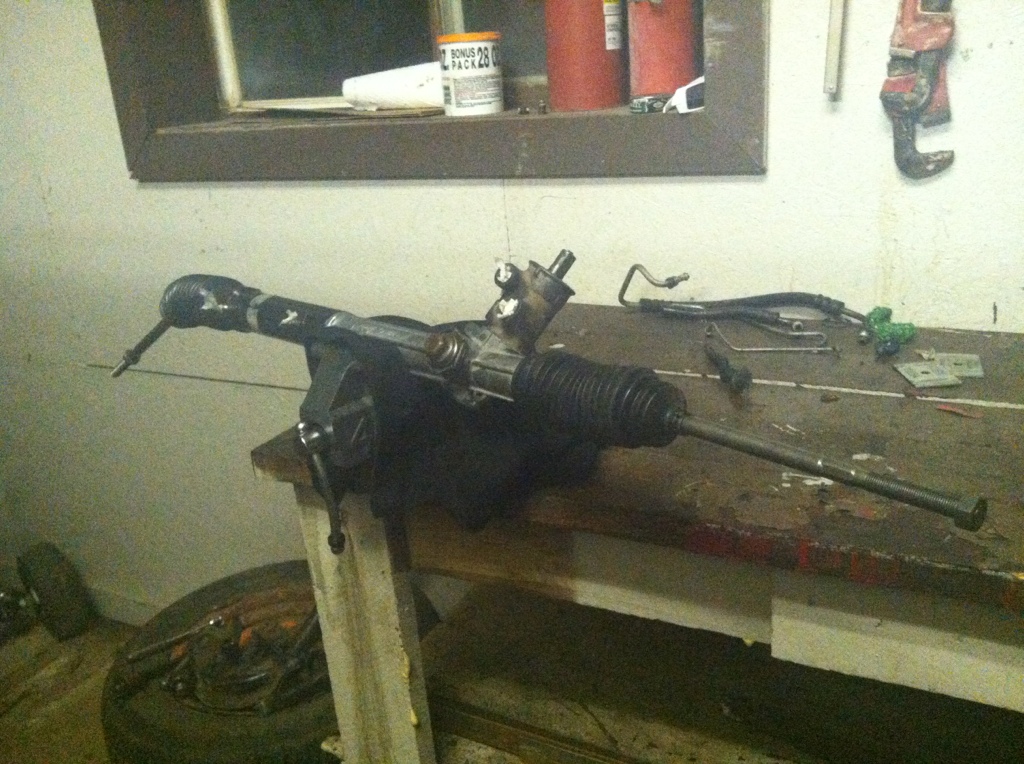
Remove your rack and pinion and thoroughly clean it. You might be surprised, the body of the rack is actually silver haha not black!

Put it in a vise. Clean it some more. When you think it can't get any cleaner go and buy another can of brake cleaner and use it all on the rack because the more dirt you get off, then that's dirt that won't be anywhere near the internals. Remove the service hole on the opposite side of the rack from the pinion by prying it out with a screw driver and a hammer. Then hold the pinion in place while you loosen the bolt in the service hole. Then Remove the tensioner nut and take the spring and the valve out. Your pinion will now come out. Their is a snap right on the passenger side that must be removed to slide out the rack. See the pictures from the flying miata tutorial.
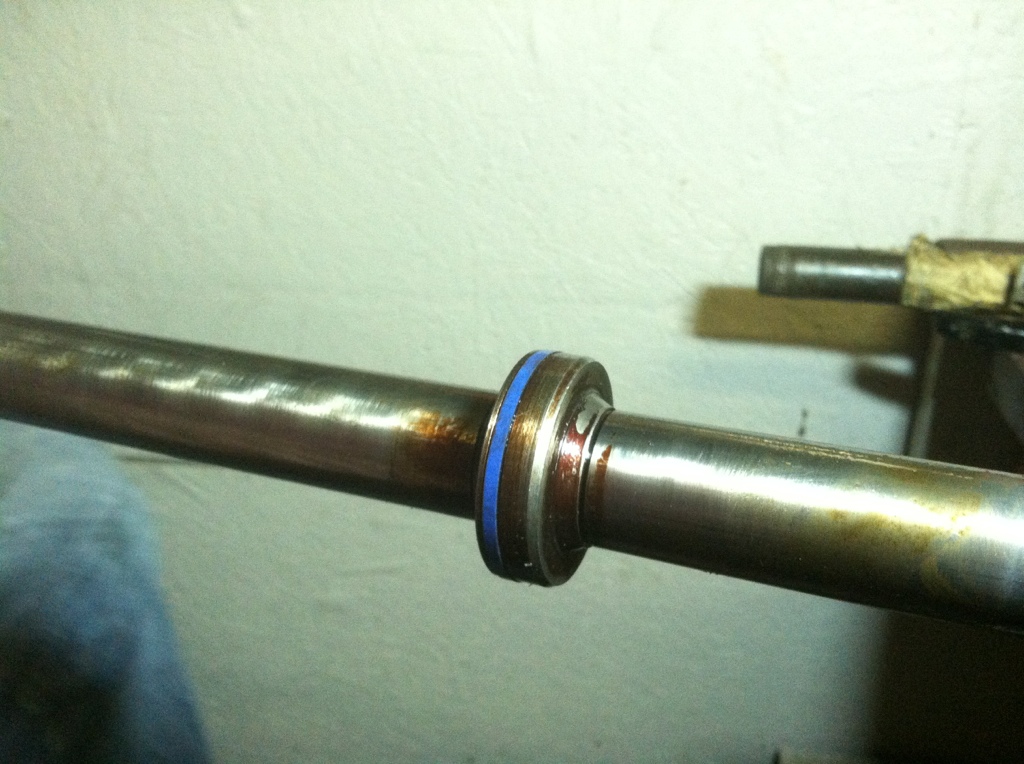
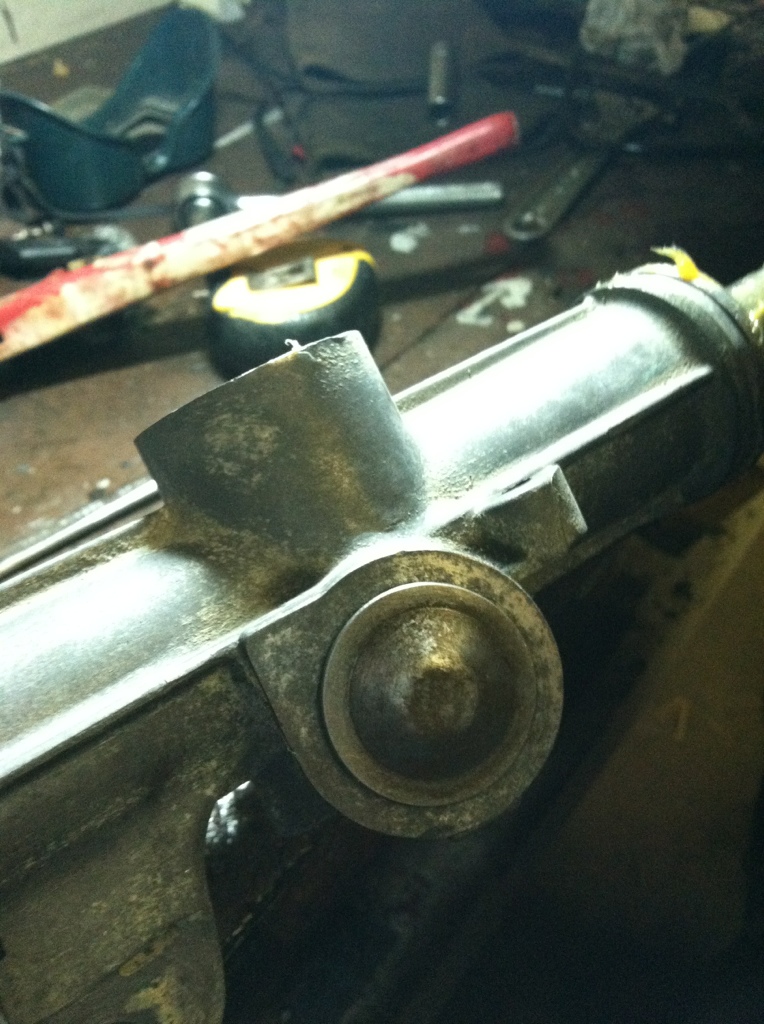
This is the bearing on the rack that needs to be removed. This causes the rack and pinion to hole pressure on either side of these for pressurized fluid to move it instead of being able to move freely within the case. We used a torch to remove this.

Cut it off with a torch. Don't worry about the rack, its extremely hardened and wont even get red after about two minutes of heat.
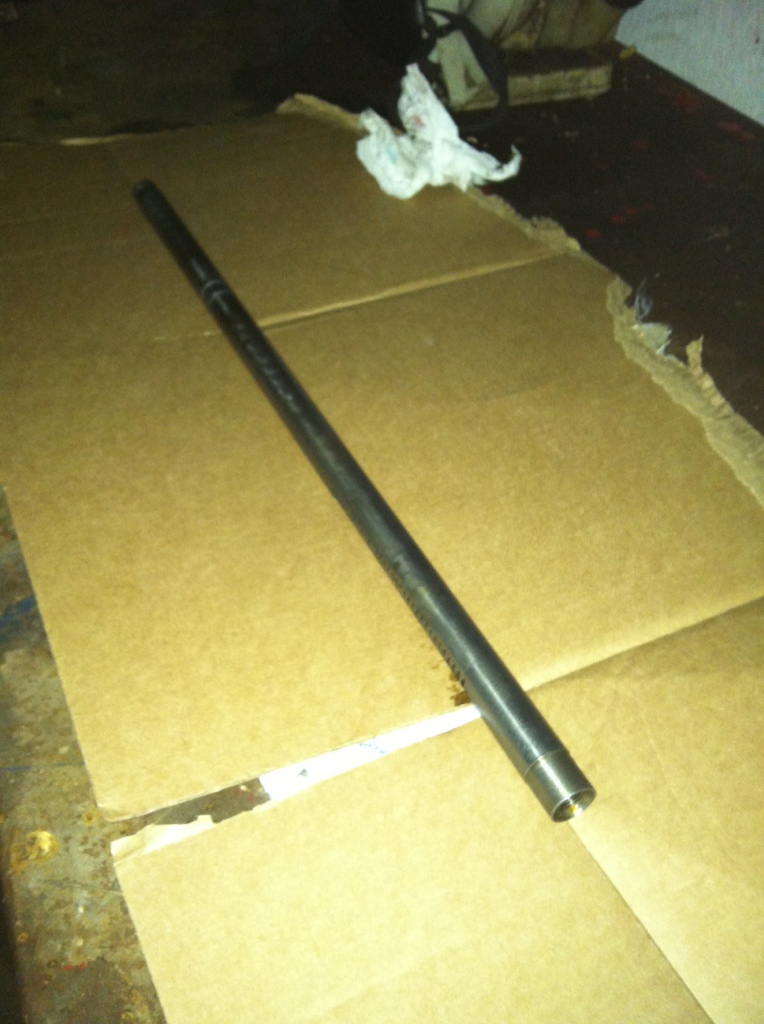
Sand down by your cut so the rack is smooth if their was any rough spots (their shouldn't be, the soft metal from the bearing bounces right off the rack), the spot where that bearing was doesn't have to be perfect, because the other bearings don't slide over on that length. I still made sure it was though.
Grease the inside of the case as much as possible and grease EVERY BEARING, NUT, AND PIECE OF METAL YOU CAN FIND that will go inside this rack and pinion. Begin putting it back together
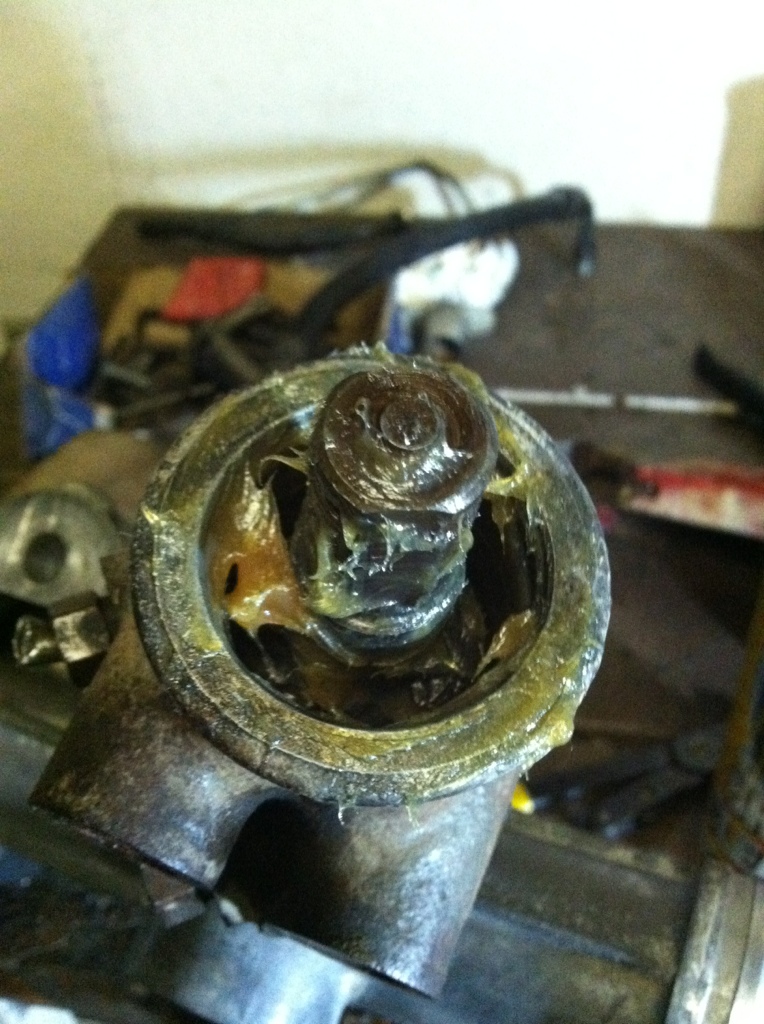
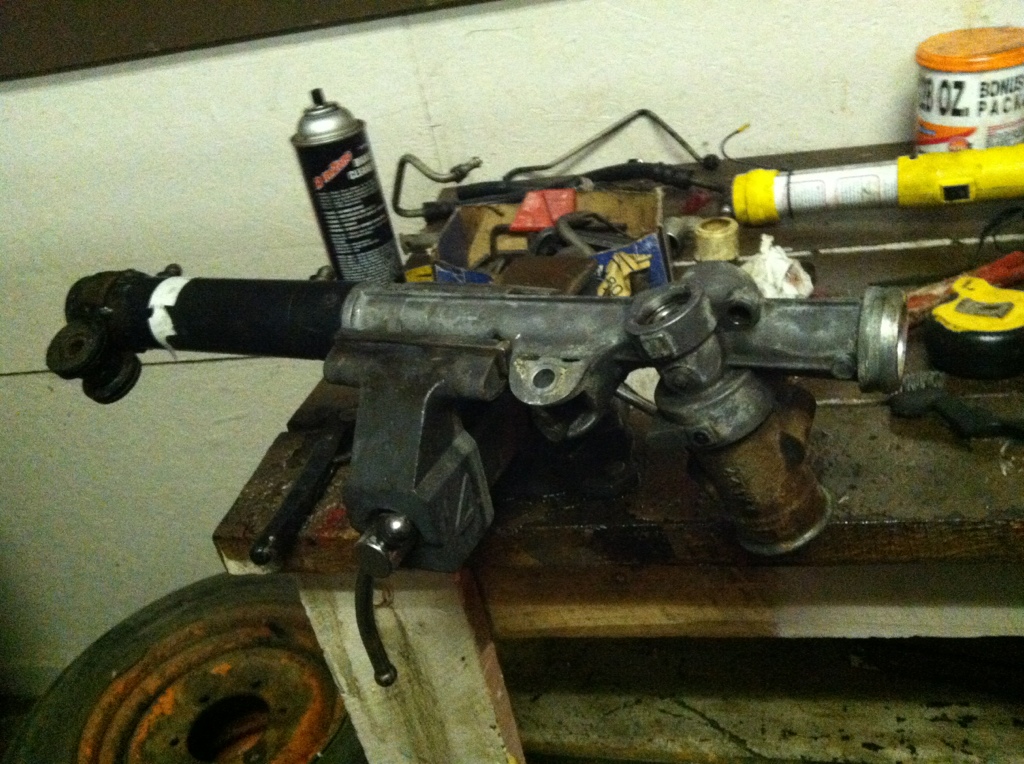
When you put the pinion in, might not be a bad idea to replace the seals around it. Make sure their is so much grease on the gear that you can't see it. This just shows how much grease was on the outer part of the pinion.
After you have your rack and pinion in with all the snap rings and bearings in, tighten down the nut in the service port that holds the pinion in. Use a rubber mallet to reseat the plug.
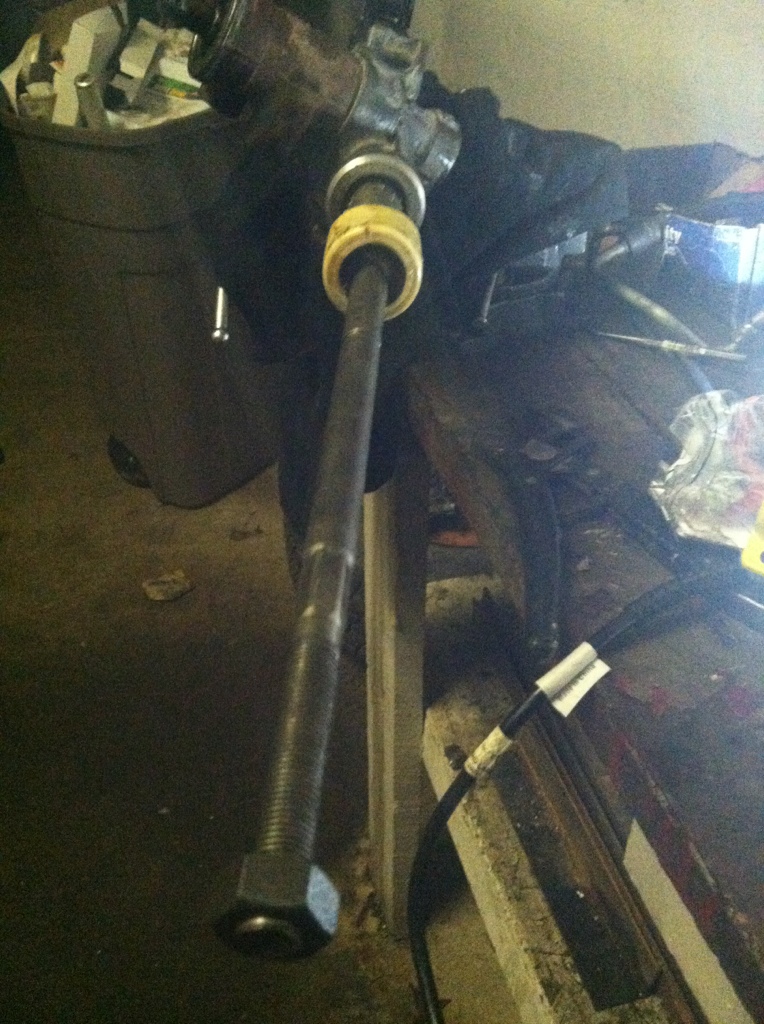
Couldn't think of a better time to replace those inner tie rods! Costs about $30 a piece but it is soooo easy now that your old ones are off! Tap the tie rod end cover back on with a rubber mallet.
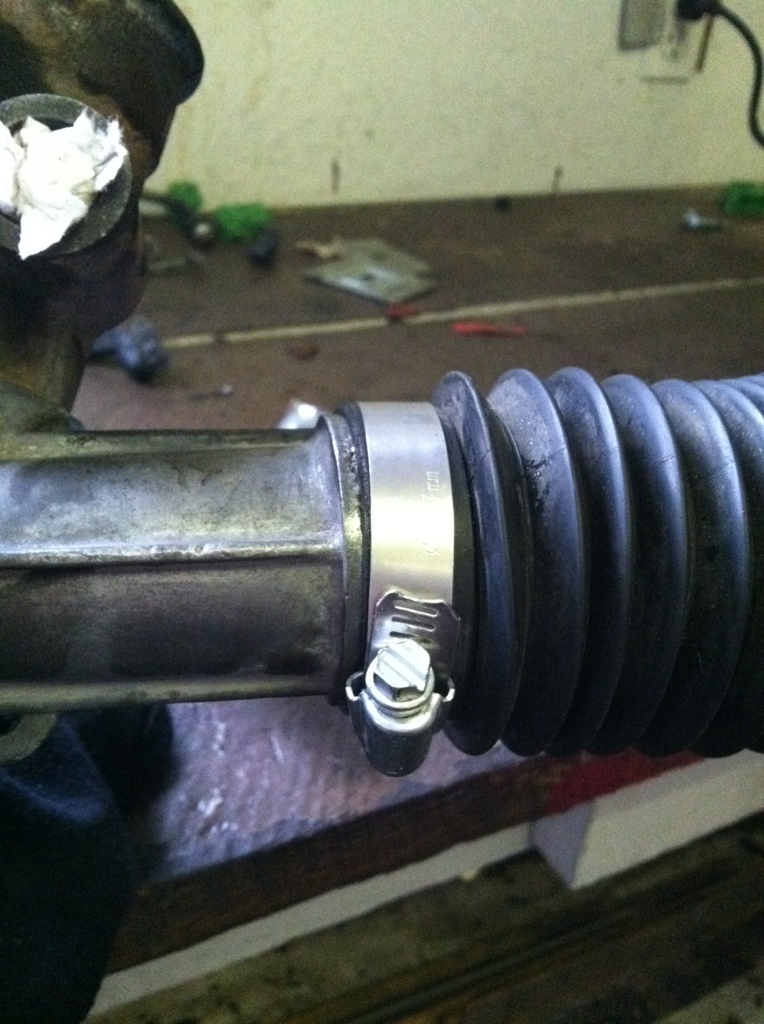
Use a hose clamp for the inner part of the tie rod boot. Use the old clamp for the outer part of the boot as it is reusable.
You're done! Now put that baby back in! Ohhh yeah, you're gonna want to plug all those holes and ports now that were used to move power steering fluid. Just to keep dirt out.
After I installed it, I was AMAZED! I can turn my steering wheel with my pinky finger lock to lock! Can't wait to have my car done and see how much more responsive this will be! Let me know what you guys think!
Here's my write up in case anyone else wants to do this. Maybe I should put this in a new thread? or change the title of this one?
Remove your rack and pinion and thoroughly clean it. You might be surprised, the body of the rack is actually silver haha not black!
Put it in a vise. Clean it some more. When you think it can't get any cleaner go and buy another can of brake cleaner and use it all on the rack because the more dirt you get off, then that's dirt that won't be anywhere near the internals. Remove the service hole on the opposite side of the rack from the pinion by prying it out with a screw driver and a hammer. Then hold the pinion in place while you loosen the bolt in the service hole. Then Remove the tensioner nut and take the spring and the valve out. Your pinion will now come out. Their is a snap right on the passenger side that must be removed to slide out the rack. See the pictures from the flying miata tutorial.
This is the bearing on the rack that needs to be removed. This causes the rack and pinion to hole pressure on either side of these for pressurized fluid to move it instead of being able to move freely within the case. We used a torch to remove this.
Cut it off with a torch. Don't worry about the rack, its extremely hardened and wont even get red after about two minutes of heat.
Sand down by your cut so the rack is smooth if their was any rough spots (their shouldn't be, the soft metal from the bearing bounces right off the rack), the spot where that bearing was doesn't have to be perfect, because the other bearings don't slide over on that length. I still made sure it was though.
Grease the inside of the case as much as possible and grease EVERY BEARING, NUT, AND PIECE OF METAL YOU CAN FIND that will go inside this rack and pinion. Begin putting it back together
When you put the pinion in, might not be a bad idea to replace the seals around it. Make sure their is so much grease on the gear that you can't see it. This just shows how much grease was on the outer part of the pinion.
After you have your rack and pinion in with all the snap rings and bearings in, tighten down the nut in the service port that holds the pinion in. Use a rubber mallet to reseat the plug.
Couldn't think of a better time to replace those inner tie rods! Costs about $30 a piece but it is soooo easy now that your old ones are off! Tap the tie rod end cover back on with a rubber mallet.
Use a hose clamp for the inner part of the tie rod boot. Use the old clamp for the outer part of the boot as it is reusable.
You're done! Now put that baby back in! Ohhh yeah, you're gonna want to plug all those holes and ports now that were used to move power steering fluid. Just to keep dirt out.
After I installed it, I was AMAZED! I can turn my steering wheel with my pinky finger lock to lock! Can't wait to have my car done and see how much more responsive this will be! Let me know what you guys think!