
The "Slow but Steady" '78 Project Build
#1421
 09-09-2015, 06:05 PM


Join Date: Jul 2011
Location: Northern Michigan
Posts: 992
Here's what it looks like under there. I don't see anything chewed up on the yoke. Straps and the bolts are ok too. Just a little bit of carnage on the floors and gas tank. A LOT of grease slung everywhere. That stuff'll make the spray wax and wiping job real fun under there in a couple days.
#1422
09-10-2015, 08:31 AM


Join Date: Oct 2007
Location: The 'Burbs of Chicago
Posts: 18,306
You got lucky. On the yoke, upper left by the bolt hole, I see a ding and a hangnail on the cap surface that's going to need to be rat tail filed smooth.
#1423
09-10-2015, 09:10 AM

Join Date: Aug 2008
Location: Portland, Or
Posts: 9,097
Couldn't agree more about how lucky you got! If a few dings, and some grease mess is all that happened; you're extremely lucky!
When you get the new driveline, I'd carefully pull a cap off the rear U joint, and see how it fits both side of the yoke. Smooth out the dings so the cap sits in the yoke first. Then put the cap back on the joint and install the driveline.
When you get the new driveline, I'd carefully pull a cap off the rear U joint, and see how it fits both side of the yoke. Smooth out the dings so the cap sits in the yoke first. Then put the cap back on the joint and install the driveline.
#1424
09-10-2015, 09:54 AM
Join Date: Jul 2011
Location: Northern Michigan
Posts: 992
I looked at that spot first after I pulled the straps off. It's actually still smooth on the cap surface(s). The actual ding is off to the inside of the yoke. I'll double check everything beforehand and make sure of course. It was the X pipe that saved the extra carnage and kept the driveshaft in the center underneath and it must've just dropped down and slid out the back. Replacement has arrived already today, relatively clean too. Gonna do my thing first before getting it installed but here it is. Really really really wanted to get it in there and log a few miles today to make sure everything's jivin' but, wouldn't you know it (last pic.) I'll get a few more pics of everything before it goes back in and afterward for concurrence that it's installed properly. I realize and agree about the luck, suppose that does fall into the category of "luck" especially for me and this Camaro. Again, I'll take the good with the bad here. The contact point on the fuel tank is ok, but much harder and I would've been replacing that too. Only other thing I'll need to do under there is remove and reinstall the exhaust after the passenger side muffler. It knocked the tail pip/tip loose from the band clamp.
Off to the dentist, into town for some edibles and kid extraction and I'll get busy this evening on the installation. More to follow.
Off to the dentist, into town for some edibles and kid extraction and I'll get busy this evening on the installation. More to follow.
#1425
09-12-2015, 02:37 PM
ya theres time still i have had mine out in south NH until end of novem.ber early dec ,depending ,you dont have 750 carb .laying around to try out ,have you thought about an electric pump with like 7 8 psi ,i know your pushing some big tlbs an hp there right ,you got that blower too ,that cars looking hot
Last edited by 95 camaro 406; 09-12-2015 at 03:08 PM.
#1426
09-12-2015, 11:11 PM
Join Date: Jul 2011
Location: Northern Michigan
Posts: 992
Appreciate the compliments very much. The Camaro's looking pretty good right now, tryin' to get ready for the show in the morning. Didn't get half as much cleaning done as I wanted to but that's par for the course. Apologies for the delay posting any updates. I just got the driveshaft installed about 9:30 this evening. Didn't get anything done on it the last 2 days. I try really hard to not complain about my back issues but it has beaten me in the war against pain the last couple days. I refuse to let me kids down so I pushed through it today and got as much done as we could. Those kids were just a couple of troopers today helping me get things polished and ready. It was a genuine pleasure to witness their determination and resilience in being a part of this build with me and I loved every second out in the garage with them today.
Here's a few pics of the replacement driveshaft install. I did file the yoke a bit just to make extra certain that the caps would fit good in there, and they do. Clips facing the yoke, in the groove and the straps are back on there. One thing that I noticed was the yoke in the trans seems a little further out than I would like to see. Not much I can do about that though, trans is as far back on the crossmember as it can go. Looking at the "line" of discoloration from where it was installed in the PO's trans tells me it's not much different though. Haven't even test drove it yet, thankfully the show is about a mile and a half from the house. Don't foresee any problems though, I'm confident the new driveshaft is in there right. I'll get a couple pics at the show tomorrow! Thanks much for all the tips and insight gentlemen.
Here's a few pics of the replacement driveshaft install. I did file the yoke a bit just to make extra certain that the caps would fit good in there, and they do. Clips facing the yoke, in the groove and the straps are back on there. One thing that I noticed was the yoke in the trans seems a little further out than I would like to see. Not much I can do about that though, trans is as far back on the crossmember as it can go. Looking at the "line" of discoloration from where it was installed in the PO's trans tells me it's not much different though. Haven't even test drove it yet, thankfully the show is about a mile and a half from the house. Don't foresee any problems though, I'm confident the new driveshaft is in there right. I'll get a couple pics at the show tomorrow! Thanks much for all the tips and insight gentlemen.
#1427
09-13-2015, 12:18 AM
Join Date: Oct 2007
Location: The 'Burbs of Chicago
Posts: 18,306
Good deal man, have fun at the show.
Slip yoke pulled back 3/4" from where it's fully bottomed out is where you want to shoot to have your minimum end play. This is with the tires on the ground and car at normal ride height. Was your picture taken with car supported by the rearend or the body? When the rearend is hanging down (body support), the driveshaft will pull back some.
Slip yoke pulled back 3/4" from where it's fully bottomed out is where you want to shoot to have your minimum end play. This is with the tires on the ground and car at normal ride height. Was your picture taken with car supported by the rearend or the body? When the rearend is hanging down (body support), the driveshaft will pull back some.
#1428
09-13-2015, 07:00 AM
Join Date: Jul 2011
Location: Northern Michigan
Posts: 992
Yes I supported it on the frame rails and not the rear end. Actually, I did wonder about that being the case, I noticed the exhaust was closer to the rear end than when it's on the ground also. Is there a maximum end play? There's no way I can get under there with the car on the ground, but when I lift the car it's usually supported at the rear end. Needed the extra height on the body this time so I had room to clean under there.
Just realized another lesson was unintentionally learned today. That would be - Don't wait until early morning in mid September to try and wipe polish off chrome and polished aluminum. There's a good chance it'll be 35 degrees, foggy and all metal will be covered in heavy dew/condensation!! That will most certainly render your spastic wiping useless. Thankful registration occurs over the next 3 hours, but it's a chilly one this morning. Think I'm forced to fire up the heater out there pretty quick here. Might as well let the kids sleep for another hour or so and go try to dry things up a bit out there. Looks like I'll be the guy that's cleaning his car while the show is happening. Oh well.
Again, thank you for the help in getting this setback sorted out one and all! Here's a pic of the new and improved (now with 400% more element) air cleaner/filter assembly. Think I'll toss the shotgun setup in the trunk of the Camaro and try to off it at the show.
#1429
09-13-2015, 12:17 PM
yes nice enjoy ,i went to some shows this year ,but have to wait till next.year now to enter my car ,. thats a long .story
#1430
09-13-2015, 04:34 PM
Join Date: Jul 2011
Location: Northern Michigan
Posts: 992
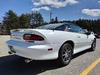
Back from the show and I'm proud to announce that it was a total success! Didn't win anything (surprise surprise with the body looking the way it does) but to see the kids smiling and talking to the old timers answering questions about the car was just awesome. As hoped, the kids got more compliments than me. We racked up a total of 2.8 miles on the replacement driveshaft and no issues to report. Perfect day for a show, mid 60's and nothing but sun, we had a good time. There was a '69 Nova there that was beyond gorgeous. Should've taken best of show without a question but ended up with 20th place. Voting was a bit tilted toward the locals that've known each other forever. Anyway, so far so good with the replacement driveshaft. I might take a cruise in a while and just get a few more miles on everything. It's perfect cruising weather and we're runnin' outta time in a hurry up here to cruise! Here's a couple pics from the show.