
New Build Thread?


#82
 10-23-2011 | 05:07 PM

Second Generation Moderator
Feb 2010 ROTM winner
Jan 2013 ROTM winner
Feb 2010 ROTM winner
Jan 2013 ROTM winner
Joined: Aug 2008
Posts: 9,097
From: Portland, Or
ROTM Winner's Club
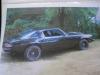
OK so who knows...Are the tail spoilers different for different years. My car is an LT some one aded the spoiler. I have never been able to adjust it right. I don't know if it is from the quarters being added(though they look good) Poorly or a wrong year, or a mismatched set.
It may be difficult to see in the pics.
It may be difficult to see in the pics.
You will probably have to remove the spoiler (once you see which way it needs to move) and drill the holes larger with a step bit to allow enough movement to get them aligned. If you remove the nuts and washers inside you can see if the stud is hitting the edge of the hole and then you'll know which direction to open the hole.
After you've got them opened and it's aligned, then you can add some sealer underneath and a larger fender washer if it's needed to cover the oversized hole. I've done a few of these for guys, and it's not hard to adjust them once the holes have some play.
It looks like your trunk lid needs to be raised, and also moved forward. How's the gap on the top by the valance?
They do make different spoilers, but if you had the wrong early spoiler it would cover the tailights on the corners.
Last edited by 1971BB427; 10-23-2011 at 05:11 PM.
#83
10-23-2011 | 07:21 PM
Thread Starter
|
2nd Gear member
Joined: Oct 2011
Posts: 527
From: so NJ
The door panels are custom. I have no inner door latches. Just buttons. I can't use std panels. I think I will be covering them. Polished alum is always dirty and it is flimsey. It rattles. I have "Thermo-Coustic" from Eastwood behind them also.
BB I would drill if it was that easy. It doesn't show in the pics but if the top is bad, the bottom is good. trunk lid is very close. I have another trunk lid I may try that. I'm not sure how much I can sand off the spoiler, are they solid?
BB I would drill if it was that easy. It doesn't show in the pics but if the top is bad, the bottom is good. trunk lid is very close. I have another trunk lid I may try that. I'm not sure how much I can sand off the spoiler, are they solid?
#84
10-23-2011 | 09:44 PM
Second Generation Moderator
Feb 2010 ROTM winner
Jan 2013 ROTM winner
Feb 2010 ROTM winner
Jan 2013 ROTM winner
Joined: Aug 2008
Posts: 9,097
From: Portland, Or
ROTM Winner's Club
The door panels are custom. I have no inner door latches. Just buttons. I can't use std panels. I think I will be covering them. Polished alum is always dirty and it is flimsey. It rattles. I have "Thermo-Coustic" from Eastwood behind them also.
BB I would drill if it was that easy. It doesn't show in the pics but if the top is bad, the bottom is good. trunk lid is very close. I have another trunk lid I may try that. I'm not sure how much I can sand off the spoiler, are they solid?
BB I would drill if it was that easy. It doesn't show in the pics but if the top is bad, the bottom is good. trunk lid is very close. I have another trunk lid I may try that. I'm not sure how much I can sand off the spoiler, are they solid?
#85
10-24-2011 | 02:18 PM
Thread Starter
|
2nd Gear member
Joined: Oct 2011
Posts: 527
From: so NJ
Not a ton of excitement today. I patched a hole in the lower passenger side heater box. Should there be a drain hole here?
Next I spent some time straightening the seam where the firewall meets the panel in front of the windshield. This seam was all wavy and took some time with a hammer and dolly.Then I ground it flat and even.
Next I spent some time straightening the seam where the firewall meets the panel in front of the windshield. This seam was all wavy and took some time with a hammer and dolly.Then I ground it flat and even.
#86
10-30-2011 | 05:36 AM
Thread Starter
|
2nd Gear member
Joined: Oct 2011
Posts: 527
From: so NJ
Not a ton of excitement on The car, had a busy week at work. AND we have Snow!!! Slushy yucky stuff.
I tested all the wiring today before I make any thing permanent. Then I'm buttoning up the false firewall. The master and boooster and wiper motor are painted Also the firewall is painted.
I'll be starting on the cowl after I finish teh firewall. Looks as though sanding in those holes willl be fun
I tested all the wiring today before I make any thing permanent. Then I'm buttoning up the false firewall. The master and boooster and wiper motor are painted Also the firewall is painted.
I'll be starting on the cowl after I finish teh firewall. Looks as though sanding in those holes willl be fun
