CRU!NCH TIME - 73 Z28 Build
#101
 06-07-2011, 08:52 AM


Join Date: Aug 2008
Location: Portland, Or
Posts: 9,097
Once you've tacked it all in like you did, you can weld away and not warp metal that thick. Metal under 1/8" should always be tack welded the entire length. Things like sheetmetal patch panels just take hundreds of tiny tack welds until they all connect, to ensure they wont warp.


#103
06-08-2011, 10:10 AM

Yeah I wasn't too worried about warping anything thing at that time. However I am rewelding some of the old welds and I am only doing 6 inches at a time. and going from side to side letting it cool in between. I'm sure it's fine.
thanks, Got to love the grinding.
I remember seeing your mounts those look really cool. But I already got some new energy suspension rubber mounts to replace the old rubbers. They actually came with the LT1 when I bought it.
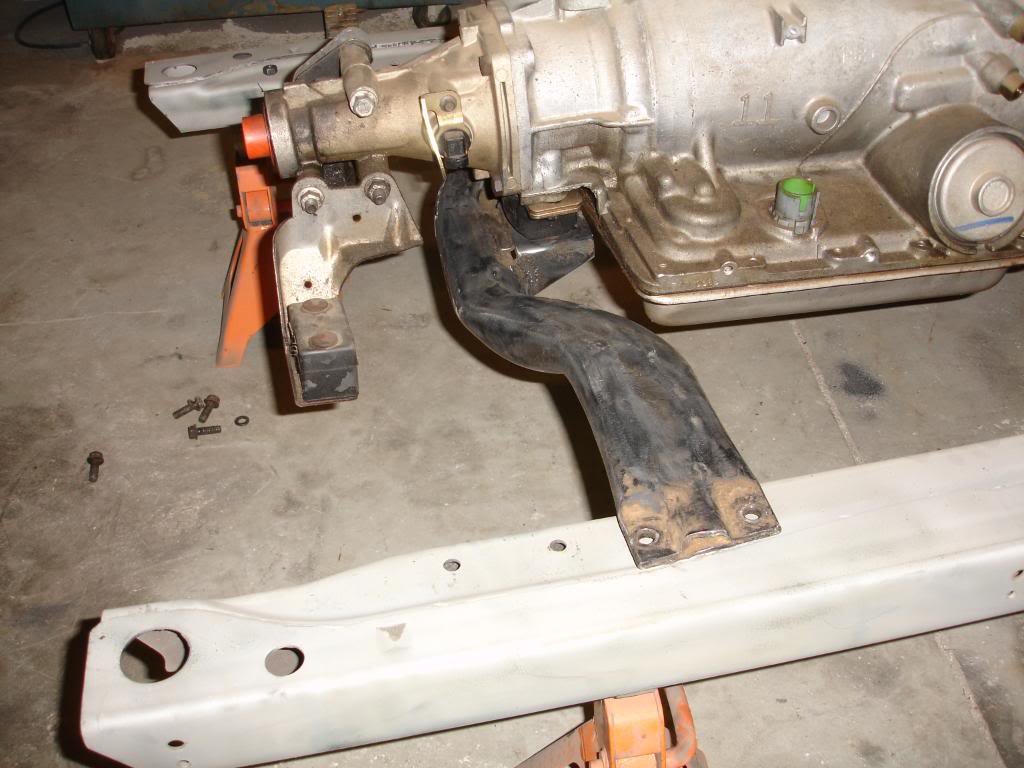
During the test fitting I found the old trans cross member wasn't goin to work. unless I drilled new holes and flipped the perch on the opposite side. which would have been fine, a pretty easy task. But of course I got this idea in my head that I could just build one myself. I think it was mostly cause I just wanted to weld on something. So I bought some metal and went to it.
here's the issue
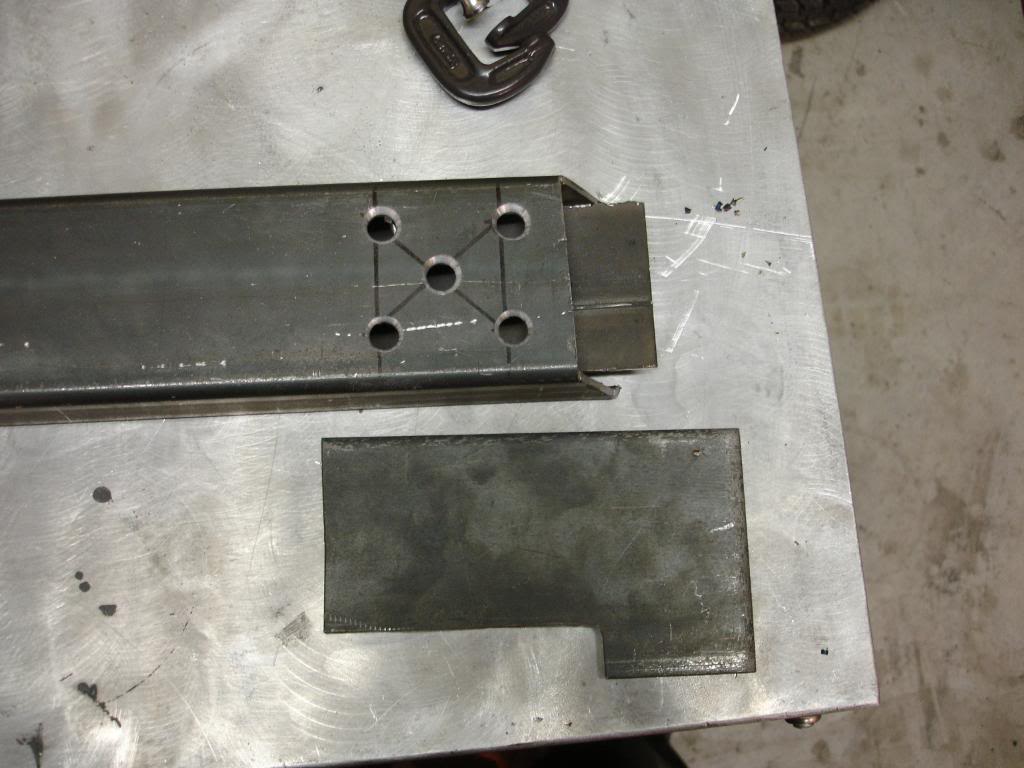
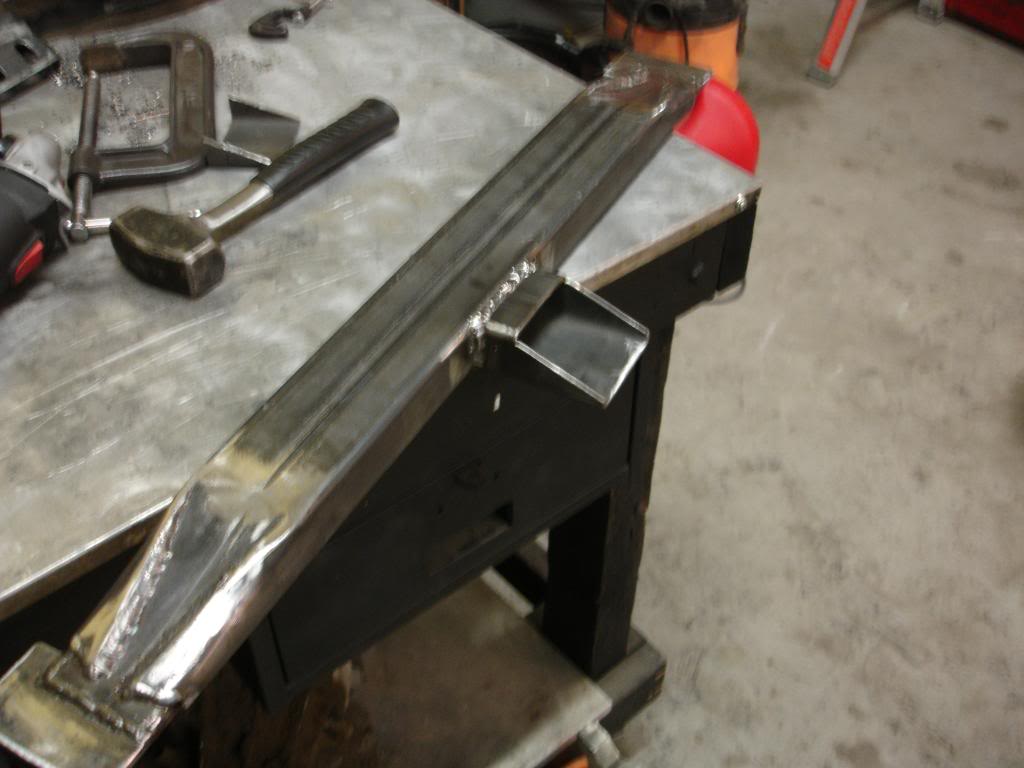
So I started with a 3' piece of 2x4 and 4"x12" steel plate
I cut these out of the plate

Just to get a first look at the comparison or what I'm doing
Drilled some holes which i'll weld up
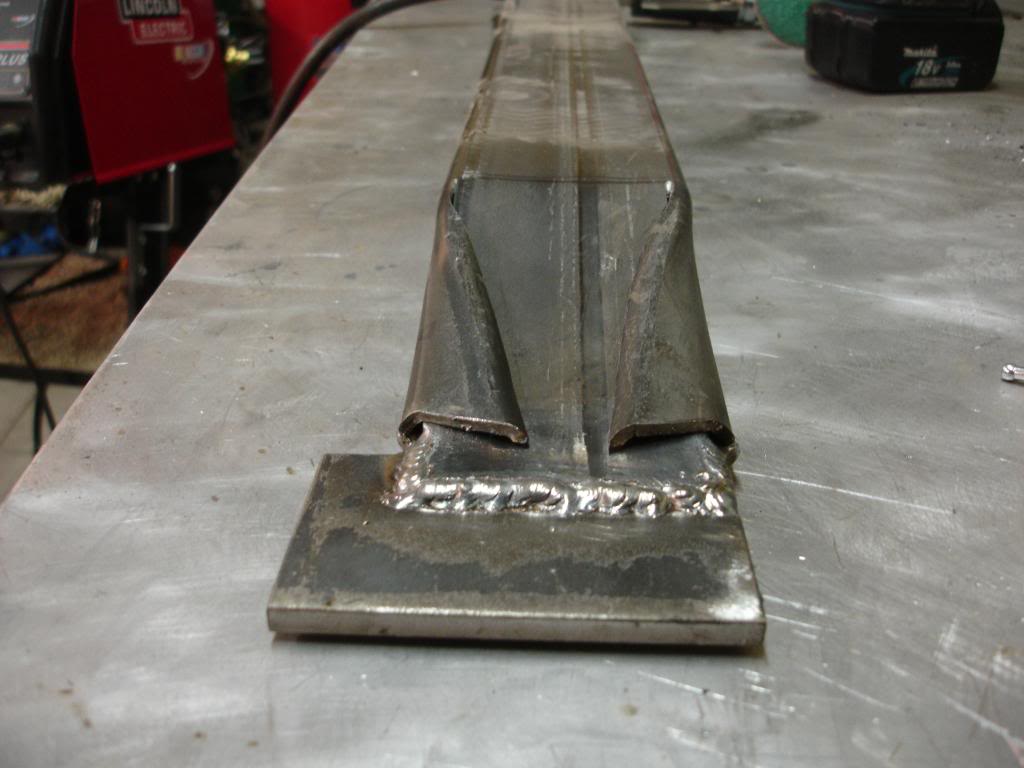
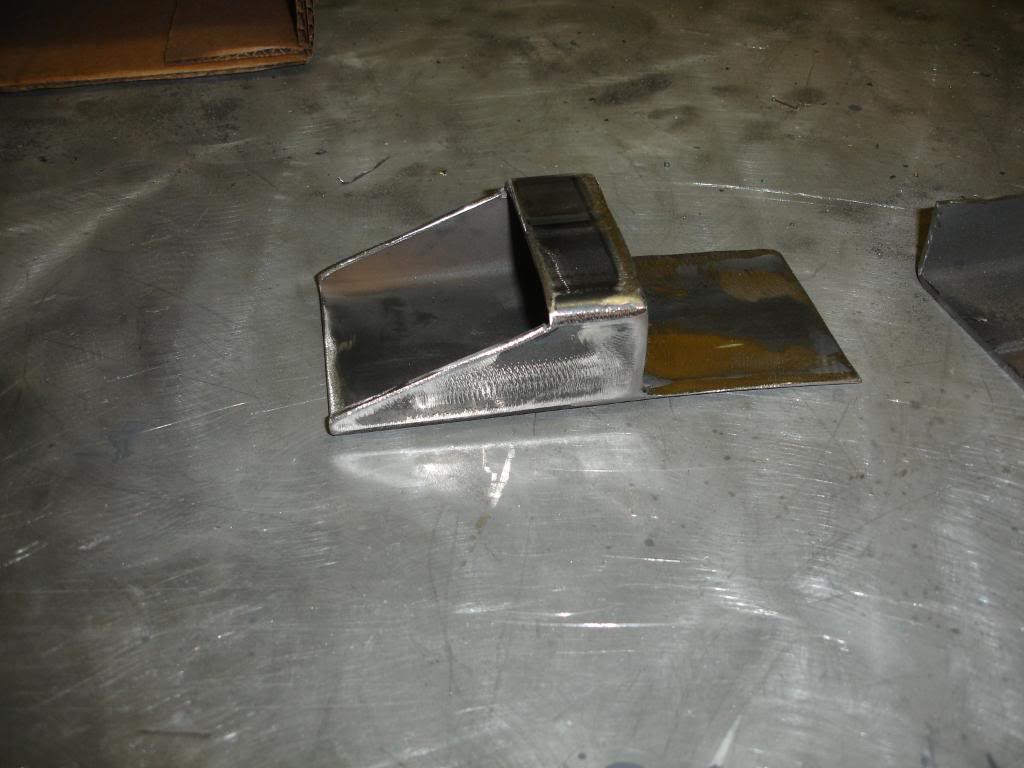
I slit the sides and used c-clamp to press this down and welded it.
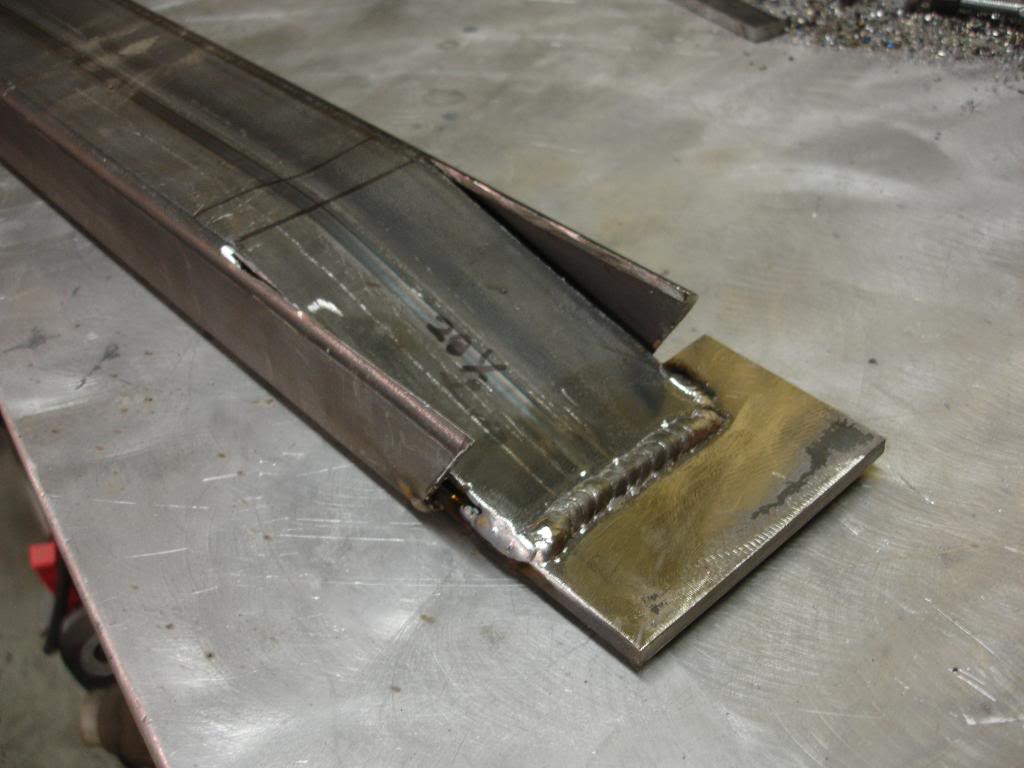
originally I was going to cut off the sides but I decided to bend them over and weld them thinking it would make it stronger.
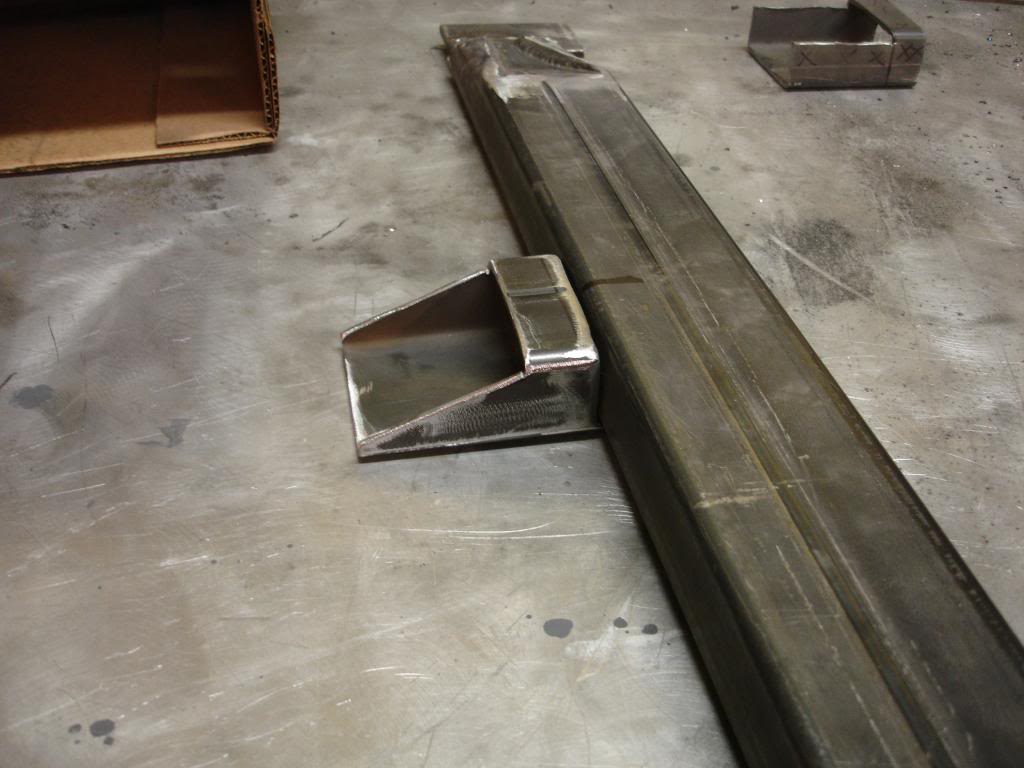
Garbage looking weld ^^^ I could not keep the wire from sticking in the tip. driving me Freaking crazy! (I'm glad I got it fixed now)
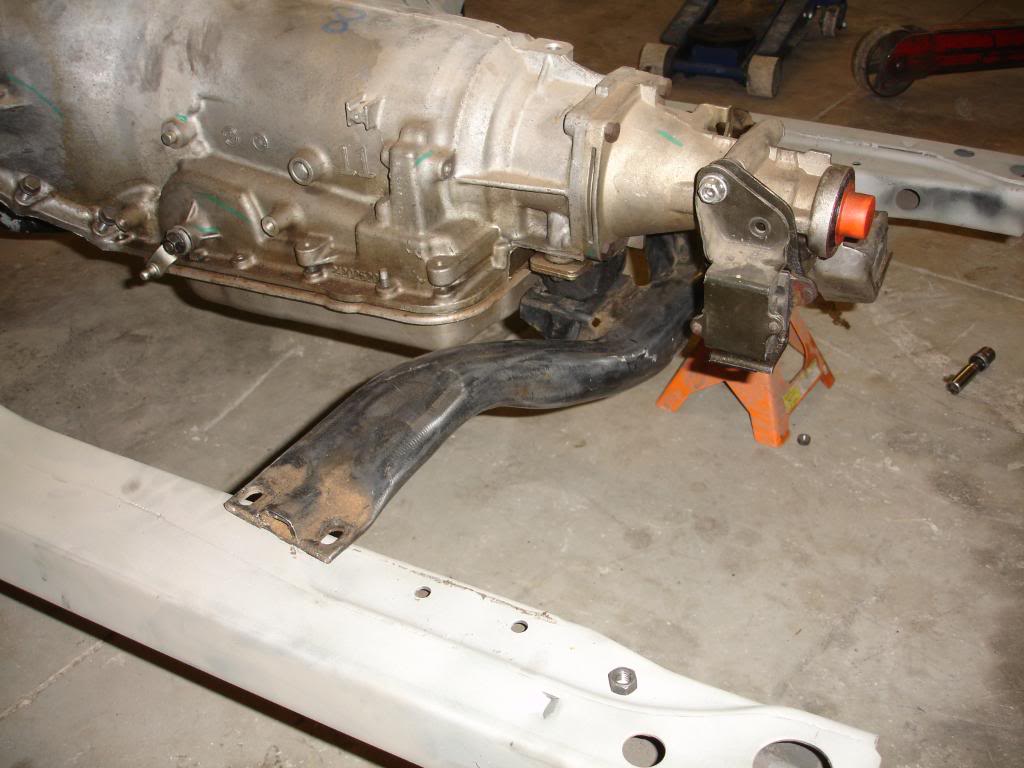
Both sides done and compared to the old one
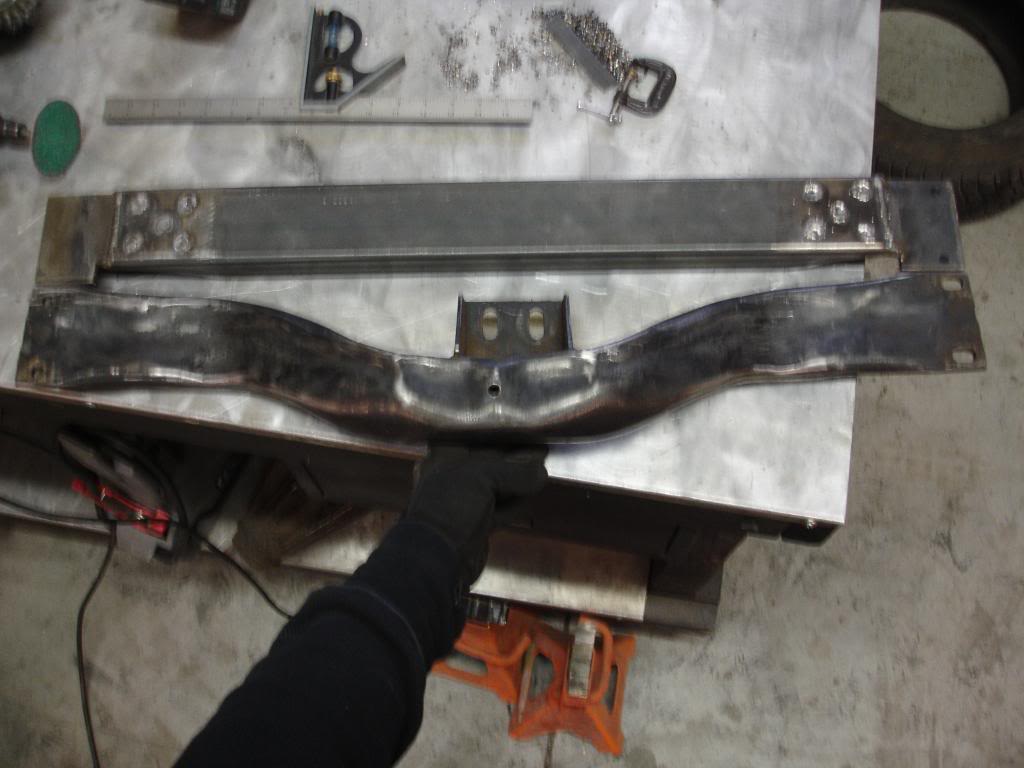
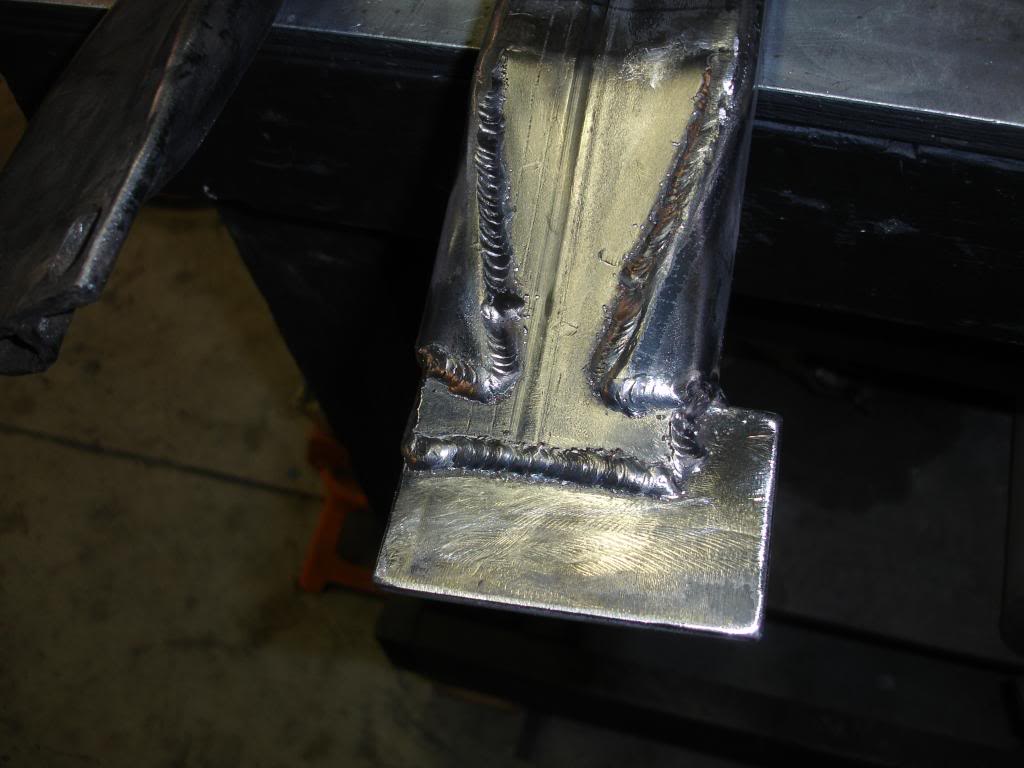
I had to bend it down so it would clear between the floor and subframe. you can see they are pretty close to the same. I figured if the original one fit under there Thats how I should make the new one.
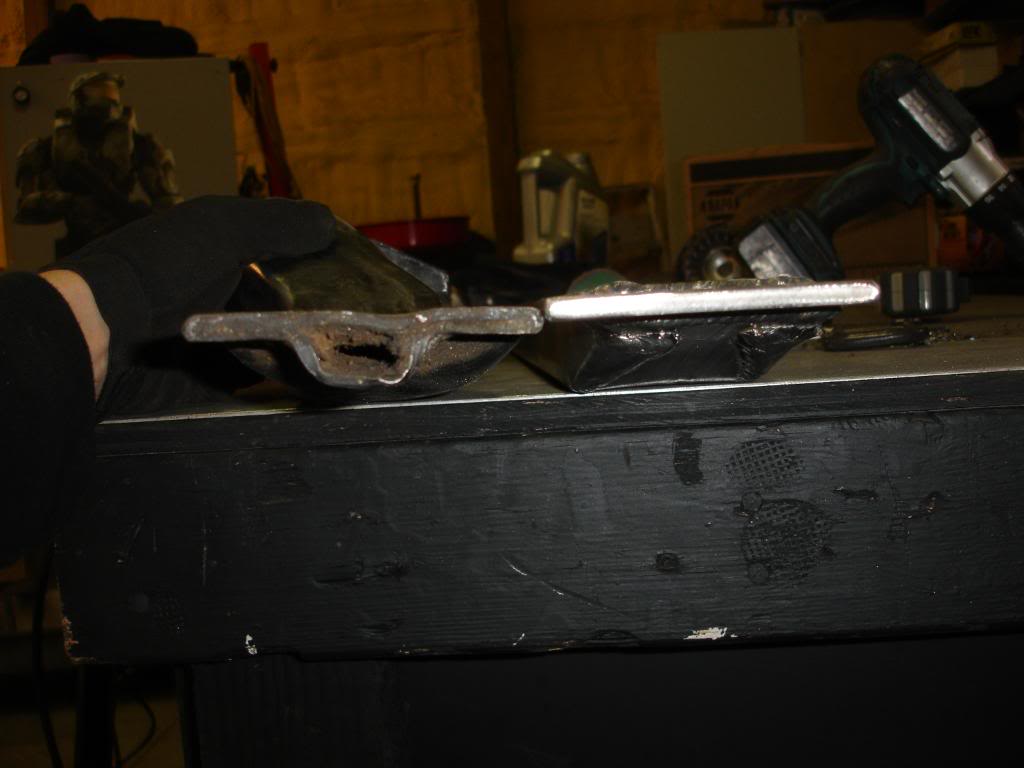
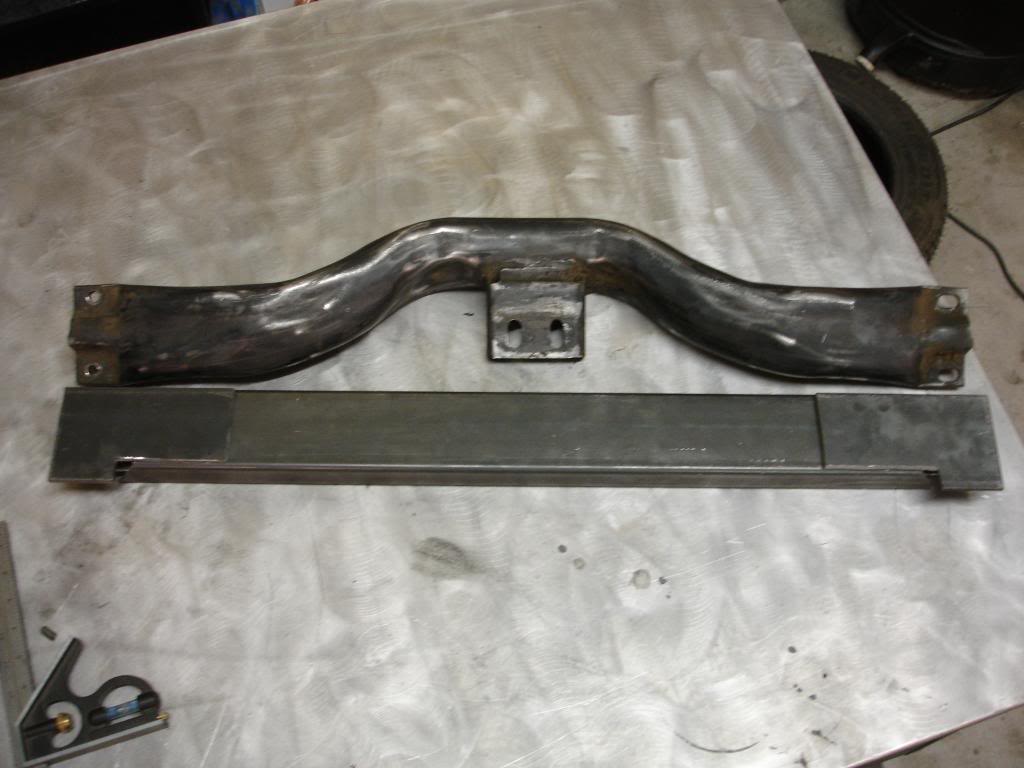
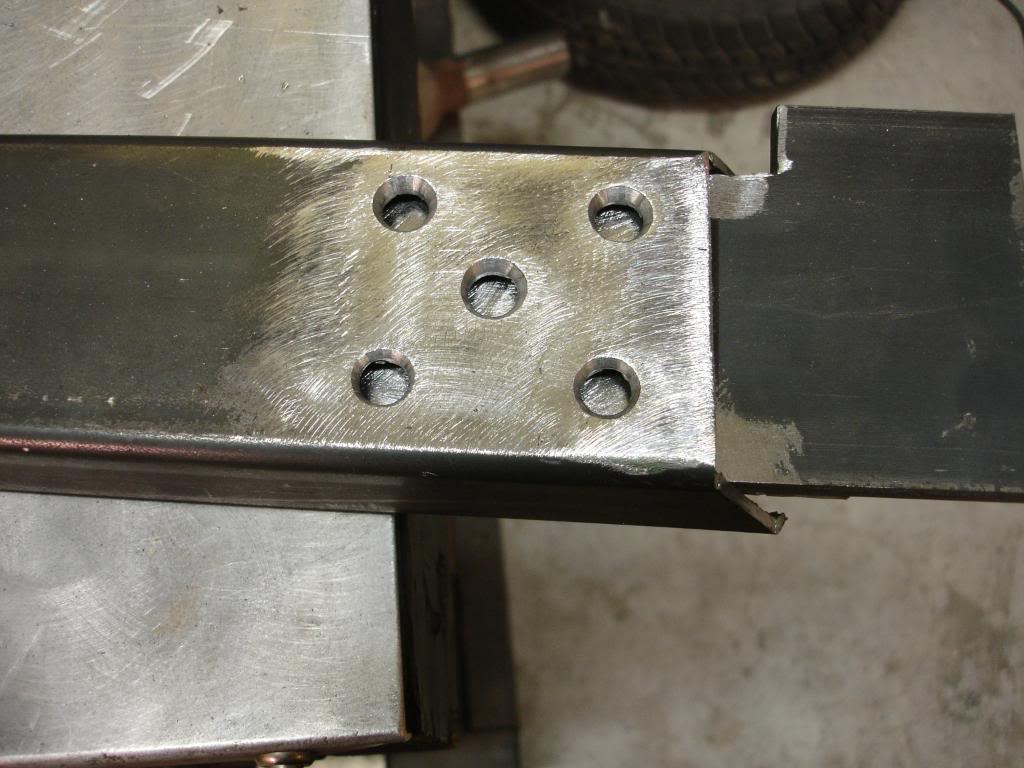
Here is the transmission perch I made.
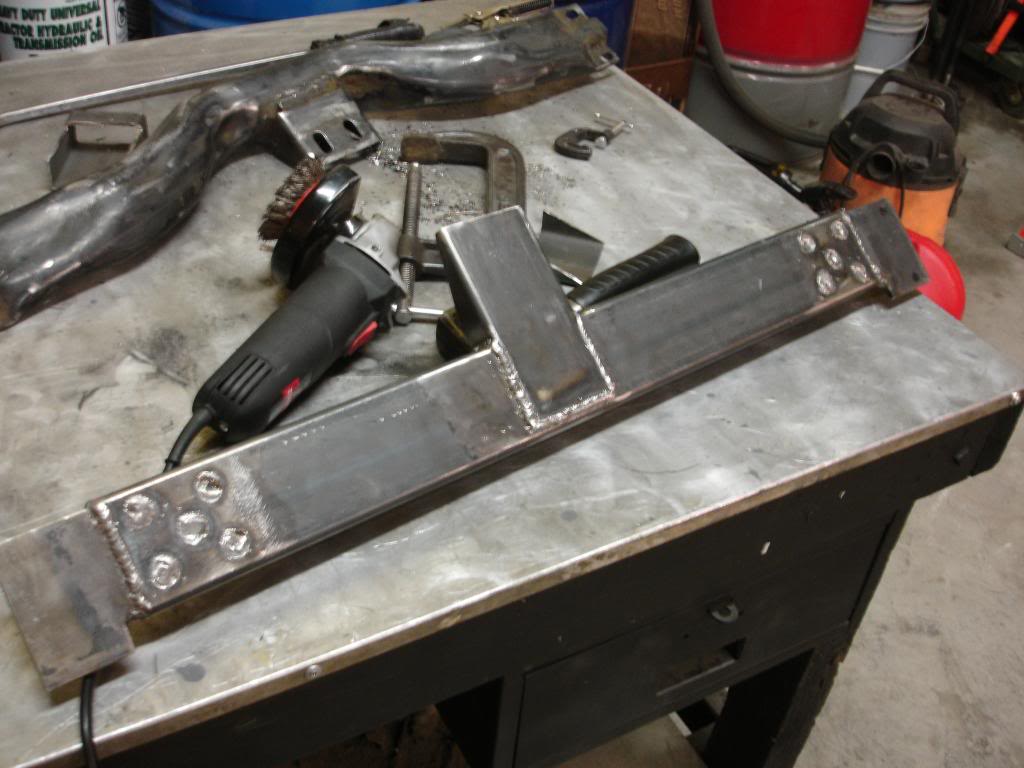
Perfect fit!
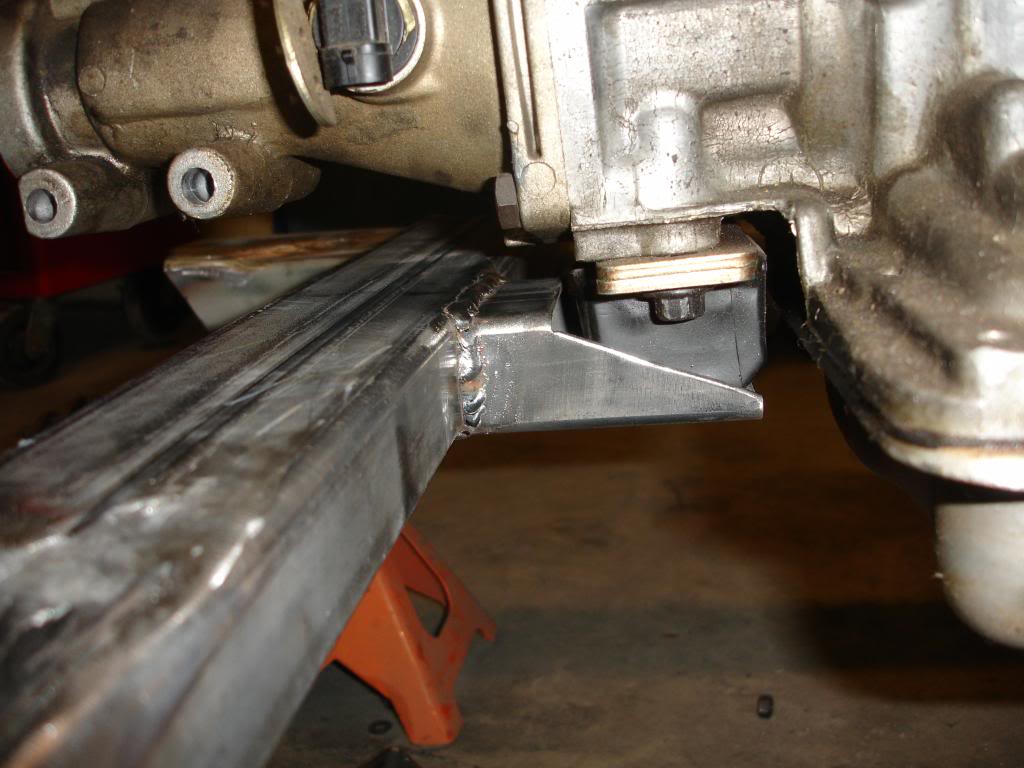
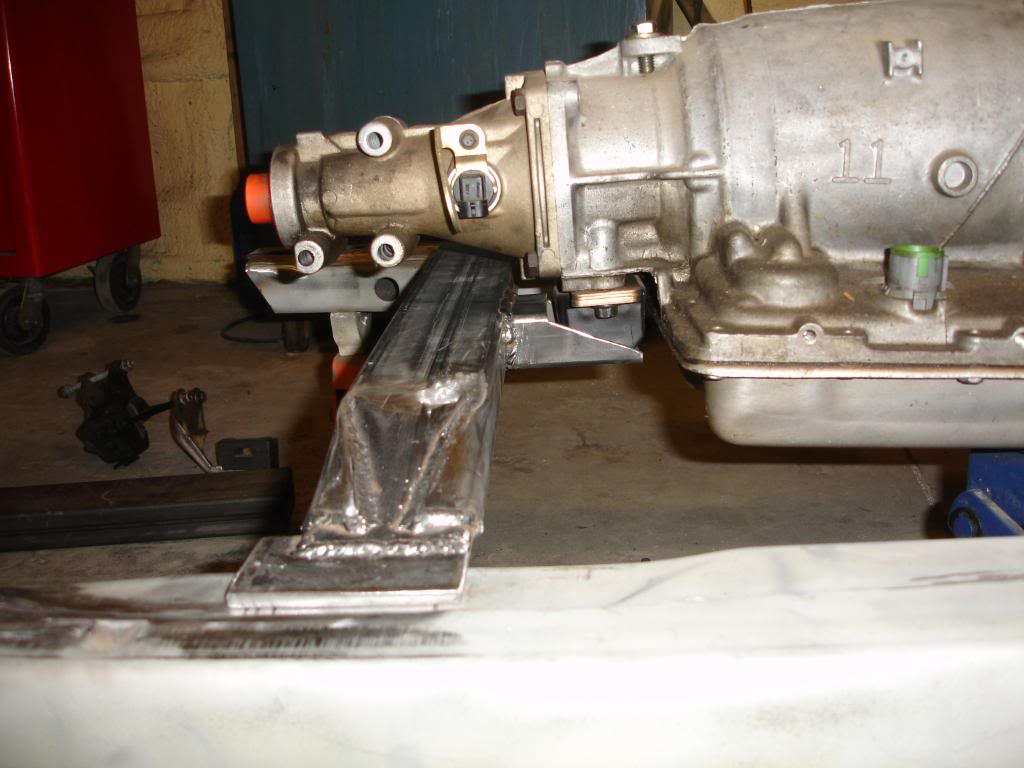
I think it came out all right it looks a little funky. I think I'll call it my "first draft". perch is at the same height as the original, which is almost level with the top of the subframe. however I don't know if it's at the right spot for the 4L60. I'll check drive line angles when I get the subframe on. I'm sure I'm going to have to adjust it. The transmission may not even clear the tunnel at that height. but I'll cross that bridge with it comes. made this one as close to the original one as i could.
77nomad Nice work. The grinding was nice too, said by some one who knows about sanding metal. You can gain a ton with solid mounts like mine.
I remember seeing your mounts those look really cool. But I already got some new energy suspension rubber mounts to replace the old rubbers. They actually came with the LT1 when I bought it.
During the test fitting I found the old trans cross member wasn't goin to work. unless I drilled new holes and flipped the perch on the opposite side. which would have been fine, a pretty easy task. But of course I got this idea in my head that I could just build one myself. I think it was mostly cause I just wanted to weld on something. So I bought some metal and went to it.
here's the issue
So I started with a 3' piece of 2x4 and 4"x12" steel plate
I cut these out of the plate
Just to get a first look at the comparison or what I'm doing
Drilled some holes which i'll weld up
I slit the sides and used c-clamp to press this down and welded it.
originally I was going to cut off the sides but I decided to bend them over and weld them thinking it would make it stronger.
Garbage looking weld ^^^ I could not keep the wire from sticking in the tip. driving me Freaking crazy! (I'm glad I got it fixed now)
Both sides done and compared to the old one
I had to bend it down so it would clear between the floor and subframe. you can see they are pretty close to the same. I figured if the original one fit under there Thats how I should make the new one.
Here is the transmission perch I made.
Perfect fit!
I think it came out all right it looks a little funky. I think I'll call it my "first draft". perch is at the same height as the original, which is almost level with the top of the subframe. however I don't know if it's at the right spot for the 4L60. I'll check drive line angles when I get the subframe on. I'm sure I'm going to have to adjust it. The transmission may not even clear the tunnel at that height. but I'll cross that bridge with it comes. made this one as close to the original one as i could.
Last edited by JmeZ28; 06-08-2011 at 03:18 PM.
#104
06-10-2011, 10:38 AM
I'm getting really close to my deadline I set for myself.  I'm starting to get worried I'm not going to make it. Last night I was up till 3:30am this morning working on the wiring. I decided to start over with the instrument panel wiring harness (I/P)! I started cutting wires out of this thing way back in 2007, I cut out stuff I wish I didn't now. I bought another I/P harness off eBay for $115. If I could only stop taking 2 steps back with everything I do I think I think my goal might have been a little more realistic.
I think I'm just going to route all the wiring and plug it all in, and not cut anything out. bolt up the subframe, fuel tank and engine and let it rip and see if she'll fire up.
Today I'm going to be finishing up the subframe and cutting out the windshield to have better access to the dash. At first I was going to just modify the 4th gen dash to fit the car now I think it's going to be easier to just modify the car to fit the dash. I also hope to pick up the floor bracket out of 4th gen t/a so I can easily mount the shifter, park brake handle and center console.
Lot to do so little time.
Last edited by JmeZ28; 06-10-2011 at 10:41 AM.
#105
06-14-2011, 12:36 AM
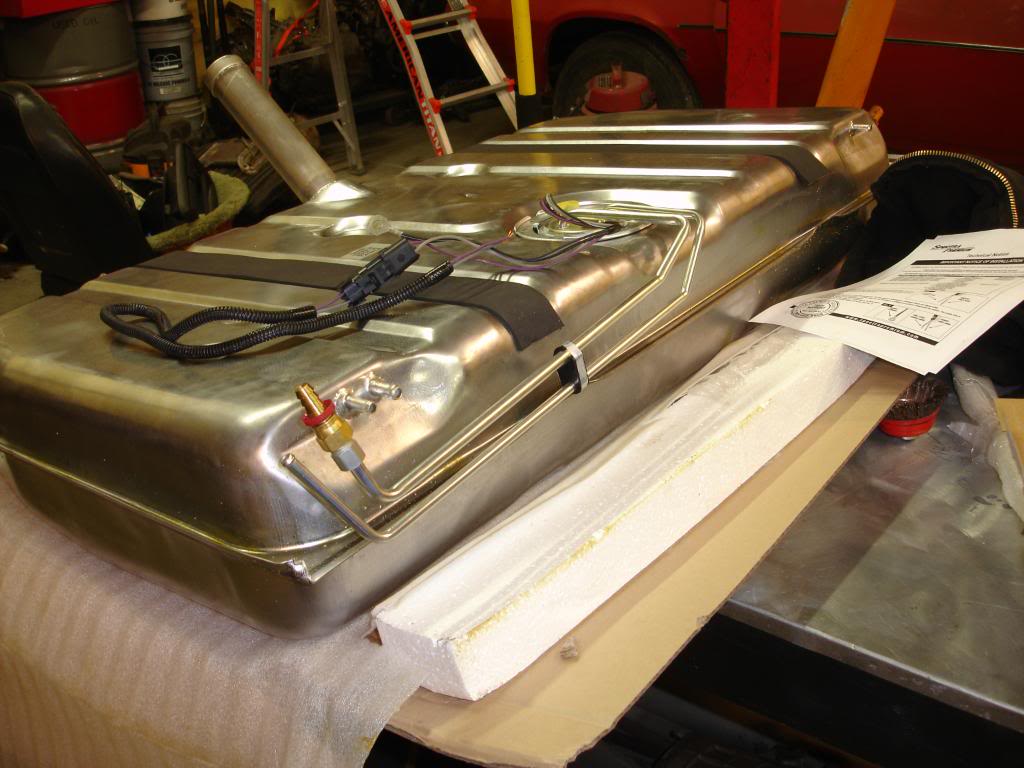
Got the new fuel tank last week finally got some pics of it.
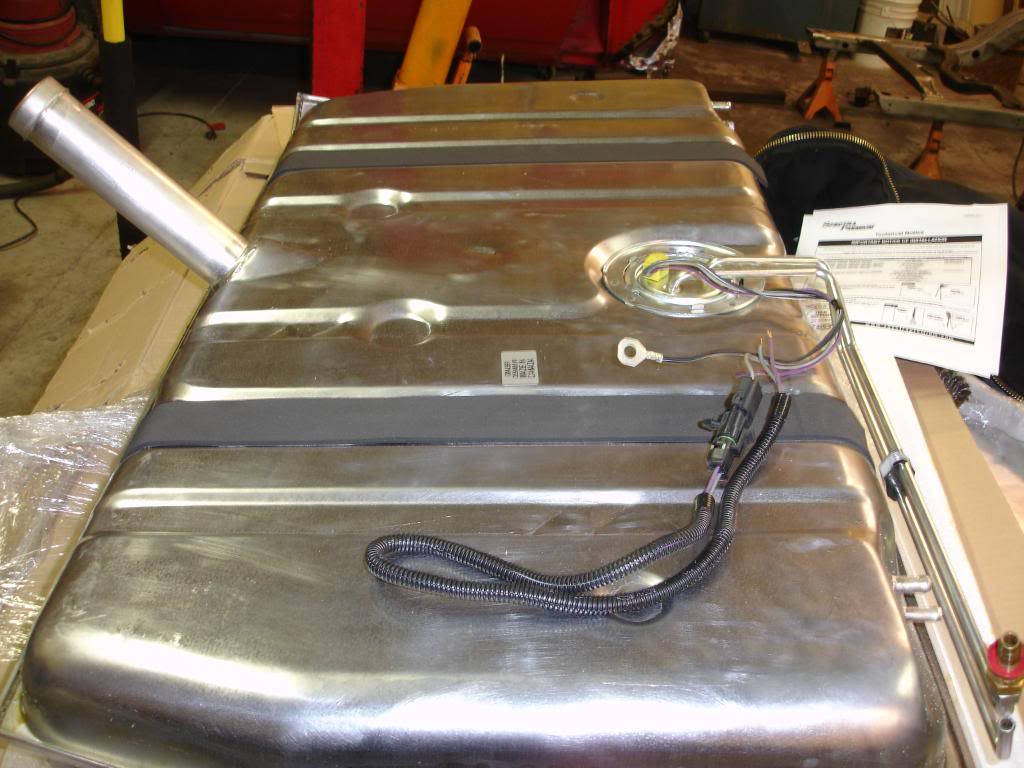
I wasn't feeling like modifying the factory tank to install an electric fuel pump. So I went the easy route. now I just need fuel lines.
I wasn't feeling like modifying the factory tank to install an electric fuel pump. So I went the easy route. now I just need fuel lines.

#107
06-14-2011, 01:08 AM
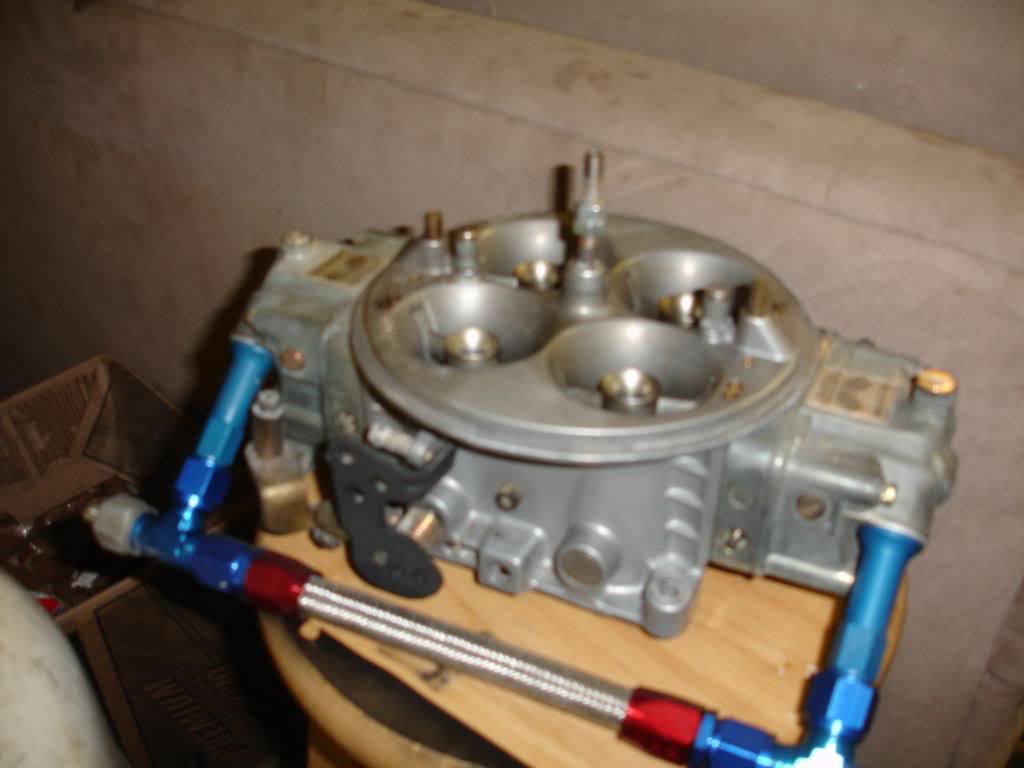
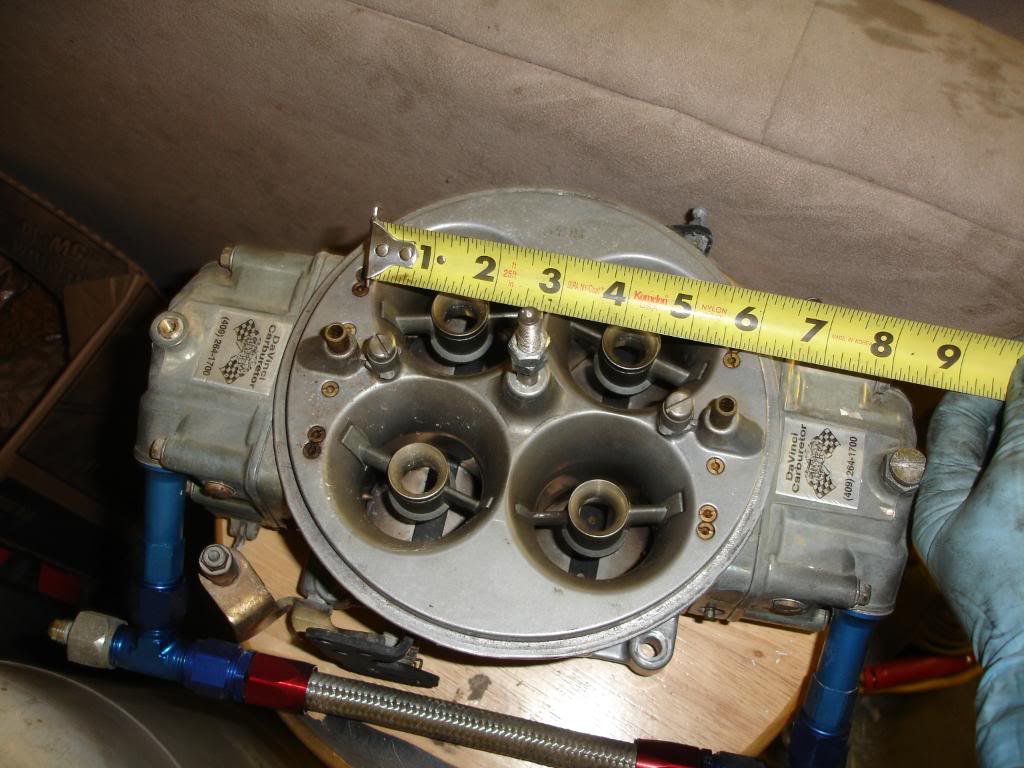
I didn't work on the Camaro last weekend. I helped my Girl's Dad disassemble his Chevy II so It can be painted again. He had the car down at Bandimere speedway running down the 1/4 mile when it cut out and died half way down the track. something happened to the carburetor. It leaked fuel everywhere and not aware this had happened when he tried to start it, it burst into flames. They put the fire out right away he thought at first he had lost everything but it looks like it will be salvageable. This car is ridiculous in every way. 830hp 22" wide tires in the back and a fiberglass body.
The car has been already striped of most of the chrome and what not. we just got the engine out.
IT's a dam shame this happened this car was perfect! A show car and hella fast.

He took off the wheel before he brought it over they are mind blowing big
We had to cut and rip the carpet out to remove the tunnel it was glued to the floor. there was burnt wires under the dash and on the floor it got super hot in there.
Get ready to start drooling when you see this engine!
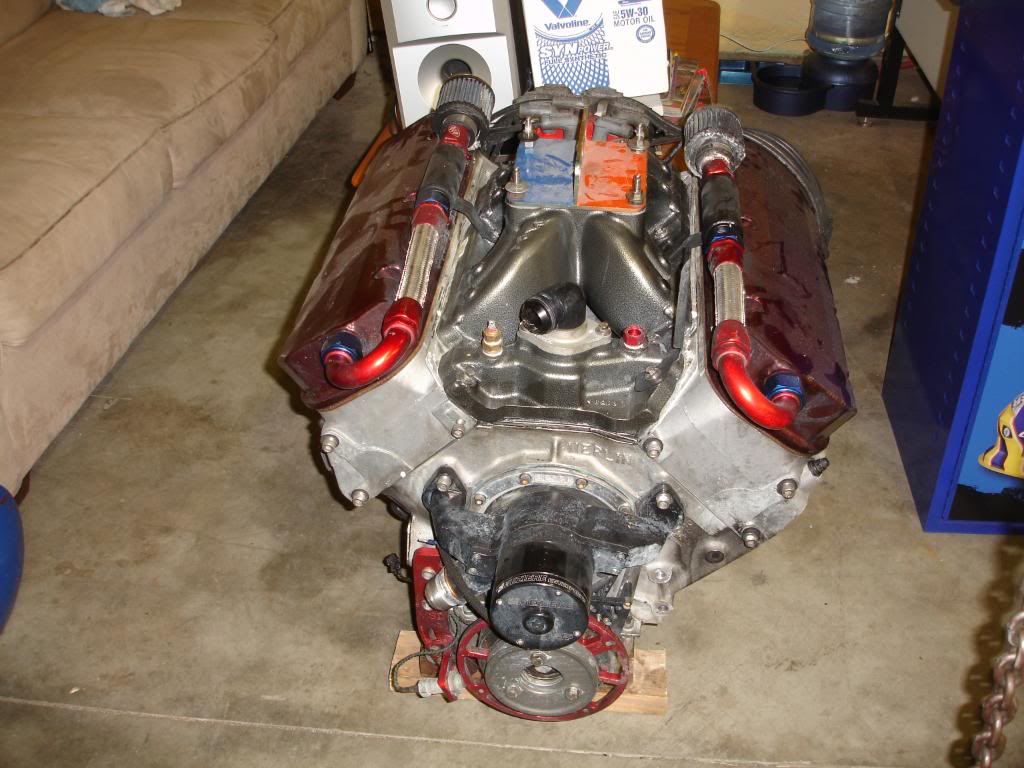
I hate carburetors with a passion but this this is amazing its freakin huge.
Got the front clip off. it's all one piece. He took off the wheels and got some from a junk yard. I'm guess to avoid overspray.
I'm sure the amount of money it's going to take to get it back to were it was is pry more than I'll put in my car over the next 5 years. Thats not saying much, but just the paint job is estimated $10,000...
I always hoped that someday I would get to work on this thing. I just wish it was under better circumstances.
The car has been already striped of most of the chrome and what not. we just got the engine out.
IT's a dam shame this happened this car was perfect! A show car and hella fast.
He took off the wheel before he brought it over they are mind blowing big
We had to cut and rip the carpet out to remove the tunnel it was glued to the floor. there was burnt wires under the dash and on the floor it got super hot in there.
Get ready to start drooling when you see this engine!
I hate carburetors with a passion but this this is amazing its freakin huge.
Got the front clip off. it's all one piece. He took off the wheels and got some from a junk yard. I'm guess to avoid overspray.
I'm sure the amount of money it's going to take to get it back to were it was is pry more than I'll put in my car over the next 5 years. Thats not saying much, but just the paint job is estimated $10,000...
I always hoped that someday I would get to work on this thing. I just wish it was under better circumstances.
Last edited by JmeZ28; 06-14-2011 at 03:12 PM.
#108
06-14-2011, 01:15 AM
Thanks, I was pretty proud of myself in all being a novice welder. But then I went to car show at Pinkee's hot rod shop, and I saw what a professional fabricators can do, I realize it's pretty not so pretty lol. it will work for the time being till I can remake it better. work in progress of course, I can never seem to be happy with anything for to long.
Last edited by JmeZ28; 06-14-2011 at 01:17 AM.
#110
06-26-2011, 03:32 PM
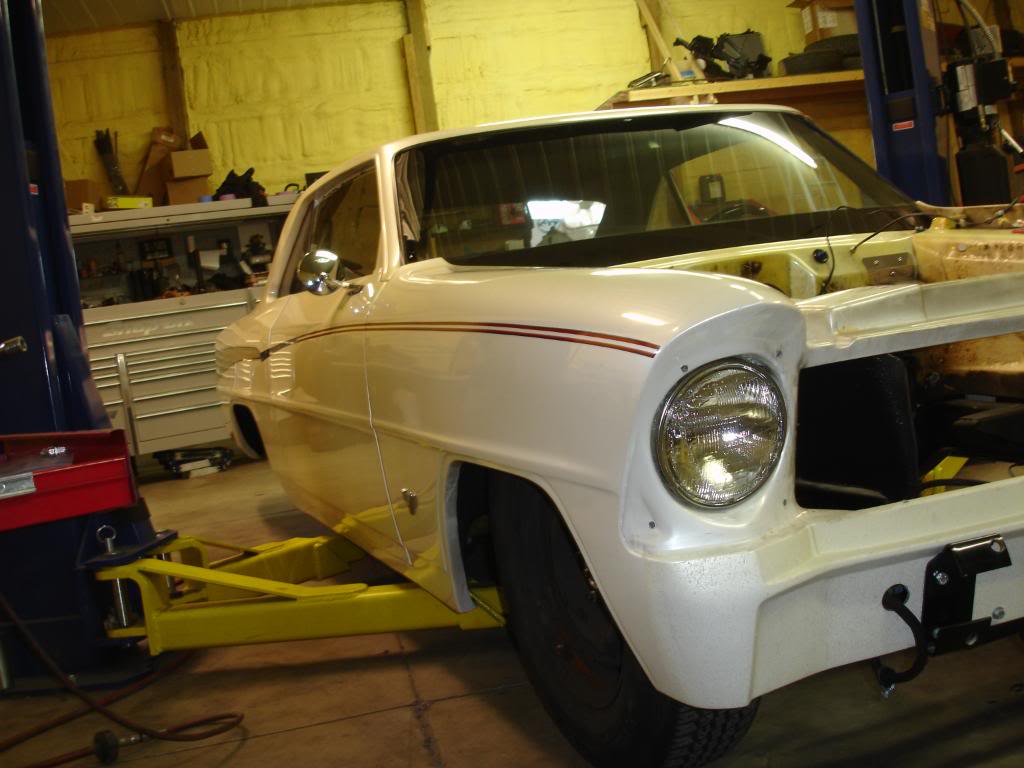
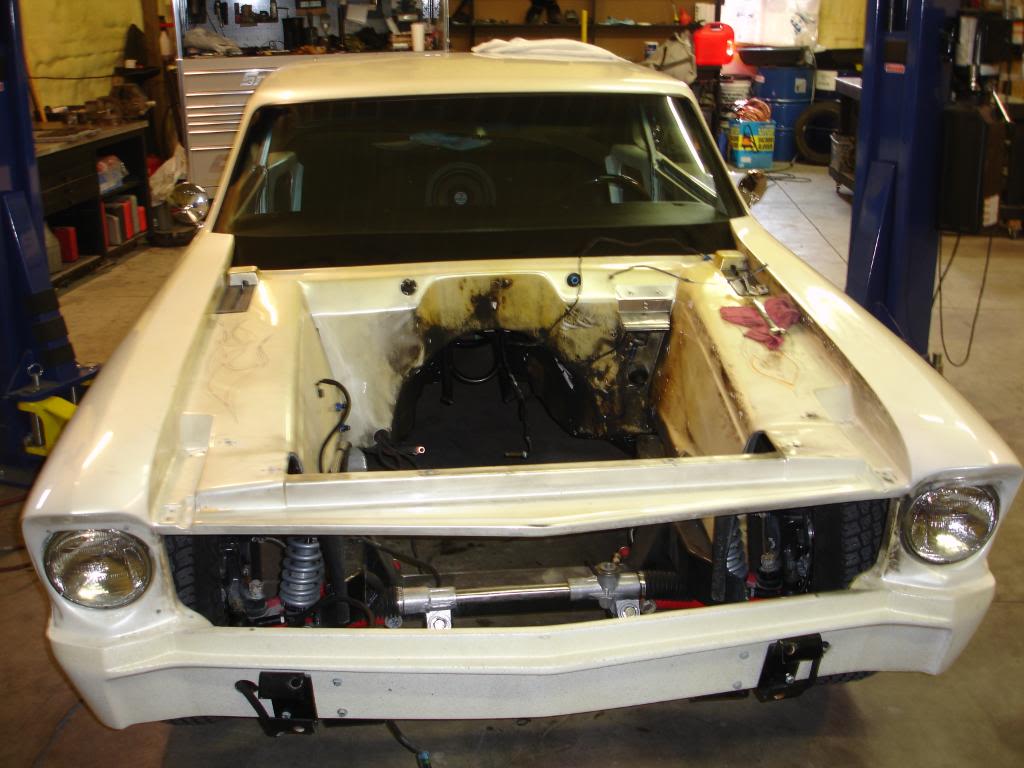
I'm in Vegas! Before I left I dropped the subframe off at the powder coaters, and ordered all the fuel lines and fittings. Earl's performance plumbing. I got the Black nylon braided hose and all black fittings and adapter to hook up to the LT1 fuel rail. I'll have the subframe done and the fuel line stuff at my house when I get back Tues. so I'm taking the week off when I get back to get this thing started by the 1st!
Last edited by JmeZ28; 07-02-2011 at 02:17 AM.