
1970 build....


Second Generation Moderator
Feb 2010 ROTM winner
Jan 2013 ROTM winner
Feb 2010 ROTM winner
Jan 2013 ROTM winner
Joined: Aug 2008
Posts: 9,097
From: Portland, Or
ROTM Winner's Club
My favorite engine color too! I have all of mine painted black, and they stay looking good a lot longer! I use those same Moroso solid mounts too. I love not worrying about mounts separating, and the small vibration transferred is acceptable to me.
I kinda enjoy putting engines together. I like checking ring, and bearing clearances, and fitting things. It's kinda therapeutic to me, and fun to watch it all come together.
I kinda enjoy putting engines together. I like checking ring, and bearing clearances, and fitting things. It's kinda therapeutic to me, and fun to watch it all come together.
Second Generation Moderator
Feb 2010 ROTM winner
Jan 2013 ROTM winner
Feb 2010 ROTM winner
Jan 2013 ROTM winner
Joined: Aug 2008
Posts: 9,097
From: Portland, Or
ROTM Winner's Club
I've heard some of the aftermarket hubs add 1/2"-3/4" to each side on the track width.

Thread Starter
|
In the Staging Lanes
Joined: Dec 2008
Posts: 73
From:
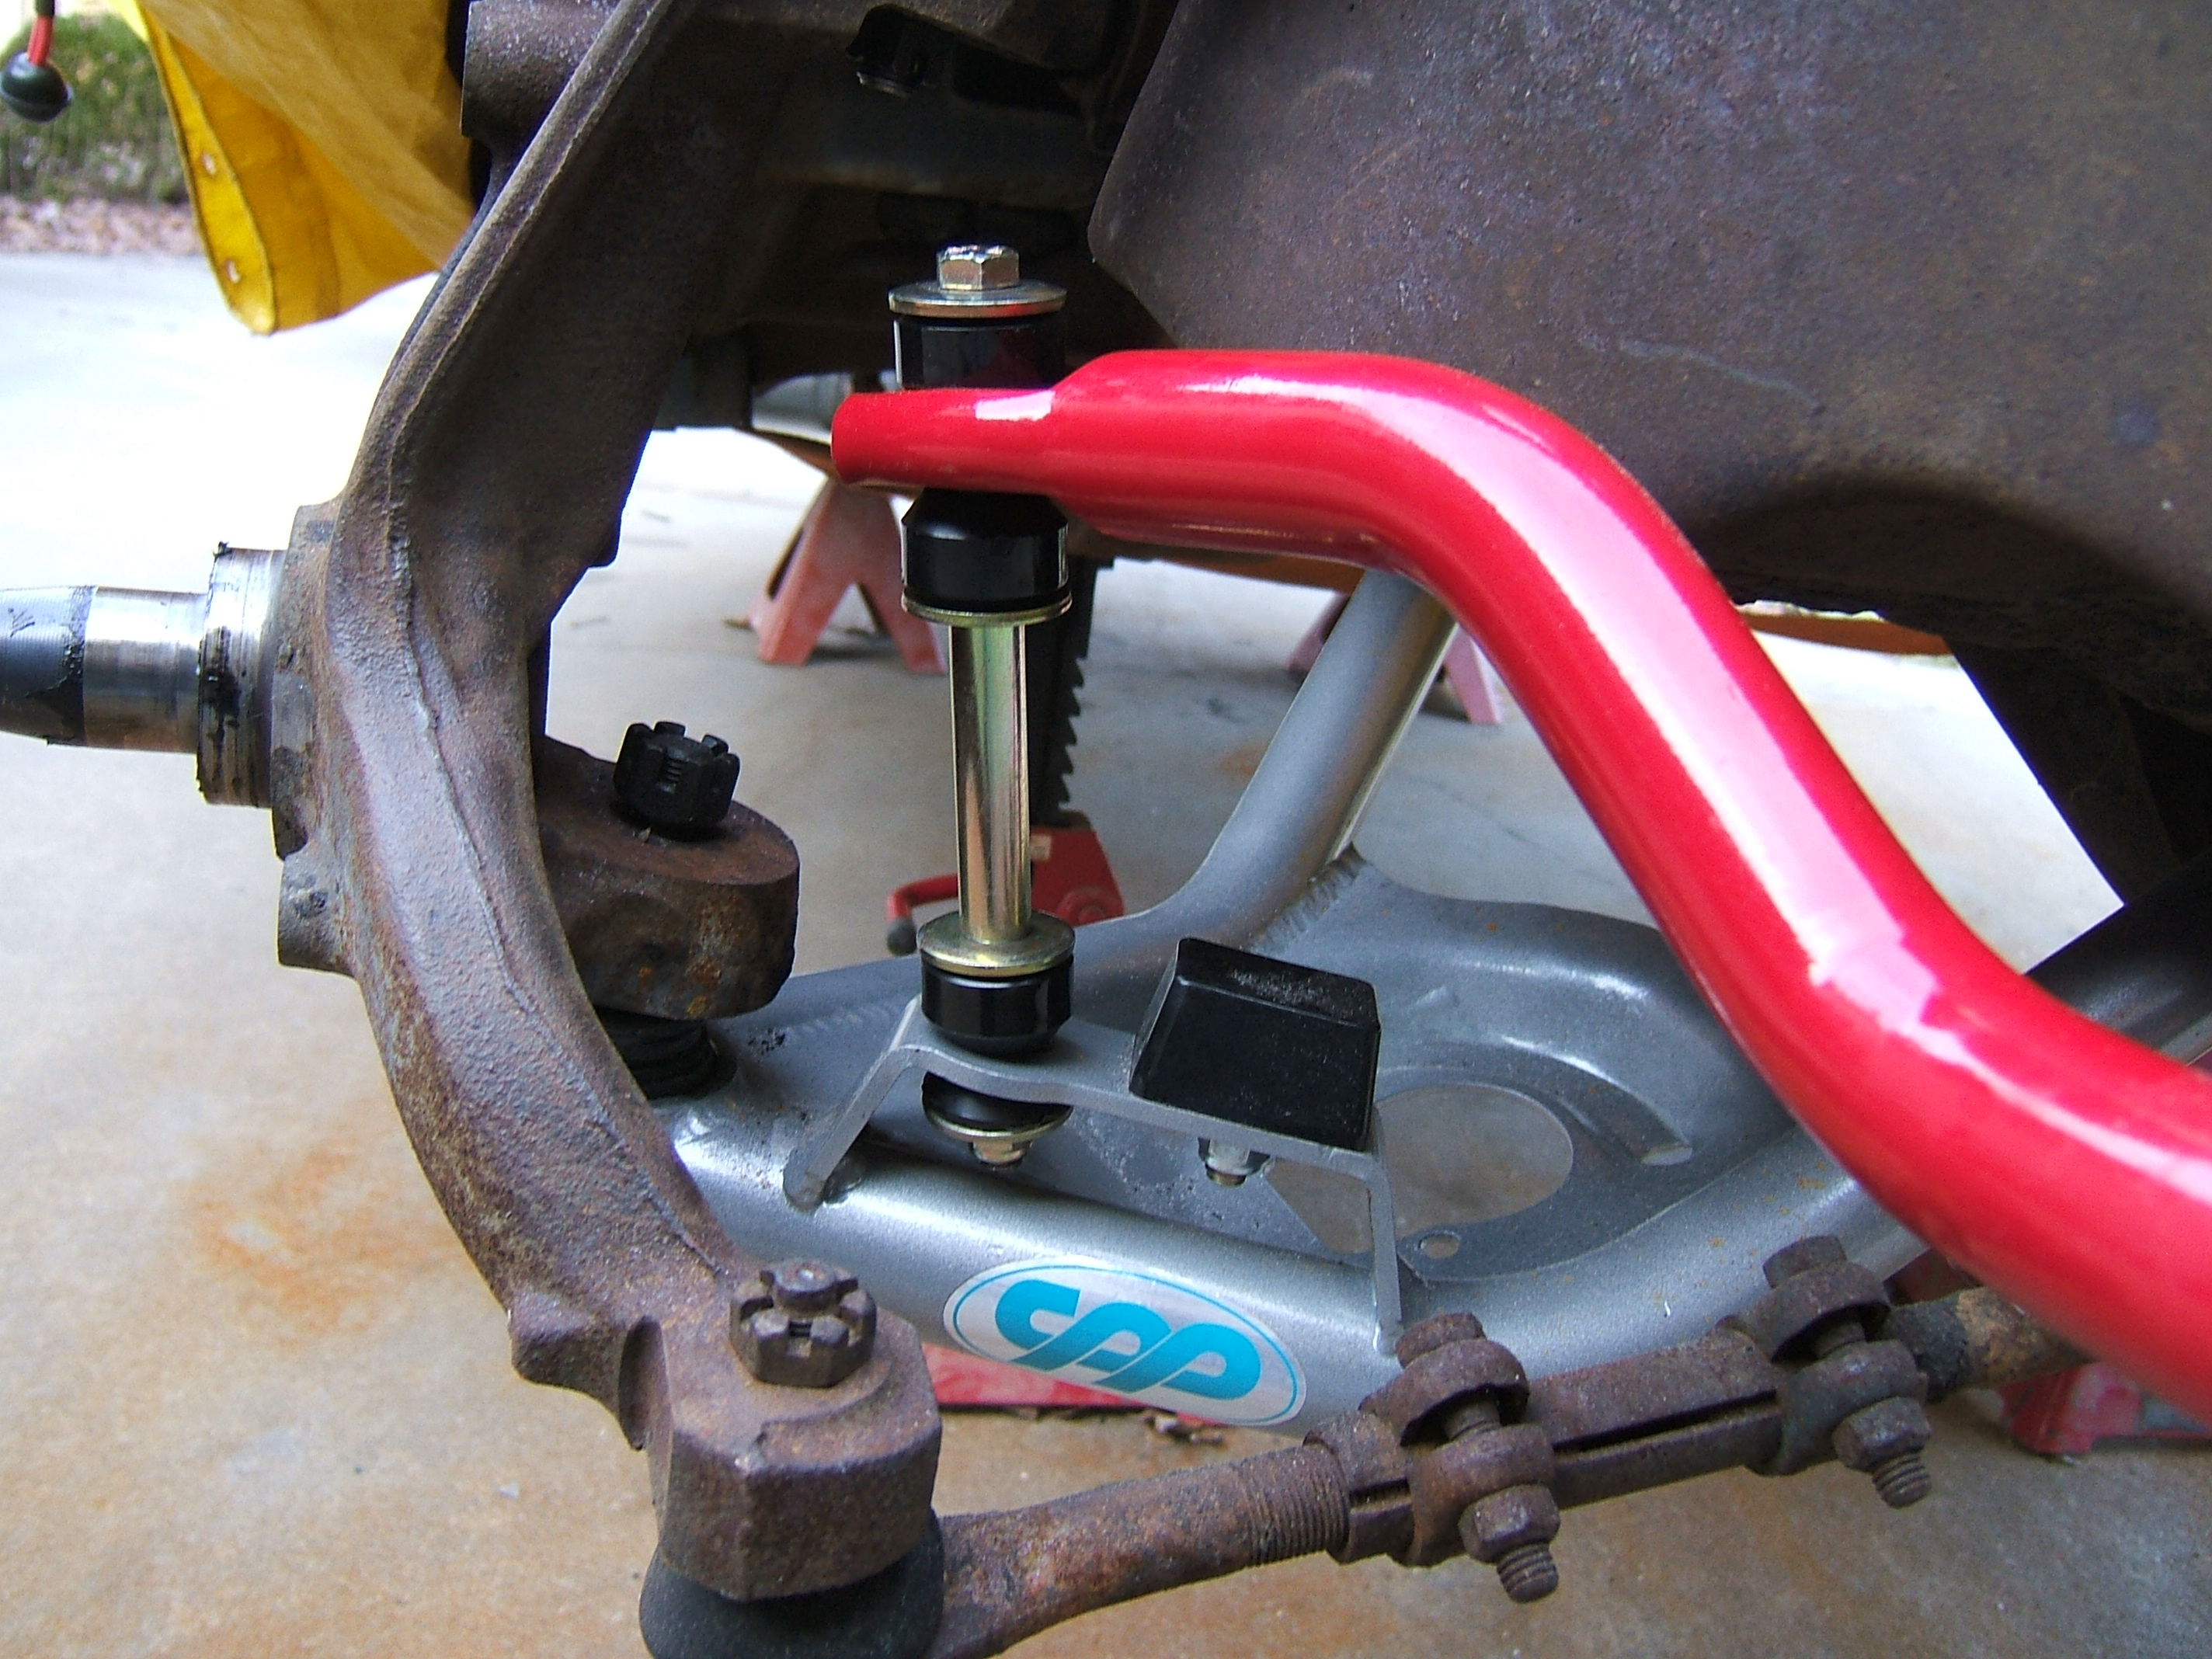
I ended up doing some family stuff Sunday, so nothing new on the motor, but I got the sway bar linkage taken care of today. Had to cut the lower bushing down thin and then cut the bolt down as well.
I also checked to see if there was a difference in the track from the stock hub/rotor to the Wilwood stuff, and it's the same, so no issues there.
I also checked to see if there was a difference in the track from the stock hub/rotor to the Wilwood stuff, and it's the same, so no issues there.
Last edited by meanstrk; Dec 15, 2014 at 07:31 PM.
Thread Starter
|
In the Staging Lanes
Joined: Dec 2008
Posts: 73
From:
This evening I pulled the control arms and sway bar all off the front end and packed up for now, then got some motor work done...
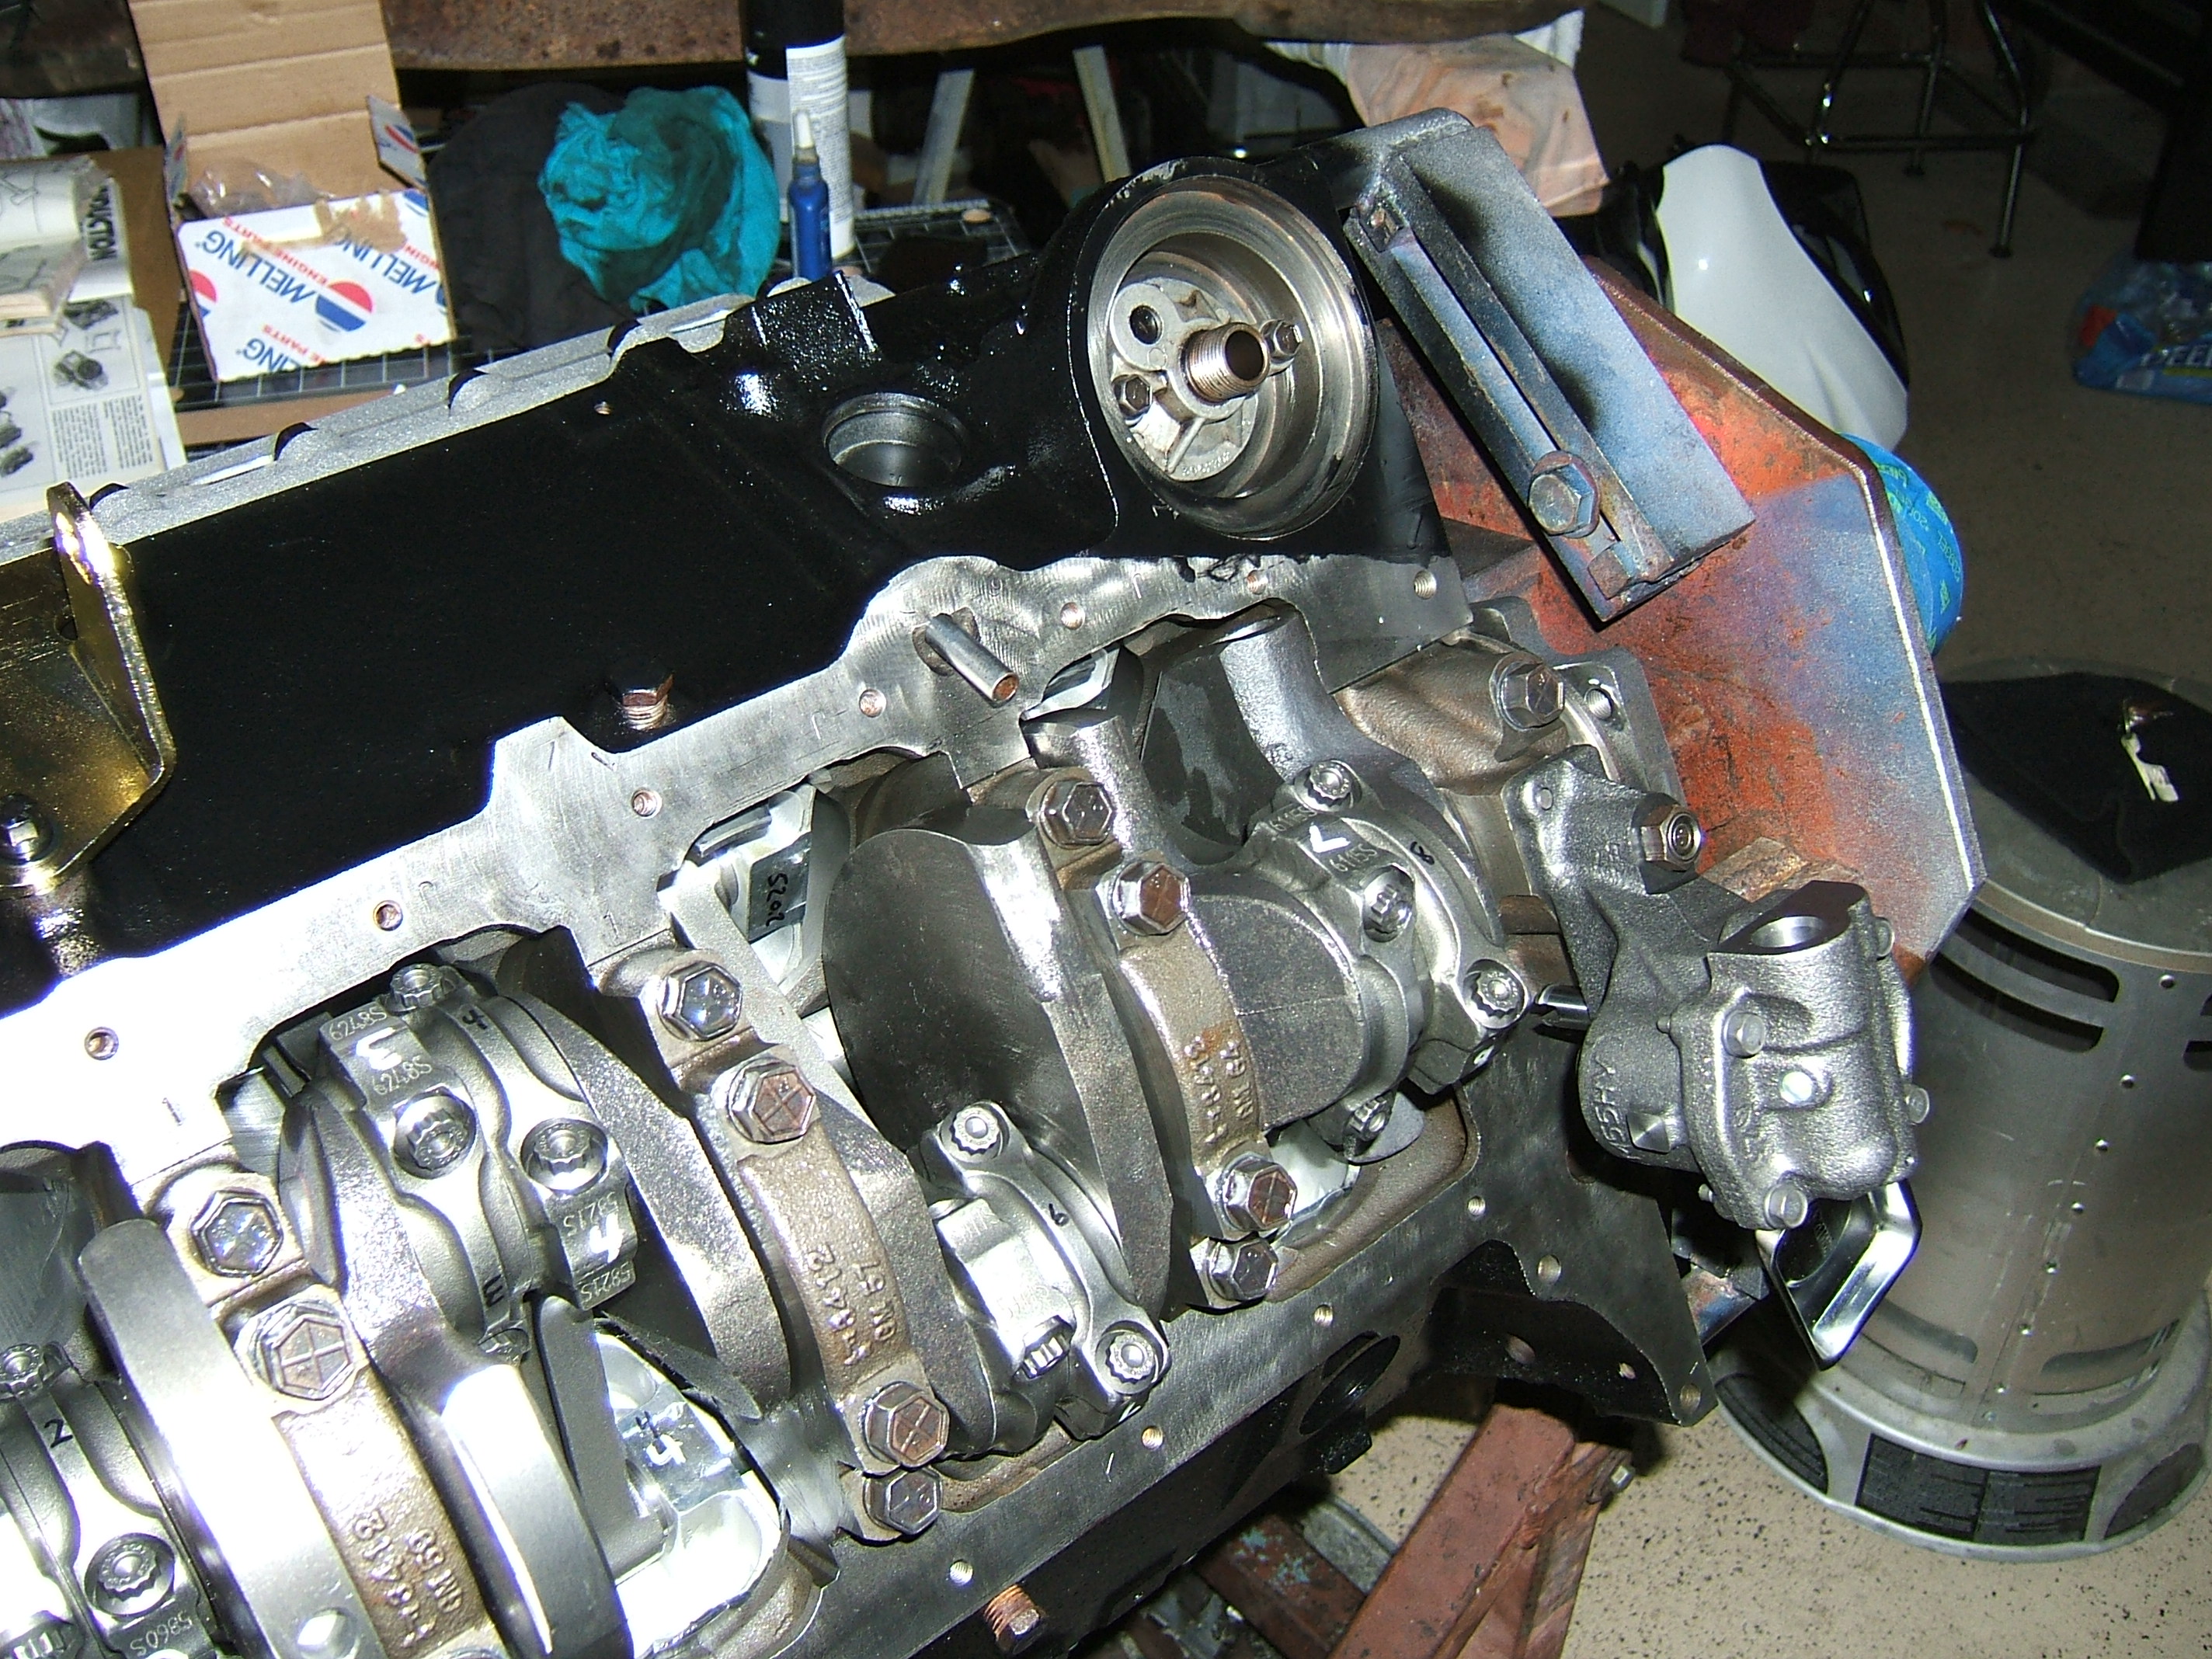
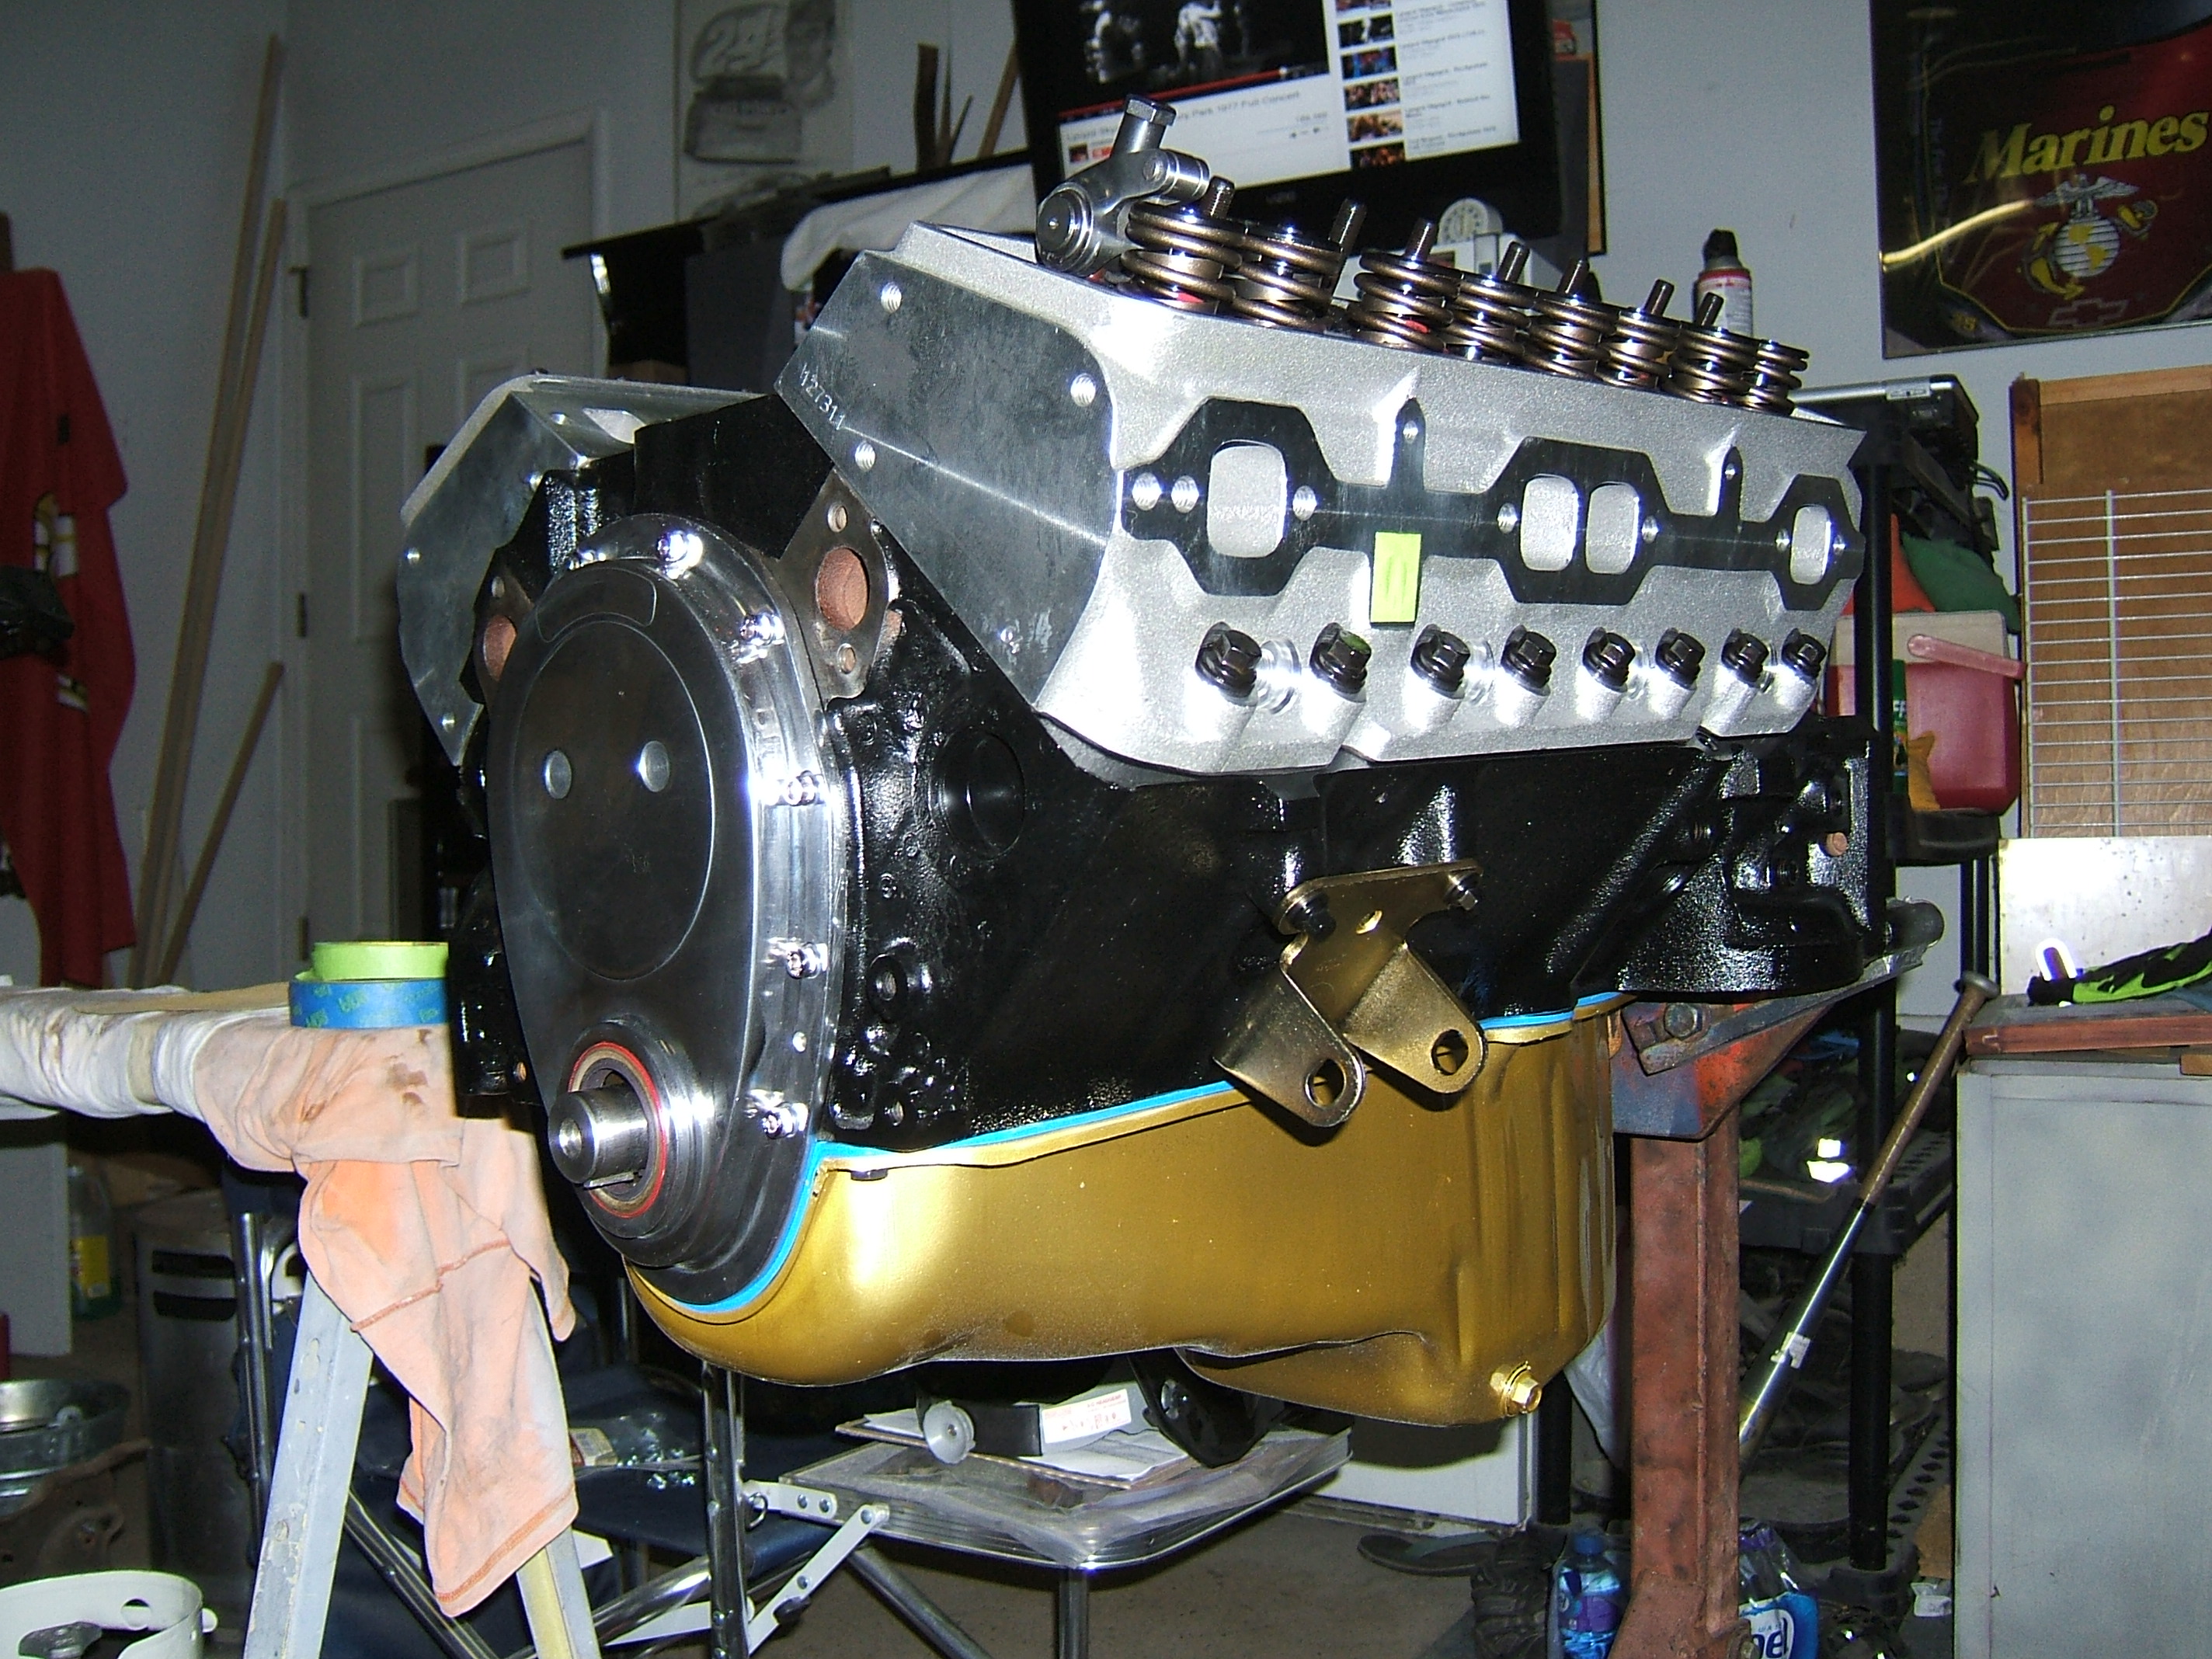
Bottom end almost all ready to be buttoned up. I just need to get the oil pan out and set the pick up at the correct height and then tack it in place.
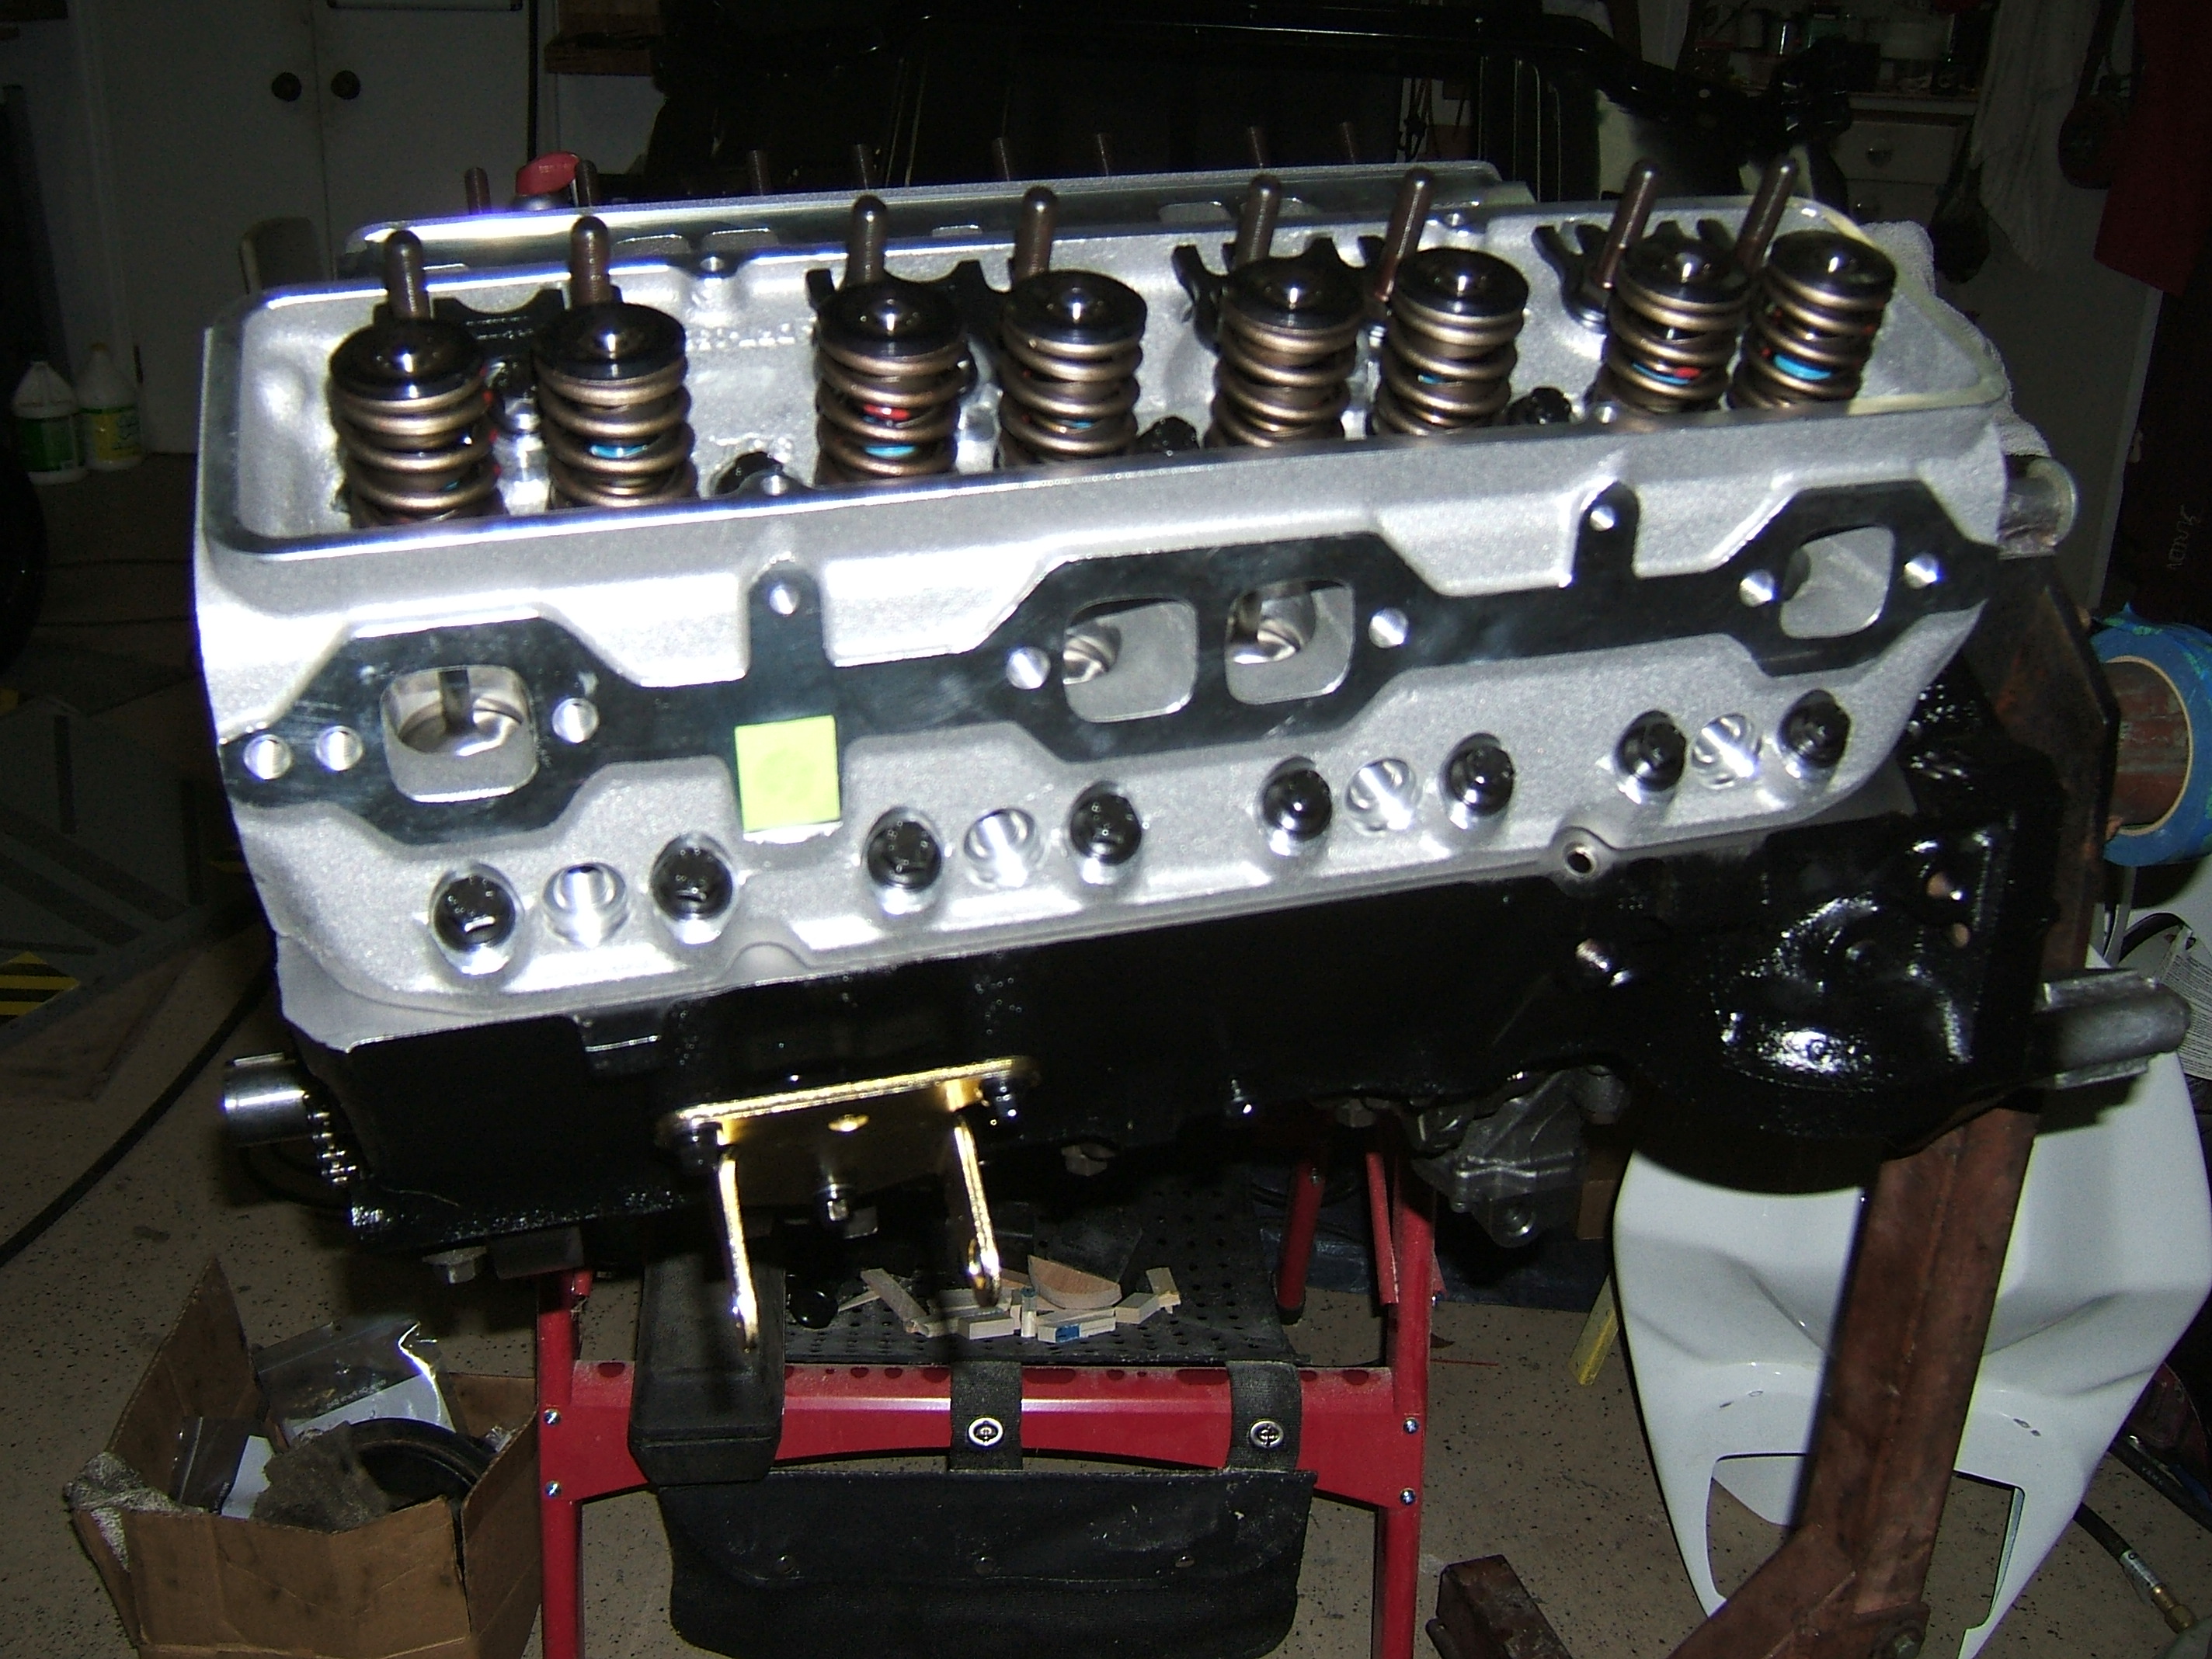
The Dart II heads installed and torqued down...
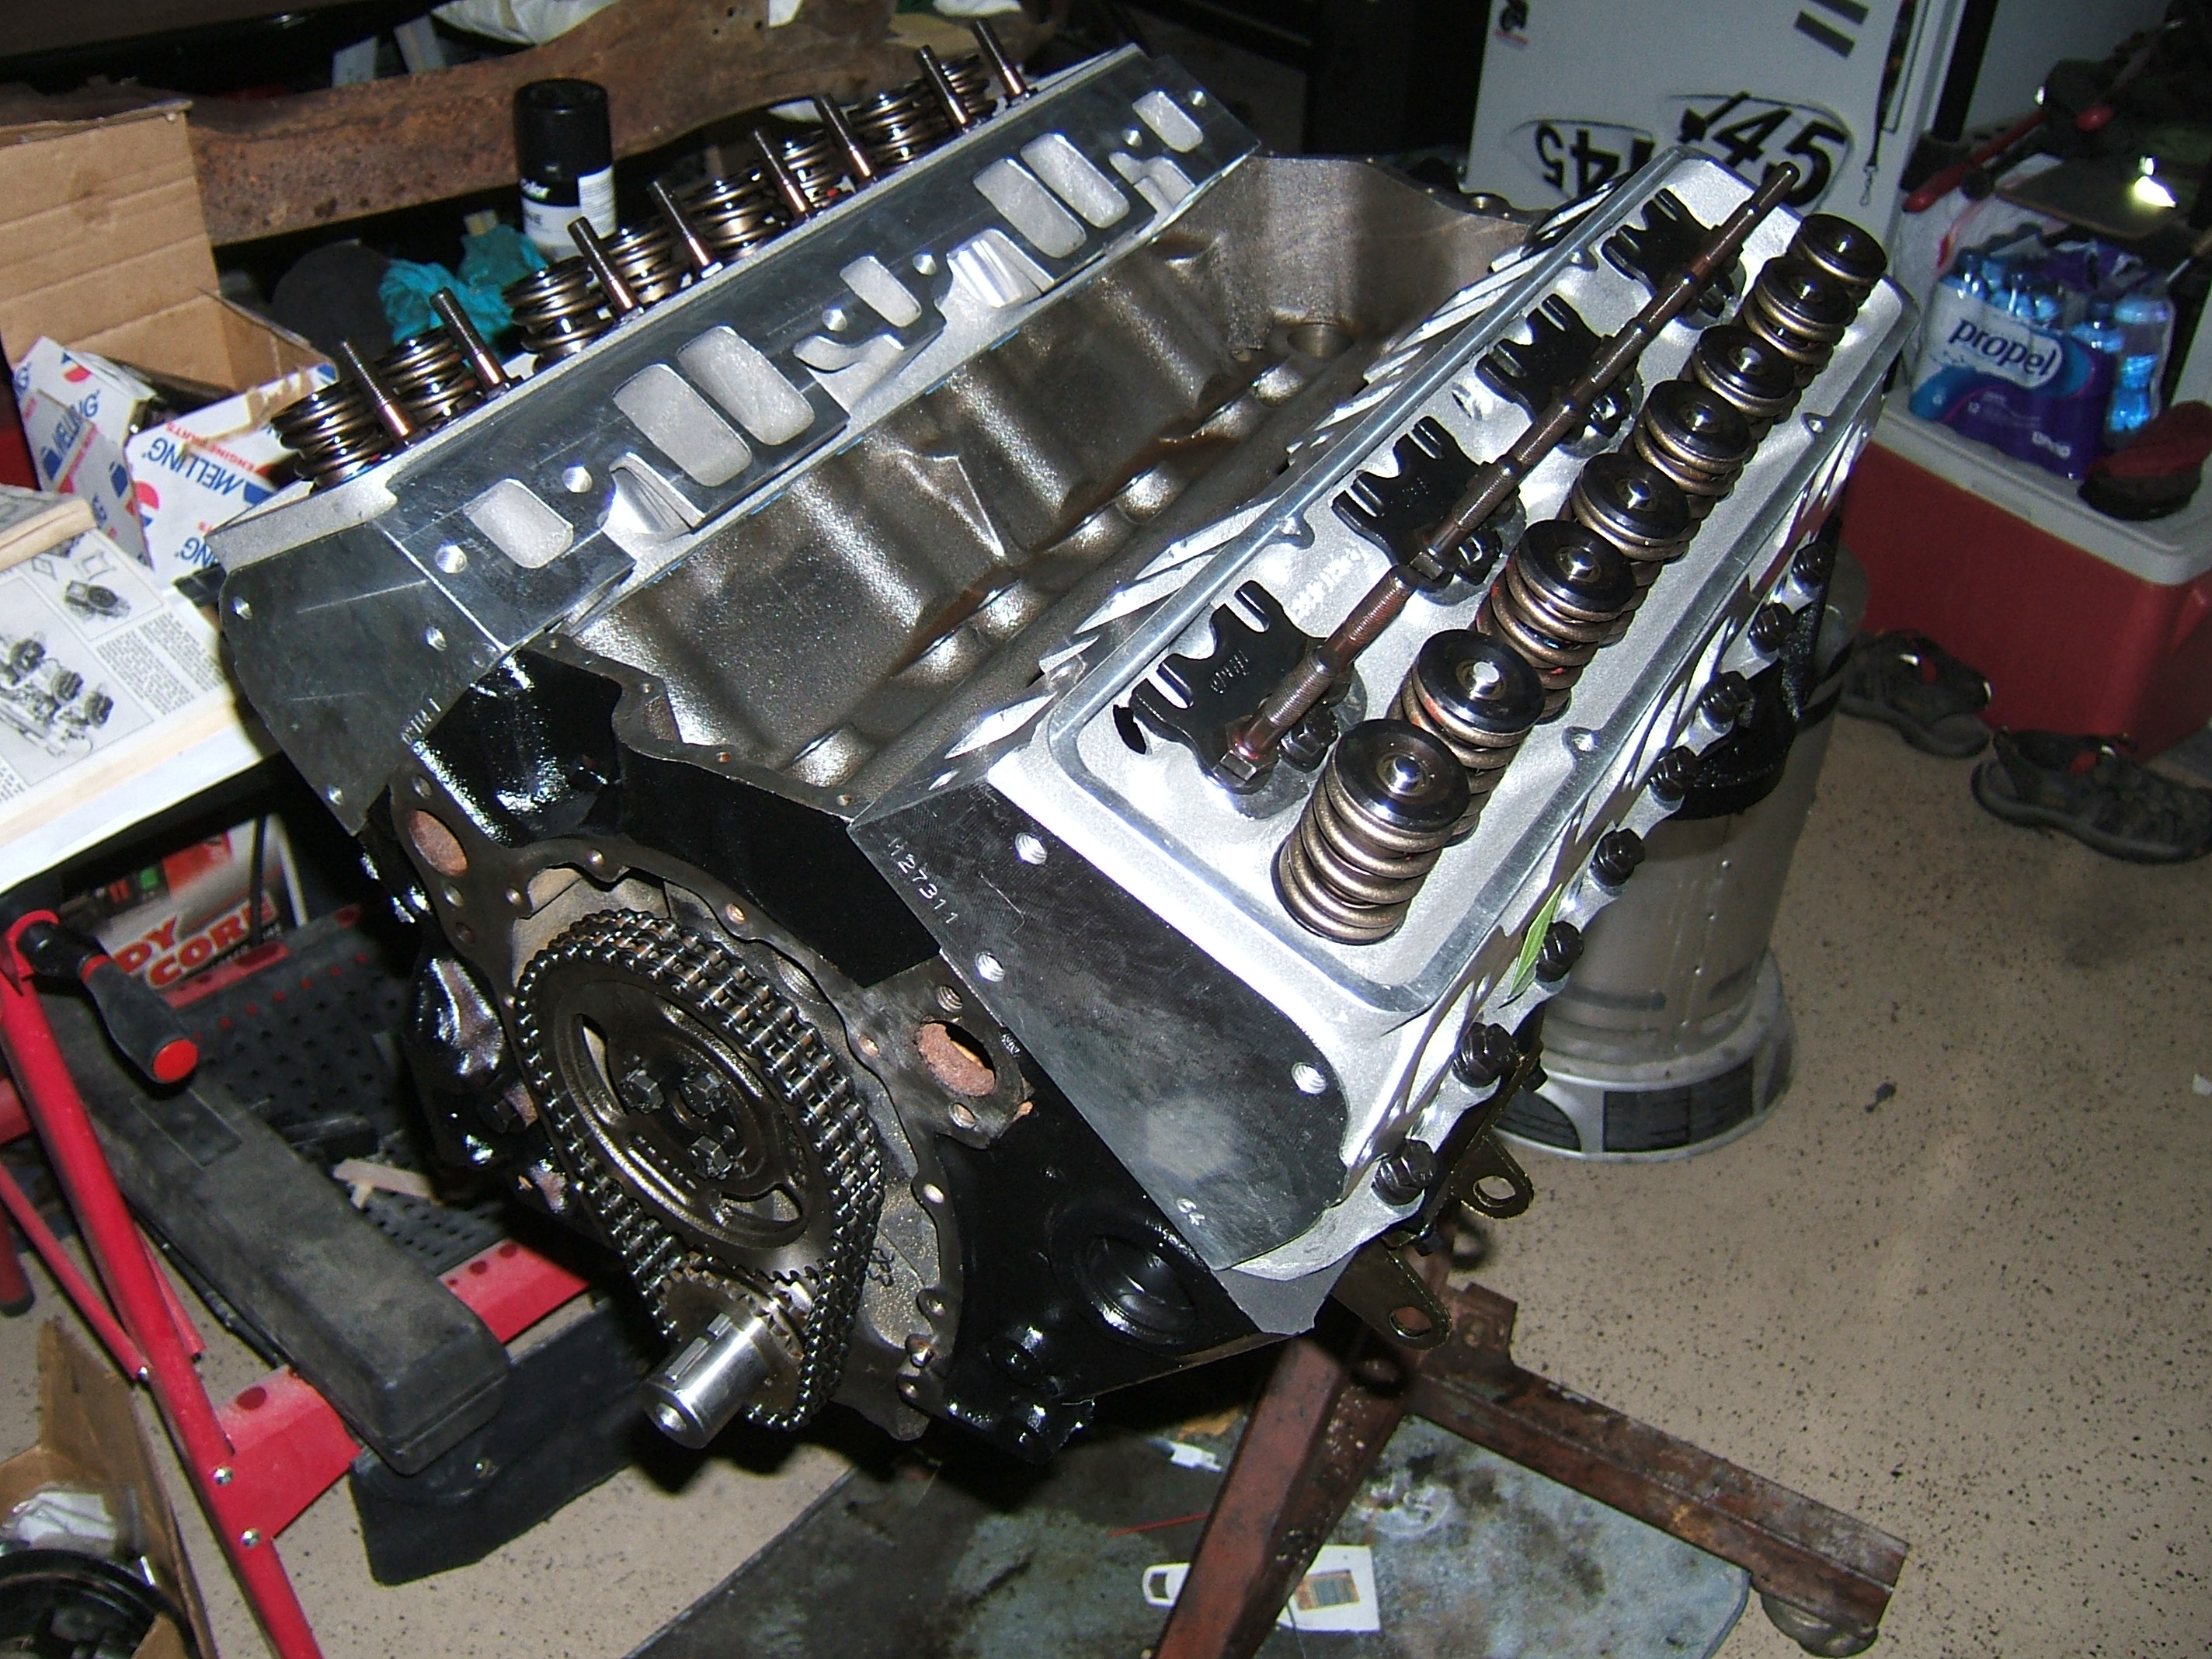
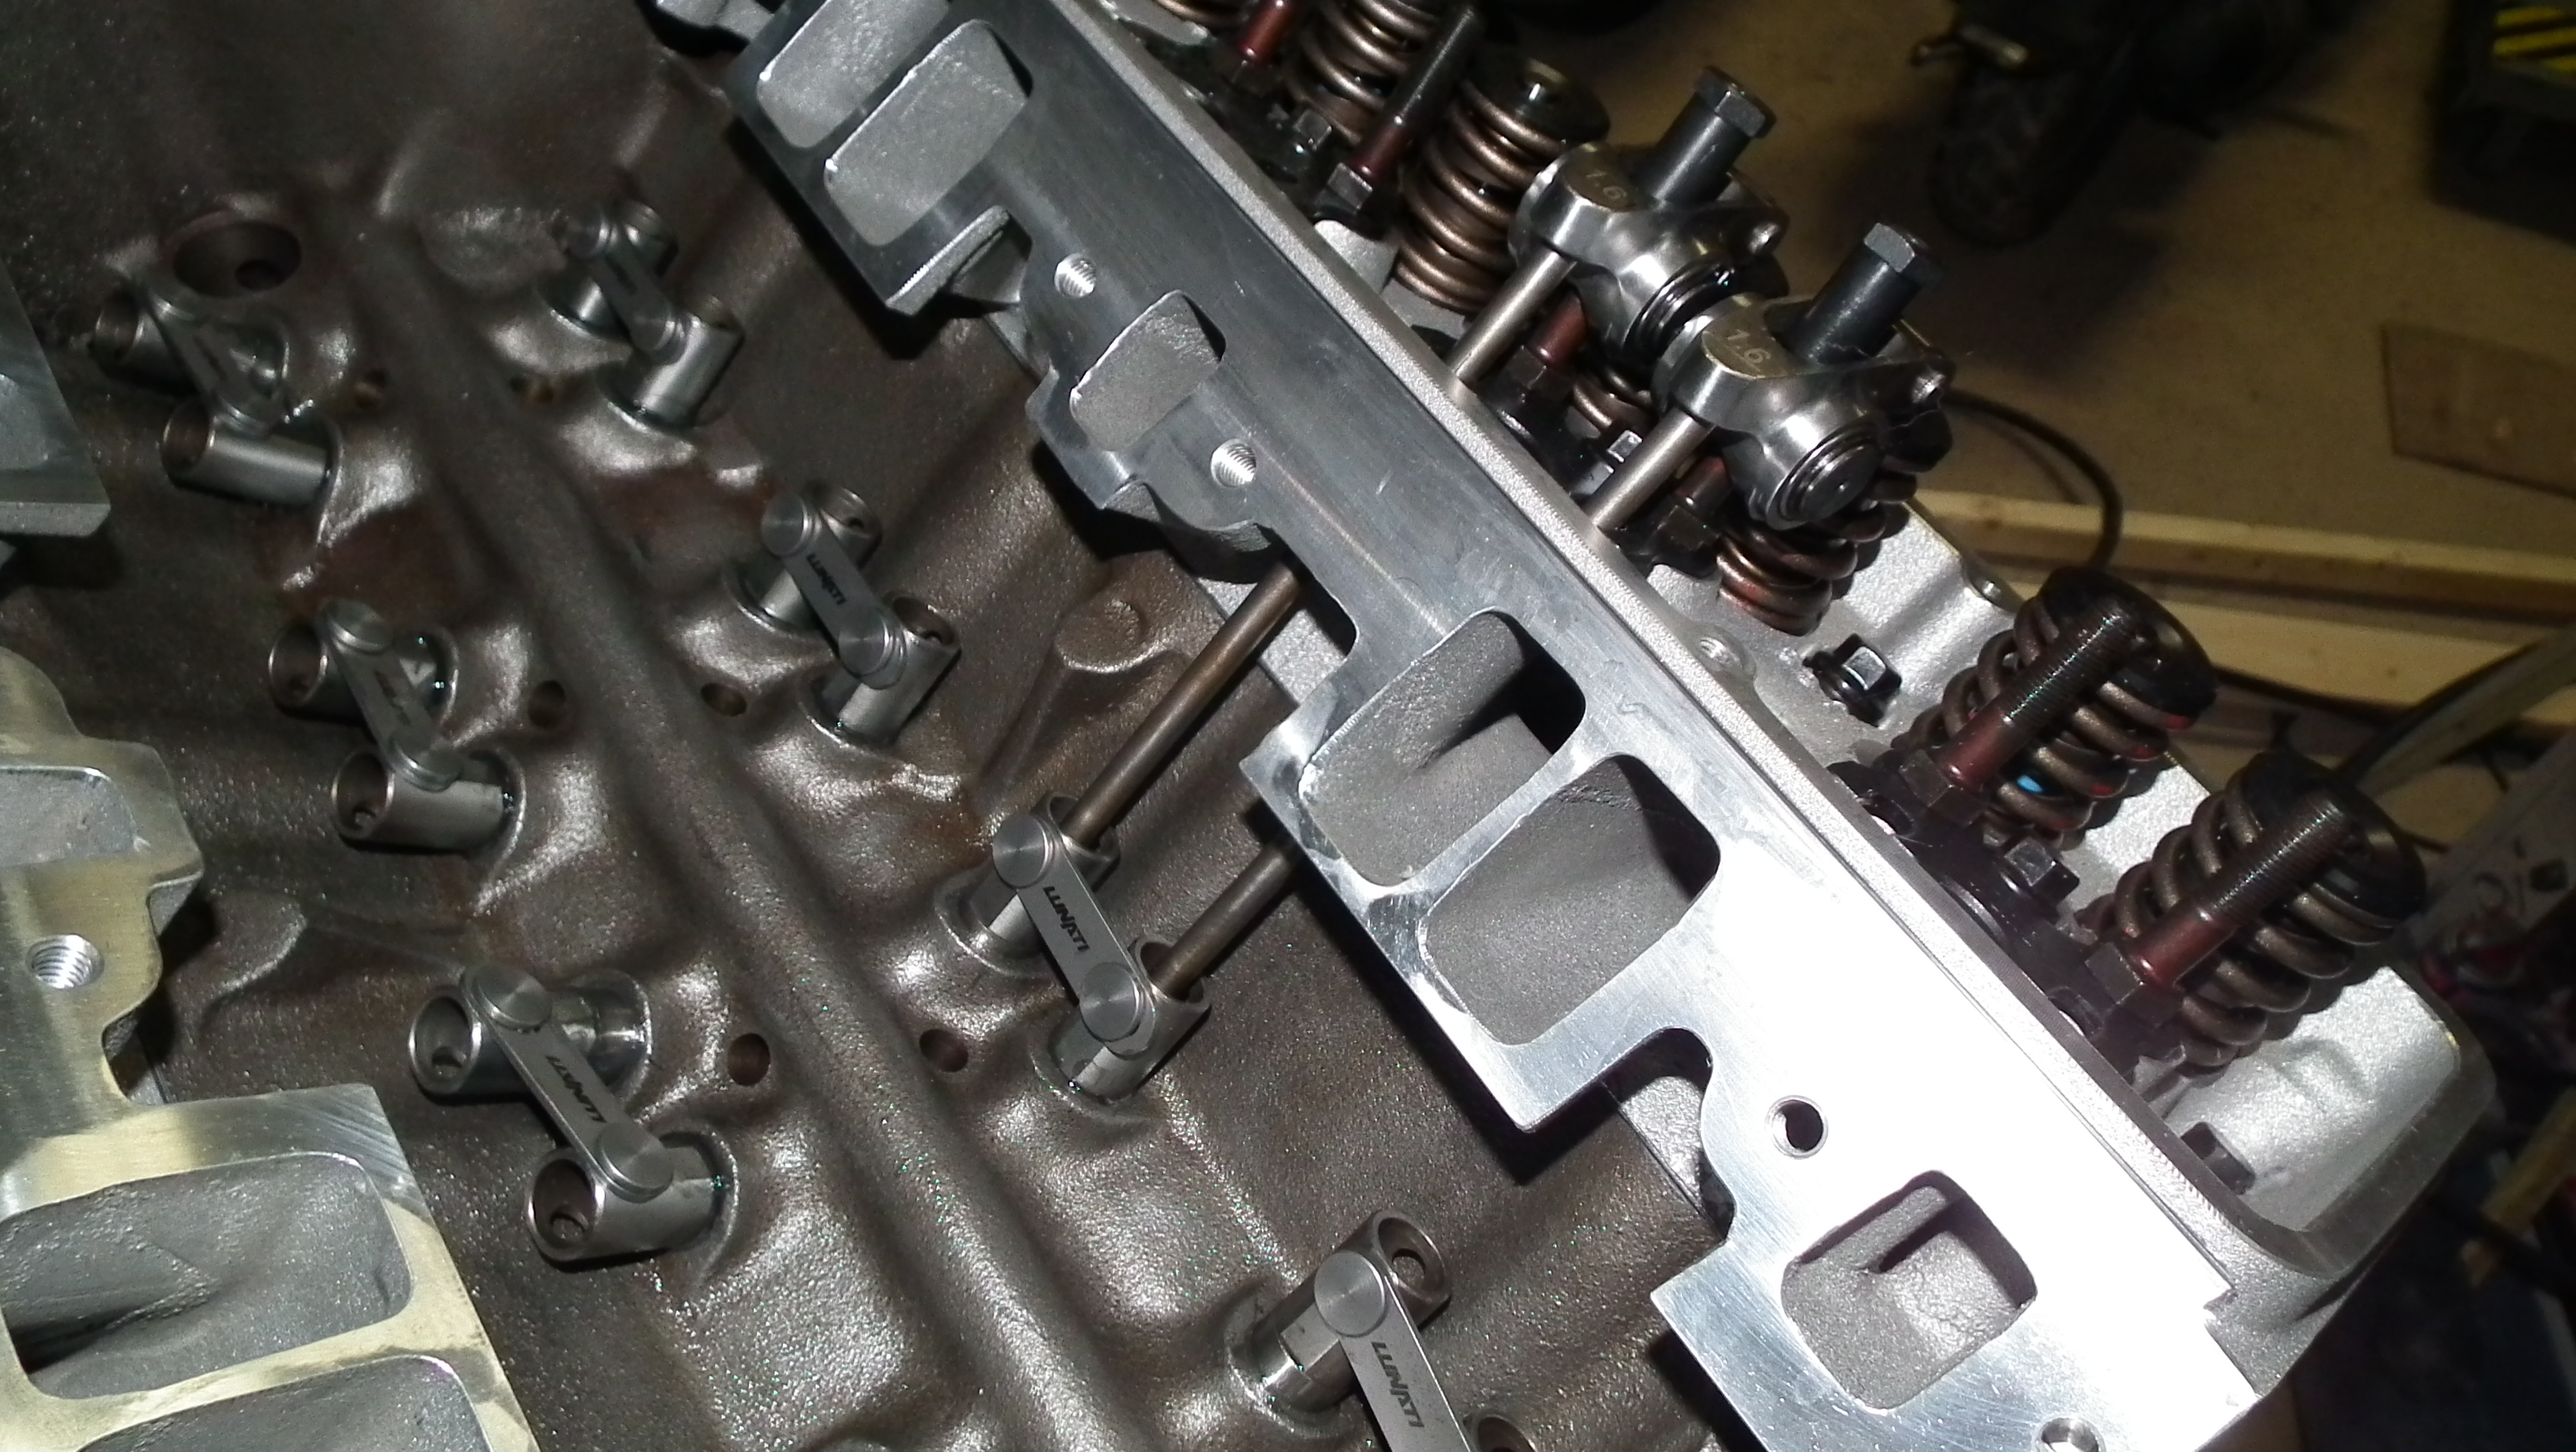
Cam installed and guide plates and rocker studs installed..
I will get the rockers and lifters in place and the measure so I can get the rods ordered.
Bottom end almost all ready to be buttoned up. I just need to get the oil pan out and set the pick up at the correct height and then tack it in place.
The Dart II heads installed and torqued down...
Cam installed and guide plates and rocker studs installed..
I will get the rockers and lifters in place and the measure so I can get the rods ordered.
Thread Starter
|
In the Staging Lanes
Joined: Dec 2008
Posts: 73
From:
Holidays, customer paint jobs, etc.... Time to try to get back to work on this thing. I started by checking for push rod length, but it turns out that the tool I ordered was too short, (Story of my life, right?) so I need to modify it in order to be able to get an accurate measurement so I can order the correct length pushrods, but I did get the timing cover and oil pan installed...
Thread Starter
|
In the Staging Lanes
Joined: Dec 2008
Posts: 73
From:
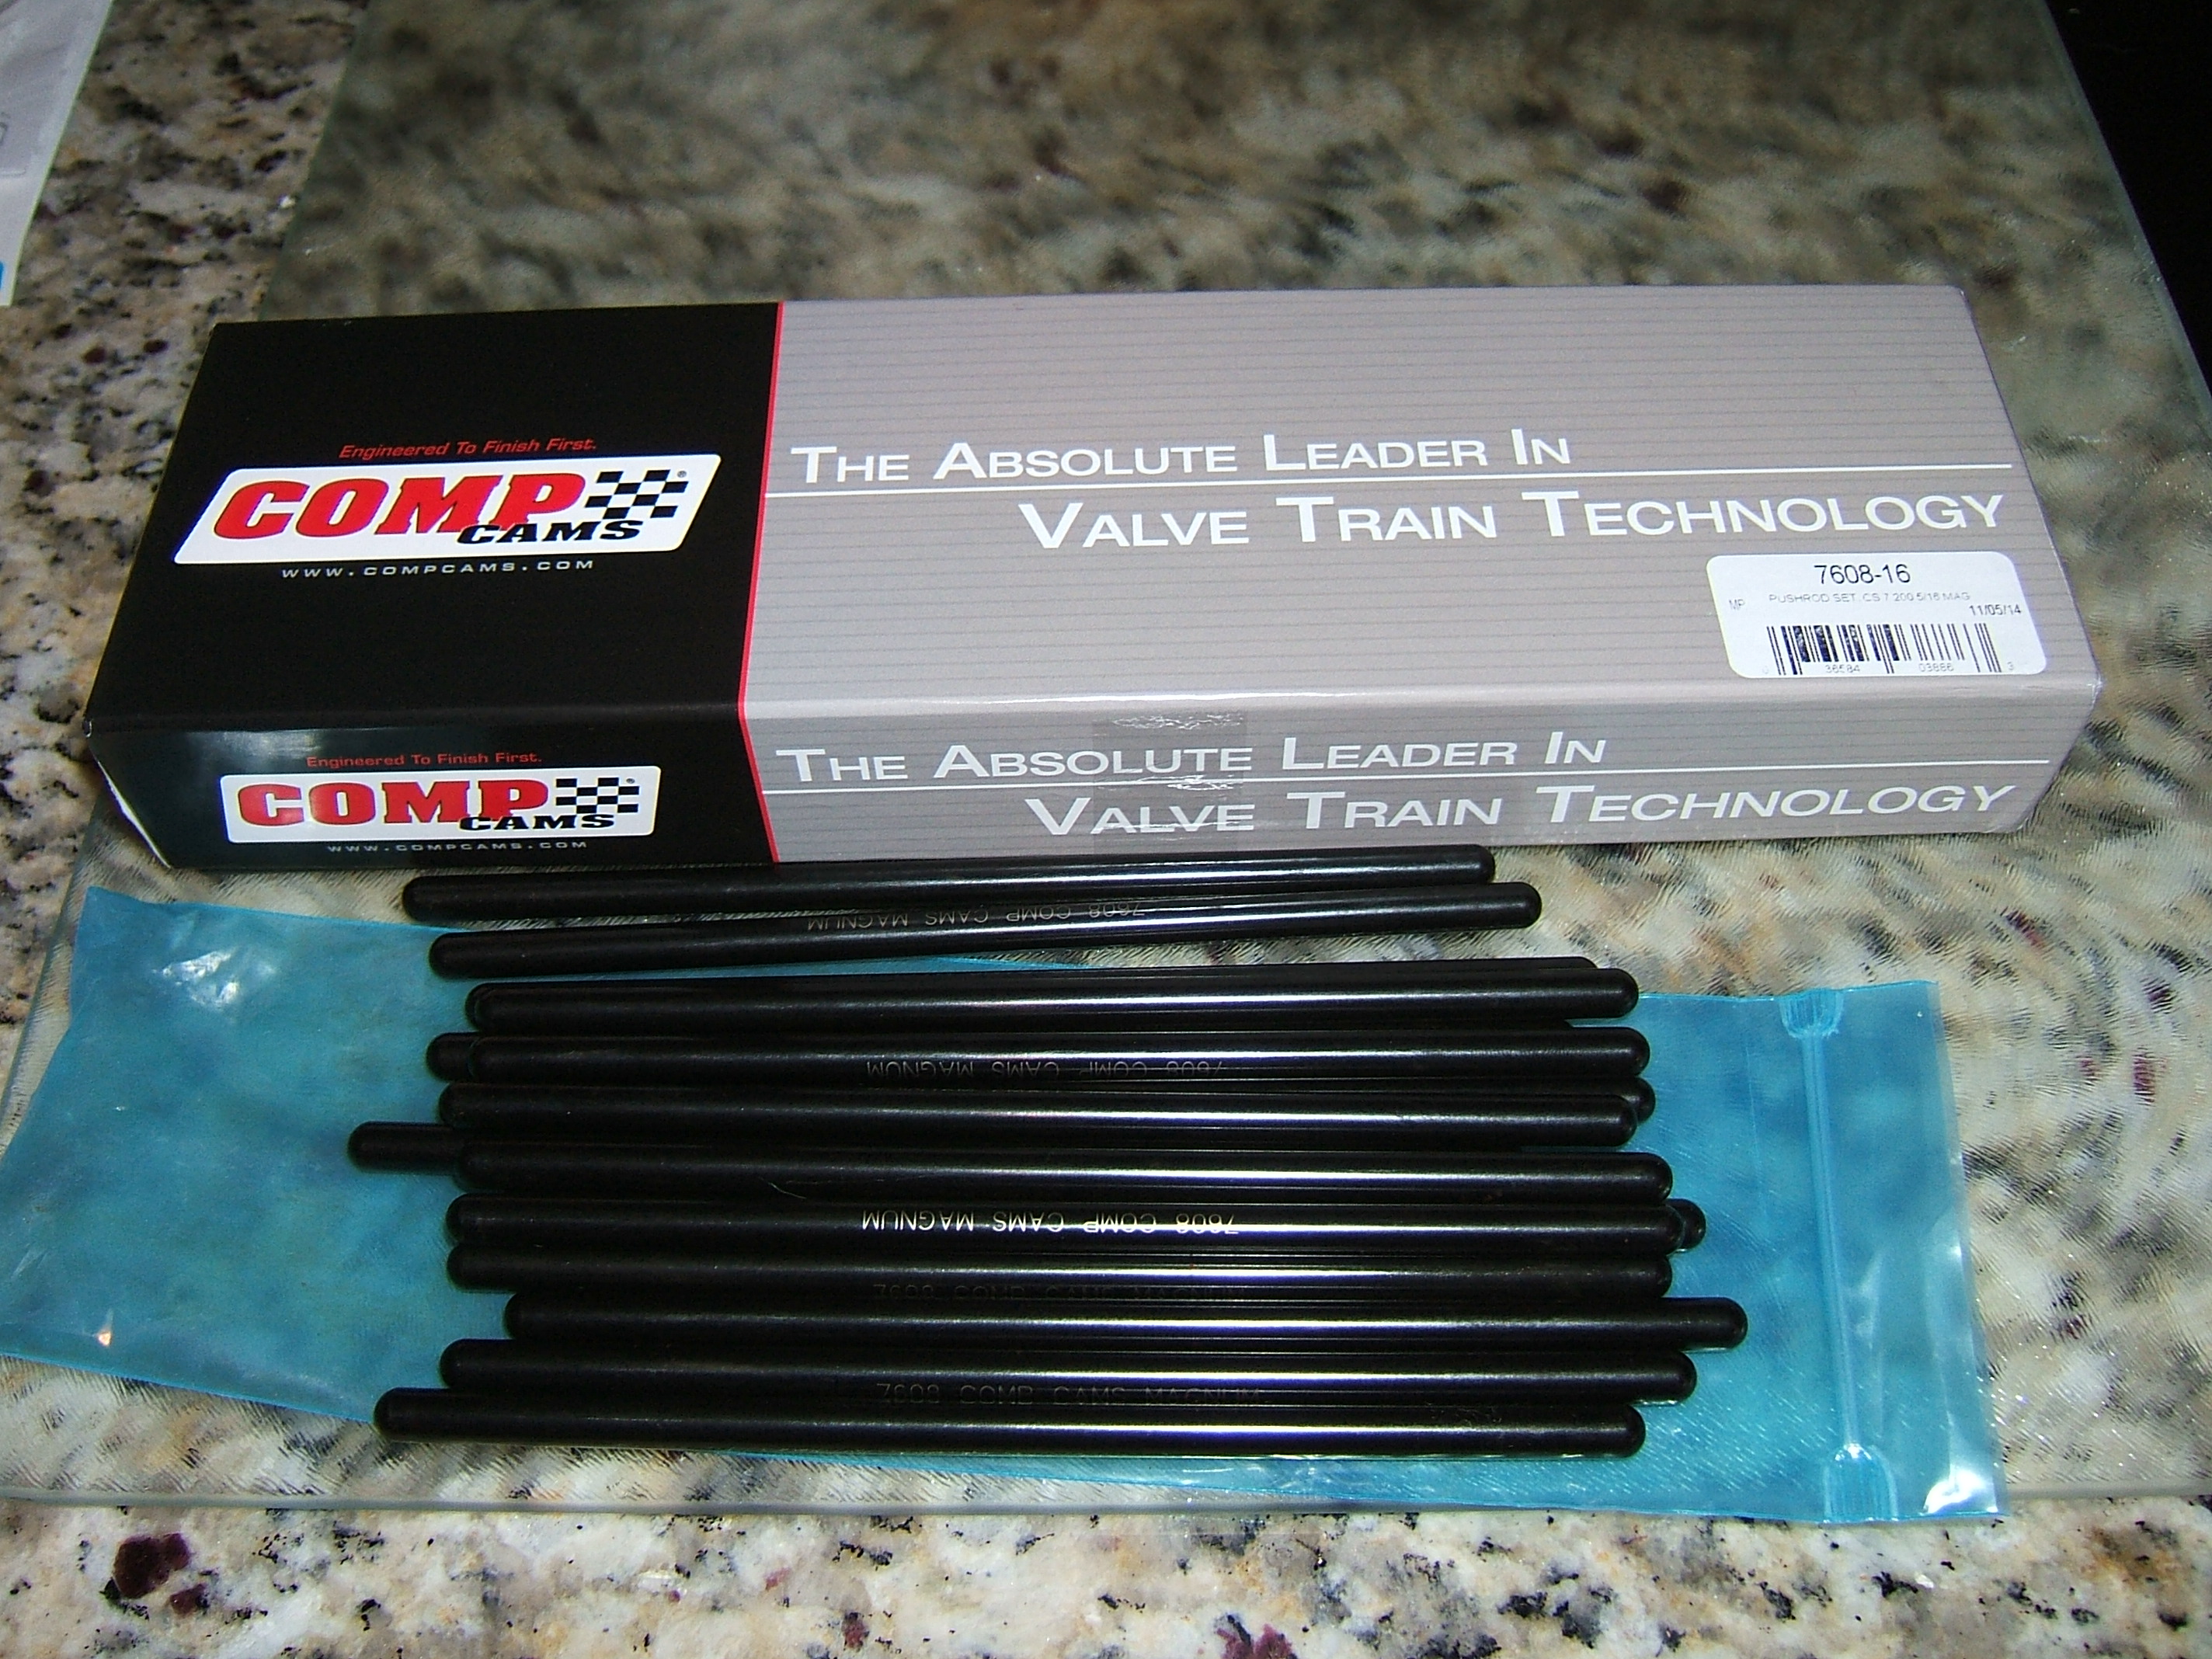
I got a couple 7.200" rods and checked everything again this afternoon and it all looks good, so I will got those ordered ASAP...
Lifters all in place... Rods in place on the #3 to check. I already checked on the #1 and was just verifying....
Yep. Nicely centered wear pattern..
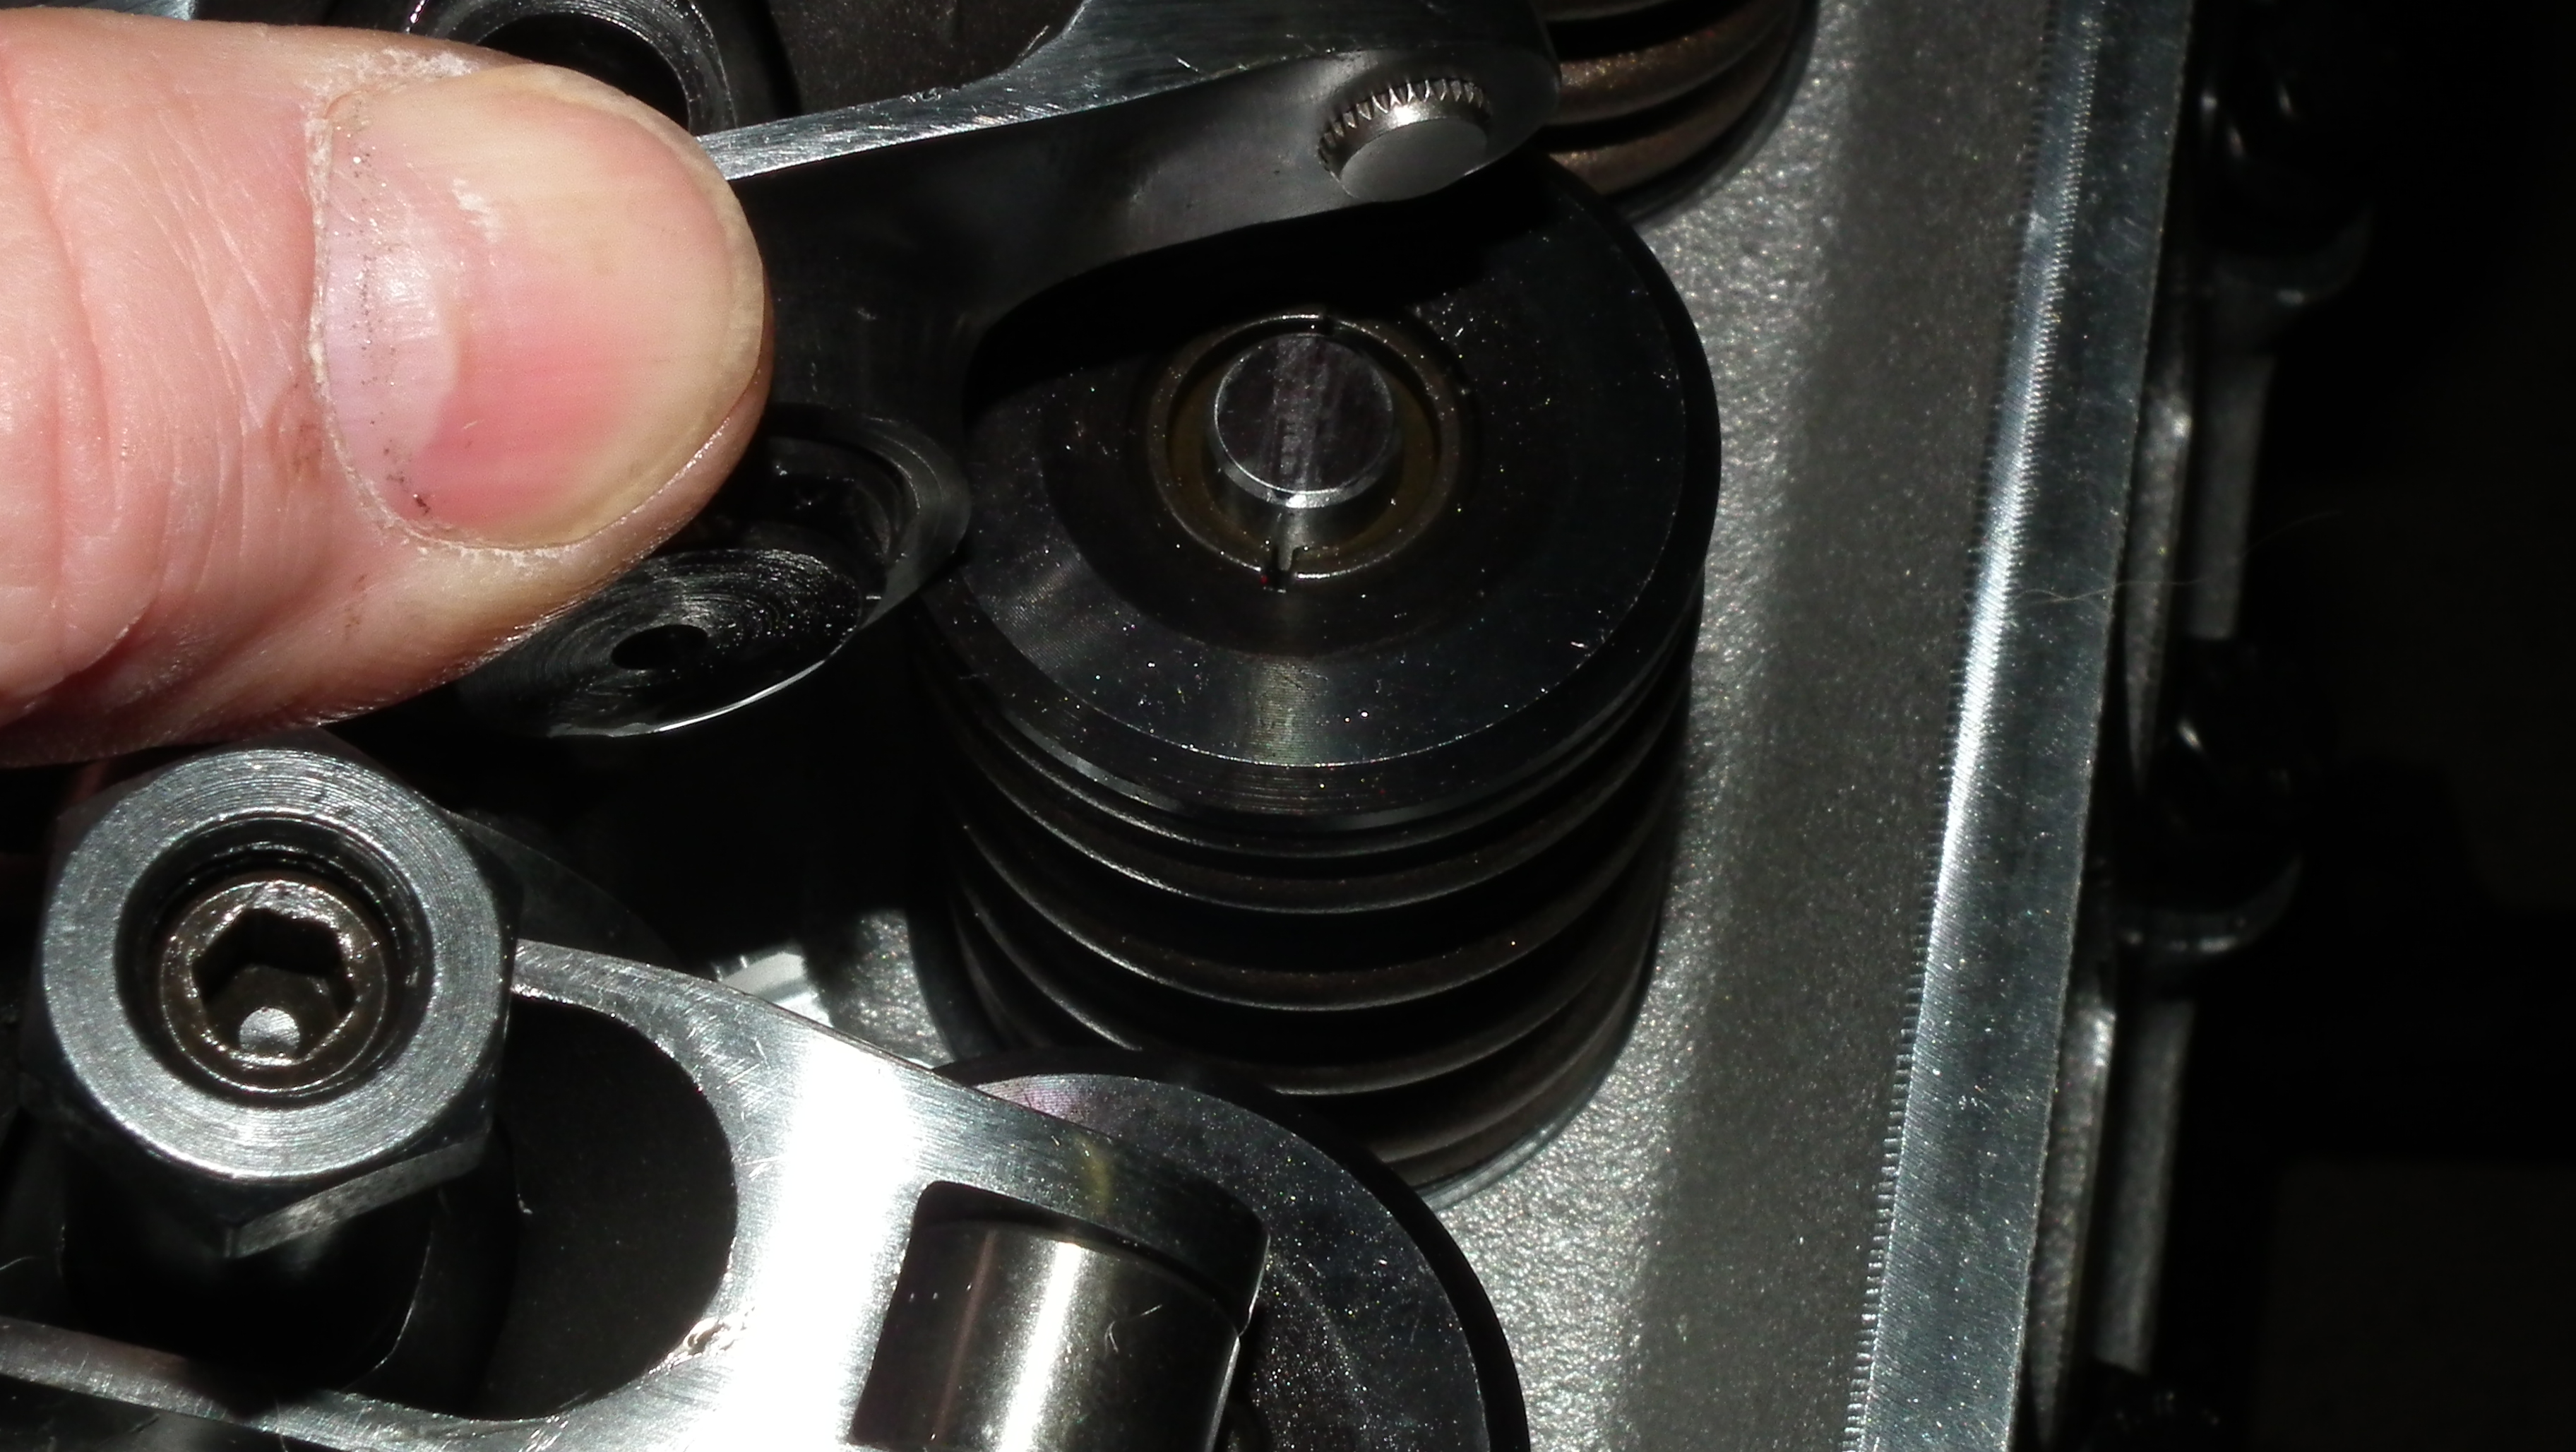
Lifters all in place... Rods in place on the #3 to check. I already checked on the #1 and was just verifying....
Yep. Nicely centered wear pattern..
Second Generation Moderator
Feb 2010 ROTM winner
Jan 2013 ROTM winner
Feb 2010 ROTM winner
Jan 2013 ROTM winner
Joined: Aug 2008
Posts: 9,097
From: Portland, Or
ROTM Winner's Club
Yeah, I went through that with my 327 SBC in my Austin. Had to switch to tall valve covers, and remove the old finned Corvette covers I liked. Then when I lost that engine and built my 355, I removed the roller rockers and stud girdles, and went back to old camel hump heads and stock type rockers, without girdles. I had already sold the Vette valve covers, so ended up with a pair of vintage Mr. Gasket finned valve covers, which I like even better. I've still got my fabricated aluminum tall covers here, as I figured I might use them on another project someday.