
What did you do to your camaro today


In the Staging Lanes
Joined: Apr 2010
Posts: 82
From: east brunswick nj
pulled me seats out tonight got to use my craftsman boltout things for the first time on one bolt worked good. carpet out this week i hope then back to the damn bumper and braces. gonna try to get my wife to post some pics
Dave
Dave

Second Generation Moderator
Feb 2010 ROTM winner
Jan 2013 ROTM winner
Feb 2010 ROTM winner
Jan 2013 ROTM winner
Joined: Aug 2008
Posts: 9,097
From: Portland, Or
ROTM Winner's Club
Nothing on the toys today. Dug into the '69 Burb to see why the previous owner had installed a horn button on the lower dash. After pulling the factory horn button and checking I found no wire from the button to the column to ground the relay. Touched the wire to the shaft and heard the relay click in.
Opened the hood and saw the new horns and button were wired directly from the battery, so I cut all the wiring loose. Made a new wire to connect the old factory button to the wire in the column, then wired from the relay to the horns, and tested it. All good now, and works like new again.
Tore out the PO wiring and button, and cleaned it all up. Good to go now!

Overdrive Member
Joined: Nov 2009
Posts: 4,848
From: off the grid
Nothing on the toys today. Dug into the '69 Burb to see why the previous owner had installed a horn button on the lower dash. After pulling the factory horn button and checking I found no wire from the button to the column to ground the relay. Touched the wire to the shaft and heard the relay click in.
Opened the hood and saw the new horns and button were wired directly from the battery, so I cut all the wiring loose. Made a new wire to connect the old factory button to the wire in the column, then wired from the relay to the horns, and tested it. All good now, and works like new again.
Tore out the PO wiring and button, and cleaned it all up. Good to go now!
Opened the hood and saw the new horns and button were wired directly from the battery, so I cut all the wiring loose. Made a new wire to connect the old factory button to the wire in the column, then wired from the relay to the horns, and tested it. All good now, and works like new again.
Tore out the PO wiring and button, and cleaned it all up. Good to go now!

Second Generation Moderator
Feb 2010 ROTM winner
Jan 2013 ROTM winner
Feb 2010 ROTM winner
Jan 2013 ROTM winner
Joined: Aug 2008
Posts: 9,097
From: Portland, Or
ROTM Winner's Club
Don't you hate that? When I got my 85 shorty the rheostat for the dome light would dim the head lights. I looked at the switch and found a rats nest. I went and cut a new plug from a j yard truck. Matched all the colors and had no problems. Can't for the life of me figure out why.
Fortunately the wiring under the dash was mostly intact. I found one poorly wired tap that someone did, and it went out under the hood to nothing, so I removed it and fixed the bare spot.

Banned
Joined: Oct 2009
Posts: 496
From: Raised in Tilton NH now residing in Kings Mountain KY
Stopped at the bodyshop today. Joe was working the rear quarters some more. It was nice to see my car getting some attention. He said him and his brother were going to take the front end apart and start working on sanding the roof down tonight. Anxious to go back tomorrow and see how far he gets. I'll be sure to get some pics.
Second Generation Moderator
Feb 2010 ROTM winner
Jan 2013 ROTM winner
Feb 2010 ROTM winner
Jan 2013 ROTM winner
Joined: Aug 2008
Posts: 9,097
From: Portland, Or
ROTM Winner's Club
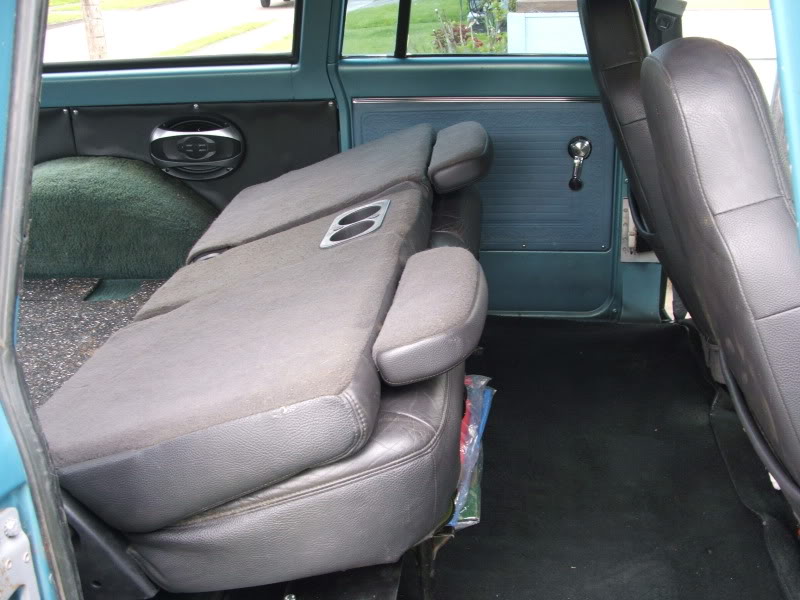
Back on the Burb again today! Bought a set of Durango leather seats from a local used car dealer tthat was parting out a dead Durango!
The weather held off all day, and it was a long one, but I got all the interior done!
Pulled out all the old carpet under the seats. (still have to do cargo area, but that will be a snap) Cleaned and prepped everything.
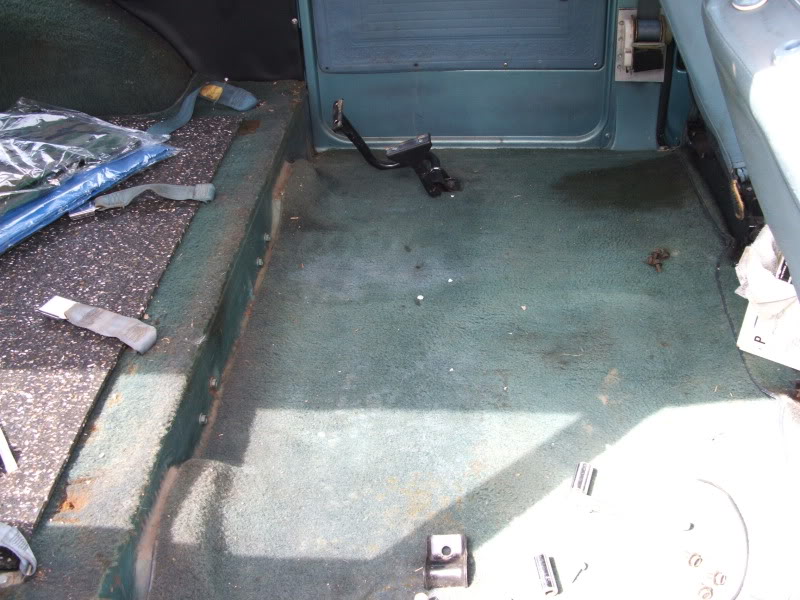
Laid down sound deadener. Removed the old frame supports from the backseat, and relocated them, then built a plate to span the new bolt pattern for the Durango backseat. Welded up a piece of box tubing on the back side to keep it ridgid, and add strength:
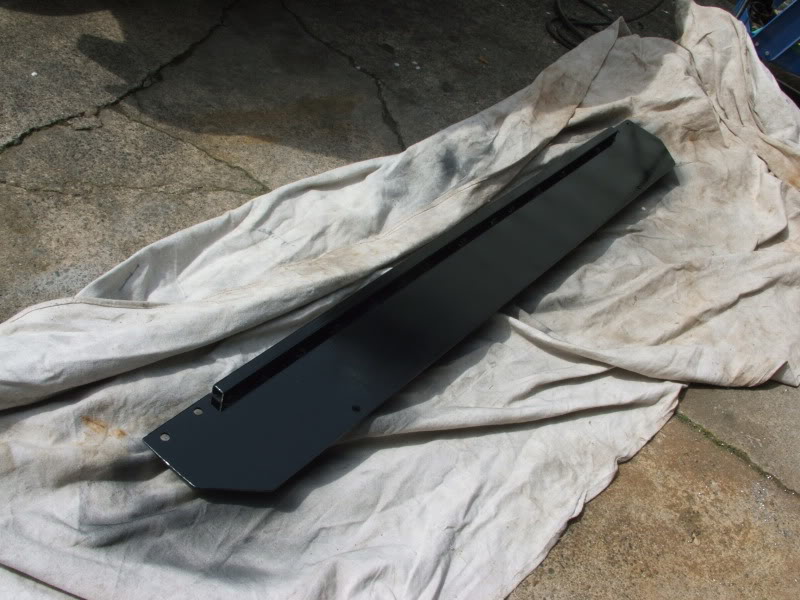
After bolting the plate to the supports, I laid the new seats on the frame and marked the bolt holes. New back seat:
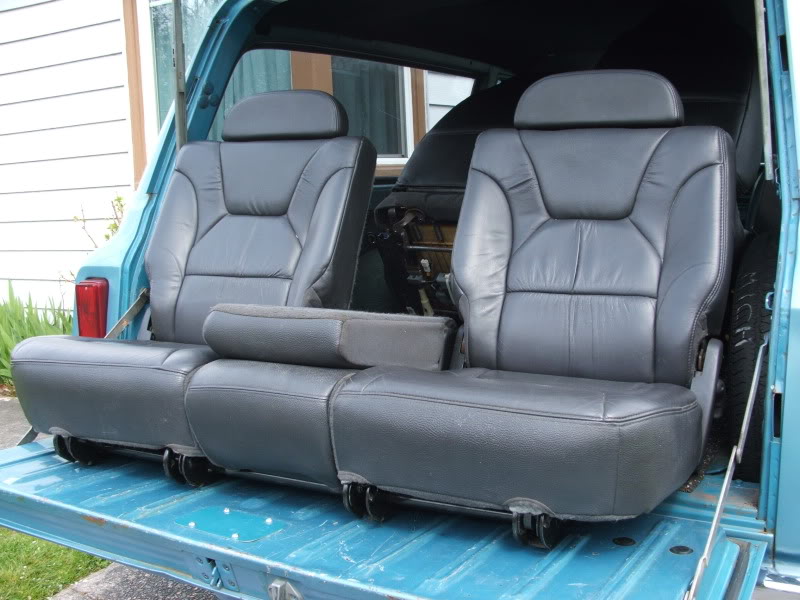
Then I drilled the pattern and bolted the new seat in:
The new seat lays down to allow more cargo space if I need it, or just look cleaner if I want it down:
Saved the buckets for last, as they would be easier. Had to add a small L bracket to the front of each foot to make it bolt horizontal, instead of perpendicular to the floor. Just used a Kindorf L bracket and then marked the holes to drill with white chalk. Bolted the seats in after cutting the electrical plug off the driver's seat and adding 5-6' of wire to run to the fuse block. Fished the wire in and bolted the new buckets down:

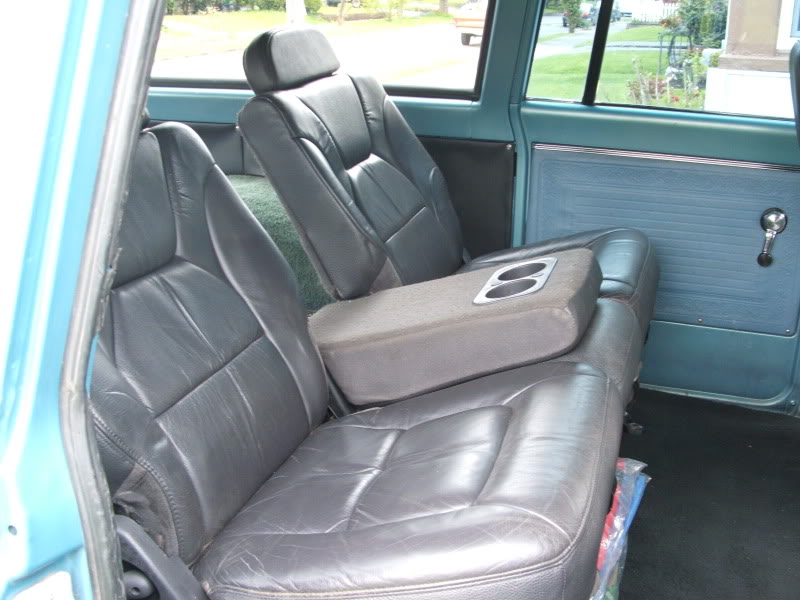
Hooked up the wires to the fuse block, and cleaned up the driveway full of tools and welder! Here's the new setup:
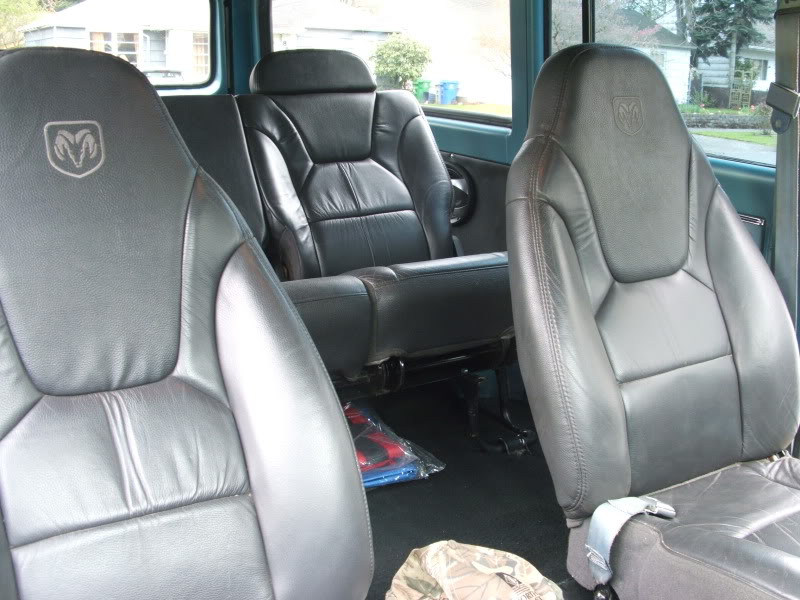
The new buckets are really nice! Dark gray leather, with adj. lumbar support, and electric 6 way controls! Gotta go to the U pull it tomorrow and find seat belts to match the seats, and then it's done!
Only bad part is that Mopar Ram on the headrest of the buckets. Hard for a diehard Chevy guy like me to see that every time I get in!
The weather held off all day, and it was a long one, but I got all the interior done!
Pulled out all the old carpet under the seats. (still have to do cargo area, but that will be a snap) Cleaned and prepped everything.
Laid down sound deadener. Removed the old frame supports from the backseat, and relocated them, then built a plate to span the new bolt pattern for the Durango backseat. Welded up a piece of box tubing on the back side to keep it ridgid, and add strength:
After bolting the plate to the supports, I laid the new seats on the frame and marked the bolt holes. New back seat:
Then I drilled the pattern and bolted the new seat in:
The new seat lays down to allow more cargo space if I need it, or just look cleaner if I want it down:
Saved the buckets for last, as they would be easier. Had to add a small L bracket to the front of each foot to make it bolt horizontal, instead of perpendicular to the floor. Just used a Kindorf L bracket and then marked the holes to drill with white chalk. Bolted the seats in after cutting the electrical plug off the driver's seat and adding 5-6' of wire to run to the fuse block. Fished the wire in and bolted the new buckets down:
Hooked up the wires to the fuse block, and cleaned up the driveway full of tools and welder! Here's the new setup:
The new buckets are really nice! Dark gray leather, with adj. lumbar support, and electric 6 way controls! Gotta go to the U pull it tomorrow and find seat belts to match the seats, and then it's done!
Only bad part is that Mopar Ram on the headrest of the buckets. Hard for a diehard Chevy guy like me to see that every time I get in!

