
My car went for paint today...
#61
 11-05-2009, 11:25 PM


yeah im not a big fan of the black rims on muscle cars but i think it would look good with the stainless around the black spokes with your paint
i plan on getting some of the crager SS rims for my car when i get bigger tires. i love the 5 spokes!
i plan on getting some of the crager SS rims for my car when i get bigger tires. i love the 5 spokes!


#65
11-08-2009, 08:57 PM

Second Generation Moderator
Feb 2010 ROTM winner
Jan 2013 ROTM winner
Feb 2010 ROTM winner
Jan 2013 ROTM winner
ROTM Winner's Club
Thread Starter
Join Date: Aug 2008
Location: Portland, Or
Posts: 9,097
What color did you chose? Post some pics when it comes home!
#66
11-14-2009, 06:14 PM
Second Generation Moderator
Feb 2010 ROTM winner
Jan 2013 ROTM winner
Feb 2010 ROTM winner
Jan 2013 ROTM winner
ROTM Winner's Club
Thread Starter
Join Date: Aug 2008
Location: Portland, Or
Posts: 9,097
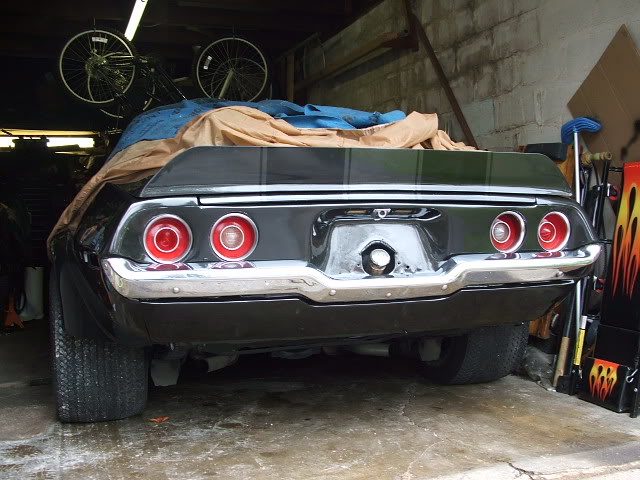
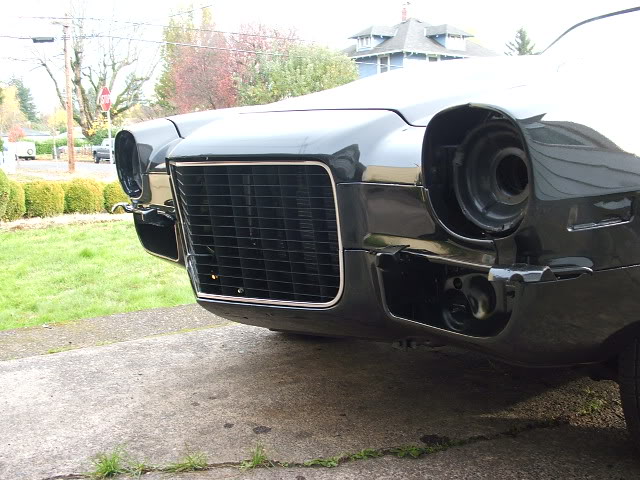
Weather was agreeable today. Pretty chilly, but very clear, so I got her out of the garage and started in on the weatherstripping. Got all of it in, plus the tailights, rear bumper, and grille. The bumper was temp., as it only has a couple bolts in and needs to come off for buffing.
Going back Tuesday for final polishing, and if weather permits it will soon be very complete.
Looked at a friend's 1969 Firebird pro street car and he had vinyl covers built to go over his rollbar pads that attach with velcro. I think I'll have the same thing made up to dress up the padding a little.
My son and grandson are coming to town next weekend to help with final assembly, so hopefully the weather will cooperate, as it's hardly possible inside my tiny garage!
#68
11-14-2009, 07:22 PM
Second Generation Moderator
Feb 2010 ROTM winner
Jan 2013 ROTM winner
Feb 2010 ROTM winner
Jan 2013 ROTM winner
ROTM Winner's Club
Thread Starter
Join Date: Aug 2008
Location: Portland, Or
Posts: 9,097
The weatherstripping is a pain! I thought since it doesn't get glued in around the doors and windows that it would be a joy, but those darn little pins that push into holes are nothing but trouble. They either bend, or wont go in, and then when they finally do go in the weatherstripping has to be stretched just enough to reach all around, but not so much as to end up too long.
The door part went the easiest, as I finally just drilled out the two pin holes at each end slightly, and they went in. Once I was sure everything would fit, then I removed it all again and applied 3M adhesive to the end area so that the pins didn't hold it all by itself.
I also had the trough out of the window area on the roof edge, so had to clean and apply the 3M foam tape to the back and install those. That created another issue. I wanted to try and hit the same holes they drilled originally, but couldn't once the new foam tape covered them. Hit 90% of them, but a few could not be found, so the self tapping washer head screws just made new holes. It's sealed by the tape, so not a problem.
After it was done of course the doors latch pretty hard, so I'll leave them as-is, and readjust the latches once the seal is compressed for a few days. Hopefully this will be the last time I ever get to do this! At my age I can't take much more strain on my frustration level!
One other thing; the weatherstripping that goes around the window has to be tucked into the trough on both egdes. I needed something like a putty knife to help it, but didn't want it to be sharp and cut the weatherstripping. I bought a cheap 1" putty knife and put the belt sander to the edge to round it and make it dull. It did the trick, as I could use it to stuff the weatherstripping into the channel and not hurt it at all. I glued the ends of that also after I ran it into place.
On the window weatherstripping I found it really needs to go into that upper corner of the window area first, and then work it toward the front and bottom rear after that. I tried starting at either end, and nothing else worked.
Still waiting for the window felt strips that go on either side of the windows to arrive. I had to send them back as they sent some with a stainless steel edge, and mine are bare rubber. Once they're back I'll install them, and the glass, then send it back to the paint shop for buffing.

#70
11-15-2009, 10:13 AM
Second Generation Moderator
Feb 2010 ROTM winner
Jan 2013 ROTM winner
Feb 2010 ROTM winner
Jan 2013 ROTM winner
ROTM Winner's Club
Thread Starter
Join Date: Aug 2008
Location: Portland, Or
Posts: 9,097
Yea the window felts should be easy, but they sent some with a stainless edge molding that didn't fit well. Mine were plain rubber, and easy to fit, so I sent for those. I need to call them, as it's been a week, and they usually send within 3 days.
Not knowing the inner felt guides would come with the outters, I reinstalled my old ones already. Now I have to pull them back off and install new when they come. Not the first thing I've had to do more than once on this rebuild!
I really want the glass in before they buff, as I don't want compound all inside the car to clean up!

Thread
Thread Starter
Forum
Replies
Last Post