my 69 camaro project
#311
So far in parts we have spent close to $22k. Yes it's all been worth it. Funny thing, when I got into this I had the chance to buy a mint condition numbers matching black w/white interior 69 vert for $36k. Guy at the dealership told me it would gain value over time and that it would be like a collectable. I laughed and said I don't want to own it to look at it but to drive it. I never thought I would have as much into as I do. A friend convinced me to restore it and that I could do it for 18-20k. Lol
I know what was done to mine and how it was put together. My husband & I have done everything else to it so far and it's been a great project. I will be very proud driving down the road in it when it's done.
Last edited by orocker; 05-30-2010 at 06:48 PM.
#313
very carefully....use a wide bladed flathead screw driver to pry them up to pop them off of their retaining clips. Use a towel between the screw driver and the paint to keep from screwing up your paint.
#314
Thank you!!1Paint is not an issue on mine yet..lol
#318
So time for an update. Sorry its taken so long. I used my iPhone to take video of the Squid cutting and welding the AC bracket but the iMovie app only lets you combine the videos into one long video but not edit them down at all. So I just decided to combine them together and use the reg video cam next time. lol.
What we did was cut and weld the AC bracket. We are using an aftermarket AC unit that my body guy got for me. He said he used them before and it was rather inexpensive so we went with it. So far so good till we got to the bracket that holds the compressor on. The bracket does not line up with the water pump and manifold at the same time. And with the type of bracket I have for the Alternator, that needs to sit on the left front of the motor and we decided that the AC compressor needs to sit on the right front. As you can see by the 1st pic that it needed to be cut down and welded allot....which is where the Squid comes in and saves the day with his new welder.
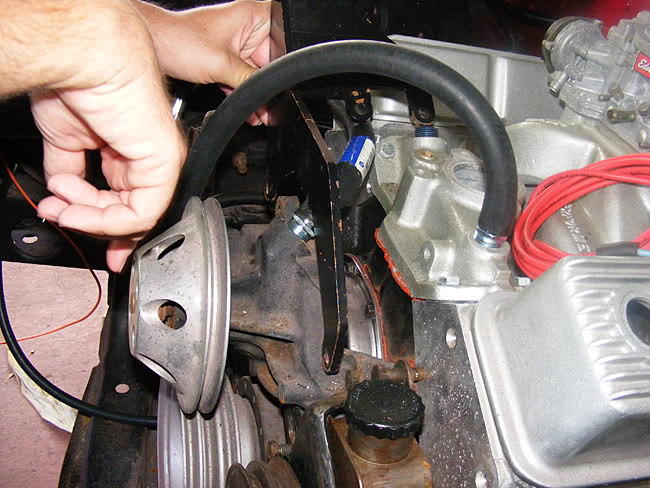
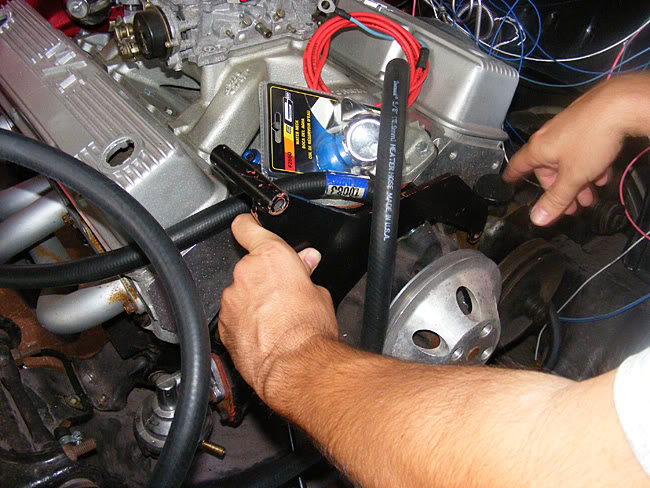
So here's the video of the Squid cutting and welding the bracket.

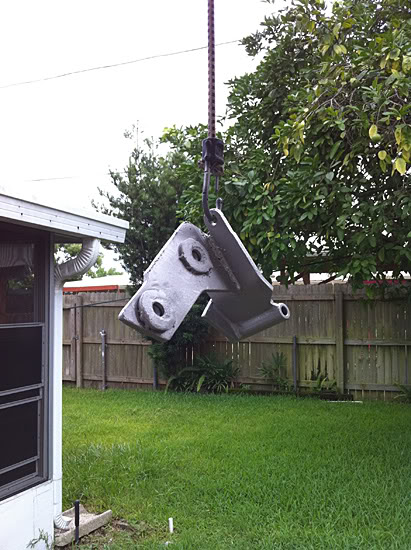
So here's the finished product. You can see that after it was welded he drilled 2 holes in the one long side and welded on some washers.

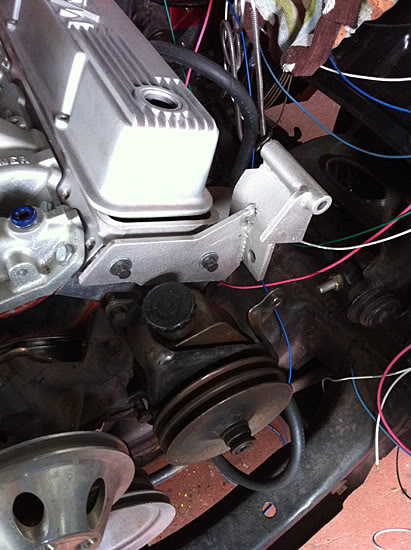
And here's the new bracket holding the compressor in place.
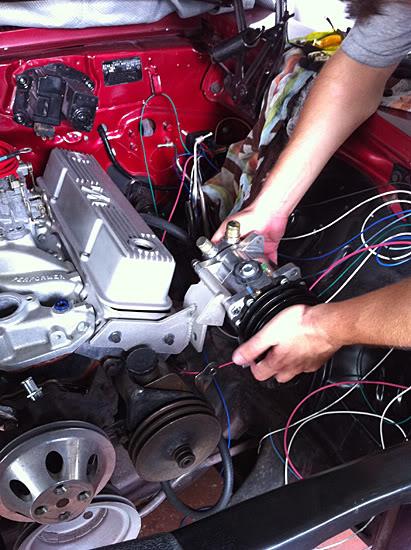
What we did was cut and weld the AC bracket. We are using an aftermarket AC unit that my body guy got for me. He said he used them before and it was rather inexpensive so we went with it. So far so good till we got to the bracket that holds the compressor on. The bracket does not line up with the water pump and manifold at the same time. And with the type of bracket I have for the Alternator, that needs to sit on the left front of the motor and we decided that the AC compressor needs to sit on the right front. As you can see by the 1st pic that it needed to be cut down and welded allot....which is where the Squid comes in and saves the day with his new welder.


So here's the video of the Squid cutting and welding the bracket.
So here's the finished product. You can see that after it was welded he drilled 2 holes in the one long side and welded on some washers.


And here's the new bracket holding the compressor in place.


#320
No, the next thing we have to do is cut some holes in the firewall for the AC hoses and make a bracket that will hold all the AC and heater hoses off to the side of the motor. I dont have any of the belts I need yet.


