When you click on links to various merchants on this site and make a purchase, this can result in this site earning a commission. Affiliate programs and affiliations include, but are not limited to, the eBay Partner Network.
Hello group
I plan to remove front subframe so I can redo suspension, clean and paint parts and engine.
So far I removed radiators and radiator support.
I looks like I would get more space if I remove front (grille, body parts, ...)
I removed lights, removed several bolts and nuts, parts are loose but still held somewhere.
I am concerned that I may damage some parts that fall without notice.
Don't I have a way to remove most of the front parts together.
Looks like I can pull the bumper (will do it next) but then what is suppose to come off. Is there any order to follow as some parts seems to be blocked in between other parts....
Not sure what year you have, but if you have already removed the radiator frame, then your almost there. Start with the bumper and rest of the front (valance panel, grille header, grille and rest of the trim). Then move on to the hood hinges, fenders and inner fenders. (when removing the fenders, make sure you remember where the body shims are at each bolt location. Make notes and separate the shims per bolt. This is key for reassembly to make your your body lines work and fenders fit) Its hard to explain where all the nuts/bolts are, so be best to review section 11-13 of the GM assembly manual for all the locations. A majority of the fasteners that hold the front sheet metal together are clip nuts (J-bolts) and bolts. These are easily hidden and very rusty, so you will have some that break and turn on you. I have attached some samples of the manual for the help. Penetrating oil works wonders, so can soak them for a couple days. Also, all these nuts/bolts are available on line if you need to cut any out or to rusty to reuse.
Thank you for this help.
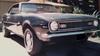
It's a 68
I have this manual. I may refer to it !
I also removed master cylinder, battery tray, exhaust manifolds, water pump !
So as you said I am almost there. That's why I thought I may go ahead and take the subframe down.
I planned to paint around the engine but it'll be easier to do it without the engine and subframe on the way.
I will also rebuild the direction and repaint every part...
I will leave the hood in place and probably the fenders (if possible)
I will lift the body with a forklift so I should be able to draw the whole assembly from under the car.
I am lucky, no rusted bolt so far. Some done rubber and a little bit of surface rust but nothing major.
Great... Nice that you have the equipment. I had to build my own dolly system to separate the two units. Be carful with leaving the hood on with the fenders since the only support you would have are the bolts at the body. I would at least remove the hood to take the weight off the fenders. Not sure how much further you going to go, but if your pulling the subframe off, would be a good idea to inspect the underside where the subframe meats the body. Clean and paint around all four body mounts and along the subframe location and make sure you use anti-seize on the body mount bolts when reassembling. I also soaked all my bolts and misc parts in a de-rust solution. Works great, but leaves an etched metal surface were the rust was, so make sure what ever you soak, needs to be painted/sealed. If you replacing front suspension, also take a look at your spindle bearings & grease seals. There lots more I can mention and hope I'm not like a nagging wife by telling you something you were already going to do. Good luck
I have more equipment than knowledge !
I will have to check this hood weight on fender question. I am working alone most of the time and readjusting the hood at the end is something I will try to avoid if possible.
I was not supposed to go much further. Actrually a leak at the water pump led me to remove the radiator, radiuator support as it was rusted, and this and that. Now I am where I realised thjat removing the subframe would be a good idea so I can really clenan things !
So all this because of a leaking water pump.
Same for the rear, some rust around the front of the leaf springs got me removing the springs, tank, axle. Then "crusty" bearings in the axle and here I ended up with a new LSD differential ! New shocks, new wheel shafts, redone brakes, ... Seems I am carried away too easily !
I have quite a lot of differnet de-rusting solutions and I powder coat, epoxy coat, ...
Of course I will have to inspect underside where the subframe meets the body. I noticed already some possible improvements there.
I am glad there is more you can mention, should you hang around here, you might well be usefull later !
Is there anything I should measure, note or mark before I remove the subframe so I can align it more easily later?
I'll keep an eye out... there others hear too that know so much more than me. Yes on the measurements of the subframe. Us fixed points on the body such as holes, weld joints, edges to take your measurements. Need to account for all directions since the frame has multiple adjustments and will twist. 1/4" off in the back can really change the bolt hole location up at the radiator frame and fender mounts. This is what I did (below), but maybe others can chime in for pointers or other methods. Take a pick to of each location with a measure tape so you don't forget what points you used. Who knows how long this will take, so make you document everything, notes and plenty of pics. For the sides of the measurements, I used the sheet metal weld joint at the rocker panel. When you reassemble, you will more than likely loosen the fender and hood bolts to get your best alignment and make sure your body lines match up at the doors and hood. That will be your hard part. If your subframe is already misaligned, you can remove and (when ready to install) square it off on the ground and use plumb bob from fix points on the body (there some videos on line). Made some mistakes on the way, but can help any way I can.
I made several measures on the subframe and feel I can put it back in the same location later !
Anybody can tell me what are the 2 hoses in the pictures below? 1 goes on left hand fender, into a kind of tin can.
The other one goes through the firewall.
They were lying in the engine bay and I can't remember having pulled them from somewhere.
And no, even though I should have, I did not checked under the dashboard to see where the 2nd one ends up in the cabin.
Looks like vacuum hoses and reservoir canister for your AC. I think those hoses go into your dash and/or from your engine to operate the the controls. I don't have AC on my car, so someone else will have to chime in. I really recommend studding that GM assembly manual. The more you look at it and see notes and other comments, it make more sense. It may not show everything, but it helps to deduct what goes were. I was a little overwhelmed with the book in the beginning, but once you know how to use the book, then you get a better grip on your car. For future reference, might be a good idea to video your dismantle of parts (especially hose and wires). Give yourself a tutorial on what you did to take something apart, pictures don't always show the full story. Of course, I do ramble on in my videos like I am now., but you can even go back while fresh in your head and go over what you did. There is not a lot on line, so I can created over 250 videos of taking stuff apart. Also helps with making notes on parts I need to replace and repair.
Trying to get some perspective from your pictures. It looks like the one hose is going through into the cowl area? If so, it would be for the windshield washers. Is your car an RS? Thinking that can could be related to the vacuum headlight doors, but those look more like a mini submarine.

 09-24-2021 | 04:00 AM


 Good luck


